MVHS030BT - Car stereo PIONEER - Free user manual and instructions
Find the device manual for free MVHS030BT PIONEER in PDF.
| Feature | Details |
|---|---|
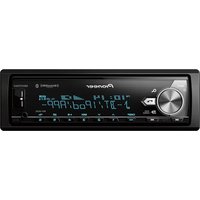
| Device type | Car stereo |
| Bluetooth connectivity | Yes, for hands-free calls and audio streaming |
| Audio inputs | USB, AUX |
| Output power | 4 x 50 Watts |
| Audio format compatibility | MP3, WMA, WAV |
| Display | LCD screen |
| Additional features | FM/AM radio, audio equalizer |
| Dimensions | Standard 1 DIN |
| Installation | Easy, compatible with most vehicles |
| Maintenance | Regularly clean connections and screen |
| Safety | Protection against overloads and short circuits |
| Warranty | Check with the retailer |
Frequently Asked Questions - MVHS030BT PIONEER
How do I connect my smartphone to the PIONEER MVHS030BT car stereo via Bluetooth?
Make sure Bluetooth is enabled on your smartphone. Turn on the car stereo, then press the \"Bluetooth\" button and follow the on-screen instructions to pair the devices.
Why won\'t the car stereo turn on?
Check that the car stereo is properly powered. Make sure the wiring is connected correctly and the fuse is not blown.
How do I set the clock on the car stereo?
Press the \"Menu\" button, select \"Clock\", then use the adjustment buttons to set the hours and minutes.
The audio from my car stereo is poor quality, what should I do?
Check the balance and tone settings. Make sure the speakers are properly connected and in good condition.
How do I reset the PIONEER MVHS030BT car stereo?
To reset the device, press and hold the reset button located on the back of the unit with a small pointed object for a few seconds.
Can I play music from a USB stick?
Yes, you can play music from a USB stick. Make sure the files are in a compatible format such as MP3 or WMA.
How do I change the language of the car stereo interface?
Go to the \"Settings\" menu, select \"Language\", then choose the desired language from the list.
The car stereo won\'t play some audio files, what should I do?
Check that the audio files are in a supported format. Try converting the files to a compatible format like MP3.
How do I adjust the volume of the car stereo?
Use the volume knob on the front panel to increase or decrease the volume. You can also use the remote control if provided.
My car stereo won\'t pick up radio stations, what should I do?
Check that the antenna is properly installed and functional. You can also try searching for stations manually.
How do I update the car stereo software?
Visit the PIONEER website to download the latest software update. Follow the provided instructions to update your car stereo.
User questions about MVHS030BT PIONEER
0 question about this device. Answer the ones you know or ask your own.
Ask a new question about this device
No questions yet. Be the first to ask one.
Download the instructions for your Car stereo in PDF format for free! Find your manual MVHS030BT - PIONEER and take your electronic device back in hand. On this page are published all the documents necessary for the use of your device. MVHS030BT by PIONEER.