
10032345 - Fan Klarstein - Free user manual and instructions
Find the device manual for free 10032345 Klarstein in PDF.

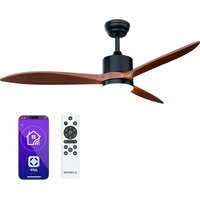
| Product type | Pedestal fan |
| Brand | Klarstein |
| Model | 10032345 |
| Power supply | 220-240 V ~ 50-60 Hz |
| Power | 26 W |
| Number of speeds | 12 |
| Operating modes | Normal, Natural, Night |
| Timer | 0.5 to 7.5 hours |
| Remote control | Yes, range 3-5 meters |
| Oscillation function | Yes |
| LED lighting | Yes |
| Silent function | Yes |
| Protective grille | Front and rear |
| Height adjustment | Yes, via adjustment button |
| Cleaning | Damp cloth, do not immerse |
| Safety | Unplug before cleaning, stable surface |
| Control panel | On the base |
Frequently Asked Questions - 10032345 Klarstein
User questions about 10032345 Klarstein
0 question about this device. Answer the ones you know or ask your own.
Ask a new question about this device
Download the instructions for your Fan in PDF format for free! Find your manual 10032345 - Klarstein and take your electronic device back in hand. On this page are published all the documents necessary for the use of your device. 10032345 by Klarstein.
USER MANUAL 10032345 Klarstein
Congratulations on purchasing this equipment. Please read this manual carefully and take care of the following hints to avoid damages. Any failure caused by ignoring the mentioned items and cautions mentioned in the instruction manual are not covered by our warranty and any liability.
CONTENT
Technical Data 8
Declaration of Conformity 8
Safety Instructions 9
Hints on Disposal 9
Care and Cleaning 9
Product description 10
Assembly 11
Operation 12
TECHNICAL DATA
| Item number 10032345 | |
| Power supply 220-240 V ~ 50-60 Hz | |
| Power consumption 26 W |
DECLARATION OF CONFORMITY

Producer:
Chal-Tec GmbH, Wallstraße 16, 10179 Berlin, Germany.
This product is conform to the following European Directives:
2014/30/EU (EMC)
2014/35/EU (LVD)
2011/65/EU (RoHS)
206/2012/EU (ErP)
SAFETY INSTRUCTIONS
- All users of this appliance must read and understand this instruction manual before operating.
- Make sure that all electrical connections are kept clean. Ensure that they are kept dry.
- Before using, check that the voltage power corresponds to the one shown on the appliance rating label.
- Do not place appliance close to the fire, water or flammable substances.
- Close supervision is necessary when any appliance is used by or near children
- Make sure that the fan is on a flat and secure surface before being switched on.
- If not used, please shut down the power supply, pull out the plug. Do not unplug by pulling on the supply cord, and ensure that handles kept dry
HINTS ON DISPOSAL
According to the European waste regulation 2012/19/EU this symbol on the product or on its packaging indicates that this product may not be treated as household waste. Instead it should be taken to the appropriate collection point for the recycling of electrical and electronic equipment. By ensuring this product is disposed of correctly, you will help prevent potential negative consequences for the environment and human health, which could otherwise be caused by inappropriate waste handling of this product. For more detailed information about recycling of this product, please contact your local council or your household waste disposal service.
CARE AND CLEANING
- Make sure that the appliance is switched OFF, unplugged and completely cool before cleaning or attempting to store.
- Do not immerse power cord, or any other chemical liquid. Wipe the exterior with a soft damp cloth or sponge. Remove stubborn spots with a cloth moistened with mild liquid detergent. Do not use abrasive scouring pads or powders.
- Do not clean the appliance using chemical like methylbenzene, javelle. You can use neutral cleaner to clean the fan.
- Using soft fabric to clean the appliance. Do not use the hard fabric to destroy the surface.
- You must do maintenance before storing.
- Mustn't wash appliance using water. That will result in short out an may destroy the fan.
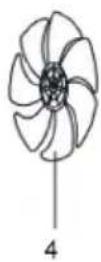
PRODUCT DESCRIPTION

0 3
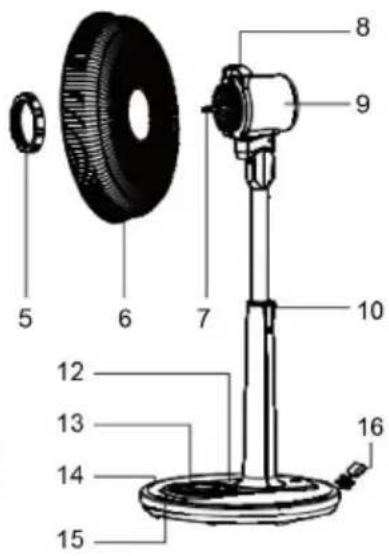
| 1 Front guard 9 Rear housing of motor | |
| 2 guard ring 10 Stand cap | |
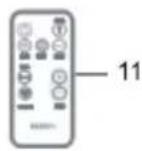
| 3 Spinner 11 Remote control | |
| 4 Blades 12 Light | |
| 5 guard nut 13 Button | |
| 6 Back guard 14 Base | |
| 7 Motor shaft 15 Control panel | |
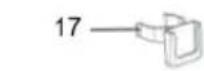
| 8 Handle 16 Wire box |
Note: You can choice remote control or control panel of fan to operate.
ASSEMBLY
1 Ensure that the product is switched off and disconnected from the power supply.
2 Place the main unit onto the stand. Secure the main unit with the main unit's nut.
3 Place the back guard onto the main unit. Make sure to align the insets of the main unit with the grooves on the back guard.
4 Secure the back guard with the back guard's nut.
5 Place the blade on the shaft. The cross pin on the shaft must fit into the indentation on the rear part of the blade.
6 Secure the blade with the spinner.
7 Place the front guard onto the guard collar. Make sure the 8 grooves on the guard collar properly click into place at the edge of the front guard. The hook of the guard collar needs to be hooked into the rear guard.
8 Secure both guards with the locking hinged clip and secure with a screw.
Height adjustment
1 Push and hold the height adjustment button.
2 Pull the upper part of the main unit up/down to choose an optimal position.
3 Release the height adjustment button.
OPERATION
Remote Control
Control distance have 3.5 5 meter.
Light mode: Press the button will close the light.
- Please refer to the below other functions.
- Mute mode: Starting up default is close, Press the button will open mute function.
Speed Knob
Clockwise the rotary knob will control wind speed from low to high. That has 12 set can be chosen. And LED light will display corresponding wind speed.
Timer
Pressing the timer button can set mini shutoff. The timer function can be set to longest 7.5 hours per 0.5 hours. And LED light can show working situation.
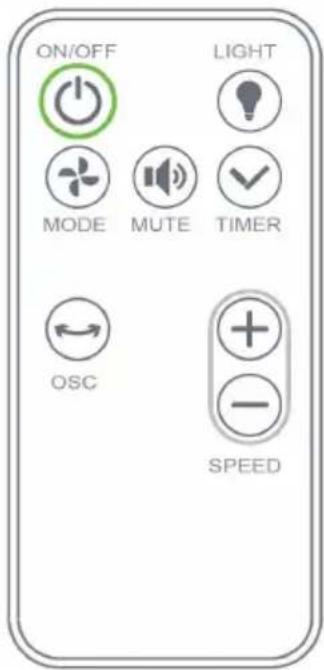
Mode
Starting up default normal mode
- After pressing the mode button, that has three mode can be chosen: normal mode, natural mode, sleeping mode.
Natural mode: The wind can imitate natural wind.
- Sleep wind: The wind can be smaller and smaller accompany with your sleeping.
OSC (lift/right swing)
After pressing the OSC button, the fan can automatically oscillate by left & right.
ON/OFF Button
After plug in, the red light can be lit. Pressing the on/off button can starting up the fan.
Estimado cliente:


Brand : Klarstein
Model : 10032345
Category : Fan