
SL150 - Juicer PROLINE - Free user manual and instructions
Find the device manual for free SL150 PROLINE in PDF.
| Product type | Slow juicer |
| Brand | Proline |
| Model | SL150 |
| Power | 150 W |
| Power supply voltage | 220-240 V ~ 50/60 Hz |
| Extraction technology | Cold slow pressing (preserves nutrients) |
| Reverse function | Yes (position R for unclogging) |
| Continuous operation time | 30 minutes maximum |
| Materials | ABS plastic, stainless steel strainer |
| Removable parts | Bowl, strainer, auger, lid, juice container, pulp container |
| Included accessories | Pusher, cleaning brush |
| Safety | Automatic shut-off in case of jamming, lid lock |
| Cleaning | Removable parts dishwasher safe (or soapy water), base wiped with a damp cloth |
| Usage | Fruits and vegetables (except hard fruits, sugar cane, grains) |
| Precautions | Do not immerse the base, do not use unattended, keep out of reach of children |
| Warranty / After-sales service | Hotline Darty (France) 0 978 970 970, Vanden Borre (Belgium) +32 2 334 00 00 |
Frequently Asked Questions - SL150 PROLINE
User questions about SL150 PROLINE
0 question about this device. Answer the ones you know or ask your own.
Ask a new question about this device
Download the instructions for your Juicer in PDF format for free! Find your manual SL150 - PROLINE and take your electronic device back in hand. On this page are published all the documents necessary for the use of your device. SL150 by PROLINE.
USER MANUAL SL150 PROLINE
Language of introduction
English EN1-EN6
French FR7-FR13
Dutch NL14-NL20
Spanish - ES21-ES27
Portuguese PT28-PT34
PLEASE READ THE FOLLOWING INSTRUCTIONS CAREFULLY BEFORE USING THE APPLIANCE AND KEEP FOR FUTURE REFERENCE.
WARNING
- This appliance is intended to be used in household and similar applications such as:
staff kitchen areas in shops, offices and other working environments;
- farm houses;
by clients in hotels, motels and other residential type environments;
- bed and breakfast type environments.
- If the supply cord is damaged, it must be replaced by the manufacturer, its service agent or similarly qualified persons in order to avoid a hazard.
- This appliance shall not be used by children. Keep the appliance and its cord out of reach of children.
- Regarding the operating times, refer to the section "Operation" on pages 4&5 of the manual.
- Always disconnect the appliance from the supply if it is left unattended and before assembling, disassembling or cleaning.
- Do not use the appliance if the rotating sieve or the protecting cover is damaged or has visible cracks.
- Regarding the instructions for cleaning surfaces in contact with food, refer to the section "Cleaning and Maintenance" on page 5 of the manual.
- Switch off the appliance and disconnect from supply before changing accessories or approaching parts that move in use.
- Appliances can be used by persons with reduced physical, sensory or mental capabilities or lack of experience and knowledge if they have been given supervision or instruction concerning use of the appliance in a safe way and if they understand the hazards involved.
Children shall not play with the appliance. - WARNING: Risks of injuries if you don't use this appliance correctly.
IMPORTANT SAFETY INSTRUCTIONS
- Do not use outdoors.
- Do not operate the appliance with wet hands or operate in a wet working environment.
- Do not force plug into outlet, ensuring plug is away from any heat source and is not bent or twisted in any way.
- Do not let the power cord hang over the edge of a table or counter top, or touch any hot surface.
- Do not disassemble the base. Keep the base dry at all times.
- Do not put any foreign substance into the appliance while operating this appliance.
- Do not use the appliance if it is damaged.
- Always turn off and unplug the appliance from the mains socket when not in use, before assembling or disassembling parts and before cleaning.
- Avoid contacting moving parts.
- The use of attachments not recommended or sold by the manufacturer may cause fire, electric shock or injury.
- Always operate the appliance on a secure, dry level surface.
- Ensure the power switch is in the 0 position before the appliance is plugged into the mains socket.
- Only use the supplied food pusher to gently feed food into the feed tube. Do not place your hands or fingers inside the slow juicer while in operation.
- Ensure all parts are securely locked while the appliance is in use.
- Do not place the appliance on or near a hot surface.
- Do not leave the appliance unattended while it is in use.
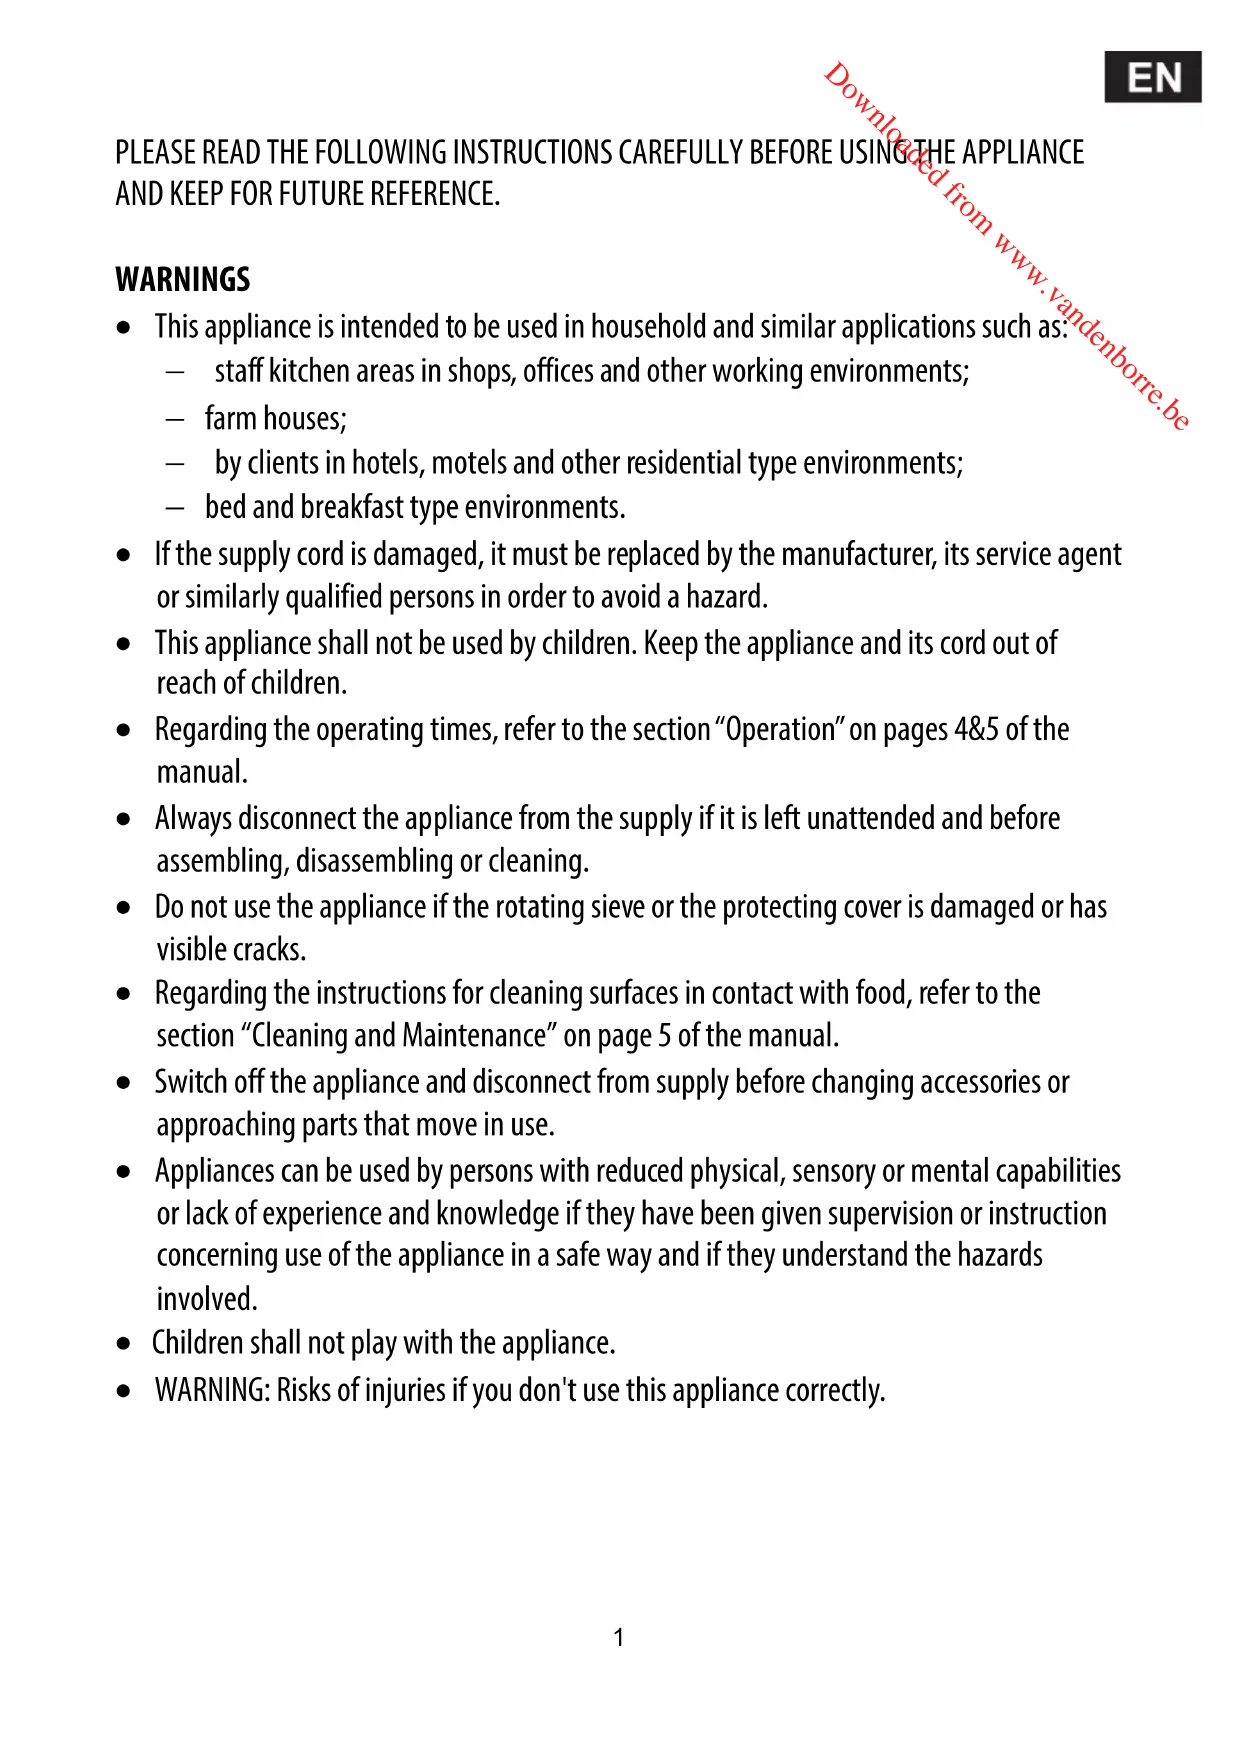
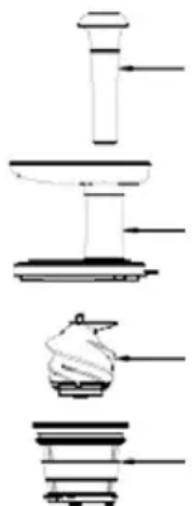
PARTS
Food pusher
Cover with feed tube
Squeezing screw
Strainer
Strainer frame
Bowl
Base
Switch with 3 settings
ON - start to make juice
O- turn off the juicer
R- reverse function, only use this function to unclog the slow juicer when it is stuck
BEFORE FIRST USE
Before using your slow juicer for the first time, wash all removable parts in warm soapy water. Rinse and dry thoroughly.
WARNING: Never immerse the base in water. Clean the base with a slightly damp cloth. Dry thoroughly.
ASSEMBLY
WARNING: ALWAYS make sure the appliance is turned off and unplugged before assembly and disassembly.
- Place the base on a clean, flat surface.
-
Assemble the bowl on the base.
-
Make sure that holes on the bottom of the bowl are aligned with protrusions on the base and then turn the bowl clockwise until it locks into place.
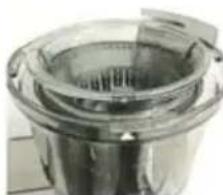
- Attach the strainer into the strainer frame.

-
Assemble the strainer assembly into the bowl.
-
Ensure that the three protrusions on the bottom of the strainer are fit into the grooves on the bowl.
- Place the squeezing screw in the center of the bowl. Turn and press the squeezing screw down until it fits securely.
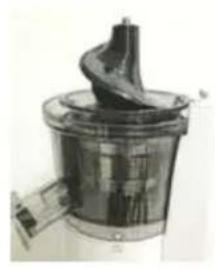
-
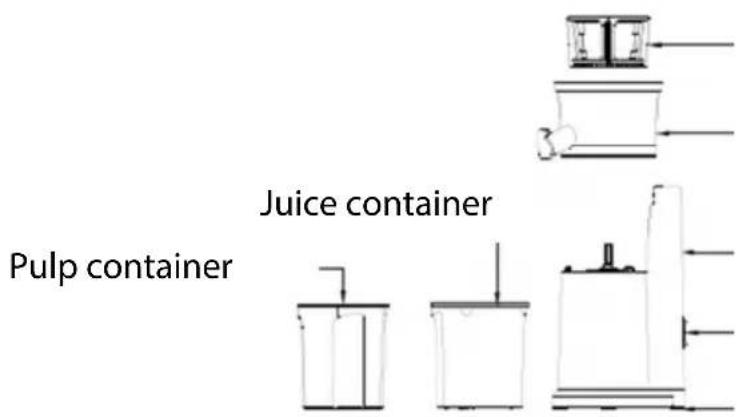
Assemble the cover with feed tube onto the bowl. Rotate the cover clockwise until it locks into place, making sure that a click is heard.
-
When the cover is locked into place, the arrows on the cover and base should be aligned.

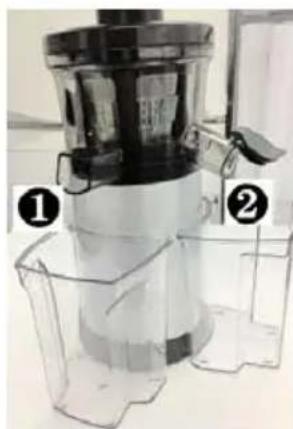
- Place the pulp container under the pulp spout 1 and place the juice container under the juice spout 2.
OPERATION
The slow juicer uses a slow squeezing technology that slowly squeezes fruit and vegetables maintaining a low temperature and helping preserve the natural taste and nutrition.
WARNING: It is not intended for crushing grains and squeezing sugarcane and hard fruits, which will damage the motor.
- Plug the appliance into the mains socket.
-
Prepare your ingredients for use.
-
Make sure you have washed all the ingredients thoroughly and cut into an appropriate size to fit easily into the feed tube. Remove seeds and stones in ingredients.
-
Peel fruit and vegetables that have a thick skin such as melons, pineapple and some citrus fruits.
-
Operate the slow juicer by pressing the switch to the ON position.
-
Slowly feed your ingredients into the feed tube using the supplied food pusher.
-
Do not operate the appliance continuously for more than 30 minutes. Let the juicer cool down before starting another session.
-
Juicing with the juice spout lid closed allows mixed juice creations with different fruits, vegetables and liquids.
- After juicing, open the juice spout lid and the juice will flow into the juice container
and the pulp will accumulate in the pulp container.
-
If the pulp container is full, empty it before continue juicing.
-
When the juicing is finished, press the switch to the O position to turn off the appliance.
When the appliance is stuck and cannot operate, please turn off the appliance and keep the switch in the R position for a few seconds and then try operating again.
CLEANING AND MAINTENANCE
Warning: Always turn off and unplug the appliance before cleaning.
Disassemble the slow juicer following the assembly instructions in reverse order.
Wash all removable parts in warm soapy water. Rinse and dry thoroughly.
Clean the strainer and its frame using the supplied cleaning brush under the running water.
Clean the base with a slightly damp cloth. Never immerse it in water or any other liquid.
Surfaces in contact with food should be cleaned regularly to avoid cross contamination from different types of food, the use of warm clean water with a mild detergent is advisable when dealing with surfaces that come into contact with food.
Correct food hygiene practises should always be followed at all times to avoid possibility of food poisoning /cross contamination.
Dry the entire appliance with a dry cloth before replacing.
Do not use chemical cleaners or abrasives product for cleaning.
TROUBLESHOOTING
During juicing, the juicer stops:
-
Check the power cord and make sure it is plugged in correctly.
-
If too many ingredients are inserted at one time, this can cause the juicer to stop. Keep the switch at the R position for 2-3 seconds and then set the switch at the ON position. Repeat this operation 3 times.
-
If there are hard seeds within the ingredients, remove them before juicing.
Odd noise from the juicer:
-
Check if the parts are assembled correctly.
-
Noise can occur if the juicer is operated on an uneven or slanted surface. Place the juicer on a flat even surface when operating.
- Noise from the squeezing screw and strainer will occur when ingredients are inserted into the juicer. This is normal.
Discolouration of the plastic parts:
- Ingredients that are rich in carotenoids such as carrots and spinach may dye plastic parts. When the parts are dyed with carotenoids, rub vegetable oil onto the dyed areas and use mild detergent to clean.
SPECIFICATIONS
Ratings: 220-240V\~, 50/60Hz 150W
DISPOSAL
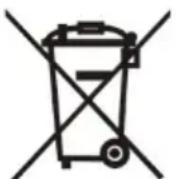
As a responsible retailer we care about the environment. As such we urge you to follow the correct disposal procedure for the appliance and packaging materials. This will help conserve natural resources and ensure that it is recycled in a manner that protects health and the environment.
You must dispose of this appliance and its packaging according to local laws and regulations.
Because this appliance contains electronic components, the appliance and its accessories must be disposed of separately from household waste when the appliance reaches its end of life.
Contact your local authority to learn about disposal and recycling.
The appliance should be taken to your local collection point for recycling. Some collection points accept appliance free of charge.
We apologise for any inconvenience caused by minor inconsistencies in these instructions, which may occur as a result of product improvement and development.
Hotline Marty France

Brand : PROLINE
Model : SL150
Category : Juicer