
SI 4850 - Iron GRUNDIG - Free user manual and instructions
Find the device manual for free SI 4850 GRUNDIG in PDF.

| Product type | Steam iron |
| Brand | Grundig |
| Model | SI 4850 |
| Power supply | 220-240 V ~ 50-60 Hz |
| Power consumption | 2200 W |
| Continuous steam output | Up to 25 g/min |
| Steam shot / Pressing | Up to 140 g/min |
| Water tank capacity | Not specified (transparent tank) |
| Soleplate | Soleplate suitable for all fabrics |
| Functions | Dry ironing, steam, steam shot, spray, vertical steam, anti-drip system, auto shut-off |
| Self-cleaning function | Yes (every 10-15 days recommended) |
| Anti-scale filter | Integrated, permanent |
| Safety | Auto shut-off, anti-drip system, overheat protection |
| Insulation class | I |
| Cable length | Not specified (with cord winder) |
| Weight | Not specified |
| Maintenance | Automatic descaling, cleaning soleplate with vinegar |
| Included accessories | Not specified |
| Repairability | Parts available for at least 5 years |
Frequently Asked Questions - SI 4850 GRUNDIG
User questions about SI 4850 GRUNDIG
0 question about this device. Answer the ones you know or ask your own.
Ask a new question about this device
Download the instructions for your Iron in PDF format for free! Find your manual SI 4850 - GRUNDIG and take your electronic device back in hand. On this page are published all the documents necessary for the use of your device. SI 4850 by GRUNDIG.
USER MANUAL SI 4850 GRUNDIG
natural_image
Simple line icon of a shirt collar with dotted lines indicating measurement (no text or symbols)SI 4850 - SI 6850
natural_image
Illustration of an iron iron being placed into a box with a red upward arrow (no text or symbols)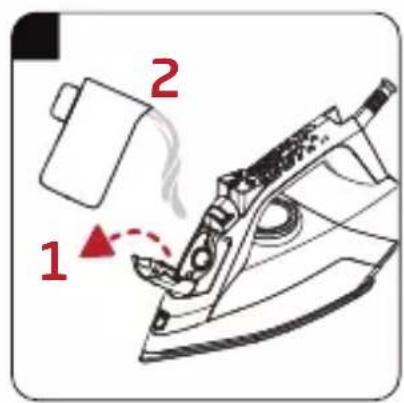
natural_image
Line drawing of an iron iron with a wall socket and a red arrow pointing to it (no text or symbols)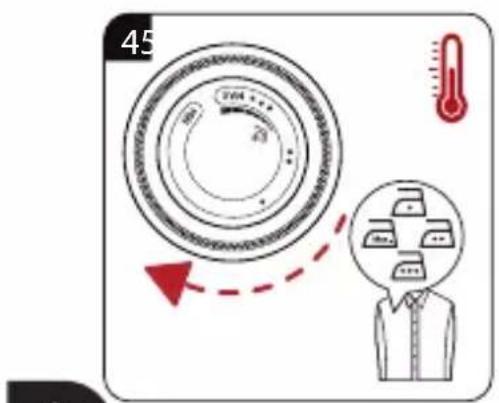
natural_image
Diagram of a car seatbelt with a magnified inset showing the wheel and seat area (no text or symbols)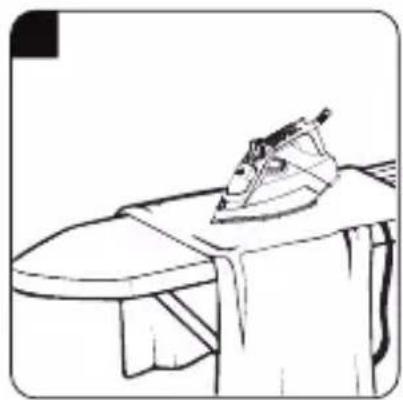
natural_image
Line drawing of a steam iron on a table (no text or symbols)
natural_image
Illustration of a shoe with a magnified inset showing a foot and seat, no text or symbols present.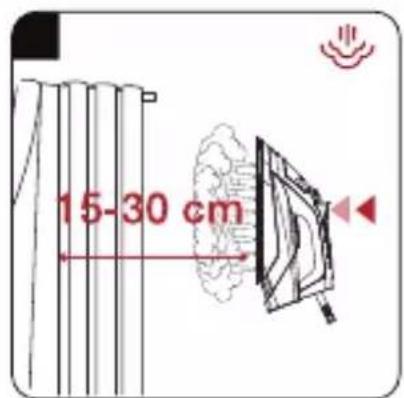
natural_image
Technical illustration of a mechanical component with a magnified inset showing a detail (no text or symbols)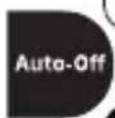
natural_image
Line drawing of a steam iron with a red arrow pointing to a wall socket (no text or symbols)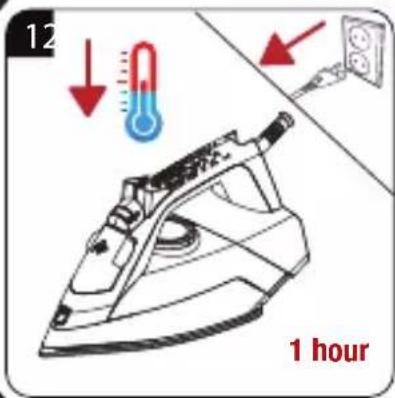
natural_image
Technical line drawing of a mechanical component or device with a handle and base, no visible text or symbols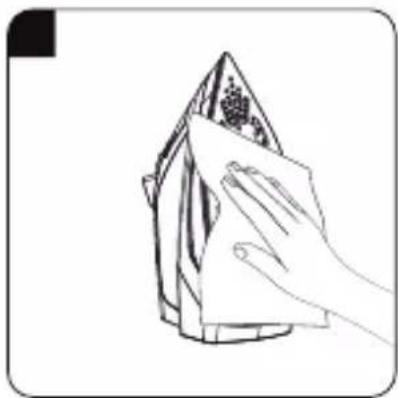
natural_image
Line drawing of a hand cleaning a triangular object with a cloth (no text or symbols)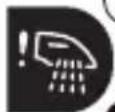


natural_image
Line drawing of a hand cleaning a triangular object with a cloth (no text or symbols) |  |  | |
| DE | BETRIEB DAMPFSTOSS | AUTOMATISCHEABSCHALTUNG | |
| EN | OPERATION SHOCK STEAM | AUTOMATICSHUTDOWN | |
| TR | KULLANIM ŞOK BUHAR OTOMATIK KAPANMA | ||
| ES | FUNCIONAMIENTO DESCARGA DE VAPOR | APAGADO AUTOMÁTICO | |
| FR | FONCTIONNEMENT FONCTION PRESSING ARRÊT AUTOMATIQUE | ||
| HR | RAD NAGLO ISPUŠTANJE PARE | AUTOMATSKOISKLUUČIVANJE | |
| PL | OBSŁUGA UDERZENIE PARY | AUTOMATYCZN E WYŁĄCZANIE |
 |  | |
| DE | REINIGUNG UND PFLEGE SELBSTREINIGUNG | |
| EN | CLEANING AND CARE SELF-CLEAN | |
| TR | TEMİZLİK VE BAKIM KİREÇ TEMİZLEME | |
| ES | LIMPIEZA Y CUIDADOS AUTOLIMPIEZA | |
| FR | NETTOYAGE ET ENTRETIEN | AUTO-NETTOYAGE |
| HR | ČIŠĆENJE I ODRŽAVANJE SAMOČIŠĆENJE | |
| PL | CZYSZCZENIE I KONSERWACJA | SAMOCZYSZCZENIE |
SICHERHEIT
natural_image
Stylized grayscale illustration of a tree with leaves and roots, enclosed in a circular frame (no text or symbols)natural_image
Symbol of a trash bin with crossed lines indicating no waste, and a solid black rectangle below (no text or labels)Please read this instruction manual thoroughly prior to using this appliance! Follow all safety instructions in order to avoid damages due to improper use!
Keep the instruction manual for future reference. Should this appliance be given to a third party, then this instruction manual must also be handed over.
■ Use this appliance for its intended purpose only.
- Use this appliance indoors only. Do not use it in the bathroom or outside.
- No liability is accepted for damages resulting from incorrect usage or improper handling of the appliance.
- Do not leave this appliance unattended while it is in use. Extreme caution is advised when using it near children and persons who are restricted in their physical, sensory or mental abilities.
- This appliance can be used by children aged from 8 years and above and persons with reduced physical, sensory or mental capabilities or lack of experience and knowledge if they have been given supervision or instruction concerning use of the appliance in a safe way and understand the hazards involved. Children shall not play with the appliance. Cleaning and user maintenance shall not be made by children without supervision.
■ Never operate or place any part of this appliance on or near hot surfaces such as a gas burner, electric hotplate or heated oven.
- Do not dismantle the appliance under any circumstance. No liability is accepted for damages caused by improper use.
- Our GRUNDIG Household Appliances meet applicable safety standards, thus if the appliance or power cord is damaged, it must be repaired or replaced by an authorised service centre to avoid any dangers. Faulty or unqualified repair work may be dangerous and cause risk to the user.
■ Never use this appliance with damp or wet hands.
- Only use the original accessories or those that are recommended by the manufacturer.
■ Danger of suffocation! Keep all packaging materials away from children.
■ Remove all packaging materials, labels and protective foil and dispose of them according to the applicable legal regulations.
- Clean all parts prior to usage as described in the section “Cleaning and care”.
■ This appliance is intended for domestic use only.
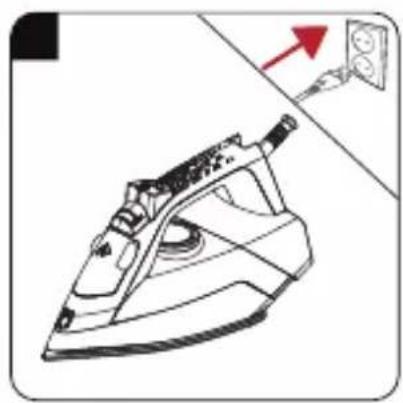
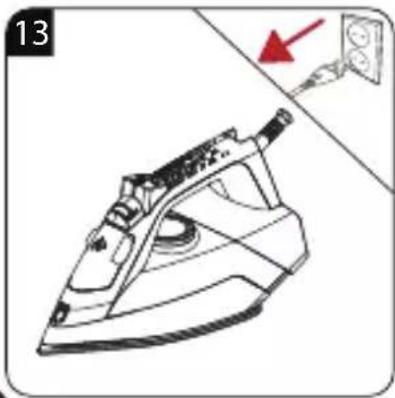
■ Make sure that your local power supply corresponds to the information on the rating plate. The only way to disconnect the appliance from the power supply is to pull the power plug out of the power outlet.
■ For additional protection, this appliance should be connected to a household residual current device with a rating of no more than 30 mA. Consult your electrician for advice.
SAFETY
- Dry off the appliance and all accessories prior to connecting it to a power supply and prior to attaching the accessories.
■ Make sure you do not accidentally trip on the power cord when the appliance is in use.
■ Position the appliance in such a way that the power plug is always accessible.
■ Never touch the power plug with damp or wet hands.
■ Unplug the appliance before each cleaning and when the appliance is not in use. - Do not squeeze or bend the power cord and do not rub it on sharp edges in order to prevent any damage.
- Keep the power cord away from hot surfaces and open flames.
- Do not disconnect the plug by pulling on the cord.
-
Do not wrap the power cord around the appliance. Use the provided cord wrap to store the cord.
-
Do not use an extension cord with the appliance.
- Do not submerge the appliance, the power cord or the power plug in water or in any other liquid.
■ Only clean this appliance with a slightly damp cloth.
■ Always keep hair, clothing and other objects away from the appliance while it is in use in order to prevent injury and damages.
■ Warning - Danger of Burns! Do not touch the hot soleplate. Do not lean over the iron while it is in use. Heat will rise from the appliance during usage! Only touch the iron by the handle. - If this appliance falls, if water leaks or other defects occur, it must be inspected and repaired by an authorised specialist.
- Do not use this appliance until the defect has been repaired.
- Do not iron over zippers, metal buttons or other metal parts, as this could damage the soleplate.
■ To ensure safe operation of the appliance, do not modify the safety features in any way.
■ Never point the hot soleplate towards people, animals or electrical devices whilst steam is being emitted.
- Keep the iron and its cord out of reach of children less than 8 years of age when it is energized or cooling down.
■ After use, always let the iron cool down completely in a location out of reach of children and persons who are restricted in their physical, sensory or mental abilities. Wait until the appliance has completely cooled down before storing it away.
■ The iron must not be left unattended. An unattended, hot iron can result in burn injuries!
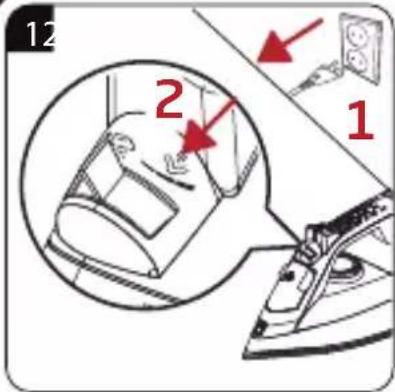
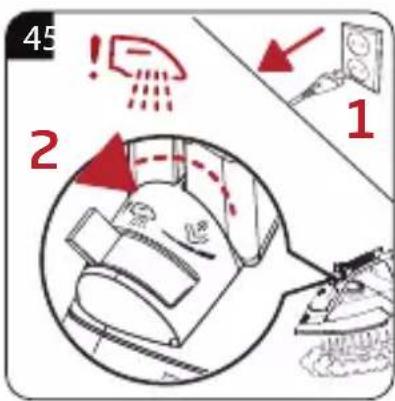
■ The plug must be removed from the socket-outlet before the water tank is filled with water.
■ The iron must be used and rested on a stable surface.
SAFETY
- When placing the iron on its stand, ensure that the surface on which the stand is placed is stable.
■ Burns can occur from touching hot metal parts, hot water or steam. Exercise care when handling.
- The bottom plate and its surrounding area can be overheated. Touching hot surface may cause burns. For this reason, pay special attention not to touch hot surfaces during or after using the device.
■: Warning of hot surfaces.
Dear customer,
Congratulations on the purchase of your new GRUNDIG Steam Iron SI 4850, SI 6850.
Please read the following user notes carefully to ensure full enjoyment of your quality GRUNDIG product for many years to come.
A responsible approach!

natural_image
Stylized grayscale illustration of a tree with leaves and roots, enclosed in a circular frame (no text or symbols)GRUNDIG focusses on contractually agreed social working conditions with fair wages for both internal employees and suppliers. We also attach great importance to the efficient use of raw materials with continuous waste reduction of several tonnes of plastic every year.
Furthermore, all our accessories are available for at least 5 years.
For a future worth living.
Grundig.
Control and parts
See the figure on page 3.
Power cable
B Iron base plate
Water tank
D Thermostat indicator and Auto-Off light
E Temperature adjustment knob
F Soleplate
G Water spray nozzle
H Water refill lid
Steam adjustment / Self-Clean button
J Water spraying button
K Shock steam button
Intended use
This appliance is intended only for household use and ironing; it is not suitable for professional use.
Initial use
Prior to initial use, fill twice and vaporize to remove the manufacturing residues. Meanwhile, use shock steam button K frequently.
Note
- You can smell a mild odour or see white sediments coming out of the soleplate holes. After performing vaporizing process twice, such odours and sediments will disappear. Also water droplets may form within the water reservoir; this is normal.
Refilling the water reservoir
Note
- Your appliance is designed for use with tap water. If your tap water is excessively hard, we recommend you to use a mixture of tap water with potable water.
Setting the temperature
Notes
■ After the appliance is plugged in, set the temperature according to the type of your fabric by turning the temperature adjustment knob E in clockwise direction.
- Thermostat indicator light D will light up.
- When the appliance reaches the set temperature, thermostat indicator light D will turn off and the appliance is ready to use.
Temperature and steam settings table
When setting the temperature of the appliance, consider the following table.
| Fabric Type Temperature control Temperautre requirement | ||
| Silk | • Low temperature | |
| Wool | • • Medium temperature | |
| Cotton, linen | • • • High temperature | |
| Linen - Jean | Max High temperature | |
Notes
If you don't know the fabric of your garment, first iron an invisible part of your garment and determine a correct ironing temperature for it.
In order to prevent the bright stains that may form on the synthetic fabrics such as silk, iron on the reverse side of the fabric. Do not use the water spraying feature in order to prevent the stain formation.
Warning
■ Before ironing first check the label of the garment.
Steam ironing
Warning
For ironing with steam, temperature adjustment knob should be between “ ” and “max” position.
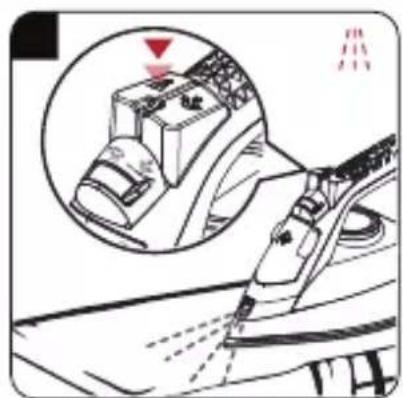
■ Turn the steam adjustment button ☐ to desired steam level.
■ Steam is produced as soon as the iron in held horizontally.
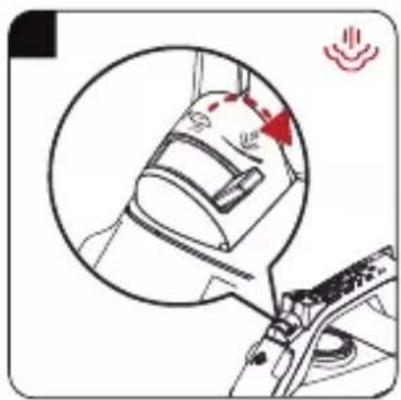
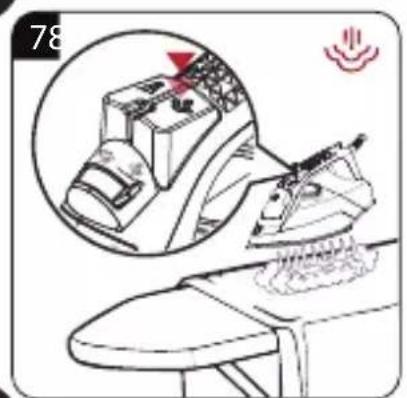
Shock steam
Warning
- Wait for a few seconds before pressing the shock steam button K again. Pressing the button repeatedly may cause water come through the soleplate F together with steam.
At the start of ironing, the first few presses may not produce shock steam. To produce shock steam, temperature knob should be at "♥" or higher position.
In order to use the shock steam feature the thermostat indicator light should be turned off.
Vertical steam
Warning
- Hold the appliance 15-30 cm away from the garment and curtains.
During the ironing if the thermostat indicator light D turns on, before proceeding with the shock steam process wait for the light to turn off.
■ Never direct this steam to people or pets.
Spraying water
Note
■ You can easily remove creases using the water spraying feature.
Dry ironing
In order to make dry ironing, set the steam setting button ☐ to the OFF position.
Note
■ Having water in the appliance would be advantageous; you may use the water spraying button ☐ when necessary.
Anti-dripping system
This iron is equipped with drip stop function: the iron automatically stops steaming when the temperature is too low to prevent water from dripping out of the soleplate.
With the anti-dripping system, you can perfectly iron even the most delicate fabrics.
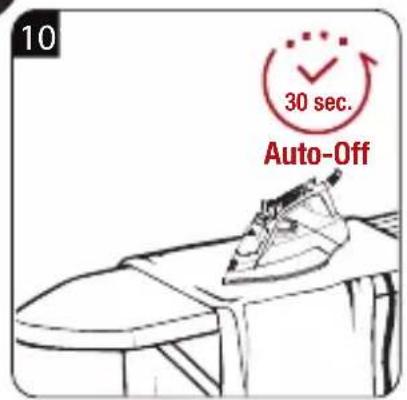
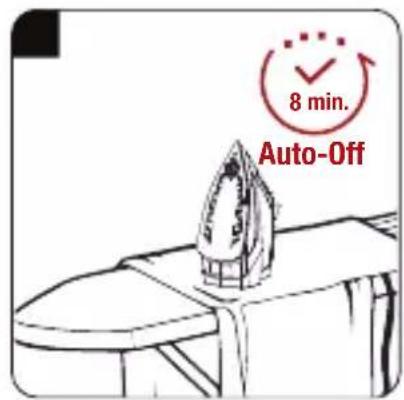
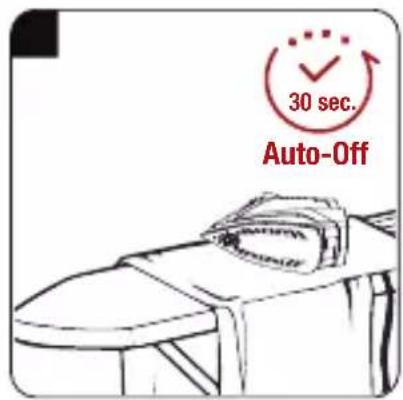
Automatic Shutdown (Auto-Off)
Notes
In case of automatic turn off the auto-off light D flashes.
■ If the appliance is moved in horizontal position it will be turned on.
It may take 60 seconds for the sole-plate F to reach the previously set temperature.
Cleaning
Warning
- When you are finished with ironing, unplug the appliance. You can drain the water in the reservoir by opening the refill lid Ⓗ and tilting the iron to the front.
- Do not use gasoline, solvent and abrasive cleaning agents or hard brush to clean the appliance.
Anti-Calc system
A special filter inside the water tank softens the water and prevents scale build-up in the soleplate. The filter is permanent and does not need replacing.
Self clean
Note
■ The self-cleaning feature cleans inside the soleplate, removing impurities. We recommend using it every 10-15 days.
Storage
If you do not intend to use the appli- ance for a long time, store it carefully.
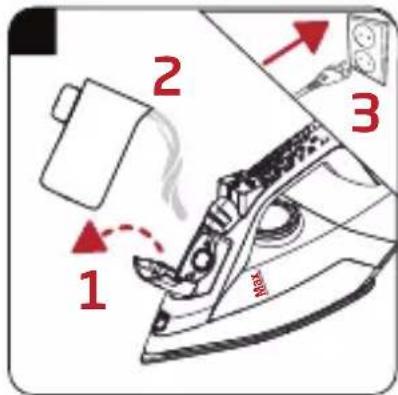
■ Before lifting the appliance unplug it and then let it cool completely.
■ Empty the water reservoir.
- Keep the appliance and its accessories in their original packages.
■ Store it in a cool, dry place.
■ Always keep the appliance out of the reach of children.
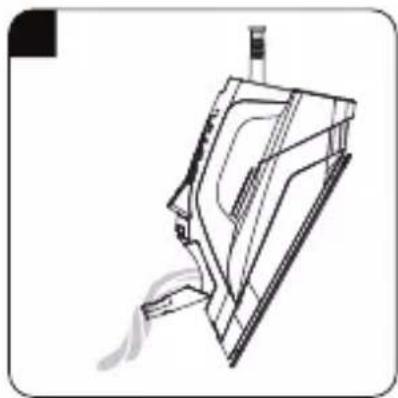
Handling and transportation
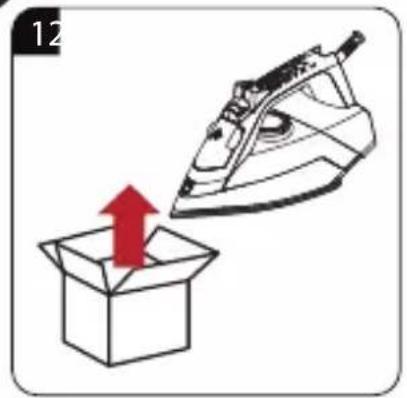
■ During handling and transportation, carry the appliance in its original packaging. The packaging of the appliance protects it against physical damages.
- Do not place heavy loads on the appliance or the packaging. The appliance may be damaged.
■ Dropping the appliance will render it non-operational or cause permanent damage.
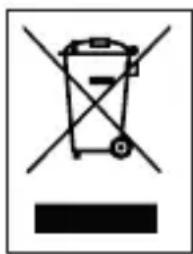
Compliance with the WEEE Directive and Disposing of the Waste Product:
This product complies with EU WEEE Directive (2012/19/EU). This product bears a classification symbol for waste electrical and electronic equipment (WEEE).
natural_image
Simple line drawing of a trash bin with crossed lines indicating no waste or discharge (no text or symbols)This symbol indicates that this product shall not be disposed with other household wastes at the end of its service life. Used device must be returned to official collection point for recycling of electrical and electronic devices. To find these collection systems please contact to your local authorities or retailer where the product was purchased. Each household performs important role in recovering and recycling of old appliance. Appropriate disposal of used appliance helps prevent potential negative consequences for the environment and human health.
Compliance with RoHS Directive
The product you have purchased complies with EU RoHS Directive (2011/65/EU). It does not contain harmful and prohibited materials specified in the Directive.
Package information

Packaging materials of the product are manufactured from recyclable materials in accordance with our
National Environment Regulations.
Do not dispose of the packaging materials together with the domestic or other wastes. Take them to the packaging material collection points designated by the local authorities.
Technical data
| SI 4850 SI 6850 | ||
| Voltage | 220 - 240 V~ 50 - 60 Hz | |
| Power consumption | 2200 W 2200-2600 W | |
| Shock steam amount | up to 140 g/min | up to 150 g/min |
| Continuous amount of steam | up to 25 g/min | up to 35 g/min |
| Insulation class | I | |
Technical and design modification rights are reserved.

For commissioning, general use and cleaning, please observe the instructions on pages 4-5 of this operating manual.
Although the appliance is plugged in, soleplate F does not heat up.
The appliance may be connected improperly. >>> Check the plug and power cable A of the appliance.
Temperature adjustment knob E may be at the Min. position. >>> Turn the temperature adjustment knob in the clockwise direction up to the steam sign.
The appliance does not generate steam.
The water reservoir may not have enough water. >>> Fill the water reservoir with water up to Max level.
Steam setting button I may be at without-steam position. >>> Switch the steam setting button to the steam position.
Shock Steam - Vertical Steam does not function.
These functions may have been used too frequently in a very short period of time.
Keep ironing at a horizontal position and wait for a while before using the shock steam function again. >>> Soleplate F may not be hot enough. Turn the Temperature adjustment knob E in the clockwise direction up to the steam sign.
Seat the appliance in a vertical position and wait for the soleplate to heat up.
Water drops fall down onto the fabric during ironing.
You may not have securely closed the water refill lid. >>> Close the water refill lid securely.
You may be using the shock steam at temperature level • or • • .
Increase the temperature level.
During ironing, sediments and residues fall down from the soleplate F.
If the water you use for your appliance is too hard, such sediments may form. >>> Use the self-clean function for once or a few times. For the subsequent ironings fill the water reservoir of the appliance with a mixture of tap water and potable water.
The appliance drops water after it cools down or stored.
You may have left the appliance on a horizontal position while there is water in its reservoir. >>> Empty the water reservoir.
Stains at the soleplate F.
Wet garments might have been ironed and the soleplate F has had lime stains.
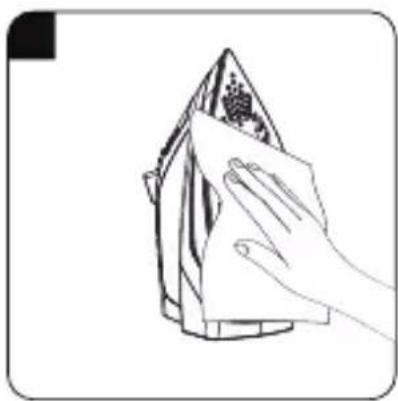
After the appliance cools enough, wipe the soleplate with a microfiber knitted or cotton cloth soaked in vinegar.
natural_image
Stylized grayscale illustration of a tree with leaves and roots, enclosed in a circular frame (no text or symbols)natural_image
Simple line drawing of a trash bin with crossed lines indicating no waste or discharge (no text or symbols)natural_image
Stylized grayscale illustration of a tree with leaves growing from soil, enclosed in a circular frame (no text or symbols)natural_image
Symbol of a trash bin with crossed lines indicating no waste or discharge, and a solid black rectangle below (no text or labels)Cher client, chère cliente,
natural_image
Stylized grayscale illustration of a tree with leaves growing from soil, enclosed in a circular frame (no text or symbols)natural_image
Symbol of a trash bin crossed with no text or numbers, representing waste sorting or disposal (no text present)natural_image
Stylized grayscale illustration of a tree with leaves and roots, enclosed in a circular frame (no text or symbols)natural_image
Simple line drawing of a trash bin with crossed lines indicating no waste or discharge (no text or symbols)natural_image
Stylized grayscale illustration of a tree with leaves and roots, enclosed in a circular frame (no text or symbols)natural_image
Simple line drawing of a trash bin with crossed lines indicating no waste or discharge (no text or symbols)
- SICHERHEIT
- SAFETY
- A responsible approach!
- Control and parts
- Intended use
- Initial use
- Note
- Refilling the water reservoir
- Setting the temperature
- Notes
- Temperature and steam settings table
- Warning
- Steam ironing
- Shock steam
- Vertical steam
- Spraying water
- Dry ironing
- Anti-dripping system
- Automatic Shutdown (Auto-Off)
- Cleaning
- Anti-Calc system
- Self clean
- Storage
- Handling and transportation
- Compliance with the WEEE Directive and Disposing of the Waste Product:
- Compliance with RoHS Directive
- Package information
Brand : GRUNDIG
Model : SI 4850
Category : Iron