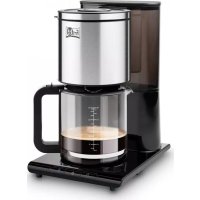
CO 2980 - Coffee machine FRITEL - Free user manual and instructions
Find the device manual for free CO 2980 FRITEL in PDF.


User questions about CO 2980 FRITEL
0 question about this device. Answer the ones you know or ask your own.
Ask a new question about this device
Download the instructions for your Coffee machine in PDF format for free! Find your manual CO 2980 - FRITEL and take your electronic device back in hand. On this page are published all the documents necessary for the use of your device. CO 2980 by FRITEL.
USER MANUAL CO 2980 FRITEL
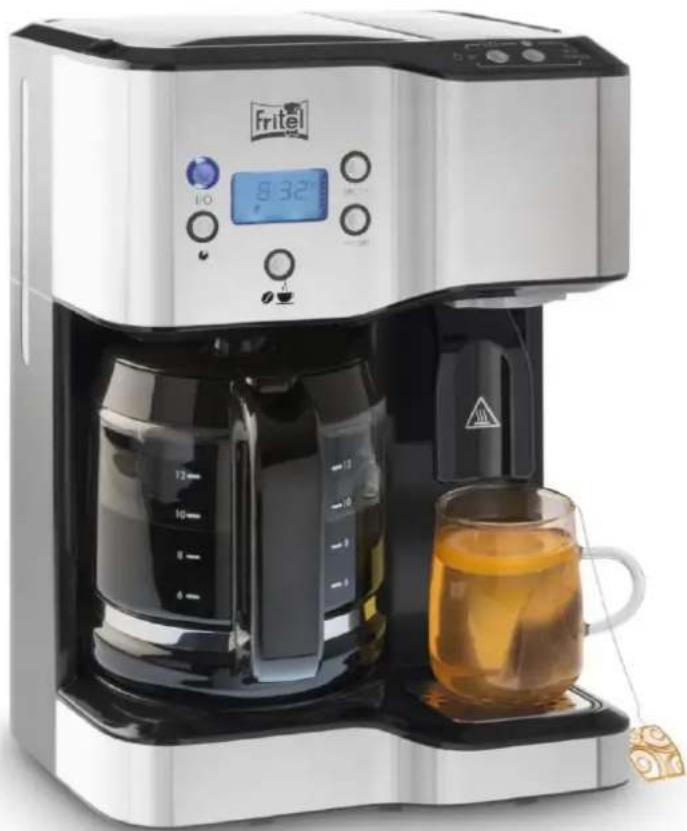
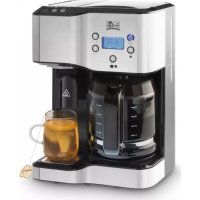
COFFEE MAKER 3 in 1 CO 2980
GEBRUKSAANWIJZING
Attentively read the user manual before using the appliance!
Keep the manual carefully.
GEBRAUCHSANLEITUNG
- Water reservoir lid (coffee)
- Water reservoir (coffee)
- Display
- Carafe (12-Cup/1,8L)
- Drip Tray
- Drip Tray Cover
- Hot water plug
- Hot water dispense pusher
- Coffee maker control panel
- Hot water dispenser control
- Water reservoir (warm water)
- Hot water reservoir lid (warm water)
13.Filter basket
The manufacturer maintains the right to introduce technical and or other changes at any time.
Congratulations! You have just bought a high-quality appliance, which will guarantee you years of pleasure. Please read the instruction manual carefully before you take the appliance into use. Save these instructions carefully! All persons who have not read the instruction manual are not allowed to use this appliance.
Pay ATTENTION to the warranty conditions.
1. SAFETY REGULATIONS
This appliance has been built in accordance with the European CE safety standards and is compliant with the general recognized standards and prescriptions with regard to the safety of appliances. As for all electrical appliances, the necessary precautions need to be taken in order to avoid accidents or damages.

ATTENTION please! Burning danger! Due to the use of the flame the surface becomes hot. Only touch the handles or the cool buttons when the appliance is in action.
- ATTENTION please! After switching off the appliance surfaces stay hot which causes burning danger. Let the appliance cool down completely before replacing it, cleaning it or putting it away.
- This appliance may be used by children of min. 8 years old, by persons with reduced physical, sensory or mental capabilities or lack of experience and knowledge on condition they are supervised and instructed to use the appliance in a safe way and understand the hazards involved. Children may not play with the appliance. Cleaning and user maintenance shall not be made by children unless they are older than 8 years and supervised. Keep the appliance and its cord out of reach of children less than 8 years.
- Cooking appliances should be positioned in a stable situation with the handles (if any) positioned to avoid spillage of the hot liquids.
- This appliance is intended to be used in household and for applications such as: staff kitchen areas in shops, offices and other operating environments; farm houses; by clients in hotels, motels and other residential type environments; bed and breakfast type environments.
- NEVER use the appliance outdoor.
- NEVER touch the control buttons, the electrical cord or the plug with wet hands, and NEVER immerse them in water or any other liquid. They are only to be cleaned with a damp cloth. Should they get wet anyway, immediately pull out the plug from the socket.
- A damaged cord can cause electric shocks. NEVER use the appliance if it is damaged, fallen or shows a malfunction, or if the cord or plug are damaged.
- Immediately switch off the appliance and pull out the plug: after use
or when the appliance is NOT in use, if the appliance does not function properly and when cleaning the appliance.
- NEVER use separate timers or remote control systems.
Only use the appliance with the mains voltage as mentioned on the rating label (230V AC).
- For your own safety, the appliance will only work if it has been assembled correctly. Check that all parts were assembled correctly.
Only use this appliance to prepare hot beverages/food (coffee, tea, soup...).
NEVER fill the appliance with other fluids or food.
NEVER fill the water reservoir above the maximum indication.
- NEVER open the lids of the water reservoirs (coffee and water) while the appliance is heating. The steam then released is hot. (burning danger).
NEVER move the appliance when plugged in.
NEVER move the appliance as long as there is water in it.
- Check the appliance and the power cord for any damage. Do not use the appliance and return it to the sales point in case of damage.
- NEVER let the cord hang over the edge of the table or the counter.
- NEVER take or move the appliance by the cord. NEVER bend it or squeeze the cord or turn it round the appliance.
NEVER pull the cord itself to pull the plug from the socket.
NEVER use extension cords and ALWAYS unroll the cord completely.
NEVER use the cord in the proximity of sources of heat, such as ovens, stoves or heating
- NEVER cover the appliance when it's working or when it is plugged in.
NEVER use the appliance when empty.
NEVER put the hot carafe on a hot or cold surface.
NEVER use the carafe when cracked or when the handle is loose.
NEVER use the carafe for other purposes, with other coffee appliances or in the microwave.
NEVER put the appliance on a wet surface or a wet towel.
NEVER use aggressive cleaning products.
NEVER use accessories from other appliances or brands.
- Repairs can only be executed by a recognized expert or a recognized repair shop.
2. BEFORE THE FIRST USE
- Remove all packaging and stickers.
Clean the appliance before the first use (see 'Cleaning'). - Assemble the appliance correctly and completely.
- Ensure that the voltage marked on the appliance is the same as your main voltage.
- According to the safety law: only use earthed sockets.
3. CONTROL PANEL AND SYMBOLS
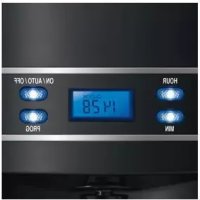
1) Control panel coffee
I/O buon (ON/OFF)
PROG (program)
BREW OPTION
(intensity of coee)
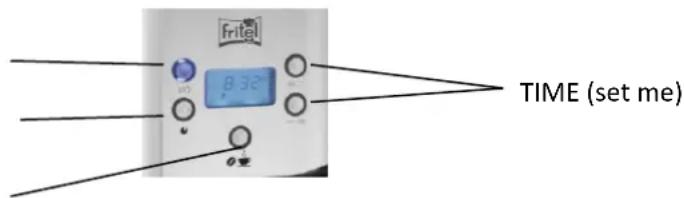
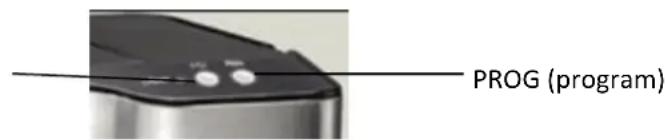
2) Control panel Hot Water
I/O buon (ON/OFF)
3) Symbols
| Regular coffee | |
| Bold coffee | |
| Hot Water function ON | |
| Coffee function ON | |
| 1-4 cups | |
| If the hot water icon and this message are lit, the water reservoir for hot water has to be filled with cold water. | |
| This symbol will flash when the heater turns on and is also displayed when delayed start is programmed. |
4. USE OF THE APPLIANCE
1) Make coffee
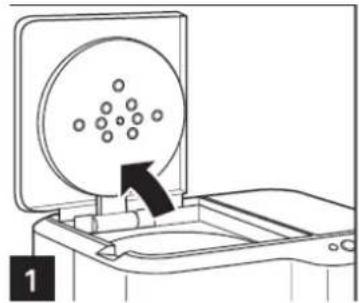
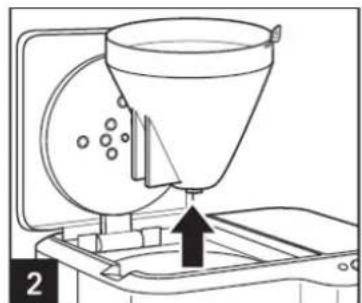
- Open the lid
- Remove the permanent lid from the appliance.
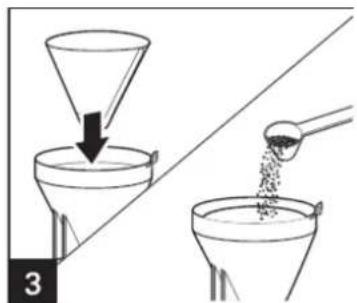
- Use a permanent filter with a paper filter and add ground coffee. For each cup of coffee being made, place one level tablespoon (15ml) of coffee into the filter. If you use decaffeinated coffee, use less ground coffee.
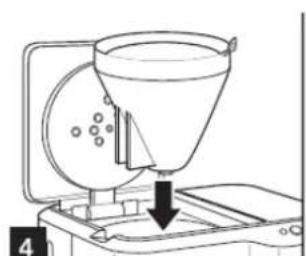
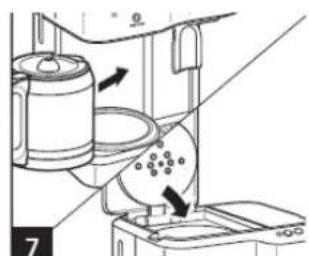
- Put the filter in the appliance.
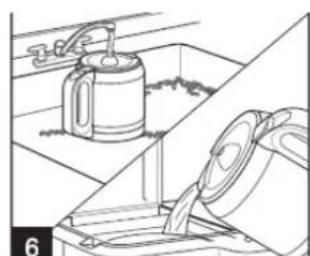
- Take out the glass carafe out of the appliance.
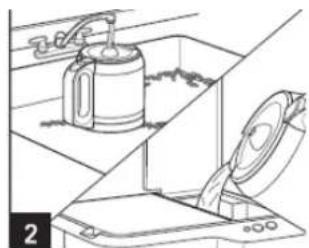
- Fill the carafe to the maximum indication with fresh water and pour it into the reservoir.
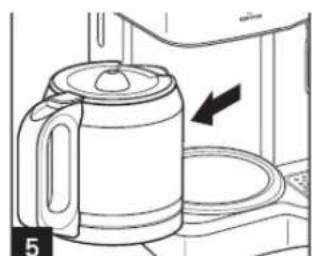
- Place the carafe back on the warming plate and close the lid.
CAREFUL! Make sure the carafe is in place when you start the appliance.
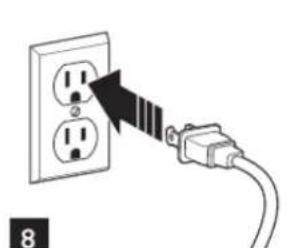
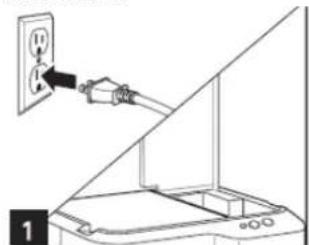
- Insert the plug in the socket.
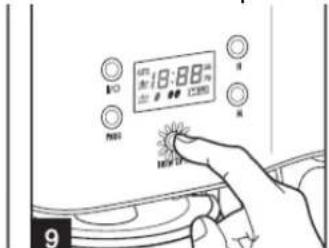
g. Press the Brew Option until the desired option is selected:
a. Regular
b. Bold
c. 141-4 cups
-
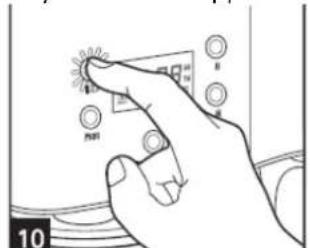
Press I/O (ON/OFF) to start. Blue light illuminates around the button.
-
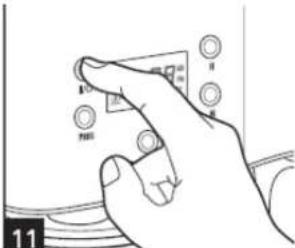
Press I/O (ON/OFF) when finished.
Remark: if the appliance isn't turned off manually, it will automatically go to standby by mode after 30 min.
2) Hot Water
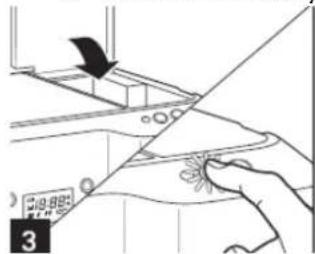
- Plug the plug in the socket and open the lid of the water reservoir.
- Fill the reservoir, with the carafe, never fill above the MAX indication. (1,4L)
-
Close the lid.
-
Press I/O (ON/OFF) to heat up the water. The button will illuminate blue, the hot water symbol will be displayed. When the water is at temperature, the light will turn green.
The water is kept hot for 2 hours, after what the appliance shuts off automatically.
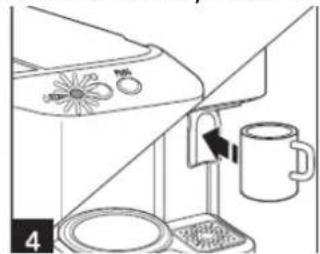
Press your cup, bowl or jar against the hot water dispense pusher to get hot water.
CAREFUL! By pressing the hot water dispense pusher hot water is released (burning danger). Always use a heat resistant reservoir (cup, bowl, jug...), preferably with grip.
5. SETTINGS
1) Set time
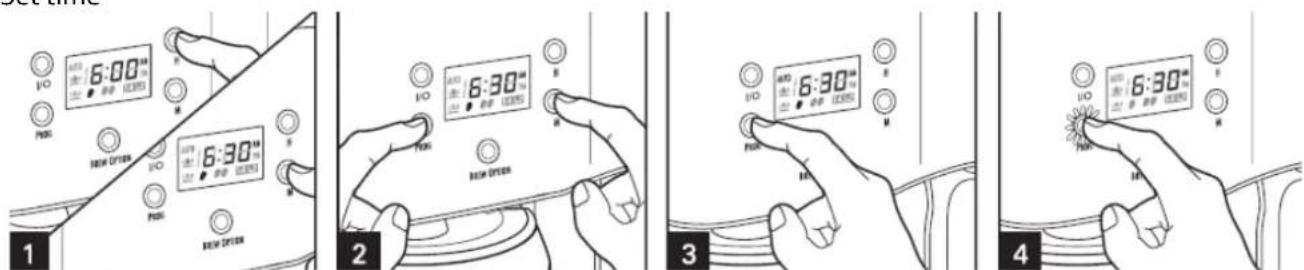
- To set actual time:
a. Press oo--- (hour) till you reach the correct hours (AM/PM)
b. Press --:oo (minute) till you reach the correct minutes.
2) Program coffee
- To set start time:
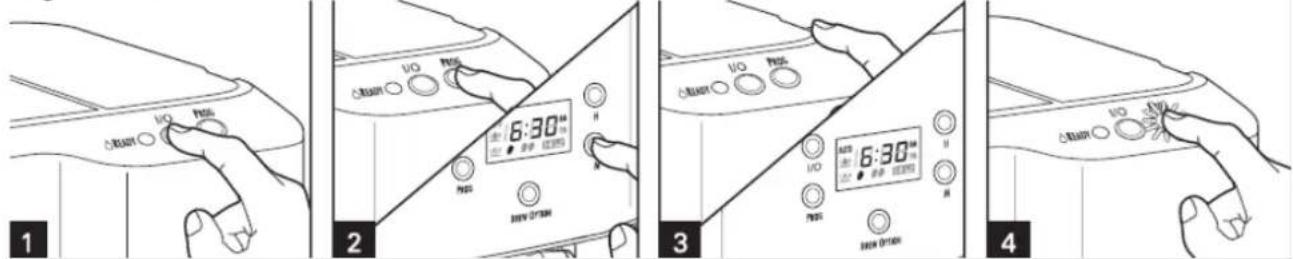
a. Press PROG (program) of the coffee display (time on display starts to flash)
b. Once the time flashes: Press simultaneously on PROG and on oo:- or --:oo till the desired start time is displayed.
- Once the desired start time is displayed: let go of the PROG button and the actual time is displayed.
- Press PROG to make the appliance start on the programmed time. The PROG button will light up green when the program is set. To cancel the program, press the PROG again.
3) Program hot water
-
Make sure the Hot Water function is not turned on (If it is: Press I/O (ON/OFF) to turn of the hot water function.)
-
To set the start time:
a. Press PROG (program) of the command panel of Hot Water (time on display starts to flash)
b. Once the time flashes: Press simultaneously on PROG and on oo:- or --:oo till the desired start time is displayed.
- Once the desired start time is displayed: let go of the PROG button and the actual time is displayed.
- Press PROG to make the appliance start on the programmed time. The PROG button will light up green when the program is set. To cancel the program, press the PROG again.
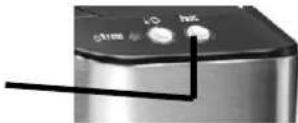
Empty the hot water reservoir:
Pull the plug from the socket and let the appliance cool down completely.
The hot water reservoir needs emptying if the appliance is stored away or if it hasn't been used for more than a week.
Put the appliance above a drain and pull the hot water cap in order for the water to be able to pour out.
- Once empty you can put the cap back.
6. CLEANING AND MAINTENANCE OF THE APPLIANCE AND ITS ACCESSORIES
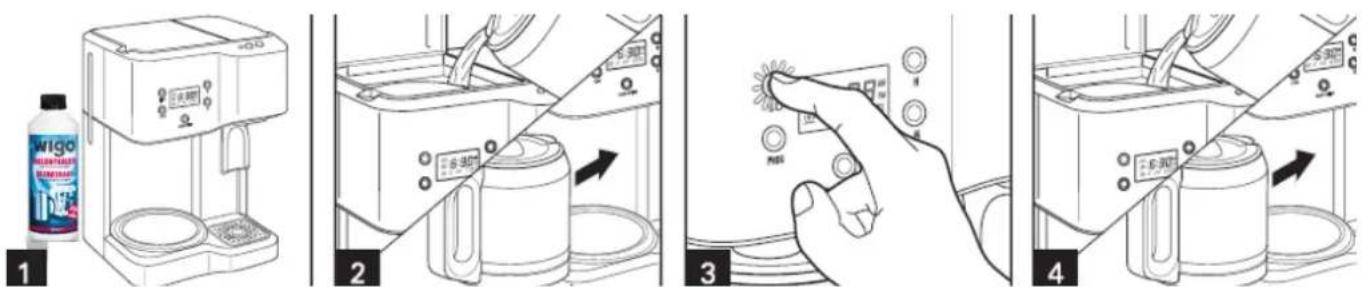
- Put 500ml in the water reservoir en add 10 caps of WIGO descaler.
- Press I/O (ON/OFF). After 30 seconds, press I/O (ON/OFF) once more and wait 30 minutes. Press I/O (ON/OFF).
- Press I/O (ON/OFF) once more when it is finished.
- Let the program run 2 - 3 times with clean water. Let the appliance cool down between the programs.
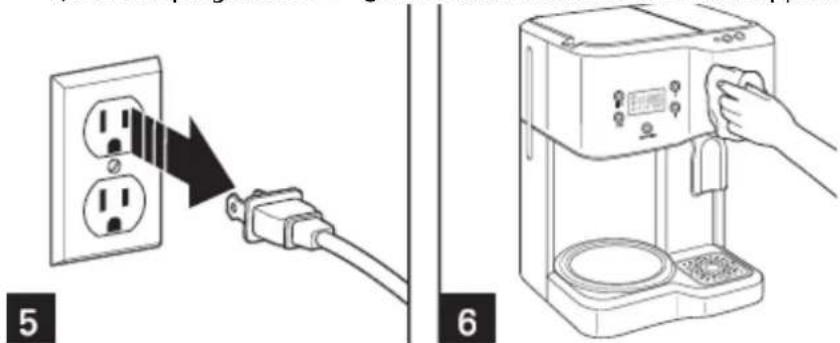
- Pull the plug out of the socket.
- Only clean the housing of the appliance with a moist cloth. NEVER immerge the appliance in water or any other liquid.
7. PRACTICAL TIPS IN CASE OF MALFUNCTIONS
| PROBLEM | PROBABLE CAUSE | SOLUTION |
| Brew basket overflow or coffee brews slowly. | - Excessive amount of ground coffee. - Decaffeinated and/or coffee ground too finely can cause overflow. - Coffeemaker needs cleaning. | - Use less coffee in the filter. - Use less grounds when brewing decaffeinated, flavored or finely ground coffee. Use medium ground coffee. - Clean the appliance as mentioned in Cleaning and maintenance. - Rinse the brew basket before inserting paper filter so the edges will remain pressed against the sides of the basket. - Use a good-quality paper filter. Before removing the filter: pull the plug of the appliance and let it cool down completely. |
| When using a paper filter: - Coffee grounds between paper filter and brew basket. - Paper filter not open and in proper position. - Poor-quality paper filter. | ||
| The coffee tastes bad. | - Coffeemaker needs cleaning. - Coffee ground too coarse or too finely. - Coffee-to-water ratio is unbalanced. - Poor coffee quality and freshness. - Poor water quality. | - Clean the appliance as mentioned in Cleaning and maintenance. - Use medium ground coffee. - Adjust for personal preference. - Use qualitative and fresh coffee. - Use filtered or bottled water. |
| The appliance doesn't brew or unit will not turn on. | - The water reservoir is empty. - Unit is unplugged. - Power outage. - Power surge. | - Fill the water reservoir. - Plug in the appliance. - Turn on the appliance. - Clock requires reset after power outage. |
| and 10 are displayed. | - No water in the hot water reservoir. | - Fill water reservoir. |
Do not use the appliance in case of a malfunction or when the power cord is damaged. Please address your sales point.
If the cord is damaged, also address your sales point.
THE APPLIANCE HAS BEEN DESIGNED FOR DOMESTIC USE. THE WARRANTY CONDITIONS EXPIRE UPON PROFESSIONAL USE.
DEFECTS AND/OF DAMAGES FOLLOWING TO THE NON OBSERVANCE OF THE
USER MANUAL ARE NOT COVERED BY THE WARRANTY.
We are entitled to make technical modifications at all times.
8. WARRANTY CONDITIONS
Your warranty starts on the day of purchase and is valid for 2 years and will only apply after submitting the purchasing invoice.
The appliance needs to be cleaned on regular base. (cleaning, descending...).
Default due to lack of maintenance or no maintenance are NOT covered by warranty.
The repair under warranty does NOT include cleaning or descaling the appliance.
Determination of the warranty
The guarantee covers every repair and/or replacement free of charge of the parts recognized defective by our Department of Service after Sale if the damage is due to faulty design, material or construction.
The warranty is only valid for the first/original user.
The transport costs are at the expenses of the purchaser.
- The warranty is only granted after presentation of your purchase invoice.
The warranty cannot be invoked for normal wear and tear
The warranty expires automatically in the following cases:
Incorrect connection, e.g. electric voltages.
- Abnormal or professional use or misuse handling
- Lack of care and cleaning
- Modifications or repairs made to the appliance by persons not authorized by us as a manufacturer.
- When reference numbers have been altered, or been removed.
- When not respecting the instructions in the user instructions
9. ENVIRONMENT

Do not throw the appliance away with the normal household waste at the end of its life, but hand it in at an official collection point for recycling. By doing this you will help to preserve the environment.
10. LIABILITIES
All liabilities, towards both consumer(s) and third parties, that could result from not observing all the safety regulations prescribed in this user manual, can under no circumstances be charged to the manufacturer. In case of non-observation of these safety regulations, the user of the deep fryer, or any other person not having observed these safety regulations, protects the manufacturer from all responsibilities that he could be charged with.
DE
GEBRAUCHSANLEITUNG
For all supplementary information, recipes and practical tips about all our appliances please visit our website www.fritel.com!
Find us on facebook: www.fb.com/fritel.vanratingen!