
Monoculair 16x30 - Binoculars BRESSER - Free user manual and instructions
Find the device manual for free Monoculair 16x30 BRESSER in PDF.

| Product type | Monocular |
| Brand | Bresser |
| Model | Monocular 16x30 |
| Magnification | 16x |
| Objective diameter | 30 mm |
| Image stabilization | Yes, electronic |
| Power supply | 2 CR2 batteries |
| Focusing | Via objective wheel |
| Eyecups | Twist-up, foldable for glasses wearers |
| Lens cleaning | Microfiber cloth, glasses cleaning liquid |
| Protection | Dust caps, carrying case |
| Warranty | 2 years, extension possible via registration |
| Compliance | CE (declaration available on request) |
| Safety | Never look at the sun, risk of fire |
| Recommended use | Terrestrial observation, respect for privacy |
Frequently Asked Questions - Monoculair 16x30 BRESSER
User questions about Monoculair 16x30 BRESSER
0 question about this device. Answer the ones you know or ask your own.
Ask a new question about this device
Download the instructions for your Binoculars in PDF format for free! Find your manual Monoculair 16x30 - BRESSER and take your electronic device back in hand. On this page are published all the documents necessary for the use of your device. Monoculair 16x30 by BRESSER.
USER MANUAL Monoculair 16x30 BRESSER
GEFAHR EINES STROMSCHLAGS!
RISK of bodily injury!
Never use this device to look directly at the sun or in the direct proximity of the sun. Doing so may result in a risk of blindness.
FIRE RISK!
Do not place the device, particularly the lenses, in direct sunlight. The concentration of light could cause a fire.
RISK of property damage!
Do not disassemble the device. In the event of a defect, please contact your dealer. The dealer will contact the Service Centre and can send the device in to be repaired, if necessary.
RISK OF ELECTRIC SHOCK
This device contains electronic components that operate via a power source (power supply and/or batteries). Children should only use the device under adult supervision. Only use the device as described in the manual; otherwise, you run the risk of an electric shock.
RISK OF CHEMICAL BURN!
Keep batteries out of the reach of children! Make sure you insert the batteries correctly. Empty or damaged batteries could cause burns if they come into contact with the skin. If necessary, wear adequate gloves for protection.
Do not expose the device to high temperatures. Use only the recommended batteries. Do not short-circuit the device or batteries, or throw them into a fire.
Excessive heat or improper handling could trigger a short-circuit, a fire or an explosion.
Privacy PROTECTION!

The binoculars are intended only for private use. Please heed the privacy of other people. Do not use them to look
into apartments, for example.
Parts overview
On/Off switch
Twist-Up eyecup
Objective adjustment
4 Battery cover
Battery compartment
Power LED (green)
Zoom ring (only Art.No.: 20-61230)
Pouch
Cleaning Cloth
10 Carry Strap
Changing the Batteries
Simply unscrew the battery cover (4) and insert two batteries of Type CR2 (5) (with the positive (+) end of both batteries facing upwards) into the battery compartment (5). The battery cover has a little flip-up grab handle to make it easy to screw on and off.
Note:
When the batteries do finally need replacing, this will become evident when the green power LED (7) starts to flash, which is the indication that the power contained within the batteries is now low and the batteries therefore need replacing. The image stabilization feature will obviously stop working once there is insufficient power in the batteries, so it is recommended that the batteries be replaced when the green light no longer remains constant and starts to flash.
Twist-up Eyecup (2)
Screw in the twist-up eyecup (2) to use the monocular while wearing glasses. If you are not wearing glasses, unscrew the eyecup to achieve the required distance from the pupil.
Adjusting the Focus
You can use the objective focus adjustment (3) to change the focus of your monocular. To focus, look at a distant object through the monocular and turn the objective focus adjustment (3) until the object comes into focus.
Using the Image Stabilization Feature
This monocular can be used with or without the image stabilization feature switched on, but switching it on will make viewing at higher magnifi cations much easier! To switch this feature on, having first inserted the batteries, simply slide the on/off switch to the "on" position and when you do this, a small green light will illuminate on the corner of the monocular very near the on/off switch. It should immediately become obvious that this feature is switched on because the viewing image will no longer be so sensitive to the natural trembling of your hand(s).
Using the Zoom Function (only Art.No.: 20-61230)
You can use the zoom ring (8) to select continuous levels of magnifi cation. Simply turn the ring to switch from a minimum of 6x to a maximum of 12x to zoom.
Please note: When changing the magnifi cation setting, it is necessary to re-adjust the focus using the objective adjustment (3).
NOTES on Cleaning
Clean the eyepieces and/or lenses only with a soft, lint-free cloth, (e.g. microfi bre cloth). To avoid scratching the lenses, use only gentle pressure with the cleaning cloth.
To remove more stubborn dirt, moisten the cleaning cloth with an eyeglass-cleaning solution and wipe the lenses gently.
Protect the device from dust and moisture. After use, particularly in high humidity, let the device acclimatise for a short period of time, so that the residual moisture can dissipate before storing. Put on the dust cover and store it in the included bag.
Before cleaning the device, disconnect it from the power supply (remove batteries)!
Protect the device from dust and moisture. Store it in the supplied bag or transportation packaging. The batteries should be removed from the unit if it has not been used for a long time.
EC Declaration of Conformity
Bresser GmbH has issued a „Declaration of Conformity" in accordance with applicable guidelines and corresponding standards. This can be viewed any time upon request.
DISPOSAL
Dispose of the packaging materials properly, according to their type, such as paper or cardboard. Contact your local waste-disposal service or environmental authority for information on the proper disposal.
Do not dispose of electronic devices in the household garbage! As per Directive 2002/96/EC of the European Parliament on waste electrical and electronic equipment and its adaptation into German law, used electronic devices must be collected separately and recycled in an environmentally friendly manner.
In accordance with the regulations concerning batteries and rechargeable batteries, disposing of them in the normal household waste is explicitly forbidden. Please make sure to dispose of your used batteries as required by law - at a local collection point or
in the retail market. Disposal in domestic waste violates the Battery Directive.
Batteries that contain toxins are marked with a sign and a chemical symbol. Cd^ = cadmium, Hg^ = mercury, Pb^ = lead.
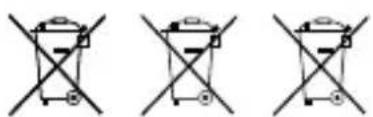
1 battery contains cadmium
2 battery contains mercury
3 battery contains lead
WARRANTY & SERVICE
The regular guarantee period is 2 years and begins on the day of purchase. To benefit from an extended voluntary guarantee period as stated on the gift box, registration on our website is required. You can consult the full guarantee terms as well as information on extending the guarantee period and details of our services at www.bresser.de/warranty_terms.
Eilleton twist-up (2)
BESCHERMING van privacy!
HnkOrda He pa36npaTe yCTpoiCTBO. Pnp BO3NHOBHeHn HncnPaBHOCTe 6paTntEc b K dInepy. OH CBAKETcC HaIM cepBnCHbIM ceHTpOM n Pn Heo6XODMOCTN OTPABNT yCTPOICTBO B peMOHT.
ONACHOCTb IOPAKeHnI 3JIeKTPOTOKOM!
DaHHOe yCTpOINCTBO COePjNT 3NEKTPoHHbIe KOMNOHEHTbl, PnBODIMBIE B DeiCTBne OT NCTOCHNKA TOKa (cTeBOI aAnTep n/nn 6aTapeuKn). He OCTaBnIte pe6eHka 6e3 npncmOTpa. YCTpOINCTBO CNeJyET NCIOJIb3OBaTb TOnbKO TaK, KaK yKa3aHO B INHCTpyKUIn, INaue eCTb cepbe3HbI pNCK NOJyHTb YDAP TOKOM.
ONACHOCTb NOLUYEHNA OXKORA!
NCKHOUHTe DOCTyn Detey K 6batapeKam! Pn yctahOBke/3ameHe 6bataeek CO6HOnaJte NOLpHocTb. BbTeKUne Hnn NOBpeXKeHHbIe 6bataeKn Bbl3bBaIOT pa3npaxKeHn Prn KOtakTe C Koxe. B cnyae Heo6xOIMOCTN HaDeBaIte NOxOJaUne 3aunTHbIe nepuATkn.
He donyckaite HarpeBaHHa YCTPOIcTBa Do BBICOKo TEMnepaTpyb. NcnoJIb3yIe TOnbKO peKOMeHIOBaHHbIe 6atapeiKn. He 3akopauBaTe yCTPOIcTBO n 6atapeiKn, He 6pocaiTe INB OOrh! NepepeB n HnpaBnJIbHOe o6paIeHne MOrYT CTaTb PnPHOH KOPOTKORO 3ambIKAHN, NOXapa n daKe B3pbIbA!
3AUHTA cfepbI IHHoJ Hn3H!

BnHOKn npedHa3NaeHb I nIyHOro
ncnIb3OBaHH. C6nHOaTe npaba
Ha IINHyO XN3Hb OKpyKaIOxix Bac
JIHOeI-He IcNoIb3yIte 3TO yCTPOIcTBO,HaPnIMep,ДЯЗлдыВвOKHA XINbIX NOMEueHn!
06nBnKOMnEKTaIa
1 NepeknouateIb BKI/BblKI (On/Off)
2 NobopoTHo-BbIbNbXHcHn HaRna3HnK
3 KoiIbIoo foKycnOBoKN
Kpbliika 6aTapeHoro OTeKeKa
BaTapeHbI oTceK
6 INHdkaTOp nHTaHn(3eHehCBETOnOJ)
7 Kolbpo perynipOBKn 3yma (TolbKO nmaoenn 20-61230)
8 Yexon
9 CanfeTka IINY UNTKN ONTNK
10 PemelioK
3aMeHa 6aTapeek
OTBnHTte KpbIshky 6batapeHoro otceka (4) n yctaHOblte Dbe 6bataeKKn Knacca CR2 (5) (o6e IIOJXITJIbHbIM IONIOCOM (+) BBepx) B 6batapeHbIOTcEK (5).MaIeHbKm IepKaTeNb Ha KpbIiKe I03BOINr YIO6Ho ee OTkpyuNBaTb N 3aKpyuNBaTb.
PpMueaHne:
Korda 6atapeiKam notpe6yETc3aMeHa, Bbl CMOKeTe onpeJeNTb 3TO NO MIRAHIO 3eJIeHOro INHnKaTOp pa (6); MIRAHne O3Haayet, YTO 6atapeiKn Noutn pa3PraIINCb nIX HAO 3aMeHHTb. Ppi HeIOCTaTOUHOM 3apRrE 6atapeek ctaBnN3auN r3O6paXeHHn IpeCTaHET pa60TaB, PO3TOMy peKOMeHnyETc MeHrTB 6atapeiKn cpa3y, KOrda NaHuyET MIRATb INHnKaTOp.
IobopoTHo-BbIDBnXHbIe HaIa3HnK (2): He BbIDBaIte Hara3Hk (2),ecn nHaHpyTe IcIOJIb3OBAt b MOHOKyIrp,He CHIMa OUYOB.EcN BbI He Hocnte Ouy,OTpeYIpUyTe rIy6uHy BbIDBxKeHHa Hara3HnKa TaK,yTo6bl Tna3am 6blno ydo6Ho.
Hactpoika fokyca
IINr I3MeHHeHr FOKyCnPOBKn MOHOKyJrpa NcNoJIb-3yInTe KOnbUo FOKyCnPOBKn (3).YTo6bI CFOKycnPoBaTb I3O6paxKeHne, rnaIte B MOHOKyJrnp Ha ydaJeH
HbI OBeKT I NOBOPaUNBaIte KOJIbIcO FOKycnPOBKn (3), NOKa OBeKT He CTAHeT YeTKM.
IcnoIb3OBAHne yHKuIN cTa6nIn3aUIN 306paXeHH
Pn nCpOJIb3OBaHm MOHOkyIpa FyHKUHO CTA6NI3aUNn 1306paXeHH MoXHO BkIOHTb NIM OTKIOHTb. Pn BkIOueHHo CTa6IN3aUNn 1306paXeHH BECTN HABIOHeH He 60JIbIX yBeJIuYeHHx HamHOTo yIO6He! YTO6bl BKIOHTb FyHKUHO CTa6IN3aUNn 1306paXeHH, CHaJala yCTaHOBNTe 6aTapeKu, 3ATEM CDBINbTe nepeKIOUaTeNb B INoJOKeHne BKJT (“on"). Byrny, COBCem prdOM c nepeKIOUaTeJeM, 3aROPITc MaNEbKn 3eJIeHb INDInKaTOP. KpOMe TOrO, Bbl Cpa3y NOIMTe, YTO FyHKUra BkIOUeHa, TAK KaK I306paXeHH Cpa3y CTAHET MeHee yVBCTBNTeJIbHBIM K ECTECTBEHHOM DPOJKAHHO PYK(n).

- GEFAHR EINES STROMSCHLAGS!
- RISK of bodily injury!
- FIRE RISK!
- RISK of property damage!
- RISK OF ELECTRIC SHOCK
- RISK OF CHEMICAL BURN!
- Privacy PROTECTION!
- Parts overview
- Changing the Batteries
- Note:
- Twist-up Eyecup (2)
- Adjusting the Focus
- Using the Image Stabilization Feature
- Using the Zoom Function (only Art.No.: 20-61230)
- NOTES on Cleaning
- EC Declaration of Conformity
- DISPOSAL
- WARRANTY & SERVICE
- Eilleton twist-up (2)
- BESCHERMING van privacy!
- ONACHOCTb IOPAKeHnI 3JIeKTPOTOKOM!
- ONACHOCTb NOLUYEHNA OXKORA!
- 3AUHTA cfepbI IHHoJ Hn3H!
- 06nBnKOMnEKTaIa
- 3aMeHa 6aTapeek
- PpMueaHne:
- Hactpoika fokyca
- IcnoIb3OBAHne yHKuIN cTa6nIn3aUIN 306paXeHH
Brand : BRESSER
Model : Monoculair 16x30
Category : Binoculars