
Profi Smartphone Gimbal - Smartphone stabilizer ROLLEI - Free user manual and instructions
Find the device manual for free Profi Smartphone Gimbal ROLLEI in PDF.

| Product type | Smartphone Stabilizer |
| Brand | Rollei |
| Model | Profi Smartphone Gimbal |
| Power supply | Rechargeable lithium-ion battery (included) |
| Charging time | Approximately 2.5 hours |
| Connectivity | Bluetooth® |
| Smartphone compatibility | iOS 8.0 and Android 4.4 or later |
| Stabilization modes | Pan, Pan and Tilt, Lock, Vertical Screen |
| App functions | Self-timer, video/photo settings, front/rear switch, flash, gallery, face detection, 180°/360° panorama, photo/video trigger |
| Joystick control | Zoom in/out, pan and tilt angle adjustment |
| Removable counterweight | Included for larger smartphones (e.g., iPhone 6 Plus) |
| Battery safety | Do not expose to fire, do not disassemble, keep away from children |
| Calibration | Possible via function button (6 seconds) in 6 positions |
| Maintenance | Clean with a soft dry cloth; avoid moisture |
| Weight | Approximately 400 g (estimated) |
| Dimensions (L x W x H) | Approximately 290 x 120 x 50 mm (estimated) |
Frequently Asked Questions - Profi Smartphone Gimbal ROLLEI
User questions about Profi Smartphone Gimbal ROLLEI
0 question about this device. Answer the ones you know or ask your own.
Ask a new question about this device
Download the instructions for your Smartphone stabilizer in PDF format for free! Find your manual Profi Smartphone Gimbal - ROLLEI and take your electronic device back in hand. On this page are published all the documents necessary for the use of your device. Profi Smartphone Gimbal by ROLLEI.
USER MANUAL Profi Smartphone Gimbal ROLLEI
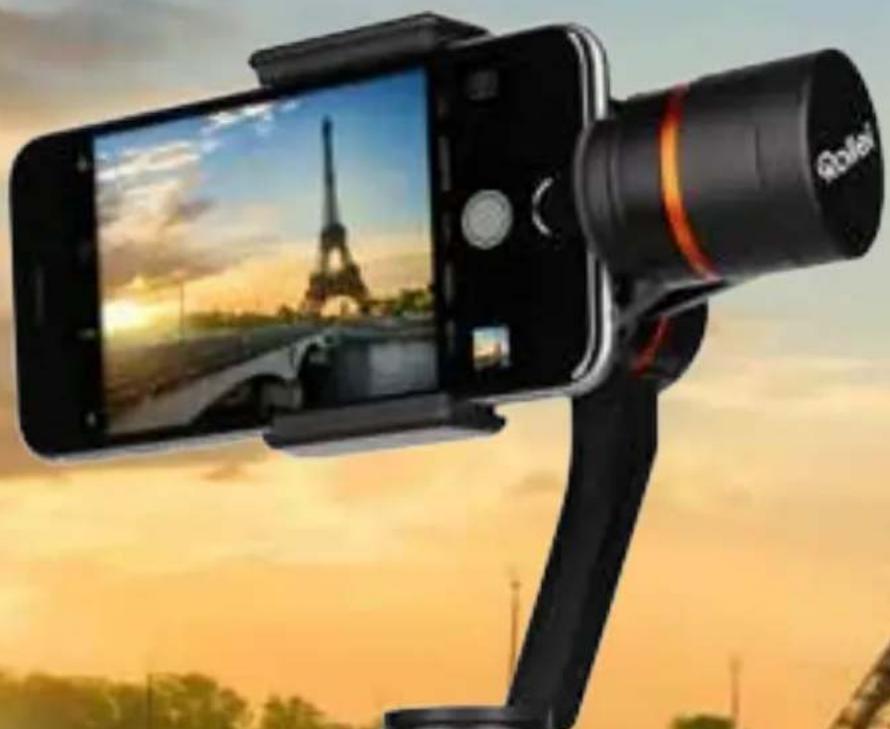
Profi Smartphone Gimbal
Pro Smartphone Gimbal
Bedienungsanleitung
User Guide
For German | English | French | Spanish
Italian | Portuguese
Rollei
Bedienungsanleitung
Profi Smartphone Gimbal 4
Entsorgung 7
Konformitat. 7
User Guide
Pro Smartphone Gimbal 8
Disposal 11
Conformity 11
18650 Rechargeable Battery
- 1x Micro USB Cable
- 1x Counter Weight
- 1x Transport Bag
- 1x User Manual
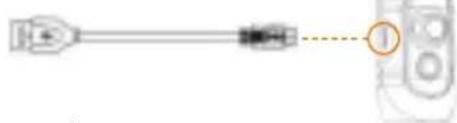
Charging: Insert the USB cable into the USB port of the gimbal and plug the other side into a charging port of a power source.
3. Mount the Smartphone
Please make sure that the gimbal is turned off. Insert the smartphone. Therefore put it with one side into the smartphone holder, push the upper part from the holder to enlarge the holder and press the smartphone inside. Make sure that the smartphone is well inserted and that it cannot fall out.
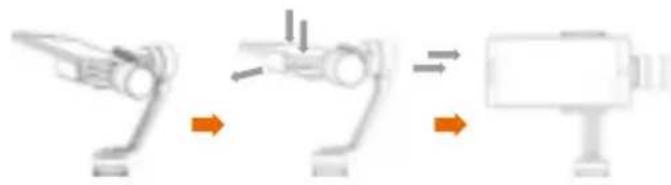
NOTE: The home button of the smartphone should be at the side near to the pitch motor. Please ensure that the smartphone is fixed tightly in order to avoid shaking of the gimbal.
1. Installation
Download and install the Rollei App called "Rollei Smart Gimbal" onto your smartphone.
The App supports iOS 8.0 and Android 4.4 or above.
2. Battery Installation
The battery needs to be fully charged before the device is used for the first time. The charging time is about 2.5 hours when it is directly charged by a power outlet (therefore an adapter is needed which is not part of the delivery).
The battery needs to be inserted into the handle of the gimbal. Therefore, please unscrew the lowest part of the handle. Then insert the battery into the handle (the minus polarity shows in the direction of the small part of the handle). Afterwards the small part can be screwed onto the handle again.

4. Balancing the Smartphone
If the gimbal is turned on and the smartphone is balanced / levelled correctly and will be held by the gimbal without making any sounds or any shakes, the smartphone is positioned correctly.
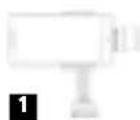
Fig. 1 Without the counter weight: suitable for iPhone 6/6s/7 and similar Android smartphones
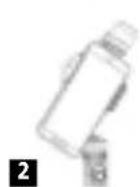
Fig. 2 If the smartphone tilts to the left, you need to add the counter weight. Therefore unscrew the cap at the pitch angle and put the counterweight on and screw the cap on again (such as iPhone 6 plus / 6s plus /7 plus and similar Android smartphones).

Fig. 3 If the smartphone tilts to the right, you need to move the phone a bit more to the left side up to the point where the gimbal can balance the smartphone. (Such as iPhone 5/5s and similar Android smartphones).
5. Connection with the Rollei App
- Make sure that your smartphone is well positioned in the smartphone holder of the gimbal. Then activate the Bluetooth® function on your smartphone.
- Start the Rollei APP on your smartphone that you have downloaded before and choose the correct model.
- Start the gimbal by pressing the function button for about 3 seconds until the indicator light starts flashing.
- When the gimbal is working it is connected to the smartphone directly (follow the instructions shown on the display of your smartphone). You can then use the device and all functions of the app.
- To turn the gimbal off also press the function button for about 3 seconds. The smartphone will not be levelled anymore if the device is off.
6. Indicator Light
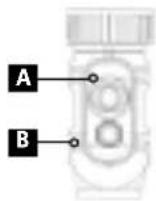
A Signal Indicator Light
- Constant on: Bluetooth 已 ^ 喜 is connected
- Flashing: Zoom in/out with the joystick
- Flashes twice: Power on/off
B Status Indicator Light
- Flashes once: Panning mode
- Flashes twice: Panning and pitching mode
- Flashes for three times: Lock mode
- Keeps flashing: Low battery/ Charging
- LED light constant on: Charge finished
7. Controls Instruction
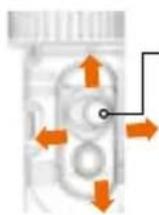
5-Way Joystick
Middle button: Switch the working mode
- Single Click: Panning Mode Following
- Double Click: Panning and Pitching Mode Following
- Triple Click: Lock Mode Following
Quartic Click: Vertical Screen Mode (Quartic click to quit) - Long press for 3 seconds: Zoom in/out by joystick (single tap to quit)
- Long press for 6 seconds: Enter the initialization
Left/Right: Adjustment of panning angle
Up/Down: Adjustment of pitching angle as well as Zoom in or zoom out
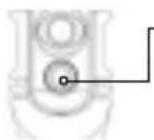
Function Button
- Single Press: Take a photo (with Rollei app)
- Double Press: Start video (with Rollei app)
- Long press (for about 3 seconds): Power on / off
8. Working Mode Instruction
Basic working modes of the gimbal
Working Mode Instruction
| Panning Mode The phone can move to the left or right smoothly along with the handheld moving. The pitching and rolling directions are fixed / locked. |
| Panning and Pitching Mode The phone can move to the left or right and pitch up and down smoothly along with the handheld moving. The rolling direction is fixed / locked. |
| Lock Mode The phone stays in its current position. The panning, pitching and rolling axes are all fixed / locked. |
| Vertical Screen Mode The phone will be held in the vertical position which can be used for live streaming |
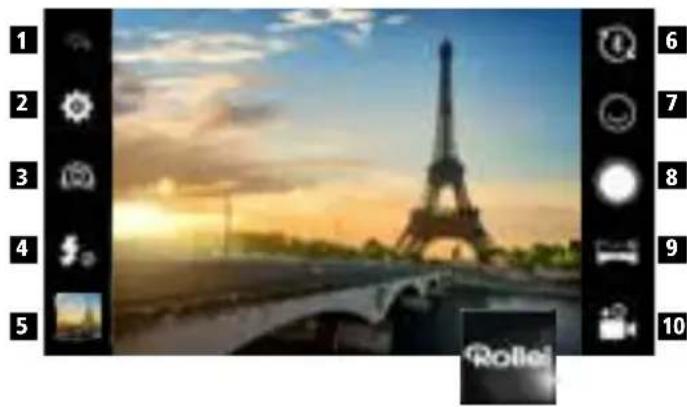
Main Functions of the Rollei App
- Back Button: Push this button to return to the start screen of the App.
- Settings: Here you can adjust the following settings: video quality, countdown for face tracking, countdown for taking pictures with the joystick, sound, exposure compensation).
- Camera Mode: Press this sign to switch between the front and back camera.
- Flash: Press this sign to change the flash mode (off, automatic, on).
- Photos: Press the picture to enter your picture gallery.
- Bluetooth 假 Connection: This sign indicates whether your smartphone is connected via Bluetooth with your gimbal. If the devices are not connected a red dot with a cross inside will be next to the Bluetooth 假 icon.
- Face Detection: Press this button and choose the face detection function you would like to use: single face, two faces, a group of people, off.
- Photo Release Button: By pressing this icon you can manually take a photo.
- Panoramic Mode: By pressing this button you can choose between three panoramic modes:
Centered panorama: If you choose the centered panorama the gimbal will start the panorama shot from the position where it is will go left for 180^ and then back to the starting point and from there 180^ to the right. Afterwards the panorama will be stitched so that the starting point will be the center within the picture.
180^ panorama: If you choose 180^ panorama the gimbal will start the panorama from its current position and will make a 180^ rotation and then end the shot.
360^ panorama: If you choose 360^ panorama the gimbal will start the panorama from its current position and will make a 360^ rotation and will end the shot at its starting point.
- Video Button: Push this sign to manually start the video function. To stop the video manually push the stop button at the right upper corner.
9. Technical Details
Material Aluminum Weight 403 g/359 g (with/without battery) Folding Size 305x125x97 mm (HxWxD)
PitchAxes 320^
RollAxes 320^
PanAxes 360^
Charging Voltage 4.5V-6.0 V
Operating Time 4 hours
Suitable for iPhone*
3, 5s, SE, 6, 6s, 7, 6 plus, 6s plus, 7 plus Samsung Galaxy, Huawei and further Android smartphones up to 6'' screen diagonal (max. weight 75-200 g)
10. Calibration (Initialization)
If the gimbal is in the following conditions, please calibrate it:
- The pitch angle is not levelled with the horizontal surface.
- The roll angle is not parallel to the horizontal surface.
- Under the lock mode, the panning angle is drifting.
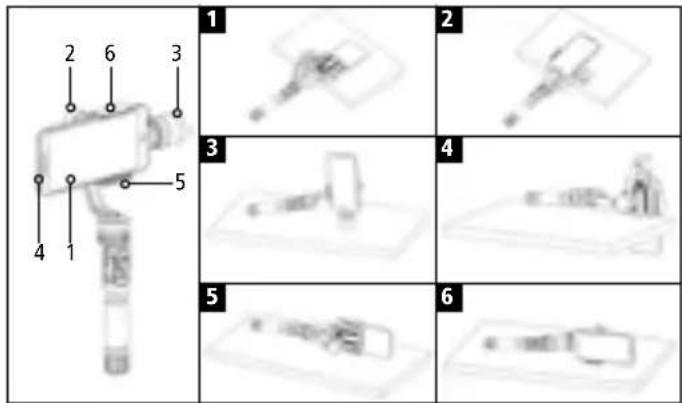
Calibration Operation Instruction:
- Turn the gimbal on and wait at least 3 seconds.
- Press the middle button of the joystick of the gimbal for more than 6 seconds until all motors are stopped and the LED indicator light of the function button will light up and will be constantly on.
- Put the gimbal into the position which is shown in picture 1 and keep the gimbal and the platform stationary. Take a look at the LED indicator light, until the light flashes three times and then remains constantly on. That means the calibration of this position is finished. Now do the calibration for the other position, shown in the pictures from 2 to 6.
Attention: Please keep the platform horizontal and after positioning the gimbal on the platform. Keep the gimbal as well as the horizontal platform stationary. Put the function button face up in order to take a look at the LED indicator clearly.
- The light will turn off after you complete the last face calibration (shown in picture 6).
Attention: If the light is constantly on after you fully completed the six steps of calibration, then the calibration has not been successful. Please turn the gimbal off and do the calibration again.
5. Turn off the gimbal after calibration is done.
6. Turn on the gimbal again and check if the gimbal has now the correct position. If his is not the case, then do the calibration operation again until the gimbal works normally.
11. Disclaimer
- Please install and use the product according to the manual!
- Please reconfirm the gimbal and the smartphone are well installed before turning them on!
- Keep the battery away from fire and hot places!
- Any illegal purpose while using this device is prohibited. Users will be responsible for all behavior of purchasing and using the products.
- For any unknown sources or usage, we will not provide any service.
Disposal

Dispose of packaging: For disposal, separate packaging into different types. Cardboard and board must be disposed of as paper and foil must be recycled.

Disposal of Waste Electrical and Electronic Equipment and/or Battery by users in private households in the European Union. This symbol on the product or on the packaging indicates that this cannot be disposed of as a household waste. You must dispose of your waste equipment and/or battery by handling it over to the applicable take-back scheme for the recycling of electrical and electronic equipment and/or battery. For more information about
recycling of this equipment and/or battery, please contact your city office, the shop where you purchased the equipment or your household waste disposal service. The recycling of materials will help to conserve natural resources and ensure that it is recycled in a manner that protects human health and environment.
Battery warning
- Never dismantle, crush, or pierce the battery, or allow the battery to short-circuit. Do not expose battery being placed in high temperature environment, if battery leaks or bulges, stop continue to use.
- Always charge using the charger. Risk of explosion if battery is replaced by an incorrect type.
- Keep the battery out of reach of children.
- Batteries may explode if exposed to naked fire. Never dispose of batteries in a fire.
- Disposed of used batteries observing local regulations.
- Before disposing the device, please remove the battery.
Conformity
The Manufacturer hereby declares that the CE marking was applied to the Rollei Pro Smartphone Gimbal in accordance with the basic requirements and other relevant provisions of the following CE Directives:
EMC directive 2014/30/EU
LVD directive 2014/35/EU
RoHS directive 2011/65/CE
RED directive 2014/53/EU
2012/19/EC WEEE Directive

The EC Declaration of Conformity can be requested from the address specified on the Warranty card.
12
Aperçu produit
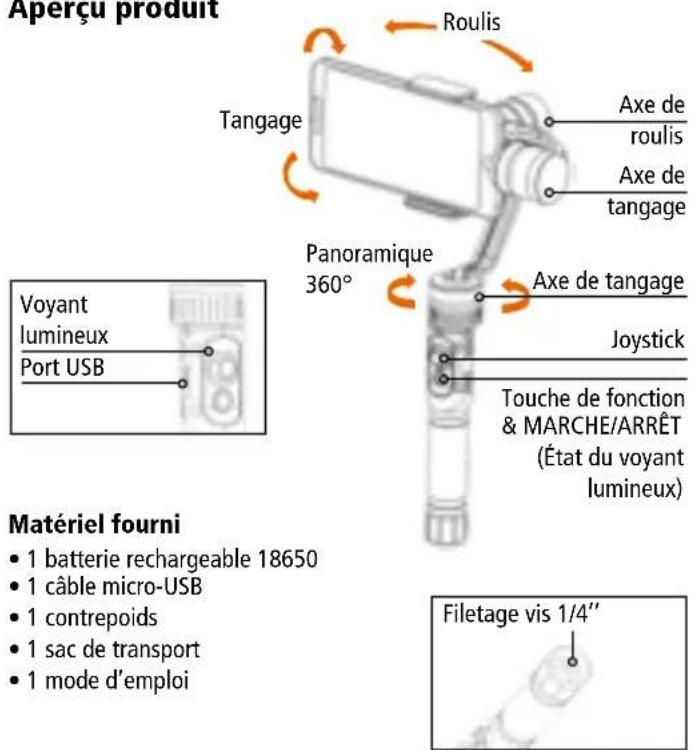
Joystick 5 directions
www.rollei.com/social