
LED1031 - TV DENVER - Free user manual and instructions
Find the device manual for free LED1031 DENVER in PDF.

| Product type | LED TV |
| Brand | DENVER |
| Model | LED1031 |
| Tuner | DVB-T/T2 |
| Input frequencies | 170-230 MHz (VHF) and 470-860 MHz (UHF) |
| RF input level | -25 to -80 dBm (64 QAM) / -10 to -75 dBm (256 QAM) |
| IF bandwidth | 7 MHz and 8 MHz |
| Modulation | QPSK, 16QAM, 64QAM, 256QAM |
| Video formats | MPEG2, MPEG4 AVC H.264 HP@L4, HEVC H.265 HT@L4 |
| Audio formats | MPEG-1 (layers 1, 2, 3) |
| Video outputs | CVBS, HDMI |
| Audio output | Stereo |
| Power supply | 9 V DC, 1.5 A |
| Consumption | ≤ 10 W |
| Remote control | Included |
| Channel search | Automatic and manual |
| Maintenance and cleaning | Wipe with a soft, dry cloth |
| Safety | Do not expose to water, do not open the case |
Frequently Asked Questions - LED1031 DENVER
User questions about LED1031 DENVER
0 question about this device. Answer the ones you know or ask your own.
Ask a new question about this device
Download the instructions for your TV in PDF format for free! Find your manual LED1031 - DENVER and take your electronic device back in hand. On this page are published all the documents necessary for the use of your device. LED1031 by DENVER.
USER MANUAL LED1031 DENVER
natural_image
Blank rectangular frame with a small icon at the bottom right corner (no text or symbols)
natural_image
Close-up of a metallic cylindrical object with a pointed tip, possibly a CD or DVD (no visible text or symbols)

text_image
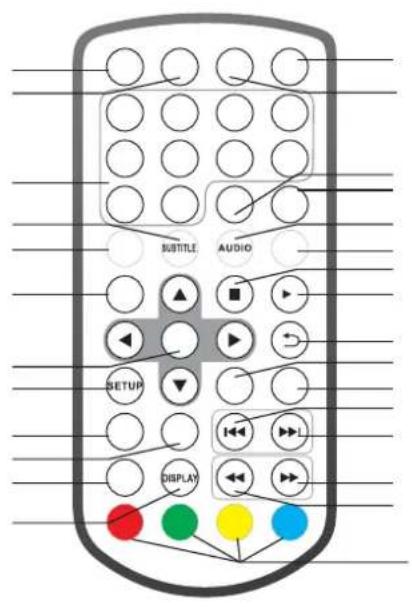
SUBTITLE AUDIO SETUP DISPLAY
natural_image
Simple line drawing of a horizontal bar with tick marks, no text or symbols present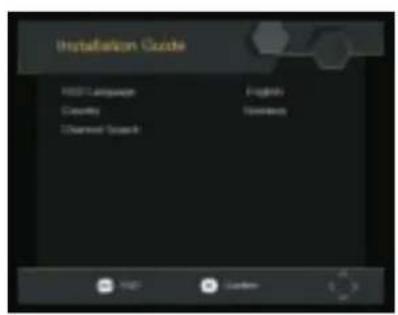
text_image
Installation Guide HIST Language Colors Open Text English Spanish
text_image
Program Program Edit EPQ Soft LCN By LCN On
natural_image
Abstract digital interface with a white line and color swatches on dark background (no text or symbols)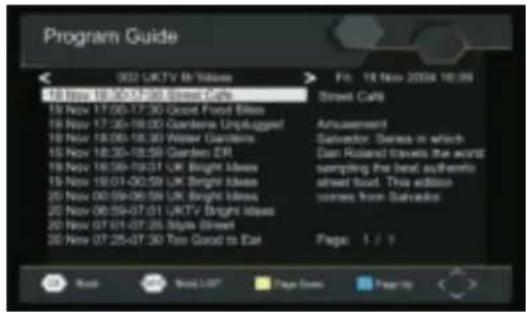
text_image
Program Guide 932 UKTV Mr'dlasse 16 Nov 18:00-17:00 Street Calls 16 Nov 17:00-17:30 Great Fixed Bless 16 Nov 17:30-18:00 Garden Unplugged! 16 Nov 18:00-18:30 Warm Garden 16 Nov 18:30-18:59 Garden ER 16 Nov 18:59-19:31 UK Bright Ideas 16 Nov 19:01-00:59 UK Bright Ideas 20 Nov 00:09-06:59 UK Bright Ideas 20 Nov 06:59-07:01 UKTV Bright Ideas 20 Nov 07:01-07:25 Style Street 20 Nov 07:25-07:30 Too Good to Eat File: 18 Nov 2004 18:09 Street Call Aruaement Dishector: Stresses in which Dan Russia travels the world sampling the best authentic street load. This addition come from Salvador. Page: 1 / 9 About New L&T Page Down Page Up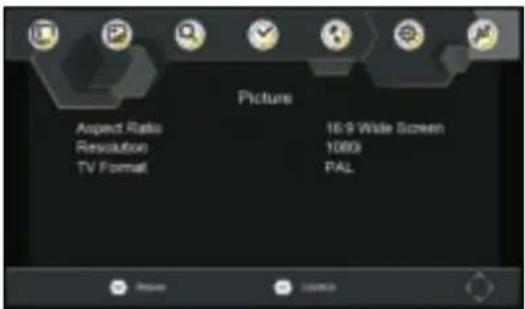
text_image
Picture Aspect Ratio Resolution TV Format 16:9 Wide Screen 1000s PAL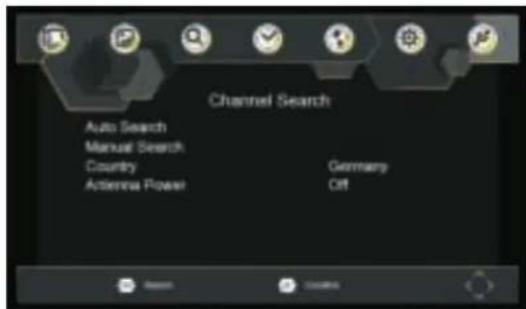
text_image
Channel Search Auto Search Manual Search Country Antenna Power Germany Off
natural_image
Pure electrical circuit lines without any symbols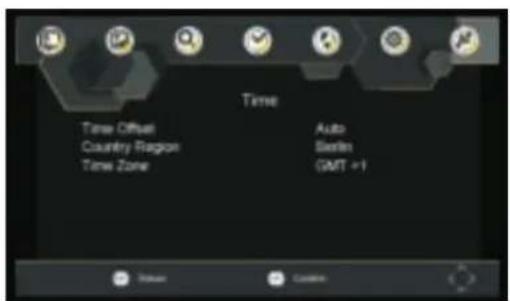
text_image
Time Time Offset Country Region Time Zone Auto Berlin GMT +1 Return Customs
text_image
Screenshot of a software interface with a horizontal bar and dotted line, likely a media or text input field.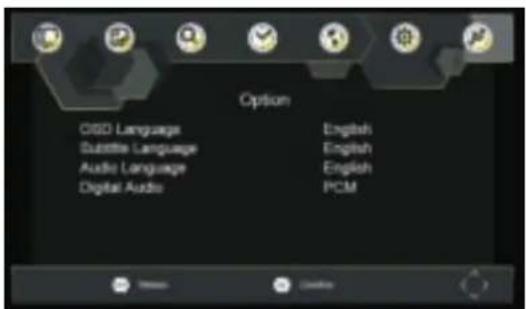
text_image
Option OBD Language Subtitle Language Audio Language Digital Audio English English English PCM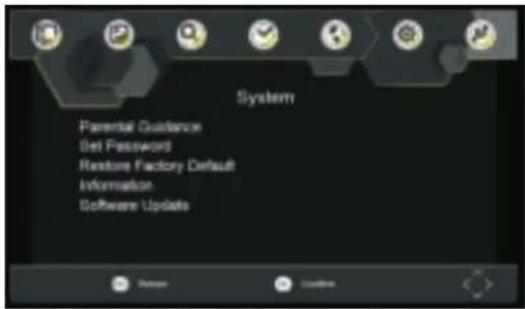
text_image
System Parental Guidance Set Password Restore Factory Default Information Software Update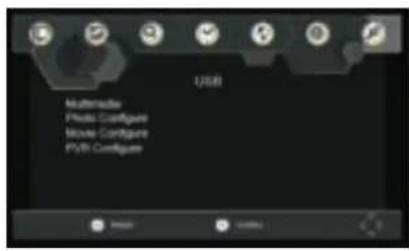
text_image
USB Multimodular Photo Configure Movie Configure PVB Configure| A |
| “ ” | ||
ALL RIGHTS RESERVED, COPYRIGHT DENVER ELECTRONICS A/S
DENVER®
www.denver-electronics.com


DENVER®

natural_image
Blank rectangular frame with a small icon at the bottom right corner (no text or symbols)
natural_image
Close-up of a metallic cylindrical object with a pointed tip, possibly a CD or DVD (no visible text or symbols)

text_image
SUBTITLE AUDIO SETUP DISPLAY
natural_image
Simple grayscale diagram with a horizontal bar and cloud on the left (no text or symbols)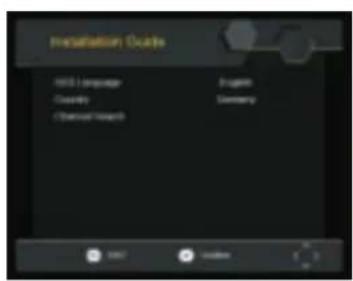
text_image
Installation Guide HBD Language Dataset Chemical Research Project Germany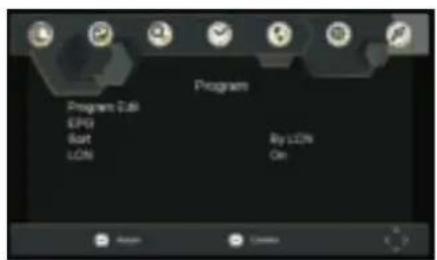
text_image
Program Program 0.68 EPG Start LCD By L23% On
natural_image
Dark background with a white horizontal line and small colored squares at the bottom (no text or symbols)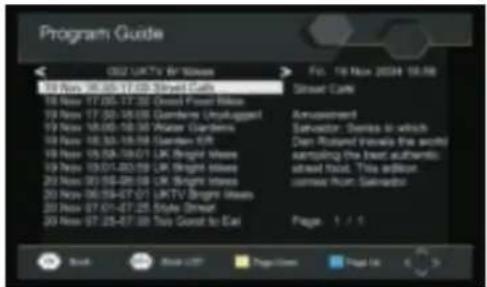
text_image
Program Guide 02. UKTV @ Slides 18 Nov 16:35-17:03 Stynd Cars 18 Nov 17:30-17:32 Steel Power Bills 19 Nov 17:30-18:00 Gardens Unyagpur 19 Nov 18:00-18:30 Water Gardens 19 Nov 18:35-18:38 Garden EUR 19 Nov 19:02-19:07 UK Bright Mines 19 Nov 19:01-00:59 UK Bright Mines 20 Nov 20:06-20:08 UK Bright Mines 20 Nov 06:04-07:07 LRTV Bright Mines 20 Nov 07:01-07:25 Style Driveur 20 Nov 07:25-07:30 Ties Coast to Eurl Fol. 16 Mon 2024-16:48 Street Cars Amarasheet Savadoa: Sandes in which Dan Rossard (forall the words) sampling the best authentic ahead Food. This editor. camer Mont: Salvadoo Page 1 / 1 Book Book OFF Page List Page Link 5
text_image
Picture Aspect Ratio Resolution TV Format HD/HD Screen 10000 PAL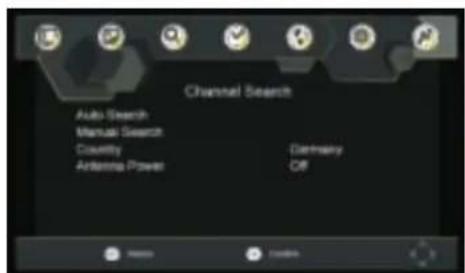
text_image
Channel Search Auto Search Manual Search Countivity Antenna Power Germany Off
natural_image
Pure electrical circuit lines without any symbols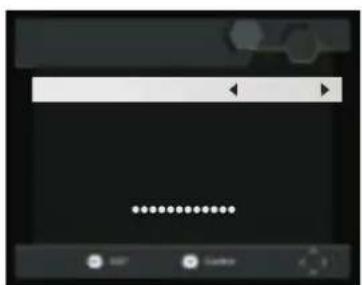
text_image
Screenshot of a software interface with a horizontal bar and dotted line, likely a media or video control panel.
text_image
Time Timer Clock Automatic Weather Timer Zone Auto Wireless GMT +1
text_image
Options OBC Language Subtitle Language Audio Language Digital Audio English English English PCI8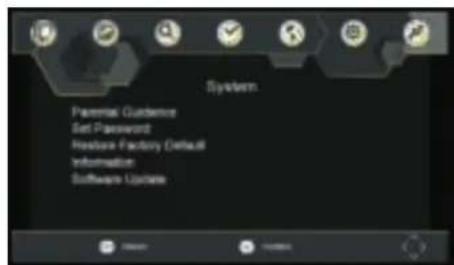
text_image
System Parental Guidance Set Password Feature Factory Default Information Software Update
text_image
USB Multimedia Photo Configure Movie Configure PVBI Configure| ≤slant |
DENVER®
www.denver-electronics.com
CE

DENVER®
natural_image
Blank rectangular frame with a small icon at the bottom right corner (no text or symbols)BÆRBAR -AFSPILLER
text_image
SUBTITLE AUDIO SETUP DISPLAY
natural_image
Simple gray background with a horizontal bar and cloud icon (no text or symbols)
text_image
Installation Guide HBD Language Dataset Chemical Research Project Germany
text_image
Program Program 0.68 EPG Start LCD By L23% On
natural_image
Dark background with a white horizontal line and small colored squares at the bottom (no text or symbols)
text_image
Program Guide 02 UKTV Hi Spain 18 Nov 16:35-17:03 Street Cars 18 Nov 17:30-17:32 Digital Power Bills 19 Nov 17:30-18:00 Gardens Unyakuppl 19 Nov 18:00-18:30 Water Gardens 19 Nov 18:35-18:38 Garden EUR 19 Nov 19:02-19:07 UK Bright Mines 19 Nov 19:01-00:59 UK Bright Mines 20 Nov 20:06-20:08 UK Bright Mines 20 Nov 06:04-07:07 UKTV Bright Mines 20 Nov 07:01-07:25 Style Driveur 20 Nov 07:25-07:30 This Coast to Eurl Fol. 16 Nov 2024-16:48 Street Cars Amarasheet Savadoa: Sandos in which Dan Rossard (forall this article) sampling the best authentic ahead Food. This editor. comee Mont: Salvadoo Page 1 / 1 Book Book List Page List Page 16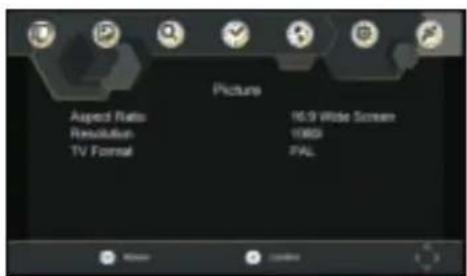
text_image
Picture Aspect Ratio Resolution TV Format 16.9 Wide Screen 1000 PAL
text_image
Channel Search Auto Search Manual Search Country Antenna Power Germany Off
natural_image
Pure electrical circuit lines without any symbols
text_image
Screenshot of a software interface with a dropdown bar and dotted line options below, likely from an older application or settings page.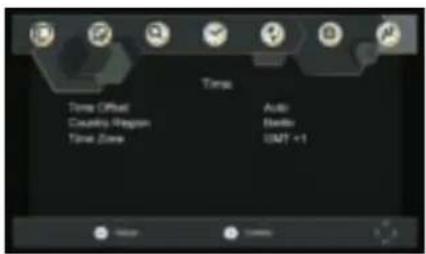
text_image
Time Time Offset Double-Wave Time Zone Auto Audio BMO +1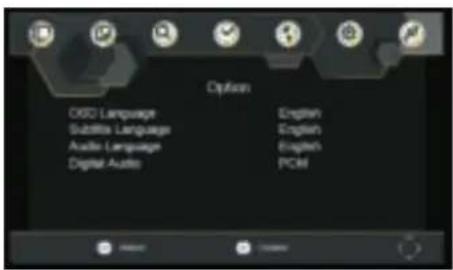
text_image
Options OSCO Language Subtitle Language Audio Language Digital Audio English English English PCM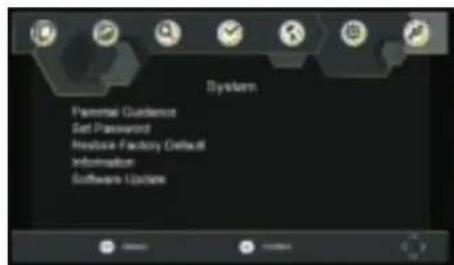
text_image
System Parental Guidance Set Password Headbase Factory Default Information Software Updates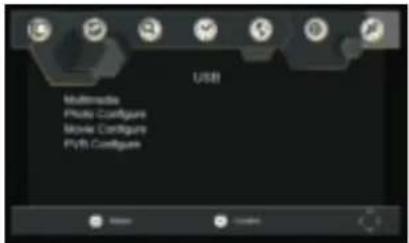
text_image
USB Multimedia Photo Configure Movie Configure Flyb Configure| Punkt | Underpunkt | Parameter |
| Tuner | Frekvensområde | 170 - 230 MHz470 - 860 MHz |
| RF-indgangsniveau | -25~80dBm (64QAM)-10~75dBm (256QAM) | |
| IF-båndbredde | 7 MHz og 8 MHz | |
| Modulation | QPSK, 16QAM, 64QAM, 256QAM | |
| Video | Dekoder-format | MPEG4 AVC/H.264 HP@L4HEVC/H.265 HT@L4MPEG2 MP@ML.HL |
| Udgangsterminaler | CVBS, HDMI | |
| Audio | Dekoder-format | MPEG-1 (layer1&2&3) |
| Audioudgang | Stereo | |
| Lysnet | Spænding | DC 9 V (1,5 A) |
| Stremkrav | 10W |
natural_image
Blank rectangular frame with a small icon at the bottom right corner (no text or symbols)
natural_image
Close-up of a metallic cylindrical object with a pointed tip, possibly a disc or optical component (no text or symbols visible)

text_image
SUBTITLE AUDIO SETUP DISPLAY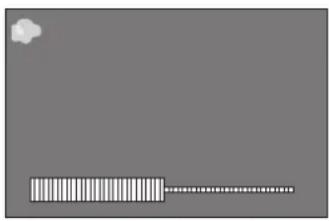
natural_image
Simple line drawing of a horizontal bar with tick marks, no text or symbols present
text_image
Installation Guide HBD Language Dataset Chemical Research Project Germany
text_image
Program Program 0.68 EPG Start LCD By L23% On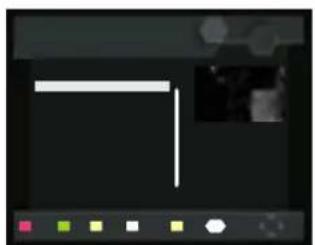
natural_image
Dark background with a white horizontal line and small colored squares at the bottom (no text or symbols)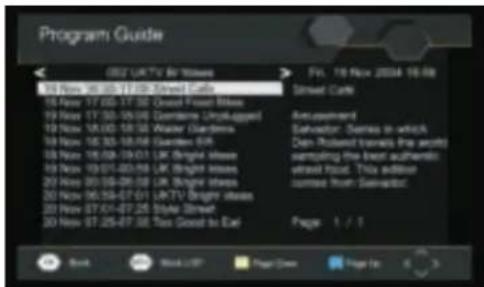
text_image
Program Guide OK! UK TV Bit Moves 08 Nov 16:30-17:20 Street Care 18 Nov 17:00-17:30 Desert Forest Buses 19 Nov 17:30-18:30 Derrante (Unkugger) 19 Nov 18:00-18:30 Water Gardens 19 Nov 18:30-18:30 Gardens EEA 19 Nov 18:30-19:01 UK Bright illness 19 Nov 19:01-03:50 UK Bright illness 20 Nov 20:05-20:05 UK Bright illness 20 Nov 26:34-27:01 UKTV Bright illness 20 Nov 27:01-27:25 Style Street 20 Nov 27:25-27:30 Tax Court to EEA Fts. 18 Nov 2024-16-08 Street Care Accuritement Salvastian: Sarnas in which Dan Robust travels the air onto sampling the best authentic street Food. This addition contact from Salvastian: Page 1 / 1 Book Work LIFT Page Draw Page In
text_image
Picture Aspect Ratio: Resolution TV Format 66.9 Wide Screen 1060 PAL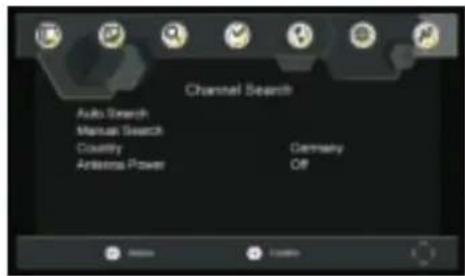
text_image
Channel Search Auto Search Manual Search Country Antenna Power Germany OF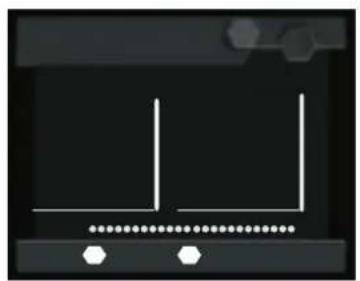
natural_image
Pure electrical circuit lines without any symbols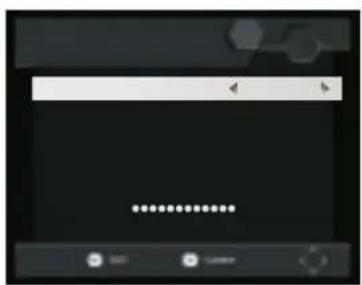
text_image
Screenshot of a software interface with a horizontal bar, navigation arrows, and dotted line options below.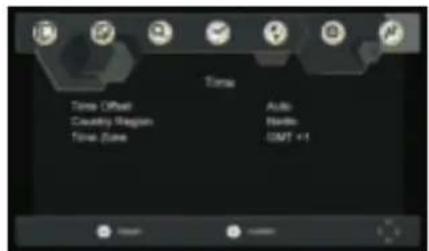
text_image
Time Time Offset Country Margin Time Zone Auto Nvidia LMT +1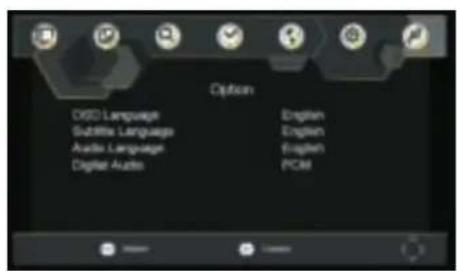
text_image
Options DVD Language Subtitle Language Audio Language Digital Audio English English English PCB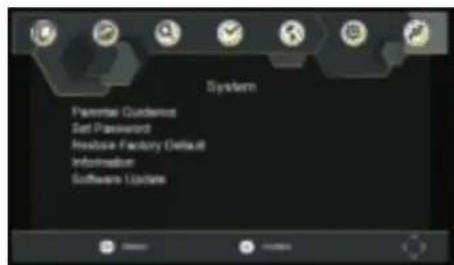
text_image
System Nummar Guidance Set Password Headbase Factory Default Information Software Update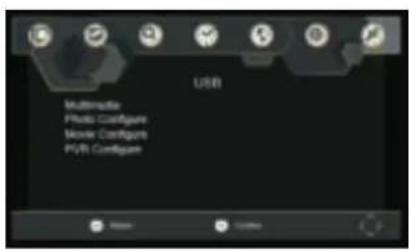
text_image
USB Multimedia Photo Configure Movie Configure PVB Configurenatural_image
Blank rectangular frame with a small icon at the bottom right corner (no text or symbols)
natural_image
Close-up of a metallic cylindrical object with a pointed tip, possibly a disc or optical component (no text or symbols visible)

text_image
SUBTITLE AUDIO SETUP DISPLAY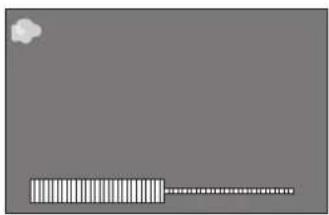
natural_image
Simple line drawing of a horizontal bar with tick marks, no text or symbols present
text_image
Installation Guide HBD Language Dataset Chemical Research Project Germany
text_image
Program Program 0.68 EPG Start LCD By L23% On
natural_image
Dark background with a white horizontal line and small colored squares at the bottom (no text or symbols)
text_image
Program Guide 02 UKTV Hi Spain 18 Nov 16:35-17:03 Street Cars 18 Nov 17:30-17:32 Digital Power Bills 19 Nov 17:30-18:00 Gardens Unyakuppl 19 Nov 18:00-18:30 Water Gardens 19 Nov 18:35-18:38 Garden EUR 19 Nov 19:02-19:07 UK Bright Mines 19 Nov 19:01-00:59 UK Bright Mines 20 Nov 20:06-20:08 UK Bright Mines 20 Nov 06:04-07:07 UKTV Bright Mines 20 Nov 07:01-07:25 Style Driveur 20 Nov 07:25-07:30 This Coast to Eurl Fol. 16 Nov 2024-16:48 Street Cars Amarasheet Savadoa: Sandos in which Dan Rossard (forall this article) sampling the best authentic ahead Food. This editor. comee Mont. Salvadoo Page 1 / 1 Book Book List Page List Page 16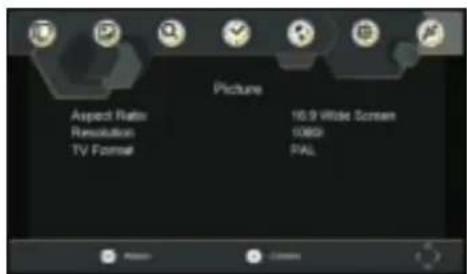
text_image
Picture Aspect Ratio Resolution TV Format 16.9 White Screen 0850 PAL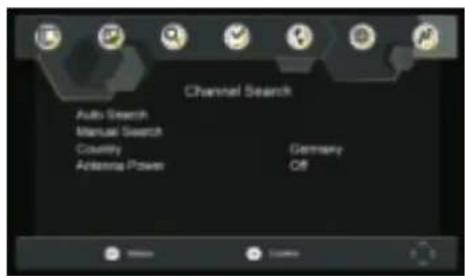
text_image
Channel Search Auto Search Manual Search Country Antenna Power Germany Off
natural_image
Pure electrical circuit lines without any symbols
text_image
Screenshot of a software interface with a horizontal bar and dotted line, likely a media or video control panel.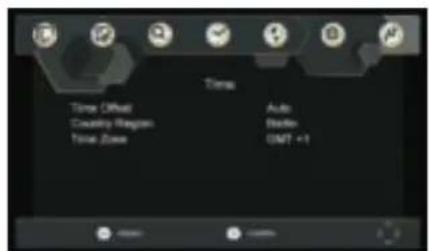
text_image
Time Time Offset Caution Region Time Zone Auto Bevel GMT +1
text_image
Options OBC Language Subtitle Language Audio Language Digital Audio English English English PCI8
text_image
System Parental Guidance Set Password Feature Factory Default Information Software Update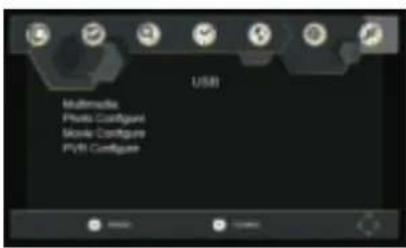
text_image
USB Multimedia Photo Configur Movie Configur PVRI Configurnatural_image
Blank rectangular frame with a small icon at the bottom right corner (no text or symbols)
natural_image
Close-up of a metallic cylindrical object with a pointed tip, possibly a CD or DVD (no visible text or symbols)

text_image
SUBTITLE AUDIO SETUP DISPLAY
natural_image
Simple line drawing of a rectangular object with a dotted line extending from it, against a plain gray background (no text or symbols)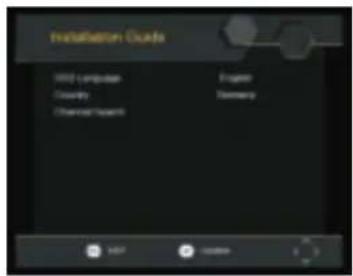
text_image
Installation Guide 300 Computer Classify Channel Repair English Germany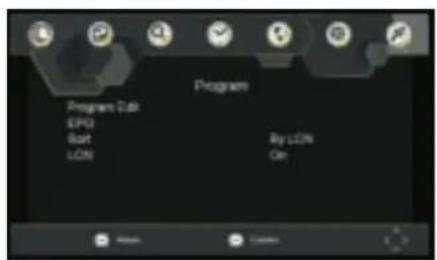
text_image
Program Program Edit LPG Start LCD By LCD On
natural_image
Dark background with a white horizontal line and small colored squares at the bottom (no text or symbols)
text_image
Program Guide 02 UKTV Hi Spain 18 Nov 16:35-17:03 Street Cars 18 Nov 17:30-17:32 Digital Power Bills 19 Nov 17:30-18:00 Gardens Unyakuppl 19 Nov 18:00-18:30 Water Gardens 19 Nov 18:35-18:38 Garden EUR 19 Nov 19:02-19:07 UK Bright Mines 19 Nov 19:01-00:59 UK Bright Mines 20 Nov 20:06-20:08 UK Bright Mines 20 Nov 06:04-07:07 UKTV Bright Mines 20 Nov 07:01-07:25 Style Driveur 20 Nov 07:25-07:30 This Coast to Eurl Fol. 16 Mon 2024-16:48 Street Cars Amarasheet Savadoa: Sandos in which Dan Rossard (forall this article) sampling the best authentic ahead Food. This editor. comee Mont: Salvadoo Page 1 / 1 Book Book List Page List Page 16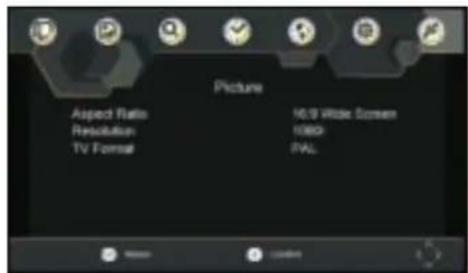
text_image
Picture Aspect Ratio Resolution TV Format 10.9 Wide Screen 1080 PAL
text_image
Channel Search Auto Search Manual Search Countly Antenna Power Germany Off
natural_image
Pure graphical interface element with no text, numbers, or symbols
text_image
Screenshot of a software interface with a horizontal bar and dotted line, likely a media or text input field.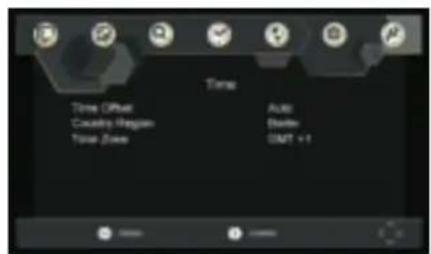
text_image
Time Time Offset Country Region Time Zone Auto Driver GMT + 1
text_image
Options OBC Language Subtitle Language Audio Language Digital Audio English English English PCI8
text_image
System Parental Guidance Set Password Feature Factory Default Information Software Update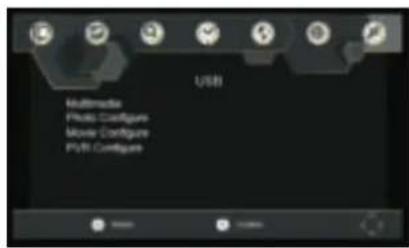
text_image
USB Multimedia Photo Configure Move Configure PVB ConfigureTechnische specificaties
| Onderwerp | Onderdeel | Parameter |
| Tuner | Ingangsfrequentie | 170~230MHz470~860MHz |
| RF-signaalvermogen aan de ingang | -25~-80dBm (64QAM)-10~-75dBm (256QAM) | |
| IF-bandbreedte | 7 MHz en 8 MHz | |
| Modulatie | QPSK,16QAM,64QAM,256QAM | |
| Video | Decoder-formaat | MPEG4 AVC/H.264 HP@L4HEVC/H.265 HT@L4MPEG2MP@ML.HL |
| Uitgangspoort | CVBS, HDMI | |
| Audio | Decoder-formaat | MPEG-1 (laag 1&2&3) |
| Audio-uitgang | Stereo | |
| Voeding | Voltage | DC 9V, 1,5 A |
| Bedrijfsvermogen | 10W |
Probleemoplossing
natural_image
Blank rectangular frame with a small icon at the bottom right corner (no text or symbols)
natural_image
Close-up of a metallic cylindrical object with a pointed tip, possibly a disc or optical component (no text or symbols visible)

text_image
SUBTITLE AUDIO SETUP DISPLAY
natural_image
Simple gray background with a small cloud icon and a horizontal bar chart at the bottom (no text or symbols)
text_image
Installation Guide HBD Language Dataset Chemical Research Project Germany
text_image
Program Program 0.68 EPG Start LCD By L23% On
natural_image
Dark background with a white horizontal line and small colored markers at the bottom (no text or symbols)
text_image
Program Guide 02 UKTV Hi Stives 18 Nov 16:35-17:03 Street Cars 18 Nov 17:30-17:32 Digital Fiesel Bills 19 Nov 17:30-18:00 Gardens Unyakuppl 19 Nov 18:00-18:30 Water Gardens 19 Nov 18:35-18:38 Garden EUR 19 Nov 19:02-19:07 UK Bright Mines 19 Nov 19:01-00:59 UK Bright Mines 20 Nov 20:06-20:08 UK Bright Mines 20 Nov 06:04-07:07 UKTV Bright Mines 20 Nov 07:01-07:25 Style Driveur 20 Nov 07:25-07:30 This Coast to Eurl File: 16 Mon 2024-16:48 Street Cars Amarasheet Savado: Series in which Dan Rossard (forall this article) sampling the best authentic ahead Food. This editor. comee Mont. Salvado Page 1 / 1 Book Book List Page List Page 16
text_image
Picture Aspect Ratio Resolution TV Format 10.9 Wide Screen 1080 PAL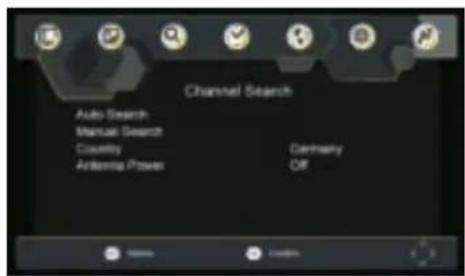
text_image
Channel Search Auto Search Manual Search Countly Antenna Power Germany Off
natural_image
Pure electrical circuit lines without any symbols
text_image
Screenshot of a software interface with a horizontal bar and dotted line, likely a media or video control panel.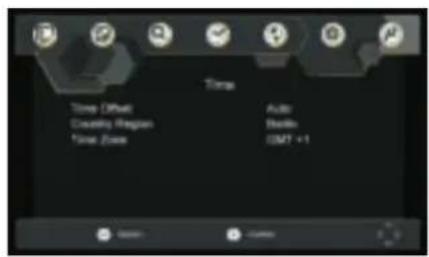
text_image
Time Temp (Diffuse) Capacity Region Time Zone Audio Sterling GMT +1
text_image
Options OBC Language Subtitle Language Audio Language Digital Audio English English English PCI8
text_image
System Parental Guidance Set Password Feature Factory Default Information Software Update
text_image
USB Multimedia Photo Configure Movie Configure PVR Configurenatural_image
Blank rectangular frame with a small icon at the bottom right corner (no text or symbols)
natural_image
Close-up of a metallic cylindrical object with a pointed tip, possibly a disc or optical component (no text or symbols visible)

text_image
SUBTITLE AUDIO SETUP DISPLAY
natural_image
Simple line drawing of a tool or device with a ruler and a cloud icon (no text or symbols)
text_image
Installation Guide HBD Language Dataset Chemical Research Project Germany
text_image
Program Program 0.68 EPG Start LCD By L23% On
natural_image
Dark background with a white horizontal line and small colored markers at the bottom (no text or symbols)
text_image
Program Guide 02 UKTV Hi Stives 18 Nov 16:35-17:03 Street Cars 18 Nov 17:30-17:32 Digital Fiesel Bills 19 Nov 17:30-18:00 Gardens Unyakuppl 19 Nov 18:00-18:30 Water Gardens 19 Nov 18:35-18:38 Garden EUR 19 Nov 19:02-19:07 UK Bright Mines 19 Nov 19:01-00:59 UK Bright Mines 20 Nov 20:06-20:08 UK Bright Mines 20 Nov 06:04-07:07 UKTV Bright Mines 20 Nov 07:01-07:25 Style Driveur 20 Nov 07:25-07:30 This Coast to Eurl File: 16 Mon 2024-16:48 Street Cars Amarasheet Savado: Series in which Dan Rossard (forall this article) sampling the best authentic ahead Food. This editor. comee Mont. Salvado Page 1 / 1 Book Book List Page List Page 16
text_image
Picture Aspect Ratio Resolution TV Format 10.9 Wide Screen 1080 PAL
text_image
Channel Search Auto Search Manual Search Countly Antenna Power Germany Off
natural_image
Pure electrical circuit lines without any symbols
text_image
Screenshot of a software interface with a horizontal bar and dotted line, likely a media or video control panel.
text_image
Time Timer Clock Automatic Weather Timer Zone Auto Wireless GMT +1
text_image
Options OBC Language Subtitle Language Audio Language Digital Audio English English English PCI8
text_image
System Parental Guidance Set Password Feature Factory Default Information Software Update
text_image
USB Multimedia Photo Configure Movie Configure PVBI Configure| ≤slant |
DENVER®
www.denver-electronics.com
CE

DENVER®

natural_image
Blank rectangular frame with a small icon at the bottom right corner (no text or symbols)
natural_image
Close-up of a metallic cylindrical object with a pointed tip, possibly a disc or optical component (no text or symbols visible)

text_image
SUBTITLE AUDIO SETUP DISPLAY
natural_image
Simple gray-scale graphic with a horizontal bar and cloud icon (no text or symbols)
text_image
Installation Guide HBS Language Complexity Transaction Support English Germany
text_image
Program Program 0.68 EPG Start LCD By LCDs On
natural_image
Dark background with a white horizontal line and small colored squares below (no text or symbols)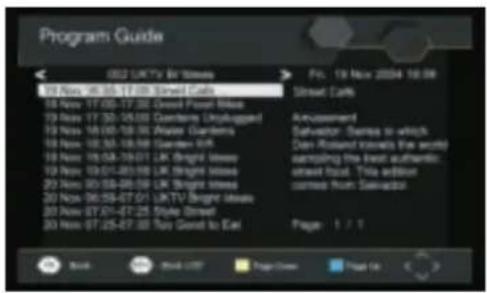
text_image
Program Guide 02 UK TV Box Stores 18 Nov 16:35-17:09 Stand Cards 18 Nov 17:00-17:30 Stand Food Waste 19 Nov 17:30-18:00 Garden Unrolled 19 Nov 18:00-18:30 Paper Gardens 19 Nov 18:30-18:50 Garden Park 19 Nov 18:50-19:01 UK Bright Waste 19 Nov 19:01-20:00 UK Bright Waste 20 Nov 20:00-20:00 UK Bright Waste 20 Nov 26:00-27:01 UKTV Bright Waste 20 Nov 27:01-27:25 Style Street 20 Nov 27:25-27:30 You Send to Eat Fol. 19 Nov 2004 16:00 Street Cards Announcement Salvador: Stories in which Dan-Round travels the world sampling the best authentic: street food. This edition comes from Salvador Page 1 / 1 Book List Page View Page On
text_image
Picture Aspect Ratio Resolution TV Format HLS9 Wide Screen 1080 PAL
text_image
Channel Search Auto Search Manual Search Circuitry Antenna Power Germany Off
natural_image
Pure electrical circuit lines without any symbols
text_image
Screenshot of a software interface with a horizontal bar and dotted line, likely a media or video control panel.
text_image
Time Timer Clock Automatic Weather Timer Zone Auto Wireless GMT +1
text_image
USB Multimedia Photo Configure Movie Configure PVBI Configure| ≤slant |
DENVER®
www.denver-electronics.com
CE

DENVER®

natural_image
Blank rectangular frame with a small icon at the bottom right corner (no text or symbols)
natural_image
Close-up of a metallic cylindrical object with a pointed tip, possibly a disc or optical component (no text or symbols visible)

text_image
SUBTITLE AUDIO SETUP DISPLAY
natural_image
Simple line drawing of a horizontal bar with tick marks, no text or symbols present
text_image
Installation Guide HBS Language Complexity Transaction Support English Germany
text_image
Program Program 0.68 EPG Start LCD By LCDs On
natural_image
Dark background with a white horizontal line and small colored squares below (no text or symbols)
text_image
Program Guide 02 UK TV Box Stores 18 Nov 16:35-17:09 Stand Cards 18 Nov 17:00-17:30 Stand Food Waste 19 Nov 17:30-18:00 Garden Unrolled 19 Nov 18:00-18:30 Paper Gardens 19 Nov 18:30-18:50 Garden Park 19 Nov 18:50-19:01 UK Bright Waste 19 Nov 19:01-20:00 UK Bright Waste 20 Nov 20:00-20:00 UK Bright Waste 20 Nov 26:00-27:01 UKTV Bright Waste 20 Nov 27:01-27:25 Style Street 20 Nov 27:25-27:30 You Send to Eat Fol. 19 Nov 2004 16:00 Street Cards Announcement Salvador: Stories in which Dan-Round travels the world sampling the best authentic: street food. This edition comes from Salvador Page 1 / 1 Book List Page View Page On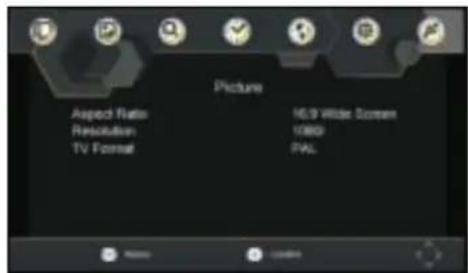
text_image
Picture Aspect Ratio Resolution TV Format HLS9 Wide Screen 1080 PAL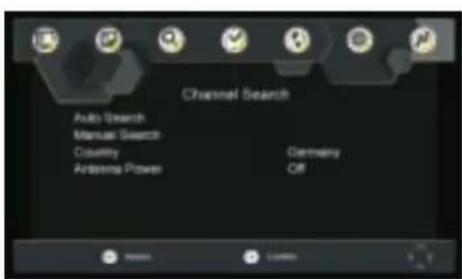
text_image
Channel Search Auto Search Manual Search Circuitry Antenna Power Germany Off
natural_image
Pure electrical circuit lines without any symbols
text_image
Screenshot of a software interface with a horizontal bar and dotted line, likely a media or video control panel.
text_image
Time Timer Clock Automatic Weather Timer Zone Auto Wireless GMT +1
text_image
Options OBC Language Subtitle Language Audio Language Digital Audio English English English PCI8
text_image
System Parental Guidance Set Password Feature Factory Default Information Software Update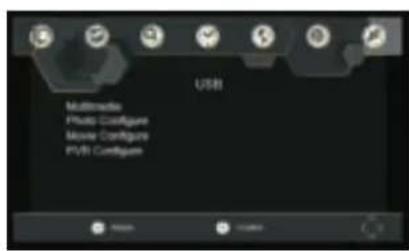
text_image
USB Multimedia Photo Configure Movie Configure PVBI Configure| ≤slant |
DENVER®
www.denver-electronics.com
CE

DENVER®

natural_image
Blank rectangular frame with a small icon at the bottom right corner (no text or symbols)
natural_image
Close-up of a metallic cylindrical object with a pointed tip, possibly a disc or optical component (no text or symbols visible)
text_image
SUBTITLE AUDIO SETUP DISPLAY
natural_image
Simple line drawing of a horizontal bar with tick marks, no text or symbols present
text_image
Installation Guide HBS Language Complexity Transaction Support English Germany
text_image
Program Program 0.68 EPG Start LCD By LCDs On
natural_image
Dark background with a white horizontal line and small colored squares at the bottom (no text or symbols)
text_image
Program Guide (01) UK TV Big Stores 19 Nov 18:35-17:00 Street Cars 19 Page 17:00-17:02 Central Power House 19 Nov 17:30-18:00 Garden's Dry-rugger! 19 Nov 18:05-18:05 Water Garden's 19 Nov 18:30-18:08 Garden's EU 19 Nov 19:04-19:01 UK Burger House 19 Nov 19:01-20:00 UK Burger House 20 Nov 00:08-06:00 UK Burger House 20 Nov 06:58-07:01 UKTV Burger House 20 Nov 07:01-07:25 Style Street 20 Nov 07:25-07:00 Tso Goutt to Ear File : 16 Nov 2024 18:08 Street Cars Jerusalem Salvador: Sartes in which Dan Roland Stover has worked emulsing the best sutherland; street food. This editor comes from: Salvador Page 1 / 1 Book Build ETF Page View Page Up
text_image
Picture Aspect Ratio Resolution TV Format 10.0 Wide Screen 10800 PAL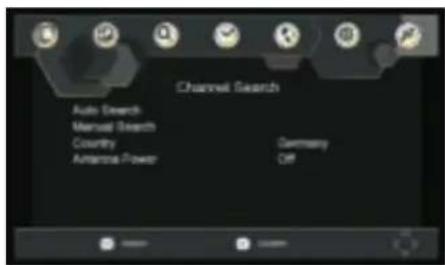
text_image
Channel Search Auto Search Manual Search Country Antenna Power Germany Off
natural_image
Pure electrical circuit lines without any symbols
text_image
Screenshot of a software interface with a horizontal bar and dotted line, likely a media or video control panel.
text_image
Time Timer Clock Automatic Weather Timer Zone Auto Wireless GMT +1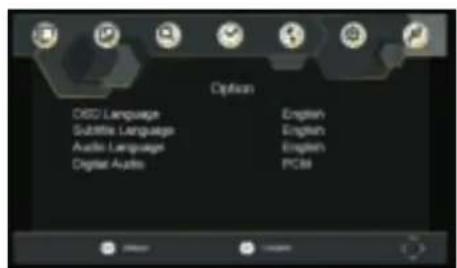
text_image
Options OBC Language Subtitle Language Audio Language Digital Audio English English English PCI8
text_image
System Parental Guidance Set Password Feature Factory Default Information Software Update
text_image
USB Multimedia Photo Configure Movie Configure PVBI Configure| ≤slant |
DENVER®
www.denver-electronics.com
CE

DENVER®

natural_image
Blank rectangular frame with a small icon at the bottom right corner (no text or symbols)
natural_image
Close-up of a metallic cylindrical object with a pointed tip, possibly a CD or DVD (no visible text or symbols)

text_image
SUBTITLE AUDIO SETUP DISPLAY
natural_image
Simple line drawing of a barcode bar with a dotted line extending from it, against a plain gray background (no text or symbols)
text_image
Program Guide 02 UKTV Hi Spain 18 Nov 16:35-17:03 Street Cars 18 Nov 17:30-17:32 Digital Power Bills 19 Nov 17:30-18:00 Gardens Unyakuppl 19 Nov 18:00-18:30 Water Gardens 19 Nov 18:35-18:38 Garden EUR 19 Nov 19:02-19:07 UK Bright Mines 19 Nov 19:01-00:59 UK Bright Mines 20 Nov 20:06-20:08 UK Bright Mines 20 Nov 06:04-07:07 UKTV Bright Mines 20 Nov 07:01-07:25 Style Driveur 20 Nov 07:25-07:30 This Coast to Eurl File: 16 Mon 2024-16:48 Street Cars Amarasheet Savadoa: Sandos in which Dan Rossard (forall this article) sampling the best authentic ahead Food. This editor. comee Mont: Salvadoo Page 1 / 1 Book Book List Page List Page 16
text_image
Picture Aspect Ratio Resolution TV Format 10.9 Wide Screen 1080 PAL
text_image
Channel Search Auto Search Manual Search Countly Antenna Power Germany Off
natural_image
Pure electrical circuit lines without any symbols
text_image
Screenshot of a software interface with a horizontal bar and dotted line, likely a media or video control panel.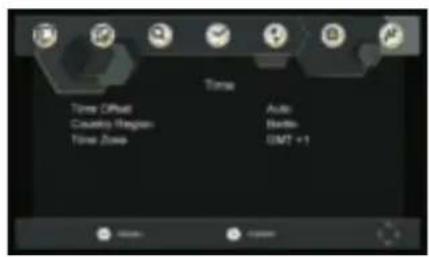
text_image
Time Timer Clock Automatic Weather Timer Zone Auto Wireless GMT +1
text_image
Options OBC Language Subtitle Language Audio Language Digital Audio English English English PCI8
text_image
System Parental Guidance Set Password Feature Factory Default Information Software Update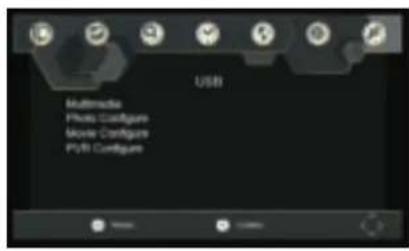
text_image
USB Multimedia Photo Configure Movie Configure PVB Configure| Del | Underelement | Parameter |
| Tuner | Inngangsfrekvens | 170~230MHz470~860 MHz |
| RF inngangsnivå | -25~80dBm (64QAM)-10~75dBm (256QAM) | |
| IF bändbredde | 7 MHz og 8 MHz | |
| Modulering | QPSK,16QAM,64QAM,256QAM | |
| Video | Dekoderformat | MPEG4 AVC/H.264 HP@L4HEVC/H.265 HT@L4MPEG2 MP@ML_HL |
| Utgangsport | CVBS, HDMI | |
| Audio | Dekoderformat | MPEG-1 (lag1&2&3) |
| Lydutgang | Stereo | |
| Strøm | Spenning | DC 9V 1,5 A |
| Arbeidskraft | 10W |