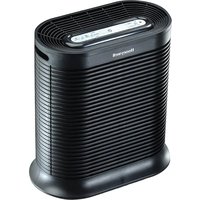
HPA300 - Air purifier HONEYWELL - Free user manual and instructions
Find the device manual for free HPA300 HONEYWELL in PDF.
User questions about HPA300 HONEYWELL
0 question about this device. Answer the ones you know or ask your own.
Ask a new question about this device
Download the instructions for your Air purifier in PDF format for free! Find your manual HPA300 - HONEYWELL and take your electronic device back in hand. On this page are published all the documents necessary for the use of your device. HPA300 by HONEYWELL.
USER MANUAL HPA300 HONEYWELL
IMPORTANT SAFETY INSTRUCTIONS
READ AND SAVE THESE SAFETY INSTRUCTIONS BEFORE USING THIS AIR PURIFIER
When using electrical appliances, basic precautions should always be followed to reduce the risk of fire, electric shock, and injury to persons, including the following:
- Read all instructions before operating the air purifier.
- Place air purifier where it is not easily overturned by persons in the household.
- ALWAYS turn the air purifier controls to the OFF position and unplug from the wall outlet when not in use.
- To disconnect the air purifier, make sure the unit is powered OFF then grip the plug and pull it from the wall outlet. NEVER pull by the cord.
- DO NOT use any product with a damaged cord or plug, any product that malfunctions, or any product that has been dropped or damaged in any manner. Keep the cord away from heated surfaces.
- DO NOT use air purifier outdoors.
- DO NOT use air purifier unless it is fully assembled.
- DO NOT run power cord under carpets, and DO NOT cover with throw rugs. Arrange cord such that it will not be a tripping hazard.
- DO NOT use air purifier where combustible gases or vapors are present.
- DO NOT expose the air purifier to rain, or use near water, in a bathroom, laundry area, or other damp location.
- The air purifier MUST be used in its upright position.
-
DO NOT allow foreign objects to enter ventilation or exhaust opening as this may cause electric shock or damage to the air purifier. DO NOT block air outlets or intakes.
-
Locate air purifier near the outlet and DO NOT using an extension cord or power strip.
- This appliance has a polarized plug (one blade is wider than the other). To reduce the risk of electric shock, this plug is intended to fit only one way in a polarized outlet. If the plug does not fit fully in the outlet, reverse the plug. If it still does not fit, contact a qualified electrician. DO NOT attempt to defeat this safety feature.
- A loose fit between the AC outlet (receptacle) and plug may cause overheating and a distortion of the plug. Contact a qualified electrician to replace loose or worn outlet.
- DO NOT sit, stand, or place heavy objects on the air purifier.
- ALWAYS disconnect power supply before servicing.
- Keep out of reach of children and pets.
- Filters may be harmful if ingested. Avoid breathing dust when changing filters.
20.SAVE THESE INSTRUCTIONS.
For FCC compliance information, please see last page of this manual.
WARNING: To Reduce The Risk of Fire or Electric Shock, DO NOT Use This Air Purifier With Any Solid-State Speed Control Device.
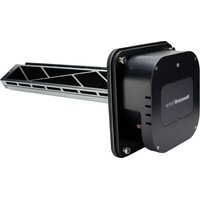
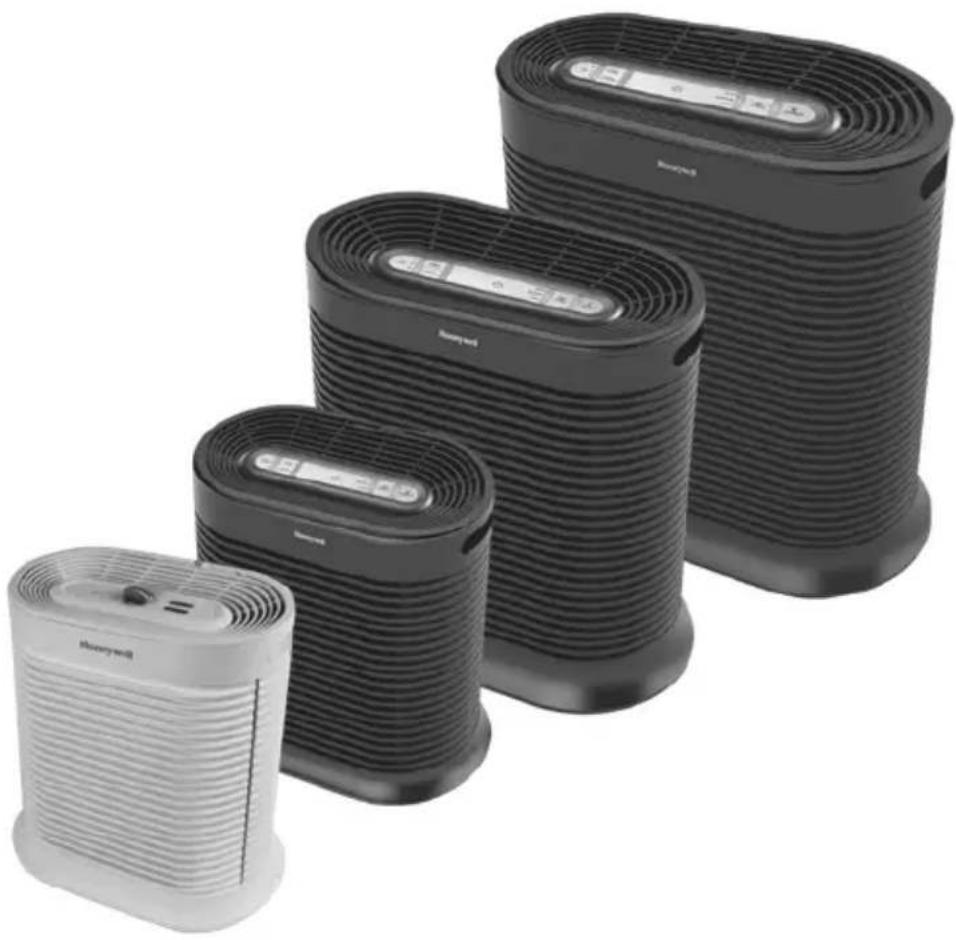
GETTING TO KNOW YOUR AIR PURIFIER

HPA090 Series
FrontGrille
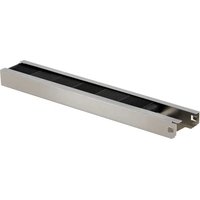
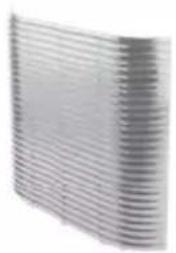
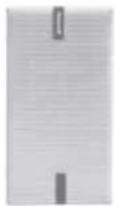
Type R Certified HEPA Filter (1)
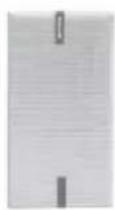
Type A Odor Reducing Pre-Filter
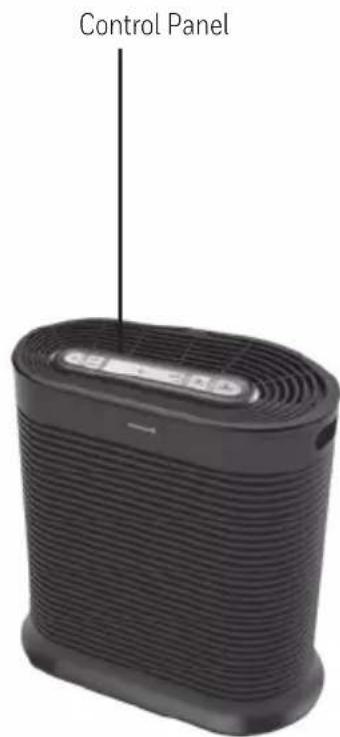
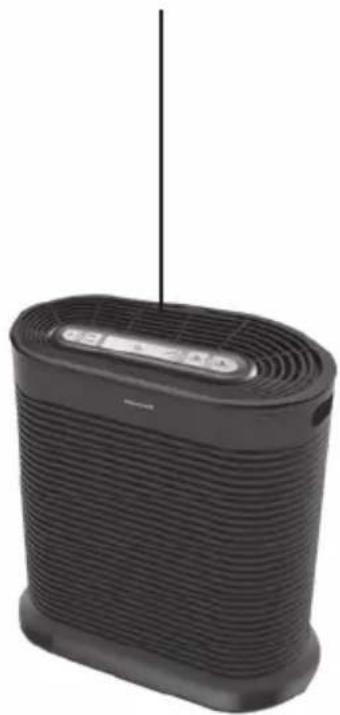
HPA100 Series, HPA200 Series, HPA300 Series
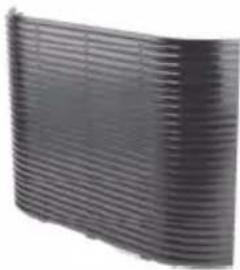
FrontGrille
Type A Odor Reducing Pre-Filter
Type Certified HEPA Filters
HPA100 HPA300HPA200
HOW YOUR AIR PURIFIER WORKS
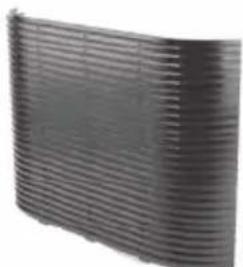
This model air purifier incorporates a 2-stage cleaning system to help clean the air that passes through the filter in the unit (Fig. 1).
Stage 1: Type A Odor Reducing Pre-Filter
Stage 2: Type 3 Certified HEPA Filter that captures the following microscopic airborne allergens and particles: dust, pollen, pet dander, dust mite debris and smoke as small as 0.3 microns or larger from the air that passes through the filter.
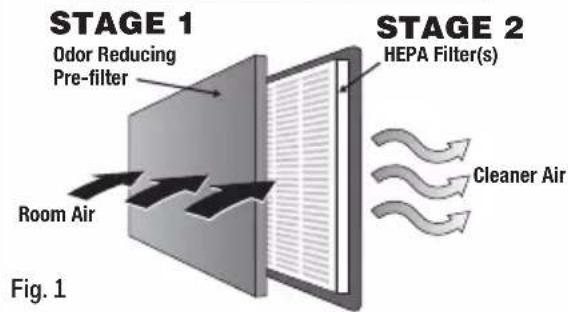
2-Stage Cleaning System
GETTING STARTED
- Select a firm, level and flat location.
- When operating, large volumes of air are drawn toward the air purifier. Surrounding areas should be cleaned and/or vacuumed frequently to prevent build-up of dust and other contaminants. This may also help prolong the life of the filter. If the unit is placed on a light colored carpet, a small mat or rug should be used underneath to prevent staining. This is especially important in homes with contamination from smoking, fireplaces, or where candles are burned.
- Ensure the front of the unit faces away from the closest wall or furniture.
- Ensure no grilles are blocked.
INSTALL CERTIFIED HEPA FILTERS AND ODR REDUCING PRE-FILTER
The Certified HEPA Filters and Odor Reducing Pre-Filter are supplied within the air purifier. New air purifiers have their filters wrapped to ensure purity, and are labeled to help identify the proper replacement filter. (Type R Certified HEPA Filter; Type A Odor Reducing Pre-Filter)
- Before using your new air purifier you must remove the wrappers covering the filters and pre-filter. Make sure the air purifier is OFF and unplugged. Press the two hand symbols (▲) on the front grille to release it from the unit and pull the grille toward you to remove it (see Fig. 2). Grasp the sides of the filter frame near its top end and pull outward. Repeat for the second and third filter if applicable.
- Remove protective wrap from the filters (including the pre-filter) that have been supplied with your air purifier.
- Place the Certified HEPA Filter(s) into the air purifier housing. Ensure that the removal "pull" tabs are facing outward (this will facilitate filter removal later). Place the pre-filter on top of the HEPA filter(s). Tuck the edges of the pre-filter into the tabs that are located around the edges of where the HEPA filter(s) are inserted. Model HPA300 has velcro strips on the housing where the pre-filter should be attached.
- Replace the front grille by placing the tabs on the bottom of the grille into the slot(s) on the unit. Gently push the top of the grille into place by pressing on the hand symbols (to secure in place.
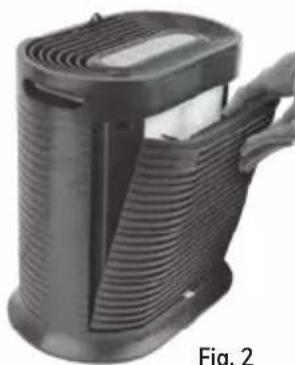
Fig. 2
OPERATION

ENERGY STAR
This product earned the ENERGY STAR label by meeting strict energy efficiency guidelines set by the U.S. EPA. Room air cleaners have demonstrated the potential for improving air quality and providing health benefits. EPA does not endorse manufacturer claims regarding the degree to which a specific product will produce healthier indoor air.
The energy efficiency of this ENERGY STAR certified model is measured based on a ratio between the model's CADR for Smoke and the electrical energy it consumes, or CADR/Watt.
Portable air purifiers are more effective in rooms where all doors and windows are closed. It is recommended that you run your air purifier while you are at home to help clean the air.
HPA090 Series Operation:
-
Once the filters have been unwrapped and replaced in the unit, ensure the air purifier's control knob is turned to the OFF position and plug the power cord into a working electrical outlet.
-
Select the desired cleaning level by turning the knob to Low, Medium, High setting (Fig. 3).
- The Turbo setting will operate the air purifier at the highest speed. This setting will maximize the unit's ability to help reduce odors and will help clean the air quickly if you have a specific air quality issue that needs to be addressed.
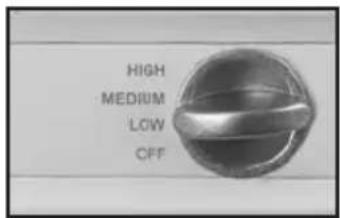
Fig. 3 HPA090 Control Panel
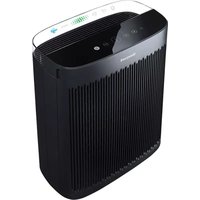
HPA100, 200, 300 Series Operation:
- Once the filters have been unwrapped and replaced in the unit, plug the power cord into a working electrical outlet.
- Select the desired cleaning level by simply TAPPING the power symbol ( ) to toggle through the cleaning levels. A blue LED light will illuminate the selected setting: Low, Medium, High.
TAP POWER (O) for on/off & cleaning level level selection. The unit will start on the Low setting.
- The Turbo setting operates the unit at the highest speed. This setting will maximize the unit's ability to help reduce odors and will help clean the air quickly. To select the Turbo setting the unit must already be running at one of the 3 cleaning settings, TAP the Turbo icon () . The Turbo LED will illuminate.
TAPPING the Turbo icon () again will return the air purifier to the previous cleaning setting. To shut OFF, tap the Power symbol (O) until the air purifier shuts off. (Fig. 4).
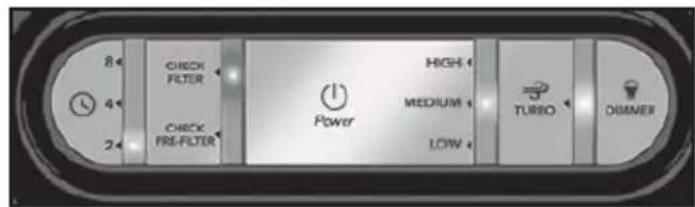
Fig.4 HPA100, HPA200, HPA300 Control Panel
Using the Timer Option (Not available on the HPA090 Series):
The Timer Option (9) allows you to select how long the air purifier will run before it automatically shuts off. There are three pre-set run times: 2, 4, and 8 hours. Do not use this option if you want the unit to run continuously.
- To set the unit for Automatic Shut Off, TAP the Auto-off Timer icon ( ).
- Continue to TAP to toggle through to the desired time setting.
- An LED light will illuminate to indicate the selected run time (Fig. 5).
- The unit will automatically shut off after the indicated run time.
Using the Dimmer Option (Not available on the HPA090 Series):
The Dimmer Option (♀) allows you to adjust the brightness of the LED displays on the control panel (Fig. 6). You may wish to adjust the brightness depending on the room where the unit is placed. The unit always turns on with the brightness on HIGH.
To adjust brightness:
TAP the Dimmer icon once to dim the lights to LOW.
- TAP the Dimmer icon (♀) twice and it will shut the lights OFF. (the air purifier will not shut off).
- TAPPING the Dimmer icon (♀) a third time will return the brightness to HIGH.
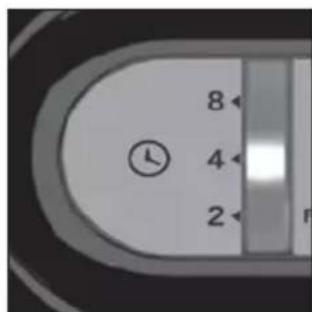
Fig. 5 Timer Function
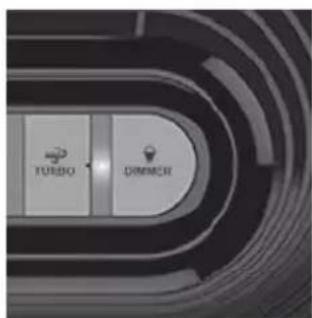
Fig. 6 Dimmer Function
ELECTRONIC FILTER CHANGE REMINDER
These air purifier models each have two electronic filter checks to remind you when to check and replace the Certified HEPA Filters and the Odor Reducing Pre-Filters based on the air purifier's hours of use.
When the Certified HEPA Filter(s) and/or the Pre-Filter need to be replaced, the "Check Filter" or "Check Pre-Filter" light will illuminate (Fig. 7).
You should periodically check these filters. Depending on operating conditions, the Certified HEPA Filters should be replaced every 12 months, and the Odor Reducing Pre-Filters every 3 months, especially if there have been heavy odors and particles in the home.
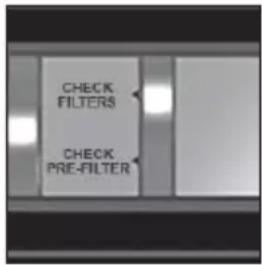
Fig. 7 Will illuminate when it is time to change HEPA filters
To RESET Either Electronic Filter Check:
After you have replaced the appropriate filter(s) the "Check Filter or "Check Pre-Filter" light will remain on until it is reset. With the unit powered on, press the lighted button and hold for approximately 2 seconds until the light turns off. The electronic filter check is now reset. Depending on individual usage (environment and hours used), you may need to replace filters more or less frequently.
NOTE: If you change the pre-filter or filter before the Electronic Filter Check lights are illuminated, it is possible to reset the light indicators. With the unit plugged in, but NOT powered on, press and hold each button individually for at least 5 seconds. This will illuminate the indicator light. After the light turns on, individually press and hold the "Check Filter" or "Check Pre-Filter" button until each light goes off. At this point, the filter indicator will be reset to its original "clean" status.
These cleaning intervals are intended as guidelines only. Performance of any filter media is dependent upon the concentration of particles going through the system. High concentrations of particles such as dust, pet dander and smoking will reduce the useful performance of the filter.
NOTE: None of the filters are washable. DO NOT immerse them in water.
WARNING: Filters may be harmful if ingested. Avoid breathing dust when changing filters.
REPLACING THE CERTIFIED HEPA FILTERS
Remove and dispose of used filters. Avoid breathing dust when changing filters
See INSTALLATION INSTRUCTIONS on page 4 of this manual.
Please note that each model series takes a different number of HEPA Filters: HPA090 and HPA100 Series use 1 Certified HEPA Replacement Filter, HPA200 Series use 2 Certified HEPA Replacement Filters, HPA300 Series use 3 Certified HEPA Filters.
See ACCESSORIES AND REPLACEMENT FILTERS section on page 7 of this manual to find out where to get filters. There are stickers inside your air purifier near the filter cavity that note the Filter Type needed for your model.
REPLACING THE ODOR REDUCING PRE-FILTER
The Odor Reducing Pre-Filter not only helps reduce odors, but also helps capture large airborne particles that enter the grille. This pre-filter should be replaced every 3 months, as it will become covered with particles and fibers that will reduce filtration performance. Avoid breathing dust when changing filters.
See INSTALLATION INSTRUCTIONS on page 4 of this manual.
Use the specially designed Type A Odor Reducing Pre-Filter.
To purchase additional A Pre-Filters, see ACCESSORIES AND REPLACEMENT FILTERS section on page 7.
CLEANING AND STORAGE
We recommend that you clean the air purifier at least once every 3 months and before extended storage. Use only a dry cloth to wipe the external surfaces of the air purifier.
DO NOT USE WATER, WAX, POLISH, OR ANY CHEMICAL SOLUTION.
If your Air Purifier will not be used for more than 30 days, we recommend that you:
- Remove the Certified HEPA Filters from the unit.
- Wrap the Certified HEPA Filters in an air tight plastic bag.
- Remove the Odor Reducing Pre-Filter and place it in an air tight plastic bag.
ACCESSORIES AND REPLACEMENT FILTERS
You may purchase Honeywell Replacement Certified HEPA Filter and Honeywell Odor Reducing Pre-Filter at the store where you purchased your air purifier or, order directly from: www.HoneywellPluggedln.com.
To help ensure stated product performance, use only Genuine Honeywell Replacement Filters. You have the option to use the Honeywell Household Gas & Odor Reducing Pre-Filter instead of the Odor Reducing
Pre-Filter. It is also available at many retailers and on www.HoneywellPluggedIn.com.
If you have any questions, please call 1-800-477-0457, or visit our website at: www.HoneywellPluggedIn.com/ contact-us
| Product Name Model | Number | Replacement Period* H | PA090 Series | HPA100 Series | HPA200 Series | HPA300 Series |
| Pre-Filters | ||||||
| Odor Reducing Pre-Filter or | HRF-AP1 every 3 months4x/yr | ✓or | ✓or | ✓or | ✓or | |
| Household Gas & Odor Reducing Pre-Filter | HRF-APP1 every 3 months4x/yr | ✓ | ✓ | ✓ | ✓ | |
| HEPA Filters | ||||||
| HEPA Replacement Filter - 1 pack | HRF-R1 every 12 months1x/yr | ✓ | ✓ | |||
| HEPA Replacement Filter - 2 pack | HRF-R2 every 12 months1x/yr | ✓ | ||||
| HEPA Replacement Filter - 3 pack | HRF-R3 every 12 months1x/yr | ✓ | ||||
- Filter replacement period is intended as a guideline only. Performance of any filter media is dependent upon concentration of particles going through the system.
FREQUENTLY ASKED QUESTIONS
My Air Purifier is starting to make noise and the air output is less. What's wrong?
The filters may be dirty. High amounts of particles can block the pores in the filter and stop the air from moving through it. Replace the filters.
How long should I run my Air Purifier?
In general, the unit will be most effective when doors and windows are closed. It is recommended that you run your air purifier while you are at home to help clean the air. If desired or conditions warrant, you may run your air purifier 24 hours a day.
Can I wash any of the filters in my Air Purifier?
No. Washing any of the filters will ruin them.
CONSUMER RELATIONS
We are here to help. Call us toll-free at: 1-800-477-0457
Or visit our website at: www.HoneywellPluggedIn.com/contact-us.
Please be sure to specify the model number.
NOTE: IF YOU EXPERIENCE A PROBLEM, PLEASE CONTACT CONSUMER RELATIONS FIRST OR SEE YOUR WARRANTY. DO NOT RETURN TO THE ORIGINAL PLACE OF PURCHASE. DO NOT ATTEMPT TO OPEN THE MOTOR HOUSING YOURSELF, DOING SO MAY VOID YOUR WARRANTY AND CAUSE DAMAGE TO THE AIR PURIFIER OR PERSONAL INJURY.
5 YEAR LIMITED WARRANTY
You should first read all instructions before attempting to use this product.
A. This 5 year limited warranty applies to repair or replacement of product found to be defective in material or workmanship. This warranty does not apply to damage resulting from commercial, abusive, unreasonable use or supplemental damage. Defects that are the result of normal wear and tear will not be considered manufacturing defects under this warranty. KAZ IS NOT LIABLE FOR INCIDENTAL OR CONSEQUENTIAL DAMAGES OF ANY NATURE, ANY IMPLIED WARRANTY OF MERCHANTABILITY OR FITNESS FOR A PARTICULAR PURPOSE ON THIS PRODUCT IS LIMITED IN DURATION TO THE DURATION OF THIS WARRANTY. Some jurisdictions do not allow the exclusion or limitation of incidental or consequential damages or limitations on how long an implied warranty lasts, so the above limitations or exclusions may not apply to you. This warranty
gives you specific legal rights, and you also may have other rights which vary from jurisdiction to jurisdiction. This warranty applies only to the original purchaser of this product from the original date of purchase.
B. At its option, Kaz will repair or replace this product if it is found to be defective in material or workmanship.
C. This warranty does not cover damage resulting from any unauthorized attempts to repair or from any use not in accordance with the instruction manual.
D. This warranty does not cover the HEPA Filters or Pre-Filters except for material or workmanship defects.
Please go to www.HoneywellPluggedIn.com/ warranty-registration to register your product and receive product information updates and new promotional offers.
Honeywell
PURIFICATEURS D'AIR HEPA
Guide d'utilisation
SERIES HPA090
SERIES HPA100
SERIES HPA200
SERIES HPA300
Series HPA100, Series HPA200, Series HPA300
Panel de Control
Rejilla Frontal
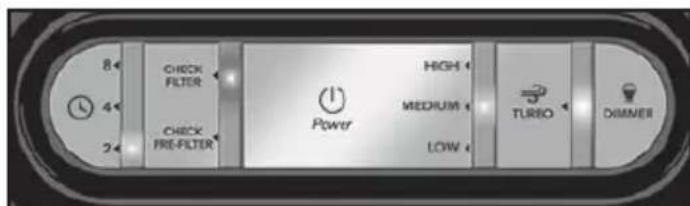
Fig.4 Panel de Control HPA100, HPA200, HPA300
NOTE: This equipment has been tested and found to comply with the limits for a Class B digital device, pursuant to Part 15 of the FCC Rules. These limits are designed to provide reasonable protection against harmful interference in a residential installation. This equipment generates, uses, and can radiate radio frequency energy and, if not installed and used in accordance with the instructions, may cause harmful interference to radio communications. However, there is no guarantee that interference will not occur in a particular installation. If this equipment does cause harmful interference to radio or television reception, which can be determined by turning the equipment off and on, the user is encouraged to try to correct the interference by one or more of the following measures:
- Reorient or relocate the receiving antenna.
- Increase the separation between the equipment and receiver.
- Connect the equipment into an outlet on a circuit different from that to which the receiver is connected.
- Consult the dealer or an experienced radio TV technician for help.
Warning: Changes or modifications to this unit not expressly approved by the party responsible for compliance could void the user's authority to operate the equipment.
© 2021 All rights reserved.
Kaz USA, Inc., a Helen of Troy Company
400 Donald Lynch Blvd., Suite 300, Marlborough, MA 01752
Honeywell is a trademark of Honeywell International Inc., used under license by Helen of Troy Limited.
Distributed in Canada by: Kaz Canada, Inc., a Helen of Troy Company
6700 Century Avenue, Suite 210, Mississauga, Ontario L5N 6A4
Contact us at 1-800-477-0457 or www.HoneywellPluggedIn.com, in Canada www.HoneywellPluggedIn.ca
The ENERGY STAR name and marks are registered trademarks owned by the U.S. EPA.
Made in China
For Responsible recycling, please visit:
RECYCLE NATION
www.RecycleNation.com
www.RecycleNation.com
| Helen of Troy Creative Department Artwork Specifications |
| Brand: Honeywell Category: Air Purifiers |
| Model: HPA090 HPA100 HPA200 HPA300 Series EPA |
| Artwork Part #: A006923R0 Die Line Part #: N/A Subject: Owner's Manual |
| Region: US |
| Flat Size: IN: W 11xH 8 |
| Folded Size: IN: W 5.5xH 8 |
| Scale: 1/1 |
| Material: 70# Matte Text |
| Page Count: 28 |
| Revision: 2 |
| Date: 18AUG21 |
| Release Date: 24AUG21 |
| Re-release Date: |
| Colors: Dielines (Do not print) Cyan 0% Magenta 0% Yellow 0% Black 100% |
| Special Instructions: |
| Quality Requirement of Artwork and Quality Clarification Process of Artwork Printing: Meet Eng-QS-06&02 |
| Helen of Troy Creative Services Marlborough, MA 01752, USA +1508 490 7000 |