Pelèr 4E - Air Conditioning OLIMPIA SPLENDID - Free user manual and instructions
Find the device manual for free Pelèr 4E OLIMPIA SPLENDID in PDF.
Download the instructions for your Air Conditioning in PDF format for free! Find your manual Pelèr 4E - OLIMPIA SPLENDID and take your electronic device back in hand. On this page are published all the documents necessary for the use of your device. Pelèr 4E by OLIMPIA SPLENDID.
USER MANUAL Pelèr 4E OLIMPIA SPLENDID
WHEN USING ELECTRICAL APPLIANCES, BASIC SAFETY
PRECAUTIONS SHOULD ALWAYS BE FOLLOWED TO RE- DUCE THE RISK OF FIRE, ELECTRIC SHOCK, AND INJURY TO PERSONS, INCLUDING THE FOLLOWING: This product should be used only in accordance with the speci- cations outlined in this manual. Usage other than what has been specied here may result in serious injury.
1 - This appliance can be used by children aged from 8 years and above
and persons with reduced physical, sensory or mental capabilities or lack of experience and knowledge if they have been given super- vision or instruction concerning use of the appliance in a safe way and understand the hazards involved.
2 - Children shall not play with the appliance.
3 - Children should not be allowed to clean or maintain the appliance
without supervision.
4 - If the supply cord is damaged, it must be replaced by the manufac-
turer, its service agent or similarly qualied persons in order to avoid a hazard.
5 - Unplug the appliance during lling and cleaning.
6 - Ensure that the fan is switched off from the supply mains before
7 - When not in use, disconnect the plug from the power supply. Grasp
the plug, not the main power cord, when disconnecting the plug.
8 - Do not disassemble or alter the unit.
9 - Do not use the unit in areas where the temperature is extremely high
or low where it may be exposed to direct sunlight.ENGLISH EN - 4
10 - Do not operate the unit near ammable liquids or in explosive at-
11 - Do not put heavy objects on the unit; this may cause damage or
malfunctions on the unit.
12 - Since the unit has the humidifying function, please do not use it for a
long time in an airtight place (such as a small closed room) to avoid too much humidity.
13 - Change the water frequently to keep it clean.
14 - This unit must be operated in a vertical position.
15 - This unit shall not be exposed to dripping or splashing water.
16 - Do not install the unit in a conned space, such as a bookcase or
17 - Switch OFF and unplug the unit before lling with water. Make sure
the water is below the “MAX” water level line.
18 - Switch OFF and unplug the unit before cleaning and maintenance.
19 - The unit should not be adjusted or repaired by anyone except spe-
cialized technicians.
20 - To reduce the risk of re or electric shock, do not use this fan with
1- MAIN FEATURES AND FUNCTIONING
- 1, 2, 4 hours timing
- Three fan speeds: high, mid, low
- Automatic horizontal oscillation
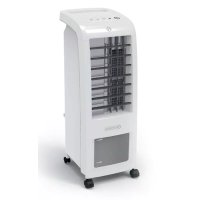
- Average speed is the default conguration when the machine is turned on. 1a- APPEARANCE AND FUNCTIONS Parts of the product1 - Handle2 - Control panel3 - Flap4 - Power cable5 - Water level indicator6 - Wheels to be installed with the key (not supplied)7 - Air lter8 - Water tank9 - Water tank lock
Select a rm, level, at location at least 15cm from any wall or object for proper air ow. Place the air-cooler appliance on a water-resistant surface, as water can damage furniture and some ooring. Do not place the unit directly on carpets, towels, blankets or other absorbent surfaces. 2a- FILLING To use the Cooling function, water must be added to the water tank. Open the tank and pour in cool, clean water. Please pay attention when adding water to:
1. Unplug the appliance.
2. Before relling, remove any remaining water (using the cap placed inside the tank).
3. Use only clean water.
4. Fill the water tank slowly.
5. Pay attention to the front water level display window to not exceed the maximum
6. Lock the tank with the slider pin, to prevent the tank falling.
3- OPERATING INSTRUCTIONS
1. Connect the plug into the power outlet, a beep tone will be heard.
2. Press the POWER button, the POWER indicator and LOW speed indicator will turn
3. Press the OFF button to shut off, the unit stops.
1. Press the MODE button, the NATURE indicator will turn on.
2. Press MODE button 2 times to turn to the SLEEP mode.
3. Press POWER button 3 times to turn to the “normal” mode again.
In NATURE mode, the appliance simulates natural changes in wind strength, with LOW, MEDIUM or HIGH intensity.
In SLEEP mode, the appliance simulates natural changes in wind strength as in nature mode, but every 30 minutes the appliance switches to a lower intensity level until it reaches LOW intensity. Once it reaches LOW intensity level, the appliance stays at this level until it is switched off by the user. 3b- SPEED button Press this key in working state, making a Bi-sound, to set up the fan speed. The fan speed follows the order: low—mid—high—Low—mid……, the indicator lights up accordingly. The product turns on at low speed by default. 3c- Oscillation button Press the Oscillation button to turn oscillation function on or off. 3d- TIMER button When the appliance is functioning, press the TIMER button to set the turning off delay. At every pressure it is possible to select 1, 2 or 4 hours. To cancel the timer mode, press the TIMER button repetitively until the selections 1, 2 and 4 hours are turned off. 3e- COOL button
1. Press COOL button. The COOL indicator will be on and the pump starts to work.
2. After about 3 minutes, the comfortable cool wind with moisture comes out.
3. Press it again to shut off. The COOL indicator turns off then fresh and dry wind
1. If the COOL button is pressed when water is below the lower level or if it is
absent, no alarm or signal is present if the pump keeps functioning. In this case the pump could emit an abnormal noise and it is advised to turn off the cooler function.
2. The unit can be used without water as normal electrical fan. In this situation,
1. Disconnect the appliance from the power supply.
2. Check that the fan is switched off.
3. Remove the screws with a cross head screwdriver (not supplied).
Disassemble the air lter, clean it with detergent (not petrol, alcohol, gas oil or similar products) and dry it.
4. Remove the water cloth, clean it with
detergent (not petrol, alcohol, gas oil or similar products) and dry it.
5. Drain the water contained in the tank
and clean it with a wet cloth or brush.
6. Clean the body of the unit with a dry cloth.
Do not use a wet cloth or any water jet because it could affect the safety of the appliance and its appropriate working.
7. Reinstall water cloth.
8. Reinstall the air lter with the related screws.ENGLISH
Follow the daily maintenance suggestions to clean lters and water cloth. Ensure the air lter and the water cloth are dry, ensure that the water tank contains no accumulated water. Pack the unit in its original carton and store in a cool, dry location.
This symbol on the product or its packaging indicates that the appliance cannot be treated as normal domestic trash, but must be handed in at a collection point for recycling electric and electronic appliances. Your contribution to the correct disposal of this product protects the environment and the health of your fellow men. Health and the environment are endangered by incorrect disposal. Further information about the recycling of this product can be obtained from your local town hall, your refuse collection service, or in the store at which you bought the product. This regulation is valid only in EU member states.
For the technical data listed below, consult the characteristic data plate applied to the product. Voltage (V) 220-240 V~ FREQUENCY (Hz) 50-60 Hz