LTV2042W - TV DGM - Free user manual and instructions
Find the device manual for free LTV2042W DGM in PDF.


| Product type | LCD TV |
| Brand | DGM |
| Model | LTV2042W |
| Display | LCD Screen |
| Supported resolutions | 640x480, 800x600, 1024x768, 1280x1024, 1440x900, 480i, 480p, 576i, 576p, 720p, 1080i |
| Connectivity | RF Antenna, SCART, S-Video, Composite (AV), VGA (PC), PC audio input |
| TV systems | PAL, SECAM, NTSC, DTV |
| Sound | Multi-channel NICAM, Stereo speakers (2x) |
| Special functions | Timer (15/30/45/60 min), Teletext, Multilingual OSD display, Picture modes (Standard, Film, Vivid, User), Aspect ratio (4:3, Full screen, Zoom) |
| Remote control | Infrared, AAA batteries (2×) included |
| Power supply | AC, power adapter (voltage unspecified) |
| Power consumption | Not specified (typical low-power model) |
| Maintenance | Clean with a soft dry cloth, do not use solvents |
| Safety | Do not expose to water/rain, do not open (high voltage), use a grounded outlet |
| Repairability | Do not repair yourself, contact a qualified technician |
| Included accessories | Power cable, remote control, batteries, user manual |
| Weight | Not specified |
| Dimensions | Not specified |
Frequently Asked Questions - LTV2042W DGM
User questions about LTV2042W DGM
0 question about this device. Answer the ones you know or ask your own.
Ask a new question about this device
Download the instructions for your TV in PDF format for free! Find your manual LTV2042W - DGM and take your electronic device back in hand. On this page are published all the documents necessary for the use of your device. LTV2042W by DGM.
USER MANUAL LTV2042W DGM
COPYRIGHT 2
DISCLAIMER 2
INTRODUCTION. 2
FUNCTIONS AND FEATURES 2
IMPORTANT INFORMATION 2
SAFETY TIPS. 3
IMPORTANT SAFETY INSTRUCTION. 3
CAUTION. 5
TIPS FOR CLEANING THE LCD TV 5
INSTALLATION AND USE OF LCD TV 5
PACKAGE CONTENTS 6
Top View & Rear View 6
Front view 6
Accessories 7
Installation of batteries 7
SETTING UP YOUR TELEVISION 8
AV and Antenna input Connection 8
PC & Video Input Connection 9
Power Connection 10
TURING YOUR LCD TV ON 10
PROGRAMMING TV CHANNELS. 11
OPERATION USING THE CONTROLS ON THE LCD TV. 11
REMOTE CONTROLLER 12
USING THE ADVANCED OSD MENU 13
OSD MENUS AND OPTIONS (TV MODE) 13
OSD MENUS AND OPTIONS (VIDEO MODE) 15
OSD MENUS AND OPTIONS (PC MODE) 16
TROUBLESHOOTING 17
TV 17
Antenna 18
SUPPORTED OPERATING MODES 19
English
Copyright
All rights reserved by the manufacturer. No part of this User's Manual may be reproduced, transmitted, transcribed, stored in a retrieval system or translated into any language or computer language, in any form or by any means, electronic, mechanical, magnetic, optical, chemical, manual or otherwise, without the prior written permission of the manufacturer.
Disclaimer
The manufacturer makes no representations or warranties, either expressed or implied, with respect to the contents of this User's Manual. The manufacturer reserves the right to revise this publication and to make changes from time to time in the contents thereof without obligation to notify any person of such revision or changes.
Introduction
Thank you for purchasing the LCD TV (Liquid Crystal Display Television). Your LCD TV will bring you years of high-quality viewing enjoyment. Your television is compatible with NTSC, PAL and SECAM systems, as well as the upcoming DTV standard. Your new television is extremely easy to operate, and has exceptionally high image quality.
The LCD TV is also extremely versatile. You can install your television on the wall or set it on a table, and it can be used under any type of illumination.
This manual will explain the operation of the LCD TV including the set's functions and features and other important information. Before installing or operating your LCD TV, please take the time to thoroughly read this manual, particularly the sections on safety!
Functions and Features
The LCD TV has many useful functions, including:
- Brightness and Contrast ratio: refer to the Function Specification
- Compatibility with all digital television (DTV) formats (with external tuner), including 1080i, 720p, 480p, 2D digital comb filter, De-Interlacing, Multiple image formats for diverse viewing conditions
Shortcut buttons:
1 Multi-Channel Television Sound (Nicam)
2 Sleep timer
3 Back light adjustment
4 Auto Calibration
5 Aspect Ratio Adjustment
6 Graphic OSD
Important Information
WARNING: TO REDUCE THE RISK OF FIRE OR ELECTRIC SHOCK, DONOT EXPOSE THIS PRODUCT TO RAIN OR MOISTURE.
CAUTION: TO PREVENT ELECTRIC SHOCK, MATCH WIDE BLADE OF PLUG TO WIDE SLOT, FULLY INSERT.
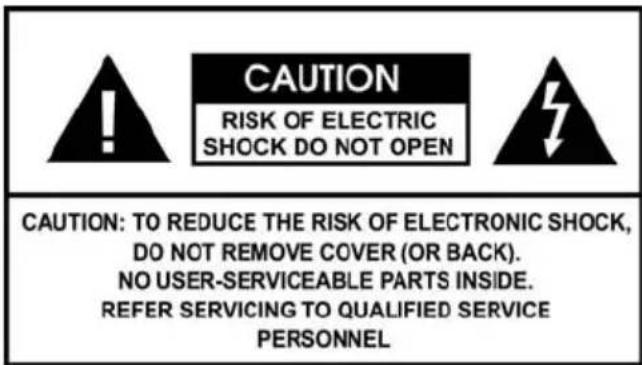

The exclamation point within a triangle is intended to alert the user to the presence of important operating and maintenance (servicing) instructions in the literature accompanying the product.
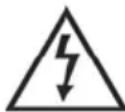
The lightning flash with arrowhead symbol within a triangle, alerts the user to the presence of uninsulated "dangerous voltage" within the product's enclosure that may constitute a risk of electric shock.
Note to CATV system installer: This reminder is provided to call the CATV system installer's attention to Article 820-40 of the National Electrical Code that provides guidelines for proper grounding and, in particular, specifies that the cable ground shall be connected to the grounding system of the building, as close to the point of cable entry as practical."
Safety Tips
Please read and follow these safety tips to ensure the equipment is free from damage, and to ensure that no injury will occur as a result of improper use.
- Do not insert any object (especially metal) or liquids, into the TV.
- Do not place any objects containing water or any other liquid on top of the TV.
- Do not place the unit in direct sunlight, near heaters or in extremely dusty or humid locations.
- Do not install this system outdoors or otherwise expose it to the elements.
- Do not place heavy objects on top of the TV.
- If the power cord is damaged or frayed in any way, electrical shock and/or fire may result.
- Please do not place objects on the power cord, and keep the cord away from heat-emitting devices. Should the power cord become damaged in any way, please contact your dealer for a replacement cord.
- Do not remove the cover of the TV for any reason. If any problems arise with the unit, please contact your dealer for service. Removing the covers will void the warranty.
Important Safety Instruction
1 Read these instructions before the product is operated.
2. Keep these instructions in a safe place for future reference.
3 Heed all warnings.
4. Follow all instructions.
5 Do not use this apparatus near water.
6 Clean only with dry cloth.
7 Do not block any ventilation openings. Install in accordance with the manufacturer's instructions.
8 Do not install near any heat sources such as radiators, heat registers, stoves, or other
apparatus (including amplifiers) that produce heat.

9 Do not defeat the safety purpose of the polarized or grounding type plug. A polarized plug has two blades with one wider than the other. A grounding type plug has two blades and a third grounding prong. The wide blade or the third prong is provided for your safety. If the provided plug does not fit into your outlet, consult an electrician for replacement of the obsolete outlet.
10 Protect the power cord from being walked on or pinched particularly at plugs, convenience receptacles, and the point where they exit from the apparatus.
11 Only use attachments/accessories specified by the manufacturer.
12 Use only with the cart, stand, tripod, bracket, or table specified by the manufacturer, or sold with the apparatus. When a cart is used, use
caution when moving the cart/apparatus combination to avoid injury from tip-over.
13 Unplug this apparatus during lightning storms or when unused for long periods of time.
14 Refer all servicing to qualified service personnel. Servicing is not included if the apparatus has been damaged in the following ways, such as power-supply cord or plug is damaged, liquid has been spilled or objects have fallen into the apparatus, the apparatus has been exposed to rain or moisture, does not operate normally, or has been dropped.
15 Apparatus shall not be exposed to dripping or splashing and no objects fill with liquids, such as vases, shall be placed on the apparatus.
16 To reduce the risk of electric shock, do not remove cover (or back). No user-serviceable parts inside. Refer servicing to qualified service personnel.
17 The apparatus must be connected to a mains socket outlet with a protected ground connection.
18 Keep 10cm minimum distance around the apparatus for sufficient ventilation.
19 Spent or discharged batteries must be recycled or disposed of properly in compliance with all applicable laws. For detailed information, contact your local county solid waste authority.
20 Please change to appropriate power cord complied with local regulation when the LCD TV purchased and utilized at different nations.

CAUTION
RISK OF ELECTRIC SHOCK DO NOT OPEN


WARNING: TO REDUCE THE RISK OF FIRE OR ELECTRIC SHOCK, DO NOT EXPOSE THIS PRODUCT TO RAIN OR MOISTURE
The lightning flash with arrowhead symbol, within an equilateral triangle, is intended to alert the user to the presence of uninsulated "dangerous voltage" within the product's enclosure that may be of sufficient magnitude to constitute a risk of electric shock to persons.

The exclamation point within an equilateral triangle is intended to alert the user to the presence of important operating and maintenance (servicing) instructions in the literature accompanying the appliance.
Caution
These servicing instructions are for use by qualified service personnel only. To reduce the risk of electric shock does not perform any servicing other than that contained in the operating instructions unless you are qualified to do so.
To protect your device from electrical damage, be sure to plug the cord into socket securely.

If you use the LCD TV with video games, computers, or similar products, keep brightness and contrast at a low level. Images with a high levels of brightness or contrast the may "burn on" the screen permanently.
[Maintenance]
If any of following occurs, unplug the LCD TV and contact your distributor or qualified technician to repair the LCD TV:
1 The power cord or plug is damaged.
2 Liquid enters the LCDTV.
3 LCD TV is damp or wet.
4 LCD TV is damaged.
5 LCD TV malfunctions.
DO NOT attempt to repair the LCD TV by yourself. There are high voltages inside the cabinet, which poses a risk of electric shock.
Safety inspection After the LCD TV is repaired, be sure to ask the technician (in accordance with the manufacturer's requirements) to conduct a routine safety inspection to make sure the LCD TV is safe.
[User's record]
You can find the serial number and model on the back of the LCD TV. Be sure to provide the model and serial number when you contact your distributor.
Tips for cleaning the LCD TV
1 Wipe the LCD TV with soft or dry cloth.
2 DO NOT use solvent or methyl benzene. Harsh chemicals may damage your LCD TV.
3 Make sure the LCD TV is unplugged before you clean it.
Installation and use of LCD TV
[CATV] Be sure to acquire due authorization from the broadcaster/CATV service provider/program owner before using the TV receiver to watch programs through UHF, VHF, or CATV.
1 Check the LCD TV power specification shown on the serial No./model tag. Be sure to use the power according to the specification. If you are unsure about the power requirement, please contact your distributor or local power company.
2 Make sure to plug the power cable into the socket securely. If you have problems plugging in, please contact your distributor.
The plug is designed in such a manner that you can plug into a socket in a certain direction. If you have problems with the plug, contact with your distributor.
1 DO NOT overload powers sockets or extension cords. Overloading poses a risk of electric shock or fire.
2 DO NOT place any objects on the power cord. Keep your LCD TV away from any
place that might cause damage to the LCD TV. Use only the correct power cord.
3 Be sure to turn off your LCD TV when not in use. If the LCD TV will not be in use for a long time, unplug it to prevent risk of fire.
4 The vent on the rear of the LCD TV is designed for ventilation and heat dissipation. Keep the vent clear.
5 DO NOT place the LCD TV on beds, sofas, or carpet, as this may block the vent.
6 DO NOT use the LCD TV in enclosed spaces, such as a bookshelf or TV cabinet as this may block the vent.
7 Keep the LCD TV away from high-temperature objects or any heat-generating object.
8 Keep the LCD TV away from direct sunlight.
9 DO NOT place the LCD TV on an unstable shelf or desk. Failing to do so may result in injury.
10 DO NOT allow foreign objects inside the LCD TV, as this poses a risk of electric shock or damage to the internal components.
11 When transporting the TV, never carry it by holding onto the speakers. Be sure to always carry the TV by two people holding it with two hands.
Package Contents Top View & Rear View
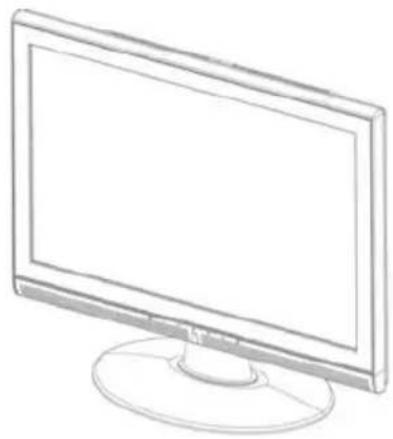
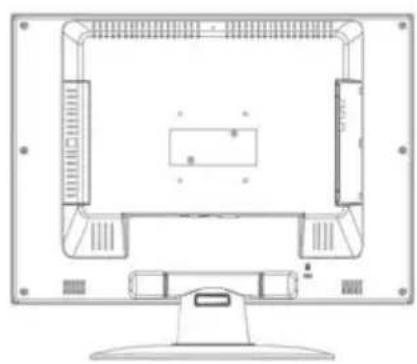
Front view
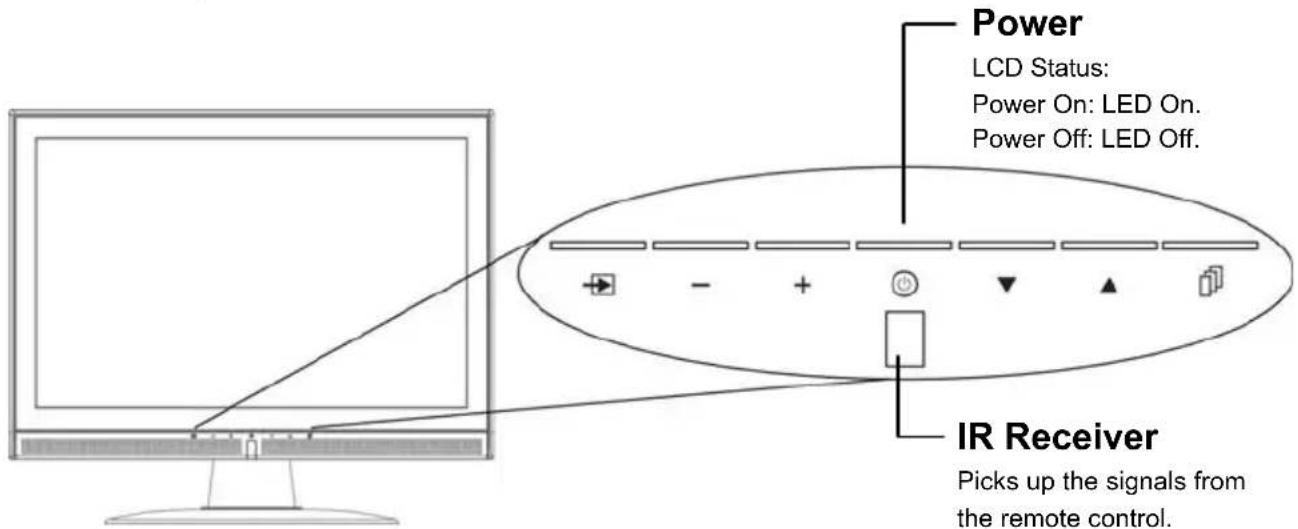
Note: The buttons on the LCD TV have the same functions as the corresponding buttons on the Remote Controller. This user's manual describes the functions based on the Remote Controller.
Accessories
After you unpack your LCD TV, make sure the following items are included in the box and are in good condition:
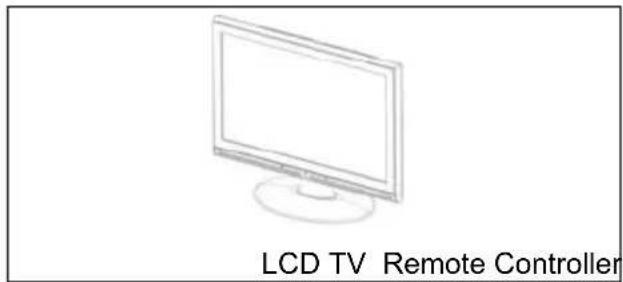
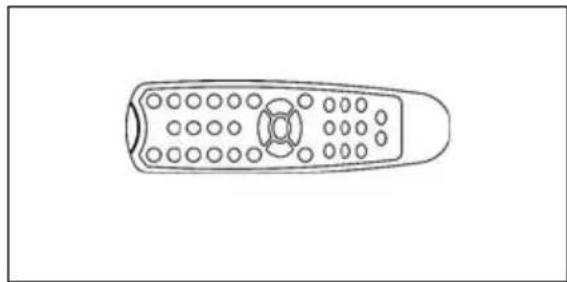
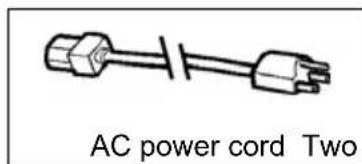
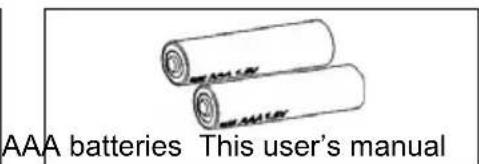
If you find that any of these items are missing or appear damaged, contact your dealer immediately. Do not throw away the packing material or shipping carton in case you need to ship or store the LCD TV in the future.
Installation of batteries
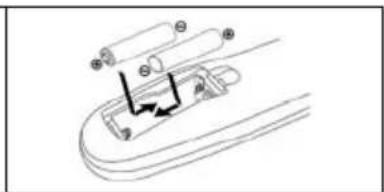
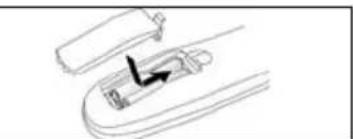
Before using the Remote Controller, you must insert two AAA batteries. Refer to the following:
- Push the battery cover latch in the direction of the arrow to release the cover.
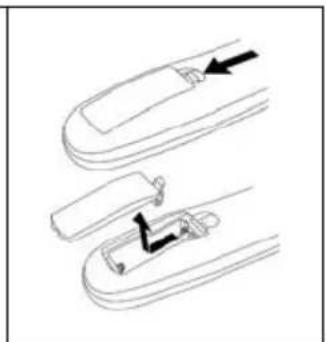
2 Insert the two AAA batteries. The battery terminals should match
- Close the battery cover.
Note:
- If the Remote Controller is not to be used for a long time, remove the batteries.
- Use the remote controller carefully. DO NOT drop the remote controller on the ground.
- Keep the remote controller away from moisture, sunlight, and high temperatures.
Setting up your Television
AV and Antenna input Connection
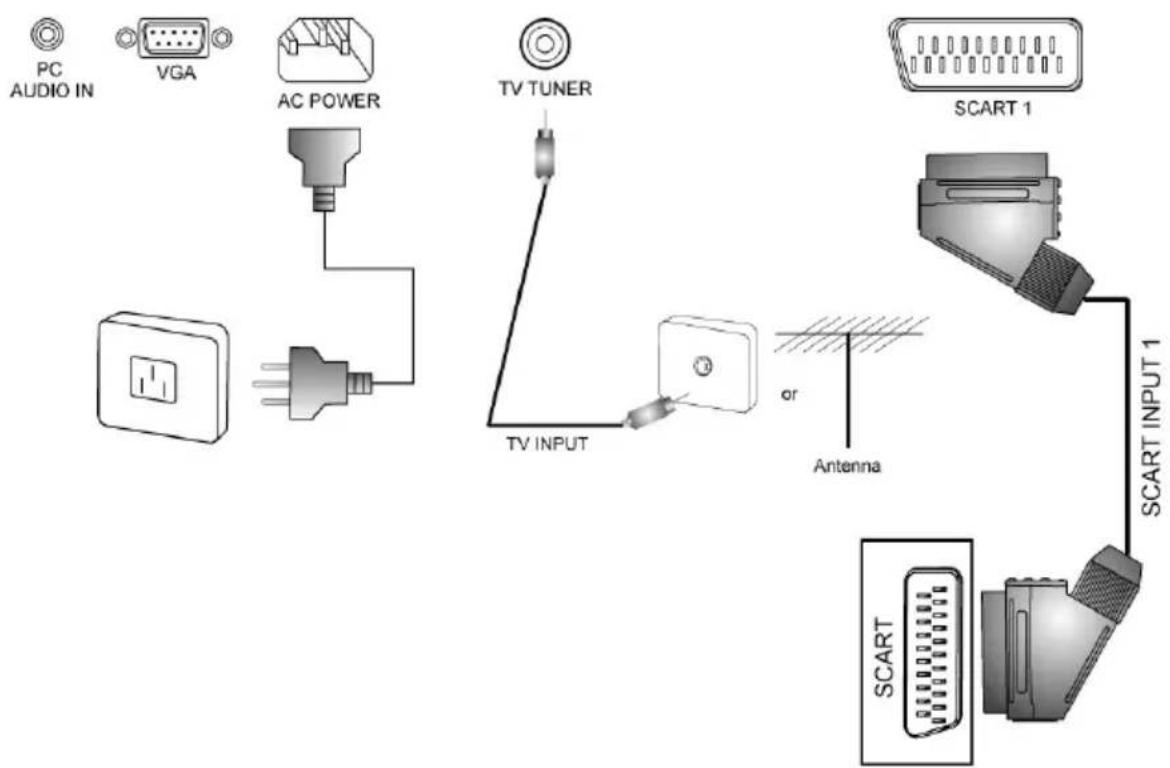
| Port Functions | |
| Tuner Input Connects to TV RF signals (antenna/CATV). | |
| SCART Input | Connects to with SCART output Video/Audio device. |
| Video and Audio input | Connects to S-Video (Y/C) or composite video and audio signal (R/L) Line.(Optional) |
PC & Video Input Connection
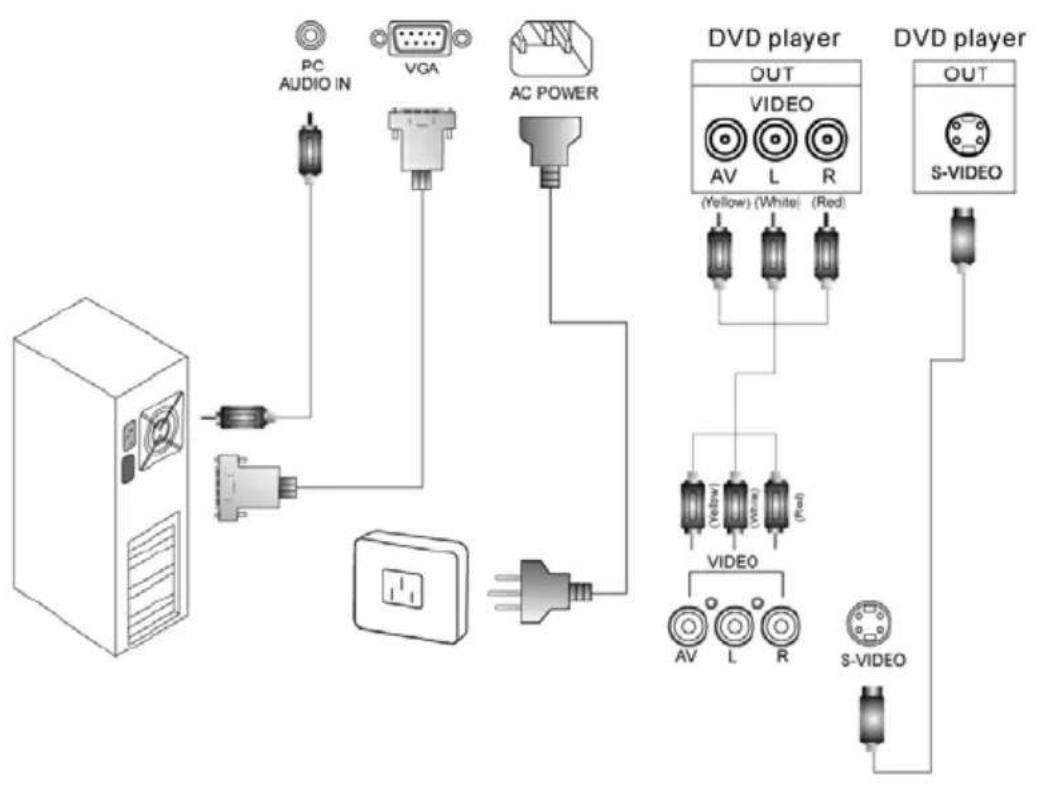
| Port Functions | |
| VGA Input (analog) and Audio input | Connector with VGA analog signals sources. |
Power Connection
Connect the AC power cord to the LCD-TV and plug into an appropriate wall outlet.
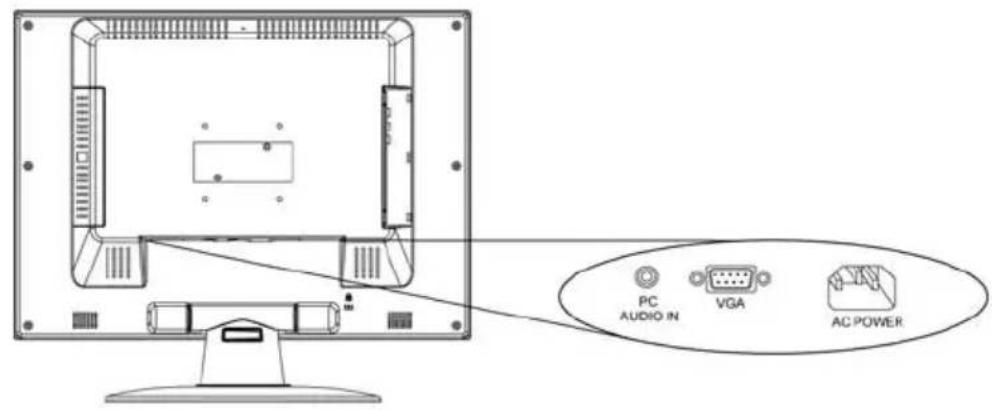
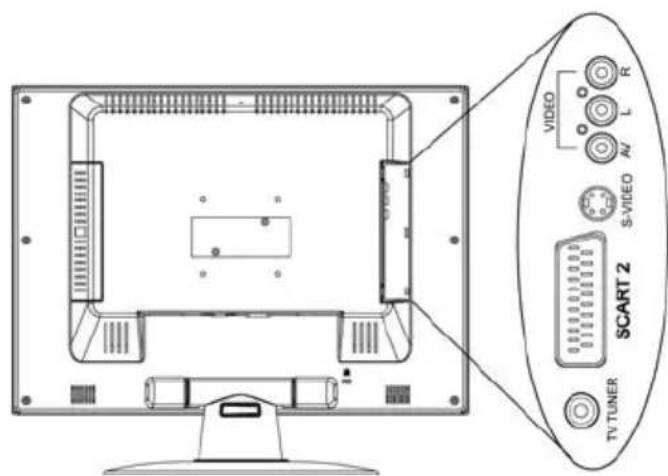
Note:
AC power Input : Connect power cord to this port
Your LCD TV connect to a PC through the VGA connector. Check your PC's user's manual to see which connectors are available on your PC.
- Connect one end of the VGA cable to this monitor.
- Connect the other end to your PC and tighten the securing screws on the connectors.
- Connect one end of the PC-audio-in cable to Audio-in.
Turning your LCD TV on
When press the POWER button, the LED on the front lower of the TV to switch off and LCD TV on.
Power indicator on -- Power on. Power indicator off -- Power off.
Programming TV channels
1 Press the TV button on the remote controller to select TV mode.
2 Press the MENU button on your remote controller to display the OSD menu.
3 Press the / button on your Remote Controller to highlight Channel Settings and press VOL+ button to select it.
4 Press the / button on your remote to highlight Auto Scan and press VOL+ button to start the tuning process. (This process will take a few minutes. The tuning process will find all available channels.)
5.You can now watch TV. Change channels by pressing the CH and CH buttons.
Operation using the controls on the LCD TV
The buttons on the LCD TV have the same functions as the corresponding buttons on the remote controller. This user's manual describes the functions based on the remote controller. A brief description is provided here of operation using the controls on the television.
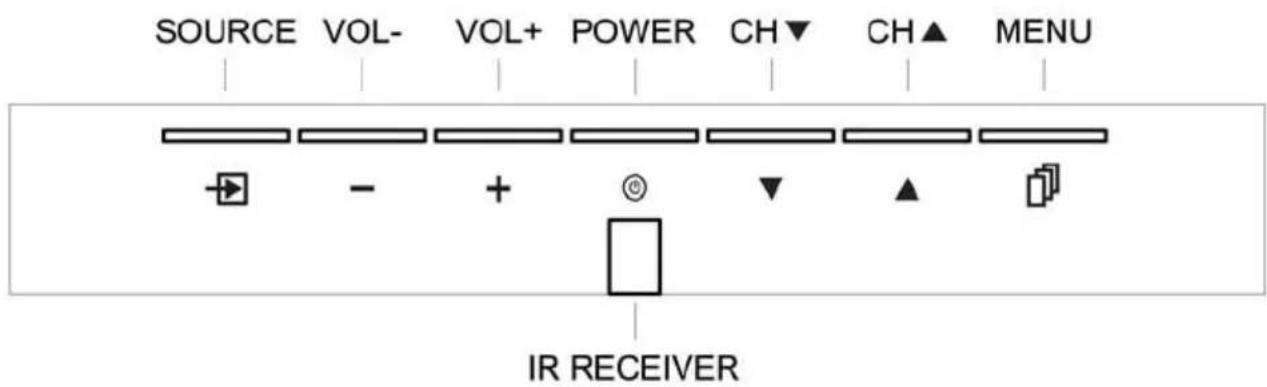
| Button Description | ||
| SOURCE | Use this button to change between video input signals. Press the INPUT button repeatedly to scroll through the following list of inputs: TV / AV / S-Video / SCART2 / RGB | |
| MENU | Use this button to display and adjust the features in the On-Screen Display. Use the four arrow keys (channel and volume adjustments) to navigate the menu options. | |
| CH (FUNCTION ) | Use these buttons to switch between preprogrammed channels. Use these buttons to move between functions in the OSD. | |
| - + | VOL +/- (ADJUST) | Use these two buttons to adjust the volume. Use these buttons to adjust the values of a function. |
Remote Controller
Remote Controller Key
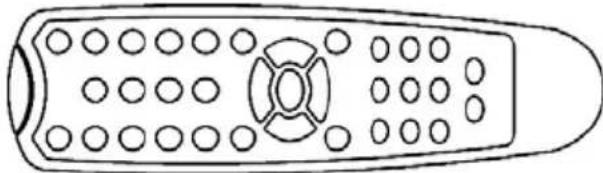
1.1 Power
To turn on the LCD TV Power On/Off.
1.2 MUTE
Press to toggle audio on and off. Press again or press volume +/- to restore the previous volume level. Sound On or Off.
1.3 Digital key from 0 to 9 and Digital key 100
Select TV channel by numbers.
1.4 RTN
Return to the previous TV channel.
1.5 MENU
Get into OSD menu and exit.
1.6 CH ▲PG
Press to select the next channel or to select next item in OSD menu.
1.7 CH PG
Press to select the previous channel or to select previous item in OSD menu.
1.8 VOL +
Press to increase the volume or the setting in OSD menu.
1.9 VOL -
Press to decrease the volume or the setting in OSD menu.
1.10 TV
Select video input source: (SCART+AV+SV) : TV→AV→S-Video→SCART2→RGB
1.11 PC
Select PC input source: VGA
1.12 MTS
Select TV audio system (TV mode): Stereo Mono NICAM 1 NICAM 2
1.13 WIDE
Select 4:3, Full screen.
1.14 DISP
Show a channel number in the screen.
1.15 zZZ
Press repeatedly to cycle through the available sleep time options at off, 15, 30, 45, 60 minutes.
1.16 TT
TT: Turn Teletext function on and Off.
1.17 INDEX
European version only.
1.18 ZOOM
European version only.
1.19 HOLD
For Teletext operation.
1.20 SUB.P
For Teletext operation.
1.21 Red key
For Teletext operation.
1.22 Green key
For Teletext operation.
1.23 Blue key
For Teletext operation.
1.24 Yellow key
For Teletext operation.
Using the advanced OSD menu
Read this chapter to learn how to adjust your LCD TV setting from the on-screen display (OSD). Your LCD TV features an OSD that lets you adjust and save contrast, brightness, and other settings. Your LCD TV saves change you make to the settings, even if you turn your TV off.
To adjust settings from the OSD:
- Press the MENU button on the Remote Controller or on the front of your LCD TV. The OSD opens.
- Press the CH ▲ or CH ▼ on the Remote Controller or on the front panel of your LCD TV to select the menu you want.
- Press the VOL - or VOL + on the Remote Controller or on the front panel of your LCD TV to adjust the option setting.
- Press the MENU button on the Remote Controller or on the front of your LCD TV. The OSD closes.
If you are using TV, Composite (AV), S-Video, or SCART for your video source, go to "OSD menus and options (TV and Video mode).
If you are using RGB (PC) for your video source, go to "OSD menu and options (PC video mode)"
OSD menus and options (TV mode)
You can use these OSD menus and options to adjust various settings for your LCD TV.
| OSD menu Item | Description | |
| Picture | Contrast | To adjust the difference between the lightest and darkest areas of the LCD TV screen. Contrast should be adjusted in conjunction with the brightness, hue, and saturation items. |
| Brightness | To adjust the light level of the LCD TV's screen. It should be adjusted in conjunction with the contrast, hue, and saturation items. | |
| Hue | To adjust the hue level of display screen. It should be adjusted in conjunction with contrast, brightness, and saturation items. | |
| Saturation | To adjust the saturation level of display screen. It should be adjusted in conjunction with contrast, brightness, and hue items. | |
| Color Tone | To select three color mode: Normal, Warm, Cool | |
| Scale | To select three mode of screen size: Full, 4:3 | |
| Picture Mode | To select favorite picture from these four default setting: Standard, Movie, Vivid, and User | |
| Sound | Bass | Adjust the bass of each speaker: right and left. |
| Treble | Adjust the treble of each speaker: right and left. | |
| Balance | Adjusts the balance level between the speakers. | |
| Sound System | To select audio mode (Mono, Stereo, NICAM 1, NICAM2). | |
| TV-Channel | Auto Scan | Auto search TV channel via board cast or cable. |
| Manual Program | This menu has 6 sub-titles:1. Channel: to adjust channel setting after auto scan from channel 1.to 125.2. Color System: to choose Auto, PAL, SECAM system.3. Sound system: to choose Auto, B/G, I, D/K, L, LL system.4. Search: from 45.75~884Hz.5. Fine tuning: manual tuning channel signal frequency.6. Store: OK to save the manual setting. | |
| Program | To set the TTX program | |
| Country | To choose TTX language format. | |
| Function | Sleep Timer | To set the sleep timer(off, 15, 30, 45, 60 minutes) |
| TTX Language | To select TT language format: AUTO, WEST, EAST, RUSSIAN, ARABIC, FARSII | |
| OSD | Language | To select which language you favorite |
| H. Position | To adjust the horizontal of display | |
| V. Position | To adjust the vertical of display | |
| Duration | To set the OSD timer disappear | |
| Halftone | To set the simulation of OSD | |
| Information | To show up the information of input source | |
| Memory Recall | To recall the original manufactory setting. |
OSD menus and options (Video mode)
You can use these OSD menus and options to adjust various settings for your LCD TV.
| OSD menu Item | Description | |
| Picture | Contrast | To adjust the difference between the lightest and darkest areas of the LCD TV screen. Contrast should be adjusted in conjunction with the brightness item. |
| Brightness | To adjust the light level of the LCD TV's screen. It should be adjusted in conjunction with the contrast setting. | |
| Hue | To adjust the hue level of display screen. It should be adjusted in conjunction with contrast, brightness, and saturation items. | |
| Saturation | To adjust the saturation level of display screen. It should be adjusted in conjunction with contrast, brightness, and hue items | |
| Color Tone | To select three color mode: Normal, Warm, Cool | |
| Scale | To select three mode of screen size: Full, Zoom, 4:3 | |
| Picture Mode | To select favorite picture from these four default setting: Standard, Movie, Vivid, and User | |
| Sound | Bass | Adjust the bass of each speaker: right and left. |
| Treble | Adjust the treble of each speaker: right and left. | |
| Balance | Adjusts the balance level between the speakers. | |
| Function | Sleep Timer | To set the sleep timer(off, 15, 30, 45, 60 minutes) |
| TTX Language | To select TT language format: AUTO, WEST, EAST, RUSSIAN, ARABIC, FARSII | |
| OSD | Language | To select which language you favorite |
| H. Position | To adjust the horizontal of OSD position | |
| V. Position | To adjust the vertical of OSD position | |
| Duration | To set the OSD timer disappear | |
| Halftone | To set the simulation of OSD | |
| Information | To show up the information of input source | |
| Memory Recall | To recall the original manufactory setting. |
OSD menus and options (PC mode)
You can use these OSD menus and options to adjust various settings for your LCD TV.
| OSD menu Item | Description | |
| Audio | Bass | Adjust the bass of each speaker: right and left. |
| Treble | Adjust the treble of each speaker: right and left. | |
| Balance | Adjusts the balance level between the speakers. | |
| Function | Sleep Timer | To set the sleep timer(off, 15, 30, 45, 60 minutes) |
| Auto Color | Auto adjust color temperature | |
| Auto Phase | Auto adjust phase | |
| TTX Language | To select TT language format: AUTO, WEST, EAST, RUSSIAN, ARABIC, FARSI | |
| PC | Contrast | Adjusts the contrast of the picture. |
| Brightness | Adjusts the brightness of the picture. | |
| H. Position | To adjust Horizontal of display | |
| V. Position | To adjust Vertical of display | |
| Clock | To adjust clock of display | |
| Phase | To adjust phase of display | |
| Color Mode | To choose color temperature and RGB in user mode | |
| Auto | Auto adjust display | |
| OSD | Language | To select which language you favorite |
| H. Position | To adjust the horizontal of OSD position | |
| V. Position | To adjust the vertical of OSD position | |
| Duration | To set the OSD timer disappear | |
| Halftone | To set the simulation of OSD | |
| Information | To show up the information of input source | |
| Memory Recall | To recall the original manufactory setting. |
Troubleshooting
You are encouraged to diagnose the problem base on the following list before calling a service center.
TV
| Symptoms Possible Causes | |
| Power does not turn ON | Ensure whether the power plug is securely inserted into the receptacle. |
| There is no picture or sound | ·Ensure the television power is ON (Indicated by the blue LED on the front of the unit) ·Reception other than those of broadcasting stations can be considered. ·Check for connection to wrong terminal or for wrong input mode. ·Ensure the communication cable is properly connected between the Video Source and the television. |
| There are spots on the screen | Check whether your AV equipments is affected by interference from automobiles, trains, high-voltage transmission lines, neon signs or other potential sources of interference. |
| Degraded colors or tints | Check whether all image adjustments have been properly adjusted. |
| Improper screen position or size | Check whether screen position and size have been properly adjusted. |
| The image appears distorted | Ensure the television's aspect ratio is properly set. |
| The image is purple | Check the "Component" or "RGB" setting in the television and set it for the appropriate signal type. |
| The image appears too bright, and there is a loss of definition in the brightest areas of the image. | ·Check whether the contrast setting is too high. ·The DVD player is set for a high-level output. ·The video signal has not been terminated properly somewhere in the system. |
| The image appears too "washed out", or the darkest areas of the image appear too bright. | ·Check whether Brightness is set too high. ·The DVD player may be set at too high a brightness level. |
| If "xxx searching" appears, the image or signal cannot be produced by display. | ·Check the cable for disconnection. ·Check for connection to proper terminal or for proper input mode. |
| Power indicator lamp appears flashes blue | ·Check the cable for disconnection. ·Check whether the screen is on power saving status (DPMS) |
| "Over range" appears | Check whether the input signal is acceptable to the display. |
| Remote Controller does not function properly | ·Check for incorrect battery orientation. ·Check for dead batteries ·Check for distance and angle from the television. ·Check whether remote controller is properly being pointed at the television's remote controller sensor window. ·Check for any obstacle between the remote controller and the remote controller sensor window. ·Check that the remote sensor window is not under strong fluorescent lighting. |
| There is no picture or sound, just noise | ·Make sure the antenna cable is properly connected. ·Consider whether TV signals are being properly received. |
| Picture is not clear | ·Make sure the antenna cable is properly connected. ·Consider whether TV signals are being properly received. |
| No sound | ·Check whether you have selected Mute for Audio setting. ·Make sure the volume is not set to minimum. ·Make sure that headphones are not connected. ·Check cables for disconnection. |
Antenna
| Symptoms Possible Causes | |
| The picture is not sharp or the picture moves | ·The reception may be weak. ·The state of the broadcast may also be bad. ·Make sure the outside antenna is not disconnected. ·Make sure the antenna is facing the right direction. |
| The picture is doubled or tripled | ·Make sure the antenna is facing the right direction. ·There may be reflected electric waves from mountains or buildings. |
| The picture is spotted | ·There may be interference from automobiles, trains, high voltage lines, neon lights, etc. ·There may be interference between the antenna cable and power cable. Try positioning them further apart. |
| There are stripes on the screen or colors fade | ·Is the television receiving interference from other devices? Transmission antennas of radio broadcasting stations and transmission antennas of amateur radios and cellular phones may also cause interference. ·Use the television as far apart as possible from devices that may cause possible interference. |
Supported Operating Modes
| Item | Resolution | H Freq. (kHz) | V Freq. (Hz) | VGA | Note |
| 1. | 640x480 @ 60 31.4 60 | V VESA | |||
| 2. | 640x480 @ 72 37.9 72 | V VESA | |||
| 3. | 640x480 @ 75 37.5 75 | V VESA | |||
| 4. | 800x600 @ 56 31.1 56 | V VESA | |||
| 5. | 800x600 @ 60 37.9 60 | V VESA | |||
| 6. | 800x600 @ 72 48.1 72 | V VESA | |||
| 7. | 800x600 @ 75 46.9 75 | V VESA | |||
| 8. | 1024x768 @ 60 48.4 60 | V VESA | |||
| 9. | 1024x768 @ 70 56.5 70 | V VESA | |||
| 10. | 1024x768 @ 75 60.0 | 75 V VESA | |||
| 11. | 1280x1024 @ 60 64.0 | 60 V VESA | |||
| 12. | 1280x1024 @ 75 80.0 | 75 V VESA | |||
| 13. | 1440x900 @ 60 55.9 | 60 V VESA | |||
| 14. | 480i | ||||
| 15. | 480p | ||||
| 16. | 576i | ||||
| 17. | 576p | ||||
| 18. | 720p | ||||
| 19. | 1080i |
Note: The VGA support timing will depend upon the panel resolution.
DROIT D'AUTEUR 21
AVIS DE NON RESPONSABILITE 21
INTRODUCTION. 21
FONCTIONS ET CHARACTERISTIQUES 21
INFORMATIONSTIMPTANTES 21
CONSEILS DE SECURITE 22
INSTRUCTIONS DE SECURITE IMPORTANTES 22
PRUDENCE 24
CONSEILS POUR LE NETTOYAGE DU LCD TV. 24
INSTALLATION ET UTILISATION DU LCD TV. 24
CONTENU DU PAQUET 25
RISQUE D' ELECTROCUTION NE PAS OUVRIR