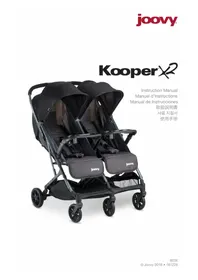
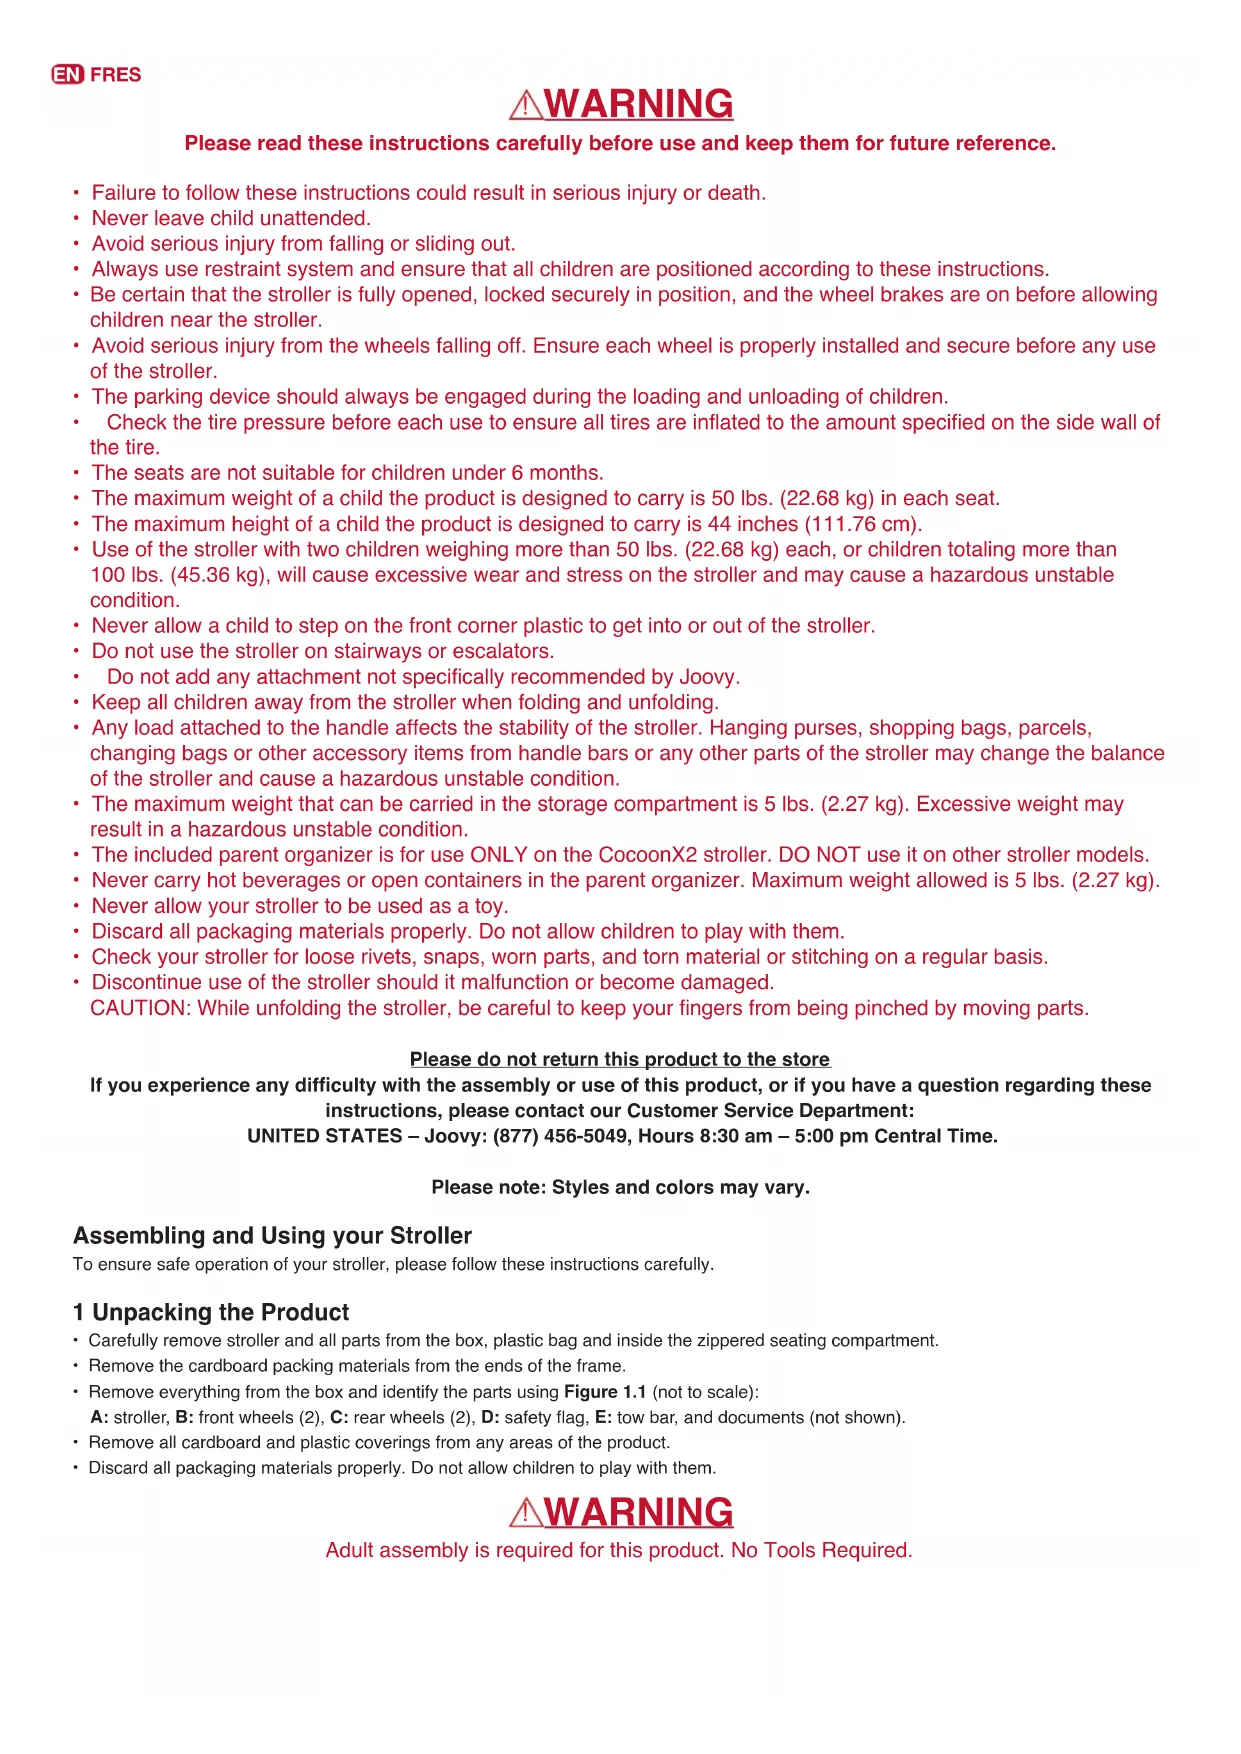
Cocoon X2 - Stroller Joovy - Free user manual and instructions
Find the device manual for free Cocoon X2 Joovy in PDF.
| Product Type | Double stroller convertible into bike trailer |
| Brand | Joovy |
| Model | Cocoon X2 |
| Number of seats | 2 (individual seats) |
| Maximum weight per seat | 22.68 kg (50 lb) |
| Maximum total weight (stroller) | 45.36 kg (100 lb) |
| Maximum child height | 111.8 cm (44 in) |
| Recommended age | From 6 months (stroller) / 12 months (trailer) |
| Frame material | Metal tube |
| Fabric material | Washable fabric (clean with soapy water) |
| Wheels | 2 swivel front wheels, 2 rear wheels with brakes |
| Tire pressure | See indication on tire sidewall |
| Canopy | Adjustable canopy with integrated mosquito net and waterproof cover |
| Safety harness | 5-point harness, height adjustable |
| Handlebar | Adjustable to multiple positions |
| Brakes | Rear wheel brakes (single-action lever on both wheels) |
| Bike trailer mode | Yes, with included tow bar (requires adapter for quick-release axle or hub nut) |
| Included accessories | Safety flag, tow bar, parent organizer |
| Folding | Compact fold (requires unlocking safety clips) |
| Maintenance | Clean with a damp cloth and mild soap; regularly check fastenings |
| Customer service | Joovy (877) 456-5049 (United States) |
Frequently Asked Questions - Cocoon X2 Joovy
User questions about Cocoon X2 Joovy
0 question about this device. Answer the ones you know or ask your own.
Ask a new question about this device
Download the instructions for your Stroller in PDF format for free! Find your manual Cocoon X2 - Joovy and take your electronic device back in hand. On this page are published all the documents necessary for the use of your device. Cocoon X2 by Joovy.
USER MANUAL Cocoon X2 Joovy
natural_image
Line drawing of a two-wheeled cart with wheels and an arrow, no text or symbols presentWARNING
Please read these instructions carefully before use and keep them for future reference.
- Failure to follow these instructions could result in serious injury or death.
- Never leave child unattended.
- Avoid serious injury from falling or sliding out.
• Always use restraint system and ensure that all children are positioned according to these instructions.
- Be certain that the stroller is fully opened, locked securely in position, and the wheel brakes are on before allowing children near the stroller.
- Avoid serious injury from the wheels falling off. Ensure each wheel is properly installed and secure before any use of the stroller.
- The parking device should always be engaged during the loading and unloading of children.
- Check the tire pressure before each use to ensure all tires are inflated to the amount specified on the side wall of the tire.
• The seats are not suitable for children under 6 months.
- The maximum weight of a child the product is designed to carry is 50 lbs. (22.68 kg) in each seat.
- The maximum height of a child the product is designed to carry is 44 inches (111.76 cm).
- Use of the stroller with two children weighing more than 50 lbs. (22.68 kg) each, or children totaling more than 100 lbs. (45.36 kg), will cause excessive wear and stress on the stroller and may cause a hazardous unstable condition.
- Never allow a child to step on the front corner plastic to get into or out of the stroller.
- Do not use the stroller on stairways or escalators.
- Do not add any attachment not specifically recommended by Joovy.
- Keep all children away from the stroller when folding and unfolding.
- Any load attached to the handle affects the stability of the stroller. Hanging purses, shopping bags, parcels, changing bags or other accessory items from handle bars or any other parts of the stroller may change the balance of the stroller and cause a hazardous unstable condition.
- The maximum weight that can be carried in the storage compartment is 5 lbs. (2.27 kg). Excessive weight may result in a hazardous unstable condition.
• The included parent organizer is for use ONLY on the CocoonX2 stroller. DO NOT use it on other stroller models.
- Never carry hot beverages or open containers in the parent organizer. Maximum weight allowed is 5 lbs. (2.27 kg).
- Never allow your stroller to be used as a toy.
- Discard all packaging materials properly. Do not allow children to play with them.
- Check your stroller for loose rivets, snaps, worn parts, and torn material or stitching on a regular basis.
- Discontinue use of the stroller should it malfunction or become damaged.
CAUTION: While unfolding the stroller, be careful to keep your fingers from being pinched by moving parts.
Please do not return this product to the store
If you experience any difficulty with the assembly or use of this product, or if you have a question regarding these instructions, please contact our Customer Service Department:
UNITED STATES – Joovy: (877) 456-5049, Hours 8:30 am – 5:00 pm Central Time.
Please note: Styles and colors may vary.
Assembling and Using your Stroller
To ensure safe operation of your stroller, please follow these instructions carefully.
1 Unpacking the Product
- Carefully remove stroller and all parts from the box, plastic bag and inside the zippered seating compartment.
- Remove the cardboard packing materials from the ends of the frame.
- Remove everything from the box and identify the parts using Figure 1.1 (not to scale):
A: stroller, B: front wheels (2), C: rear wheels (2), D: safety flag, E: tow bar, and documents (not shown).
- Remove all cardboard and plastic coverings from any areas of the product.
- Discard all packaging materials properly. Do not allow children to play with them.
WARNING
Adult assembly is required for this product. No Tools Required.
2 Rear Wheels
• DO NOT unfold the stroller at this time.
- Position the stroller upside down in a clean dry place.
- Press the middle button of the rear wheel hub (See Figure 2.1) and insert the axle into the rear wheel housing. See Figure 2.2. Push firmly to lock in the wheel. Pull the wheel away from the stroller to ensure it is securely installed. Repeat for the other side.
• To remove the rear wheels, press the middle button of the rear wheel hub (See Figure 2.1) and pull the wheel away from the stroller.
3 Front Wheels
- Press the release button located on the back of the front wheel housing (See Figure 3.1) and insert a front wheel post into the housing. See Figure 3.2. Pull the wheel away from the stroller to ensure it is securely installed. Repeat for the other side.
- To remove a front wheel, press the release button located on the back of the front wheel housing and pull the wheel away from the stroller.
4 Unfolding the Stroller
- Position the stroller so it is resting on all four wheels.
- Engage the linked rear brake (see Using the Rear Wheel Brakes) and position the stroller with the handlebar closest to you.
- Pull upwards on the handlebar until the stroller is partially unfolded. See Figure 4.1.
- Open the zippers on the access door at the rear of the stroller. See Figure 4.2.
- Locate the locking clamps on EACH side of the frame inside the compartment and rotate them all the way towards the front of the stroller. See Figure 4.3.
- Pull upwards on the handlebar and firmly pull the rear support tube towards you until an audible click is heard. See Figure 4.4. NOTE: If the stroller does not open or seems stuck, check to ensure that the clamps are not interfering with the seat back.
- Grasp a locking clamp and rotate the clamp towards you. Secure the clamp onto the tube until it is locked into place. See Figure 4.5.
- Repeat this step on the other side until BOTH clamps are locked securely in place.
WARNING
ALWAYS keep children away from the stroller when unfolding. ALWAYS secure the clamps on BOTH sides before use.
5 Using the Rear Wheel Brakes
- To engage the rear wheel brakes, push down on the brake lever. See Figure 5.1. The lever will lock both wheels. Check that the brakes are properly applied by attempting to push the stroller backwards and forwards.
- To release the brakes, gently lift up on the brake lever. See Figure 5.2.
WARNING
Always make sure the wheel brakes are engaged when the stroller is not being pushed so that the stroller will not roll away. Never leave stroller unattended, especially on a hill or incline, as the stroller may tip over or slide.
6 Operating the Hood
- The front of the stroller can be used in three positions: fully opened, closed with mesh window, and closed with mesh window and weather shield.
- To configure the hood with the mesh window and weather shield closed, zip the mesh window closed around the seating compartment.
See Figure 6.1. Then, pull the weather shield down over the mesh window and attach the Velcro® at the bottom to secure it closed.
See Figure 6.2.
- To configure the hood with only the mesh window closed, detach the Velcro® on the weather shield, neatly roll the weather shield up and secure it under the elastic loops at the top corners of the hood. See Figure 6.3.
- To configure the hood in the fully opened position, roll the mesh window AND the weather shield up together and secure them under the elastic loops as shown in Figure 6.4.
NOTE: The top rear portion of the hood has a roll back window. To open, pull the forward edge up, roll the flap back and secure it using the elastic loop attachment. See Figure 6.5.
7 Securing/Removing a Child
There are three height adjustment positions for the shoulder harness straps. For a younger child, the shoulder straps should be positioned through the lower sewn-in loops on the seatback. For a young child that is tall, the shoulder straps may be positioned through the upper sewn-in loops on the seatback. For a taller child, use the shoulder straps WITHOUT positioning them through these sewn-in loops. To re-position the shoulder straps, unbuckle them from the harness buckle and feed these straps through the sewn-in loops, ensuring that they are not twisted. Re-buckle the shoulder straps onto the harness buckle to secure them.
- Before loading or unloading, ensure that the wheel brakes are engaged.
• To unlatch the buckle, press the center button and remove the male ends of each buckle. See Figure 7.1. - Carefully place the child in the seat with the shoulder straps over their shoulders and chest. Then place the crotch strap between the child's legs.
- If necessary, reattach the shoulder straps with the waist straps. See Figure 7.2.
EN FRES
- Bring the shoulder/waist buckles into the crotch buckle until the shoulder/waist buckles snap into place. See Figure 7.3.
- Tighten the waist belt to be snug around the child's waist.
- The shoulder, waist, and crotch straps may be adjusted using the sliding buckles on these straps.
WARNING
Avoid serious injury from falling or sliding out. Always use the restraint system.
8 Adjusting the Handlebar
- The handlebar can be adjusted into multiple positions.
- To adjust, unlock the latch on BOTH sides of the handlebar. See Figure 8.1.
- Move the handlebar to the desired position.
- Lock the latches on BOTH sides of the handlebar. See Figure 8.2. Ensure that both latches lie flat for a secure lock.
9 Storage Compartment Loading/Unloading
- Before loading or unloading the storage compartment, ensure that the wheel brakes are engaged.
• To access the storage compartment, unzip the access door on the rear of the stroller. See Figure 9.1.
10 Folding the Stroller
- Keep children away from stroller while folding.
- Engage the rear brakes and position the stroller with the handlebar closest to you.
- Open the access door on the rear of the stroller.
- Locate the locking clamps on BOTH sides of the frame inside the rear compartment.
- Slide the button on the clamp towards you and pull the clamp off the tube. Swing the clamp all the way towards the front of the stroller. See Figure 10.1. Repeat this procedure for the other side.
- To fold, push the secondary lock on the right side down while pushing the upper tube on that side towards the front of the stroller. See Figure 10.2. Push the handlebar downward until the stroller is collapsed. See Figure 10.3.
- Use caution not to catch the clamps or the secondary lock against the rear of the seatback when folding. CAUTION: While folding the stroller, be careful to keep your fingers from being pinched by moving parts.
WARNING
ALWAYS keep children away from the stroller when folding.
Jogging Stroller Mode (Optional)
Assembling and Using the Fixed Front Wheel Attachment
The fixed front wheel attachment is sold separately. To ensure safe operation of your jogging stroller, please follow these instructions carefully.
11 Installing the Fixed Front Wheel
- Tilt the stroller so it is resting on the handlebar and the rear wheels.
- Remove the front swivel wheels by pressing the release button located on the back of the front wheel housing and pulling the wheel away from the stroller. Repeat for the other side.
- Remove the locking pin from the attachment housing (located on the lower front end of the stroller) by pulling the safety clamp over the pin and sliding the pin out. See Figure 11.1.
- Insert the front wheel tube into the housing at the center front of the stroller, with the wheel pointing forward. Line up the holes on the sides. See Figure 11.2.
- Insert the locking pin through the holes and attach the safety clamp over the pin to ensure it is secure. See Figure 11.3.
- Pull the wheel away from the stroller to ensure it is securely installed.
- To remove this accessory, reverse the instructions in this section.
WARNING
Use caution not to get pinched by the locking clamp.
12 Wrist Tether Strap
There is a tether strap located on the rear frame of the stroller to keep your stroller close by if you lose your grip.
• Always loop the wrist tether around your wrist before using your stroller.
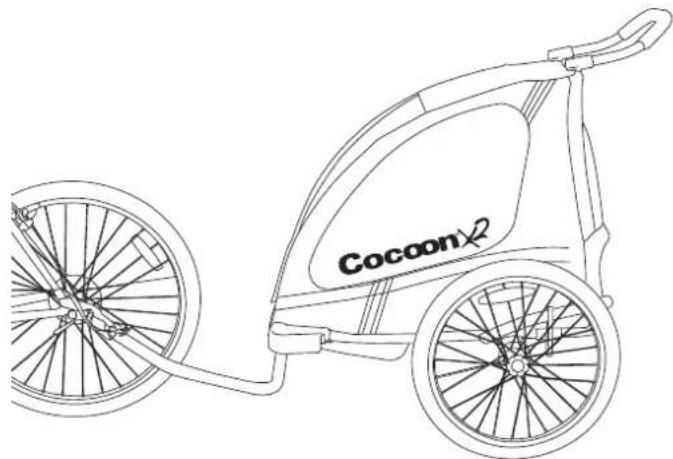
Bicycle Trailer Mode
natural_image
Line drawing of a two-wheeled car with a bicycle wheel, no text or symbols presentYour Joovy CocoonX2 can be converted to a bicycle trailer by attaching the optional tow bar. The tow bar is included with the stroller.
WARNING
Please read these instructions carefully before use and keep them for future reference.
- Failure to follow these instructions could result in serious injury or death.
• Never leave child unattended.
- Avoid serious injury from falling or sliding out. Always use restraint system.
- Do not install a car seat or any other seating device not approved by the manufacturer inside the trailer.
• Make no modifications to the trailer.
- Before attaching the trailer to a bicycle, it is recommended that the bicycle undergo a complete safety check by a qualified bicycle mechanic.
- Do not allow any of the child's body, clothing, shoe laces, or toys to come in contact with moving parts.
• A reflector that complies with CPSC regulations shall be visible on the rear of the trailer.
- Before each ride, ensure the attached trailer does not interfere with braking, pedaling, or steering of the bicycle.
- Never ride a bicycle at night without adequate lighting. Obey all local legal requirements for lighting.
- Do not use with children who exceed the weight limitations.
- Do not use this product with children under 12 months old. Children must be able to support their own heads.
- When trailer is attached to bicycle, the added weight of the trailer, its passenger(s) and/or any cargo may affect the handling characteristics of the bicycle. Do not ride at high speed. Turn corners slowly. Do not make abrupt turns or stops.
• Always be cognizant of exposure hazards such as wind chill and heat exhaustion.
- Do not use cleaning solvents. Clean only with mild soap and water.
- Check the tire pressure before each use to ensure all tires are inflated to the amount specified on the side of the tire.
- Keep all children away from trailer during assembly of the hitch, folding and unfolding.
- Discard all packaging materials properly. Do not allow children to play with them.
- Check your trailer for loose rivets, snaps, worn parts, and torn material or stitching on a regular basis.
- Discontinue use of the trailer should it malfunction or become damaged.
- BE SURE TO FOLLOW THE INSTRUCTIONS FOR THE STROLLER/TRAILER BEFORE USING THIS PRODUCT.
- If you cannot find the stroller/trailer instructions, please visit www.joovy.com or call us at (877) 456-5049 to obtain a new copy.
- BE SURE TO FOLLOW THE INSTRUCTIONS FOR THE BICYCLE BEFORE AND WHILE USING THIS PRODUCT
• The maximum number of passengers is two.
• The maximum weight of a child the product is designed to carry is 50 lbs. (22.68 kg) in each seat.
• The maximum height of a child the product is designed to carry is 44 inches (111.76 cm).
- Use of the trailer with two children weighing more than 50 lbs. (22.68 kg) each, or children totaling more than 100 lbs. (45.36 kg), will cause excessive wear and stress on the trailer and may cause a hazardous unstable condition.
13 CAUTIONARY TOWING TIPS
- Stop trailer use immediately on poor road conditions, in severe weather or in any other dangerous environments.
- Ensure the trailer is completely disengaged from bicycle when not in use.
• Always store tow bar in a clean dry place. - Before and after each use, inspect tow bar and discontinue use should it malfunction or become damaged.
- Not for use at high speeds. DO NOT exceed 10 MPH (16 km/h).
• Each child must wear an approved safety helmet when riding in the product in trailer mode.
• Always ensure your bicycle brakes function properly. Braking distance is increased when pulling a trailer. - The trailer is wider than most bicycles. Allow extra clearance when near curbs, signs, parked cars and other obstacles.
- Do not turn sharply. A bicycle with a trailer requires a wide turning radius.
• Install a rearview mirror on your bicycle to check on children in the trailer.
Assembling and Using the Trailer Mode Attachment
To ensure safe operation of your trailer, please follow these instructions carefully.
WARNING
Adult assembly is required for this product. No tools required for bicycles with a quick release axle on the rear wheel. Bicycles without a quick release axle on the rear wheels will require an adjustable wrench.
WARNING
Use caution not to get pinched by the locking clamp.
14 Removing the Coupler Attachment from the Tow Bar
- Locate the coupler attachment on the tow bar.
• To remove, carefully rotate the locking clamp off the tow bar. See Figure 14.1. Pull the locking pin out from the tube. - Remove the coupler attachment from the tow bar tube. See Figure 14.2.
15 Installing/Uninstalling Coupler Attachment for Bicycles with Quick Release Rear Axles
- Flip the rear axle quick release lever open and remove the nut and spring from the opposite side. See Figure 15.1.
- Hold the lever and pull out the axle skewer with spring. See Figure 15.2.
- Completely remove the skewer while leaving the wheel in place.
- Place the coupler over the left side of the axle with the flat side of the coupler attachment facing inward against the frame of the bicycle. Insert the skewer through the wheel hub (and the coupler) and hook it onto the bicycle frame dropout. See Figure 15.3.
NOTE: The wide end of the spring should face outward and touch the quick release hub. See Figure 15.4.
- Replace the spring and then the nut onto the skewer. Turn the nut to tighten and then close the quick release lever. See Figure 15.5.
- Check the rear wheel to ensure it is tight and operating correctly.
- To remove this accessory, reverse the instructions in this section.
16 Installing/Uninstalling Coupler Attachment for Bicycles with Rear Hub Nuts
- Loosen the left rear wheel hub nut with a wrench.
- Remove the hub nut and washer from the axle. See Figure 16.1.
- Place the coupler attachment onto the axle with the flat side facing inward against the frame of the bicycle. See Figure 16.2.
- Replace the washer and the bicycle hub nut onto the axle and turn the nut to tighten. See Figure 16.3.
- Tighten the hub nut securely with a wrench.
- Check the rear wheel to ensure it is tight and operating correctly.
- To remove this accessory, reverse the instructions in this section.
17 Attaching/Detaching the Tow Bar to the Stroller/Trailer
- Tilt the stroller so it is resting on the handlebar and the rear wheels.
- Remove the front swivel wheels by pressing the release button located on the back of the front wheel housing and pulling the wheel away from the stroller. Repeat for the other side.
- Remove the locking pin from the attachment housing (located on the lower front end of the stroller) by pulling the safety clamp over the pin and sliding the pin out. See Figure 17.1.
- Insert the tow bar into the housing until the holes on the sides line up. See Figure 17.2.
- Insert the locking pin through the holes and attach the safety clamp over the pin to ensure it is secure. See Figure 17.3.
- Pull the tow bar away from the stroller to ensure it is securely installed.
- To remove this accessory, reverse the instructions in this section.
18 Attaching/Detaching the Tow Bar to the Bicycle With Coupler Attachment
- Insert the coupler attachment inside the tow bar tube and line up the holes. See Figure 18.1.
- Insert the locking pin through the holes and carefully rotate the locking clamp over the tube to secure. See Figure 18.2.
- Ensure the coupler attachment is securely attached before proceeding.
- Locate the tether attachment on the tow bar, loop it around the bicycle frame and clip the fastener onto the metal tri-clip. See Figure 18.3.
- To remove this accessory, reverse the instructions in this section.
WARNING
Always make sure the trailer is securely attached to the bicycle before towing the trailer.
19 Securing/Removing a Child
There are three height adjustment positions for the shoulder harness straps. For a younger child, the shoulder straps should be positioned through the lower sewn-in loops on the seatback. For a young child that is tall, the shoulder straps may be positioned through the upper sewn-in loops on the seatback. For a taller child, use the shoulder straps WITHOUT positioning them through these sewn-in loops. To re-position the shoulder straps, unbuckle them from the harness buckle and feed these straps through the sewn-in loops, ensuring that they are not twisted. Re-buckle the shoulder straps onto the harness buckle to secure them.
- Before loading or unloading, ensure that the wheel brakes are engaged.
• To unlatch the buckle, press the center button and remove the male ends of each buckle. See Figure 19.1. - Carefully place the child in the seat with the shoulder straps over their shoulders and chest. Then place the crotch strap between the child's legs.
- If necessary, reattach the shoulder straps with the waist straps. See Figure 19.2.
- Bring the shoulder/waist buckles into the crotch buckle until the shoulder/waist buckles snap into place. See Figure 19.3.
- Tighten the waist belt to be snug around the child's waist.
- The shoulder, waist, and crotch straps may be adjusted using the sliding buckles on these straps.
WARNING
Avoid serious injury from falling or sliding out. Always use the restraint system.
20 Installing the Flag
- Insert the sections of the flag pole together until they are securely connected.
- Slide the end of the flag pole into the small pocket on the side of the hood until it cannot go any further. See Figure 20.1.
WARNING
Always use the flag when pulling the trailer.
21 Disassembly and Storage of the Bicycle Tow Bar and Stroller
- Ensure that the stroller and all of the attachments and accessories are clean and dry before storage.
- Store your CocoonX2 in a dry, well ventilated place.
- Disengage the bicycle tow bar and store it separately for extended periods of time.
- Prior to the next use, please check all components (including tires, tire pressure, fabric, frame, accessories) for signs of damage or excessive wear.
- Do not use the trailer or stroller if you see signs of damage or excessive wear. Please contact customer service for replacement parts or repair options.
Maintenance
All of the fittings, snaps, locks, rivets, and other hardware and plastic parts on the stroller should be inspected periodically to ensure that they are secured properly and not damaged or malfunctioning. The restraint system, as well as all other straps and fabric items and their stitching should also be inspected periodically to ensure that they are secured properly and not loose, torn or otherwise damaged. All moving parts, such as wheels, brakes, and hinges should also be checked periodically to ensure they are operating properly.
Tires should be inflated to recommended pressure. See tire side wall for correct pressure. DO NOT overinflate the tires.
Any missing, broken, or worn components should be replaced immediately, and the stroller should not be used until they are replaced. Only original manufacturer's components should be used. If needed, please contact Joovy at our toll-free phone number.
Cleaning
The fabric material on this stroller can be cleaned using mild household soap or detergent and warm water on a sponge or clean cloth. Always allow the fabric to completely air dry before using the stroller.
The frame and wheels should always be kept clean and free of dirt and foreign matter, especially after operating the stroller in rain, snow, or other harsh environments. Use a sponge or cloth dampened with warm water and a mild detergent cleaner to clean the wheels after such use.
SATISFACTION GUARANTEED
We want you to be completely satisfied with your purchase of this product. Should you experience any difficulty in assembling or using this product, or if you have any questions, please contact our Customer Service Department: UNITED STATES – Joovy: (877) 456-5049, Hours 8:30 am – 5:00 pm Central Time.
Please log onto www.joovy.com to register your new Joovy product.