BT5511 - Beard trimmer PHILIPS - Free user manual and instructions
Find the device manual for free BT5511 PHILIPS in PDF.
User questions about BT5511 PHILIPS
0 question about this device. Answer the ones you know or ask your own.
Ask a new question about this device
Download the instructions for your Beard trimmer in PDF format for free! Find your manual BT5511 - PHILIPS and take your electronic device back in hand. On this page are published all the documents necessary for the use of your device. BT5511 by PHILIPS.
USER MANUAL BT5511 PHILIPS
All rights reserved.
20032447元1988/2007


10560606@qq.com 1234567890@qq.com


English
Danger
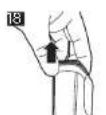
-Keep the supply on tcry Fig 21.
Warning
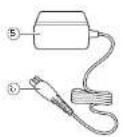
To charge the battery only use the collectable supply unit (11028503) provided with the applience.
The supply unit contains a transform: Do not use the supply unit to replace it with no other use as this can cause a hazardous situation.
This appliunare can be send by cirdemaged from 5 years and above and persons wth reduced physioal suroriry of manful caput licts or arce expenience and knowledge. They have been given supervision or instruct onore in ng use of the appliance in a safe way, and understand the hazards involved. Children shall not play with the appnice. Cleaining one user manntanee stll not be made by children under supervision.
Always umput the spoilace before you can't under the sun.
Abeve cckh this apnace before you use it Do not use the apoliceff is dargher as this may cause injury. Always politos a
Darranged pain with one of the original lyes. This appliance contains battle force that are non
Do not open the appliance to replace the rechargeable battery.
Caution
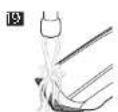
- Never Increases the charging speed in water and does not stop it (see the Tao [2]).
- New Inmerse the lopulation in water. Do not use the appliance in the better or sower.
New use wate houde. Use 60°C to rinse the appliance.
Only use this appliance for the intended purpose.
For hygienic reasons, the capulature should only be used by one person.
Do not use the supply unit in near-well.
Suggest that conditions are different than those to prevent prepa- - Never use compressed or cooling fluids
- abrasive cleaning aims for aggressive liquids such as petrol,柴油 to clean the appliance.
Electromagnetic fields (EMF)
The Philips appliance compares with all applicable standards and regulations regarding exposure to electronic magnetic fields.
General
This substance can be safely cleaned under the Jan. 19, 2013:
The supply unit is suitable for various processes ranging from 100 to 240 vols.
The supply unit transforms 100-240 volts to a safe low voltage of less than 21 volts.
Introduction
Congrats on your success and welcome to! Ptoo. To fully benefit from the support that Primers helps register your product at www.phltpis.com/welcome.
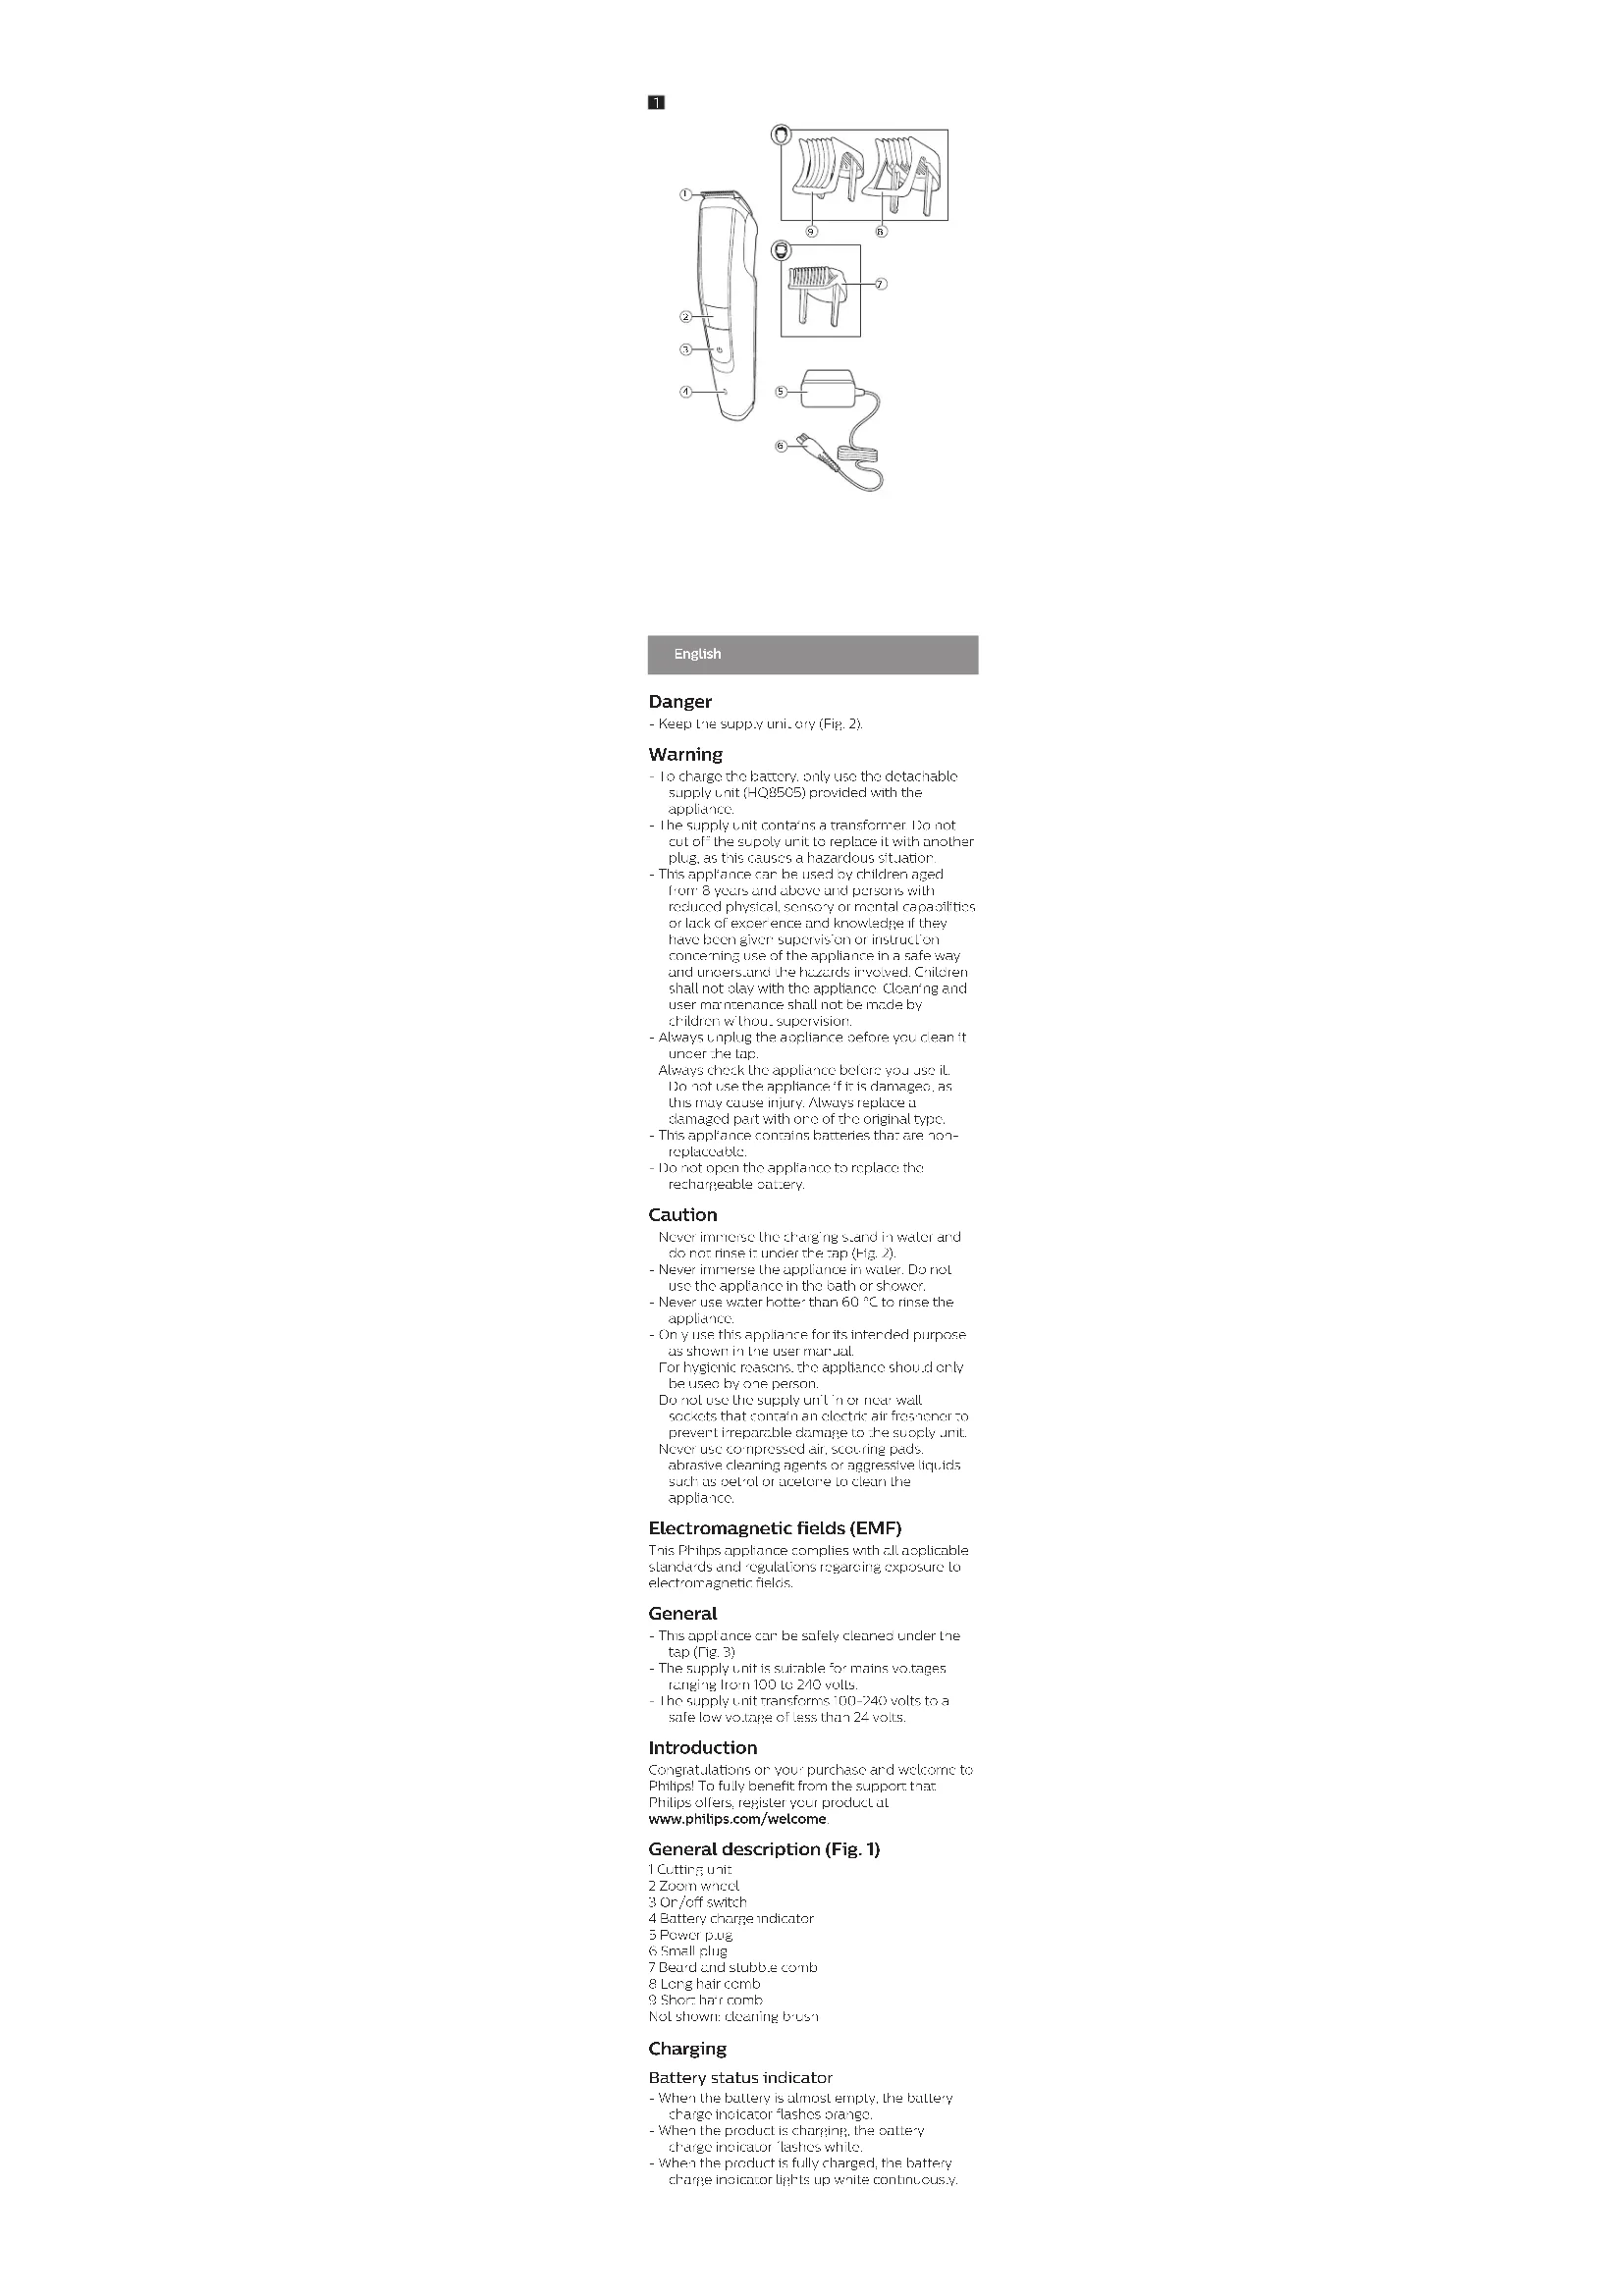
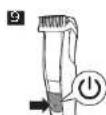
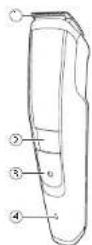
General description (Fig. 1)
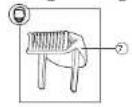
1Cutting unit:
2.2017年1月1日
3078+5%tch
B. 与它们的差
- Power block
5
7Bae a n 1n bhe e cmb
B Long hair corneal
9 short bar coro.
Not shown cleaning, brush
Charging
Battery status indicator
- when the battery turns empty, the battery changes in drain/flushes/charges.
When the electronic is charging, the battery charge indicates flashlights white
When the circuit is fully charged, the battery charge information lights up while continuously
Note After approx. 30 minutes, the light goes on a tornadoy day.
Charging with the power cord
Change the product fully before you... set it for the first time and after a long period of use.
-
Changing or using the product properties below 35^ (40°F) or higher than 35^ (95°F). Adversity unless the lifetime of the battery.
-
It the product is subjected to a major change in temperature, pressure or hand by lot. The product actiinal for 30 minutes before use
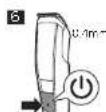
I takes approximately four to fully charge theproduct . When it ’ s fully charged , the product hasacordoussecuring time of up to 200 minutes.1 May ensure the product is lurned off
2 Insert the small plug into the product one out. The power plug in any DC/AC unit (Fig 7)
3 After change, remove the power put from the wall. I.e., and out the small ohm out of the product
Note: An adaptor plug may be necessary for cord ... usage in some foreign countries ... see an attachment plug adapter of the proper ... configuration for the power outlet.
Using the product
Always check the product and all accessories before using. Do not use the product or any accessory If it is damaged, as this may cause injury. Always replace a damaged part with one of the original type.
- Use this product for its intended use. Use as described in this manual. For hygienic purposes, the product should only be used by one person. Note: this appliance can be used without cord or when it is connected to the wall or set (Fig 3).
Turning the product on and off
- Press the on/off button once to turn the production order off (Fig. 6).
Beard trimming
Trimming with guard
Note: When you turn for the first time, start all long-term settings that are on or near what you are used to. To familiarize yourself with this product.
1is pdd. 1nre wth one bcr and subbe 2,36
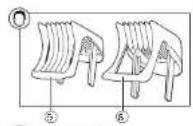
Use the printing gird and attach led to the colling element to fit your board, scrobie and muscels in your preferred style. Turn the zoom wheel to choose from 10 length sections ranging from 0.7mm (1/64 m) to 10mm (2/64 m) (Fig. 8). The length sections are mentioned as the back of the guava.
1Maesure the product is turned on
2 Slicc the guard into the guiding groove on holl sles in he proofo (fice) (Fig 7)
3 turn the zoom wheel to select the desired length) seling (Fig 2).The selected hong setting is shown on the front of the canoes. For the need and slubbing guard, the silver color refers to length settings ranging from 0.4mm (1 / 6) to 10mm(25 / 64) (Fig 8).
4 Turn on the product (Fig. 9)
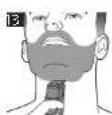
: to min max, effectively, view the product against the har growth direction. Make sure that the surface of the guardways stays in contact with the skin (Fig. 10). Since all hards do not grow in the same direction, you may want to try different trimming directions (i.e. upwards, downwards, or across). Practice is best for your exposure!
- A man's hair has grown in the guard,
remove it from the product and blow and/or shake out the pins.
The train depregnant removes hair from the guard.
The selected hair length setting does not change when "the guard is removed." - Turn off and clean the product after each use (see Cleaning).
Trimming without guard
If you mnr without the guare (Gmm or 1/8 in) your hair scw close to the skin Yen can use he tmmring head without the guare too.
- Del net hair
Tnr 3pc of neck
- -
1 Ma: e sure the proo: is turnoe
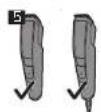
2 Pull the comr to T'aroud (T).
- Never pull at the foible of the comr. Always pull.
3 Turn on the product.
4 Make well controlled movements, touch the hair lightly with the rinner.
For a comfortable trim close to your skin, place hea little bit of the rinning need against your skin and make strokes in the desired direction (Fig 1D).
For contouring, no one the trimming need perpendicular to the skin and involve the trimming head upwards or downwards with gentle pressure (Fig 1B).
5 Turn off and clean the product after use (Shell Cleaning).
Hair clipping
-
For bed nets, use the product on clean, dry hair. Do not use cotton fresh vs. cleaned hair.
-
Theorem: Show that, combining the pair in the direction of a line, we have
-
Wher you, I think for the first time said a little highest onthc section to familiarize yourself with the good.
To achieve optimal diapian resu, always move the product slowly through the hair against the direction of hair growth.
1Maesuretheprodiscisturnenof
2 slice to combine into the cutting proceeds on halo sice n .the product (flic 1Fig.7
3Turn the zoom wheel, use the desired
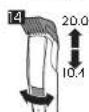
length setting. The selected length settings are shown on the line or be provided. Short card guard select a complete setting for the silver color ranging from 0.2mm (7/8 to 13mm (25/64 m).
- cng: nigd gndseel: leg: nseting from the buc color, rarrin: 13.4mm (5/32 in) to 20.1mm (29/32 in) (fig. 14).
4Turn on the product (9,9)
a Move the product slowly through the funnel, making sure the surface of the guard stays in contact with the skin and gait.
Reglarily remove out bars from free gerd. If a lot of bars have accumulated in the gerd, detach free gerd from the above and blow one or more of the bars out of it.
5 "Turn on Line clear: the proceed at each use See Clear"
for Wi to down the setings you have used to create a new profile as a reminder for future cropping success ons.
Cleaning
Never use scouring pads: abrasive cleaning agents or aggressive liquids such as potrol or acetone to clean the appliance.
Clean the product after use.
1 turn of the product and disconnec it from he well.c.u.t.c.
- Were I the stings of the product with a dry cloth?
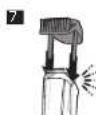
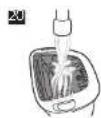
3 Remove the comr (gT) into clean with the cleaning brush and/or rinse it under the tap (gT).
4 Clean the curing joint with the cleaning brush and use a microwill under bed lamp (Fig. 12).
5 Carefully shape of excess water and let the all parts dry completely.
Deyor dry the trimmer tooth with a towel or tissue, as this may damage the trimmer teeth
8 After recalling read each the comb (Fig. 7) to the product
Every 3 months: cleaning trimming head connector
- Turn off the product and disconnect it from the wall cable.
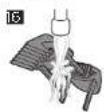
Remove he guard (Fig 11)
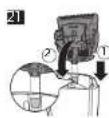
3 PuIhe cutting unit of the product (F, 12).
41 1
5Clean the stains of the trimmings head with the cleaning brush and rinse it, then he up (Fig.7).
c carefully make off excess water and let it pass dry completely.
- Press the Frimming head back on the product... Malsus, the projection on the back of the Frimming head (fla exactly once it notch in the hair chamber [Fig. 2]).
Ordering accessories
To buy accessories or spare parts visit www.philips.com/parts-and-accessories or go to yourPhilips dealer. You can also contact: Inc. Pricip's Consumer Care Center in your country (see the international warranty leaflet for contact details)
Disposal
This product contains acetylated NMP-battery which m, st be disposed of properly
Luck your bud, town or city of this for battery disposal information. You can also call 1888-22-976-031. www.calzrecycle.ca for battery drop-in all our sites.
or cass sta'cc visit our website at www.philips.com/support-us/1888-22-3505-031
- Your procud is designed and manufactured with high quality materials and components, which can be recycled and re-used for recycling information, please contact your local waste management facilities or visit: www-recycle.philips.com
Warranty and support
I you need information on support please www.phitips.com/support or csl toll free: 1-806-800-331
Warranty restrictions
Philips North America LLC (USA) and/or Philips Electronics Ltd (Canada) warrants its product for a period of two years after the date of purchase. If any reflected due to fully materials and workmanship occurs within this two year warranty period, Philips Nordic America LLC (USA) and/or Philips Electronics Ltd (Canada) will report or republish the corrected list of products.
- Philips North America LLC (USA) and/or Philips Electronics Ltd (Canada) will only pay for repair or replacement. A convincing proof is provided, for instance by means of a record, that the city on which service is delivered is within the warranty period. Parts that are subject to wear (such as cutting parts and stinging items) are not covered by the terms of the International at-warranty.
The warranty is no vioho f a deficienoe du to damage caused by nonuse, poor maintenance (e.g. parts blocked by scale) or if alterations or repairs have been carried out by persons not authorized by Prices North America L.C.(USA) and/or Philios Electronics Ltd (Canada).
or the applicatior to be used correctly, the user should clearly adhere to all instructions included in the User manual, and should always from any time of use consults, are described as undesired or which are worried against in the user manual.
These warranty restrictions do not affect your Halukary rights.
Danger
-GeTeIbeOhchalirnEion nser (ig.2)
Avertissement
- Your clinic needs to calculate the approximate annual rate of 5% per year on March 31st (in fig. 2).
Taille de la barbe
1 Assure you are up to date.
2 Fix dates for the season, day and time, numbers, dates, etc.
3 Do not put products (your children) on a list.
4 Check if they are all finished.