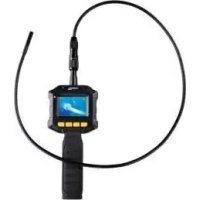
PEK 2.3 A1 - Camera POWERFIX - Free user manual and instructions
Find the device manual for free PEK 2.3 A1 POWERFIX in PDF.


| Product type | Flexible gooseneck endoscope camera |
| Brand | Powerfix |
| Model | PEK 2.3 A1 |
| Dimensions of the handle (L x W x H) | 257 x 92 x 44 mm |
| Gooseneck length | Approx. 1050 mm (including camera head and extension foot) |
| Camera diameter | 8 mm |
| Weight (with batteries) | Approx. 407 g |
| Power supply | 4 AA/LR6 1.5 V batteries (6 V) |
| Battery life | Approx. 8 hours |
| Display | 5.9 cm (2.31 inch) color TFT, resolution 960 x 240 pixels |
| Camera lighting | 4 white LEDs adjustable to 8 levels |
| Screen brightness | Adjustable to 8 levels |
| Image rotation | 180° with mirror effect (4 views) |
| Video output | 3.5 mm jack socket for TV connection (cable not included) |
| Gooseneck waterproofing | IP67, max. immersion 90 cm in aqueous liquids (gooseneck only) |
| Included accessories | Magnet, hook, double hook, mirror, attachment (2 pieces), hard case, 4 AA batteries, instruction manual |
| Maintenance and cleaning | Clean with a dry or damp cloth, without solvents or caustic detergents |
| Safety | Do not use on humans or animals; do not open the housing; observe battery polarity |
| Spare parts and repairability | No user-serviceable parts; contact technical support in case of malfunction |
| Warranty | 3 years (excluding batteries and consumables) |
Frequently Asked Questions - PEK 2.3 A1 POWERFIX
User questions about PEK 2.3 A1 POWERFIX
0 question about this device. Answer the ones you know or ask your own.
Ask a new question about this device
Download the instructions for your Camera in PDF format for free! Find your manual PEK 2.3 A1 - POWERFIX and take your electronic device back in hand. On this page are published all the documents necessary for the use of your device. PEK 2.3 A1 by POWERFIX.
USER MANUAL PEK 2.3 A1 POWERFIX
Safety instructions 6
First use 10
Overview of the controls and button functions 10
Inserting/replacing the batteries. 11
Attaching/detaching the gooseneck 12
Use of the device 13
Switching the endoscope camera on and off 13
Lighting 13
Screen brightness 13
Changing the display. 13
Video-out function. 13
Screen displays. 15
Fitting the attachments. 16
Storage when not in use. 17
Troubleshooting 17
Cleaning 17
Environmental and disposal information 17
Conformity information 18
Copyright 18
Warranty and servicing advice. 18
Introduction
Thank you for purchasing the endoscope camera PEK 2.3 A1. The endoscope camera with a flexible gooseneck and adjustable LED lighting can be used in inaccessible places to aid inspection and fault analysis. You can use the built-in video-out port, for example, to display the image on a TV.
Please read the following instructions carefully before using the device, even if you are familiar with the use of electronic devices.
Store these instructions in a safe place for future reference. If you pass on the device to someone else, be sure to always include these instructions.
The operating instructions are an integral part of the device.
Symbols used and their meaning

DANGER! This symbol in conjunction with the "danger" note indicates an imminent dangerous situation which, if not prevented, could result in serious injury or even death.

WARNING! This symbol in conjunction with the "warning" note indicates important information for safe use of the device and the safety of the user.

This symbol indicates other important information on the topic.
Intended use
The endoscope camera PEK 2.3 A1 is an optical inspection device which is not approved for medical use.
The endoscope camera with a gooseneck and LED lighting can be used in inaccessible places to aid inspection and fault analysis.
The gooseneck is watertight and suitable for use in aqueous liquids provided the immersion depth does not exceed 90cm . Please note that only the gooseneck may be exposed to moisture, and not the control panel (TFT screen with handle). Use of the device in oils, lyes or acids is not permitted.

DANGER! The endoscope camera is not suitable for medical applications or use and should never be inserted into body orifices.
The manufacturer does not assume any liability if
The endoscope camera is not used in accordance with its intended purpose.
Material damage or personal injuries are caused by incorrect use of the endoscope camera or non-observation of these instructions.
The endoscope camera is damaged, incomplete or modified prior to connection and use.
This is an information technology device. It may only be used for private purposes, but not for industrial, commercial or medical purposes.
Please observe the regulations and laws in the country of use.
Supplied items
Remove the device and all accessories from the packaging. Remove all packaging material and check that all parts are complete and undamaged. In the event of an incomplete or damaged delivery, please contact the manufacturer.
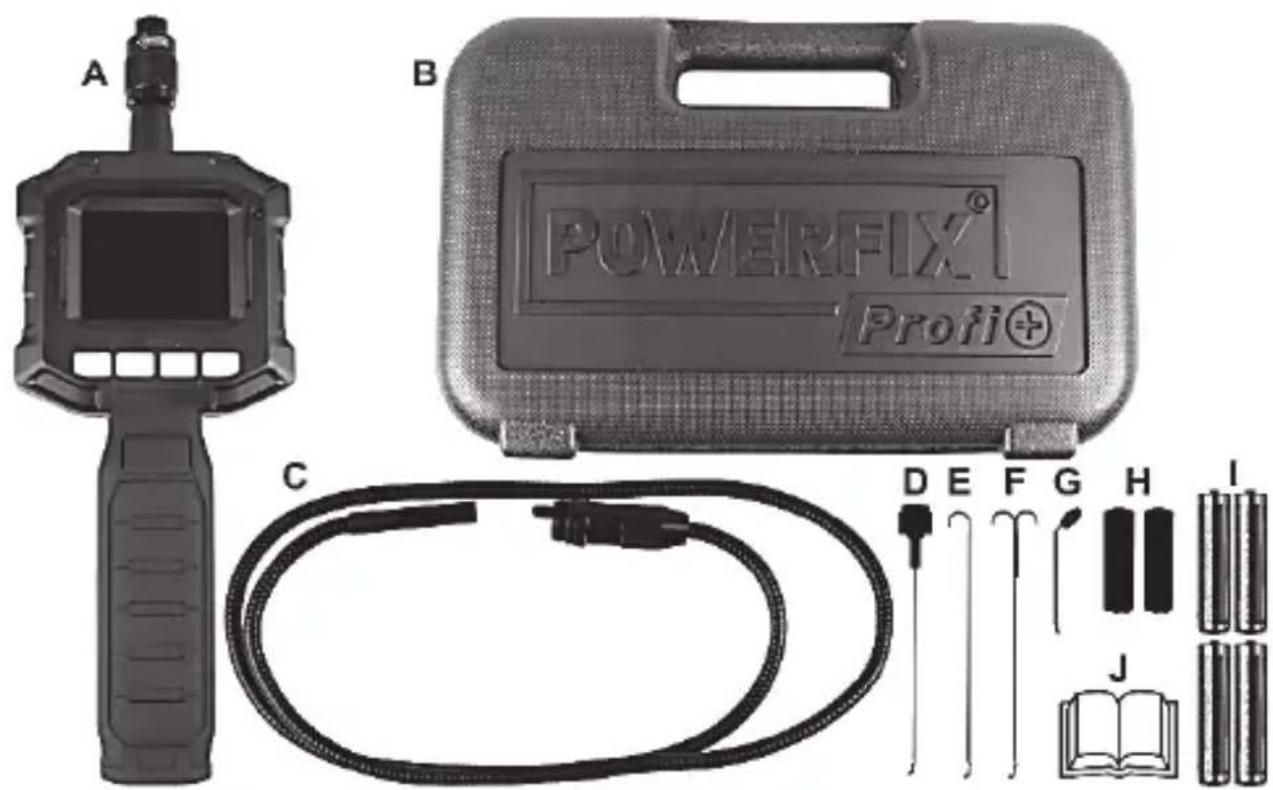
A Endoscope camera PowerFix PEK 2.3 A1
B Hard shell case
C Flexible gooseneck with camera head and LED lighting
D Magnet camera attachment
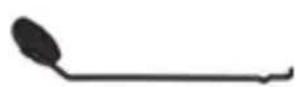
E Hook camera attachment
F Double hook camera attachment
G Mirror camera attachment
H 2 attachment fixtures
1 4 x 1.5V AA / LR6 batteries
J These operating instructions (symbolic representation)
Technical data
| TFT screen 5.9cm / 2.31" screen size | |
| Resolution 960 (RGB) x 240 or | 320 (pixels) x 240 |
| Camera lighting 4 white LEDs | (with 8-stage adjustment) |
| Illuminated display with 8-stage adjustm | ment of brightness |
| Power supply 6V | 4 x 1.5V AA / LR6 batteries |
| Run time approx. 8 hours | |
| Ambient/outside temperature -10°C to +50°C | +50°C |
| Permissible storage conditions -10°C to +50°C, max. 85% rel. air humidity (non-condensing) | |
| Total length of goosenck with camera head and adapter base | approx. 1,050mm |
| Endoscope camera diameter 8mm | |
| Flexible goosenck Ingress Protection Rating | IP 67 |
| Weight (including batteries) approx. 407 g | |
| Dimensions of hand unit (W x H x D) 257 x 92 x 44mm |
The technical data and design may be changed without notification.
Safety instructions
General information

DANGER! The endoscope camera is not approved for medical use! There is a risk of a potentially fatal injury!
- If smoke is produced, or there are any unusual sounds or smells, the device should not be used until it has been inspected by authorised service personnel. In this case, switch off the device immediately and remove the batteries.
Use of the camera on humans and animals is not permitted. The user, and not the manufacturer, is responsible for any personal injury or material damage resulting from incorrect use.

DANGER! Children and persons with disabilities
Electrical devices do not belong in the hands of children. Persons with limited physical, sensory or mental abilities should also only use electrical devices appropriately. Never allow children or persons with disabilities to use electrical devices unsupervised unless they have been instructed accordingly or are supervised by a person responsible for their safety. Children should always be supervised to ensure that they do not play with this device.
Always keep plastic packaging out of reach also.

It poses a suffocation risk!

DANGER! Screen
Do not exert any pressure on the display and keep sharp objects away from the display. There is a risk of injury if the display is broken. Wear gloves if you are gathering broken parts and contact the manufacturer if necessary. If the screen becomes scratched or damaged in any way, take special care to ensure that no liquid leaks from the screen.
If liquid has leaked, follow the instructions below:
- If the liquid comes into contact with your skin, wipe it off with a clean cloth and rinse the area of contact with a large amount of water. Consult a doctor if necessary.
- If the liquid comes into contact with your eyes, rinse them with running water for at least 15 minutes and then go to a hospital immediately. Consult a doctor if necessary.
If you swallow the liquid, first rinse your mouth with water and then drink a large amount of water. Consult a doctor immediately!

WARNING! Operational safety
The housing of the endoscope camera must not be opened because it does not contain any parts that require maintenance. Ensure that the device is not subject to extreme temperature fluctuations, since this could result in condensation and electrical short circuits. If the device was subjected to extreme temperature fluctuations, however, wait (approx. 2 hours) until the device has reached ambient temperature before use.

DANGER! Batteries
Always ensure correct polarity of the batteries. Please note the markings on the batteries and in the battery compartment. Never try to recharge batteries and never throw them into an open fire. Never use different batteries (old and new, alkaline and carbon, etc.) at the same time. Remove the batteries if you will not
be using the device for an extended period of time. In the event of improper use, there is a risk of explosion and leakage.
Batteries may not be dented or opened as leaking chemicals can cause injuries. In the event of skin or eye contact with chemicals, they must be immediately rinsed with generous amounts of water and a doctor must be consulted. Batteries and small parts may cause choking resulting in death or serious injury. Store the batteries in a safe place. If a battery is swallowed, seek medical help immediately.

WARNING! Operating environment/Environmental conditions
Keep the control panel (TFT screen with handle) away from moisture and ensure that no foreign objects penetrate the device. Never place any objects filled with liquids, for example, vases or drinks, on or near the device. Avoid vibrations, dust and heat, and ensure that the device is not exposed to direct sunlight or bright artificial light. The device could be damaged as a result.
Ensure that no fire sources (e.g. burning candles) are placed on or near the device.
First use
Overview of the controls and button functions
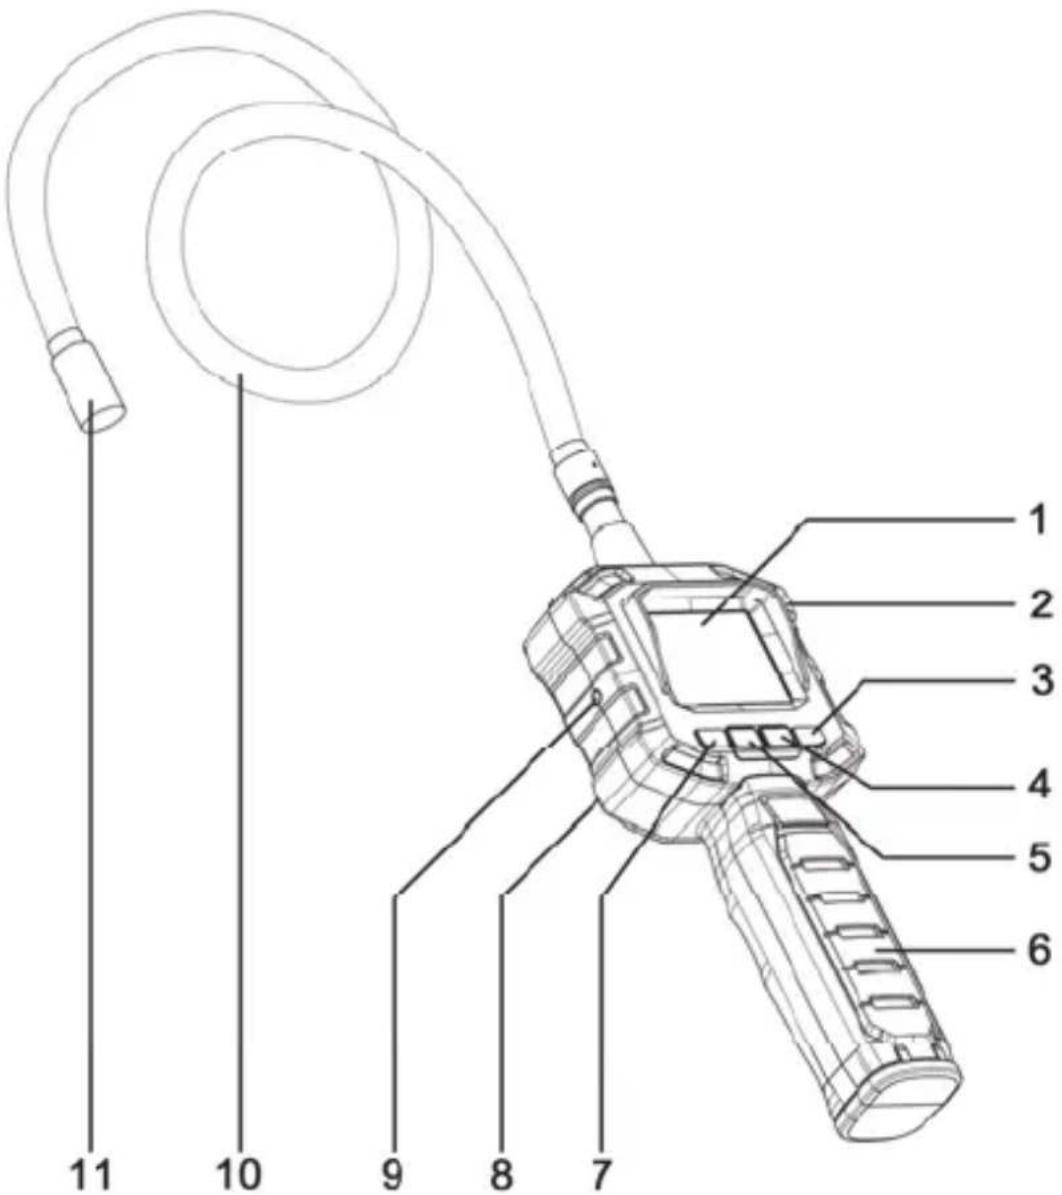
- Screen
- Power indicator
- On/off switch
- View/rotate image button
- Camera head illumination button
-
Handle
-
Brightness adjustment display button
- Battery compartment (at the back of the device)
- Video-out port
- Flexible gooseneck
- Camera head with LEDs
Inserting/replacing the batteries
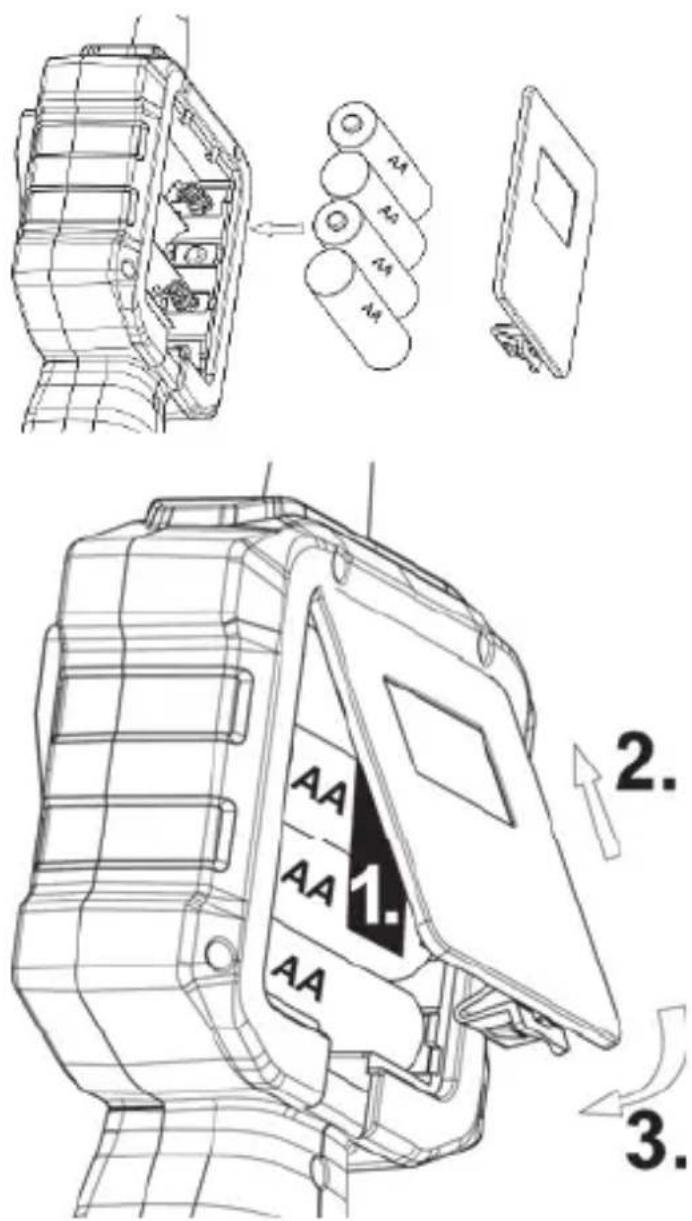
Ensure that the camera is switched off. The battery compartment [8] is located at the back of the device.
Remove the battery compartment cover by pressing the release mechanism and lifting the cover upwards. The ribbon in the battery compartment is intended to facilitate the subsequent removal of the batteries. When inserting the batteries, make sure that this ribbon runs completely under all 4 batteries and that you can still access the end of the ribbon after the batteries have been inserted.
Insert 4 x 1.5V AA / LR6 batteries with the correct polarity in the battery compartment. Please note the markings in the battery compartment and on the batteries.
- The end of the ribbon should lie smoothly between the batteries and battery compartment cover.
- Close the battery compartment by first inserting the two plastic tabs of the battery compartment cover into the slots provided for this purpose on the housing of the endoscope camera.
- Then press it downwards until it audibly engages.
Attaching/detaching the gooseneck
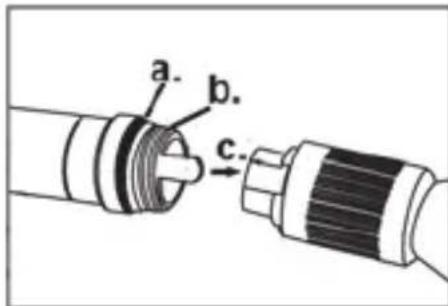
Proceed as follows:
To ensure the tightness of the screw connection, remove any impurities on the rubber ring (a.) and on the screw thread (b.) with a slightly damp cloth. To maintain the flexibility of the rubber ring, you should lubricate it occasionally, for example, with Vaseline. The gooseneck can only be attached in one direction due to the polarity protection feature. Insert the polarity protection for this purpose into the slot provided (c.).
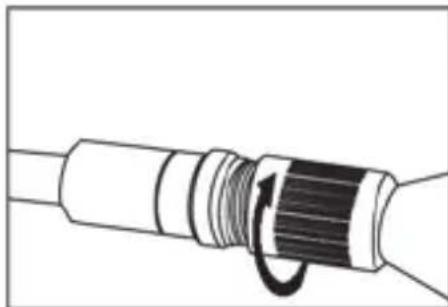
The goosenec can then be screwed on. Turn the screw connection to the right until it is firmly secured.

To detach the gooseneck, turn the screw connection to the left until it is released. The gooseneck can then be pulled off by exerting a little force.
Use of the device
Switching the endoscope camera on and off
The endoscope camera is switched on and off by pressing the on/off switch [3] for approximately 2 seconds. The power indicator [2] lights up green and, after a short delay, the image is shown on the screen [1].
Lighting
The camera head is equipped with 4 LEDs. This lighting can be switched on with the camera head illumination button [5]. This button can also be used to gradually increase the brightness of the LEDs by pressing it several times. 8 different levels can be set. When the highest level is reached and the camera head illumination button [5] is pressed again, the lighting switches itself off.
Screen brightness
The brightness of the screen can be changed with the brightness adjustment display button [7]. The brightness of the screen is gradually increased when this button is pressed several times. 8 different levels can be set. When the highest level is reached and the brightness adjustment display button [7] is pressed again, the brightness adjustment is reset to the default value.
Changing the display
The camera image can be rotated by 180^ and mirrored vertically or horizontally by pressing the view/rotate image button [4]. This setting enables you to display four different views of your image. If the display is changed, the default display is shown after the camera has been switched off and then switched on again.
Video-out function
You can use this function, for example, to display the images of the camera on a TV. Depending on the device on which you want to perform the playback, you will require a connection cable which must have a 3.5mm jack plug on one side for connecting to the video-out port [9] of the endoscope camera. The other connector may vary depending on your playback device. For further
details, please read the user manual for your playback device. A connection cable is not included in the items supplied with the endoscope camera.
To use the video-out function, proceed as follows:
- Switch off the endoscope camera.
- Connect the video-out port [9] of the endoscope camera to your playback device with a suitable connection cable. Note the corresponding user manual to adjust your playback device correctly.
Note: Please use only a high-quality AV cable with ferrite core (not supplied) in the video output.
The illustration shows a sample photo.

- Switch on the endoscope camera with the on/off switch [3]. The image is now displayed on both the screen of the endoscope camera and on your playback device.

Please note that pressing the view/rotate image button [4] and brightness adjustment display button [7] only affects the screen display of the endoscope camera. Pressing these buttons is irrelevant for the display of the playback device in use, for example, TV.
Screen displays
The following displays are shown on the screen:
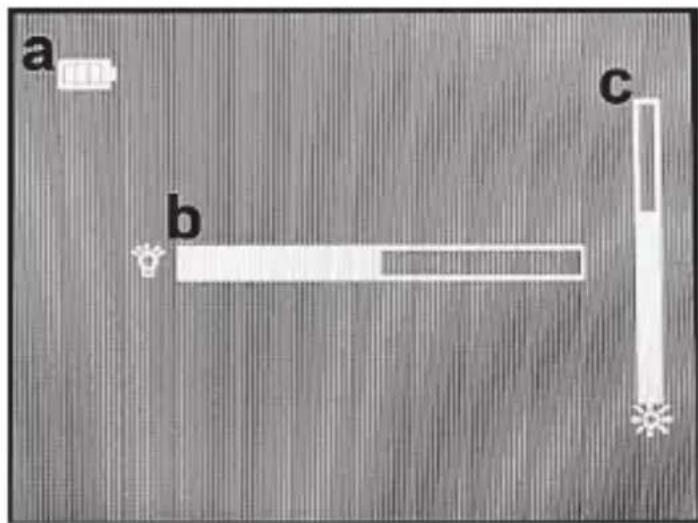
a Battery charge level indicator (permanent)
b LED lighting of the camera head (display for approximately 3 seconds when pressing the camera head illumination button [5]).
c Screen brightness (display for approximately 3 seconds when pressing the brightness adjustment display button [7]).
Fitting the attachments
The device is supplied with the following attachments/fixtures:

Magnet [D] Hook [E]


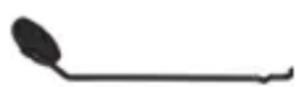
Double hook [F] Mirror [G]
Attachment fixture [H]
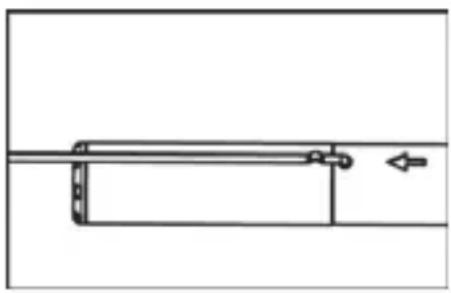
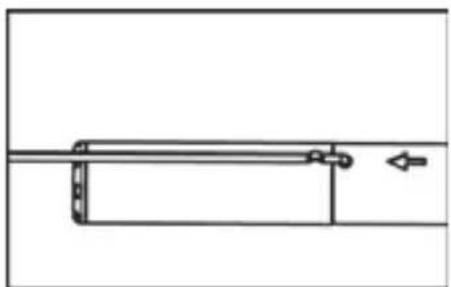
Place the small barbed hook of the attachment into the opening provided at the end of the gooseneck just below the camera head.
Note: The attachment fixture of magnet and double hook attachments must be slid onto the attachments first due to their size.
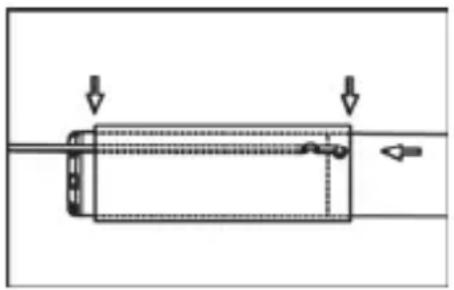
Then slide the attachment fixture carefully and completely over the camera head. Ensure that the attachment is positioned in the slot provided in the attachment fixture.
Storage when not in use

If you will not be using the endoscope camera for an extended period of time, remove the batteries to avoid leakage.
Keep the clean, dry endoscope camera and accessories in the supplied hard shell case (B) in a cool, dry place.
Troubleshooting
The device cannot be switched on
- Batteries may be empty, replace the batteries.
- Check whether the batteries are inserted correctly.
No image in the display/distorted images
Check the connection between the gooseneck and hand unit. Remove the gooseneck and then attach it again as described in the section "Attaching/detaching the gooseneck".
Distorted images on an external screen, for example, TVs
Check that the cable is connected. You may have to use a different or better cable.
Cleaning
Clean the device with a dry cloth if soiled, and use a slightly damp cloth to remove stubborn dirt. Make sure that no major pressure is exerted when cleaning the display to avoid damaging it. Do not use any solvents, corrosive or gaseous cleaning agents. Ensure that no moisture penetrates the control panel.
Environmental and disposal information
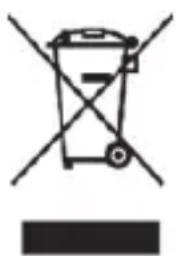
When this symbol appears on a product, this indicates that the product is subject to the European Directive 2012/19/EU. All electrical and electronic devices must be disposed of separately from household waste at designated disposal points.
The correct disposal of old devices in this manner will prevent environmental pollution and human health hazards. For further information about proper disposal, contact your local authorities, waste disposal office or the shop where you bought the device.
Remember to protect the environment. Used batteries should not be disposed of in domestic waste. They must be taken to a collection point for old batteries. Please note that only discharged batteries may be deposited in collection bins for portable batteries. Care must be taken to ensure that batteries that are not fully discharged do not short circuit.
Dispose of the packaging in an environmentally compatible manner. Cardboard can be put out for municipal paper collections or brought to public collection points for recycling. Films and plastic used for packaging the device are collected by your local disposal services and disposed of in an environmentally compatible manner.
Conformity information
This device meets the basic requirements and other relevant regulations of the EMC Directive 2004/108/EC as well as the RoHS Directive 2011/65/EU. The corresponding Declaration of Conformity can be found at the end of these instructions.
Copyright
All information contained in these instructions is subject to copyright and is provided for information purposes only. It is only permitted to copy or duplicate data and information with the express and written consent of the author. This also includes commercial use of the content and data. The text and illustrations are based on the state of the art at the time of printing.
Warranty and servicing advice
Warranty of TARGA GmbH
This device is sold with three years warranty from the date of purchase. Please keep the original receipt in a safe place as proof of purchase. Before using your product for the first time, please read the enclosed documentation. Should
any problems arise which cannot be solved in this way, please call our hotline. Please have the article number and, if available, the serial number to hand for all enquiries. If it is not possible to solve the problem on the phone, our hotline support staff will initiate further servicing procedures depending on the fault. Within the warranty period the product will be repaired or replaced free of charge as we deem appropriate. No new warranty period commences if the product is repaired or replaced. Consumables such as batteries, rechargeable batteries and lamps are not covered by the warranty.
Your statutory rights towards the seller are not affected or restricted by this warranty.
Service

Phone: 0207-3650744
E-Mail: service.GB@targa-online.com

Phone: 01-2421583
E-Mail: service.IE@targa-online.com

Phone: 800-62175
E-Mail: service.MT@targa-online.com

Phone: 800-92496
E-Mail: service.CY@targa-online.com

Manufacturer
TARGA GmbH
Coesterweg 45
59494 SOEST
GERMANY
Sisallysluettelo
Montering of adaptere 70
Montering of adaptere
Folgende adaptere/fastgorelser medfolger ved levering:

Magnet [D] Krog [E]

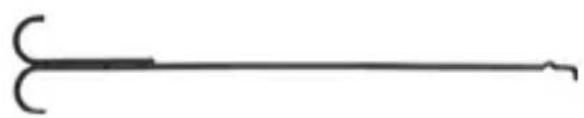
Dobbeltkrog [F] Speil [G]

Adapterfastgorelse [H]
EU-Declaration of Conformity
Address: Targa GmbH Coesterweg 45 59494 Soest, Germany
Product: Endoscope camera
Model: Powerfix PEK 2.3 A1
IAN: 107122
The product complies with the requirements of the following European directives:
2004/108/EC Electromagnetic Compatibility
2011/65/EU Restriction of the use of certain hazardous substances in electrical and electronical equipment
Compliance was proved by the application of the following standards:
EMC: EN 55022:2010 EN 55024:2010
ROHS: EN 50581:2012
Year of CE marking: 2014
Soest, 29th of December 2014
Matthias Klauke, Managing Director


- Introduction
- Symbols used and their meaning
- Intended use
- Supplied items
- Safety instructions
- General information
- DANGER! Children and persons with disabilities
- Always keep plastic packaging out of reach also.
- It poses a suffocation risk!
- DANGER! Screen
- WARNING! Operational safety
- DANGER! Batteries
- WARNING! Operating environment/Environmental conditions
- First use
- Overview of the controls and button functions
- Inserting/replacing the batteries
- Attaching/detaching the gooseneck
- Use of the device
- Switching the endoscope camera on and off
- Lighting
- Screen brightness
- Changing the display
- Video-out function
- Screen displays
- Fitting the attachments
- Storage when not in use
- Troubleshooting
- The device cannot be switched on
- No image in the display/distorted images
- Distorted images on an external screen, for example, TVs
- Cleaning
- Environmental and disposal information
- Conformity information
- Copyright
- Warranty and servicing advice
- Warranty of TARGA GmbH
- Service
- Manufacturer
- Sisallysluettelo
- Montering of adaptere
- EU-Declaration of Conformity
Brand : POWERFIX
Model : PEK 2.3 A1
Category : Camera