DVC105IP - Surveillance Camera ALECTO - Free user manual and instructions
Find the device manual for free DVC105IP ALECTO in PDF.
User questions about DVC105IP ALECTO
0 question about this device. Answer the ones you know or ask your own.
Ask a new question about this device
Download the instructions for your Surveillance Camera in PDF format for free! Find your manual DVC105IP - ALECTO and take your electronic device back in hand. On this page are published all the documents necessary for the use of your device. DVC105IP by ALECTO.
USER MANUAL DVC105IP ALECTO
NL1 PRODUCTOMSCHRIJVING
8 DECLARATION OF CONFORMITY:
FRESCRIPTION DU PRODUIT
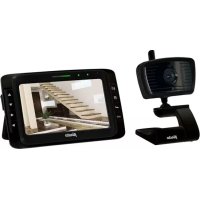
This Alecto IP-camera is a security monitor suitable for indoor use. It's often used for securing living rooms and garages, but also for observing babies, small children or pets.
The camera uses Wi-Fi to transmit its signal to your internet modem. Using a tablet or smartphone you can view the camera images and rotate the lens by swiping over the screen.
Thanks to our Real Plug & Play system and the UID code (Unique IDentification) it's very easy to establish a connection with the camera via our app. This app is available for iOS and Android and can be downloaded via the App Store or Play Store.
Refer to the user's manual of the AlectoCam app for a quick registration and/or additional information (www.alecto.nl).
After the initial setup, you can also view the camera images via the GSM internet or external Wi-Fi connections.
The camera is provided with night lighting for a clear view of any objects within 5 meters from the camera in a dark environment. Because this night lighting consists of infra-red lights, people cannot see it but it's sufficient for the camera to show clear images. However, these images are of course in black/white.
When everything is working properly, you should first change your password. The default factory password is not unique, which would allow others to use your UID code and gain unauthorised access to your camera.
2 OVERVIEW
- Lens
- Infra-red LEDs
- Indication LED
- Mounting foot
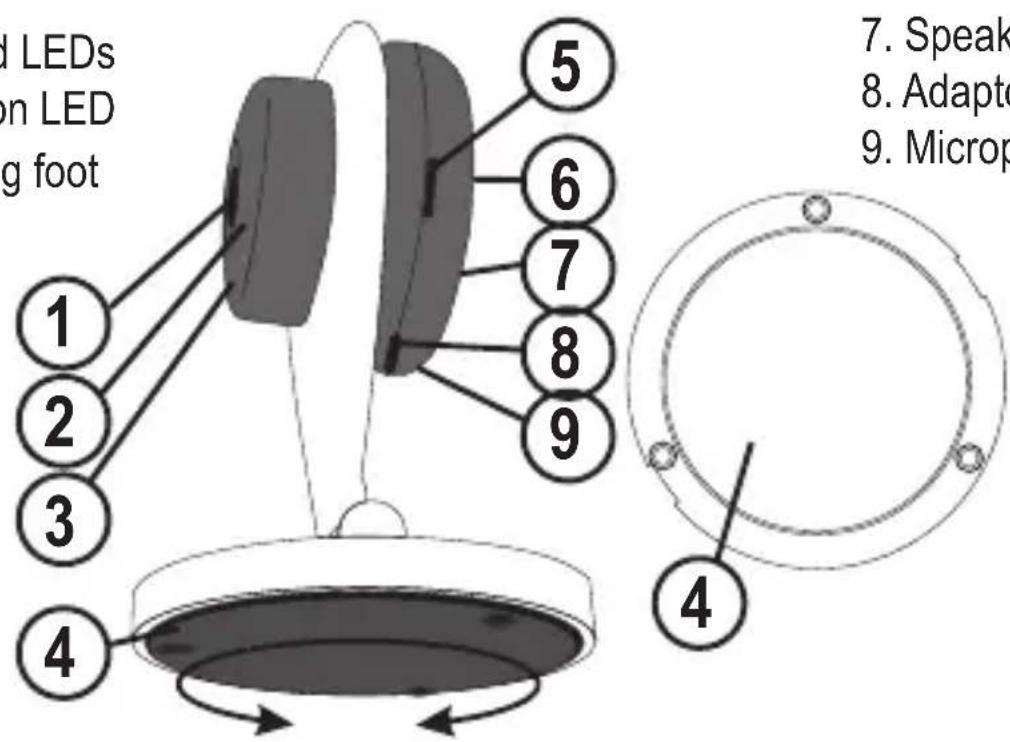
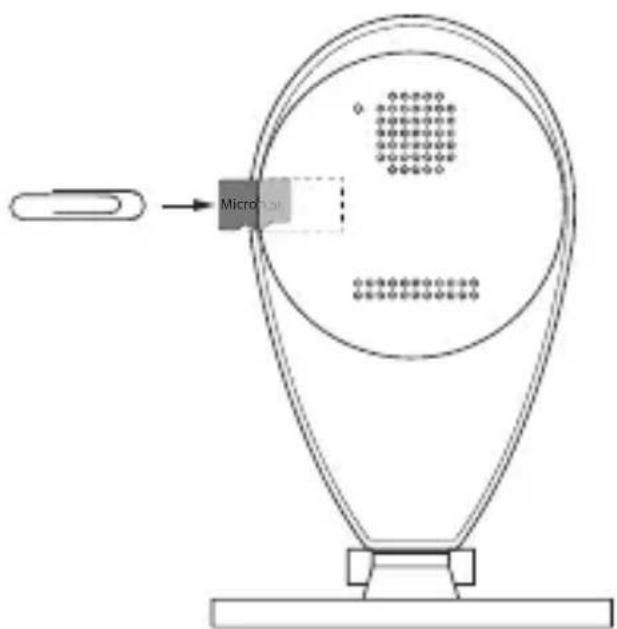
- MicroSD card slot
- Reset
- Speaker
- Adaptor input
- Microphone
3 QUICK START GUIDE
See attached Quick Start Guide for the quick explanation of the installation of your camera.
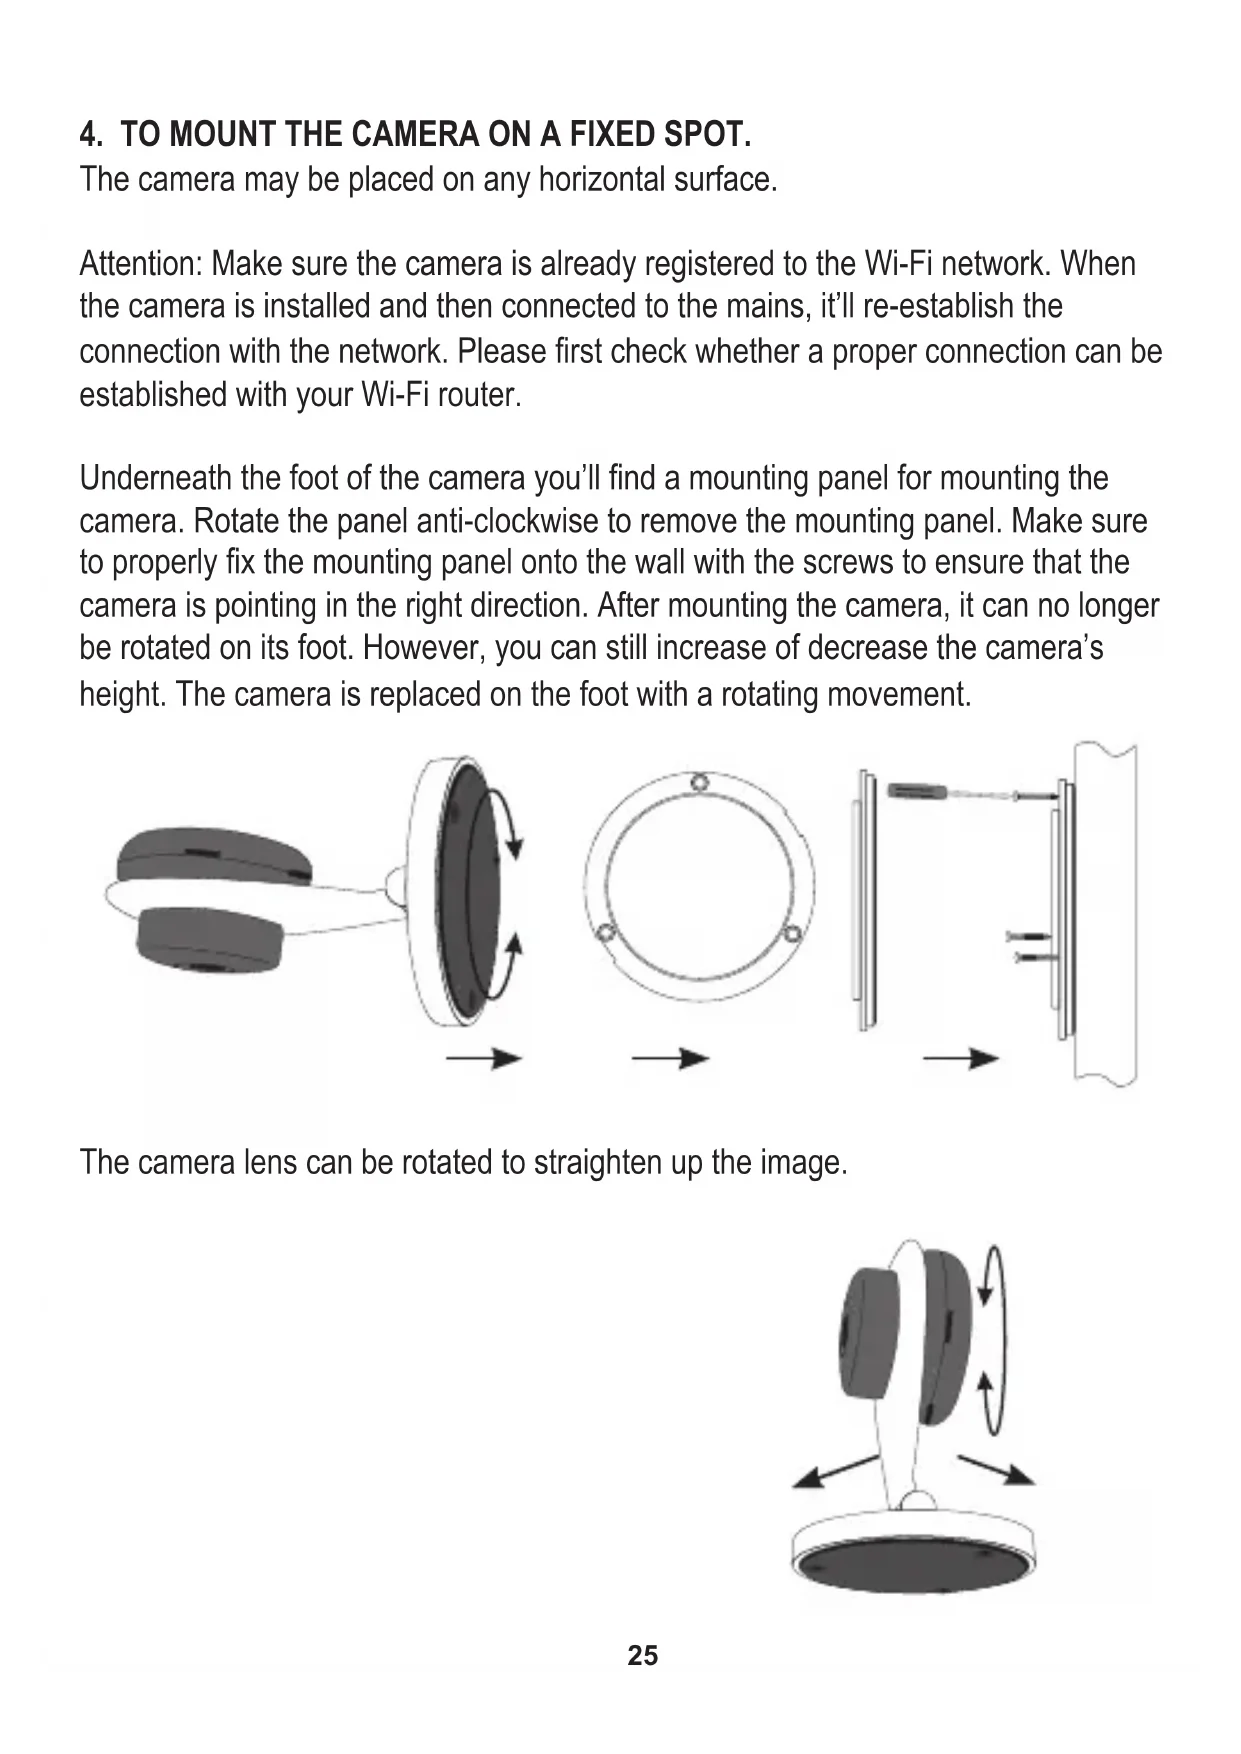
4. TO MOUNT THE CAMERA ON A FIXED SPOT.
The camera may be placed on any horizontal surface.
Attention: Make sure the camera is already registered to the Wi-Fi network. When the camera is installed and then connected to the mains, it'll re-establish the connection with the network. Please first check whether a proper connection can be established with your Wi-Fi router.
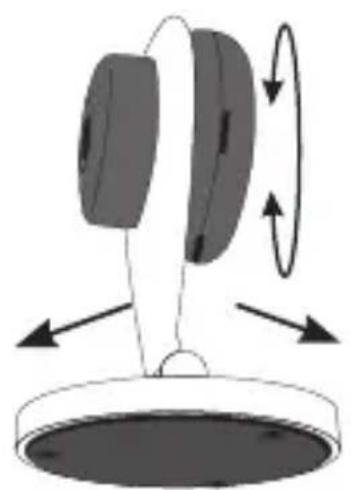
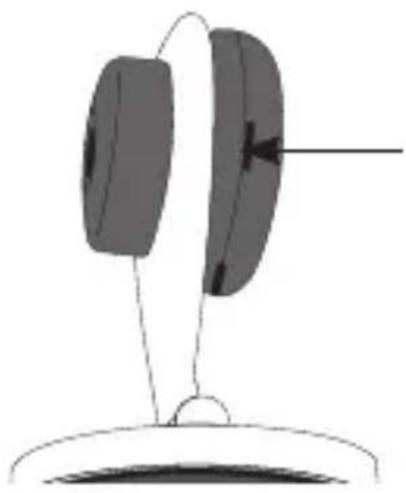
Underneath the foot of the camera you'll find a mounting panel for mounting the camera. Rotate the panel anti-clockwise to remove the mounting panel. Make sure to properly fix the mounting panel onto the wall with the screws to ensure that the camera is pointing in the right direction. After mounting the camera, it can no longer be rotated on its foot. However, you can still increase of decrease the camera's height. The camera is replaced on the foot with a rotating movement.

The camera lens can be rotated to straighten up the image.
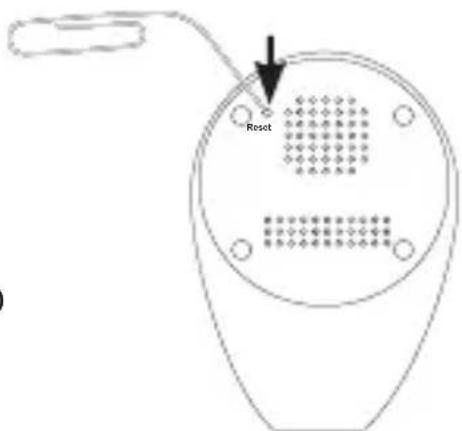
5 RESET.
When contact with the camera is no longer possible and you can no longer determine what the IP address or the port number no longer corresponds, you can externally reset the camera to restore the default factory settings.
At the rear of the camera you'll find a small hole marked 'reset'. Use a pointy object such as a paperclip to press the button inside this hole.
Press this button while the camera is starting up and keep it depressed for at least 10 seconds.
The camera can now only be reached via Wi-Fi Direct.
Now follow the registration process, see section 3.
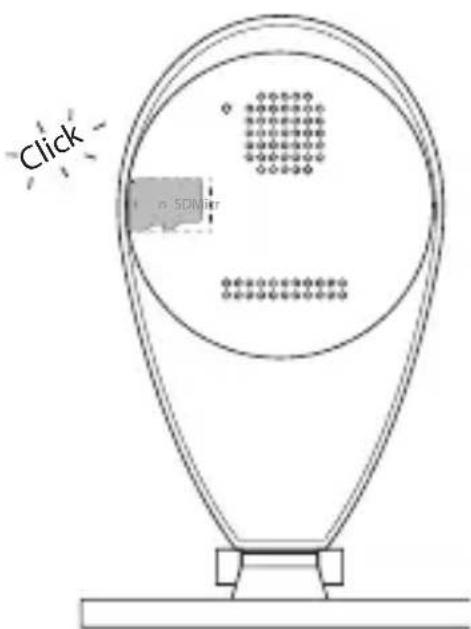
6 TO INSERT THE SD CARD.
At the side you'll find a slot for inserting a Micro SD card, this card slot sits rather deep. You might have to use a paperclip to carefully press the card until it clicks into the correct position.
7 TIPS AND WARNINGS
7.1 GENERAL
- Read the user manual carefully and follow all instructions.
- Never place or use the adaptor in a wet or moist room or environment.
- Take care of proper heat dissipation; never cover the camera unit and/or the power supply adapter(s), and do not place them directly beside a heat source. The camera and adaptor already become warm themselves during operation.
- Only use the supplied connecting cables; connecting cables of a different type can be dangerous or cause damage to the electronics.
- Take care that the cables and the adapter do not get damaged, and prevent that they cause tripping or falling.
- Never disassemble the camera unit and/or adaptor; this may only be performed by qualified personnel.
- The video connection occurs via the public internet and is secure according to the current standards, but can still be hacked. We are not liable for this in any way. We advise you to instantly change the password, preferably using a combination of letters, numbers and special characters.
7.2 INSTALLATION
- Only connect the power wire or disconnect the adapter is removed from the wall socket.
- Never install the camera during thunder storms.
- Never touch non-insulated wires unless the plug or adapter is unplugged.
7.3 MAINTENANCE
- Only clean the camera with a moist cloth; never use chemical cleaners. Before any cleaning, you must disconnect the adapters.
7.4 ERROR
-
In case the camera no longer shows any images and/or there's no more sound, please check the following:
-
the camera is connected
- the correct UID code is used
- the correct password is used
- restart the camera by briefly interrupting its power supply
- press and hold the reset button for at least 10 seconds to reset the camera. The camera will now reboot. Repeat the entire setup and actions from the beginning, because all settings will be reset to the default factory settings
-
restart your smartphone or tablet.
-
When it becomes dark, the camera will switch to the night mode and turn on the infra-red lights. In certain environmental lighting conditions, the screen might start flashing. You can resolve this by increasing or decreasing the environmental light. When the IR LEDs are activated, the screen will be black/white.
- If you still see no images, please contact the service department of Alecto via www.alecto.nl.
7.5 IMAGE DELAY
- Because of coding and decoding of the images, there will be a slight delay in the signal. The image quality also depends on changes in the bandwidth via internet. You may set a lower resolution.
- The camera may restart after changing certain settings. In this case it'll take some time (maximum 2 minutes) before the images return.
7.6 DATAUSE
- If you're using a mobile network, please keep in mind that the data use can increase considerably while watching video. We recommend you to use a Wi-Fi network.
- Also the battery usage of your smartphone or tablet will increase.
7.7 ENVIRONMENT AND DISCARDING:
- The packaging of this camera can be collected as old paper. However, we recommend you to save it, to adequately protect the phone during transport.
- When replacing this camera, please return it to the supplier to ensure environment-friendlyly processing.
8 DECLARATION OF CONFORMITY:
This equipment complies with the essential requirements and provisions as described in the European Directive 2014/53/EU.
The declaration of conformity is available at: http://DOC.hesdo.com/DVC-105-DOC.pdf
Frequentie: 2407-2475 MHz Maximum Vermogen : < 20 dBm
9 SPECIFICATIONS CAMERA
Image Sensor High Definition Color CMOS Sensor
Display Resolution 1280 x 720 Pixels (1000K Pixels, i.e. 1.0 Megapixel)
Lens 2.8mm Glass Lens
Mini. Illumination 0.5 Lux (With IR Illuminator)
Viewing Angle 90 Degree
Input Built-in microphone
Output Built-in speaker
Audio Compressioin ADPCM
Image Compression H.264
Image Frame Rate 25fps maximum, downward adjustable
Resolution 720P(1280 x 720), VGA(640 x 360) and 320x180
Flip Mirror Images flip and mirror adjustable by user
Supported Protocol IP, TCP, UDP, HTTP, HTTPS, SMTP, FTP, DDNS, UPnP
Remote access P2P
Wireless Standard IEEE 802.11b/g/n
Frequentie range WiFi(H20):2412-2472 MHz,
WiFi(H40):2422-2462 MHz
Transmitted power WiFi:15,53 dBm EIRP
Data Rate 802.11b: 11Mbps (max), 80211g: 54Mbps (max.), 802.11n: 150Mbps (max.).
Wireless Security WEP & WPA WPA2 Encryption
Pan/tilt Angle Not supported
Infrared Light 10 IR LEDs, Night visibility up to 5 meters
Alarm Input / Output Not supported
TF/SD card External up to 32GB
Power Supply DC 5 V/1.0A (adapter)
Power Consumption 5 Watts (Max.)
Operate Temper. -10^ 50^ ( 14^ 122^ )
Operating Humidity 20% 85% non-condensing
Storage Temper. -20^ 60^ (-4^ 140^)
Operating Humidity 0% 90% non-condensing
Certification CE, FCC, RoHS

ServiceHelp


WWW.ALECTO.NL
SERVICE@ALECTO.NL

Hesdo,Australielaan 1
5232 BB, 's-Hertogenbosch
The Netherlands
v3.0