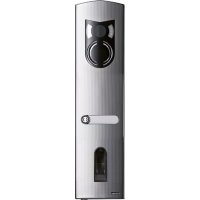
ELVOX 12A1 - Intercom Vimar - Free user manual and instructions
Find the device manual for free ELVOX 12A1 Vimar in PDF.



| Brand | Vimar |
| Model | ELVOX 12A1 |
| Product type | Biometric fingerprint intercom |
| Reader power supply | 8-24 VAC or 8-30 VDC |
| Control unit power supply | 9-12 VAC or 9-12 VDC |
| Power consumption (control unit) | Approx. 2 W |
| Number of storable fingerprints | Up to 99 |
| False acceptance rate (FAR) | 1 × 10⁻⁶ |
| False rejection rate (FRR) | 1.4 × 10⁻² |
| Protection rating (reader) | IP43 |
| Protection rating (control unit) | IP41 |
| Operating temperature (reader) | -40 °C to +85 °C |
| Operating temperature (control unit) | -20 °C to +70 °C |
| Recognition speed | 1 to 4 seconds |
| Number of relays | 1 |
| Relay switching power | 230 VAC / 10 A |
| Relay mechanical life cycle | 10 million switches |
| Relay electrical life cycle | 200,000 switches at 250 V / 5 A |
| Sensor maintenance | Clean with a soft damp cloth (pure water, no solvents) |
| Repairability | Spare parts not specified; contact Vimar after-sales service |
Frequently Asked Questions - ELVOX 12A1 Vimar
User questions about ELVOX 12A1 Vimar
0 question about this device. Answer the ones you know or ask your own.
Ask a new question about this device
Download the instructions for your Intercom in PDF format for free! Find your manual ELVOX 12A1 - Vimar and take your electronic device back in hand. On this page are published all the documents necessary for the use of your device. ELVOX 12A1 by Vimar.
USER MANUAL ELVOX 12A1 Vimar
1200 Series entrance panels with Fingerprint
The instruction manual is downloadable from the site www.vimar. com
1. General information
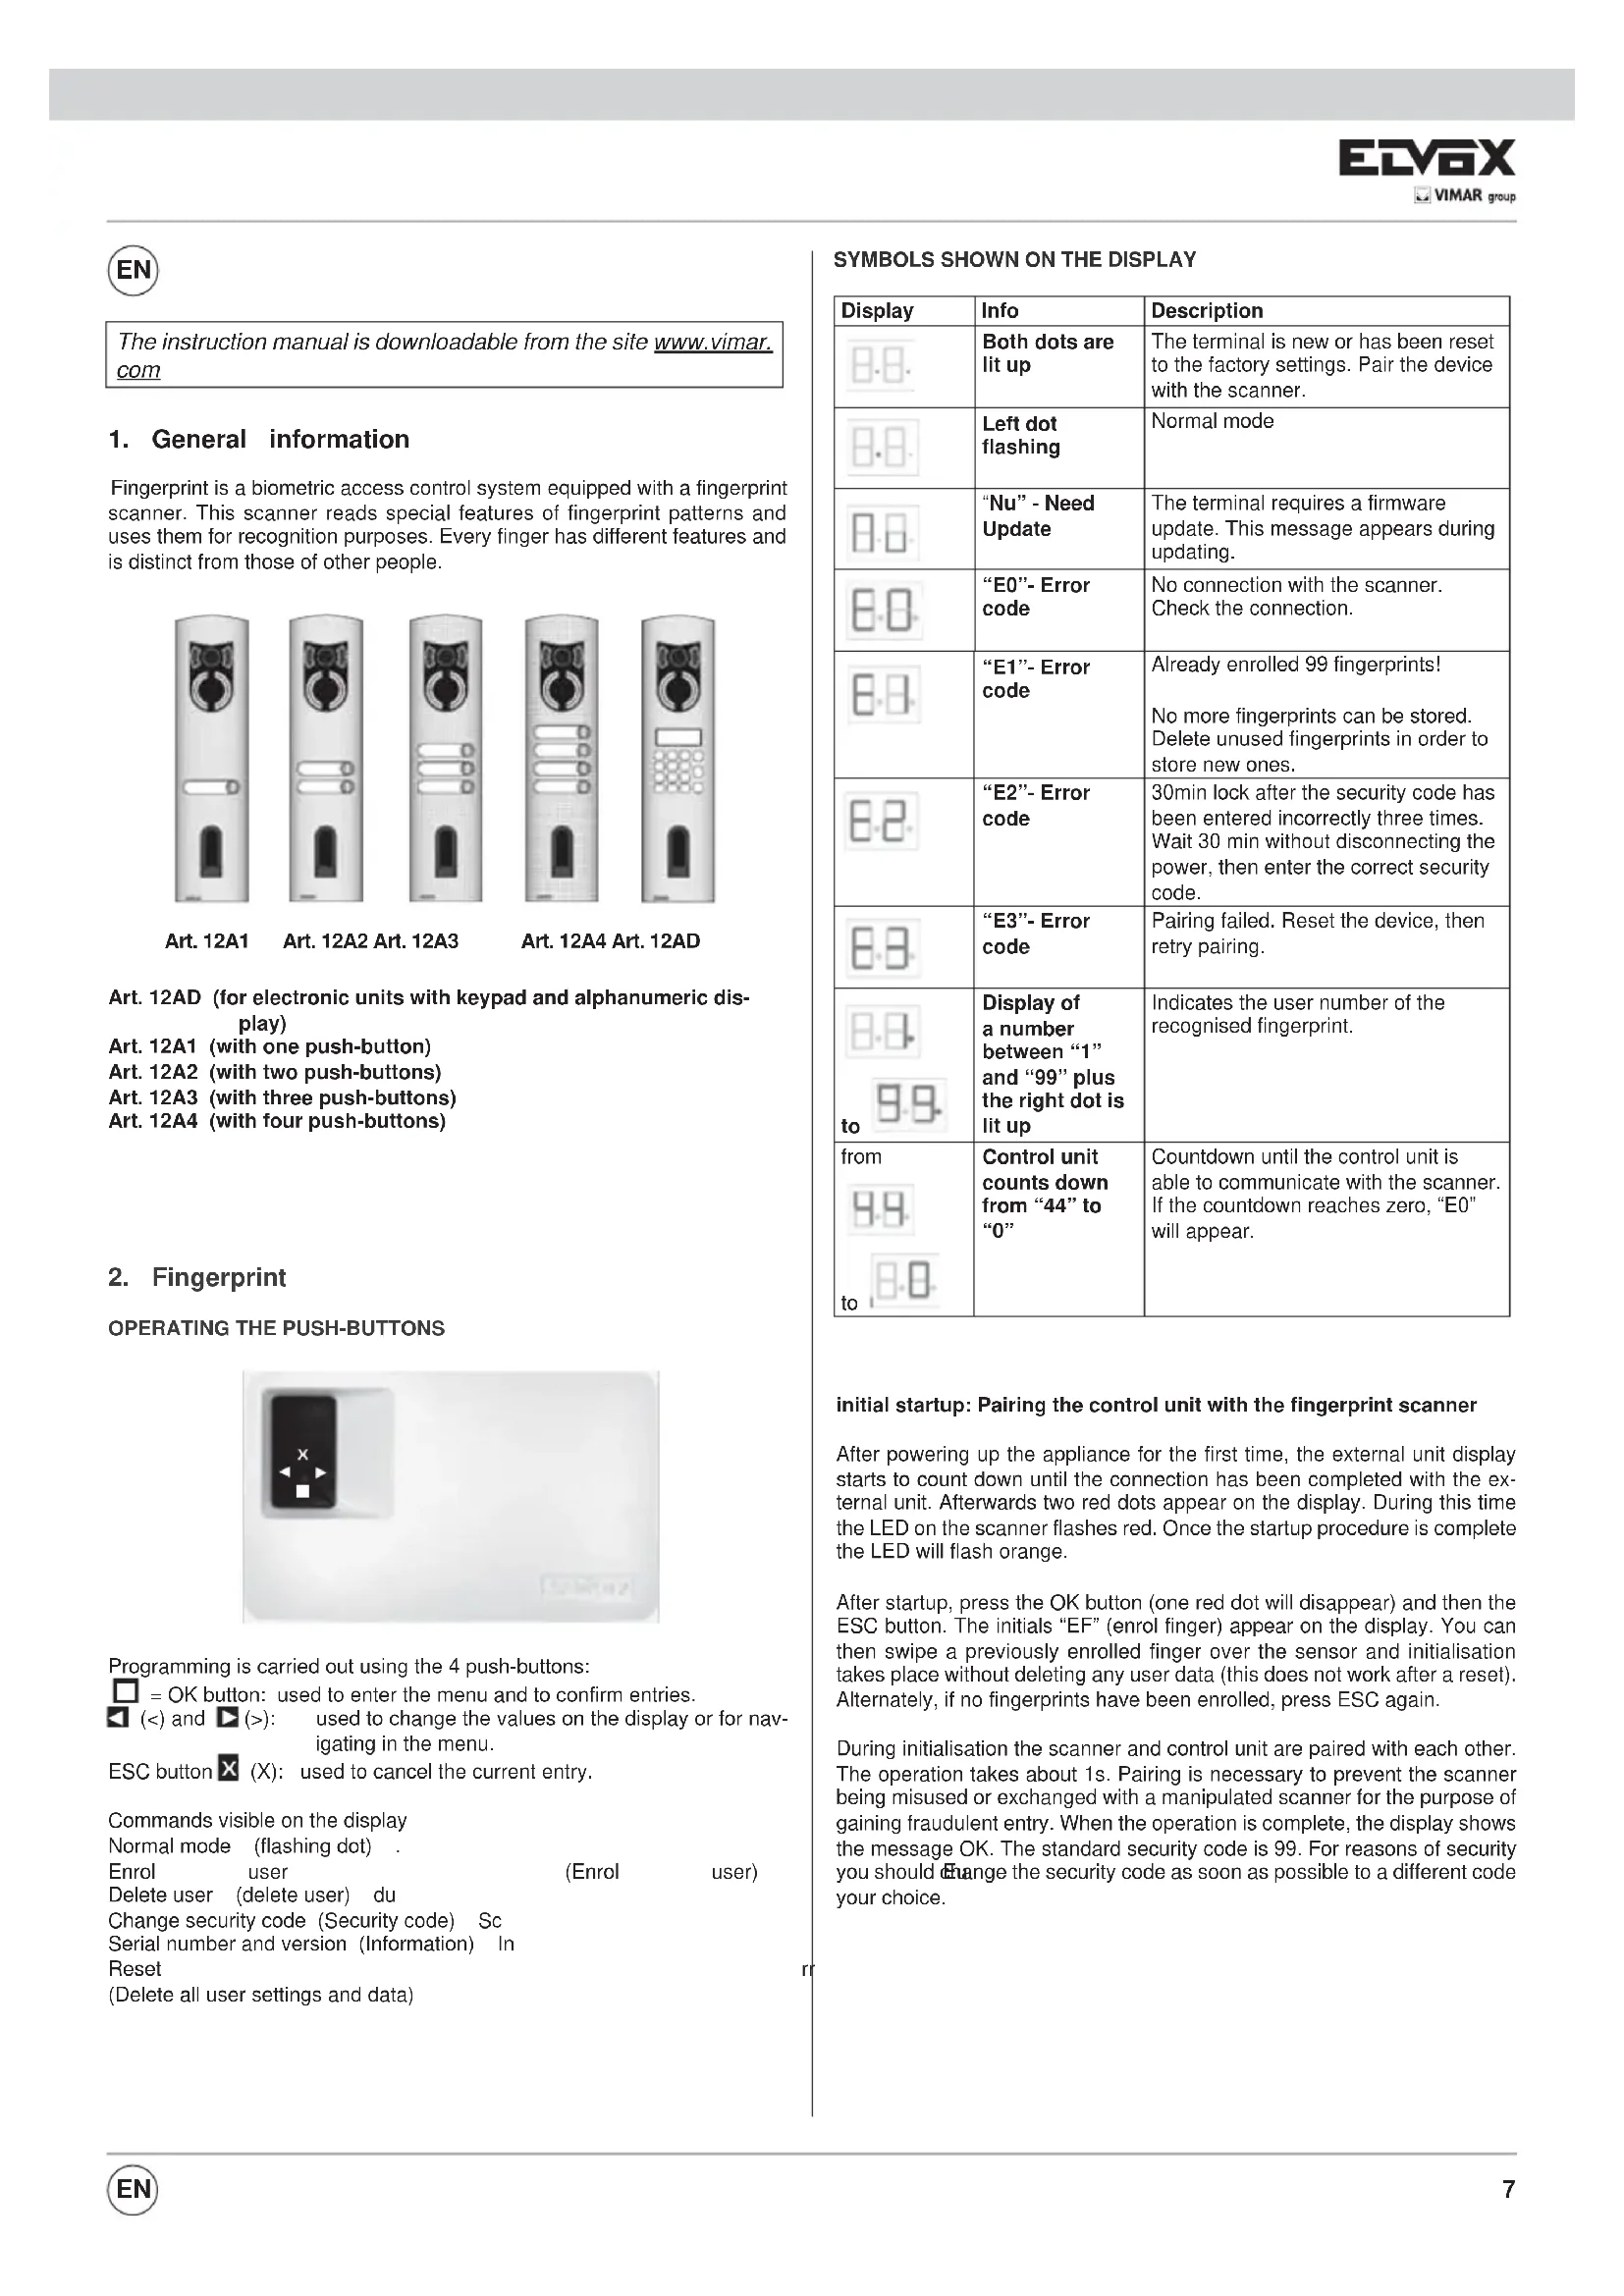
Fingerprint is a biometric access control system equipped with a fingerprint scanner. This scanner reads special features of fingerprint patterns and uses them for recognition purposes. Every finger has different features and is distinct from those of other people.
Art. 12A1
Art. 12A2 Art. 12A3
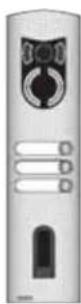
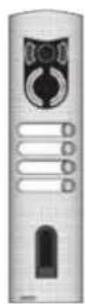
Art. 12A4 Art. 12AD
Art. 12AD (for electronic units with keypad and alphanumeric display)
Art. 12A1 (with one push-button)
Art. 12A2 (with two push Buttons)
Art. 12A3 (with three push Buttons)
Art. 12A4 (with four push Buttons)
2. Fingerprint
Programming is carried out using the 4 push buttons:
= OK button: used to enter the menu and to confirm entries.
(<) and (>) used to change the values on the display or for navigating in the menu.
ESC button X (X): used to cancel the current entry.
Commands visible on the display
Normal mode (flashing dot)
Enrol user (Enrol user)
Delete user (delete user) du
Change security code (Security code) Sc
Serial number and version (Information) In
Reset
(Delete all user settings and data)
SYMBOLS SHOWN ON THE DISPLAY
| Display | Info | Description |
| Both dots are lit up | The terminal is new or has been reset to the factory settings. Pair the device with the scanner. | |
| Left dot flashing | Normal mode | |
| “Nu” - Need Update | The terminal requires a firmware update. This message appears during updating. | |
| “E0” - Error code | No connection with the scanner. Check the connection. | |
| “E1” - Error code | Already enrolled 99 fingerprints! No more fingerprints can be stored. Delete unused fingerprints in order to store new ones. | |
| “E2” - Error code | 30min lock after the security code has been entered incorrectly three times. Wait 30 min without disconnecting the power, then enter the correct security code. | |
| “E3” - Error code | Pairing failed. Reset the device, then retry pairing. | |
| Display of a number between “1” and “99” plus the right dot is lit up | Indicates the user number of the recognised fingerprint. | |
| from | Control unit counts down from “44” to “0” | Countdown until the control unit is able to communicate with the scanner. If the countdown reaches zero, “E0” will appear. |
initial startup: Pairing the control unit with the fingerprint scanner
After powering up the appliance for the first time, the external unit display starts to count down until the connection has been completed with the external unit. Afterwards two red dots appear on the display. During this time the LED on the scanner flashes red. Once the startup procedure is complete the LED will flash orange.
After startup, press the OK button (one red dot will disappear) and then the ESC button. The initials "EF" (enrol finger) appear on the display. You can then swipe a previously enrolled finger over the sensor and initialisation takes place without deleting any user data (this does not work after a reset). Alternately, if no fingerprints have been enrolled, press ESC again.
During initialisation the scanner and control unit are paired with each other. The operation takes about 1s. Pairing is necessary to prevent the scanner being misused or exchanged with a manipulated scanner for the purpose of gaining fraudulent entry. When the operation is complete, the display shows the message OK. The standard security code is 99. For reasons of security you should change the security code as soon as possible to a different code your choice.
OVERVIEW OF THE PROGRAMMING MENU:
You can access the lower menu level by pressing the OK button. You can return to the previous menu by pressing the ESC button. You can navigate by pressing the < and > buttons.
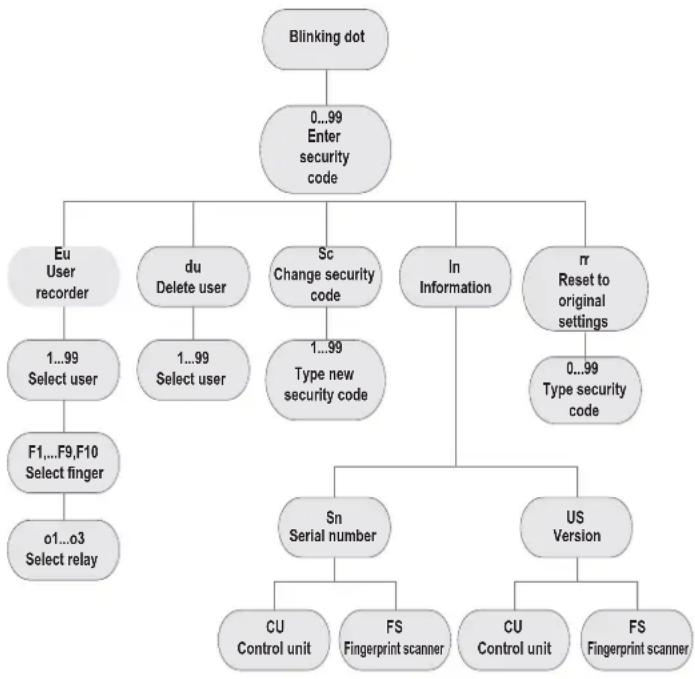
ENTERING THE SECURITY CODE
- Press the OK button on the control unit
- Enter the left-hand digit of the security code by pressing the < and > buttons (factory setting is 9)
- Press the OK button
- Enter the right-hand digit of the security code by pressing the < and > buttons (factory setting is 9)
- Press the OK button
- "Eu" (Enrol user) appears on the display
A maximum number of 99 fingerprints can be enrolled.
- Enter the security code as indicated in the paragraph "Entering the security code"
ASSIGNING ACCESS PERMISSIONS
- When "Eu" appears on the display, press the OK button
-
Select the user: "1" is shown on the display. If this number is already in use, this is indicated by a dot next to the number. Example: "1." Select the desired number using the < and > buttons
-
Press the OK button
- Select the finger: "F1" is shown on the display to represent fingerprint 1. Start counting from the little finger on the left hand "F1" to the little finger on the right hand "F0" (equal to F10). If a fingerprint is already enrolled, this is indicated by a dot next to the number, for example "F8." For example if you choose to enrol your right-hand index finger, select "F7"
- Press the OK button
- At this point "EF" will appear on the control unit display
ENROLLING A FINGERPRINT
Once "EF" appears on the display you have 60 seconds to correctly swipe your finger over the sensor. See the instructions on page 14.
The external unit features a status LED that indicates the status of the device using three different colours:
Red: The finger has not been enrolled correctly; please repeat the
scanning process!
Orange: Enrolment mode. The device is waiting for a finger to enrol.
Green: Enrolment complete
DELETING A USER
- Enter the security code as indicated in the paragraph "Entering the security code"
SELECTING AND DELETING THE USER
- Press the > button repeatedly until "du" (delete user) is displayed
- Press the OK button.
- Press the < and > buttons to select the user that you want to delete from the system
- Press the OK button
- "OK" is then shown on the display for a short time. The device then returns to normal mode
- The "DELETE" (du) function always refers to a user: it is not possible to delete individual fingerprints
SETTING A NEW SECURITY CODE
Warning: no changes can be made to the system (storing or deleting users, etc.) without setting a new security code. After three incorrect attempts the device is locked for 30 minutes.
- Enter the security code as described in the paragraph "ENTERING THE SECURITY CODE"
ENTERING THE NEW SECURITY CODE
- Press the > button until "Sc" is displayed
- Press the OK button
- Enter the first digit of the security code using the < and > buttons
- Press the OK button
- Enter the second digit of the security code using the < and > buttons
- Press the OK button
- "OK" is displayed for a short time. The device then returns to normal mode (flashing dot)
VIEWING THE SERIAL NUMBER AND VERSION NUMBER
The serial number and version number can be viewed on the control unit display. Two positions of the number are displayed at a time.
- Enter the security code as described in the paragraph "ENTERING THE SECURITY CODE"
VIEWING THE SERIAL NUMBER
- Press the > button until "In" is displayed
Press the OK button - Press the > button until "Sn" is displayed
- Press the OK button
- Select the device for which you want to view the serial number using the < and > buttons:
"FS"...Fingerprint scanner
"CU"... Control unit
- Press the OK button
- The first two digits of the serial number are displayed.
By pressing the > button you can view the remaining digits.
The serial number is 14 digits long - Pressing the OK button returns to the first two digits of the serial number. Pressing the ESC button returns to the previous menu
VIEWING THE VERSION NUMBER
- Press the > button until "In" is displayed
- Press the OK button
-
Press the > button until "US" is displayed
-
Press the OK button
- Select the device for which you want to view the version number using the < and > buttons:
"FS"... Fingerprint scanner
"CU". Control unit
- Press the OK button
The first two digits of the version number are displayed. By pressing the > button you can view the remaining digits. The version number is 8 digits long
Pressing the OK button returns to the first two digits of the version. Pressing the ESC button returns to the previous menu.
RESETTING TO FACTORY SETTINGS
Resetting the device deletes all of the data stored in memory. The security code is reset to 99, the internal and internal units will no longer be paired.
- Enter the security code as indicated in the paragraph "ENTERING THE SECURITY CODE"
PERFORMING THE RESET
- Press the > button until "rr" is displayed
- Press the OK button
- Enter the first digit of the security code using the < and > buttons
- Press the OK button
- Enter the second digit of the security code using the < and > buttons
- Press the OK button
- Two red dots then appear on the display. The scanner flashes orange. The device is now restored to its original settings.
- To start operating the device again, see the section "Initial startup: Pairing the control unit with the fingerprint scanner".
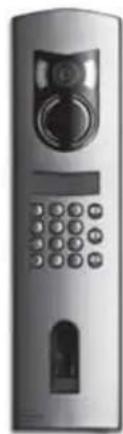
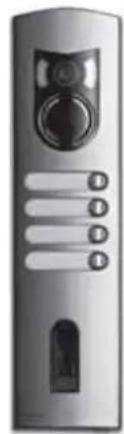
3. Fingerprint scanner
Operating the fingerprint scanner
Correct operation of the fingerprint scanner is a guarantee that the product will function properly. We recommend that you use the finger which has the best fingerprint lines in your opinion. It is also recommended to swipe your finger over the sensor while applying a medium amount of pressure. In particular with poorly pronounced finger lines, you should avoid pressing down too hard on the sensor and squashing the finger lines, so as to ensure correct identification. The scanner is equipped with an automatic Learning Finger system to improve recognition performance over a long period. To optimise recognition of the fingerprint, it is best to swipe the finger over the sensor at least 5 times. If any negative identification results are returned, we recommend that you repeat the enrolment process for that finger. In the event of insufficient fingerprint identification, try the following:
- Apply less pressure on your finger when you place it over the sensor.
Make sure that you place your finger exactly over the finger area visible on the casing
Use the pad of your finger starting from the top knuckle. The joint between the first and second sections of your finger should be the start position for scanning. - The middle finger is typically the best finger for scanning.
- Avoid using the small finger or thumb as they are difficult to position on the scanner. Thumbs are the most difficult to use.
Try scanning the fingerprint at different speeds to find out the best speed for you.
Do not exaggerate the movement, if it is too slow or too fast the finger will not be identified.
If the above information does not help, we recommend that you save the same fingerprint in several positions to improve the recognition rate. The device has space for 99 fingerprints! In extreme cases use up to 10 memory spaces for one finger. Wet fingers show modified finger lines, as can be seen with the naked eye. If you often have wet fingers we advise you to save a wet version of your fingerprint. Children's fingerprints are usually only recognised from the age of 5, depending on the child's height. Please also observe the points mentioned above.

ENROLLING A FINGERPRINT USING THE SENSOR
It is important to swipe your finger correctly over the sensor.
Best results are achieved by using the middle finger while stretching out the middle finger and ring finger at the same time.
Swipe the desired finger, starting from the top knuckle, making full contact with the sensor. The larger the scanned surface of the finger, the higher the recognition rate. In order to maximise the recognition rate, swipe your finger along the sensor in the same way as in the enrolment process.
The sensor is located in the middle of the finger swiping track.
Swipe the finger carefully, with light pressure and constant, moderate speed over the sensor.
In the case of excessively worn fingerprint patterns caused by manual work, we recommend, for instance, that right-handed people enrol a fingerprint from their left hand. If the lines of your fingerprint are difficult to see, use a finger where the lines are most pronounced.
WARNING!
Try to swipe as large a surface as possible over the sensor, starting from the top knuckle, with moderate pressure and speed. This ensures the best recognition results.
Care of the sensor area
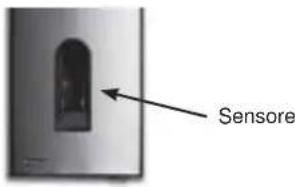
The sensor area of the finger scanner is the most important element of your Fingerprint device and needs to be taken care of accordingly in order to maintain its long-term reliability.
The sensor area is self-cleaning and therefore does not require special maintenance. If the surface still becomes dirty, wipe it with a damp (not wet), non-scratch or non-abrasive cloth. Use normal water without the addition of solvents or detergents. Be particularly careful when cleaning the surface of the sensor. Do not rub on the sensor area or exert pressure on it, to prevent breakage.
Fingerprint scanner: Scanner LED signals
| LED signal Status LED Connection LED * | Description | ||
| Orange flashing light | OFF There is no connection with the Fingerprint control unit. Please check the connection. | ||
| OFF Left: Green Right: Green | The system is online - all components are communicating correctly. | ||
| Orange flashing light | Left: Green Right: Green | Fingerprint recognition: checking | |
| Green Left: Green Right: Green | Fingerprint recognition: positive, the relay is connected accordingly | ||
| Red Left: Green Right: Green | Fingerprint recognition: fingerprint not recognised | ||
| Orange Left: Green Right: Green | Fingerprint enrolment mode. The finger needs to be swiped over the sensor | ||
NOTE: The connection LEDs (green) are only visible when the scanner is detached from the faceplate.

4. Troubleshooting
| Error Cause Remedy | ||
| Fingerprint enrolment is not working | 1. The finger was not swiped evenly over the sensor starting from the top knuckle2. The finger was swiped too lightly or too heavily over the sensor3. The finger was swiped too fast or too slowly over the sensor | 1. Swipe the finger evenly over the sensor without jerky movements, starting at the top knuckle2. Swipe the finger gently, making full contact with the sensor3. Swipe the finger over the sensor at moderate speed |
| A finger that has already been enrolled is no longer recognised | 1. During enrolment, a different part of the finger was recorded2. The first enrolment was not carried out properly | 1. Enrol the finger in the system again, swiping it evenly over the sensor2. See: “Fingerprint enrolment is not working” Perfect enrolment guarantees optimum recognition |
| The status LED on the internal unit is not flashing | No power supply 1. Check | the power supply2. Check the condition of the fuse |
| Error code “E0” shown on the display, then the countdown starts from 45 | 1. No connection to the external unit2. The power supply to the system has been interrupted and the system is restarting | 1. Check the connection cables between the IU and EU2. Wait until the startup process has finished |
| Error code “E1” on the display | 99 fingerprints have already been enrolled | No more fingerprints can be enrolled. Where necessary delete existing fingerprints in order to record new ones |
| Error code “E2” on the display | 30 min lock after three incorrect attempts to enter the security code | Wait 30 minutes before entering the correct security code |
| Error code “E3” on the display | Device paired incorrectly | Repeat the pairing process |
| Repeat the pairing process The green LED on the external unit indicates that the fingerprint has been positively recognised, but the relay does not react | Incorrect pairing between external unit and internal unit.The recognition is not accepted, as one of the devices has been exchanged. | Repeat the pairing process |
5. Mounting and installation
Wall mounting of the Fingerprint control unit

Mount the installation rail (DIN Rail 35mm) on the wall.
The rail serves as a support for the casing of the control unit.
Now fit the control unit onto the rail. Open the unit by pressing the tab.
The internal unit must be mounted in such a way that unauthorised people are prevented from accessing it.
6. Technical data
| Description Measurement Fingerprint | ||
| Power supply | VAC 8-24 | |
| VDC 8-30 | ||
| Input power | W | c a |
| Operating temperature | °C -40 up to +85 | |
| Memory Fingerprints | 99 | |
| Security | FAR 1x 10 | -6 |
| FRR 1,4x 10 | -2 | |
| Protection class | IP43 | |
| Recognition speed | s | 1-4 |
| Life span Finger scans approx. 1 million |
| Description Measurement Fingerprint | ||
| Power supply | VAC | 9-12 |
| VDC | 9-12 | |
| Input power | W | approx. 2 |
| Relay | Number | 1 |
| Relay power | 230VAC/ 10A | |
| Mechanical life span of the relays | Switching cycles | 10Mill. |
| Electrical life span of the relays | Switching cycles | 200.000 to 250V/5A |
| Operating temperature | °C | -20 to +70 |
| Protection class | IP41 | |
| Digital inputs | - | |
| Maximum current to X6 PIN 1 | A | - |
- The maximum input current on pin 1 of the X6 connector must not exceed 3.5A.
The control unit and Fingerprint scanner must be connected using a 4-pole cable with a minimum diameter of 0.5mm (approx. 0.14mm^2 ). For distances over 50m the cable connected to pins 3 and 4 must have a larger diameter in order to prevent voltage and current drops. The maximum permitted distance between the scanner and the control unit is 500m . 1 relay is available for controlling external devices. It is programmed via the programming menu on the control unit.
The relay has a voltage-free changeover contact, which can be used as required. The maximum switching capacity is 250VAC 10A (30V / 2A on the Integra version).
The connecting cables between the internal unit and external unit must be laid separately from other electrical cables, since they carry low-voltage signals that can be impaired by other live cables.
The connections are not protected against reverse polarity!
7. Connection terminals
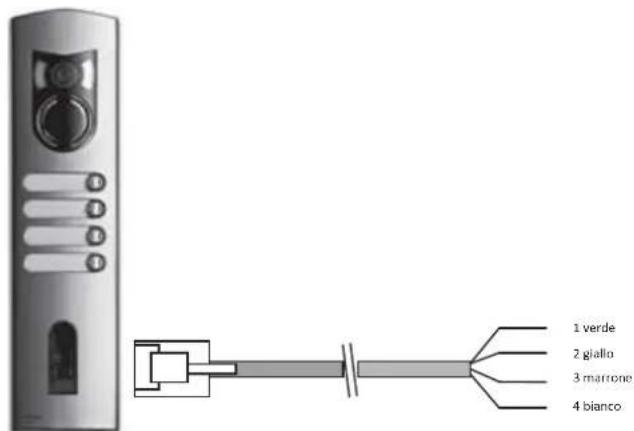
Fingerprint scanner
| Terminal No. | Function |
| 1 | Terminal 1 (BUS) |
| 2 | Terminal 2 (BUS) |
| 3 | Terminal 3 (Power supply) |
| 4 | Terminal 4 (Power supply) |
X2: Power supply 9VAC-in: unipolar; no polarity to watch when using a DC power supply.
We recommend that only the supplied cables are used to connect Fingerprint scanners. The colours indicated above apply only to these cables.
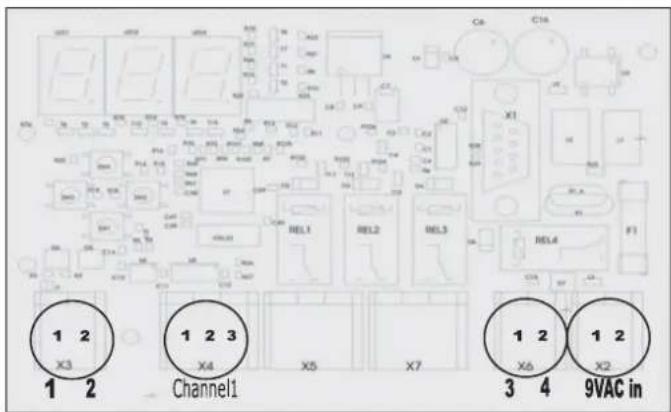
Fingerprint control unit terminals
X2-X7 Spring terminals
| Terminal No. | Function |
| 1 | Power supply 9-12VAC or 9-12VDC |
| 2 | Power supply 9-12VAC or 9-12VDC |
X3: BUS for communication with the scanner. Connection with the Fingerprint scanner.
| Terminal No | Function |
| 1 | RS485 A, Terminal 1 |
| 2 | RS485 A, Terminal 2 |
X4: Relay, Voltage-free contact for control of one device.
| Terminal No. | Function |
| 1 | Common |
| 2 | N.O. (normally open) contact |
| 3 | N.C. (normally closed) contact |
X6: Fingerprint scanner power supply:
| Terminal No. | Function |
| 1 | Scanner power supply terminal 3 |
| 2 | Scanner power supply terminal 4 |

3. Fingerprint scanner
Operating the fingerprint scanner
"FS" .... Fingerabdruckscanner
X4: Relay, Voltage-free contact for control of one device.
CONFORMITA NORMATIVA.
Direttiva EMC
Norme EN 61000-6-1, EN 61000-6-3.
INSTALLATION RULES.
Installation should be carried out observing current installation regulations for electrical systems in the Country where the products are installed.
CONFORMITY.
EMC directive
Standards EN 61000-6-1, EN 61000-6-3.
RÉGLES D'INSTALLATION.
CONFORMITE AUX NORMES.
Directive EMC
Normes EN 61000-6-1, EN 61000-6-3.

In order to avoid damage to the environment and human health as well as administrative sanctions, any appliance marked with this symbol must be disposed of separately from municipal waste, that is it must be assigned to the dealer upon purchase of a new. Appliances marked with the crossed wheelie bin symbol must be collected in accordance with the instructions issued by the local authorities responsible for waste disposal.

COMMUNICATION AUX UTILISATEURS CONFORMÉMENT À LA DIRECTIVE 2002/96 (RAEE)
CE Product is according to EC 2004/108/EC and following norms.
INSTALLATIONSVORSCHRIFTEN.

- General information
- Fingerprint
- initial startup: Pairing the control unit with the fingerprint scanner
- OVERVIEW OF THE PROGRAMMING MENU:
- ENTERING THE SECURITY CODE
- ASSIGNING ACCESS PERMISSIONS
- ENROLLING A FINGERPRINT
- DELETING A USER
- SELECTING AND DELETING THE USER
- SETTING A NEW SECURITY CODE
- ENTERING THE NEW SECURITY CODE
- VIEWING THE SERIAL NUMBER AND VERSION NUMBER
- VIEWING THE SERIAL NUMBER
- VIEWING THE VERSION NUMBER
- RESETTING TO FACTORY SETTINGS
- PERFORMING THE RESET
- Fingerprint scanner
- Operating the fingerprint scanner
- ENROLLING A FINGERPRINT USING THE SENSOR
- Best results are achieved by using the middle finger while stretching out the middle finger and ring finger at the same time.
- WARNING!
- Care of the sensor area
- Troubleshooting
- Mounting and installation
- Technical data
- Connection terminals
- X2-X7 Spring terminals
- CONFORMITA NORMATIVA.
- INSTALLATION RULES.
- CONFORMITY.
- RÉGLES D'INSTALLATION.
- CONFORMITE AUX NORMES.
- COMMUNICATION AUX UTILISATEURS CONFORMÉMENT À LA DIRECTIVE 2002/96 (RAEE)
- INSTALLATIONSVORSCHRIFTEN.
Brand : Vimar
Model : ELVOX 12A1
Category : Intercom