GJ452 - Grill plate BUFFALO - Free user manual and instructions
Find the device manual for free GJ452 BUFFALO in PDF.
| Features | Details |
|---|---|
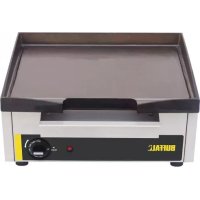
| Product type | Grill plate |
| Dimensions | Not specified |
| Power | Not specified |
| Cooking surface material | Not specified |
| Number of cooking zones | Not specified |
| Adjustable temperature | Not specified |
| Indoor/outdoor use | Not specified |
| Ease of cleaning | Not specified |
| Safety system | Not specified |
| Warranty | Not specified |
| Included accessories | Not specified |
Frequently Asked Questions - GJ452 BUFFALO
User questions about GJ452 BUFFALO
0 question about this device. Answer the ones you know or ask your own.
Ask a new question about this device
Download the instructions for your Grill plate in PDF format for free! Find your manual GJ452 - BUFFALO and take your electronic device back in hand. On this page are published all the documents necessary for the use of your device. GJ452 by BUFFALO.
USER MANUAL GJ452 BUFFALO
Contact Grill Instruction manual

Contactgrill Handleiding

- Position on a flat, stable surface.
- A service agent/qualified technician should carry out installation and any repairs if required. Do not remove any components on this product.
- Consult Local and National Standards to comply with the following:
Health and Safety at Work Legislation
BS EN Codes of Practice
Fire Precautions - IEE Wiring Regulations
Building Regulations - DO NOT immerse the appliance in water.
Always use the black handles to lift the plates. - Some surfaces become hot during operation - take care when using the appliance.
- Always switch off and disconnect the power supply to the appliance when not in use.
- Not suitable for outdoor use.
- Keep all packaging away from children. Dispos of the packaging in accordance to the regulations of local authorities.
- If the power cord is damaged, it must be replaced by a BUFFALO agent or a recommended qualified technician in order to avoid a hazard.
- This appliance is not intended for use by persons (including children) with reduced physical, sensory or mental capabilities, or lack of experience and knowledge, unless they have been given supervision or instruction concerning the use of the appliance by a person responsible for their safety.
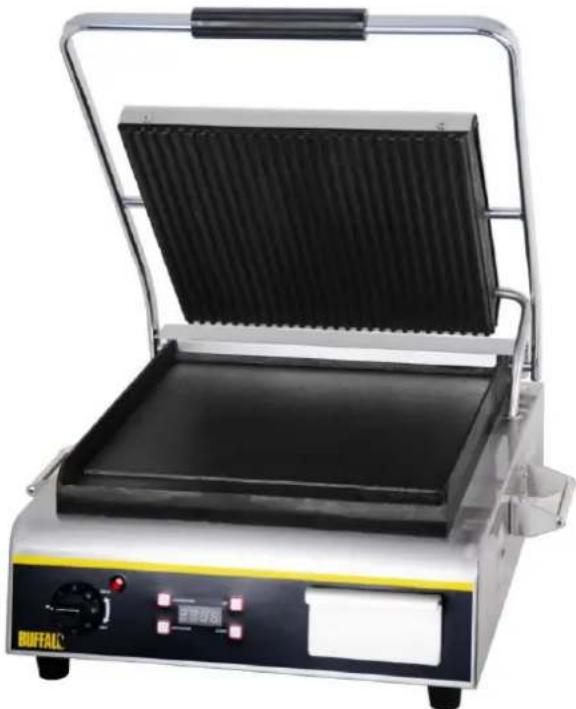
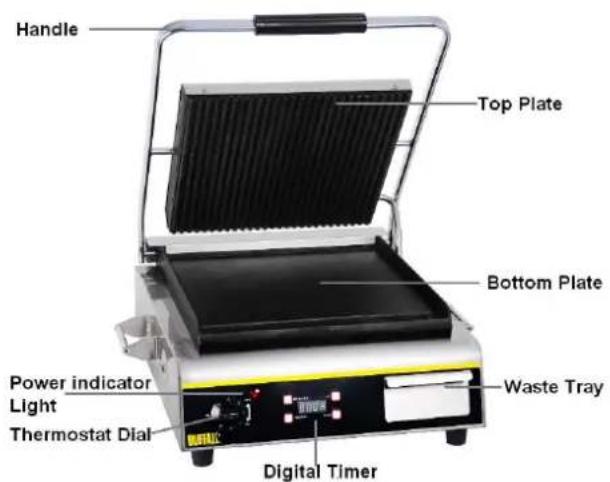
Product Description
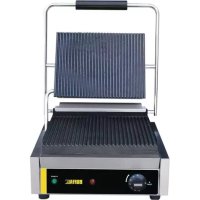
GJ452- Single Grill with ribbed top plate and flat base plate
Introduction
Please take a few moments to carefully read through this manual. Correct maintenance and operation of this machine will provide the best possible performance from your BUFFALO product.
Pack Contents
The following is included:
- BUFFALO Contact Grill
- Waste Tray
Allen Key - Instruction Manual
BUFFALO prides itself on quality and service, ensuring that at the time of packaging the contents are supplied fully functional and free of damage.
Should you find any damage as a result of transit, please contact your BUFFALO dealer immediately.
Operation
Seasoning the Cooking Surfaces
The cooking plate surfaces need to be 'seasoned' before using for the first time.
- Ensure the cooking surfaces are clean.
- Brush the surfaces with cooking oil.
- Set the thermostat(s) to 110^ and turn the appliance On. The power indicator light turns on.
- Once the appliance reaches temperature the power indicator light turns off.
- Turn the appliance Off and allow the to cool before wiping away any excess oil.
- The appliance is now ready to use.
Cooking
- Close the plates.
Note: It may be necessary to slightly grease the plates with cooking oil before cooking depending on the foodstuff.
- Set the thermostat(s) to the desired temperature (60^ - 300^) and turn the appliance On. The power indicator light(s) turn on.
Note: 200^ C to 220^ C is suitable for general cooking.
- The power indicator light(s) turn Off when the appliance has reached the set temperature.
- Lift the top plate and place the foodstuff on the bottom plate.
- Lower the top plate.
Note: All BUFFALO Contact Grills feature counter-balanced top plates that allow for even cooking.
Adjusting Top Plate Tension
Use the Allen key supplied to adjust the tension of the top plate. Turn clockwise to
tighten, anti-clockwise to loosen.
Note: It is possible to tighten the plate so that it sits in the open position (if required).
BUFFALO recommend the appliance is disconnected from the power supply and allowed to cool before any adjustments are made.
Using the Timer
The digital timer with audible alarm can be set from 1 second to 15 minutes
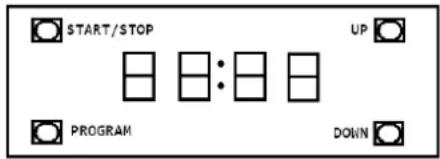
The timer provides an audible alarm after the set time expires. It provides no electrical control over the unit
START/STOP: Press START/STOP to start timer, press again to stop. The timer will provide an audible alarm after the set time. The alarm will beep 10 times and the display will continue to flash until timer is reset (press the START/STOP button)
UP: Press UP to add extra time
DOWN: Press DOWN to reduce time
PROGRAM:There are a total of 6 programmable timer settings. The default factory program settings are given below
| Program | 1 | 2 | 3 | 4 | 5 | 6 |
| Factory Preset Time | 00:30 | 01:00 | 01:30 | 02:00 | 02:30 | 03:00 |
To change the length of a program select the program you want to change by scrolling using the PROGRAM button. Adjust the program time by using the UP and DOWN buttons. Press START/STOP to commence the count down. The new program time will be automatically stored
If the unit is left without power for more than 24hrs the timer settings will revert to the factory defaults
Cleaning, Care & Maintenance
If grease is permitted to accumulate, it will begin to carbonise into a hard substance that is extremely difficult to remove. To prevent this follow the cleaning steps below:
- Always turn Off the appliance and disconnect from the power supply before cleaning.
- Allow the appliance to cool before cleaning but for best results clean the plates when they are still slightly warm.
- Use warm, soapy water and a damp cloth to clean the exterior of the appliance.
- Take care when using scrapers to remove cooking residues as they can damage the cooking surface.
- Dry thoroughly after cleaning.
- A BUFFALO dealer or qualified technician should carry out repairs if required.
Scraping
After each use, scrape the appliance with a scraper/grill stone/copper brush or flexible spatula to remove excess fat and food. A waste tray is provided for the scrapings if necessary.
If there is an accumulation of burned fat or food, the cooking surface should be thoroughly scoured and re-seasoned.
NOTE: IT IS VITAL THAT THE COOKING SURFACE IS RE-SEASONED AFTER SCOURING.
WARNING: DO NOT USE STEEL WOOL AS IT MAY LEAVE SHARDS THAT COULD CONTAMINATE FOOD.
Waste Tray
These appliances feature a waste tray to collect any liquid or fats that run off during cooking.
At least once a day, remove and empty the waste tray before washing with warm soapy water. Do not allow the tray to overfill or excess grease will run out of the overflow hole at the front of the tray.
WARNING: DO NOT remove the tray during or immediately after use as the contents will be hot.
Troubleshooting
If your BUFFALO appliance develops a fault, please check the following table before making a call to the Helpline.
| Fault | Probable Cause | Action |
| The unit is not working | The unit is not switched on | Check the unit is plugged in correctly and switched on |
| Plug and lead are damaged | Call BUFFALO agent or qualified technician | |
| Fuse in the plug has blown | Replace the plug fuse | |
| Power supply | Check power supply | |
| Internal wiring fault | Call BUFFALO agent or qualified technician | |
| Appliance does not reach set temperature | Faulty thermostat | Call BUFFALO agent or qualified technician |
| Faulty element | Call BUFFALO agent or qualified technician | |
| Appliance heats up but indicator light does not come on | Bulb has expired | Call BUFFALO agent or qualified technician |
| Power indicator light comes on but appliance does not heat up | Faulty element | Call BUFFALO agent or qualified technician |
| Faulty thermostat | Call BUFFALO agent or qualified technician | |
| Thermostat set incorrectly | Check thermostat | |
| Appliance slow to heat up | Cooking surface not clean | Clean cooking surface |
| Faulty element | Call BUFFALO agent or qualified technician |
Technical Specifications
| Model | Voltage | Power | Current | Plate Type | Dimensions h x w x d (mm) | Weight (kg) | |
| Top Bottom | |||||||
| GJ452 | 230v 50Hz | 2950W | 12.8A | Rib | Flat | 230 x 565 x 540 | 38.5 |
Electrical Wiring
This appliance is supplied with a 3 pin, moulded, BS1363 plug and lead, with a 13 amp fuse as standard. The plug is to be connected to a suitable mains socket.
This appliance is wired as follows:
Live wire (coloured brown) to terminal marked L
- Neutral wire (coloured blue) to terminal marked N
Earth wire (coloured green/yellow) to terminal marked E
This appliance must be earthed, using a dedicated earthing circuit. If in doubt
consult a qualified electrician.
Electrical isolation points must be kept clear of any obstructions. In the event of any emergency disconnection being required they must be readily accessible.
Compliance
The WEEE logo on this product or its documentation indicates that the product must not be disposed of as household waste. To help prevent possible harm to human health and/or the environment, the product must be disposed of in an approved and environmentally safe recycling process. For further information on how to dispose of this product correctly, contact the product supplier, or the local authority responsible for waste disposal in your area.
BUFFALO parts have undergone strict product testing in order to comply with regulatory standards and specifications set by international, independent, and federal authorities.
BUFFALO products have been approved to carry the following symbol:

All rights reserved. No part of these instructions may be produced or transmitted in any form or by any means, electronic, mechanical, photocopying, recording or otherwise, without the prior written permission of BUFFALO.
Every effort is made to ensure all details are correct at the time of going to press, however, BUFFALO reserve the right to change specifications without notice.
Veiligheidstips
Specifications techniques
Application of Council Directives(s)
Toepassing van Europese Richtlijn(en) · Application de la/des directive(s) du Conseil · Anwendbare EU-Richtlinie(n) · Applicazione delle Direttive · Aplicacion de la(s) directiva(s) del consejo · Aplicacao de directiva(s) do Conselho
Standards
Standaarden · Normes · Normen · Standard · Estandares · Normas
I, the undersigned, hereby declare that the equipment specified above conforms to the above Directive(s) and Standard(s).
| 24/02/14 |
| R.J.Gunnell. |
| Richard Cromwell |
| Commercial Director |