B TNF 5322 OX2 - Fridge WHIRLPOOL - Free user manual and instructions
Find the device manual for free B TNF 5322 OX2 WHIRLPOOL in PDF.
| Technical Specifications | Combined refrigerator, energy class A++, total capacity 340 L, refrigerator volume 230 L, freezer volume 110 L. |
|---|---|
| Dimensions | Height 201 cm, width 60 cm, depth 65 cm. |
| Usage | No Frost function, electronic temperature control, LED lighting, vegetable drawers with adjustable humidity. |
| Maintenance and Repair | Easy maintenance with removable shelves, automatic defrost system, odor-filtering air filter. |
| Safety | Safety lock, door open alarm, overload electrical protection. |
| General Information | 2-year warranty, annual energy consumption 300 kWh, noise level 40 dB. |
Frequently Asked Questions - B TNF 5322 OX2 WHIRLPOOL
User questions about B TNF 5322 OX2 WHIRLPOOL
0 question about this device. Answer the ones you know or ask your own.
Ask a new question about this device
Download the instructions for your Fridge in PDF format for free! Find your manual B TNF 5322 OX2 - WHIRLPOOL and take your electronic device back in hand. On this page are published all the documents necessary for the use of your device. B TNF 5322 OX2 by WHIRLPOOL.
USER MANUAL B TNF 5322 OX2 WHIRLPOOL
THANK YOU FOR PURCHASING A WHIRLPOOL PRODUCT
To receive more comprehensive help and support, please register your product at www.whirlpool.eu/register

W
You can download the Safety Instructions and the Use and Care Guide by visiting our website docs.whirlpool.eu and following the instructions on the back of this booklet.

Before using the appliance carefully read the Health and Safety guide.
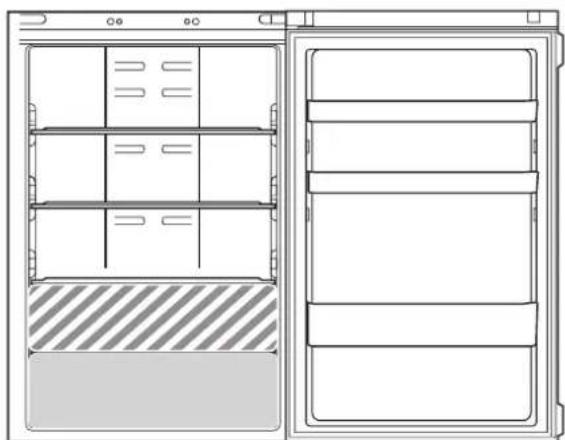
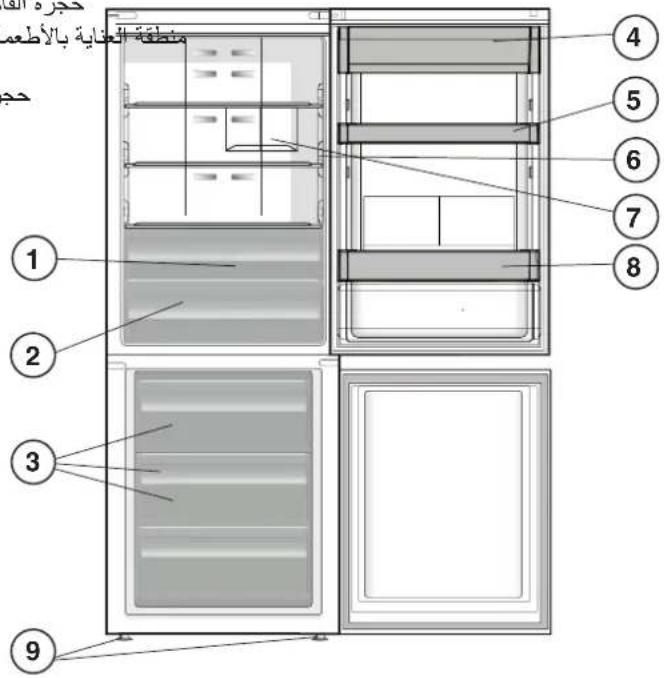
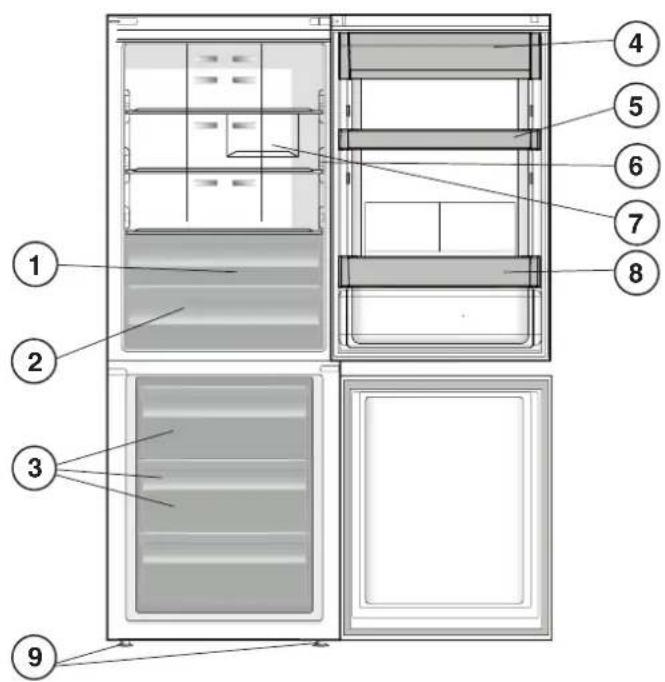
PRODUCT DESCRIPTION

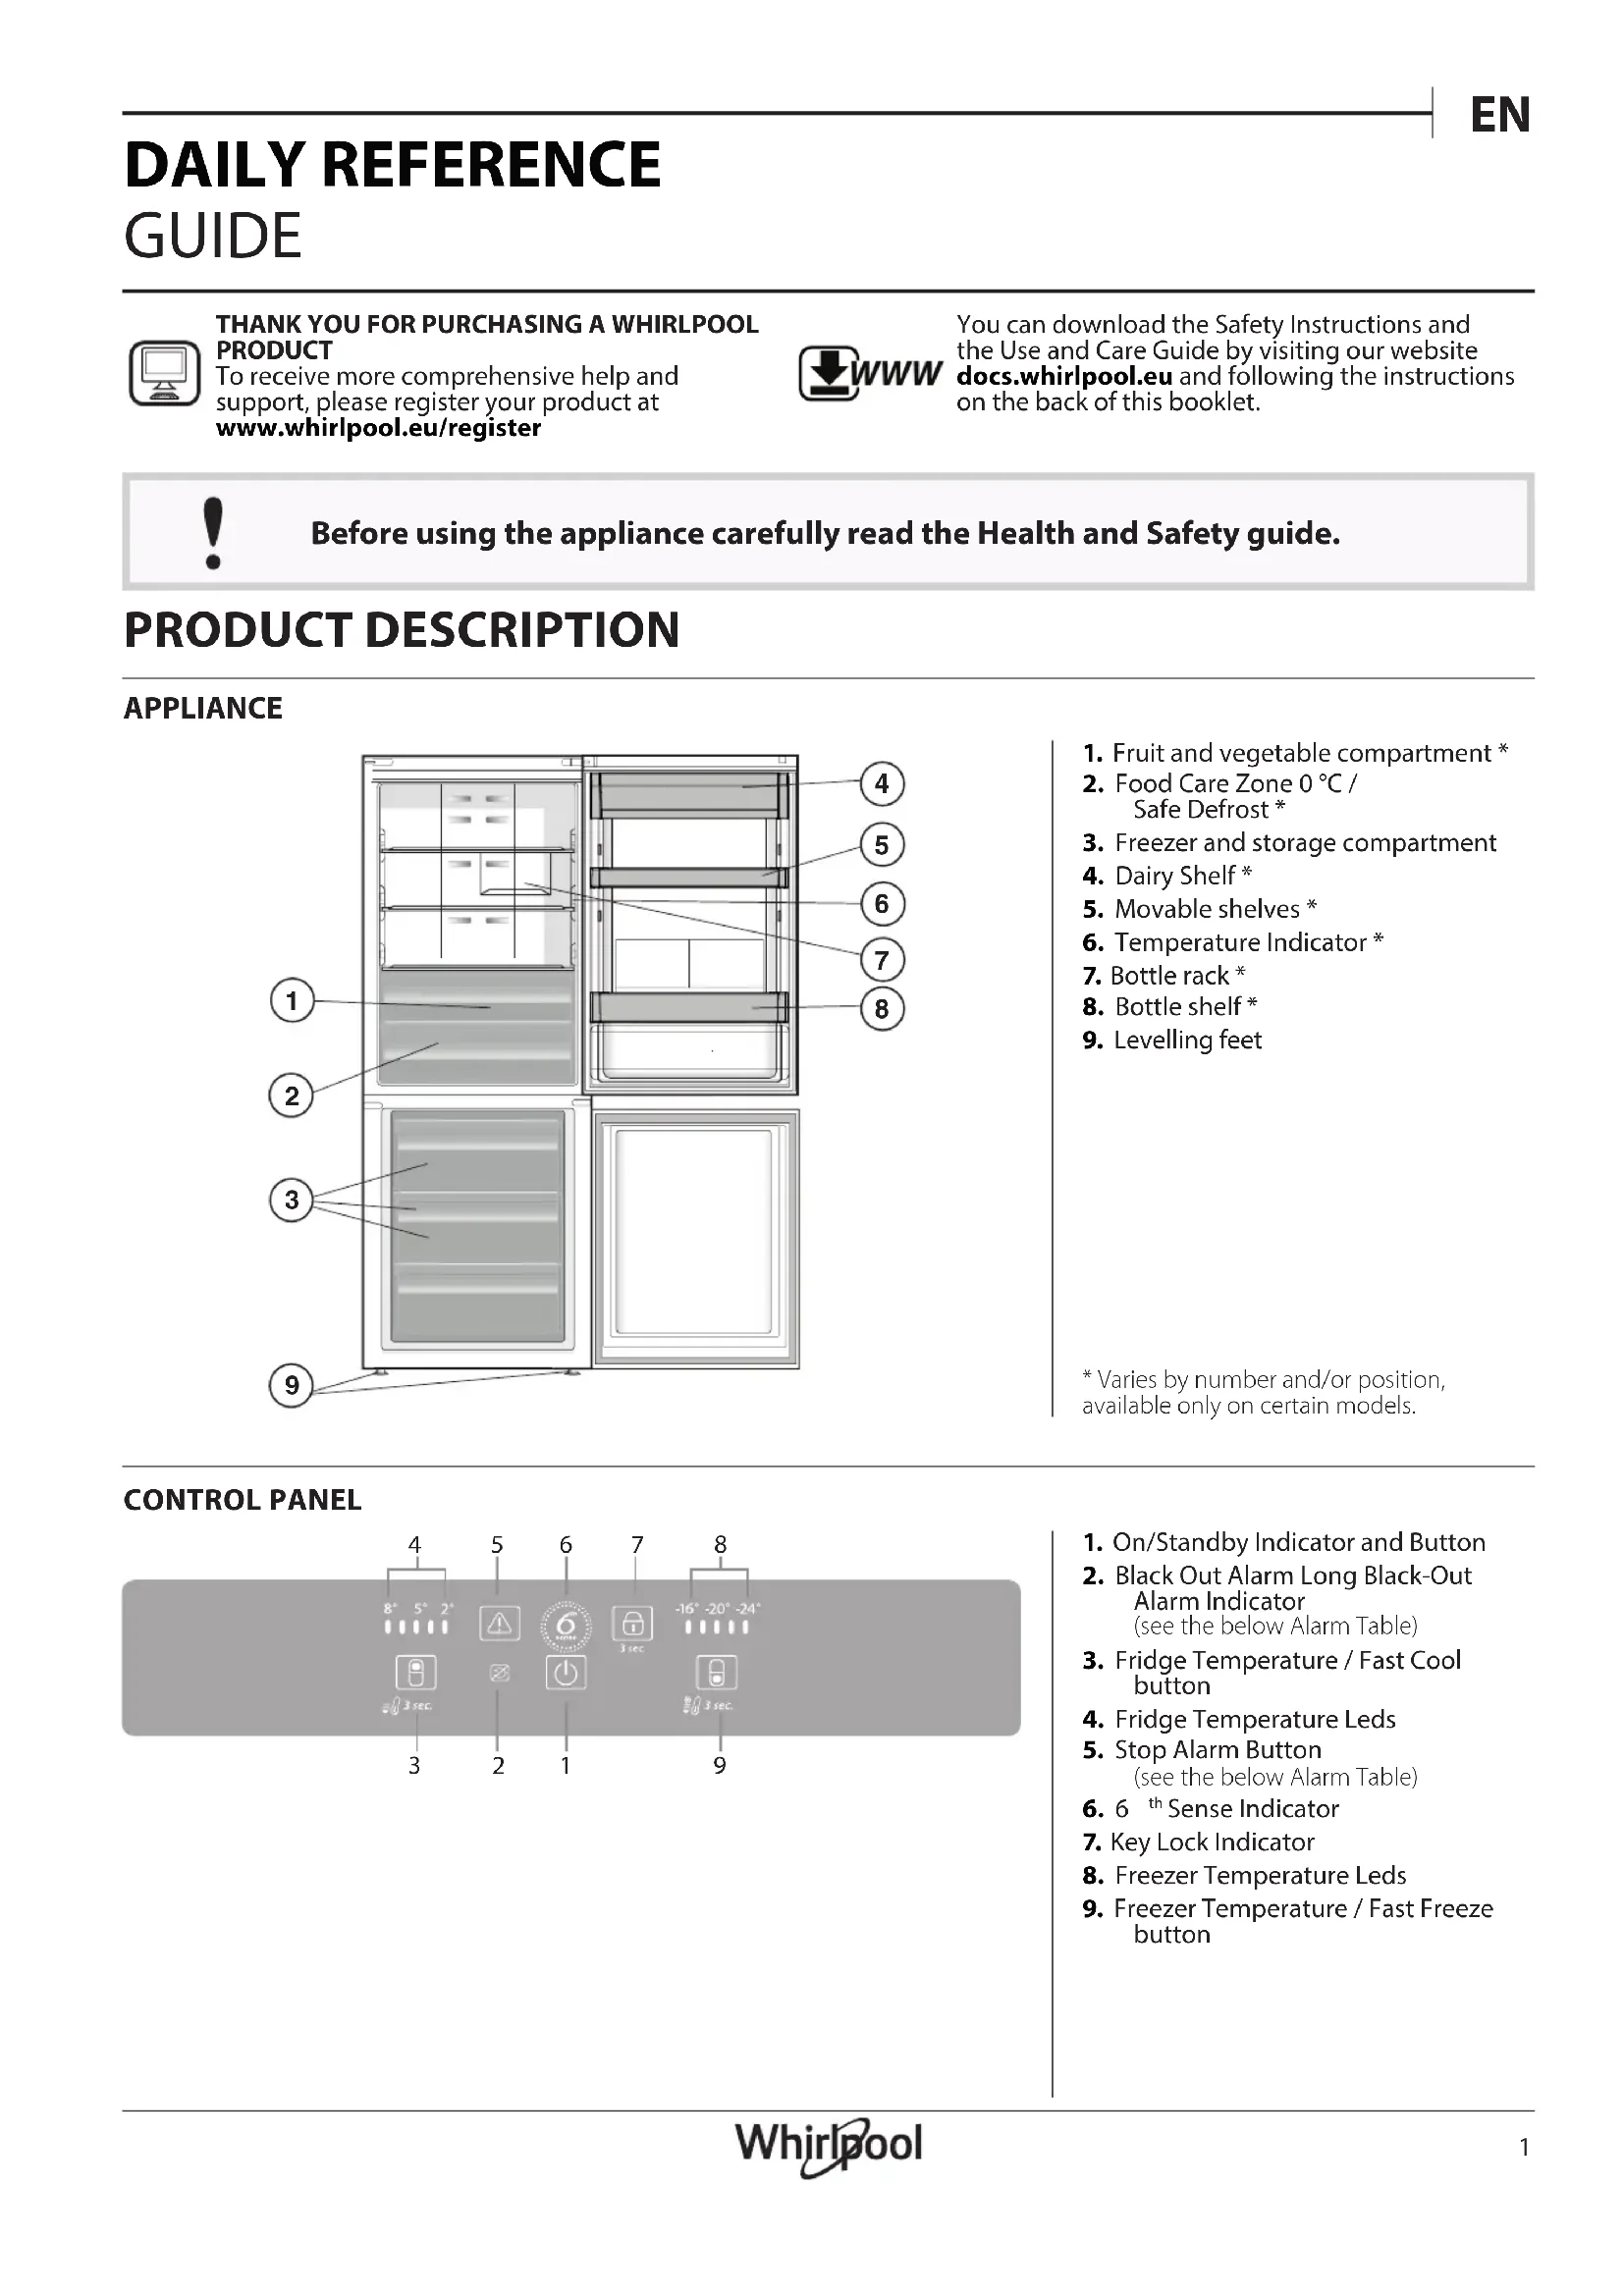
APPLIANCE
- Fruit and vegetable compartment *
- Food Care Zone 0^ / Safe Defrost
- Freezer and storage compartment
- Dairy Shelf *
- Movable shelves *
- Temperature Indicator *
- Bottle rack
- Bottle shelf *
-
Levelling feet
-
Varies by number and/or position, available only on certain models.

CONTROL PANEL
- On/Standby Indicator and Button
- Black Out Alarm Long Black-Out Alarm Indicator (see the below Alarm Table)
- Fridge Temperature / Fast Cool button
- Fridge Temperature LEDs
- Stop Alarm Button (see the below Alarm Table)
- 6 ^th Sense Indicator
- Key Lock Indicator
- Freezer Temperature LEDs
- Freezer Temperature / Fast Freeze button
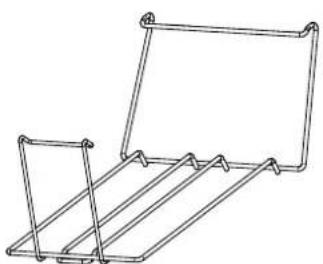
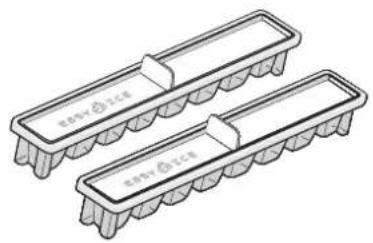
ACCESSORIES

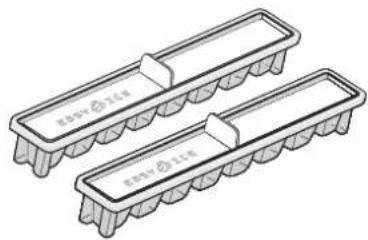
EASY ICE BOTTLE RACK

FIRST TIME USE
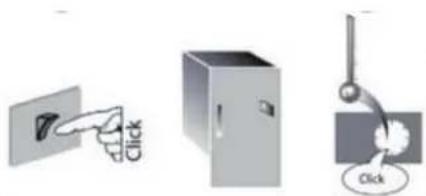
HOW TO START THE APPLIANCE
After plugging the appliance to the mains, it starts the operation automatically. After starting the appliance, wait at least 4-6 hours before placing food into the fridge and into the freezer compartment.
When the appliance is connected to the power supply, the display lights up and all the icons appear on the display for approximately 1 second. The default (factory) values of the fridge - freezer compartment settings light-up.
DAILYUSE
See Use and Care Guide for more details on functions / see last page for information on how to obtain the Use and Care Guide
FUNCTIONS
ON/STANDBY INDICATOR /BUTTON
To put the product in Stand-by, press and hold for 3 seconds. All the icons turn off except:

FRIDGE TEMPERATURE
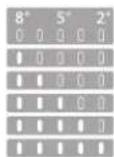
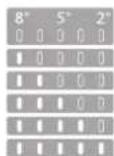
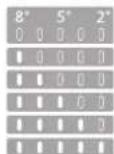
To adjust the Fridge Temperature, press the Fridge ^ C button. The Fridge Temperature can be adjusted between +2^ and +8^, as shown by the Fridge Temperature LEDs.
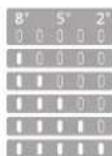
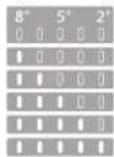
FAST COOL
Using Fast Cool function it is possible to increase the cooling in the refrigerator compartment. The use of this function is recommended when placing a very high quantity of food in the refrigerator compartment. Press & hold for 3 sec. the Fridge ^ C button to activate Fast Cool function. When activated, the Fast Cool indication will be displayed by the Fridge Temperature LEDs as shown in the beside sequence. The function is automatically disabled after 6 hours, or can be manually disabled by pressing Fridge ^ C button.
FREEZER TEMPERATURE
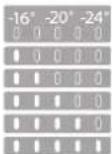
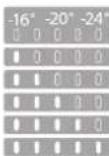
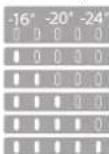
To adjust the Freezer Temperature, press the Freezer ^ C button. The Freezer Temperature can be adjusted between -16^ and -24^, as shown by the Freezer Temperature LEDs.
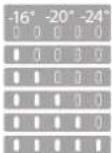
FAST FREEZE
The use of this function is recommended when placing a very high quantity of food to be frozen in the freezer compartment. 24 hours before freezing fresh food, press & hold for 3 sec. the Freezer button to activate the Fast Freeze function. When activated, the Fast Freeze indication will be displayed by the Freezer Temperature LEDs as shown in beside sequence. After 24 hours place the food to be frozen in the upper basket of freezer compartment. The function is automatically disabled after 48 hours, or can be manually disabled by pressing Freezer ^ C button.
KEY LOCK FUNCTION
To lock/unlock the keys of the Control Panel, press the Key Lock button for 3 seconds. The Key Lock indicator is on when the option is engaged.

6^th SENSE INDICATOR
6^th Sense technology automatically works to ensure the optimal conditions to preserve the stored food.
SMART DISPLAY
This optional function can be used to save energy. To activate the Smart Display, press Fridge ^ C and Freezer ^ C buttons at the same time for 3 seconds until an audible signal sounds. To deactivate this function repeat the same procedure. Remember that this function does not disconnect the appliance from the power supply, but only reduce the power consumed by external display.
FOOD CARE ZONE 0^ /SAFE DEFROST\*
A compartment designed to keep delicate food such as meat and fish fresh. The low temperature in the compartment makes it possible to store the food for up to one week tests performed on meat products - without changing its nutrients, appearance and flavour. The compartment is also very suitable for healthy food defrosting, as low-temperature defrosting prevents any proliferation of microorganisms, while protecting its taste and organoleptic properties. It is not suitable for fruit, vegetables and green salad. But it can be used for stuffed fresh pasta and even cooked food or leftovers.
TEMPERATURE INDICATOR*
Temperature indicator informs you if the temperature in this cavity is cold enough for storage with the word "OK".
- Check that OK appears clearly on the indicator light (see the picture below).

-
If the word "OK" does not appear it means that the temperature is too high: set a lower temperature and wait approximately 10 hours until the temperature has been stabilised.
-
Check the indicator light again: if necessary, readjust it following the initial process. If large quantities of food have been added or if the refrigerator door has been opened frequently, it is normal for the indicator not to show OK. Wait at least 10 hours before adjusting the REFRIGERATOR OPERATION knob to a higher setting.
SHELVES*
Due to the special guides the shelves are removable and the height is adjustable, allowing easy storage of large containers and food.
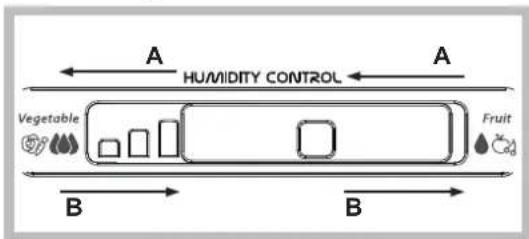
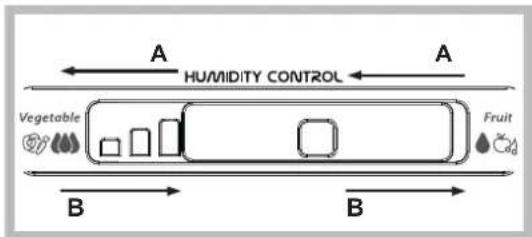
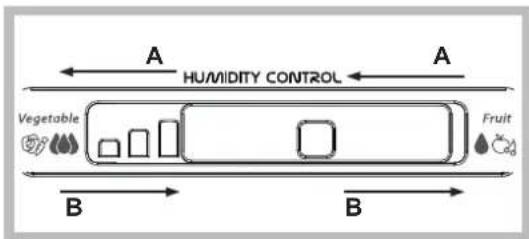
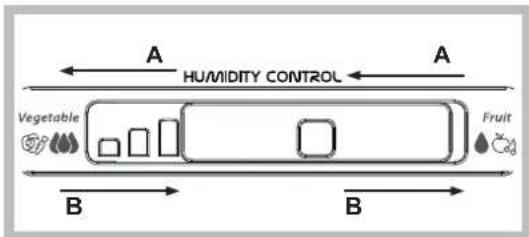
FRUIT AND VEGETABLE BIN *
The salad crispers fitted inside the fridge have been specially designed for the purpose of keeping fruit and vegetables fresh and crisp. Open the humidity regulator (position B) if you want to store food in a less humid environment like fruit, or close it (position A) to store food in a more humid environment like vegetable.
ALARM TABLE
| ALARM TYPE SIGNAL CAUSE SOLUTION | |||
| Door open alarm | The acoustical alarm is activated and the Alarm Indicator ▲ blinks. | The door has remained open for more than 2 minutes. | Close the door or press the Stop Alarm to mute the acoustical alarm. |
| Temperature Alarm | The Temperature LEDs display blinks (°C) and the Alarm Indicator ▲ remains on. | The inside freezer temperature is not adequate. | Press the Stop Alarm button ▲; the acoustical alarm stops, the Temperature Display (°C) blinks and the Alarm Indicator ▲ remains on until a temperature < -10°C is reached. |
| Long Black-Out alarm | The Black Out Alarm icon ▲ remains on, the Alarm indicator ▲ blinks. | Prolonged power failure, able to cause the inside temperature to increase to 0°C. | Press the Stop Alarm button ▲; the acoustical alarm stops, the Temperature Display (°C) blinks and the Alarm Indicator ▲ remains on until a temperature < -10°C is reached. |
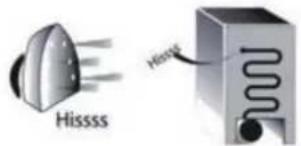
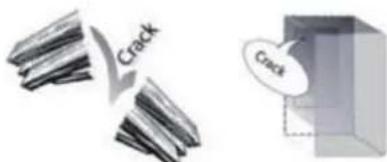
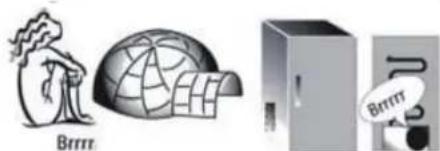
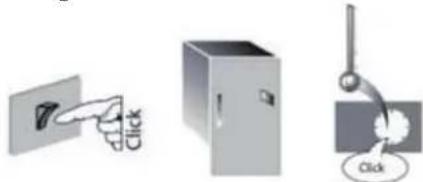
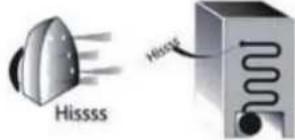
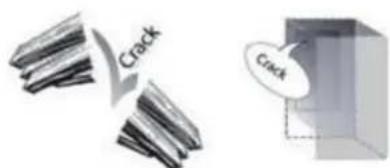
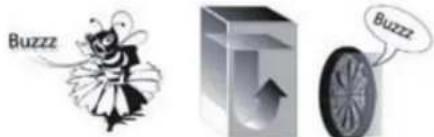
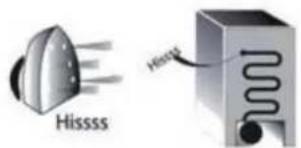
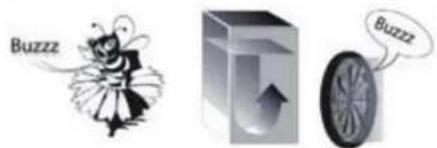
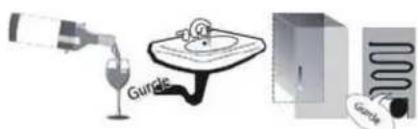
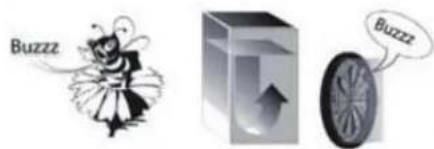
SOME OF THE FUNCTIONAL SOUNDS YOU MIGHT HEAR
A hissing sound when switching on the appliance for the first time or after a long pause.
Buzzing sound when water valve or fan start working.
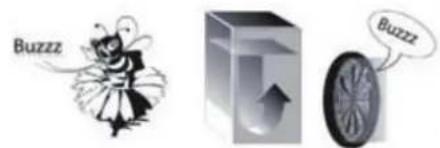
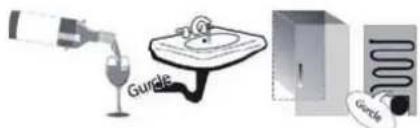
A gurgling sound when refrigerant fluid enters into the pipes.

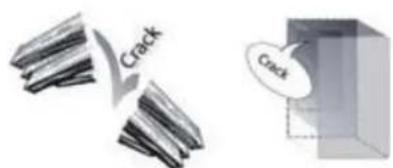
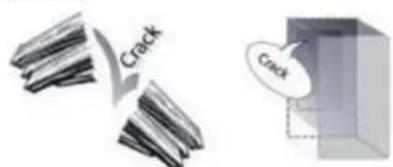
A cracking sound when compressor starts.
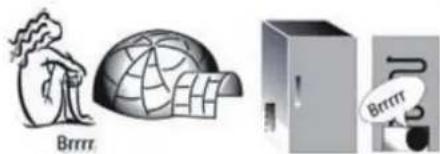
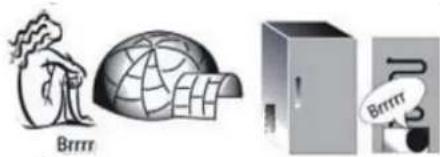
BRRR sound is from the compressor running.
The Click is from the thermostat which adjusts how often the compressor is running.
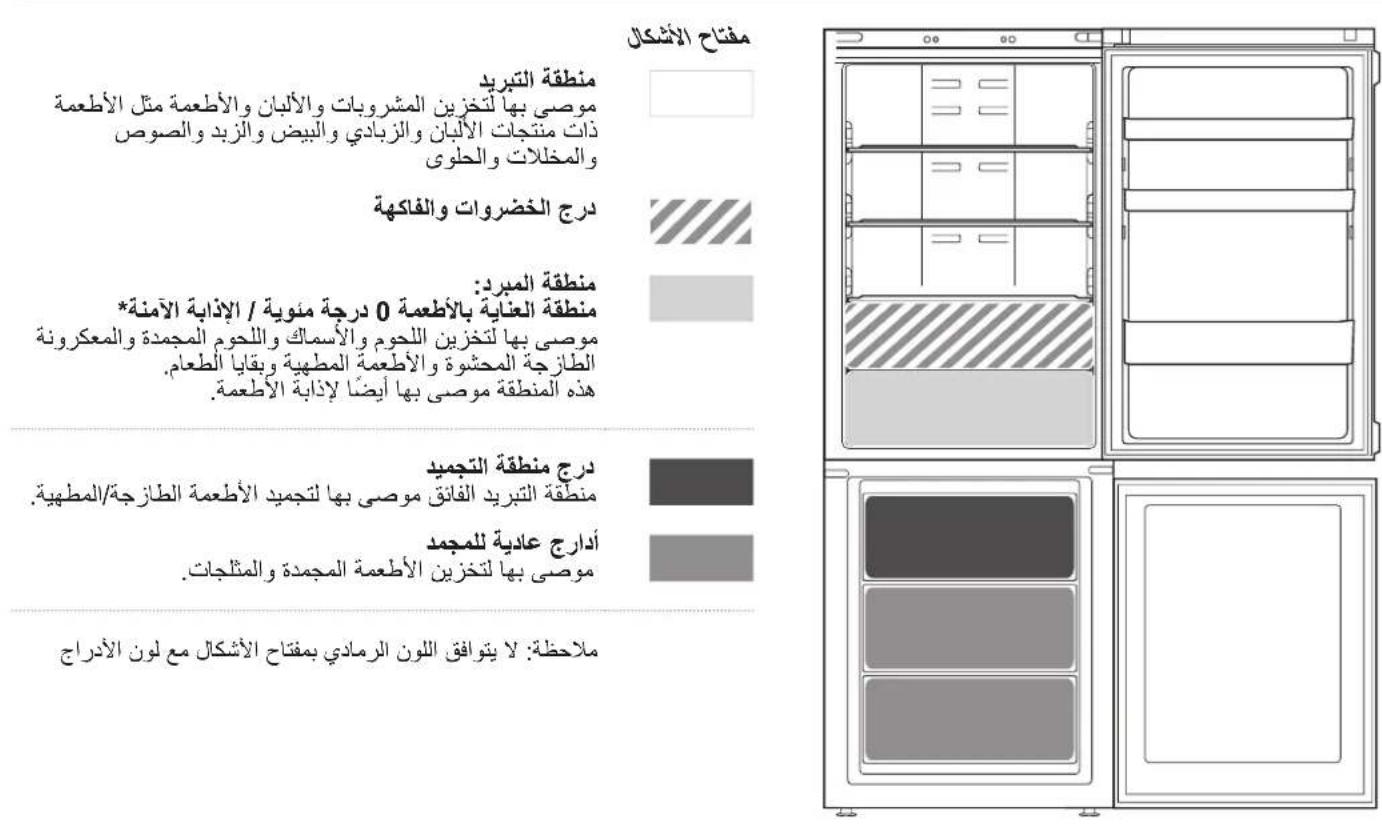
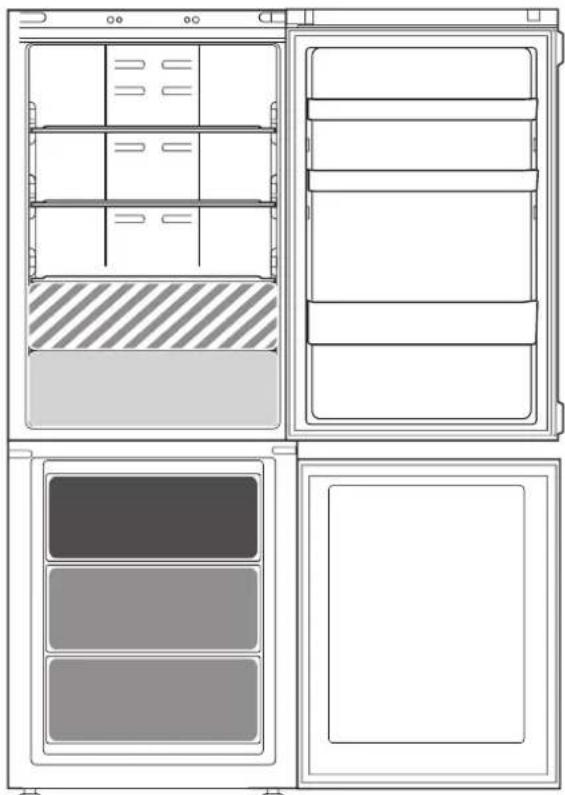
HOW TO STORE FOOD AND BEVERAGE
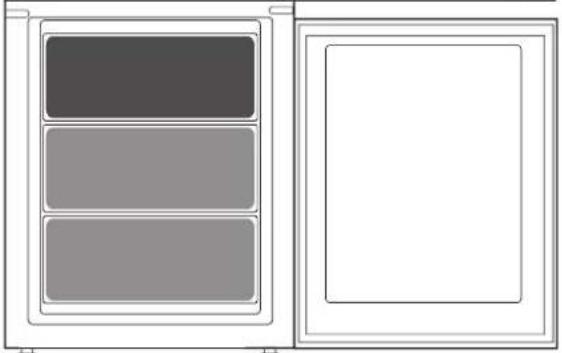
Legend

COOL ZONE
Suggested for the storage of beverage, milk and food as dairy food, delicatessen, yogurt, eggs, butter, sauces, pickles, desserts

FRUIT & VEGETABLE DRAWER
COOLER ZONE:
FOOD CARE ZONE 0°C / SAFE DEFROST *
Suggested for the storage of meat, fish, cold cuts, stuffed fresh pasta, cooked food, leftovers. This zone is also suggested for food defrosting.

FAST FREEZING ZONE DRAWER
Max cool zone suggested to freeze fresh food and cooked food.

NORMAL FREEZER DRAWERS
Suggested for the storage of frozen food and ice cream.
Note: The Grey tone of the legend doesn't match with the color of drawers
FRIDGE COMPARTMENT
Use recyclable plastic, metal, aluminum and glass containers and cling film to wrap foods.
Always use closed containers for liquids and for food that may give off or be tainted by odor or flavor transfer or cover them.
If you have a little quantity of food to store in the refrigerator, we recommend to use the shelves above the crisper for fruits and vegetables since this is the coolest area of the compartment.
Foods which give off a large amount ethylene gas and those that are sensitive to this gas, such as fruit, vegetables and salad, should always be separated or wrapped so as not to reduce the storage life; for example do not store tomatoes together with kiwi fruits or cabbage.
To avoid bottles falling over, you can use the bottle holder (available on selected models).
Do not store food too close together to enable sufficient air circulation.
FREEZER COMPARTMENT
The freezer is the ideal storage location for store frozen food, make ice cubes and freeze fresh food in the freezer compartment.
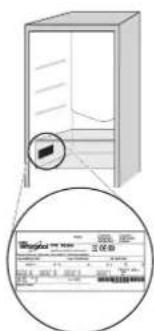
The maximum number of kilograms of fresh food that can be frozen within a 24-hour period is indicated on the rating plate (...kg/24h).
If you have a little quantity of food to store in the freezer, we recommend to use the coldest areas of your freezer compartment, corresponding to the middle area.
PRODUCT FICHE
www The product fiche with energy data of this appliance can be downloaded from Whirlpool website docs.whirlpool.eu
HOW TO OBTAIN THE USE AND CARE GUIDE
Download the Use and Care Guide from our website docs.whirlpool.eu(you can use this QR Code), specifying the product's commercial code.
Alternatively, contact our Client After-sales Service.

CONTACTING AFTER-SALES SERVICE
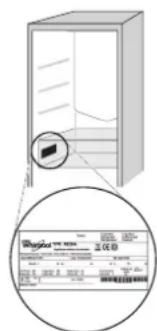
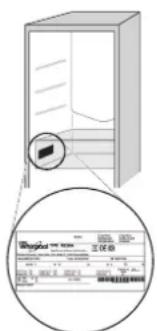
You can find our contact details in the warranty manual. When contacting our Client After-sales Service, please state the codes provided on your product's identification plate.


Printed in Italy
jds jaoaillg aaiyll jajg axll cayes jj jis dcsag
elj gdocs.whirlpool.eu ci jaiy Ic lias go o jy j

WHIRLPOOL

aaiie aaii g aaiii jia jiaai

C
jg 1
j 1
- x^2 + y^2 = 1 ②
2/4jio 0*
GOOLO
3.124
4.4
yj 1 jll (olil ci jzill
aal jai jy jil) th Sense a
-
12345678901234567890
2.2 Eal jixi jill Ebal jia -
3
4.42 100
.5
.66
.7jidj
.8jjj jj j j j j j j j j j j j j j j j j
9. 1/
a
a 3 2 1 0 0 0 0 0 0 0 0 0 0 0 0 0 0 0 0 0 0 0 0 0 0 0 0 0 0 0 0 0 0 0 0 0 0 0 0 0 0 0 0 0 0 0 0 0 0 0 0 0
J 1
1 1
AR
10 10 10 10
132 100000000000000000000000000000000000000000000000000000000000000000000000000
*
* ( 1,2,3,4,5)
a 10000000000000000000000000000000000000000000000000000000000
a a a a a a a a a a a a a a a a a a a a a a a a a a a
- ai = aj

aill lle 10 1
J
| 2 2 2 2 2 2 2 2 2 2 2 2 2 2 2 2 2 2 2 2 2 2 2 2 2 2 2 2 2 2 2 2 2 2 2 2 2 2 2 2 2 2 2 2 2 2 2 2 2 2 2 Δ √ √ √ √ √ √ √ √ √ √ √ √ √ √ √ √ √ √ √ √ √ √ √ √ √ √ √ √ √ √ √ √ √ √ √ √ √ √ √ √ √ √ √ √ √ √ √ √ √ √ ∘ Δ √ √ √ √ √ √ √ √ √ √ √ √ √ √ √ √ √ √ √ √ √ √ √ √ √ √ √ √ √ √ √ √ √ √ √ √ √ √ √ √ √ √ √ √ √ √ √ √ ∇ Δ √ √ √ √ √ √ √ √ √ √ √ √ √ √ √ √ √ √ √ √ √ √ √ √ √ √ √ √ √ √ √ √ √ √ √ √ √ √ √ √ √ √ √ √ √ √ √ √ ∶ Δ √ √ √ √ √ √ √ √ √ √ √ √ √ √ √ √ √ √ √ √ √ √ √ √ √ √ √ √ √ √ √ √ √ √ √ √ √ √ √ √ √ √ √ √ √ √ √ √ ∙ Δ √ √ √ √ √ √ √ √ √ √ √ √ √ √ √ √ √ √ √ √ √ √ √ √ √ √ √ √ √ √ √ √ √ √ √ √ √ √ √ √ √ √ √ √ √ √ √ √ ∗ Δ √ √ √ √ √ √ √ √ √ √ √ √ √ √ √ √ √ √ √ √ √ √ √ √ √ √ √ √ √ √ √ √ √ √ √ √ √ √ √ √ √ √ √ √ √ √ √ √ ∘ |
gaaa 1


- juj 2. juj 3. juj 4. juj


1
Jaaal
INHANKATOP/BYTOH,"BKJ./BΓOTOBHOCT"
3a da nocTaBnTe ypeDa B pexMM Ha rTOBHOCT,HaTNCHeTe N 3aDpbXte 3a 3 cekyn. BcnuKN INKOH YracBaT, C INKIOUeHne Ha

TEMNEPATYPA HXJIADNIHINKA
3a da perynnpate TemepaTpaHa xnaadinHnka, HATNCHTe 6ytoHa C Ha xnaadinHnka. TemepaTpaTa Ha xnaadinHnka MoKe Da ce Hactpoi MeKny +2^ n +8^, KaKTo e NocOueHOOT CBETODNIOITE 3a TemepaTpaHa xnaadinHnka.
ББР3O OXЛАЖДАСЕ
Ye3n3no3BaHe Ha fynKuTAta, bbp3o oxJaHaMe MoKe Da ce yBEnuN KanaUTeBt 3a OxJaHa B OTJeHHeTo Ha XlaDnHnKa. PpeOpBvBa ce n3no3BaHeTO Ha Ta3n FyHKua, KOraTO B OTJeHHeTo HA XLaDnHnKa Ce NOCTABN MHORO TOnA M0 KOJueCtBO XpaHn. HATNCHe t 3aDpbXte 3a 3 Cek.6yToHa XlaDnHnK C, 3a da AKTNBpate fYHKuaTAt, bbp3o oxJaHae". Korato e AKTNBpapa, INnkaua 3a, bbp3o oxJaHae" ue ce nokae ot CBetOnIOuNTe 3a Tempepatya Ha xlaDnHnKa, KaTTo e NOKa3aHO Ha NocJeOBaTeHNHOCTTa BCTpaHn.
Функцята ce DeakTNBnpa abTomatNHO cne6 yacn NIM MoKeJa ce DeakTNBnpa pbuHc Ype3 HaTnCKaHe H6byToHa "Tempepatypa Ha XlaDnNnKa".
TEMNEPATyPA HA OPIN3EPA
3a da perynipate Tempepatya Ha np3epa,HaTnchTe 6yToHa "Tempepatya Ha np3epa". Tempepatypata Ha np3epa MoKe Da ce perynipa MexNy-16C n -24C, KaKTo e nocoueHo ot CBeToNDIOITE 3a Tempepatya Ha np3epa.
ББР30 3AMPA3BAHAE
I3noJI3BaHeTo Ha Ta3n fYHKJna Ce npenOpbYBa, KOraTO B OTJeHHeTo Ha pIn3epa Ce NoCTaBMy MHOrO rONMy KOJIyEcTBO XpaHa 3a 3ampa3raBaHe.
24 npei 3aMPa3BaHe Ha npra Cha xpaHa, HATnCHete u 3aIpbXte B pOdbJIkeHHe Ha 3 cek.6yToHa Ho oPun3epa, 3a Da aKTNBnPaTe yHKUHTA 3a 6bp3o 3aMPa3BaHe. KOrato e AKTNBnPaHa, INDkaTAta 3a "bIp3o 3aMPa3BaHe" Ue ce NOKaKe OT CBETOINOITe 3a TemNepaTpy Ha oPn3epa, KaKTo e IOKa3aHO Ha NOcIeIOBATEJHOCTTA BCTpAH.
Cle 24 yaca noctabete xpaHata 3a 3ampa3BaHe B roPHaTa KoUHnua Ha OTdeJeHneTo Ha φpntepa. DyHKnIra Ta Ce DeakTNBnpa ABTomATuHNo Cte 48 yaca nn MoKe Da CE DeakTNBnpa pTuHO ue3 HATNCKaHc Ha 6yToHa Freezer ^ (Temn. Ha φpntepa).
ФУHKUЯБЛOKИРАЕHAБTOHINTE
3a da 6IoknPate/de6IokPate 6yToHnTe Ha KOHTpOJIHH naHe, HATNCHEte 6yToHa "5IokPaine Ha 6yToHnTe" 3a 3 cekyni. INdikatopbT 3a 6IokPaine Ha 6yToHnTe CBETN, KORATO ONcYra Ta e AKTNBnPaHa.

NHДИКATOP 6TH SENSE
TexHONOTNtTa 6th Sense pa60TN abTOMaTnUHO 3a rapaHTnpaHe Ha ONTMaJIHnTE yCNOBnA 3a 3ana3BaHe Ha CbXpaHaBHnTe XpaHn.
HHTENIHTEH DNCJIENEI
Ta3n DoTbHInTeHa fYHKUma MoKe Da Ce n3NOJ3Ba 3a cNeCTBaHe Ha eHepn.3a Da BKnIOHTe "INTeJIreHTe DcNnei" ,HaTNCHE6 ByTOHnTe 3a C HxnaIINHka N°C Ha oPn3epa. eNHOBpeMeHHo 3a 3ceKHyDn, JOKaTO He yyeTe 3ByKOu BcHann. 3a Da DeAKTNBpuATE Ta3n fYHKUra, NOBTOpe CbUata npOeDpya. He 3a6paBnTe, Ye Ta3n fYHKUma He n3KIOUba ypeDa OT 3axpaHbAHeto, a CaMO HAAMJIBA KOHCyMaLITa Ha eHepn.OT BbHUNr DnCnnei.
3OHA 3A CBEXECT HA XPAHNTEJIHNTE IPOJYKTU 0^/ BE3OPIACHOPA3MPA3RABAHE*
OteneHne,cb3daeHOn da 3ana3Ba npesHn deNkathn XpaHn KaTO Meco n p6a. Hnckata Tempepatya B OTdeheneto no3BOJRA bCxpaHeHnTo Ha xpaHn do eHa ceMnua -npoBeHn Ca TeCTOBe C MeCHn PPOyKTn- 6e3 Te da npomeHr XpaHntenHnTe CN KaueCTBa,BbHweh BnD N BKyc.
OcbEN TOBA OTdEnHeHTo E MHOro NODxOJaTo 3a 3IpaBOcNOBHO pa3Mpa3BaHe Ha XpaHn, Tb KaTO pa3Mpa3BaHeTo npHncka TempepaTypa He N03BOJRA Ba pa3BNTHeTo Ha MmKpOoPrHaN3Mn B XpaHnTe, KaTO B CbIoTO BpeMe 3aNa3Ba TEXHn BKyc n OprAHOJIeTNHn KaueCTBa.
OTeIeHHeTo He e nOxOJaIOo 3a nnIOOBe, 3eHcyuN 3eHn cAlaTn. To oBaue MoKe Da ce H3nOJI3Ba 3a cbXpaHЯBaHe Ha npraCh a NaCTa N dopn CrotBHeH IIN HeDOn3JrEHN XpaHn.
INHДИΚATOP HATEMПЕРATYPATA*
HnIkaTob3a Tempepatpata daBa HOpMaunC dymata "OK" daN TeMnepaTpaBbTpBe Bypee a eoCTaTbHcHO HcKa 3a CbxpaHeHne Ha xpaHn.
- PpOBepTe DaJIyDymaTa OK ce NOBBA JCHO Ha CBETINHHN INHdkaTOp (BXK.KAPTNHKATA NO-DONY).

2.AKOpymata"OK"He Ce NOBBA,TOBa 3Haun,Ye TEMpepaTpa TBbpJe BnCOKa:3aJaTe N-HnCKa TEMpepaTpaN3uKaJte OKo10Uaca,Dokato TEMpepaTpaCe Cta6nnn3npa.
3.Пюоверето OTHOBOCBTINHHNIM INHДNKATOP:akOe HEO6xOДIMO, roпи�н actpoite, KaTO nI3TbJIHNTe ONICAH NIIPOUC. AkO ca NOCTaBeHrROlemn KOLIueCTBa XpaHn IIN AKO BpAtnuKaTa Ha XnaIINHka ce OTBapr YecTo, e HopMaIHO INHДNKATOpBt Da He NOKa3Ba OK.N3yakaTe nohe 10 Yaca, npedn da HAcTpOnTe KInOya PABOTA HA XIAJINIHNAHaNo-BnCoka CToMHOCT.
PATOBE*
BlaorapeneHa CnepaHNTe BODaH, paTOBteCa NOBHXN, a BnCOHHaTaNmEpeynpyema, KOETo N3BOJRAJeCHOTOCbXpaHeHne HaTolemCbDoBe XpaHn.
YKMEJXE 3A PIOIOBE IN 3EJIENYUIN
YekmejkeTa3a canaTn Crisper B xnaHnHka ca CneuHaHO npoeKtnpaHn C cen 3ana3BaHETo Ha NIOOBeTe N 3eENyUIne CBexn I xpynkab. OToBopTe peryaTopa 3a Bnlarata (no3nuiB A), ako JeaTe Da cbxpanBaTe XpaHn B No-Cyxa CpeDa, HApN. NIOOBe, INI rO 3aTbOpTe (no3nuiA), 3a Da cbxpanBaTe XpaHn B No-BnaJHa CpeDa, HApN. 3eENyUin.
TABJIUCA CbC 3BYKOBN CNHAJN
| ВИД 3BYKOB CINHAN | СINHAN3AUCY | ПИЧИHA | PEWEHME |
| 3BYKOB CINHAN 3a OTBOPENH BPAHNUKA | 3BYKOBNT CINHAN CE AKTINBINA индikatopьТ „Аларma" Δ премигв. | Вратукatinge o octabeha OTBOPENH 3a NOBEVE O T 2 MIMHTN. | Затоветe Вратукatinge ини Hatис悔e „Спиранe Ha anapma" 3a 3aIGNIbUbaHe Ha 3BYKOBATA anapma. |
| Аларma 3a temпература | Севедиота 3a Temпература мURA (℃), a ИндikatopьТ „Anapma" Δ OCTABA BKNIOUChE. | Temпература вв Бфprizepa He e noIxodnua. | Hatinchete 6byToHa "Спиранe Ha anapma" Δ; 3BYKOBNT CINHAN Cnnpa, dinCnPJIeR 3a tempepatyata (℃) примь Ha INdikatopbT "Anapma" Δ OCTABA BKNIOUChE, DOKATO He 6bIde ДОCTIHATA Tempepatypa, no-HnCKa OT -10°C. |
| Аларma 3a прдынітелно прекьсаве Ha eNEKTPOZaXpAHBaHeto | Иконата Ha anapmaTa 3a Вразимно Ппекьсаве Ha eNEKTPOZaXpAHBaHeto OCTABA CBeteцa, a ИндikatopьТ "Anapma" Δ ZanOuBa Д Ma | Проблжително рпекьсаве Ha 3axpaHBAHeto, KOETO може da NOBЕDEdo NOBIIaHabaHe Ha tempepatyata Do 0°C. | Hatinchete 6byToHa „Спиранe Ha anapma" Δ; 3BYKOBNT CINHAN Cnnpa, dinCnPJIeR 3a tempepatyata (℃) примь Ha INdikatopbT "Anapma" Δ OCTABA BKNIOUChE, DOKATO He 6bIde ДОCTIHATA Tempepatypa, no-HnCKA OT -10°C. |
HRAKOHOTIyMOBETEPNPABOTA,KOUTOMOXETEAYETE
Cbnctene npn BkIIOUbaHe Ha ypea 3a nbpBn nbT mnn Cne IbIra nay3a.
BpbMueHe, KOrato BOHa KJIana NnN BeHTnIaTOp 3anoHc Da pa6oTn.
KJIOKOueHe, KOraTO OxJaKaJaAaTaTeuHOCTBn3aB Tpb6bnte.
UpaKaHe, KoraTo KOMnpecOpbT Ce BKnIOuN.
3Byk "BPPP" npu pa6ota ha komnpecopa.
UpaKaBaHTo e oT TepMoCTa, KOITo peYnipa YecToTaHa paBoTaHa KOMnPecopa.
KAKДA CE CbXPAHЯBAT XPAHи HAPNTKN

Jezenda

XJIAH3OHA
PpeopbUba ce 3a cbxpaHbAhe Ha HanNTKn, MIAKO IN XpAHN KaTO MNeuHN PPOyKTN, DEINkateCN, KNCENO MIAKO, Rua, MaCNO, COCOBE, TypuNN, DecepTu

YEKMENXE 3A NIOOBE IN 3ENEHUYU

XIAH3OHA: 3OHA TPNJKA 3A XPAHATA O°C /BE3ONACHO PA3MPA3RABAHE*
IpeopbUba ce 3a cbxpaHbAhe Ha Meco, p6a, cTyeHn KOn6acn, npca nacta C nbHeK, roTBHeN rCTn, OCTaTbCn. Ta3n 3oHa ce npenOpbUba cbso 3a pa3mpa3BaHe Ha npOdykTN.

YEKMEJXE HA 3OHATA 3A BbP3O 3AMPA3BAHE
MaKc. cTyHeHa 30Ha - IpenOpbUba ce 3a 3aMPa3BaHe Ha npeCHN n CrotBeHn XpaHn.

YEKMEJXETA 3A HOPMAJIHO 3AMPA3RABAHE IpenopbUba ce 3a cbxpaHЯBaHe Ha 3ampa3eHn xpaHи cnaDone.
3a6eKka: CnBnT ToH Ha nereHdaTa He CbOTBeTCTBa Ha CBeta Ha YekMeJKeTa
OTJEHEHNE HA XIAIINIHKA
N3NoJ3BaIte PnactMacOBn, MetaHn, aIyMnHHeBn nCTbKJIeHn KOHTeHepn, KOUTo MOraT da Ce peuNKlnpaT, KaKTo n OnaKOBbHOb oJIno 3a O6BnBaHe Ha xpaHnte.
BnHaN n3NoJ3BaIte 3aTBopeHn KOHeHepn 3a TeUHOCTn 3a XpaHn, KOnTO OTdEnrT Nm MoRat da NoeMaT MmPn3Mn Nnn Bkyc, Nnn Tn NOKpNbAit.
Ako mate MaIKO KOINueCTBO xpaHa 3a CbXpaHHe N B XnaIINHka, npenopbUBaMe Da n3NON3BaTe paTOBete Hnd YekMeJKeTo 3a IIOOBe N 3eNeHcyuN, TbN KaTO TOBa B Han-CTyDeHata O6NaCT OT OTdeneHneTO.
XpaHn, KOINTO OTDaBAT ROLAMO
KONUcTeBO eTnIeH, IN XpaHn, KOUTO
Ca YyBCTBNTEN H KbM TO3N rA3,
KaTO NIODoBE, 3eNEHuYuN i CanaTN,
TPa6Ba BnHaRn Da 6bTaT pa3dEnaHn
HnYBnBAHn BBΦoJNo, 3a Da He ce
HaMaJIbBA TAXHaT RoDHOCT; HaPmEpe,
He CbXpAHBaIe ToDMAtn 3aeDnC
KNBn NII 3eJe.
3a n36arbahe Ha naHaTe Ho 6yTuNK MoKeTe Da n3NON3BaTe NOCTaBkata 3a 6yTuKn (HaJIuHn pni ONpeJelen HmOdeN).
He cbxpaHraBaIte xpaHnte npekaneHo 6n3o eHa do npyra 3a no3BOJBAHe Ha DOCTaTBcHNOuPKyanaHr Ha Bb3dyX.
OTJEJEHNE HA OPN3EPA
Φpns3epbTe nideaHOTOMrTO 3a
cbxpaHeHne Ha 3ampa3eHN xpaHn,
npaBeHe Ha IeDeHn Ky6yeta
3ampa3BaHe Ha npesHn xpaHn B
OTpeHneHTo Ha pns3epa.
MaKcImaHHTO KOJIueCTBO B KINORpaMn
OT npesHn xpaHn, KOITMOrAT da ce
3ampa3RbPamKITE Ha nepNOd OT
24 yaca, e NocOeHO Ha Tabelkata C
OCHOBHNTe DaHHN (...kg/24 q).
Ako Imate MaIKO KOJueCTBO
XpaHa 3a CbxpaHne HbB pns3epa,
npenopbUbAME Da n3NoJ3BaTe HAI-CTyJeHNTe O6NaCTn Ha OTdeJeHNeTO
Ha pns3epa, KOITOCbOTBETCTBAt Ha
CpeHnTa 06NaCT.
ETUKET C DAHHN 3A UPEDA
www JIINCTOBkata C daHHN 3a KOHCyMaunra Ha eHepnHa To3n ypeJ MOKeJa 6bJe n3TerHeHa OT ye6cauTa Ha Whirlpool docs.whirlpool.eu
KAK DA CE CIOBNETEC PbKOBOCTBOTO 3A YNOTPEBA I NOIDPbJKA
www CbaIeTe PbKOBOdCTBOTO 3a ynoIpe6a n noIpbXka OT hauny ye6caIT docs.whirlpool.eu (MOxTe Da n3nOJ3BaTe To3n QR K0D), kato nocouHte TbproBckn KaD Ha npOdyKta.
MoKeTe CbIoo TaKa Da ce CbBpKTe C OTdena 3a CneInpOpaJx6eHO O6cnyXbaHe

CBbP3BAHE COTdEla 3A CJeI\PoDAJXBeHO OBCJIyXBAHE
HaHHnTe 3a KOHTAKMOKTe Da HamePte B KHNKKATA 3a rapaHnraTa. Korato ce CbbpKeTe COTena 3a cneepoadk6eHo o6cnyKaHe, NocOuyTe KOOBTe OT Ta6enKaTc DaHHn Ha Baunr ypei.

OTneetaHOBITaJIIN
PRÍRUČKA
PRO KAŽDODENÍ POUžITÍ

DEKUJEME VAM ZA NAKUP VYROBKA ZNACKY WHIRLPOOL
Pro komplexnejśpomoc a podporu prosim
zaregistrujte svuj vyrobek na webovych strankach
www.whirlpool.eu/register

W
MERCI D'AVOIR CHOISI UN PRODUIT WHIRLPOOL
TASTO/SPIA ACCENSIONE/STANDBY
AJFAWKbI PET PAIДАЛAHY
KYPbIINFbIHbIKOCYKOJIbl
KypbInfbHbI KENIRE KOckaHHaH KeIH OJ aBTOMaTbI Tpyde Xmbic ITei bactaDbI. KypbInfbHbI icKe KOckaHHaH KeIH TaFamdbI My3daTkblka KHe MY3daTkbIb6JIIMHe caIyDah 6ypbH KEM dereHne 4-6 Cafat KyTe TypbHbI3.
Kypblfby Kyat Ke3iHe KocblfHaHda DnCnIe JxHaHbJ
Kehe 6apblk 6enlireep DncnneJe duamameh 1
cekynd 6oBbl kpcetineDi. ToHa3blkbl - My3DaTkbli
6eimwelepi napametpnpepin H aenki (3aybltbK)
Mehepi KaHaBl.
KYHДЕЛIKTI ПАДАЛAHY
Функuarnap boibua monbik mimemmi Naadany Meh Kymin ycmay HcKaynbihah KapaH3 / NauanaHy Meh Kymin ycmay HcKaynbih Kanau any mypaB1 coHfB1 Gemmeh KapaH3
ФУHKUЯЛAP
ON/STANDBY INHДИKATOPbI/TYIMECI
Thimdi Kyty pexmimi He KOHO yuiH 3 cekyHd bacbl TpybHbI. KelecinepeH hacka bacnBk beitrineep ewei

TOHA3bITKblI TEMNEPATYPACbl
ToHa3bITKbIi TemnepaTypacbH peTey yuiH Fridge ^ C TyIMecin BacsHB. ToHa3bITKbIi TemnepaTypacbIHbIK KApBik DNODTapbl apkblb KepcetINrReHdei, ToHa3bITKbIi TemnepaTypacbH +2°C XeHe +8°C apanbIFbIHda peTeyre 60naBl.
XbINDAmCAJKbIHDATY
KbIaam cankbHdaty fhyHKunraCbH naDanaHaBn TOHa3bTKbI W 6eimihcankbHdaty MymkiHdiH apTbipyfa bonaDb. Byf yHKunraHb naDanaHcy ToHa3bTKbI W 6eimuece HtaFmHbH eTe yIKeH KelemH cainFaH Ke3de naDanaHraH XeH. KbIaam caNkBHdaty fhyHKunraCbH icke Kocy yUinh, Fridge ^ C TyMeuirih 3 ceHyH bcBacB typbH3. Icke KocBunFAH Ke3de, peTTiikneh KepcetireHek BnIaam cankbHdaty Benrici ToHa3bTKbI W TempepaTpaCbiHbH XapBk DIOdTapbl ApkbInbl Kepcetinei. FyHKun8 6 carattah KeIH aBTOMaTbI Tpyde eWipinei HeMece Fridge ^ C TyMeuirih bacy apkbInbl KOImeh eWipye BoNaDbI.
KATbIPFbIu TEMNEPATYPACbl
M3daTkbIu TemnepaTypacbH peTey uih Freezer ^ C TyMeuiirh 6acbHb3. My3daTkbiu TemnepaTypacbHbH kapbIK dIOiTapbl apkblb KepeCtiReHdei, My3daTkbiu TemnepaTypacbH -16°C XeHe -24°C apaIbIbHa peTteyre 6oIaBl.
TE3MY3DATY
ByfynKnHbnaaHaMy3daTbaTbH TaramapdbH
yIKeH KeIeMH My3aTbIbI 6oIiMe He cany Ke3InHe yCbIHbIaIbI.
BaIFbH TaFamdApdbMy3aTpydAn 24 carf 6bybH, KbIaNAM My3aTpy fYHKnraCBH 6bcNepHy uWHi My3aTkbIu
TyMeirH 3 cekHy iwiHne 6acBn TybHbI. IcKe KocBlnraH
Ke3de, petTIiKneH kepcTeINReHne JbIaNAM My3aTpy Benrici ToHa3bITbIbI TeMnepaTpacbHbH XapbIK DIOdTapbl apkblbl kpcetinei.
24 carattah keih My3daTbnaTbH TaFambl My3daTkbl 6eimih xorapfbccebihe ophanactbipbHbI. FyHKnra 48 carattah keinh abTomatbl Typde ewiipinei hemece Freezer ^ C Tymeiwirin kainbacy apkblb eiipine anaabi.
TYIMEHI KylbIITAY FyHKUINCbl
Bacapy naHeniDi eri nepHepepi KynbInTay/KynbInTah 6ocaty yuih, Key Lock (Tymehi KynbInTay) Tymecin 3 cekyHd
bacIn Typblb3. Onuia Kocynbl 6oJFaHa TaYMeHi KynbInTay cyHKUcBiKocblnAbI.

6TH SENSE INHДИKATOPbI
6th Sense texhONrmaCbI ABToMaTTbI Type JyMbIC ICTen, TOHa3bITKbIITaFbI TafAmDbI CaTay YUH OHTaNbI WapTTapDbI KaMTaMaCbI3 eTeDi.
CMAPT DINCIJIEN
Bn KocbIMwa dyHKunraHb KyaTbCaKay yuH naJaIaNyHa 60naDb. Cmap Tncnnne FyHKuncaH bencHe npy uH n6bctbK beNri eCInreHue ToHa3bTKbUo C XeHe KaTbipfBtUoC TyImepin 6ip Me3rInde 3 cekyHd 60nb KaTAP 6acbIN typbHb3. Byn FyHKunraHb Ewipy uH, dAn con npOeDypaHb KaTaNbH3. Byn FyHKunryPbINbHb Kyat Ke3iHn axbpTaNa, TK cbiptkBi DnCnNe TytBaHbTH KyaTb1 a3aTAtbIHbE cTe CaKaTbH3.
TAFAMCAKTAYAIMAFbI 0^ /KAYINCI3KIBITY\*
Et nen 6anbik cnaKbI kac TaFambl caKtayfa aphanfah 6eimuie.
BenimweHH iHnderi Teme Htempeatypa Taramhnh Hepninirih,
cbiptkby Typi MeH dEmiE3repTneTeH bip anTara deHcakTayra
MmkiHbK bepeidi - cbHak e TaramdapbIme Hxprizindi.
Byn 6enimue coHdai-ak TARambl deHcaynbka 3nHcb13
Typde xbiityre KOnaiNb, ce6ebi TeMeH TemnepaTyada Xbiity
MknpoopraHm3Mepin ecin-eHyine KOn bepmei, Taramhnh Dami
MeH opraHoneNTKaBik CnnaTATpbH KopraDbI.
Byn 6enimue xemic-xndekke, KeKHeN cHKe Kc CanAtka
XkapamaiNb.AnaiDa OHbl ToTTbIPMacbl 6ap XaHa nicken MakoH
Xhe TiTI nicken TAMak Hemece KaFah TAMak Yuih naDanaHyra
6oala.
TEMNEPATYPA INDINKATOPB1*
TemnepaTpya HmikatopbI OHbIH iHdien TemnepaTpaHbIH Taramdbi CaKaTHbHdA cybEkeHH "OK" ce3 apkblx xaapnaDbI.
- INHikatop WambHaO CK ce3iHn ahbIK KepiHeTIHn TEKcePiH3 (TeMeHneri cypETTI kapaHbI3).

-
Erep "OK" ce3i kepiH6ce, 6yI TeMnepaTpya TbIM Kxorapbl DereHdi biDipei: TeMeHipeK TempepaHaBOpHaTbHb3 da, ON e6dien TypakTaHaHaWu WamamEn 10 carattan KyTHi3.
-
INHdkatop LAMBH KaTaNan TeKcepiH3: erepKaKet Bonca, 6actanbpekeTT opbHdAn, OHkaTaNan peTteH3. Erep TARAM KEN MEIWepeDe caJIbHcA HEmeCe TOHa3bIKBILTBiH ecii Kmi aUbInca, INHdkatop UAMda OK ce3HH KePi6eYi - KaIbITb KaFdAn. TOHA3bIKBILX KYMbICbl Tetiri XKorapbpak napamETpre aybICTbIPmac 6yipIN KEM DereHne 10 carat KyTH3.
COPEJIEP*
Aphai bafaybIITaybIITapbIH IN Kemerimeh cepenepdi anbin 1bIyfa 60anaJI XeHe 6nIKTIN peTTen, KeNEMI yKeH bIDbc NEH TaramdbOnaI cKaTayfMyMkiHdk bepei.
KENIIJI Kbl3MET KOPCETY OPTAIBIFbIHA XABAPJIACY
Bi3iH 6aJNaHbIC aKnapaTbIMbI3bl KeniIik HyckayIbIbHaHa Ta6yFa 60JaBc. KeniDi Kbi3MeT KepCeTy opTaIbIbHa xa6apnackaH Ke3de, eHIMHi TexNkAblK keCTecIHDe KepCetIinReH KoITapDbI aTbHbI3.

19515719100
Itanra 6aclnra
IKDIENAS LIETOSANAS
INSTRUKCIJA

VAMULTUMIMCAATIACHIZITIONAT UN PRODUS WHIRLPOOL
Pentru a putea beneficia de asistenta, va rugam sa va inregistrati produsul la www.whirlpool.eu/register

BbICTpblIeI NOIKA IJIy BtIIOK

He pa3meuaiTe npOdykTb CnIkwOM 6nI3Ko Dpyr K Dpyry, UTO6bl He 3aTpPyHrTb CnpKyJyauIO BO3dyxa.
MOPO3NJIbHOEOTDELEHNE
Mop03nHbHOeOTdeneHneYBnETCy
NdeaHbIMMeCTOMIgXpaHeHn
3amOpOKeHHbIX pOdyKTOB,
pnproTOBNeHn Ky6uKOB Ibda,a
TaKkeIJI3aMopaxBaHn CBexnx
pOdyKTOB.
MaKcMaJIbHOe KOJINuYeCTBO CBExKHX npOdyKTOB B KInOrpAmMax, KOTOpoe MOxH0 3aMOpO3nTb 3a 24 Yaca, yKa3aHo Ha nacnopTHoT Ta6nUKe (...Kr/24 u).
EcnKoJIueCTBO npOdyKTOB, Tpe6yUOx XpaHeHnB MOp03nIbHnke, HeBeNko, NcNoIb3ynte CpeHNIO 3OHy KaK camYIO XoJIoHHyIO 3OHy B MOp03nIbHOM OTdJeHn.
TEXHNUECKN JNCT U3DEJNA
wwwTexHnueckn INCI np6opa c yka3aHneM daHHbIX 3heprnonotpe6NeHn moXHO 3arpy3ntb c caTa Whirlpool docs.whirlpool.eu
CNOCObI NOJUyeHnRA PYKOBoDCTBA IcNoJIb3OBAHHe N YXoI
www 3arpy3nte pykoBOCTBO "IcnoJIb3OBaHne n yxOJ" C haIero caIra docs.whirlpool.eu (NcNoJIb3yIte npEcdTaBHeHHbI QR-KoD), yKa3aB KOMMepueckn KoD n3dEInna.
PykoBOcTBo MOxHO TaKKe NOJyHTb, 06paTnBwncb B CepBnC

OBPAUHEHNE BCEPBNC
BbMOKeTe HaHTn HaUN KOHTKThIe daHHbIe B rapaHTnHOM 6yKnTe. Pnp O6paueHN N B Cnyk6by noDnepKKn KIneHToB COo6uTne KoDbI, yKa3aHHbIe Ha nacnOpTHOJ 3TuKeTke npn6opa.

19515719100
HaneataHO BITANIN
PRÍRUČKA NA KAZDODENNE
POUZIVANIE

DAKUJEME, ZE STE SI KUPILI VYROBOK WHIRLPOOL
Ak chcete ziskat komplexnejsiu pomoc a podporu, zaregistrujte, prosim, svoj vyrobok na www.whirlpool.eu/register

W
BezpečnostnéPokyny a Navod na použivanie a udrzbu si moźete stiahnut na nasej webovej stranke docs.whirlpool.eu a postupovat podla pokynov na zadnej strane tejto brožurky.
! Pred použivanim spotrebica si starostlivo prečitajte Príručku o ochrane zdravia a bezpečnosti.
OPIS SPOTREBICA
SPOTREBIC
- Zásvúvka na ovocie a zeleninu *
- Zásuvka na uchovávanie Čerstvych potravin 0°C/Bezpečné Rozmrazovanie*
- Mraziaci a ulozny priestor
- Policka na mliečne vyrobky *
- Posúvaténé police *
- Indikator teploty*
- Polica na flase
- Priehradka na flase
-
Vyrovnávacie nožicky
-
Lísa sa počtom a/alebo polohou, dostupné iba pri niedkortorych modeloch.

OVLADACI PANEL
SUOIDEHHE BUKOPUCTAHNRA
Bilbu doknaohy infopmauio npo ykuui dubimbcry Tocihuky 3 bukopucmanha ma dozny)/infopmauio npo me, kompumamu /Tocihuk 3 bukopucmanha ma dozny),duibmcra Ha ocmanhi cmopiniu
ФУHKUII
IHIMKATOP/KHOTIKA YBIMKHEHO/PEXIM OYIKYBAHH
Ioo nepeBecn npuad y pexim OuyBaHHaHTb i ytpmYnte npTgrom 3 ckyHd uO KHONy. BmKHybcr Bc CmBOn, 3a BNHTKOM

TEMNEPATyA XOJIOIDINbHOro BIDJIENHRA
IooB biperynIObATn TempeatpyxOIOINbHOro BIDINEHnHaTNCHTb KHOKNy 已 _ 0 XOIOINbHE BIDINEHn (^) .YXOIOINbHOMy BIDINEHnMOHXa BCTAHOBITN TEMepatpy B dianaoHI BID +2^ Do +8^ ,Ha IIO BKA3yOTb CBITIOIOHl IHNKATOpNTempeatpyxOIOINbHOro BIDINEHn.
UBNDKEOXOJIOJXEHH
3a donomoroio fhykui «UWBnke oxoJxHHe B xOIOINbHOMy
BIDINHMI MOKHa PnWIBuINn IPOuec OXoJIOKeHH npOdyKTIB.
LIO fyHKui pekomeHDOBAHO BIKOPNCOTByBatn, Ako B xOIOINbHe
BIDINHRA 3aBAHTaKEHO 3a6araTo npOdyKTIB. Uo6akTNByBaTn FyHKui0
«UWBnke oxoJNOJKeHH» HATNCHiB iYTPmYte IPOrAOM 3 cekHyd
KHONKY XoONiDHE BIDINENH (C).Ipo BBIMKHeHH FyHKui «UWBnke
oxoJNOJKe HCBiUHb IHOpMaJci, Rky BIDopKaTHMyb CBITIOJDiHi
IHINAtOPn TEMNEPATyn OXoJINbHorO BIDINH (npKnlaad
nocNIOBHOCTi BIDopaxHH LJIeIHOpMaJIH HabeDeHO 36Oky).
Yepe3 6 roDnH fhykui ABTomTuHBO BMKNHeTcB. Uo6BMKNHTn II
BpyHy, HATNCHtB KHONKY «XoONiDInbHe BIDINENH (C)
TEMNEPATyMA MOPO3NJIbHOrO BIIDUIEHHA
HanahybTMempaTy MPo3nBHO BIDINHHAHTCHKONky «Mop03nBHe BIDINHRA (°C)T. MemepaTypa MOp03nBnHapeyIOeBcB 16-16°Cdo-24°C 3rdHO CBITIOJIOHNIX INHKaTOPIBTEMnpaTypN BCEpENHI MOp03nBnHaKa.
UWBIDKE 3AMOPOXyBAHH
LIOyHKJIO peKomeHIOBAHO BIKOPNCTOBYBaTIN,AKUO B MOpO3NJbHe
BiiJiINH3aBaHTaKeHO 3a6aTATO npOdykTB Ia3AmOpOxyBaHH. 3a 24 roHNn DO 3amOpOxyBaHH CBKnx npOdykTB HATNCITb Ta yTpmyIte HATNCHyTO KHNKy MOpOzINbHOI Kamep3 CekyH,Io6 AKTINbYBaTH pHyKlIO «UWBdke 3amOpOxyBaHH. PICNA kTNBAuII pHyKlCI BcITIOADHI IHNtakopOn TEmpeATypM OPOzINbHOrO BIDINIeHH BIDOpBa3AIBHIO pO cyHKUIO WbNKO TO 3amOpOxyBaHH (PnIKnAD NocIIOBHOCTI BIDopKaHeHH IHOpMaui HabeDeHO 360ky). Yepe3 24roHNn POKaNtBnpOyKnDnRA ZmOpOxyBaHH Y BepxHi BucByHn RAik MOpOzINbHO R BIDInehHH. Upe3 48roHNuO pHyKlIO 6yde ABtOMAtNUHO BUMKHeHO. UoB BumKHyTN II BpyHy, HATNCITb KHONKY «MopOzINbHe BIDInehHH (^)
ФУHKЛЯБLOKΥBAHΗΚΗΝΟΚ
Lio6 3a6IkyBaTn/po36IkyBaTn KHOKN nAHei KepyBaHHaTNCHtB KHOKNy 5IOkyBaHHa KHOONKHa 3 cekHydN. AkuO fynkUIO 6IOkyBaHHa KHOONK yBIMKHeHO, BiNDOBHm IHNKATOp CBITNbCRA.

IHDMKATOP 6^th SENSE
TexHONORI 忍 ^ 6 t h Sense) aKTHyETbC aBOMaTnHTo Ta 3a6e3neHyc ONTMaJIbHi yMOBn dIg 36epirAHn npOdykTIB.
PO3YMHNI DNCPTJEI
LIOIIOATAKOBYfHKUIOMOKHBAKNOPNCTOBYATIN3AooJADKeHHN 1eNEKTPOEHEPI. IIO6aKTHyBbATn fHKUIO CMapT-IMCNIEN,ODHOACHO HATNCHTBI yTPMmYte npOTrOM 3ceKHyN KHOHKn XoONOINbHe BIIINHRA (C)》I MOpO3INbHE BIIININEHH (C),DOKn HE pOlyHaC 3ByKOBn CnHAn. IO6B BMKNHYtn fHKUIO,NOBtPOHO BKNOHaTe IIO npOeDpy.CiNDam'AtTN,IO 3aYM0BNBkOPNCtAHN UeiIfYHKUII eNEKTPOXNBHeHH npINA dy He BMnKaETbc.Hatomictb IpocTo 3MeHwTyBCaPiBeHB CNOXnBaHH ENEKTPOEHEPII 3OBHIHIM DCNJIeEM.
3OHAДБАЛINBOTO 3БЕPIAHHЯ0℃/БE3ПЕЧЕ PO3MOPOЖУBAHH*
BidineHH npu3HaHeNo Ira 36epirAHn nerKoi iXi, Takoik M'rci o pnu6a, CBikoIO. Hn3bka Temnepatyap y BidineHHi DozBoJIe 36epirAt npOdykTNpOTAROM OJHO TIKHRA -PPO CE CBIuaTb TcTNI, PPOBeHEi i3MRCHMNPoDyKTAMN-6e3 BTPaTI XI NOKNBHX peOBOH, 3OBHIuHbORO BuRJaIy i avaky.
BijineneHHraTakOxNykepiXoOnuTbIpa03mOpoxyBaHHa3Dopoboi iki, TOMy 10p03mOpoxyBaHHa3HaH3bKoi TemnepaTyPi zanobira noiupenHHIO mIKpoopraH3MIB,yToI Jeac 3axuauOHy CMAk i opraHoneTTHbNCTUBOCTI.
BOHO He nixoHbI 36epirAHn HpyKrib, OOBvI 3eneHoro canaty. Ane BOHO MoKe 6yTN BKNOPcTaHe IIN CBIXOI fapuNPOBaHOi MaKApOHHOI cTpaBn Ta HabITb IIN pPiROTOBaHOI CTpaBn aOo 3aNIuKIB iXi.
IHДИKATOP TEMПЕРТYPN*
IHnKaTOp TEMpePaTyPiHΦopMye IPO Te,IO TEMpePaTyPy UcN Kamepi DOCTaTHbO Hn3bKa Dn 36epirAHn, BiO6paKaOnu CNObO OK
- IpekeHaiTeCra, 10 CIOBO «OK» iITKO BIDOpaxKaETbCRA Ha iHnKAtopoi (IMB.MaI.HNKe).

-
RaKIO CNOBO «OK» He 3'ABNIOcA, Ie O3HaueAe, IIO TEMNEpatyra 3aHAnTO BnCoka: BCTAHOBITb 6IbIb Hn3bky Tempepaty i 3aueKaIte npu6n3HO 10rOHH, nOKI TEMNEpatyra CTabii3yETcbn.
-
3HOby nepeBipte iHnKATOp: 3a Heo6xHnOCTi BIDperyIIOHe Ioro nicra noaTkoBO rpoecy. Raio doHaHO HAdTo BeNkY KJIbKiCTb npdyktib ao kAIO DBeeprTa XOnOINbHnKa cAto BIDkpBaII, BIDcyTHcTB Ha iHnKATopi HanCy «OK» E HopMaJbHOIO. 3aYeKaIte 10doHH, nepw HIX BCTaHOBttn pyKO«YIPABJIHHX OONOINbHnKOM» 6inbe 3naeHH.
NOMNI
3aBdKn 3aCTOCyBaHHIO CNEJIaJIbHIN HAnpAmHIN MoKHa 3HIMATN NOniCi I peryIIOBAtN BNCOTU, UO Do3BOJRAE 3pyH0 36epiratN BeNIki KOHTeHepn i XapOBI npOyKTNI.
ПДДОНДЯ OBOUIB TAФPyKTIB*
KoHTeHepn dna canaty, kBCTaHOBIOIObCra ycepeDHy xOJOnMbHOro BiiJIneHHMAOTb 6yTN CNEuaJIbHO PO3PObHeHMN DnI NITpIMMaHH HpykTtBa OOBiB CBIXMMn. BImKHITb peryIaTOp BOIOROCTI (NOJoxKeHH B),AkuO 6baKaete 36epiratn npOyKTn m Heu BOIOROMy cepeOBuU,0 6JbW nIXxoINb DnI FpykTtB aOyBIMKnHb Ioro (NOJoxKeHH A),AkuO 6baKaete 36epiratn npOyKTn y 6JbW BOIOROMy cepeOBuU,0 6JbWe nIXxoINb DnI OOBiB.
TABINZI NOPEJXHEb
| ТП ПОЛЕРДЖЕНЯ | СИГHAЛ | ПИЧИHA | PIWEHЯ |
| ПОпeрджени по Вidкрип ti дervараза | Лунас 3ыкови сигнai i 6лимаe iндikатор «ПОпeрджени» | Дерцага 3алшени Вidчненimi п ropягом погад 2хвлии. | Шоь ВIMКнутni 3ыкови сигнai, зakриite дervаразаabo натугь кногу «ВIMКнут пОпeрджени». |
| ПОпeрджени по temпepатуу | Блимас CBITLOДIOДHи ДИСПел temпeратури (℃) i CBITINbcs iндikатор «ПОпeрджени» | Нерpinуctima temпeратури BCEpeДи Mopoэильноi Камери. | Натсihть кногу «ВIMKнут niОпeрджени» Δ; ВIMKнeтбс 3ыкови сигнai, дИСПел temпeратури (℃) boDE 6лимати, a INДИКаТOP «ПОпeрджени» Δ6уDE 6лимати do dОсraнення Tempepатури < -10°C. |
| ПОпeрджени пpo Тривале Знectrypмлени | СИmbOL ПОпeрджени по Збий elekn'tpoЖиВelenня 3алшаETьсу yBIMKнeнIM, i 6лимас iндikatot «ПОпeрджени» | Тувалу 3бiB elekn'tpOMePexi, lo може сprnuchinTu nIDNVSEнь temпeратури BCEpeДи прiladny do 0 C. | Натсihть кногу «ВIMKнут niОпeрджени» Δ; ВIMKнeтбс 3ыкови сигнai, дИСПел temпeратури (℃) boDE 6лимати, a INДИКaТOP «ПОпeрджени» Δ6уDE 6лимати do dОсraнення Tempepатури < -10°C. |
DEKIKI3BYKINPINJADY,AKIMOJHANOTUYNIIDYACNOHOYHKUHOYBAHH
UmmiHnNpiJac nepwOBO BBIMKHeHH npuNaIy a6o BBIMKHeHH nicra TpBAnoro nepioNy npocToIO.

D3nKHaHH, KOJIIOUHHeIpaUOBaTI BODONPOBIDHm BEHTINb i BEHTNIArTOp.
3Byk 6yIbKOTIHn, KOIpiIKN XOIOINBHN aReHT HaXODINbY Tpy6N XOIOINBnKa.

IotpickyBaHHK, KOJI IN IOUHHe IpaIOBAtN KOMPecOp.
3ByK 6p-p-pnyhae niac po60n KOMPecopa.
KlaaHn TepmoCTata, kIn peryIOe cactOty po6OTu KOMnPecopa.


36EPIRAHNA POKYKTIB I HANOIB
YMOBHI no3Ha4ku

3OHAOXOJIOJXEHH
PekomehnyetybcaI py 36epirahnHaHOIB,MOOKa Ta MOnouHnx npOdyKTIB,JeIikaTecIB,IOpyTy, RaCb,Macna,CoycIB,CoJIHB,DeceptIB

KOHTEHEP DIA ΦPYKTIB I OBOYIB

3OHA OXOJIOJXEHH: 3OHA ⅡSAJIINBOI0 3BEPIGAHHH 0°C / BE3NEYHE PO3MOPOXYBAHH*
PekomeHnyeTbCnI36epirahHHMa ca,
pNbM'rcHOi Hapi3Kn,CBIXOi fapuipOBaHOI
MaKapOHHOCTpaBN,piroTOBaHOI CtpaBN,
3aIIuKIB iXi.
TaKoJIO 30Hy peKomeHnyeTbCn3actOCOByBaTN
dIpyo3MOPoKByAHnXapOobx npOdyKTtB.

KOHTEHEP 3OHN WBNIKOTO 3AMOPOXKYBAHH
3OHy MaKcImaJIbHOrO OxIOLJKeHHpeKOMeHNyETbcR BnKOpNCTOByBaTIN DnI 3AmOPxByBaHHcBIXTx Ta npriTOBaaHnx IpOdyKTIB.

3BNUAHI KOHTENHEPN MOPO3NbHORO BIDJIJEHH
PeKOMeHnyEbCBA NKOPNCTOBByBaTN DnA 36epirahHH 3aMOpOKeHnx npOdyKTIB I MOpO3NBA.
PpumitKa:Cipn KOnip yMObHoi no3HaKn He 36iraTcBc3 KOJbOpOM KOHTeHepiB
XOJIOJIbHE BIDJIUEHHA
Длзбериггпу рpoудкгвнорсOTByntnlaCTNKOBi,MeTaneBi,anOMHIEBi TaCKNHI KOHTeHepu,TOpiIaHOTbCA BTOpHHI nepepo6ci,a TAKOXxapUOBy nibKy.
BukopncobyTe repMeTuHNo 3akpnti KOthEnepn dna 36epirAHn piin H iKj, kmoKe BnJnTn CneuNCHn 3anax a6o MoKe 3incyBaTnca Upe3 TaKn CneuNCHn 3anax.
KIO KINbKiTb npOyKTIB DnI 36epirAHH B XOIOuNtBuHky HeBEniKa, peKOMeHyEMO BIKOpNCOTByBaTN DnI UbOro NOnUz HAD KOHTeHepom IIO OBOvH i opykTB, aJKe B CII 30HI XOIOuNtBuHO BiDInHeHH CNOCTepiraETbCa HAIHNKHa TEMNEpaTypa.
IpoNyKT, 10o BnJInyB EInky KInbKictb
eTnEHy, Ta T, kki E cyTINBIMM Do UcBOrO r3ay,
HaPnKnAd, FpykTn, OBOUi Ta Canat, 3aBXKn
Heo6xHIO 36epirAtN OkpEmo a6o 3arOpTaTI,
Io6 He cKOPOTNT CTPOK iXhBo rO 36epiraHna;
HaPnKnAd, He 36epiraTe NomiOpn pa3OM 3
Kibi KN KanyCTOIO.
Lio6yHnKHytn naIHIN CHBnIaHaHH nIaIK, BnKOpNCTOByITE NiDcTaBky IINIaIK (IOCTynHO BOKpEmx MoJeJx).
He 36epiraTe npOdykTu HAnTo 6JIn3bKo OOnH Do OOnHO, 0o6 3a6e3neuTn HAnExHy CnpKyIaIIO NOBITp.
MOPO3nIbHE BIDJIUEHHRA
Mop03nIbHe BiDineHnXoNoIbHnKa iDeaIbHo nIXoDntB dIra 36epiraHHa 3AmOpOKeHHx npOyKTIB xapUyBaHH, nPfROTyBaHHK Ky6NKIB NbOdy Ta 3AmOpOxyBaHH CBIXN XpOyKTIB. MaKcMaJIbHy Bary CbiNx npOyKTIB, kMy MoKHs 3amOp03Tu NPOTrOM Do6u, yKa3aHO Ha Ta6NIuCt 3TexHiHmIM DaHIMN (...Kr/24 rO).
Akuo Bam Heo6xHNO NOKlaCTyn MOp03nIbHy KaMepy HeBENKU KINbKiTb npOdyKTIB, peKOMeHNyETbc BIKOPNCTOByBaTN HauXoNODHIi 3OHm MOp03nIbHO BiDineHHB CpePHi YactNI.
IOBIOKOBNIJNCTOKTEXHICHNX DAHNX
wwwPacnoptBupo6y,AnmMiCTNbDaHi3 eJIeKTPocnoXbAHHdIaZbOTo npUaDy,MOxHa 3aBaHTaxNTNaHaBe6-caTlWhirlpool docs.whirlpool.eu
JAK OTPUMATN NOCIBHUK «EKCJIYATAUJA TA OBCJYROBYAHHRA»
www3aBaHTaxTeIIOBINIKi3 BnKOpNCTaHH Ta DOrJIy3 HaOro Be6-caTy docs.whirlpool.eu (MOxHa cKOpNCTaTncr QRKOdom), BkazABUN KOMepuHNI KO BnPo6y.
TaKoX nIaBoro MoKHa 3BepHyTuCA DO ceHTpy NiCIAJnpOdaXHOrO 06cNyROByBaHHA

3BEPHEHHI O CEHTPY IICJIPIPOJAXKHOO6CJYTOBYBAHHI
HaWi KOHTaKTHi daHi HabeHeHO y rapaHTiHOMy KepiBnucTbi. Y pa3i 3BepHeHHr DO ueHTpy nicIaPoaJxHorO 06CnyroByBaHHr BkaxiTb KoIN, aKi HaBeHeHO Ha Ta6NmuCi 3 nacnOpTHmN daHmM Bnpo6y.

19515719100
HaaykoBaHO Itanii