SA240 - Smoke detector ALECTO - Free user manual and instructions
Find the device manual for free SA240 ALECTO in PDF.
| Features | Details |
|---|---|
| Product type | Smoke detector |
| Power supply | 9V battery |
| Detection technology | Ionization |
| Sound signal | 85 dB at 3 meters |
| Low battery indicator | Yes |
| Dimensions | Approximately 10 cm diameter |
| Weight | Approximately 200 g |
| Installation | Wall or ceiling mounting |
| Maintenance | Test regularly, clean with a soft cloth |
| Battery life | Approximately 1 year |
| Safety standards | Compliant with EN 14604 standards |
| Warranty | 2 years |
Frequently Asked Questions - SA240 ALECTO
User questions about SA240 ALECTO
0 question about this device. Answer the ones you know or ask your own.
Ask a new question about this device
Download the instructions for your Smoke detector in PDF format for free! Find your manual SA240 - ALECTO and take your electronic device back in hand. On this page are published all the documents necessary for the use of your device. SA240 by ALECTO.
USER MANUAL SA240 ALECTO
natural_image
Simple diagram of a device with a vertical line and signal icon, no text or symbols present
text_image
Recommended Optional Do not use
text_image
Recommended Optional Do not use
INFORMATION D'INSTALLATION:
natural_image
3D illustration of a mechanical connector with three slots and a central pin (no text or symbols)text_image
Recommended Optional Do not use
INSTALLATIONS INFORMATION:
natural_image
Illustration of a mechanical connector with three slots and a central pin (no text or symbols)natural_image
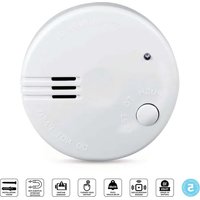
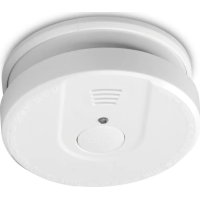
Pure electrical circuit lines without any symbolsThe SA-240 is a smoke detector set for discovery of fire in the first stage. If smoke develops, the SA-240 will give a loud beep of at least 85dB (A). As part of the link function all the smoke alarms within range will sound the alarm. We advice to test the smoke detectors weekly using the test button on the detectors. Save this
manual in a safe place or inside of the electricity meter cupboard.
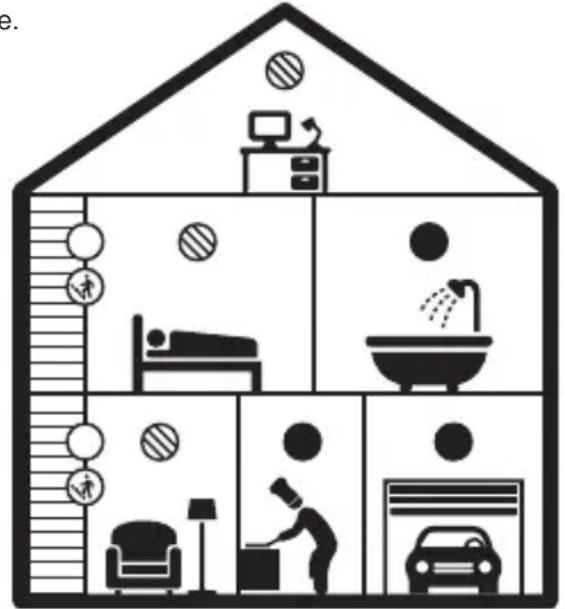
RECOMMENDED INSTALLATION LOCATIONS FOR THE SA-240:
Install the first smoke detector near the bedroom. Ensure that it is placed so, if it would detect fire, at least one exit route would still be accessible. We recommend to place one alarm near each potential blockade of your exit route, so you are alerted before a fire would block off escape.
Use multiple smoke detectors to increase safety and ensure an alert before the escape route is blocked.
Install at least one smoke detector on each floor of your house.
Install at least one smoke detector in each room where people smoke or where there is equipment that may potentially cause a fire.
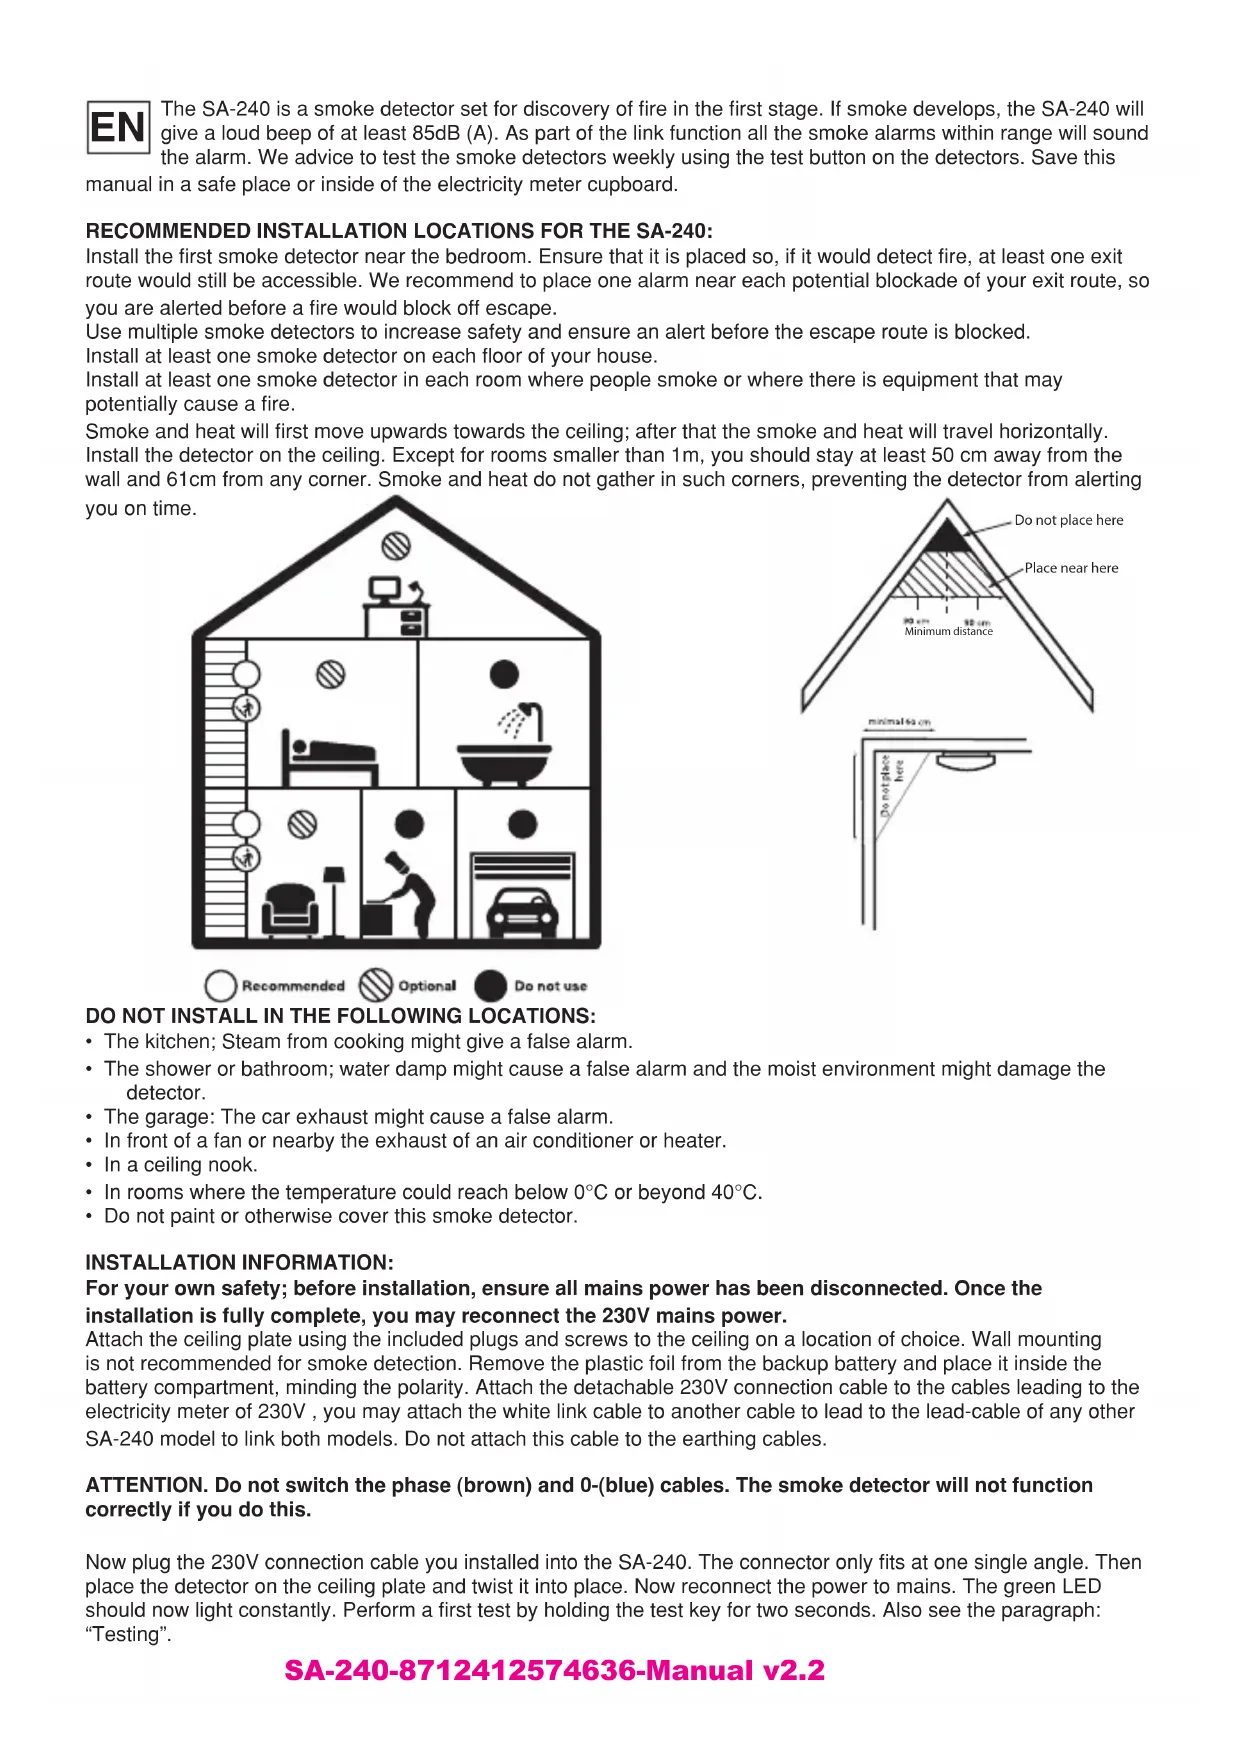
Smoke and heat will first move upwards towards the ceiling; after that the smoke and heat will travel horizontally. Install the detector on the ceiling. Except for rooms smaller than 1m, you should stay at least 50 cm away from the wall and 61cm from any corner. Smoke and heat do not gather in such corners, preventing the detector from alerting
you on time.
text_image
Diagram illustrating a multi-house residential layout with labeled rooms including bed, shower, car, and bathroom fixtures.
Recommended

Optional

Do not use

text_image
Do not place here Place near here 90 cm 10 cm Minimum distance minimal 50 cm Do not place hereDO NOT INSTALL IN THE FOLLOWING LOCATIONS:
- The kitchen; Steam from cooking might give a false alarm.
- The shower or bathroom; water damp might cause a false alarm and the moist environment might damage the detector.
- The garage: The car exhaust might cause a false alarm.
- In front of a fan or nearby the exhaust of an air conditioner or heater.
- In a ceiling nook.
- In rooms where the temperature could reach below 0^ or beyond 40^ .
- Do not paint or otherwise cover this smoke detector.
INSTALLATION INFORMATION:
For your own safety; before installation, ensure all mains power has been disconnected. Once the installation is fully complete, you may reconnect the 230V mains power.
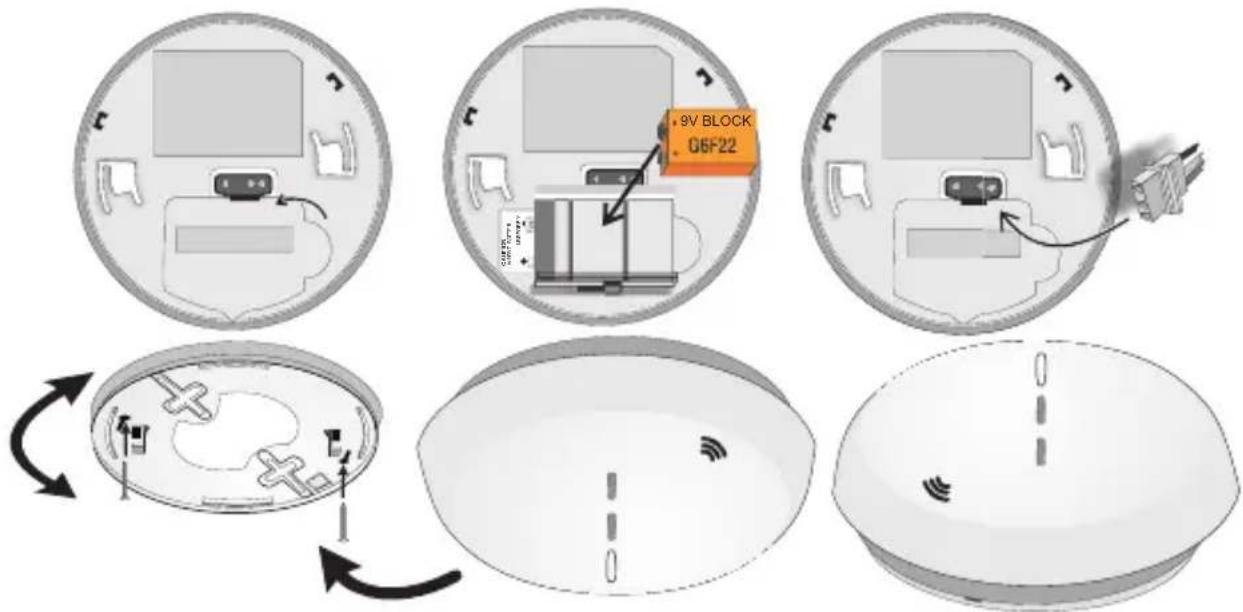
Attach the ceiling plate using the included plugs and screws to the ceiling on a location of choice. Wall mounting is not recommended for smoke detection. Remove the plastic foil from the backup battery and place it inside the battery compartment, minding the polarity. Attach the detachable 230V connection cable to the cables leading to the electricity meter of 230V, you may attach the white link cable to another cable to lead to the lead-cable of any other SA-240 model to link both models. Do not attach this cable to the earthing cables.
ATTENTION. Do not switch the phase (brown) and 0-(blue) cables. The smoke detector will not function correctly if you do this.
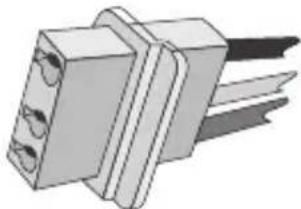
Now plug the 230V connection cable you installed into the SA-240. The connector only fits at one single angle. Then place the detector on the ceiling plate and twist it into place. Now reconnect the power to mains. The green LED should now light constantly. Perform a first test by holding the test key for two seconds. Also see the paragraph:
"Testing".
natural_image
Illustration of a mechanical connector with three pins and a spring (no text or symbols)Brown - Connect to phase
White - Cable to connect to other smoke alarms of the same type (DO NOT attach to any ground cable)
Blue - Connection to 0
text_image
9V BLOCK 05F22LINKING SMOKE DETECTORS USING AN INTERCONNECT-CABLE
You can link smoke detectors of the same type with a cable. To link them, do not use the earthing cable, but ensure you have an extra cable placed inside your ceiling for this purpose. Preferably use a (harmonized) wire with a diameter of 1,5 or 2,5 mm ^2 (H05V-U / H07V-U). Follow the same safety standards for this interconnection cable as you would for installation of mains power cables. The interconnect-cable will lead a high voltage from one smoke alarm to the next. It relays the signal by using the 0/neutral cable and the interconnect cable. If you switched the 0 and phase cables during installation the detectors will sound the alarm constantly. By using this link function all devices will give alarm when one device detects smoke. You can connect a maximum of 12 devices and link-operation is guaranteed as long as all devices are connected to the same end-group and no switches are part of the same group.

text_image
Phase (Brown) Connection cable Neutral/0 (Blue)To ensure you know the smoke detectors are inactive in case of power failure, ensure a vital part of your lighting is attached to the same power group. Please view national standards for proper installation procedure.
USE, TESTING AND MAINTENANCE:
Use: The smoke detectors is operational if the 230V mains power is connected, the 9V backup battery is placed and the SA-240 is mounted to the ceiling. The SA-240 can only be attached to the ceiling plate if the backup battery is placed. If the device is operational the green LED will continuously light. The red LED will blink every 40 sec. to indicate the backup battery is ok. Once smoke is detected, the alarm will sound. Once the smoke disappears, the smoke alarm will stop automatically.
Test:
Hold the test key for at least 2 seconds. The operation is still correct if you hear 2 or three signal tones. Check the smoke detectors weekly. In alarm status the smoke detector will generate about 85dB(A). Do not use candles, open fire or cigarettes to test the smoke detector. Test the link-function by holding the test-button even longer. The other detectors will now start beeping.
ATTENTION:
- If the cause of an alarm is unclear, assume it's caused by fire. Immediately evacuate the building.
- Keep the smoke detectors out of range of children.
- Protect against dust during rennovations. Without protection the smoke detectors will lose their functionality.
Maintenance:
The smoke detector is maintenance-free. In very dusty rooms they may be cleaned by vacuum.
PLAN AN ESCAPE ROUTE:
- Make a map and mark all locations of doors and windows and a possible escape route. Note that you may need an escape ladder on high floors.
- Ensure everyone in the house knows the sound the smoke alarms produce and regularly practice use of the escape route.
- Leave the house immediately according to the plan when hearing the alarm. Every second counts: so respond quickly. If you do not notice smoke or heat, check if everyone in the house is in a secure location.
- Do not open any doors without feeling wether the door is warm or if there is smoke coming from underneath the doors. If it is, do not open that door. If the door is cold, put your shoulder firmly against the door and open it a small amount to check for any heat or smoke first.
- If there is much smoke, keep low and take shallow breaths, preferably through a moist towel. Call the fire department as soon as you are safe outside.
REPLACING THE BATTERY:
The detector is supplied using a 9Volt blok battery. Only use the recommended type GoldPeak GP1604A, GoldPeak GP1604S, Raymax 6LR61 or EVE CR9V/P. Under normal conditions the battery will last at least one year. If it is about to need replacement, the smoke detector will make a chirping sound every 60 seconds for at least 30 days. Disconnect mains power before you replace the battery.
Pay attention to the polarity when replacing batteries. Test the detector after every battery replacement. If the smoke detector does not function, please contact your supplier.
ENVIRONMENT:
Do not throw away used batteries, but recycle them using your local chemical depot. Product may not be thrown out as normal waste, but must be recycled as electrical waste.
TECHNICAL DATA:
Working temperature.... 0°C tot 40°C
Power 220-240V AC 50Hz + 9V DC Battery backup
Battery backup time If the 230V is not connected, the 9V battery will last at least 1 year
Power usage in standby 18μA max.
Power usage in alert 45mA max.
Sound level during alert.... 85dB at a distance of 3m
Humidity.... < 93%
Maximum link possible 12 SA-240 models at a maximum distance of 150M
| PROBLEM SOLUTION | |
| No sound during test procedureNote: Hold the test button at least 5 seconds during the test. | 1. Remove the alarm to check if the battery is installed properly and on the right polarity. |
| 2. Clean the smoke alarm. | |
| The smoke alarm beeps every minute Replace the 9V battery | |
| The smoke alarm frequently gives a false alarm, constantly gives a false alarm during cooking or when showering. | 1. Clean the smoke alarm. |
| 2. Move the smoke alarm to a different location. | |
text_image
Recommended Optional Do not use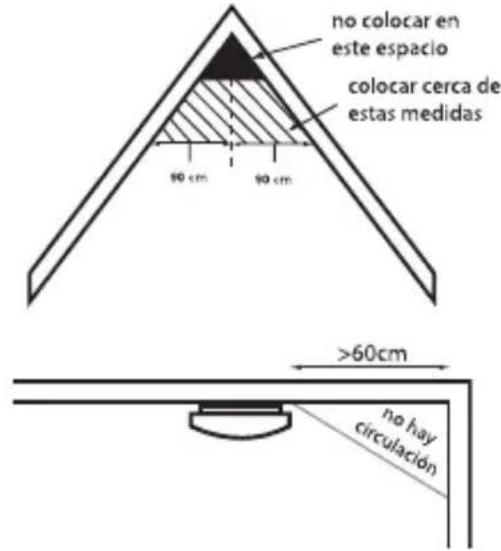
natural_image
Illustration of a mechanical connector with three pins and a strap (no text or symbols)text_image
Diagram illustrating device mounting and ventilation process with labeled components including 9V BLOCK, GBF22, and fan base.19  001CPR2016-11-27SA-240conforms to EN 14604:2005/AC:2008 001CPR2016-11-27SA-240conforms to EN 14604:2005/AC:2008 |
| Hesdo BV, Azielaan 12, ‘s-Hertogenbosch The NetherlandsEN14604:2005/AC:2008 |
| Smoke Alarm DeviceSA-240Fire detection in buildingsEssential characteristic 1: PassEssential characteristic 2: PassEssential characteristic 3: PassEssential characteristic 4: PassEssential characteristic 5: PassEssential characteristic 6: PassEssential characteristic 7: PassEssential characteristic 8: Pass |
This product meets all essential requirements and other provisions as described in the European Directive 2014/53/EU. The declaration of conformity is available at: http://DOC.hesdo.com/SA-240-DOC.pdf
text_image
Service Help Alecto® Aziëlaan 12 ‘s-Hertogenbosch WWW.HESDO-SERVICE.NL INFO@HESDO-SERVICE.NL NL +31 (0) 73 6411 355 FR +32 (0) 3 238 5666| Main function Smoke | |
| Method of mounting Ceiling | |
| Main power source | 230V AC / Backup battery, 9V block, inc.Start to use before:MM-YYYY |
| Autonomy At least: 5 years | |
| Interconnectible Wired | |
| Suitable for installation in a mobile home No | |
| Individual alarm indicator Yes | |
| Temporary deactivation facility No | |
| Temporary muting facility Yes |