
AirCard 810S - Router NETGEAR - Free user manual and instructions
Find the device manual for free AirCard 810S NETGEAR in PDF.
| Features | Details |
|---|---|
| Product Type | 4G LTE Mobile Router |
| Dimensions | 100 x 62 x 16 mm |
| Weight | 150 g |
| Connectivity | 4G LTE, 3G, Wi-Fi 802.11 a/b/g/n/ac |
| Download Speed | Up to 600 Mbps |
| Upload Speed | Up to 150 Mbps |
| Number of Connected Devices | Up to 15 devices simultaneously |
| Battery | 2930 mAh, up to 11 hours battery life |
| Screen | Color LCD screen |
| Operating System | Compatible with Windows, macOS, iOS, Android |
| Maintenance | Regular reboot recommended, firmware update |
| Security | WPA/WPA2, built-in firewall |
| Included Accessories | USB cable, power adapter, quick start guide |
| Warranty | 1 year |
Frequently Asked Questions - AirCard 810S NETGEAR
User questions about AirCard 810S NETGEAR
0 question about this device. Answer the ones you know or ask your own.
Ask a new question about this device
Download the instructions for your Router in PDF format for free! Find your manual AirCard 810S - NETGEAR and take your electronic device back in hand. On this page are published all the documents necessary for the use of your device. AirCard 810S by NETGEAR.
USER MANUAL AirCard 810S NETGEAR
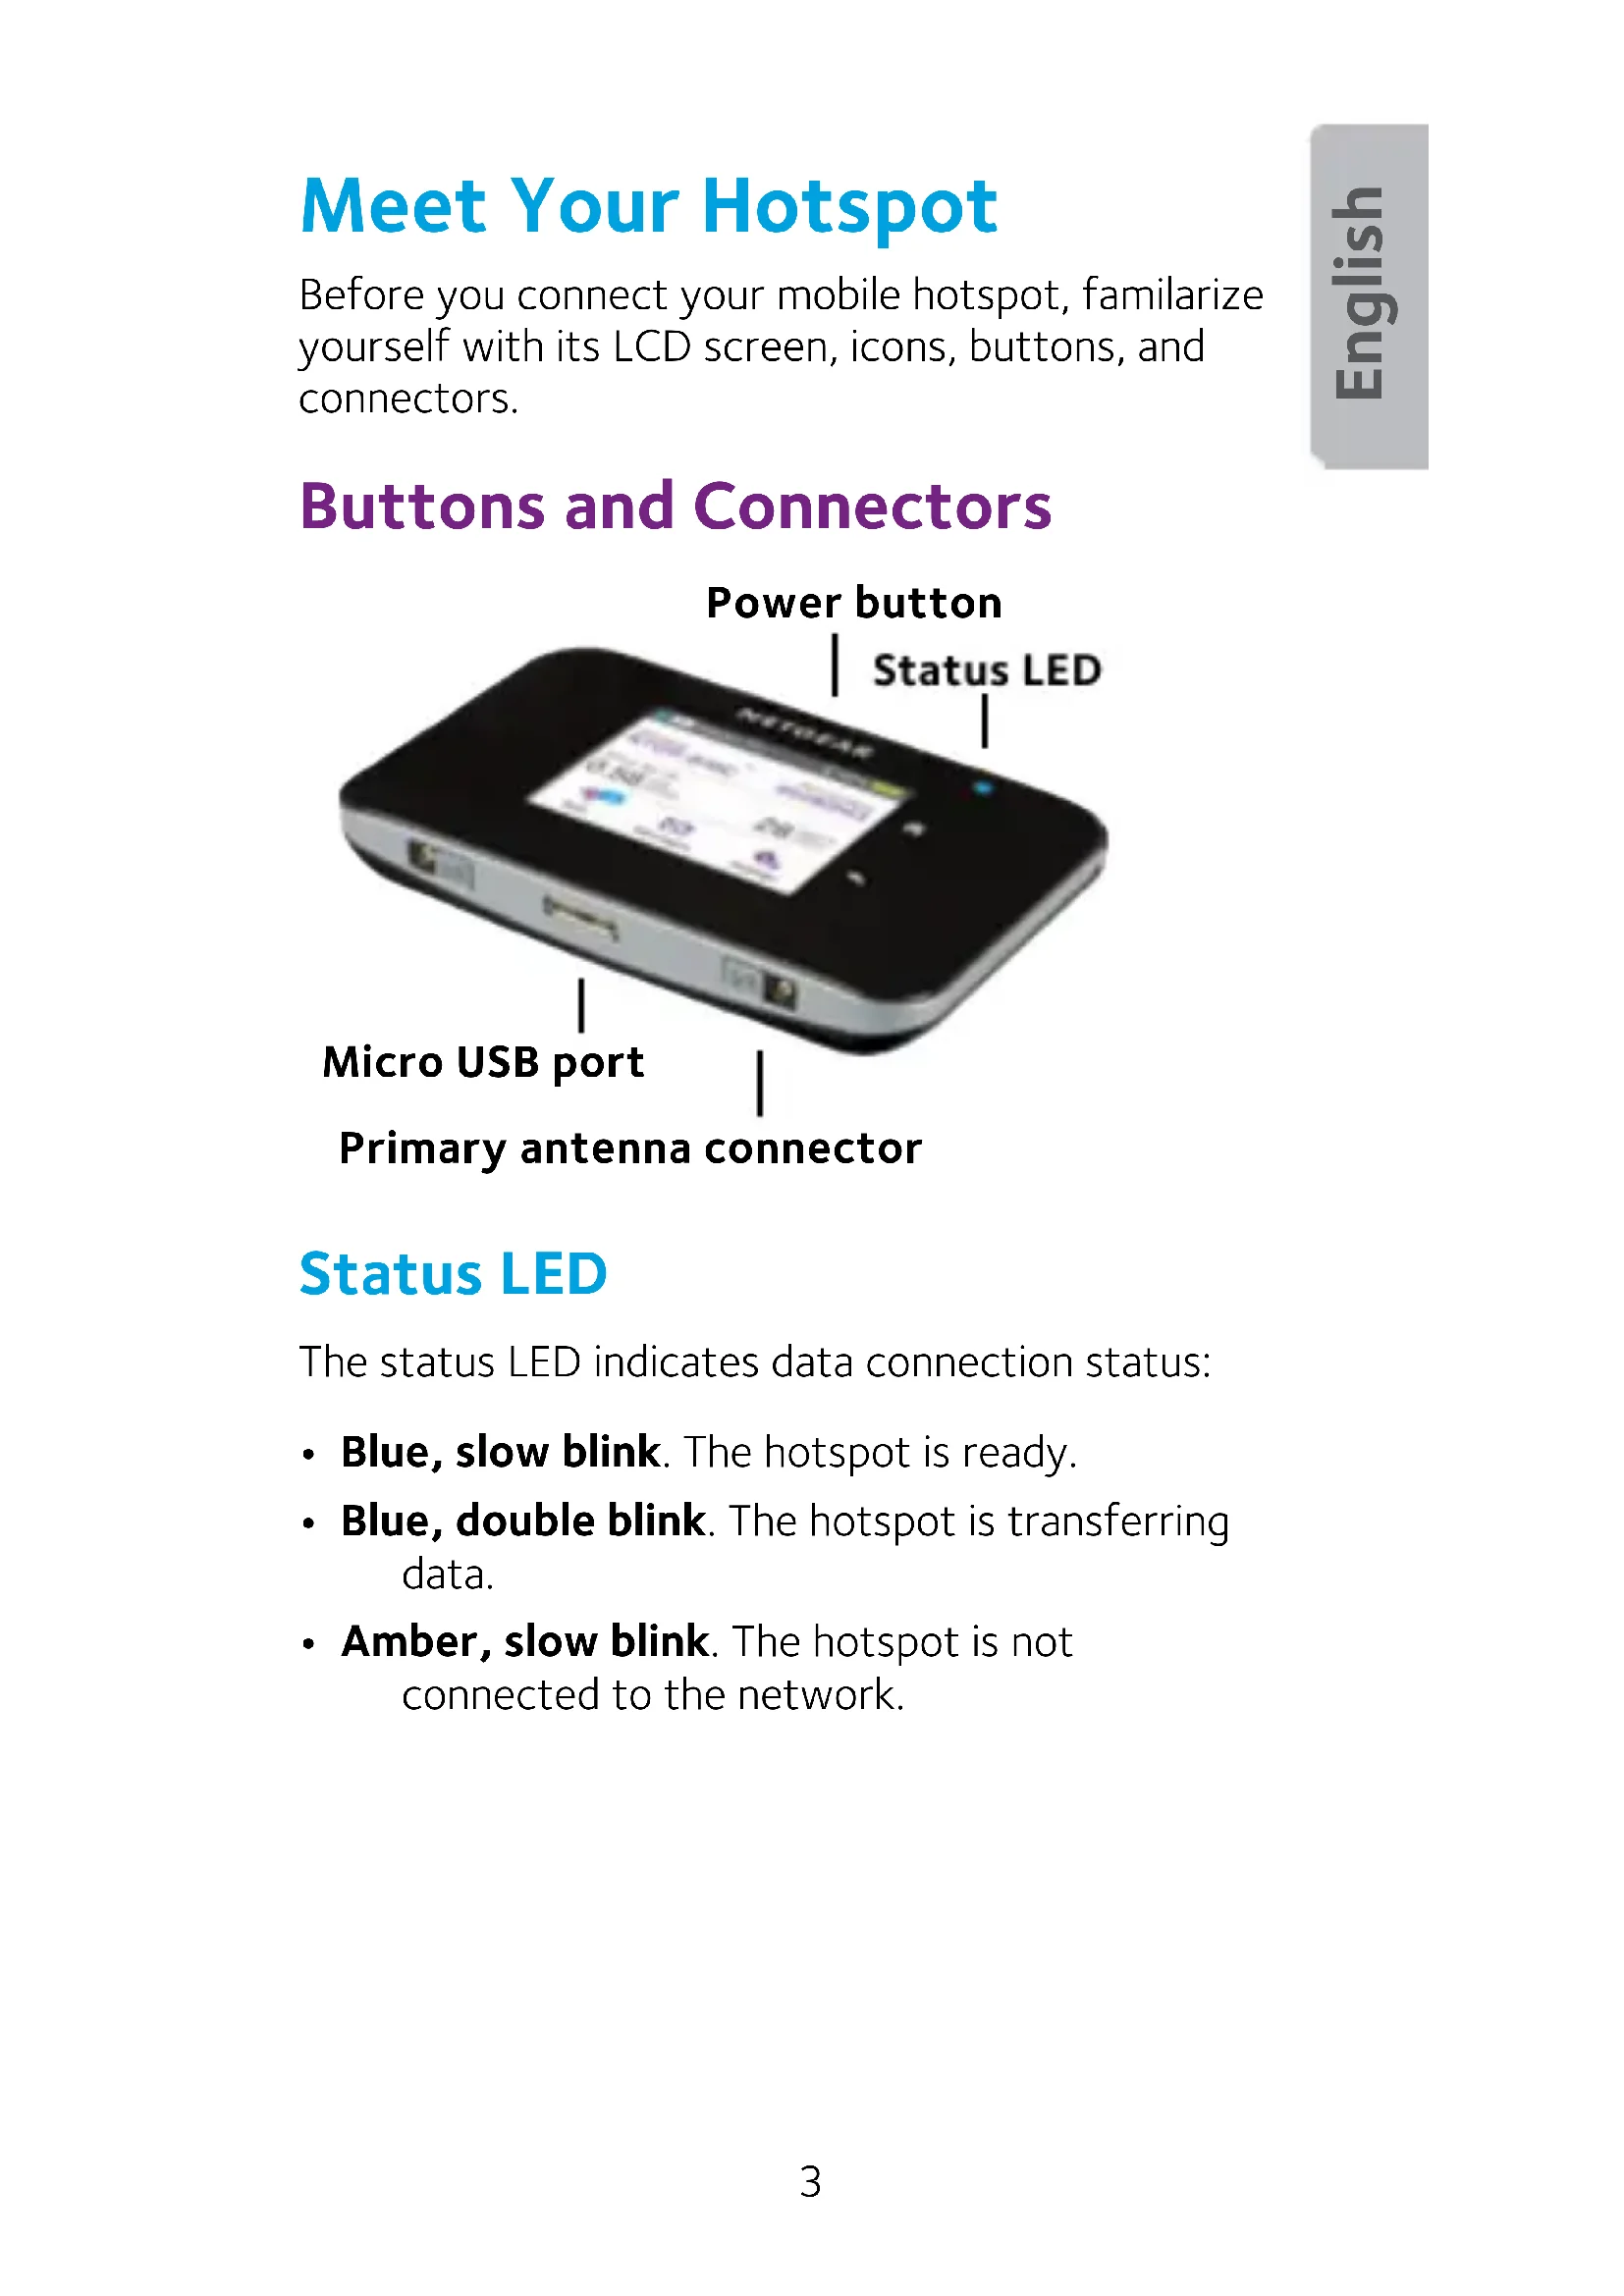
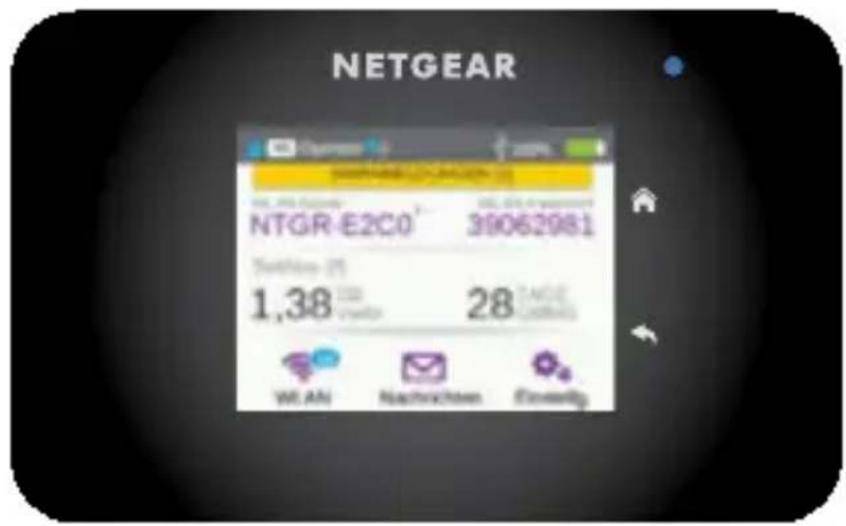
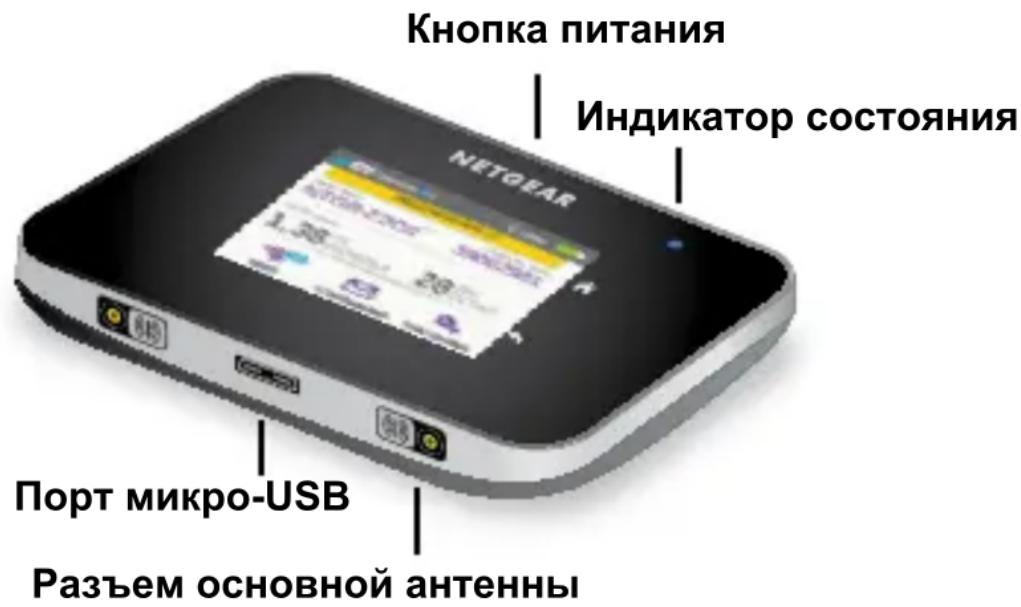
Before you connect your mobile hotspot, familiarize yourself with its LCD screen, icons, buttons, and connectors.
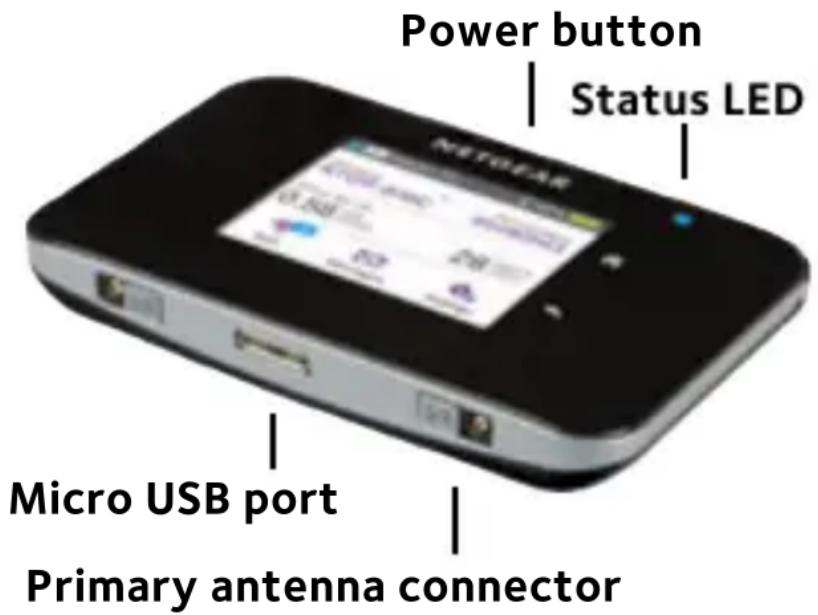
Buttons and Connectors
Status LED
The status LED indicates data connection status:
- Blue, slow blink. The hotspot is ready.
- Blue, double blink. The hotspot is transferring data.
- Amber, slow blink. The hotspot is not connected to the network.
Power Button
Press and hold the Power button for two seconds to power the hotspot on, five seconds to turn the hotspot off.
Press and release the Power button to cycle through LCD screens.
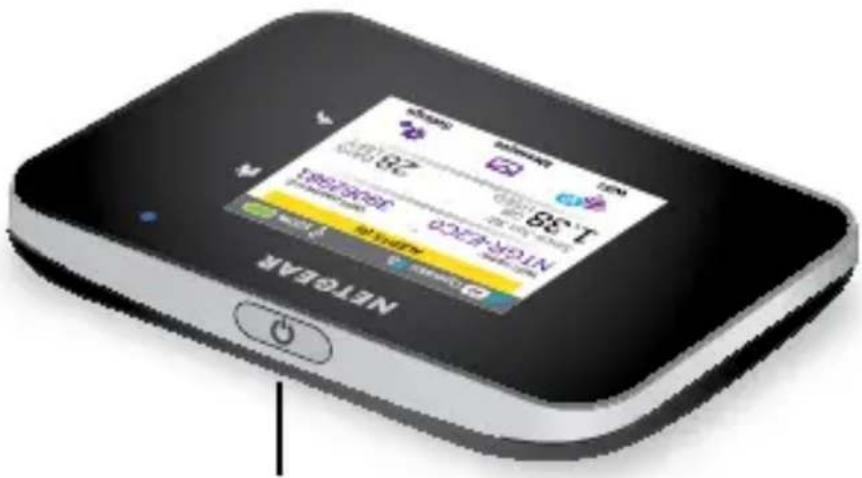
Power button
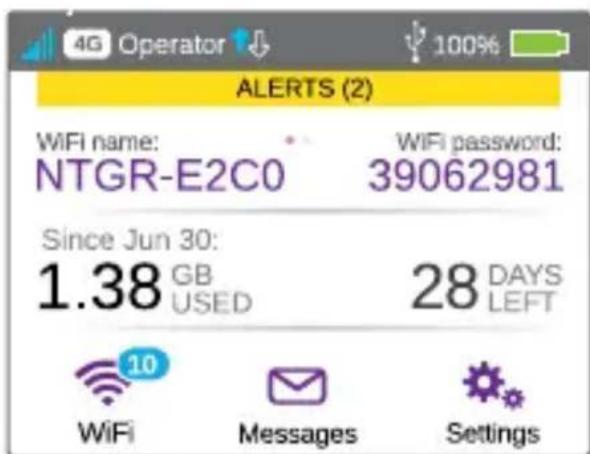
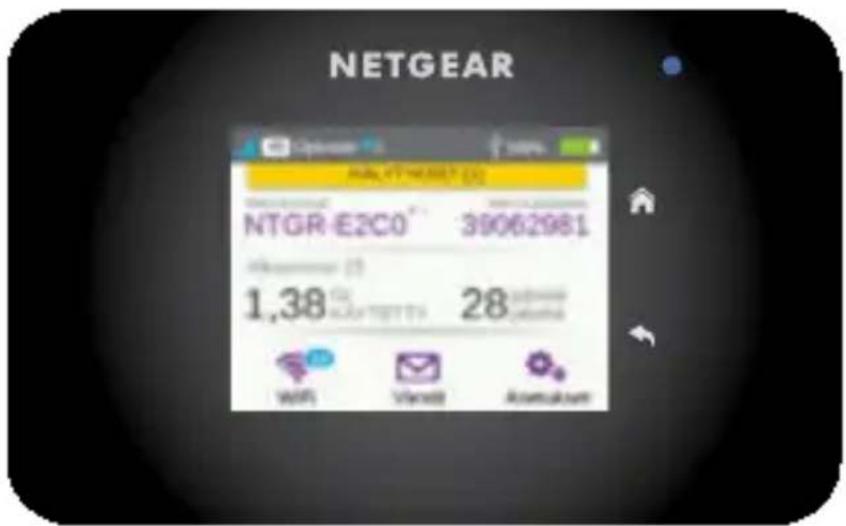
LCD Screen
You can use the touch screen icons and other screen elements to view the mobile hotspot's status, configure WiFi band settings, view data usage details, and view system alerts.
| Icon Description | |
| Signal strength | 5 bars. Excellent. 1 bar. Low level. |
| Network type | 4G+. An LTE Advanced network with carrier aggregation is available. 4G. An LTE network is available. H+. DC-HSPA+ HSPA+/DC HSPA. H. HSPA. 3G. UMTS. |
| Traffic | Outline. Connected. Solid. Sending or receiving. None. Not connected. |
| Battery level | The percentage of the remaining battery charge. |
Set Up Your Hotspot
Before you connect to your mobile hotspot, you must insert a micro SIM card (3FF), install the battery, power on the mobile hotspot, and charge your battery.
Note: To obtain a micro SIM card, contact your Internet service provider.
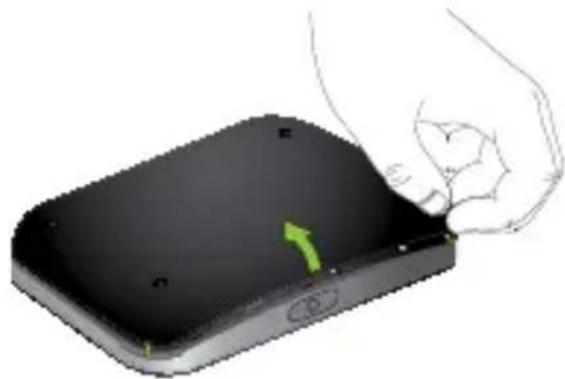
To insert the micro SIM card:
- Remove the back cover using the thumb catch on the corner of the mobile hotspot.
- Remove the battery.
- Slide the micro SIM card into the slot with the gold colored contacts facing down.

- Ensure that the micro SIM card is seated securely.
- Reinsert the battery.
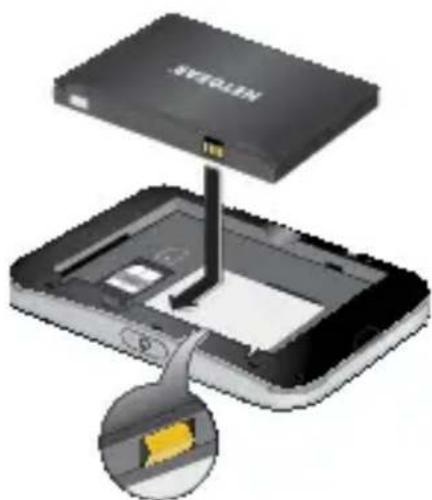
- Replace the cover.
To power on your hotspot:
Press and hold the Power button until the LCD screen lights.
A language selection screen displays.
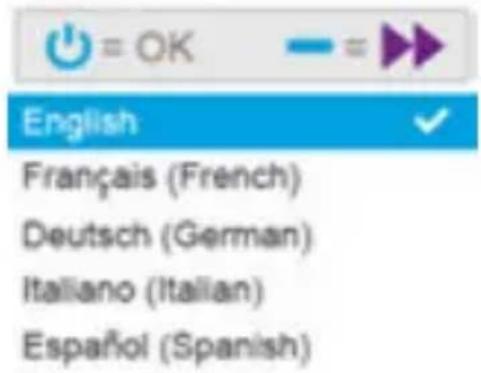
To select a language:
- Press the Navigation button to cycle through the language options until your language is highlighted.
- Press the Power button to select the language. You can change the language again later from the hotspot web page.
To recharge your battery:
- Connect the micro USB cable to your hotspot.
- Connect the other end of the cable to the USB port on your computer or to the USB charger.
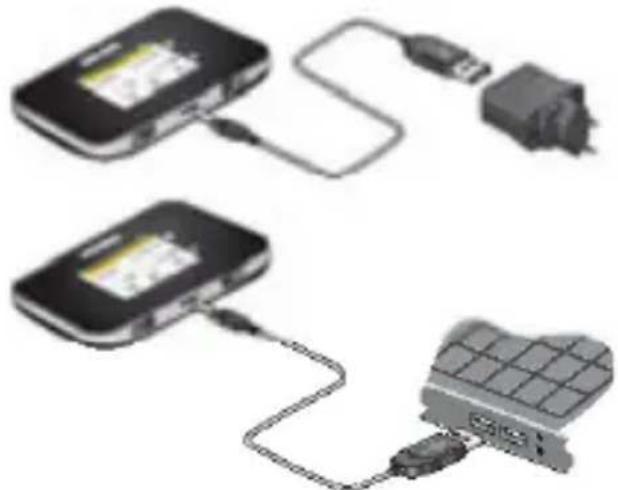
Note: Your battery comes partially charged.
Create a Mobile Connection
Your hotspot comes preconfigured with the access point name (APN) for your network service provider.
Your hotspot checks the APN to determine the type of network connection to establish.
You are now ready to surf the web!
You must configure an APN for your hotspot if you are setting up your hotspot for the first time or if you see a message indicating that APN setup is required.
To configure an APN:
- On the home screen, tap the Settings icon.
- Tap the Network icon.
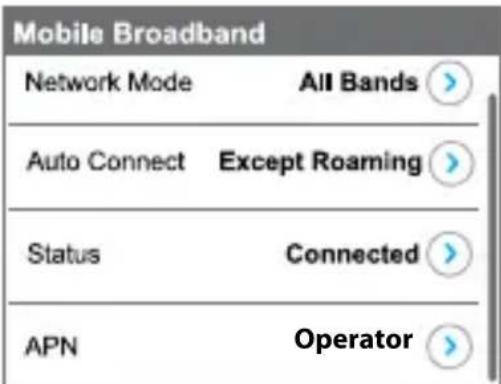
- Tap the APN > button.
A list of preprogrammed APNs that might work with your current SIM displays.
-
Select the appropriate APN.
-
If none of the preprogrammed APNs are appropriate, set up an APN.
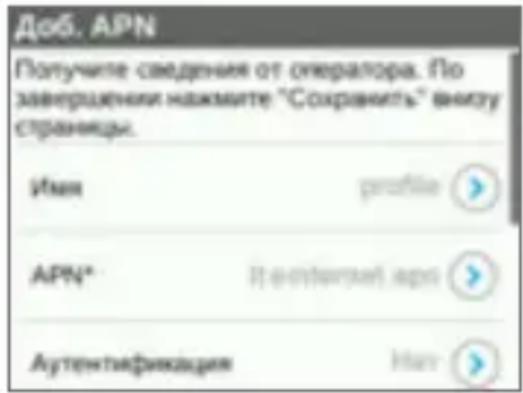
a. Tap the +Add button.
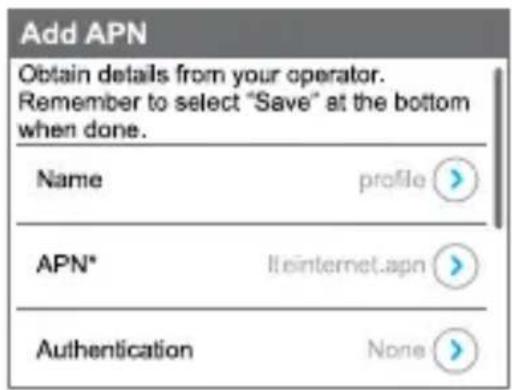
b. Enter the APN details.
Contact your network service provider for information about these specific details.
c. Tap the Save button.
A message indicating that an APN was created displays.
To connect to your hotspot:
- Ensure that WiFi is enabled on your computer or other device.
-
On your computer or other device, search for WiFi networks:
-
For Windows devices, click the Internet Access icon.
- For Mac devices, from the WiFi menu, select the network.
-
For tablets, look for a settings option.
-
Select the WiFi name displayed on your LCD screen.
- Enter the WiFi password exactly as it appears on the LCD screen.
Passwords are case-sensitive.
When a computer or mobile device connects to the hotspot, a 1 displays beside the WiFi icon on the LCD screen.
Note: For you to connect to the mobile broadband network, your SIM account must be active. If you use a prepaid or pay-as-you-go micro SIM, the account must show a positive balance.
- Launch your browser and, if desired, visit the hotspot web page netgear.aircard to personalize your settings.
Your mobile hotspot is ready to use out of the box. You probably don't need to personalize any settings.
The mobile hotspot is completely secure using its default security settings.
NETGEAR AirCard App

Download on the App Store


Download the complimentary mobile app from netgear.com/AirCardApps. Use this app to view your settings and connection and data usage information from your smartphone or tablet. To manage all hotspot settings, visit netgear.aircard.
Manage WiFi Settings
You can manage your WiFi settings by tapping the WiFi icon on the hotspot touch screen.
You can also manage your WiFi settings from your hotspot web page.
Note: The hotspot resets when you change WiFi settings. Connected devices are disconnected.
View orCompose SMS Messages
Tap the Messages icon to view or compose SMS messages.
To read messages:
- On the home screen, tap the Messages icon.
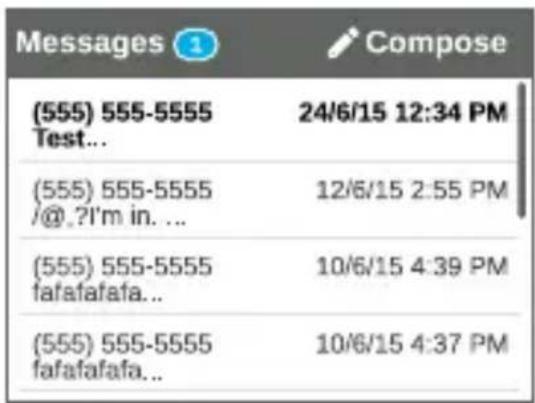
- Tap a message line.
To compose a message:
- On the home screen, tap the Messages icon.
- Tap theCompose button in the upper right corner.
If a valid SIM card is not inserted in your hotspot, theCompose button appears grey.
- Enter a telephone number.
- Tap the Next button.
- Compose the message.
- Press the Send button.
Customise Hotspot Settings
You can customise other settings as well.
To customise your hotspot's settings:
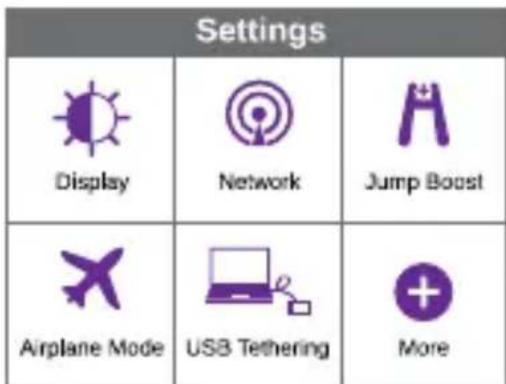
- On the home screen, tap the Settings icon.
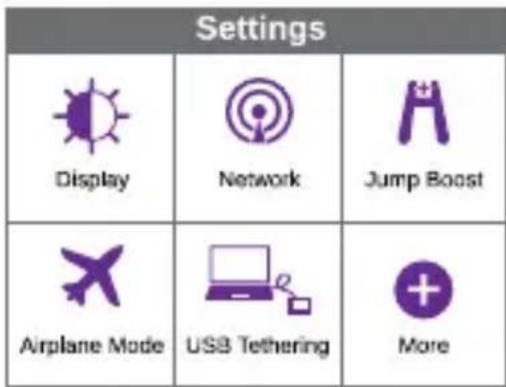
- Tap any one of the icons to adjust a setting.
The following table describes the icons that display on the Settings screen.
| Icon Description | |
| Display | Configure the touch screen display (brightness, time-out, display of WiFi credentials, status LED display). |
| Network | Choose the network types to use, set roaming rules, display network connection details. |
| Jump Boost | Use your mobile hotspot to give a boost to another device's battery using the jump boost cable provided with your device. |
| Airplane Mode | Disable the mobile hotspot's WiFi and cellular radios while on an airplane or in areas where WiFi is restricted. The jump boost feature can still be used in this mode. |
| USB Tether | Connect to the Internet from supported computers with a USB cable, and charge your device at the same time. |
| More | See information about the device including software updates, factory reset, and tutorial. |
View Alerts
You can view alerts and notifications by swiping downward from the ALERTS icon at the top of the screen. Scroll across to view multiple alerts.
Hotspot Web Page
On the hotspot web page, you can do the following:
- Change the WiFi SSID, WiFi password, admin password, and WiFi encryption
- Set autoconnect options
View data usage - Read SMS messages
View alerts
View and change other settings - Check device status
To access your hotspot web page:
- Launch an Internet browser from a computer or WiFi device that is connected to the network.
- Enter http://netgear.aircard.
- Enter the administrator login password. The default password is password. The hotspot web page displays.
Change Security Settings
The WiFi network name and admin password provide security. Your mobile hotspot comes with a randomly generated and secured WiFi network name (SSID) and password that you can continue to use as is. Read this section if you want to change your security settings.
To change the WiFi network name:
- Launch an Internet browser from a computer or WiFi device that is connected to the hotspot.
-
Enter http://netgear.aircard.
-
Enter the administrator login password.
The default password is password.
The hotspot web page displays.
- Select WiFi > Options.
- Enter a new WiFi network name.
- Click the Submit button.
To change the WiFi password:
- Launch an Internet browser from a computer or WiFi device that is connected to the hotspot.
- Enter http://netgear.aircard.
The hotspot web page displays.
- Enter the administrator login password.
The default password is password.
The hotspot web page displays.
- Select WiFi > Options.
The WiFi options page displays.
- Enter a new WiFi password.
If you change your password, be sure to keep a record of it and store it in a safe place.
- Click the Submit button.
Connect Devices
You can add devices to your network using a WiFi network manager or WPS if the device can use WPS.
Note: WPS enables you to connect WPS-enabled devices to a WiFi network without entering a WiFi password using a keyboard.
To connect additional WiFi-capable devices:
- Open the WiFi network manager on your computer or other WiFi device (such as a smartphone, tablet, media player, or camera).
- Select the WiFi network name displayed on the LCD screen.
- Enter the WiFi password displayed on the LCD screen.
- Launch your browser.
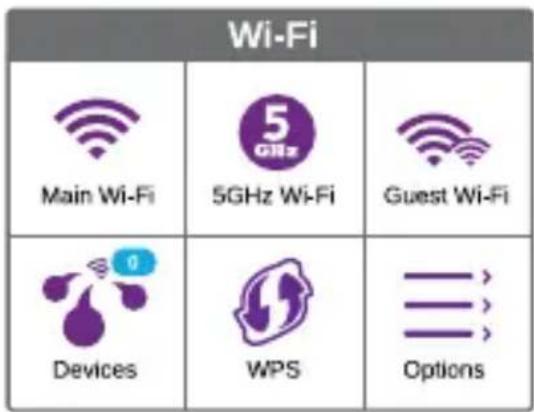
To connect devices using WPS:
- Press the Power button to awaken the LCD screen.
- Tap the WiFi icon.
The WiFi screen displays.
- Tap the WPS icon.
The WPS screen displays.
- Tap the Pair with Main Wi-Fi button.
- Within two minutes, press the WPS button on the device that you want to connect to your WiFi network.
The hotspot and the WiFi device automatically communicate and establish a secure connection.
Support
Thank you for purchasing this NETGEAR product.
After installing your device, locate the serial number on the label of your product and use it to register your product at https://my.netgear.com.
You must register your product before you can use NETGEAR telephone support. NETGEAR recommends registering your product through the NETGEAR website.
For product updates and web support, visit http://support.netgear.com.
NETGEAR recommends that you use only the official NETGEAR support resources.
You can get the user manual online at http://downloadcenter.netgear.com or through a link in the product's user interface.
Trademarks
© NETGEAR, Inc., NETGEAR and the NETGEAR Logo are trademarks of NETGEAR, Inc. Any non-NETGEAR trademarks are used for reference purposes only.
Compliance
For the current EU Declaration of Conformity, visit http://support.netgear.com/app/answers/detail/a_id/11621/.
For regulatory compliance information, visit http://www.netgear.com/about/regulatory/.
See the regulatory compliance document before connecting the power supply.
Kurzanleitung
AirCard 810
Mobiler Hotspot
Ihr Hotspot
Download on the App Store


http://www.netgear.com/about/regulatory/.
Download on the App Store


http://support.netgear.com/app/answers/detail/a_id/11621/.
http://www.netgear.com/about/regulatory/.
Download on the App Store

GET ON Google Play

Available at amazon
http://support.netgear.com/app/answers/detail/a_id/11621/.
Para匐ar la informacion de complimiento normativo, visite http://www.netgear.com/about/regulatory/.
b. Ange APN-information.
Kontakta nattjänstleverantoren for mer information om detta.
KpaTkoe pyKOBoIDCTBO
AirCard 810
Mobilbare Tocka Doctyna
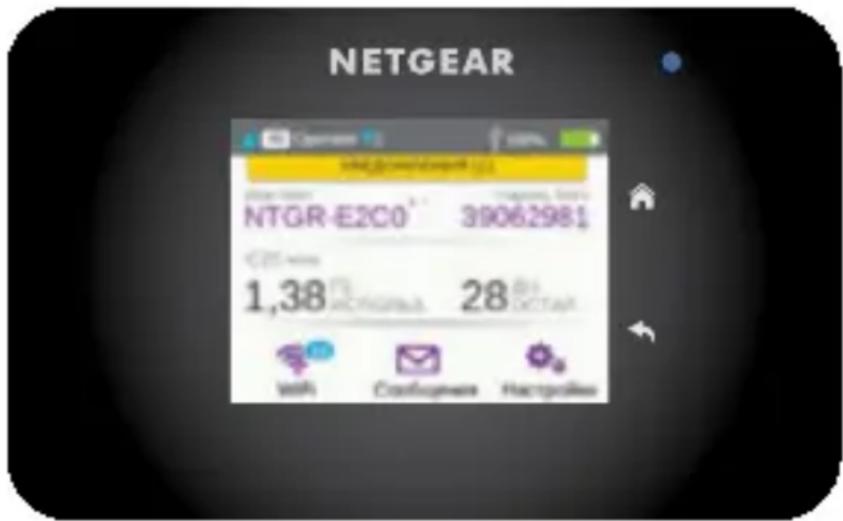
Вворнble CBeDEHnO TOUKe DoCTyna
Ipeed Tem KaK NOdklOuatab MObInbHyTOUky DoCTyna, O3HaKombTeecb c HOpmauee Ha KK-dncnnee, 3HauchamN, KHONKaMn I pa3beMaMn.
Khoŋkni pa3bembl
ИнданkaTop coctoHnЯ
BnocneDCTBnIy3bIK MOxHOCMeHNTb Ha Be6-CTpaHnce TOUKN DOCTyna.
- BbIbepeTe pOxOJaUAPN.
- EcIn Hn Odn H3 3anpOpaMMnpoBaHbIX APN He NOxOHT, BblOnHnTe NaCTpoIy APN BpyHyIO.
a. KocHTecb 3HaUka +Add (+O6aBnTb).
b. BBeIte noDpo6HbIe daHHbIe APN.
Download on the App Store


3a rpy3nte 6ecnlaTHoe MObIbHoe npIIOxHe n C Be6-CTpaHnCBy netgear.com/AirCardApps. NcnoIb3yIte 3TO npIIOxHe nE dIy IPOcMoTpa CBOIX HAcTpoE K CoedInHeN, a TaKKe IOnyuEHN CBeDeHn O6 ObbeMe IpePaHHbIX DaHHbIX pR NOMOuIN BaUeRO cMaprTofoHa IJIi PIIaHSeTa. DJIa UnpaBLeHnRA BcEMn HAcTPOkAMN TOUKN DOCTyNa NocETnTe Be6-CTpaHnCy netgear.aircard.
BnpedCTaBHeHNo HnKe Ta6IuCe npNBOiNTcR OINscAHe 3NaUKOB,OTo6paXaEmbIX Ha cTpaHnCe Settings (HaCtpoIKN).
Be6-ctrpaHnca TOnkN Doctyna
Ha Be6-cTpaHnCe TOnKn DoCTyNa MOrTy 6bITb BbIIOJIHeHbI CNeDyUOUsne DeIcTBnA:
CootBeTCTBne cTaHdapTaM
Tekuця Версан Teкста Декларци O COOTBeTCTBn Cтандэр EMC пedingtablena на Be6-стрнице http://support.netgear.com/app/answers/detail/a_id/11621/.
Информацnia O COOTBETCTBиHOPMaTnBaM праздставлени no aDpecy http://www.netgear.com/about/regulatory/.
Ipeed nodknoyeHnem nCTOuHnka nITaHnBHNMaTeJIbHO O3HaKOMbTEcB C DOKymeHTaMn O COOTBETCTBn HOpMaTnBaM.
Pikaopas
AirCard 810
Mobiilitukiasema
Tukiaseman esittely
Download on the App Store

GET ON Google Play

Available at amazon
First Floor Building 3 University Technology Centre Curraheen Road Cork Ireland
Corporate Office Phone 353 21 2333 200.
201-19527-03
February 2016
NETGEAR, Inc.
350 East Plumeria Drive San Jose, CA 95134, USA