
Luna Solar 23210 - Kettle RUSSELL HOBBS - Free user manual and instructions
Find the device manual for free Luna Solar 23210 RUSSELL HOBBS in PDF.
| Features | Details |
|---|---|
| Capacity | 1.7 liters |
| Power | 2200 watts |
| Material | Stainless steel |
| Keep warm function | Yes |
| Water level indicator | Yes |
| Safety system | Automatic shut-off |
| Anti-scale filter | Removable and washable |
| Usage | Ideal for quickly preparing hot drinks |
| Maintenance | Regular cleaning recommended, descaling depending on water used |
| Dimensions | Approx. 24 x 15 x 22 cm |
| Weight | About 1.2 kg |
Frequently Asked Questions - Luna Solar 23210 RUSSELL HOBBS
User questions about Luna Solar 23210 RUSSELL HOBBS
0 question about this device. Answer the ones you know or ask your own.
Ask a new question about this device
Download the instructions for your Kettle in PDF format for free! Find your manual Luna Solar 23210 - RUSSELL HOBBS and take your electronic device back in hand. On this page are published all the documents necessary for the use of your device. Luna Solar 23210 by RUSSELL HOBBS.
USER MANUAL Luna Solar 23210 RUSSELL HOBBS
HnCTpyKcnn (Pycckn) 36
pokyny (Čestina) 39
pokyny (Slovencina) 42
instrukcja 45
upte 48
navodila 51
oynyic54
utasitások 57
talimatlar 60
instruktiuni 63
Hnctpykun (BbIrapckn) 66
69

Read the instructions, keep them safe, pass them on if you pass the appliance on. Remove all packaging before use.
IMPORTANT SAFEGUARDS
Follow basic safety precautions, including:
This appliance can be used by children aged from 8 years and above and persons with reduced physical, sensory or mental capabilities or lack of experience and knowledge if they have been supervised/instructed and understand the hazards involved.
Children shall not play with the appliance.
Cleaning and user maintenance shall not be done by children unless they are older than 8 and supervised.
Keep the appliance and cable out of reach of children under 8 years. Misuse of the appliance may cause injury.
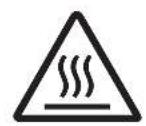
The surfaces of the appliance will get hot. Residual heat will keep the surfaces hot after use.
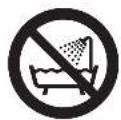
Don't immerse the appliance in liquid.
If the cable is damaged, it must be replaced by the manufacturer, its service agent, or someone similarly qualified, to avoid hazard.
- Sit the appliance on a stable, level, heat-resistant surface.
- Keep the appliance and cable away from the edges of worktops.
- Don't use accessories or attachments other than those we supply.
- Don't use the appliance for any purpose other than those described in these instructions.
- Don't use the appliance if it's damaged or malfunctions.
HOUSEHOLD USE ONLY
PARTS
- Lid
- Slot
- Filter holder
-
Paper filter #4 (not supplied)
-
Carafe
- Hotplate
Dishwasher - top rack
BEFORE USING FOR THE FIRST TIME
Fill the reservoir to the max mark, and run the appliance without coffee.
FILLING
- Remove the carafe from the hotplate.
- Open the lid.
- Fill the reservoir with the exact amount of water required. Note that the brewing process will use all of the water that you put in the reservoir.
- Make sure that the filter holder is pressed down all the way into position. It will click when correctly installed.
- Put a #4 paper filter into the filter holder.
- The reservoir is calibrated to give 14 large cups (at 125ml per cup) and 21 small cups (at 83ml per cup). For each large cup, add 6g of ground filter coffee and for each small cup add 4g.
- Close the lid.
- Replace the carafe on the hotplate.
SET THE CLOCK
It isn't necessary to set the clock to use your coffee maker but you will need to set it if you want to use the timer functions.
- Put the plug into the power socket.
-
Use the h and min buttons to set the correct time in 24 hour format.
-
The clock will retain its settings until the coffee maker is unplugged.
COFFEE STRENGTH
Pressing the 1-4 button will make the brewed coffee slightly stronger. You can also use it if you are only brewing a partial carafe of coffee (i.e. not completely filling the reservoir). Your coffee maker will then alter the brewing process so your coffee will have about the same strength as it would if you had made a full carafe.
MAKING COFFEE
Note: If you want to use the coffee strength feature press the 1-4 button before pressing the button. The 1-4 button will light up.
- Press the button - the icon will appear on the display. The button will light up.
- Shortly afterwards, coffee will start to drip into the carafe.
- If you want to stop the coffee maker while it's brewing, press the button.
- Once brewed, the hotplate will keep the carafe warm for up to 40 minutes.
USING THE TIMER
Note: Make sure the clock is set to the correct time. Use the h and min buttons.
- Set the timer to the time you want to start brewing.
a) Press the (一) button.
b) Use the h and min buttons to set the time you want brewing to start.
If you don't press either the h or min buttons within 5 seconds, the coffee maker will revert to "normal", and the current time will show. Press the (1) button to start again.
- When the time is programmed, press the button. The ① button will light up and the ① icon will appear on the display. Your coffee maker is now set to make coffee at the selected time.
- If you want to use the coffee strength feature when using the timer, press the 1-4 button now. The 1-4 button will light up.
If you want to cancel the timer before brewing has started, press the button.
If you want to stop the coffee maker while it's brewing, press the button.
KEEP WARM/AUTO SHUT-OFF
- Your coffee maker will keep the coffee warm for about 40 minutes.
- 40 minutes after brewing your coffee maker will shut down and the time of day will be displayed.
- To wake the appliance, press the min button.
A QUICK CUP
If you want a quick cup of coffee before the brewing cycle has finished:
- You can remove the carafe at any time. The non-drip valve will prevent coffee dripping on to the hotplate.
- To prevent the filter holder overflowing, replace the carafe on the hotplate within about 20 seconds.
- When you replace the carafe on the hotplate the non-drip valve opens to let any remaining coffee through.
CARE AND MAINTENANCE
- Unplug the appliance and let it cool.
- Tip the contents of the filter holder into the bin.
- Wipe all surfaces with a clean damp cloth.
- Press the lever at the rear of the carafe lid, above the handle, to open the carafe lid.
- Hand wash the carafe and filter holder.
- Replace the filter holder. Make sure that the filter holder is pressed down all the way into position. It will click when correctly installed.
- Close the lid, and press down to lock it.

You may wash these parts in the top rack of a dishwasher.

ENVIRONMENTAL PROTECTION
To avoid environmental and health problems due to hazardous substances in electrical and electronic goods, appliances marked with this symbol mustn't be disposed of with unsorted municipal waste, but recovered, reused, or recycled.
SO STEllen SIE DIE UHR
APENAS PARA USO DOMÉSTICO
ESQUEMAS
BEHANDLING OG VEDLIKEHOLD
IPIN ANO THN INQTH XPHSE
Teiote to doxio vepou i Tnv evdEiEg n oTaOmC max kai 0eote eAeitoupyia tn ouokueh xwiic va npoo0eotc kafe.
- Kavata
- Eotia
πλuvntpio πiαtwv -navw kaλaθι
IANHPQsH
- Anopakpuve tnv kavata ano tnv eoia.
- AvoiTeTo KaTaki.
- T E M I O T E TO DOXEIO ME T N V A K P I B N N O O T N T A V E P O U N O U A N T E I T A. E X E T E U N O P H O A C O T I K A T A T N D I A D I K A O I A N P A O A K E U N C K A F E a x p n o i m o i n e i o L O T O V E P O N O U a b a L E T E M E O A O T O DOXEIO V E P O U.
- Bεβαιωθείτε οτι ηήκη φιλτρου εύαι πεομένη ευτελώς προς τα κάτω ως τη θέση τής. 'Oταν ἐλθει στη σωστή τής θέση θα ακουσεί τοχαρακτηριστικό κλικ.
- AvoiEe eva xapivo i tpo ap. 4 kal tonoetnoTe to eoa otnv thkn pfiaTPOU.
- To doxio vepou eivai a o yia tvnapaokevn 14 yayaw i c i v (125 ml ava i c v i) kai 21 mikpwv i c i v kae (83 ml ava i c v i) .Ia k0e yayalo i c v i, npoo0eot6 g aaleoEvou kaepiTpou, evw ia k0e miKp o i c v i 4g.
- Kλείστε το καπάκι.
- Tonoetnoe nai tyn kavata otny eotia.
PYOMIISHPOAOTIOY
v xpeiazetai va puthetaoente to poloi yia va xpooiopoioeTe tnv kaepiepa, alambda a npenei va to puthetaoente av thete va xpooiopoioeTe tic leitoupyicxpovodiaokotn.
1.Σuvδεοτε to φις στην πρίζα.
2. Xpnooioiote ta koupiia h (wpec) kal min (a epta) yia va putheta ete tn ootn wpa oepn 24 owv.
To poI oI a diatnpnoeI tic puOmuoic, mexpi n kaepiEpa va anoouvdelta i ano tnvi pia.
ENTAESH TOY KAΦE
Av natoe to koupi 1-4, 0a qiae e aappw c nio duvato kaep. Mnpet e enionc va to xpoiopoioe av pfayve tmuptoepn kavata kaep (dnl. av dveymuote vteaw to doxio vepou). H kaepiepa oac toe tha tponoioe i th diakkaia npaaokueuc wote o kapec oac va eivai too oduvatoc onwc otav pfayve t oloknpn tnkvavata.
IAPAZKEYH KAΦE
XPHESH TOY XPONODIAKONTH
BpeiN B pe3yIaT OT HaTpynBaHe Ha KOTJIeH KaMbK, NOJnxKaT Ha TaKca 3a peMOHT.

ОПАЗBAHE HA OKОЛHATA CPEДA
3a da ce n36erHaT ekONOruHn H 3dpabHn npo6nemn nopadn Ha onaCHn cy6ctaHcN B eJeKtpnuecknte n eJeKtpoHHn CTOKn, ypeNTe, o603NaeHN C TO3N CmBOJ, He Tp8Ba da ce n3XBbPnT 3aeDnO c HecOpTnpaHn O6uHckn OTnaDbu, a CneBda da ce BbPHaT 6paTHO, da ce n3IOn3BaT OTHO BO IIN peuNKnPaT.
aie 11 j 1 j 1 1 1 1 1 1 1 1 1 1 1 1 1 1
JLaeuiy
a
aaii iiaaii jilai jilai jilai
8 8
y