172.050 - Receiver Vonyx - Free user manual and instructions
Find the device manual for free 172.050 Vonyx in PDF.

| Technical Features | Vonyx 172.050 receiver, operating frequency 863-865 MHz, range up to 100 meters, compatibility with various transmitters. |
|---|---|
| Usage | Ideal for live events, conferences, and professional audio installations. |
| Maintenance and Repair | Regularly check connections and battery condition. Clean contacts and store in a dry place. |
| Safety | Use only with compatible accessories to avoid damage. Do not expose to moisture. |
| General Information | Lightweight and portable product, easy to install. 2-year manufacturer warranty. |
Frequently Asked Questions - 172.050 Vonyx
User questions about 172.050 Vonyx
0 question about this device. Answer the ones you know or ask your own.
Ask a new question about this device
Download the instructions for your Receiver in PDF format for free! Find your manual 172.050 - Vonyx and take your electronic device back in hand. On this page are published all the documents necessary for the use of your device. 172.050 by Vonyx.
USER MANUAL 172.050 Vonyx
VXA Amplifier Series
Ref. nr.: 172.050 / 172.052 / 172.054 / 172.056 / 172.058

INSTRUCTION MANUAL
GEBRUKSAANWIJZING
GEBRAUCHSANLEITUNG
MANUAL DE INSTRUCTIONS
MANUEL D'INSTRUCTIONS
INSTRUKCJA OBSLUGI
V1.0
ENGLISH
Congratulations to the purchase of this Vonyx product. Please read this manual thoroughly prior to using the unit in order to benefit fully from all features.
Read the manual prior to using the unit. Follow the instructions in order not to invalidate the warranty. Take all precautions to avoid fire and/or electrical shock. Repairs must only be carried out by a qualified technician in order to avoid electrical shock. Keep the manual for future reference.
- Prior to using the unit, please ask advice from a specialist. When the unit is switched on for the first time, some smell may occur. This is normal and will disappear after a while.
- The unit contains voltage carrying parts. Therefore do NOT open the housing.
- Do not place metal objects or pour liquids into the unit. This may cause electrical shock and malfunction.
- Do not place the unit near heat sources such as radiators, etc. Do not place the unit on a vibrating surface. Do not cover the ventilation holes.
- The unit is not suitable for continuous use.
- Be careful with the mains lead and do not damage it. A faulty or damaged mains lead can cause electrical shock and malfunction.
- When unplugging the unit from a mains outlet, always pull the plug, never the lead.
- Do not plug or unplug the unit with wet hands.
- If the plug and/or the mains lead are damaged, they need to be replaced by a qualified technician.
- If the unit is damaged to such an extent that internal parts are visible, do NOT plug the unit into a mains outlet and DO NOT switch the unit on. Contact your dealer. Do NOT connect the unit to a rheostat or dimmer.
- To avoid fire and shock hazard, do not expose the unit to rain and moisture.
- All repairs should be carried out by a qualified technician only.
- Connect the unit to an earthed mains outlet (220-240Vac/50Hz) protected by a 10-16A fuse.
- During a thunderstorm or if the unit will not be used for a longer period of time, unplug it from the mains. The rule is: Unplug it from the mains when not in use.
- If the unit has not been used for a longer period of time, condensation may occur. Let the unit reach room temperature before you switch it on. Never use the unit in humid rooms or outdoors.
-
To prevent accidents in companies, you must follow the applicable guide lines and follow the instructions.
-
Do not repeatedly switch the fixture on and off. This shortens the life time.
- Keep the unit out of the reach of children. Do not leave the unit unattended.
- Do not use cleaning sprays to clean switches. The residues of these sprays cause deposits of dust and grease. In case of malfunction, always seek advice from a specialist.
- Do not force the controls.
- If this unit is with speaker inside which can cause magnetic field. Keep this unit at least 60cm away from computer or TV.
- If this unit is with built-in lead-acid rechargeable battery. Please recharge the battery every 3 months if you are not going to use the unit for a long period of time. Or the battery may be damaged.
- If the battery is damaged please replace with same specifications battery. And dispose the damaged battery environment friendly.
- If the unit has fallen, always have it checked by a qualified technician before you switch the unit on again.
- Do not use chemicals to clean the unit. They damage the varnish. Only clean the unit with a dry cloth.
- Keep away from electronic equipment that may cause interference.
- Only use original spares for repairs, otherwise serious damage and/or dangerous radiation may occur.
- Switch the unit off prior to unplugging it from the mains and/or other equipment. Unplug all leads and cables prior to moving the unit.
- Make sure that the mains lead cannot be damaged when people walk on it. Check the mains lead before every use for damages and faults!
- The mains voltage is 220-240Vac/50Hz. Check if power outlet match. If you travel, make sure that the mains voltage of the country is suitable for this unit.
- Keep the original packing material so that you can transport the unit in safe conditions.

This mark attracts the attention of the user to high voltages that are present inside the housing and that are of sufficient magnitude to cause a shock hazard.

This mark attracts the attention of the user to important instructions that are contained in the manual and that he should read and adhere to.
The unit has been certified CE. It is prohibited to make any changes to the unit. They would invalidate the CE certificate and their guarantee!d
NOTE: To make sure that the unit will function normally, it must be used in rooms with a temperature between 5^ / 41^ and 35^ / 95^ .

Electric products must not be put into household waste. Please bring them to a recycling centre. Ask your local authorities or your dealer about the way to proceed. The specifications are typical. The actual values can slightly change from one unit to the other. Specifications can be changed without prior notice.
Do not attempt to make any repairs yourself. This would invalid your warranty. Do not make any changes to the unit. This would also invalid your warranty. The warranty is not applicable in case of accidents or damages caused by inappropriate use or disrespect of the warnings contained in this manual. Vonyx cannot be held responsible for personal injuries caused by a disrespect of the safety recommendations and warnings. This is also applicable to all damages in whatever form.
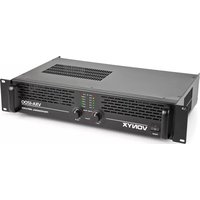
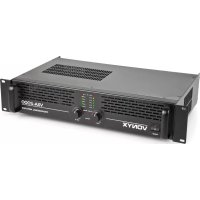
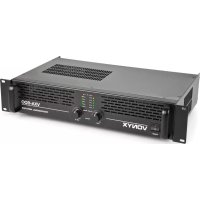
FRONT PANEL

1. On/Off Switch.
For switching the amplifier on and off. Always adjust the volume down to its minimum before switching this amplifier on.
2. Cooling Vents.
Front to rear forced airflow.
3. Volume Controls.
These controls adjust the volume level of both channels. Turn slightly to the left when the clip indicators (4) light up.
4. Signal indicators.
Three orange LEDs indicate the amplifiers output signal levels.
5. Clip Indication.
These LEDs will light up when one or both channels are on max power. It can occur that these LEDs will lit up now and then, this is not a problem. But if it lights up continually you need to adjust the volume down, otherwise permanent damage to equipment might occur
6. Protect Indication.
When on any given point, something damaging might occur to your amplifier, it will switch in protect mode. The amplifier will disconnect the point where the damage is about to occur and switch on the protection led to indicate to you that something is wrong. Reasons might be: Bad ventilation, A low impedance (< 4 Ohm), Defect fan(s), A short circuit in cables.
7. Bridge Mode Indication.
8. Power Indication.
This clear blue indicator will light when the amplifier is turned on.
REAR PANEL
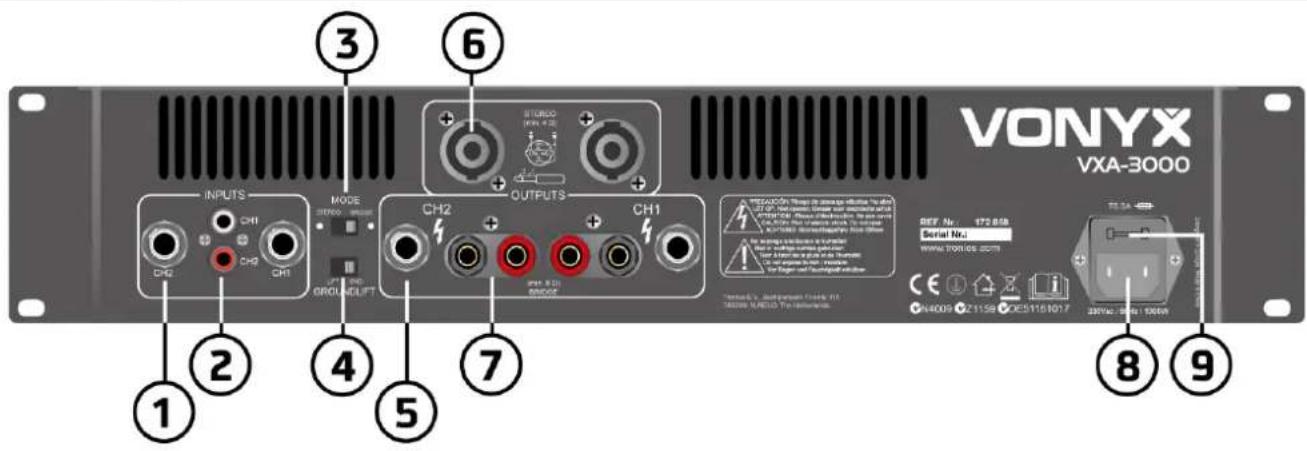
1. 6.3mm Jack inputs.
Two 6.3mm jack female input connector for connecting a signal source (mixer etc.).
2.RCA inputs.
Two RCA input connector for connecting a signal source (mixer etc.).
3. Mode Switch.
The amplifier can use 2 different modes: stereo & bridge.
Choose one of these functions:
Stereo mode: Standard left/right stereo mode.
Bridge mode: This mode combines both amps on one channel which results in double power on this channel.
Connects the signal to the left input channel and the output level can now be adjusted with the left volume control.
4. Ground Lift Switch.
Allows circuit and chassis grounds to be separated in case of problems with earth loops (hum)..
5.6.3mm Jack Outputs.
Maximum load in stereo mode 4 Ohm per channel.
6. Speaker Outputs NL4.
Maximum load in stereo mode 4 Ohm per channel.
Pin +1 & +2 = + output, Pin -1 & -2 = -output
7. Binding Post Output Jacks.
Maximum load in stereo mode 4 Ohm per channel. Maximum load in bridge mode 8 Ohm.
8. Mains Power Connector
9. Fuse
This main fuse secures the amplifier and wires against defects. Replace this only with a fuse of same type and value.
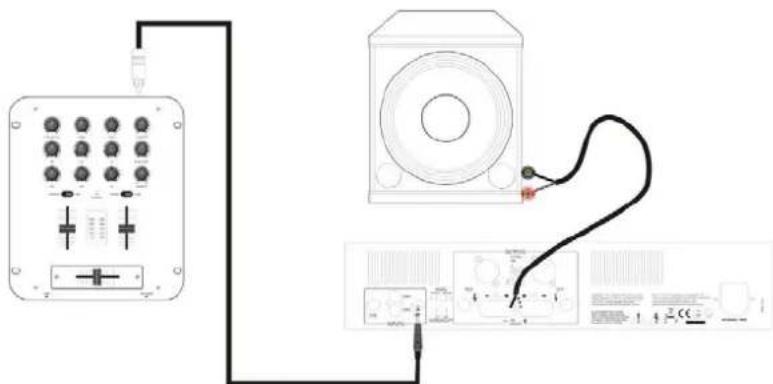
INSTALLATION
Connecting Output
Make sure the amplifier is turned off before you wire the system. Speakers can be connected using speaker NL4 plugs or bare wire for your binding post output connectors. Using the guidelines below select the appropriate size of wire bases on the distance between the amplifier and speaker.
Distance
Wire
Size
<10m
1.5mm2
10m<20m
2.5mm2
20m <30m
4.0mm2
Setup operation mode
Amplifier can used in 2 modes:
1. Stereo operation
Set the mode selector (3) to the 'stereo' position.
In this mode the amplifier have two in depended channels with their own inputs and volume controls.
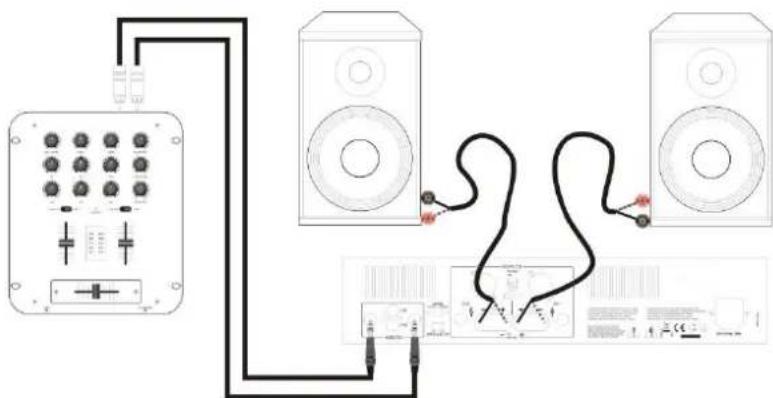
2. Bridge operation
Set the mode selector (3) to the 'bridged' position.
This mode combines both amps on one channel which results in double power on this channel. Connects the signal to the A input channel and the output level can now be adjusted with the A volume control. Connect the speaker across the positive (+) output terminals. Do not use the negative (-) terminals when the amplifier is being operated in bridged mode.
NOTE: Never connect a hot (+) output to ground or (-) output and never connect the hot (+) to other hot outputs!
Connect to mains power
Before plugging the unit in always make sure that the power supply matches the product specification voltage. First connect the IEC end of the cord set to the IEC connector on the amplifier then plug the other end of the cord set to the AC mains.
Please read instructions below for reliable and problem free use:
- Be sure all connections made are made in the correct way.
- Check if the connected speakers are compatible with the amplifier.
- Ensure there is adequate ventilation.
- Prevent exposure to moisture.
- Never plug speakers in/or out while in use, this can result in serious damage.
NEDERLANDS
7. Bridge Mode indicator
8. Aan/Uit-indicator.
1. Interruptor On/Off.
Distance Section cable
<10m 1.5mm2
10m <20m 2.5mm2
20m <30m 4.0mm2
Note: Specifications and design are subject to change without notice for purpose of improvement.
VXA-3000

tronios
Sound & Light
CE Declaration of Conformity
Manufacturer:
TRONIOS BV
172.050, 172.052, 172.054, 172.056, 172.058
Product Description: VXAmplifier Series
Trade Name:
V O N Y X
Regulatory Requirement:
EN 60065:2002+A1:2006+A11:2008
EN 55103-1:1996
EN 55103-2:1996
EN 61000-3-2:2006
EN 61000-3-3:1995+A1:2001+A2:2005
EN 55103-2:1996
The product meets the requirements stated in Directives 2006/95 and 2004/108/EC and conforms to the above mentioned Declarations.
Almelo,
01-02-2016
Name : B. Kosters
Controller regulations
Signature
Specifications and design are subject to change without prior notice..
www.tronios.com
Copyright © 2016 by TRONIOS the Netherlands