Madera - Child safety gate Munchkin - Free user manual and instructions
Find the device manual for free Madera Munchkin in PDF.
| Technical specifications | Not specified |
|---|---|
| Usage | Not specified |
| Maintenance and repair | Not specified |
| Safety | Not specified |
| General information | Not specified |
Frequently Asked Questions - Madera Munchkin
User questions about Madera Munchkin
0 question about this device. Answer the ones you know or ask your own.
Ask a new question about this device
Download the instructions for your Child safety gate in PDF format for free! Find your manual Madera - Munchkin and take your electronic device back in hand. On this page are published all the documents necessary for the use of your device. Madera by Munchkin.
USER MANUAL Madera Munchkin
KEEP FOR FUTURE REFERENCE
Please read the instructions carefully before installing this gate. For additional help,
installation videos are available at www.munchkin.com
GUARDE PARA FUTURA REFERENCIJA
Included parts 6
Proper width 7
Adding extensions 8
Gate placement 9
Wall cups 9
Mounting your gate 11
HOW TO USE
Swing guard 13
Opening & closing 13
Cleaning your gate 13
Light Operation (LUNA) 14
Changng batteries (LUNA) 14
CUSTOMER SERVICE
One-year limited warranty 15
Contact us 16
INFORMATION IMPORTANTE
Introduccion 18
Aviso Legal 18
Configuraciones de extension 20
Thank you for choosing a premium safety gate from Munchkin to protect your family.
These gates stay in place by creating pressure between two opposing surfaces. Do not use this gate in any location without using all 4 wall cups, sticky pads, and screws provided when installing the gate. Please inspect your gate immediately. If you see any damage, do not attempt installation. Check page 15 of this instruction booklet for information on damaged products.
Assemble the gate away from small children. Some of the parts may present a choking hazard when loose.
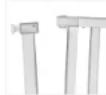
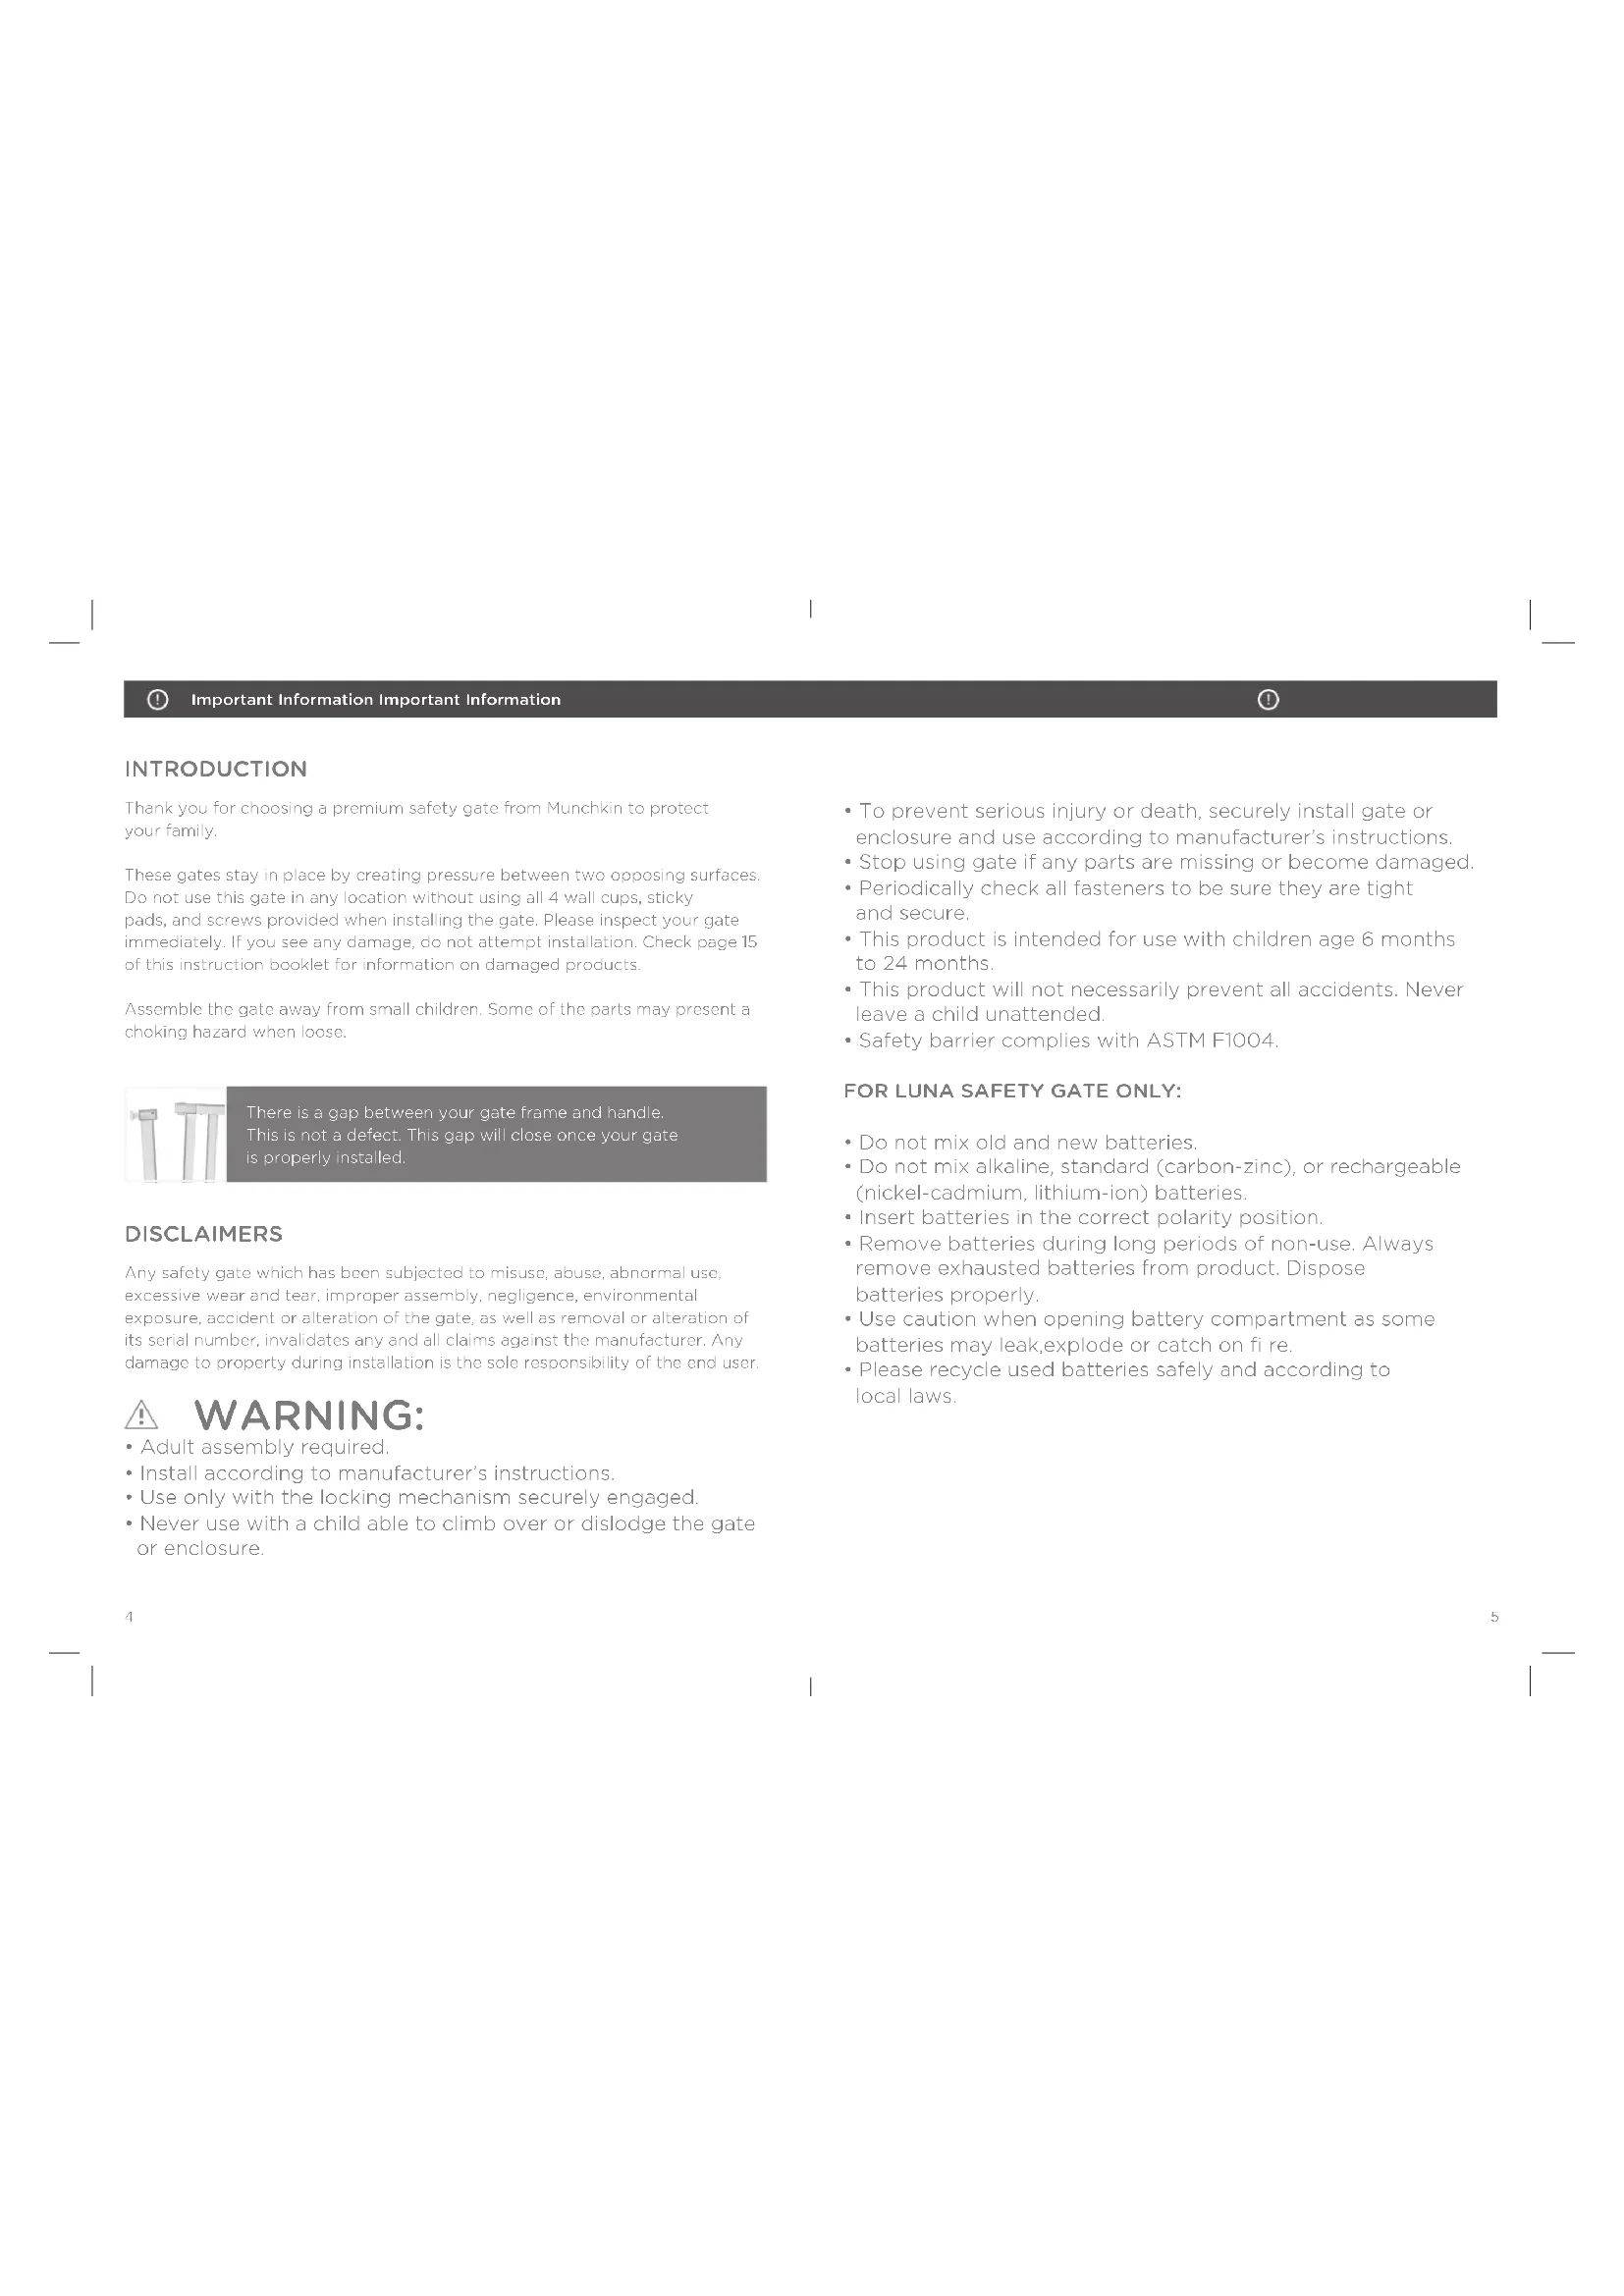
There is a gap between your gate frame and handle. This is not a defect. This gap will close once your gate is properly installed.
DISCLAIMERS
Any safety gate which has been subjected to misuse, abuse, abnormal use, excessive wear and tear, improper assembly, negligence, environmental exposure, accident or alteration of the gate, as well as removal or alteration of its serial number, invalidates any and all claims against the manufacturer. Any damage to property during installation is the sole responsibility of the end user.

WARNING:
Adult assembly required.
Install according to manufacturer's instructions.
- Use only with the locking mechanism securely engaged.
- Never use with a child able to climb over or dislodge the gate or enclosure.
- To prevent serious injury or death, securely install gate or enclosure and use according to manufacturer's instructions.
- Stop using gate if any parts are missing or become damaged.
Periodically check all fasteners to be sure they are tight and secure. - This product is intended for use with children age 6 months to 24 months.
- This product will not necessarily prevent all accidents. Never leave a child unattended.
- Safety barrier complies with ASTM F1004.
FOR LUNA SAFETY GATE ONLY:
- Do not mix old and new batteries.
- Do not mix alkaline, standard (carbon-zinc), or rechargeable (nickel-cadmium, lithium-ion) batteries.
- Insert batteries in the correct polarity position.
- Remove batteries during long periods of non-use. Always remove exhausted batteries from product. Dispense batteries properly.
- Use caution when opening battery compartment as some batteries may leak, explode or catch on fire.
- Please recycle used batteries safely and according to local laws.

Important Information / How To Install How To Install
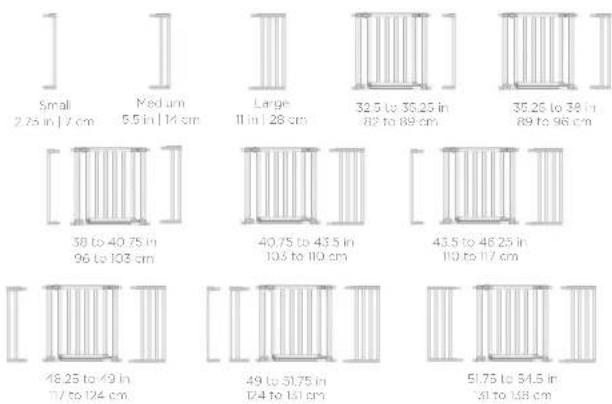
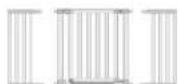
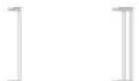
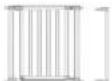
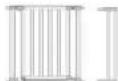
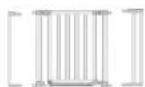
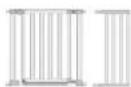
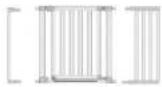
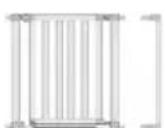
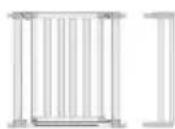
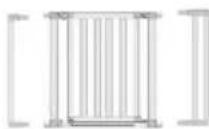
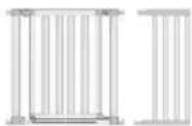
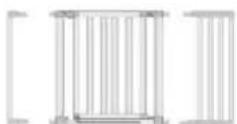
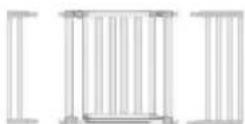
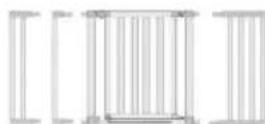
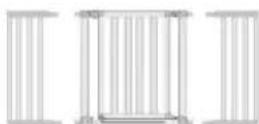
EXTENSION CONFIGURATIONS
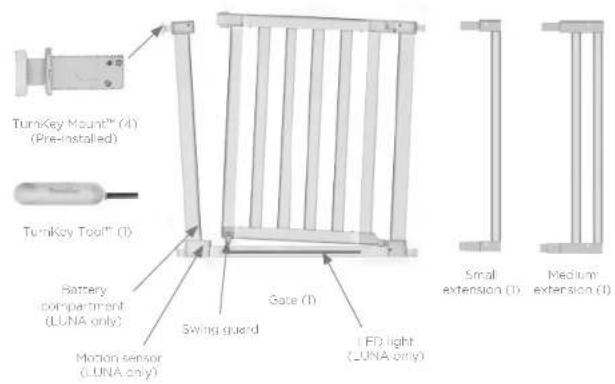
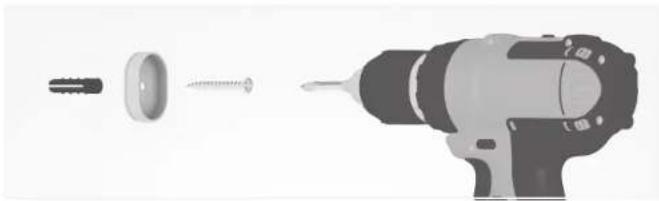
INCLUDED PARTS
If any parts are missing or damaged, please contact our Customer Service Center at 800-344-2229.

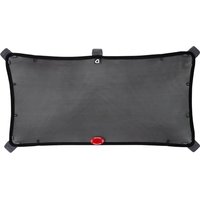
Your gate may look different but the installation steps are the same. VIBE features a see-through mesh center, MADERA features wood slats. In addition, LUNA has an LED light bar across the bottom.
Included parts (continued)

Deywal anchor (A)
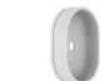
Tricky pad and Wall cup (T) (Pre Instad)

Wall-screw (4) AAA/ R&D Batteries (2) LUNA only
PROPERWIDTH
Measure the width of the opening where the gate will be installed. Re sure to measure at the narrowest point. For example, include any baseboards in your measurement.
Your gate fits openings from 30 to 40.5 inches wide using the included extensions, DO NOT attempt to install this gate in any other size openings. Longer extension kits that allow this gate to fit wider openings are available for purchase with same day shipping on www.munchkin.com

How To Install How To Install
See the extensions chart on page 6 for the proper extension configuration for your opening.
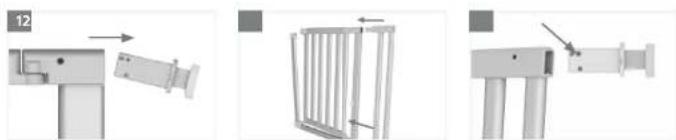
ADDING EXTENSIONS

If your opening is between 30 and 32.5 inches wide, you DO NOT need to add any extensions Please skip to the next section: Gate Placement For openings wider than 32.5 inches, attach either the small or medium extension (or both) before installation.
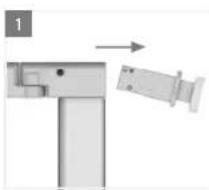
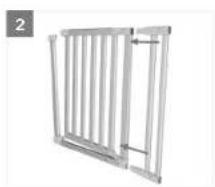
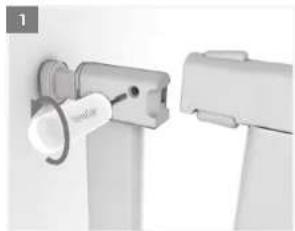
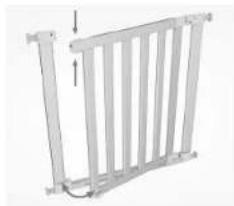
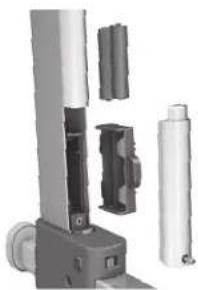
- Pull out the TurnKey Mounts™ from the top and bottom corners of one side of the gate and put them aside for now.
- Insert the small extension into the pockets where you removed the TurnKey MountsTM.
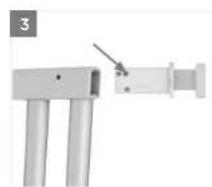
- Re-insert the TurnKey Mount that you removed earlier into the open pockets of the extension. Be sure to insert the TurnKey Mount so that the hex head in the mount is aligned with the hole on the gate frame.
- To attach additional extensions, repeat the steps above on the other side of the gate.
8

GATE PLACEMENT
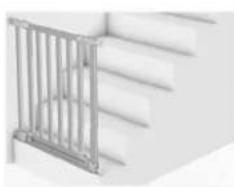
This gate is approved for use at the top or bottom of stairs, as well as in doorways, hallways and entryways. The gate must be installed between two structurally sound surfaces.
If you are installing the gate at the top of stairs, it MUST be placed on the top landing and only swing away from the stairs. Do not use this gate in any location without using all 4 wall cups, sticky pads, and screws provided when installing the gate.
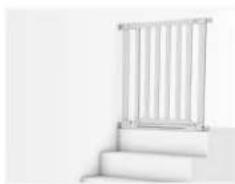
If you are installing the gate at the bottom of the stairs, we recommend placing it on the floor below the first step. If the gate must be placed on the lowest stair, position it toward the front of the step.
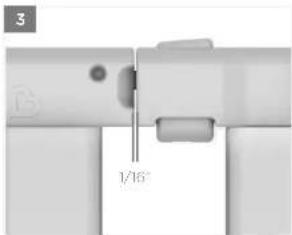
Be sure that the gate is resting on the floor. The gate should NOT be raised above the floor >5mm .
WALL CUPS

Do not use this gate in any location without using all 4 wall cups, sticky pads, and screws provided when installing the gate.
- Temporarily place the gate where you want to install it
9

How To Install
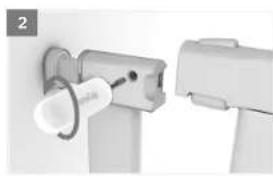
- Insert the TurnKey Too™ into the holes to extend each TurnKey Mount™. Turn clockwise to extend the mount on the right side of the gate and counterclockwise on the left side.
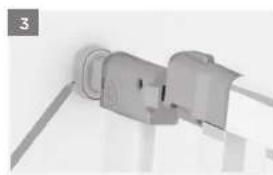
- When they reach the walls, trace the position of each wall cup with a pencil.
- Retract the TurnKey Mounts and remove the gate.
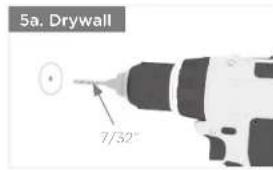
5a. FOR DRYWALL WITHOUT STUD/ PLASTERBOARD: Hold the wall cups in position and mark the center with a pencil. Then put the cup aside and drill a 7/32 hole into the drywall at the center mark. Insert a drywall anchor
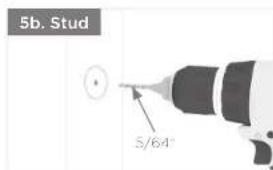
5b. FOR DRYWALL WITH STUD: Hold the wall cups in position and mark the center with a pencil. Then put the cup aside and drill a 5/64" hole into the drywall at the center mark. - Pool the backs off the sticky pads attached to the wall cups. Then stick the wall cups back onto the wall to fit your pencil marks.
- Secure the wall cups against the wall with screws.
- FOR DRYWALL WITHOUT STUD/PLASTERBOARD: Use screwdriver or drill to insert screw into center of wall cup. The screw will go through 10.11

How To Install
the attached sticky pad and into the wall anchor previously inserted in step 5a.
FOR DRYWALL WITH STUD: Use screwdriver or drill to insert screw into center of wall cup. The screw will go through the attached sticky pad and into the hole previously drilled in step 5b.
MOUNTING THE GATE
- Place the gate where you want to install it. Stand on the side of the gate with the holes near the TurnKey MountsTM.
Insert the TurnKey Tool into the holes to extend each TurnKey Mount. Turn clockwise to extend the mounts on the right side of the gate and counterclockwise on the left side.

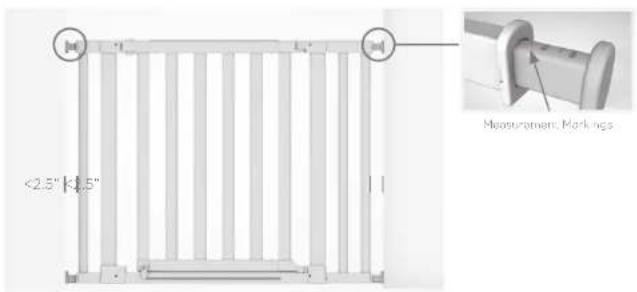
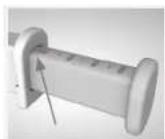
To keep the gate an equal distance within the opening, tighten each screw a little at a time and alternate between ALL 4 CORNERS. Make sure the measurement markings on the top 2 TurnKey Mounts match as well as the markings on the bottom 2 match.

How To Install

How To Use
2. Ensure that the ends of the TurnKey Mounts are seated inside the wall cups.
DO NOT overextend the TurnKey Mounts, If the Max Opening Indicator begins to appear on the left and right sides of the gate in order for the handle to latch into the frame, you must remove the gate and add an extension for a proper fit.
- Tighten the TurnKey Mounts until the latch locks into the gate frame and the gap closes between the gate latch and the gate frame.
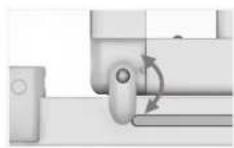
SWINGGUARD
When using at top or bottom of stairs, always be sure the swing guard on the opposite side of the gate from the stairs is in the locked position (down). This prevents opening the gate into the stairway. In all other locations, be sure the swing guard is in the locked position (down) on the side of the gate that the child occupies.
OPENING & CLOSING
Press the button on top of the handle with your thumb, then squeeze the trigger on the underside of the handle to open the gate.
Swing the gate back to its closed position. The gate will lock automatically. Always check to ensure the gate is locked. Never leave your child unattended.
CLEANING THE GATE
Use mild soap and wipe with a damp cloth. Be careful not to wash or wipe the stickers on the base of the gate. Removing or damaging the stickers will void the warranty. For LUNA, do not wipe damp cloth near light, battery compartment, or motion sensor.

How To Use

Customer Service
LIGHT OPERATION
LUNA ONLY
The LUNA gate has motion detectors on both sides. When motion is detected within 6 feet, the light will turn on for 15 seconds before shutting off.
To turn off the motion sensor when light is not needed, slide the switch adjacent to the motion sensor to the right. To turn on the motion sensor, slide the switch to the left.
CHANGING BATTERIES
LUNA ONLY
To replace the batteries, open the battery compartment with a screwdriver and slide compartment out of frame. Remove the old batteries and insert 2 size AAA batteries.

Slide the compartment back into the frame and tighten the battery compartment doors with a screwdriver.
145
ONE-YEAR LIMITED WARRANTY
A. Munchkin, Inc.'s Safety Gates Include a one-year limited warranty from the date of purchase.
POLICY: In the event of a malfunction or defect during the in-warranty period, Munchkin, Inc., at its option, will replace or repair a gate under warranty, Munchkin, Inc.'s limited warranty is only extended to the gate's original purchaser.
PROCEDURE: We ask that you contact Munchkin, Inc. to provide all pertinent information relating to any issues you are experiencing with your safety gator. Munchkin, Inc.'s Consumer Relations department can be reached at
800-344-2229 Monday through Friday from 8am to 8pm (Pacific Time) or by email at cserv@munchkin.com. The following information, when applicable, is required for all warranty claims:
Gate Name
Mode Numbei
- Batch Code
- Receipt Copy
This may be faxed, emailed, or sent via mail to Munchkin, Inc. attention to Consumer Relations.
ATYPICAL ISSUES: For atypical issues that require physical review, Munchkin, Inc. will request that you return your gate to its Quality Assurance department. Munchkin, Inc. will compensate you for postage costs by providing a complimentary gift equal in value to the expense incurred in shipping the product. Alternatively, Munchkin, Inc. at its option, may issue a UPS call tag in order to expedite receipt of the defective product for review.

Customer Service
B. Conditions that void Munchkin, Inc.'s one-year limited warranty.
POLICY: Munchkin, Inc.'s one-year limited warranty does not cover a defect that has been caused by misuse, abuse, abnormal use, excessive wear and tear, improper assembly, negligence, environmental exposure, alteration or accident.
Important Note: A safety gate that has had its batch code altered or removed invalidates any and all claims against the manufacturer.
C. Munchkin, Inc. does not provide refunds as a remedy for defective or nonconforming safety gates. Nor does Munchkin, Inc. offer cash back for returned product purchased through any of Munchkin, Inc.'s safety gate websites. Exception: Munchkin, Inc. will provide cash back refund on purchases made through any of Munchkin, Inc.'s safety gate websites ONLY if there was a processing or shipping error made by Munchkin, Inc. Contact Consumer Relations with any questions at 800-344-2229.
CONTACT US
If you have any questions about installing your gate, or if you need additional extensions or replacement parts or wish to provide feedback or comments, feel free to contact our Customer Satisfaction team at 800-344-2229 between the hours of 8:00 am and 5:00 pm PST Monday or Friday or visit our website at www.munchkin.com
16
SPANISH
ESPANOL
ESPAGNOL

131 a 139 cm 51.75 a 54.5 in
Simple 7cm2.75in

Double cm|5.5in

Quadruple 28cm1Tin
82a69cm32.5a35.25in
89≥98.cmm35.25≥36.m
36 a 105 cm 39 a 40.75 in
103 aT0 cm 4075a435 in
10a17cm 435a4625n
PIECES COMPRISES

Pain colorant: Verioule murale (4) (Prentations)

Vismurase (4) Pilles de type AAA/103 (2) (Lund Uniauement)
LARGEUR ADEQUATE
KEEP FOR FUTURE REFERENCE
Please read the instructions carefully before installing this gate. For additional help, installation videos are available at www.munchkin.com.
- Remove the TumKey Mounds from the top and bottom corners of one side of the gate.
- Insert the extension into the packets where you removed the TurnKey Mounts
- Re insert the TurnKey Mounts that you removed earlier into the open dockes of the extension. Be sure to insert the TurnKey Mounts so that the fox head in the mount is aligned with the hole on the gate frame.
- To attach additional extensions, repeat the steps above if two extensions are fitted on the same side of the gate, ensure smallest extension is closest to the gate.
- Refer to your safety gate instructions for how to finish mounting your gate.
WARNING: Do not use this gate at top or bottom of stars without using all 4 wall cups. For maximum safety, use 4 wall cups with sticky pads and screws provided when nataling the gate in all locations. Consumer assumes the risk for installing the gate in locations without the use of the wall cups and sticky pads. Never use extension in doorways wider than 54".
PIEZAS:
-
Extension (Pequeña, Mediana, o Grange) (T)
-
Torrillas de parec (2)
- Almochadilas adhesives (7)
-
Arciages para pared (2)
-
Topes para pared (2)


ADICION DE EXTENSIONES
EXTENSION CONFIGURATIONS
326.1852.5in 82.1in 89.4in
35.2 to 38 in 89.4 to 96.1 cm
38 to 40.7 in 96.5 to 103.3 cm
40.7 to 45.5 in 103.3 to 110.4 cm
4.5.6.4.6.21
110.4 to 117.3 cm
46.2 to 49 in 117.3 to 124.4 cm
491c5171
124.4313.3cm
175 to 545 in 13.3 to 138.4 cm
PRODUCT AND DESIGN ARE TM & ©2015 MUNCHKIN, INC. MUNCHKIN AND THE HEART LOGO ARE TRADEMARKS OR REGISTERED TRADEMARKS OF MUNCHKIN, INC. 7835 GLORIA AVE. VAN NUYS, CA 91406. MUNCHKIN BABY CANADA LTD., 50 PRECIDIO CT., UNIT A. BRAMPTON, ON L65 6E3. MADE IN CHINA/FABRIQUE EN CHINE/HECHO EN CHINA. munchkin.com • 800.344.2229