CAV242L - TV Caratec - Free user manual and instructions
Find the device manual for free CAV242L Caratec in PDF.

| Product type | LED TV 24" (61 cm) |
| Resolution | 1920 x 1080 pixels (Full HD) |
| Image format | 16:9 |
| Contrast ratio | 1000:1 |
| Brightness | 250 cd/m² |
| Viewing angle (H/V) | 85°/85°/80°/80° |
| Speakers | 2 x 3 Watts |
| Tuners | Analog, DVB-T, DVB-S2, DVB-C |
| Connectivity | HDMI, SCART, Component (YPbPr), Composite, USB, PC (VGA), PC Audio, Digital audio output (SPDIF), Headphone jack |
| USB port | Yes (FAT32, up to 500 GB) |
| Supported USB formats | Audio: AAC, M4A, MP3, WAV, WMA; Video: AVI (XVID, DivX), MP4 (H.264), MKV (MP4V), MPG (MPEG-1/2); Image: BMP, JPG, JPEG, PNG; Text: TXT |
| CI slot | Yes |
| Power supply | 12-24 V DC (via cigarette lighter cable or included 230 V/12 V power adapter) |
| Power consumption (standby/on) | 0.2 W / 28 W |
| Energy class | B |
| Dimensions (W x H x D) without stand | 581.5 x 362 x 42.5 mm |
| Weight | 3.6 kg |
| VESA mounting | 100 x 100 mm (M4 screws, max. depth 8 mm) |
| Operating temperature | 0 °C to 50 °C |
| Pixel defect class | 0 (no defects according to ISO 9241-307) |
| Included accessories | Remote control, AAA batteries, detachable stand, 12 V power cable, 230 V/12 V power adapter, manual |
Frequently Asked Questions - CAV242L Caratec
User questions about CAV242L Caratec
0 question about this device. Answer the ones you know or ask your own.
Ask a new question about this device
Download the instructions for your TV in PDF format for free! Find your manual CAV242L - Caratec and take your electronic device back in hand. On this page are published all the documents necessary for the use of your device. CAV242L by Caratec.
USER MANUAL CAV242L Caratec
Caratec Vision CAV192L CAV222L CAV242L
Bedienungsanleitung
User's Manual
natural_image
Black-and-white photo of a caratec monitor displaying a scenic lake with wooden dock, mountains, and trees in the background (no text or symbols on the main image)Inhaltsverzeichnis
natural_image
Illustration of a hand holding a test tube with liquid inside (no text or symbols)natural_image
Simple line drawing of a mechanical component with two circular eyes and a flanged base (no text or symbols)Channel Type >All<
Service Type >All<
Polarization >Auto<
natural_image
Simple line drawing of a computer monitor with a CD on top, no text or symbols present.- General Information....28
- Scope of supply 29
- Initial start-up and operation....30
3.1. Ports 30
3.2. Establishing the power supply 30
3.3. Image and Sound Sources 31
3.4. Appliance control panel....32
3.5. Remote control 32
3.6. Fastening on the VESA bracket....35
- The main menu....36
4.1. Navigating the menu 36
4.2. The level „Channel“ 36
4.3. The level "Picture" 37
4.4. The level "Sound" 37
4.5. The level "Time" 38
4.6. The level "Option" 38
4.7. The level „Lock“ 39
- The DVD menu 40
5.1. Navigation in the Menu 40
5.2.Generalsettings....40
5.3. Audio settings....41
5.4. Preferences....41
- The Television Functions....42
6.1. Television via Satellite (DVB-S) 42
6.2. Television via a Terrestrial Antenna (DVB-T) 43
6.3. Television via a Cable Connection (DVB-C) 43
6.4. Backing up and Restoring the personal List of Channels 43
6.5. Resetting the List of Channels (DVB-S)....43
-
Playing a DVD 44
-
Playback of Media (USB) 45
8.1. Prerequisites....45
8.2. Playback 45
-
Troubleshooting 46
-
Specification 47
11.1 Notes on the pixel fault class 49
1. General Information
To prevent damage to your appliance, please observe the following points during the initial start-up and use of it.
| Mounting to a wall bracket | at the mounting screws are not too long. The screws (M4) must not protrude into the appliance by more than 8 mm. |
| Cleaning the appliance | ing disconnect the power supply line. Do not use detergents, do only clean with a soft humid cloth or special detergents for flat screens. |
| LED display | he damaged by heavy pressure onto the screen surface. |
| Heat / Humidity | I'd be exposed neither to extreme heat (direct sunlight, radiator, open flame) nor to water and humidity, respectively. |
| Condensation | cold environment to a warm environment, the appliance must be left to stand for at least an hour without being connected to a power outlet. A rapid change in temperature can lead to the build-up of condensation in the appliance, which causes damage when in operation. |
| Air circulation | ce from overheating, the vent holes on the back must always be kept clear. |
| Small parts | ll parts or liquids penetrate the appliance. This can lead to damage to the appliance or even to fire. |
2. Scope of supply
Please, ensure that the following parts are included in the scope of supply.

text_image
TV set, foot*
text_image
Remote control, 2 AAA batteries*
natural_image
Simple 3D rectangular block labeled 'Manual' (no other text or symbols)
text_image
Power supply connection cable*
text_image
Power supply unit (12V)*
text_image
Power supply unit Connection cable for cigarette lighter** optional, depending on version
3. Initial start-up and operation
3.1. Ports
External appliances or sources can be very easily connected to your TV set. The connections are located on the back side of the appliance. It is possible to connect passive as well as active antennas (with integrated booster) to the antenna input.
| Port Explanation | |
| DC 12V Connection power cable / power supply | |
| HDMI A/V input for external source, digital | |
| SCART A/V input for external source | |
| PC AUDIO Audio connection PC | |
| PC Video connection PC | |
| DVB-T/C TV antenna connection | |
| COAXIAL Digital audio output | |
| MINI AV AV input | |
| MINI YPBPR Component video input | |
| USB USB connection to play media data (FAT32) | |
| DVB-S2 | Connection for satellite dish |
| CI | CI slot for receiving coded stations |
| EARPHONE | Headphone output |
* optional, depending on version
3.2. Establishing the power supply
You have the following possibilities of supplying your Caratec TV set with power:
- Connecting the set to the vehicle's on-board power supply (12-24VDC). If you use a cable which is longer than 5m , you must use a cable with a cross section of at least 2× 2.5mm^2 .
Positive polarity:

-
Connecting to the cigarette-lighter (12-24VDC).
-
Connecting to a 230V power plug using the mains adapter supplied with the TV set (230VAC/12VDC).
Switch on the set's main switch on the rear side after connecting to the power supply.
3.3. Image and Sound Sources
Selecting a source:
| Action Control panel Remote control | ||
| Open source selection TV/AV INPUT | ||
| Select source CH+ (up) | CH- (down) | ▲ (up)▼ (down) |
| Confirm selection VOL + (forward) OK |
Your appliance supports the following sources:
| Source CAV192LTS | CAV222LTSCAV242LTS | CAV192LDTSCAV222LDTSCAV242LDS |
| ATV | √ | √ |
| DVB-T | √ | √ |
| DVB-C | √ | √ |
| DVB-S | √ | √ |
| USB | √ | √ |
| AV | √ | √ |
| PC | √ | √ |
| YPBPR | √ | √ |
| DVD - | √ | |
| Scart | √ | √ |
| HDMI | √ | √ |
Possibly not all feature versions are available for all sizes.
3.4. Appliance control panel
At the right side of the TV set there is a control panel. With these buttons all important functions can be controlled, such as e.g. switching the appliance on and off.
PLAY/PAUSE: Play / stop disk
EJECT: Eject disk
STANDBY: Appliance power on / off
TV/AV: Source selection
CH+: Next channel, navigation: ▲
CH-: Previous channel, navigation: ▼
VOL+: Increase volume, navigation: ▶
VOL-: Reduce volume, navigation:
MENU: Show menu
3.5. Remote control
For activating the remote control, open the battery port on the back side, and position the supplied batteries (AAA, 2 x 1.5V) according to the marks „+“ and „-“.
natural_image
Illustration of a hand holding a test tube with liquid inside (no text or symbols)| No. Designation Description | ||
| 01 STA | NDBY Switch appliance on / off | |
| 02 Numerical keys To enter numbers | ||
| 03 -/-- Channel selection | ||
| 04 ASPECT Format changeover | ||
| 05 VOL + Increase Volume | ||
| 06 VOL - Decrease Volume | ||
| 07 | DISPLAY | Display information bar |
| 08 | ▲ | Navigation button: up |
| 09 OK | Navigation button: confirmation | |
| 10 | ◀ | Navigation button: to the left |
| 11 | ▼ | Navigation button: down |
| 12 LCD | MENU Display of the main menu | |
| 13 PMODE | Screen mode selection | |
| 14 INPUT | Source selection | |
| 35 LANG | Change audio language | |
| 39 SMODE | Sound mode selection | |
| 40 SLEEP | Adjust sleep timer | |
| 41 EXIT | Exit from menu | |
| 42 | ▶ | Navigation button: to the right |
| 43 CH | Channel selection, down | |
| 44 NICAM | Not assigned | |
| 45 CH+ | Channel selection, up | |
| No. Designation Description | |
| 46 Last selected channel | |
| 47 AUTO Automatic screen adaptation in PC mode | |
| 48 MUTE Muting |
Only for appliances with DVB-T (DTV) / DVB-S
| No. Designation Description | ||
| 15 FAV | - Channel selection, favourites, down | |
| 16 FAV | Display favourites menu | |
| 17 HOLD | D Stop teletext page, prevent page change | |
| 18 TEXT | Open teletext | |
| 19 SIZE | Magnification of teletext page | |
| 20 | INDEX | Back to teletext front page |
| 21 | ▶II | Activate Time-Shift |
| 22 MEDIA | Display media menu | |
| 23 | ■ | without function |
| 24 | ● | without function |
| 25 | Green selection button | |
| 26 | Red selection button | |
| 26 | TV/RADIO | Switch between TV and Radio Mode |
| 27 | Yellow selection button | |
| 28 | Blue selection button | |
| 36 SUBTITLE | Set | subtitle |
| 37 FAV | + Channel selection, favourites, up | |
| 38 | EPG | Display programme overview (Electronic Programm Guide) |
Only for appliances with DVD
| No. Designation Description | ||
| 17 ZOOM | Image zoom in/zoom out | |
| 19 TITLE | Title menu | |
| 20 D.MENU | DVD | main menu |
| 21 | ▶II | Play / Pause |
| 23 | Stop | |
| 25 INTRO | Chapter overview | |
| No. Designation | Description | |
| 27 | REPEAT | Rerun |
| 28 | A-B | Rerun of self-selected scenes |
| 29 | I◀◀ | Chapter forward |
| 30 | ▶▶I | Chapter back |
| 31 | ◀◀ | Backwards |
| 32 | ▶▶ | Forwards |
| 33 | D.DISP | Information bar: Time, chapter etc. |
| 34 | GOTO | Chapter selection |
| 36 | SUBTITLE Setting of subtitle | |
| 41 | DVD SETUP | Display DVD menu |
| 47 | ▲ | Eject DVD |

text_image
AUTOSTANDBYMUTE 1 48 123 47 456 789 46 ASPECTNICAM 45 + - + + 44 DISPLAY 43 42 41 40 MENUEXT INPUT PMOOSMOOESLEEP 39 16 FAV FAV-FAV+EPG 38 TEXT HOLD LANGSUBTITLE 37 18 INDEX SIZEREVEALSUBPAGE 36 20 MEDIA 35 22 33 23 24 31 25 26 TV/RADIO 27 29 283.6. Fastening on the VESA bracket
ATTENTION: When mounting the VESA bracket, please observe that the screws (M4) must not protrude into the appliance by more than 8 mm max.
For fastening the monitor on a bracket, the foot can be removed as follows:
| Diagram Procedure | |
 | Place the appliance cautiously onto an even surface. If necessary, put a soft and clean cloth underneath to prevent the LED screen from becoming scratched.Remove the two screws on the underside. Then press the knob on the upper side and remove the pedestal by turning to the right.Unscrew the three remaining screws to completely remove the mount. |
4. The main menu
For matching the appliance to your demands, you are able to carry out several settings via the menu. The menu can be accessed pressing the „LCD MENU“-button on your remote control or the „MENU“ button on the appliance control panel.
4.1. Navigating the menu
| Action Control panel Remote control | ||
| TV menu call-up MENU LCD MENU | ||
| Select level VOL+ (forward) | VOL+ (back) | ► (forward)◄ (back) |
| Changing to the set-up mask of a level | CH- (down) | ▼ (down) |
| Exiting the setting mask of a level MENU LCD MENU | ||
| Navigating within the set-up mask | CH- (up)CH- (down) | ▲ (up)▼ (down) |
| Change of settings | TV/AV | OK |
| Confirming settings and exiting the set-up mask | MENU | OK |
| Exiting the TV menu | MENU EXIT |
Please, do also always observe the on-screen displayed navigation information.
4.2. The level „Channel“
For carrying out settings in level „Channel“ proceed as follows:
- Call up the menu by pressing the „LCD MENU“-button on the remote control.
- Select level „Channel“.
- Change to the set-up mask of the level.
| Function Explanation | |
| Auto Scan | Start automatic station search for the selected source. |
| Cable Manual Tuning (DVB-C/T sowie ATV) | Starting manual station search for the selected source. |
| Programme Edit | Stations can be arranged, deleted, blocked or marked as favourites. |
| Signal Information | Have signal information of the station displayed. |
| CI Information | Display information on the plugged-in CI cards. |
| 5V Antenna Power | For active antennae, switch on to operate the antennae with 5V. |
| Dish Setup | Management of satellites and transponder. |
| Import Preset Channels | Reset the sender list to delivery status. |
4.3. The level „Picture“
For carrying out settings in level „Picture“ proceed as follows:
-
Call up the menu by pressing the „LCD MENU"-button on the remote control.
-
Select level „Picture“.
-
Change to the set-up mask of the level.

| Function Explanation | |
| Picture Mode | Selection of different picture modes (Standard / Dynamic / Mild / User). |
| Contrast | Adjustment of the contrast ratio. |
| Brightness | Adjustment of brightness. |
| Color | Adjustment of the colour ratios. |
| Sharpness | Setting the screen sharpness. |
| Tint | Adjusting the tinting (NTSC format only). |
| Color Temperature | Select colour temperature (Cool / Medium / Warm / User). |
| Red | Fine tuning of the displayed red shades. |
| Green | Fine tuning of the displayed green shades. |
| Blue | Fine tuning of the displayed blue shades. |
| Aspect Ratio | Selection of different image formats (4:3 / 16:9 / Zoom1 / Zoom2 / Panorama). |
| Noise Reduction | Setting the noise reduction (Off / Low / Middle / High). |
| Screen | Adjust size and position of PC screen. |
4.4. The level „Sound“
For carrying out settings in level „Sound“ proceed as follows:
-
Call up the menu by pressing the „LCD MENU"-button on the remote control.
-
Select level „Sound“.
-
Change to the set-up mask of the level.

| Function Explanation | |
| Sound Mode | Selection of different sound effects (Standard / Music / Movie / Sports / User). |
| Tre ble | Treble setting. |
| Bass | Bass setting. |
| Balance | Setting the balance between right and left loudspeaker. |
| Auto Volume | Switching the automatic volume control on or off. |
| Surround Sound | Switching the surround sound on or off. |
| SPDIF Mode | Switching the AD switch on or off (Off / PCM / Auto). |
For carrying out settings in level „Time“ proceed as follows:
- Call up the menu by pressing the „LCD MENU“-button on the remote control.
- Select level „Time“.
- Change to the set-up mask of the level.

| Function Explanation | |
| Clock | Indication of the hour. The hour is automatically set by the system. |
| Off Time | Time setting for different switch-off times. |
| On Time | Time setting for different switch-on times. |
| Sleep Timer | Setting the time for automatic switch-off of the TV. |
| Auto Sleep | Setting the time for the appliance to automatically move into stand-by mode when no operation has been performed during this time period. |
| Time Zone | Select time zone. |
4.6. The level „Option“
For carrying out settings in level „Option“ proceed as follows:
- Call up the menu by pressing the „LCD MENU“-button on the remote control.
- Select level „Option“.
- Change to the set-up mask of the level.

| Function Explanation | |
| OSD language | Defining the menu language. |
| Audio Languages 1st | Defining the audio language in case of multi-channel sound. |
| Audio Languages 2nd | Defining the audio language in case of multi-channel sound. |
| Subtitles Languages 1st | Select subtitle language. |
| Subtitles Languages 2nd | Select subtitle language. |
| OSD Duration | Setting the time for automatically hiding the LED menu. |
| Country | Depending on the station search in DVB-T. Not adjustable. |
| Restore Factory Default | Reset appliance to factory settings. |
4.7. The level „Lock“
For carrying out settings in level „Lock“ proceed as follows:
- Call up the menu by pressing the „LCD MENU“-button on the remote control.
- Select level „Lock“.
- Change to the set-up mask of the level.

Entry of the preset PIN code necessary. Factory-set PIN code: "0000".
| Function Explanation | |
| Lock Channel | Turn the parental controls on or off. |
| Set Passwort | Personalizing the factory-set password. |
| Block Program | Tag defined stations with password protection. For showing the running program of a station it is required to enter the password. |
| Parental Guidance | Defining the age limit for youth protection settings. |
| Hotel Setting | Restrict the functions of the set for the user. Import and export the list of channels. |
5. The DVD menu
For matching the DVD player to your demands, you are able to carry out different settings in the DVD menu. For menu call-up press the „DVD Setup“ button on the remote control.
5.1. Navigation in the Menu
| Action Procedure | |
| DVD menu call-up DVD Setup | Requirement: DVD selected as source |
| Select level ▶ (forward) | ◀ (back) |
| Changing to the set-up mask of a level ▼ (down) | |
| Exiting the setting mask of a level ◀ (back) | |
| Changing the line in the set-up mask ▲ (up) | ▼ (down) |
| Enable set-up for editing ▶ (forward) | |
| Changing set-ups ▲ (up) | ▼ (down) |
| Confirming setting and exiting the set-up mask OK | |
| Exiting the DVD menu DVD Setup |
5.2. General settings
| Function Explanation | |
| TV Display | Adjusting the screen display format. |
| OSD Lang | Set-up of menu language (DE/FR/ENG). |
| Screen Saver | Activated screen saver on / off. Comes up after the image was stopped for a longer time. |
| Last Memory | The activation of this function makes the appliance memorize the position where the DVD was stopped before switch-off.Replay of the DVD is continued at this position after starting it again. |

5.3. Audio settings
| Function Explanation | |
| Speaker Setup | Switch the downmix function (convert multi-channel sound into stereo sound) on / off. |
| Dual Mono | Switching between stereo and mono channels. |
| Dynamic | Differences between soft and loud sounds are adjusted. |

5.4. Preferences
The menu can be accessed only if the DVD is ejected.
Entry of the preset password necessary. Factory-set password: "123456".
| Function Explanation | |
| TV Type | Select TV standard (PAL / NTSC). |
| Audio | Setting the playback language. |
| Subtitle | Set-up of subtitle language. |
| Disc Menu | Setting the menu language. |
| Parental | If a film is inserted, whose age rating is higher than what has been approved by you, then it cannot be played. |
| Password | Personalise password. |
| Default | Reset DVD menu to factory settings. |

6. The Television Functions
Note: Depending on the location, the search run can take up to 20 minutes. If the search run is interrupted, the list of channels is incomplete or even empty. However, you can reset the list of channels to the delivery status.
6.1. Television via Satellite (DVB-S)
Connection
Connect the satellite dish and the set with a conventional coaxial cable to the "DVB-S-Tuner" inlet. Align the dish to the required satellites.
Automatic Channel Search Run
To start an automatic channel search run, proceed as follows:
- Select "DVB-S" as the source.
- Press the "LCD MENU" button on your remote control.
- Choose the "Auto Scan" function.
- Press "OK"
- You can configure the search run in the following window. Default settings:
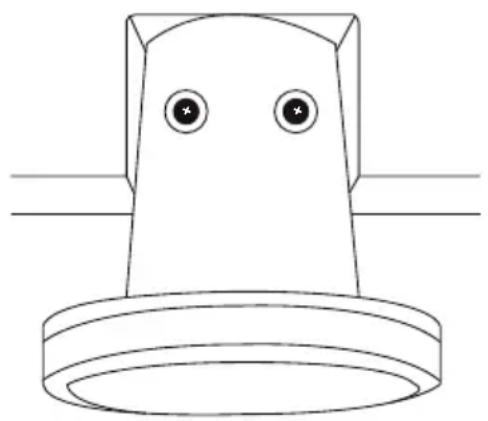
Scan Mode >Blind Scan<*
Channel Type >All<
Service Type >All<
Polarization >Auto<
-
Start the search run by pressing the blue button on your remote control.
-
After ending the channel tuning, a TV image appears if a signal exists.
Manual Channel Search
To carry out a manual channel search, proceed as follows:
- Select "DVB-S" as the source.
- Press the "LCD MENU" button on your remote control.
- Select the function "Dish setup" in the "Channel" level.
-
Select the required satellite or transponder and mark it with "OK".
-
Press the blue button on your remote control and select the following in the following window:
Scan Mode >Blind Scan<*
Channel Type >All<
Service Type >All<
Polarization >Auto<
-
Start the search run by pressing the blue button on your remote control.
-
After ending the channel tuning, a TV image appears if a signal exists.

Scan Mode Explanation
| Default | Scanning the known transponder on the satellite. |
| Blind Scan | Complete scan over the full frequency spectrum of a satellite without use of presets. |
| Network | Scan with the help of a transponder list transmitted by satellite. |
6.2. Television via a Terrestrial Antenna (DVB-T)
Connection
Connect your terrestrial antenna with the "DVB-T/C" inlet on the back. If you use a passive antenna (without its own power supply), switch the "5V Antenna Power" option in the "Channel" level of the main menu to "On".
Manual Channel Search Run
To carry out a manual channel search, proceed as follows:
- Select "DVB-T" as the source.
- Press the "LCD MENU" button on your remote control.
- Choose the "Cable Manual Tuning" function.
- Press "OK".
- You can configure the search run in the following window. (Recommended: FULL / Auto / Auto / Auto).
6.3. Television via a Cable Connection (DVB-C)
Connection
Connect your outlet and the set with a conventional coaxial cable to the "DVB-T/C" inlet.
Manual Channel Search Run
To carry out a manual channel search, proceed as follows:
- Select "DVB-C" as the source.
- Press the "LCD MENU" button on your remote control.
- Choose the "Cable Manual Tuning" function.
- Press "OK".
- You can configure the search run in the following window. (Recommended: FULL / Auto / Auto / Auto)
6.4. Backing up and Restoring the personal List of Channels
To back up or restore your personal list of channels, proceed as follows:
- Press the "LCD MENU" button on your remote control.
- Move to the "Lock" level.
- Open the "Hotel Setting" function.
Connect a suitable empty USB medium to the back of the set. Choose the "DataBase Export" function to back up your current list of channels.
To restore a previously backed up list of channels, select the "DataBase Import" function. The file containing the lists of channels must be in the root directory of the USB medium.
6.5. Resetting the List of Channels (DVB-S)
To reset the list of channels to the delivery status, proceed as follows:
- Select "DVB-S" as the source.
- Press the "LCD MENU" button on your remote control.
- Select the "Import Preset Channels" function and press "OK".
- Select "YES" to confirm the following information
- Wait until the menu closes independently.
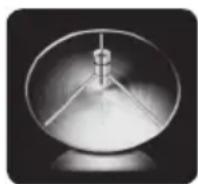
7. Playing a DVD
To play a DVD, insert this into the drive on the right side of the set. Ensure that the underside of the DVD is facing you. Slowly insert the DVD until it is automatically accepted by the disk drive.
Please note that the insertion and removal of the DVD is only possible when DVD is selected as the source.

natural_image
Simple line drawing of a computer monitor with a CD on top, no text or symbols present8. Playback of Media (USB)
8.1. Prerequisites
You can playback data saved on a USB medium. To playback media data, make sure that your storage medium fulfils the following properties.
| Characteristics | |
| Formatting FAT32 | |
| Maximum storage capacity 500 GB | |
| Type of USB USB 2.0 | |
| Supported file formats Audio: aac, m4a, mp3, wav, wmaVideo: avi (XVID, DivX), mp4 (H.264), mkv (MP4V),mpg (MPEG-1, MPEG-2)Image: bmp, jpg, jpeg, pngText: txt | |
8.2. Playback
- Press the „Media“ button on your remote control or select „USB“ as source.
- The four categories „Photo“, „Music“, „Movie“ and „Text“ are displayed. Select the category where your file is located and confirm with „Ok“.
- Select the storage space (C) of the medium and the subfolder, if required. The data saved on the medium are displayed.
- For playing a file, press the „OK“ button, for deleting a file the red button on your remote control.
9. Troubleshooting
| Problem Solution | |
| No function Please ensure that | the power cable is correctly connected.Please ensure that the mains switch on the rear side is switched on.Please ensure that the polarity of the power supply. |
| No image Please ensure that the | according source (Input) is selected.Please ensure that the according source or antenna is correctly connected. |
| No sound Please check the volume. | Please check if the mute function is activated. |
| Blue screen Please ensure that | the according source (Input) is selected. |
| Appliance does not respond to remote control. | Please ensure that the batteries are inserted according to the marks for the poles. Please replace the batteries, if required. |
| DTV / DVB-T mode:Error message „no signal“ | Please check the antenna connection.Please restart the programme search. |
| DVB-S mode:Error message „no signal“ | Please check the antenna connection.Please restart the programme search. |
| PC mode:The image is too small, too large or displaced | Please select PC as source and change the image settings in the LCD menu.Please select PC as source and press the Auto button on the remote control. |
10. Specification
| Technical data 19" (47 cm) LED TV CAV192 22" (55 cm) LED TV CAV222 | ||
| Item number CAV192LDTS CAV222LTS, CAV222LDTS | ||
| Resolution (Pixel) 1366 x 768 px 1920 x 1080 px (Full HD) | ||
| Image format 16:9 16:9 | ||
| Contrast ratio 1000:1 1000:1 | ||
| Brightness 250 cd/m2 250 cd/m2 | ||
| Viewing angle (R/L/A/B) 85°/85°/80°/80° | 85°/85°/80°/80° | |
| Loudspeaker | 2 x 3 Watt | 2 x 3 Watt |
| Analog TV Tuner | Yes | Yes |
| DVB-T Tuner | Yes | Yes |
| DVB-S2 Tuner | Yes, for CAV192LDTS | Yes, for CAV221LTS/LDTS |
| DVD player | Yes, for CAV192LDTS | Yes, for CAV221LDT/LDTS |
| HDMI | Yes | Yes |
| Scart | Yes | Yes |
| Component (Y,Pb,Pr) | Yes, over 3,5 mm Klinke (optional) | Yes, over 3,5 mm Klinke (optional) |
| Composite (FBAS) | Yes, over 3,5 mm Klinke (optional) | Yes, over 3,5 mm Klinke (optional) |
| USB connection (media player) | Yes | Yes |
| PC (VGA) | Yes | Yes |
| PC audio (3,5 mm) | Yes | Yes |
| Antenna connection analogue/DVB-T with 5V output for active DVB-T antennas | Yes | Yes |
| Antenna connection DVB-S2 | Yes, for CAV191LDTS | Yes, for CAV221LTS/LDTS |
| CI slot | Yes | Yes |
| Digital audio output (cinch connector) | Yes | Yes |
| Headphone (3.5 mm) | Yes | Yes |
| Remote control | Yes | Yes |
| Foot (detachable) | Yes | Yes |
| 12V connection cable | Yes | Yes |
| Power supply unit (100 ... 240 V), external | Yes | Yes |
| VESA mounting option | Yes, 100 mm | Yes, 100 mm |
| Set switch on/off | Yes | Yes |
| Supported USB file formats | Music: aac, m4a, mp3, wav, wmaPictures: bmp, jpg, jpeg, pngVideo: avi (XVID, DivX), mp4 (H.264), mkv (MP4V), mpg (MPEG-1, MPEG-2) | |
| Operating voltage | 12-24 V | 12-24 V |
| Power consumption (OFF/stand-by/ON) | CAV192LDTS: 0/0,2/28 Watt | CAV222LTS: 0/0,2/25 WattCAV222LDTS: 0/0,2/30 Watt |
| Energy efficiency class | B | B |
| Temperature range operation / storage | 0...50°C/-20...60°C | 0...50°C/-20...60°C |
| Pixel defect class to EN ISO 9241-307 | 0 (fault-free) | 0 (fault-free) |
| Weight | CAV192LDTS: 3,5 kg | CAV222LTS: 3,5 kgCAV222LDTS: 3,8 kg |
| Dimensions (W x H x D in mm) without foot | 460 x 293 x 42,5 mm | 527 x 331 x 42,5 mm |
| Technical data 24" (61 cm) LED TV CAV242 | |
| Item number CAV242LTS | |
| Resolution (Pixel) 1920 x 1080 px (Full HD) | |
| Image format 16:9 | |
| Contrast ratio 1000:1 | |
| Brightness 250 cd/m2 | |
| Viewing angle (R/L/A/B) 85°/85°/80°/80° | |
| Loudspeaker 2 x 3 Watt | |
| Analog TV Tuner Yes | |
| DVB -T Tun er Yes | |
| DVB -S 2 Tun er Yes | |
| DVD player No | |
| HDMI Yes | |
| Scart | Yes |
| Component (Y,Pb,Pr) | Yes, over 3,5 mm Klinke (optional) |
| Composite (FBAS) | Yes, over 3,5 mm Klinke (optional) |
| USB connection (media player) | Yes |
| PC (VGA) | Yes |
| PC audio (3,5 mm) | Yes |
| Antenna connection analogue/DVB-T with 5V output for active DVB-T antennas | Yes |
| Antenna connection DVB-S2 | Yes |
| CI slot | Yes |
| Digital audio output (cinch connector) | Yes |
| Headphone (3.5 mm) | Yes |
| Remote control | Yes |
| Foot (detachable) | Yes |
| 12V connection cable | Yes |
| Power supply unit (100 ... 240 V), external | Yes |
| VESA mounting option | Yes, 100 mm |
| Set switch on/off | Yes |
| Supported USB file formats | Music: aac, m4a, mp3, wav, wmaPictures: bmp, jpg, jpeg, pngVideo: avi (XVID, DivX), mp4 (H.264), mkv (MP4V), mpg (MPEG-1, MPEG-2) |
| Operating voltage | 12-24 V |
| Power consumption (OFF/stand-by/ON) | CAV242LTS: 0/0,2/28 Watt |
| Energy efficiency class | B |
| Temperature range operation / storage | 0...50°C/-20...60°C |
| Pixel defect class to EN ISO 9241-307 | 0 (fault-free) |
| Weight | CAV242LTS: 3,6 kg |
| Dimensions (W x H x D in mm) without foot | 581,5 x 362 x 42,5 mm |
10.1 Notes on the pixel fault class
Unless indicated to the contrary, all the flat screens supplied by Caratec GmbH comply with Class 0.
In case of flat screens pixel defects occur related to technology and production. A 22" display with a resolution of 1920 x 1080 pixels e.g. consists of more than 2 million individual screen cells controlled by tiny transistors. With such a tremendous number it is possible that in spite of highest quality standards one or several individual cells are not perfectly functioning, and are permanently switched on or off. Then, the outcome are continuously shining or continuously black pixels on the screen.
In this respect, the ISO standard 9241-307 defines quality classes providing transparency with respect to warranty claims of final customers, retailers and wholesalers against the manufacturers. With the commitment to an ISO defect class, the monitor manufacturers undertake to comply with the corresponding standard for serial production. In this, the pixel defect classes are guided by the number of pixel defects and by the specific defect type, as explained in the following table.
| Defect class Fault type 1Defective pixelAlways on | Fault type 2Defective pixelAlways black | Fault type 3Defective sub-pixelAlways on | Fault type 3Defective sub-pixelAlways black |
| 0 0 0 0 0 | |||
| I 1 1 2 2 | |||
| II 2 2 5 2 | |||
| III 5 15 Up to 50 | |||
| IV 50 150 Up to | 500 | ||
The pixel defect number is defined each time per 1 million pixels.
Explanation:
A continuously shining pixel (defect type 1) is more disturbing for thee user than a continuously black pixel (defect class 2). The least evident is, if only one subpixel is defective, and shines in one of the three colours red, green or blue, or is black (defect class 3).
Because of these differences also the respective accepted number of defects of the three defect types is different, e.g. in class II.