RunTechA - Exercise bike DKN - Free user manual and instructions
Find the device manual for free RunTechA DKN in PDF.

| Product type | Treadmill |
| Brand | DKN |
| Model | RunTechA |
| Usage | Residential |
| Maximum user weight | 130 kg |
| Speed range | 1 – 20 km/h |
| Adjustable incline | 1 – 15 levels |
| Training program types | Manual, preset, custom, HRC cardio |
| Heart rate measurement | Integrated sensors (hands) + telemetric belt (optional, ref 20073) |
| Safety key | Yes (required to start) |
| Bluetooth compatibility | Yes (enabled via menu) |
| Power supply | Mains (standard plug) |
| Warranty | 2 years (conditions apply) |
| Recommended maintenance | Interior vacuuming twice a year, annual belt lubrication |
| Exterior cleaning | Non-abrasive products, avoid liquid penetration |
| Spare parts | Original only |
| Optional accessories | DKN telemetric belt (ref 20073) |
| Manual languages | FR, DE, EN, ES, IT, NL, RU and others |
Frequently Asked Questions - RunTechA DKN
User questions about RunTechA DKN
0 question about this device. Answer the ones you know or ask your own.
Ask a new question about this device
Download the instructions for your Exercise bike in PDF format for free! Find your manual RunTechA - DKN and take your electronic device back in hand. On this page are published all the documents necessary for the use of your device. RunTechA by DKN.
USER MANUAL RunTechA DKN
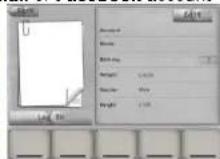
Create or Select User profile.

Landing page: select work-out.

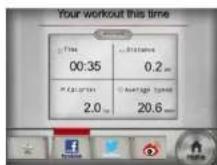
Start work-out.
AFTER WORK-OUT:

Press Home to LANDING PAGE.
Press BACK (3x), press EXIT.
Deactivate Bluetooth Connection to clear console.


Press Home to LANDING PAGE.
Press BACK (3x), exit APP on the tablet.
- Deactivate Bluetooth Connection on iPad to clear the training console.

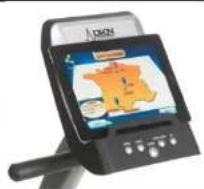
DKN iWorld

Available on the App Store


GET IT ON Google play
GETTING STARTED
Activate Bluetooth connection on iPad or tablet
Pair DKN Trainer (password 0000)
Activate DKN IWorld App on your tablet

Log in using your own G-Mail or Facebook account

Select favourite, or create your own route.

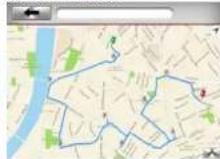

Press start
Toggle between Map, Streetview or Satellite


Post update
Log file
| Supported OS: www.dkn-technology.com |
| The Bluetooth® word mark and logos are registered trademarks owned by Bluetooth SIG Inc. Not all Bluetooth features may be supported by compatible Bluetooth enabled devices. DKN is not responsible for the operation, nor the functioning of Bluetooth accessories in connection to this machine. |
| "Made for iPod," "Made for iPhone," and "Made for iPad" means that an Electronic accessory has been designed to connect specifically to iPod, iPhone, or iPad, respectively, and has been certified by the developer to meet Apple performance standards. Apple is not responsible for the operation of this device or its compliance with safety and regulatory standards. Please note that the use of this accessory with iPod, iPhone, or iPad may affect wireless performance. iPod, iPhone, iPod, iPod classic, iPod nano, iPod shuffle, and iPod touch are trademarks of Apple Inc., registered in the U.S. and other countries. |
| Google Play is a trademark of Google Inc. Google, Android and the Google Logo or registered trademarks of Google Inc. |
This DKN product is designed for residential use only.
DKN warrants this product to be free from defects in material at the time of the product's tender of delivery. This 'Carry-in' Limited Warranty applies for a period of two (2) years, beginning on the date mentioned on your product invoice or proof of purchase of product sold through the DKN Authorized Dealer Network to the original retail purchaser and authenticated by proof of purchase from a retailer a product sold by an authorized DKN dealer.
This Limited Warranty is not transferable and does not cover normal wear and tear (including, but not limited to, damage and wear to batteries, springs, bearings, running mats, hydraulic systems, ropes, belts, pulleys, power shocks, drive belts and other non-durable parts, etc...).
This Limited Warranty is void if the product is damaged by accident, unreasonable use, improper service, failure to follow instructions provided, modification from its original state, or other causes determined not arising out of defects in material, the consequences of improper treatment, bad installation, wrong assembly or tampering of the parts by incorrect assembly, improper use of the machine (eg. too heavy load in time, weight etc...), problems caused by lack of maintenance, deviations of the standard machine, such as light vibrations or noise, and in case of semi-professional, professional and commercial use (inter alia in sports schools, physio, companies, etc...).
Transport charges, travel charges for technicians, and possible trader and/ or workshop charges are excluded from this warranty, and will be at the sole cost of the owner.
The liability of the manufacturer under this Limited Warranty shall not include any liability for direct, indirect, or consequential damages resulting from any defect nor the use of this machine.
Before you start training on your DKN platform, please read the instructions carefully. Be sure to keep the instructions for information, in case of repair and for spare part delivery.
This exerciser has been tested up to a max. body weight of 130 kg/290 lbs.
Follow the carefully the different steps of the assembly instructions.
Use only original parts as delivered.
Before starting the assembly, be sure to check if delivery is complete by using the included parts-list.
For assembly use only suitable tools and ask for assistance with assembly if necessary.
Place the exerciser on an even, non-slippery surface. Because of possible corrosion, the usage of any exerciser in moist areas is not recommended.
Check before the first training and every 1-2 months that all connecting elements are tight fitting and are in the correct condition.
Replace defective components immediately and/or keep the equipment out of use until repair.
For repairs, use only original spare parts.
In case of repair please ask your dealer for advice
Avoid the use of aggressive detergents when cleaning.
Ensure that training starts only after correct assembly and inspection.
For all adjustable parts be aware of the maximum positions to which they can be adjusted/tightened to.
This exerciser is designed for adults. Please ensure that children use the exerciser only under the supervision of an adult.
Ensure that those present are aware of possible hazards, e. g. movable parts during training.
Warning: incorrect/excessive training can cause health injuries.
Please follow the advice for correct training as detailed in training instructions.
Consult your physician before starting with any exercise programme. He can advise on the kind of training and which impact is suitable.
The owner's manual is only for customers' reference.
The supplier can not guarantee for mistakes occurring due to translation or change in technical specification of the product.
All data displayed are approximate guidance and cannot be used in any medical application.
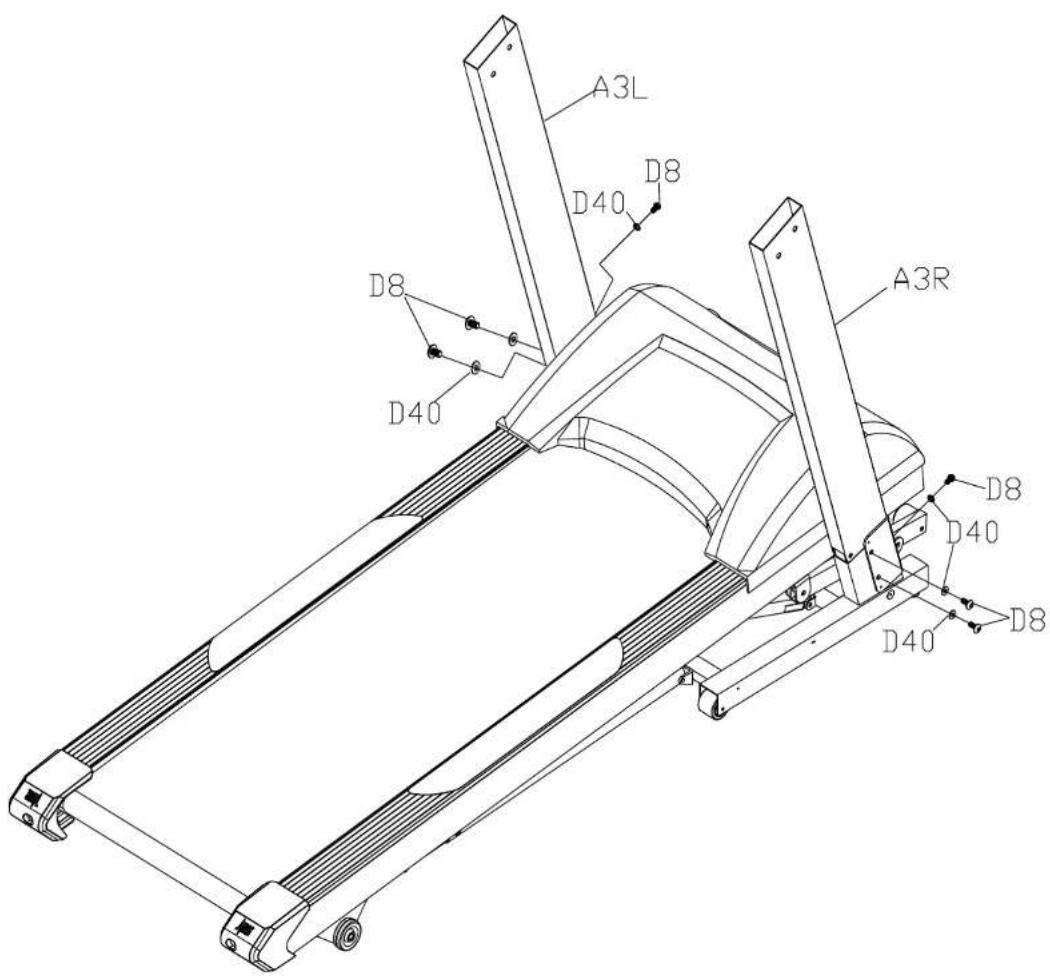
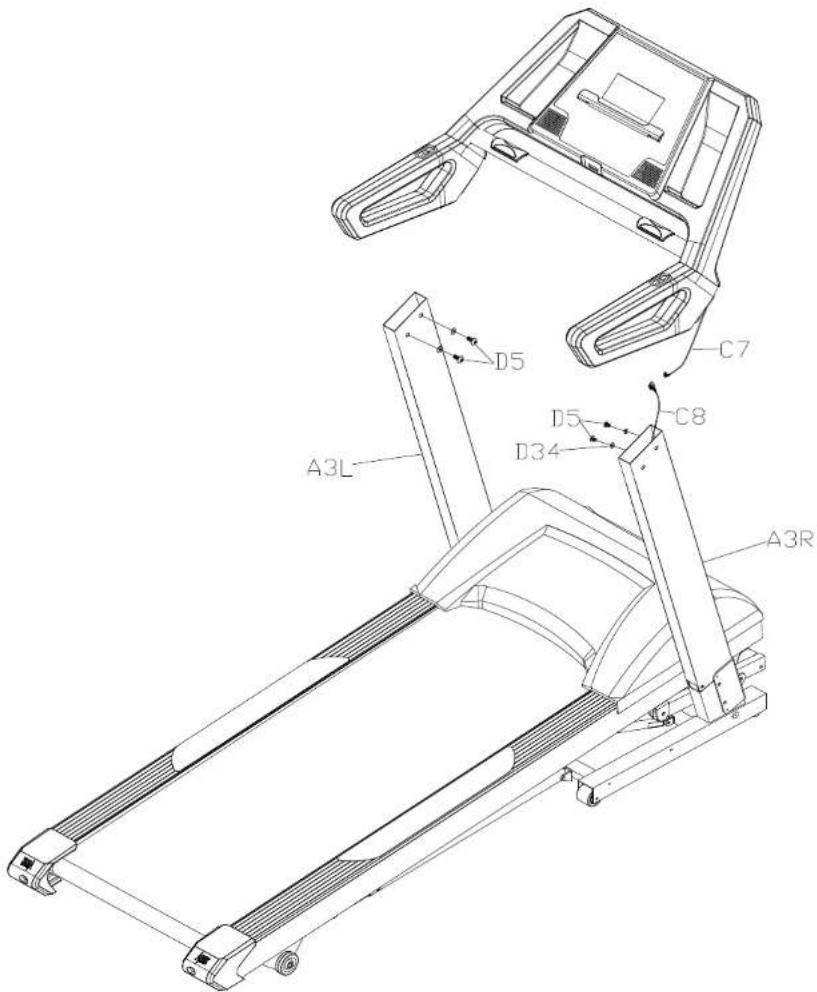
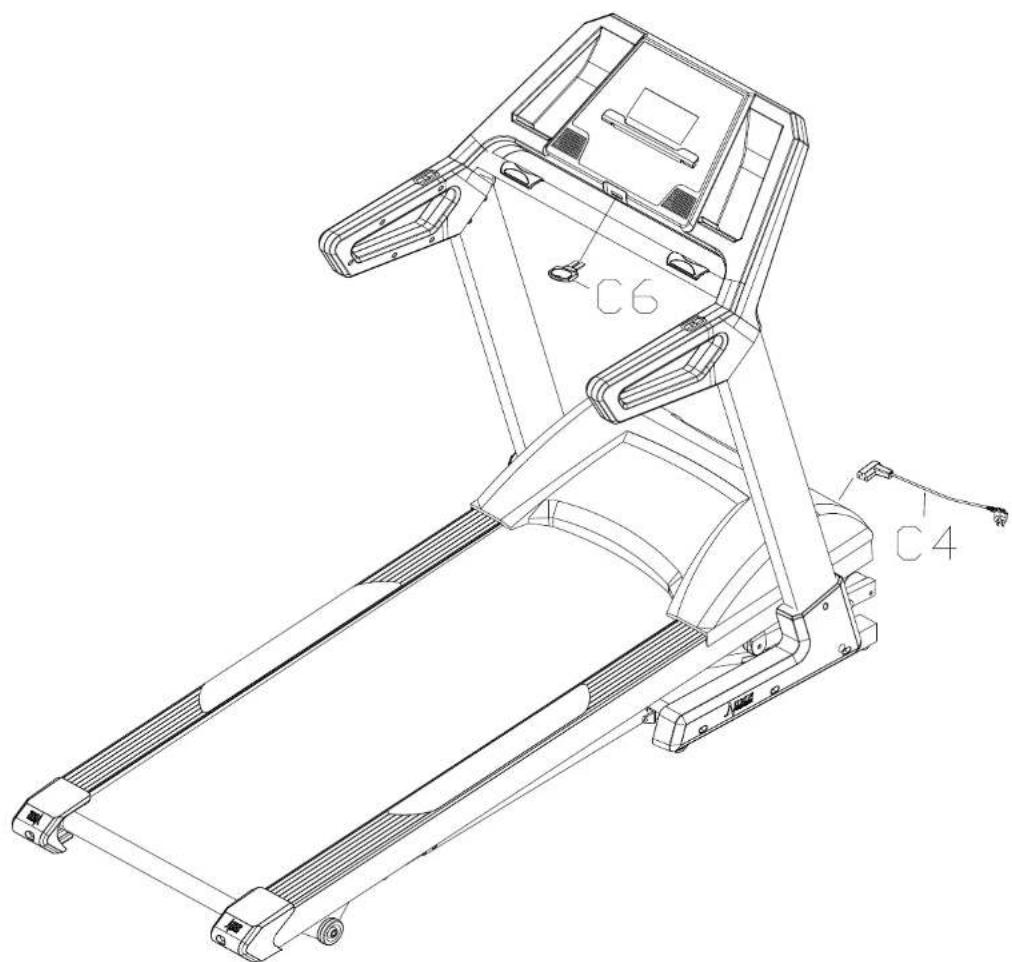
| Main frame 1set | Computer bracket 1set | D8 Round hex bolt M8*15 6PCS | C6 Safety key 1set |
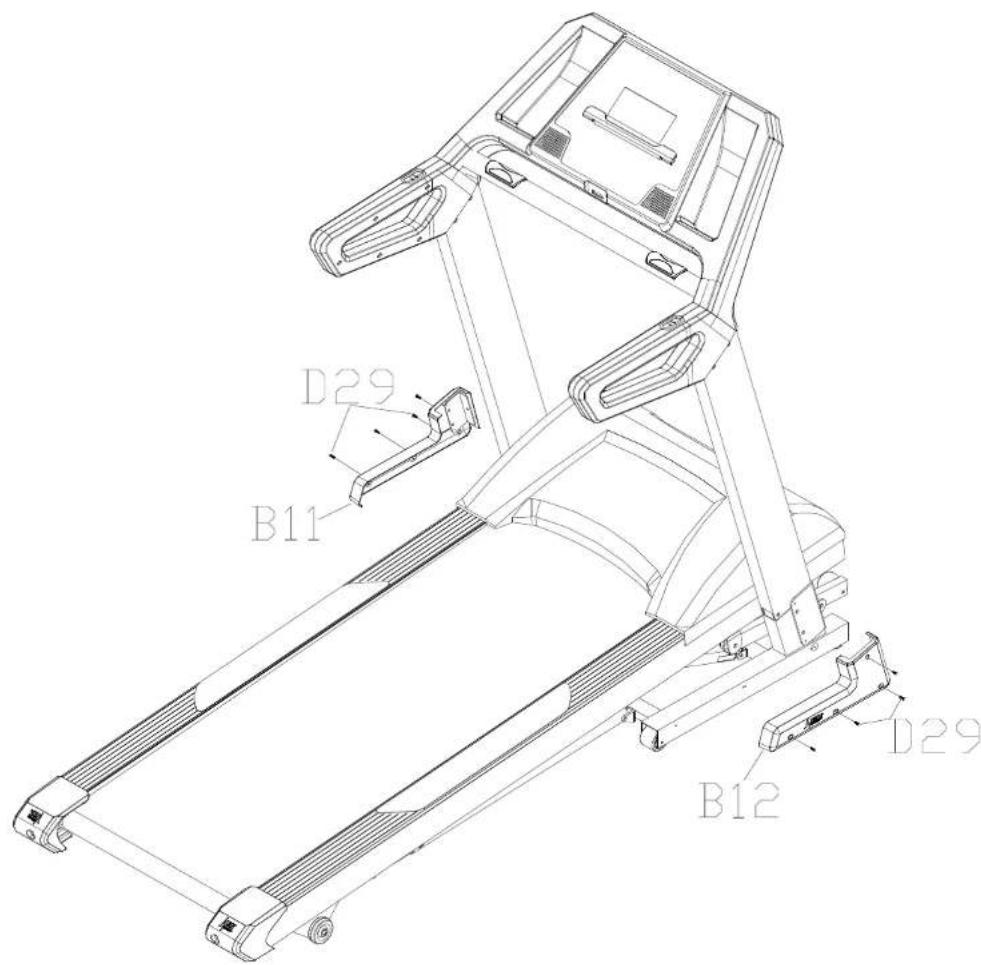
| D1 Allen wrench 5MM, 1PC | D2 Allen wrench 6MM, 1 PC | D42 Screw driver 1 PCS | D29Self-tapping screw ST4.2X25 8 PCS |
| B11 Left side cover 1 PCS | B12 Right side cover 1 PCS | C4 Power code 1PC | D40 Inner washer M8 6PCS |
| D5 Round hex bolt M10*15 4PCS | D34 Flat washer M10 4PCS | B6 Silicon oil 1PC |
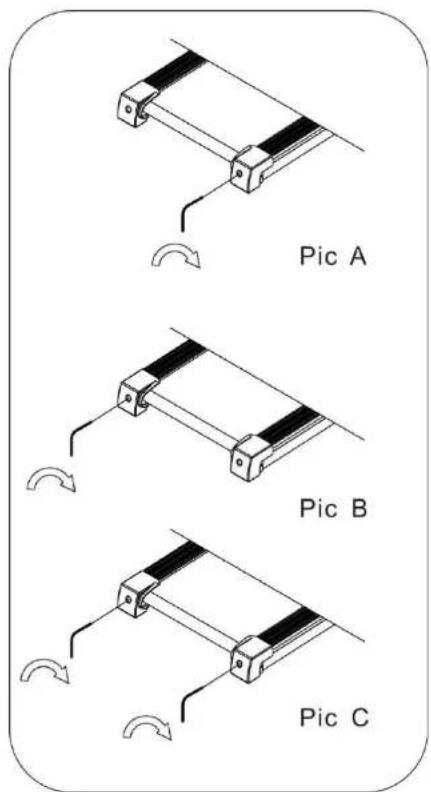
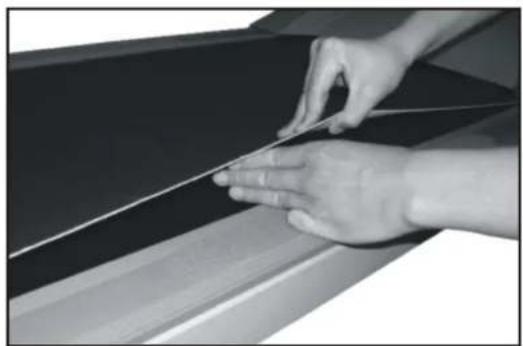
! Note : The treadmill should be placed on a level surface. If the treadmill is not level the belt will continuously track to the low side of the treadmill.
-
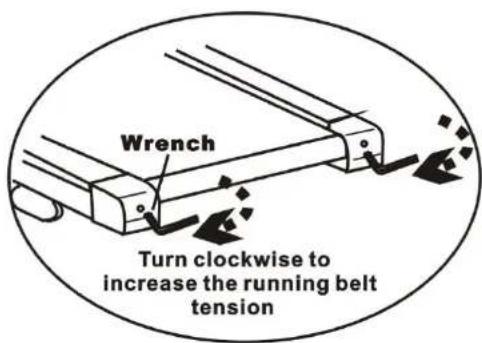
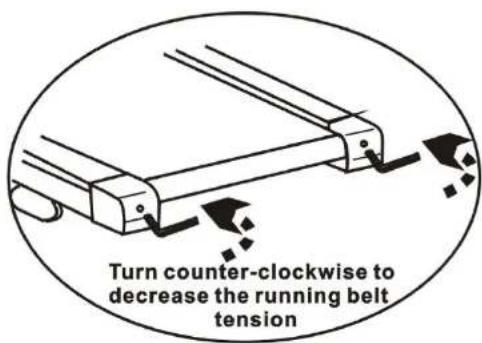
Belt adjustment bolts are located at the rear of the treadmill, as shown in above drawing.
-
Belt moving (tracking) to the right :
Start the treadmill and set at 4 kph. Using an allen key wrench, turn the right adjustment bolt clockwise 1/4 of a turn. Continue adjustments at 1/4 of a turn until belt returns to the center. Continue to run the treadmill for a short period of time monitoring the belt movement to ensure you have not made an over adjustment.
- Belt moving (tracking) to the left :
Start the treadmill and set at 4 kph. Using an allen key wrench, turn the right adjustment bolt clockwise 1/4 of a turn. Continue adjustments at 1/4 of a turn until the belt returns to the center. Continue to run the treadmill for a short period of time monitoring the belt movement to ensure you have not made over adjustment.
At least twice a year remove the motor cover and vacuum inside.
This Treadmill's walking belt and deck are equipped with a pre-lubricated, low maintenance deck system. The belt versus deck friction may play a major role in the function and life of your Treadmill, thus requiring periodic lubrication. We recommend a periodic inspection and annual lubrication of the deck.
Always hold onto the hand rails when getting on and off the treadmill. Place feet on foot rails (not on the tread) of the treadmill before starting. Turn on treadmill and set at slow position before stepping on. Adjust the speed slowly to avoid sudden surge in speed.
Always unplug the power cord before performing the maintenance and adjustment procedures described in this manual. Never remove the shroud unless instructed to do so by an authorized service representative. Servicing other than the procedures in this manual should be performed authorized service representative only.
ara activar Blue Tooth.
Operacion general
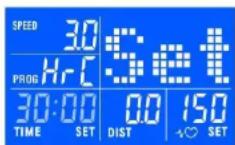
Operating Instructions Computer
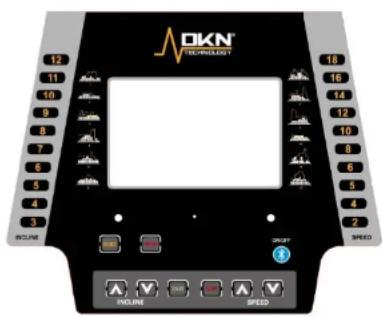
Function keys
Start/stop: starting and stopping the belt.
Enter: confirming program or data.
Select: selecting program or data.
Speed / : to adjust speed. Or set speed using the direct speed keys (1-20 km/h).
Incline / : to adjust inclination level. Or set inclination using the direct incline keys (1-15).
Blue Tooth to activate Blue Tooth.
General operation:
Please read carefully before using
Safety tips:
To start, turn on the power and attach the safety key to the monitor. Note that the machine does not work and no data will be displayed without the safety key attached. Please clip the other end of the safety key to the user before exercising to ensure the machine will stop in case the user accidentally runs off the treadmill. Should that happen, the safety key will be cut off the monitor and the treadmill will stop at once to avoid further injury.
Pulse rate:
There are two ways to measure your heart rate. Hand-pulse sensors or chest belt. Hand-pulse sensor requires both hands to gently hold the hand-pulse sensors. There are 2 sensors and 2 pieces of metal part each sensor. Each hand must gently hold both metal pieces to trigger the HR measuring.
For HR training the use of a chest belt to measure pulse rate is compulsory.
Your computer is compatible with the optional DKN chest transmitter (ref 20073), for integrated wireless heart rate registration. Contact your dealer, or visit our website www.DKN-Technology.com
Start-up
Press the power button.
Position the safety key into the on position.
Start-up screen:
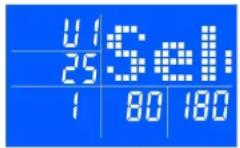
Use / to select User 1 or 2, and press ENTER to confirm your setting (user data are stored).
Enter your personal data (gender, age, height and weight) using 个 / . Press ENTER to confirm your setting value.
(1=,2=)
Next select manual (press start) or select a program using SELECT button.
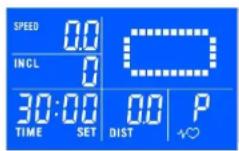
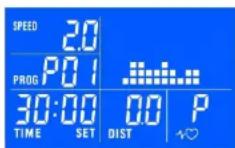
Manual menu
Quickstart mode:
Press START, use / buttons to adjust values. Matrix shows a 400 m running track. Adjust Speed and Incline using / buttons or the hot kets.
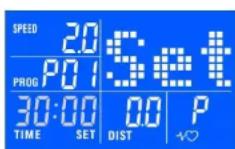
Countdown mode:
Press SELECT to select time, distance and calories, and set data using / . Press ENTER to confirm selection.

Press START to begin exercising.
The exercise will stop once one of the set parameters is reached.
Program menu
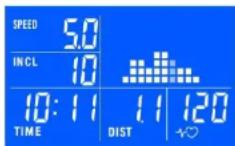
Preset runs:
Use SELECT button to choose program press ENTER to confirm selection.
Press ENTER to set time, use / buttons to adjust values, press ENTER to confirm.
Press START to begin exercising. Total runtime is set over 10 time segments.
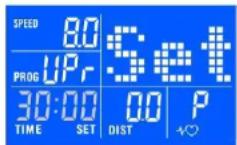
User program:
Use SELECT button to choose UPr, press ENTER to confirm selection.
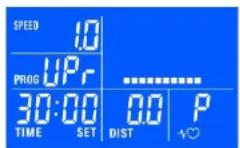
Use / buttons to program speed and incline for each segment, press ENTER to confirm.
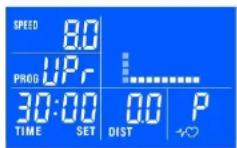
Use / buttons to program total exercise time and distance, press ENTER and START.
HRC program: (Chest belt transmitter compulsory)
Use SELECT button to choose HRC, press ENTER to confirm selection
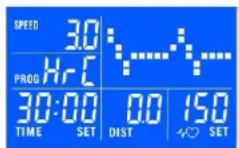
Use / buttons to program target heart rate, press ENTER to confirm
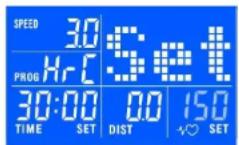
Use / buttons to program total exercise time and press ENTER to confirm
Press START: the treadmill will run at 3km/h for 2 minutes as warm-up: adjust elevation manually.
After this timeframe the computer will adjust speed with 0.5km or incline with 1 step every 30 seconds till THR (+/-10 BPM) is reached.
In case the THR is exceeded, the computer will automatically reduce speed and/or elevation until THR is reached again.
After the total exercise time elapsed, the treadmill will slow down to 3km / h with decrements of 0.5km / h every 10 seconds.
In case no pulse is received, display will show:

Heart rate displayed is an approximate read-out, and may not be used as guidance in any cardio-vascular related medical or paramedical program.
If you have not been physically active for a long period of time and also to avoid health risks you should consult your general physician before starting to exercise.
Heart rate displayed is an approximate read-out, and may not be used as guidance in any cardio-vascular related medical or paramedical program.
Blue Tooth Ibour activer Blue Tooth.
Instructions generales
Blue Tooth Com Blue Tooth to activeren.
HaKMnTE START (CTAPT): Ha npotraKeHN 2 MNHYT 6ydt BbNOHHTbca PA3MmHkA, CKOPcTe bEoBn Dopoknn Bdyet COCTaBnTb 3 KM?: HMeHnTe NObem BpyHyO.
Tocne OKOHAAHn DaHHORo BpeMeHN KOMBIOTep HaHHeNt MHeHTb CKOpOCTb Ha0,5 KM/Hac yron KaHNoHa 1Yepe3 KaKdble 30 cekyHdo doctkHexHn L4CC (+/- 10 yd/MNH).
B Cnyae npeBbUeHnI LlCC KOMnbloteP B ATOMaTnueckn yMeHbSnT HAKJIOH mNnC kOPOCT Bo do JocTNKeHnI LlCC.
Tocne okohuaHnBpeMeHN 6eOBaDopokka3aMeNITcRdoCKoOCTN3KM/ucacSuaFOM0.5KM/uacKaKdIbe10ScyHd.
Ecnn 3naeHne YCC (nybca) He doCTnHyTo, To Ha 3kpaHe OTo6pa3ntc:

OTo6paXaemay yactota cepJeYbIX cokpauehenyraTcra
np6Ibn3nteBLOHn He MoKet 6bItb
ncOnoB30BAHb K aueCtBe
pyKOBoCDtBA nra MeDnUHNcknx
nporpamn no neuHno 6oNe3ne
cepdeHo-cocyncto cncTeMbI
napameNnHCKNX nporpamr.
The owner's manual is only for customers' reference. The supplier can not guarantee for mistakes occurring due to translation or changes in technical specifications of the product.
| No | Description | Qty |
| B1 | Computer chlp | 1 |
| B1-1 | Overlay | 1 |
| B1-3 | Computer panel | 1 |
| B2 | Computer bottom cover | 1 |
| B3 | Motor cover | 1 |
| B4 | Right handrail cover L | 1 |
| B5 | Right handrail cover R | 1 |
| B6 | Silicon oil | 2 |
| B7 | Non-slim sticker | 1 |
| B8 | Handle pulse | 2 |
| B9 | Safety key house | 1 |
| B10 | Inner plug | 4 |
| B11 | Left side cover | 1 |
| B12 | Right side cover | 1 |
| B13 | Left end cap | 1 |
| B14 | Right end cap | 1 |
C. Electrical parts
| No | Description | Qty |
| C1 | Incline motor | 1 |
| C2 | AC Motor | 1 |
| C3 | Power switch | 1 |
| C4 | Power code | 1 |
| C5 | Outlet | 1 |
| C6 | Safety key | 1 |
| C7 | Computer upper wire | 1 |
| C8 | Computer middle wire | 1 |
| C9 | Magnetic ring | 1 |
| C11 | Inverter | 1 |
| C12 | Overload protector | 1 |
D.Hardware
| No | Description | Qty |
| D1 | Allen wrench 80X80XT5mm | 1 |
| D2 | Allen wrench 80X80XT6mm | 1 |
| D3 | Round hex bolt M10X50 | 4 |
| D4 | Round hex bolt M8X65 | 2 |
| D5 | Round hex bolt M10X15 | 4 |
| D6 | Round hex bolt M10X45 | 1 |
| D7 | Round hex bolt M8X55 | 4 |
| D8 | Round hex bolt M8X15 | 6 |
| D9 | Round hex bolt M8X30 | 4 |
| D10 | Round hex bolt M8X35 | 2 |
| D11 | Round hex bolt M8X40 | 1 |
| D12 | Round hex bolt M8X45 | 1 |
| D13 | Round hex bolt M8X50 | 4 |
| D14 | Round hex bolt M8X60 | 2 |
| D15 | Round hex bolt M8X110 | 1 |
| D16 | Round hex bolt M8X55 | 1 |
| D17 | Round hex bolt M8X60 | 2 |
| D18 | Round hex bolt M10X20 | 2 |
| D19 | Round hex bolt M8X20 | 4 |
| D20 | Cross head screw M6X25 | 2 |
| D21 | Cross head screw M6X40 | 2 |
| No | Description | Qty |
| D22 | Cross head screw M6X65 | 6 |
| D23 | Self-tapping screw ST3.5X16 | 2 |
| D24 | Self-tapping screw ST4.2X25 | 4 |
| D25 | Self-tapping screw ST4.2X16 | 30 |
| D26 | Screw M5X20 | 4 |
| D27 | Screw M5X15 | 4 |
| D28 | Screw M5X8 | 4 |
| D29 | Self-tapping screw ST4.2X25 | 8 |
| D30 | Nylon nut M10 | 5 |
| D31 | Nylon nut M8 | 18 |
| D34 | Flat washer M10 | 11 |
| D35 | Flat washer M8 | 21 |
| D36 | Flat washer M5 | 4 |
| D37 | Washer | 8 |
| D38 | Spring washer M8 | 4 |
| D39 | Spring washer M5 | 2 |
| D40 | Inner washer M8 | 8 |
| D41 | Cross head screw M4X10 | 14 |
| D42 | Screw driver13-15-17 | 1 |
| D43 | Spring bushing | 1 |
| Code | Description | Processing |
| E01 | Communication error. The control board and computer are not communicating correctly. | The machine stops and goes into fault status, computer shows "E1", and the alarm beeps three times. Possible causes: check all the connection points between the console and controller. Make sure all plugs are well connected. Check all the wires for damage. If this fails, change the connector wires. |
| E04 | Incline error | Incline motor induction wire or AC line is not well connected. Unplug and reconnect the lines correctly. Erratic incline signal. Replace the control board Potentio meter on the incline motor is broken. Replace the incline motor |
| E05 | Over-current protection. (6A overload for 3 seconds or more) | Stops and goes into fault status, computer shows "E05". Other areas show blank. After 10 seconds the machine will go into ready mode, and can be restarted. Possible causes: system encounters overvoltage and goes to self-preservation. Moving parts may be blocked. Check and adjust the machine and restart. Check motor or controller for burning smell. If so, change motor and/or controller. Check whether the power voltage is too low or not to standard and retest with the correct voltage |
| E06 | Control board self-check error. | Check incline motor sense wire and AC wire are inserted well; AC wire is right inserted according to the indentify in the incline motor; make sure the incline motor wire without damager; after check those, if the faulty still exists, then please change the controller. |
| E08 | EPROM (Data memory error) | Computer shows "E08". Possible causes: the controller wires are not connected well, check and reconnect or change. |
DKN


www.dkn-technology.com