PowerPack 300 Performance Line - Rechargeable Battery BOSCH - Free user manual and instructions
Find the device manual for free PowerPack 300 Performance Line BOSCH in PDF.
| Brand | Bosch |
| Model | PowerPack 300 Performance Line |
| Product Type | Rechargeable lithium-ion battery |
| Nominal voltage | 36 V |
| Nominal capacity | 8.2 Ah |
| Energy | 300 Wh |
| Operating temperature | -10 °C to +40 °C |
| Storage temperature | -10 °C to +60 °C |
| Permissible charging temperature | 0 °C to +40 °C |
| Weight (standard battery / rack battery) | 2.0 kg / 2.4 kg |
| Protection type | IP54 (dust-tight and splash-proof) |
| Charging time (with 4 A charger) | 2.5 hours |
| Charge indicator | 5 LEDs (each LED = 20% capacity) |
| Material | Lithium-ion |
| Compatibility | Bosch eBike Performance Line systems |
| Maintenance | Clean with a soft damp cloth; do not immerse or use a pressure washer |
| Safety | Protection against deep discharge, overload, overheating, and short circuit (ECP) |
| Transport | Classified as dangerous goods (ADR); special packaging required for shipping |
| Recycling | Do not dispose of in household waste; drop off at an authorized bike dealer |
Frequently Asked Questions - PowerPack 300 Performance Line BOSCH
User questions about PowerPack 300 Performance Line BOSCH
0 question about this device. Answer the ones you know or ask your own.
Ask a new question about this device
Download the instructions for your Rechargeable Battery in PDF format for free! Find your manual PowerPack 300 Performance Line - BOSCH and take your electronic device back in hand. On this page are published all the documents necessary for the use of your device. PowerPack 300 Performance Line by BOSCH.
USER MANUAL PowerPack 300 Performance Line BOSCH
Performance Line Performance Line
Robert Bosch GmbH
Bosch eBike Systems
72703Beullinger
GERMANY
www.bosch-ebike.com
0276001SPI(2014.0/)1/160
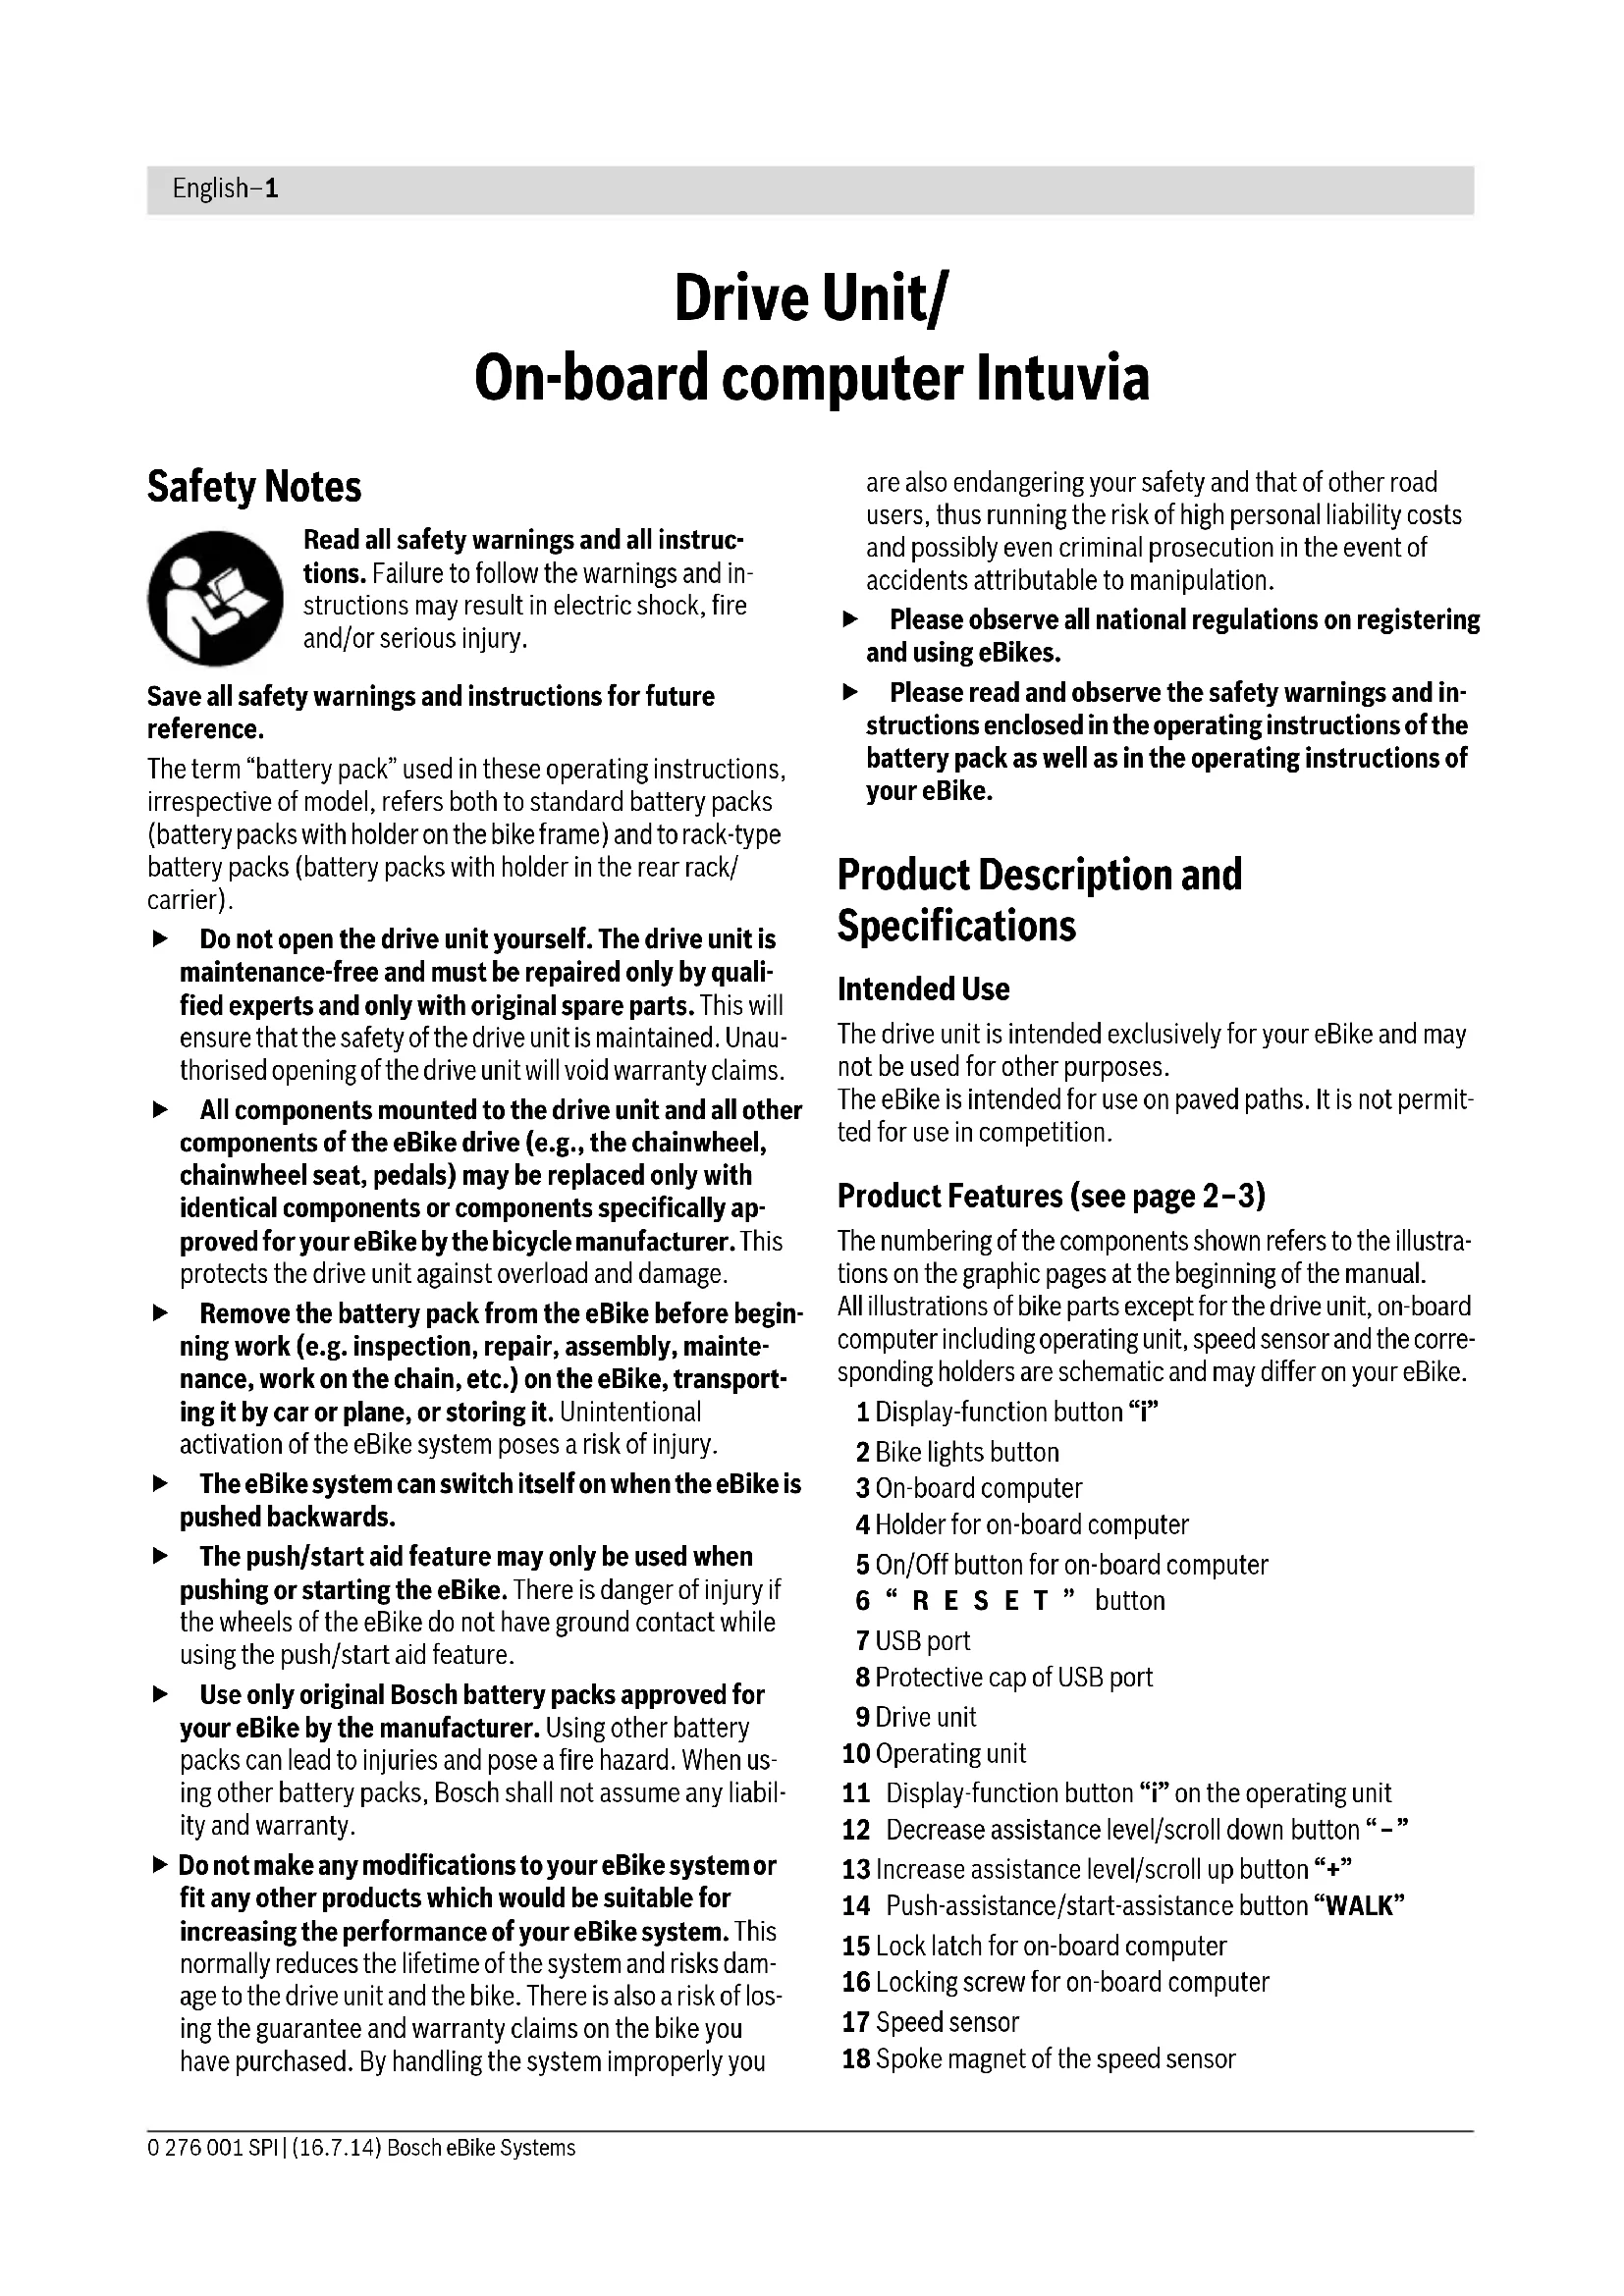
Drive Unit | Intuvia |
PowerPack 300 | PowerPack 400 | Charger
0275007031|0275007033|0275007027|1270020909|
0275007511|0275007512|0275007522|0275007907

BOSCH
On-board computer Intuvia
Safety Notes

Read all safety warnings and all instructions. Failure to follow the warnings and instructions may result in electric shock, fire and/or serious injury.
Save all safety warnings and instructions for future reference.
The term "battery pack" used in these operating instructions, irrespective of model, refers both to standard battery packs (battery packs with holder on the bike frame) and to rack-type battery packs (battery packs with holder in the rear rack/ carrier).
Do not open the drive unit yourself. The drive unit is maintenance-free and must be repaired only by qualified experts and only with original spare parts. This will ensure that the safety of the drive unit is maintained. Unauthorized opening of the drive unit will void warranty claims.
All components mounted to the drive unit and all other components of the eBike drive (e.g., the chainwheel, chainwheel seat, pedals) may be replaced only with identical components or components specifically approved for your eBike by the bicycle manufacturer. This protects the drive unit against overload and damage.
- Remove the battery pack from the eBike before beginning work (e.g. inspection, repair, assembly, maintenance, work on the chain, etc.) on the eBike, transporting it by car or plane, or storing it. Unintentional activation of the eBike system poses a risk of injury.
The eBike system can switch itself on when the eBike is pushed backwards.
The push/start aid feature may only be used when pushing or starting the eBike. There is danger of injury if the wheels of the eBike do not have ground contact while using the push/start aid feature.
Use only original Bosch battery packs approved for your eBike by the manufacturer. Using other battery packs can lead to injuries and pose a fire hazard. When using other battery packs, Bosch shall not assume any liability and warranty.
- Do not make any modifications to your eBike system or fit any other products which would be suitable for increasing the performance of your eBike system. This normally reduces the lifetime of the system and risks damage to the drive unit and the bike. There is also a risk of losing the guarantee and warranty claims on the bike you have purchased. By handling the system improperly you
are also endangering your safety and that of other road users, thus running the risk of high personal liability costs and possibly even criminal prosecution in the event of accidents attributable to manipulation.
- Please observe all national regulations on registering and using eBikes.
- Please read and observe the safety warnings and instructions enclosed in the operating instructions of the battery pack as well as in the operating instructions of your eBike.
Product Description and Specifications
Intended Use
The drive unit is intended exclusively for your eBike and may not be used for other purposes.
The eBike is intended for use on paved paths. It is not permitted for use in competition.
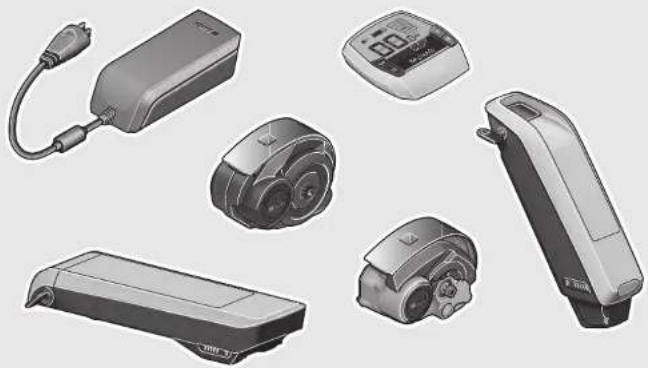
Product Features (see page 2-3)
The numbering of the components shown refers to the illustrations on the graphic pages at the beginning of the manual. All illustrations of bike parts except for the drive unit, on-board computer including operating unit, speed sensor and the corresponding holders are schematic and may differ on your eBike.
1 Display-function button “i”
2 Bike lights button
3 On-board computer
4 Holder for on-board computer
5 On/Off button for on-board computer
6“RESET” button
7 USB port
8 Protective cap of USB port
9 Drive unit
10 Operating unit
11 Display-function button "i" on the operating unit
12 Decrease assistance level/scroll down button “-”
13 Increase assistance level/scroll up button "+"
14 Push-assistance/start-assistance button "WALK"
15 Lock latch for on-board computer
16 Locking screw for on-board computer
17 Speed sensor
18 Spoke magnet of the speed sensor
Display elements of on-board computer
a Drive unit assistance indicator
b Assistance-level indicator
c Light indicator
d Text indication
e Value indication
f Speed indication
g Shift recommendation: higher gear
h Shift recommendation: lower gear
i Battery charge-control indicator
Technical Data
| Drive Unit Drive Unit Cruise | ||
| Article number | 0 275 007 033 | |
| 0 275 007 027 | ||
| Rated continuous output | W | 250 |
| Torque at drive, max. | Nm 60 | |
| Rated voltage | V= | 36 |
| Operating temperature | °C -5...+40 | |
| Storage temperature | °C -10...+50 | |
| Degree of protection | IP 54 (dust and splash water protected) | |
| Weight, approx. | kg | 4 |
| Drive Unit Drive Unit Speed | ||
| Article number | 0 275 007 031 | |
| Power | W | 350 |
| Torque at drive, max. | Nm 60 | |
| Rated voltage | V= | 36 |
| Operating temperature | °C -5...+40 | |
| Storage temperature | °C -10...+50 | |
| Degree of protection | IP 54 (dust and splash water protected) | |
| Weight, approx. | kg | 4 |
| On-board computer Intuvia | ||
| Article number | 1 270 020 909 | |
| Max. charging current, USB connection | mA | 500 |
| Charging voltage, USB connection | V | 5 |
| Operating temperature | °C -5...+40 | |
| Storage temperature | °C -10...+50 | |
| Charging temperature | °C | 0...+40 |
| Degree of protection | IP 54 (dust and splash water protected) | |
| Weight, approx. | kg | 0.15 |
| Bosch eBike system uses FreeRTOS (see www.freertos.org) | ||
| Bike lights* | ||
| Rated voltage | V= | 6 |
| Power output | ||
| - Front light | W | 8.4 |
| - Rear light | W | 0.6 |
| *Not possible via the eBike battery pack in all country-specific versions, depending on the statutory regulations | ||
Assembly
Inserting and removing the battery pack
For inserting and removing the eBike battery pack in/from the eBike, please read and observe the battery pack operating instructions.
Inserting and removing the on-board computer (see figure A)
To insert the on-board computer 3, slide it from the front into the holder 4.
To remove the on-board computer 3, press the lock latch 15 and slide the on-board computer toward the front out of the holder 4.
- Remove the on-board computer when you park the eBike.
It is possible to secure the on-board computer against removal in the holder. To do so, remove the holder 4 from the handlebars. Put the on-board computer in the holder. Screw the locking screw 16 (thread M3, 8 mm long) from below into the thread provided in the holder. Mount the holder back onto the handlebars.
Checking the Speed Sensor (seefigure B)
The speed sensor 17 and its spoke magnet 18 must be mounted in such a manner that the spoke magnet, after a turn of the wheel, moves past the speed sensor with a clearance of at least 5mm yet no more than 17mm .
Note: If the distance between speed sensor 17 and spoke magnet 18 is too small or too large, or if the speed sensor 17 is not properly connected, the speed indication f will fail, and the eBike drive unit will operate in emergency mode. In this case, loosen the screw of the spoke magnet 18 and fasten the spoke magnet to the spoke in such a manner that it runs past the mark of the speed sensor at the correct clearance. If the speed is still not being indicated in the speed indication f after this, please contact an authorised bicycle dealer.
Operation
Initial Operation
Requirements
The eBike system can only be activated when the following requirements are met:
- A sufficiently charged battery pack is inserted (see battery pack operating instructions).
- The on-board computer is properly inserted in the holder (see "Inserting and removing the on-board computer", page English-2).
- The speed sensor is connected properly (see "Checking the Speed Sensor", page English-2).
Switching the eBike System On/Off
Options for switching on the eBike system:
- If the on-board computer is already switched on when you insert it into the holder, then the eBike system will be switched on automatically.
- When the on-board computer and the eBike battery pack are inserted, briefly press the On/Off button 5 of the onboard computer.
- When the on-board computer is inserted, press the On/Off button of the eBike battery pack (see battery pack operating instructions).
The drive is activated as soon as you step on the pedals (except when in the push aid feature, see "Switching the Push/Start Aid On/Off", page English-4). The motor output depends on the settings of the assistance level on the onboard computer. As soon as the system is activated, "Performance Line" will appear briefly on the display.
As soon as you stop pedaling when in normal operation, or as soon as you have reached a speed of 25 / 45km / h the assistance from the eBike drive is switched off. The drive is automatically re-activated as soon you start pedaling again and the speed is below 25 / 45km / h .
Options for switching off the eBike system:
- Press the On/Off button 5 of the on-board computer.
- Switch the eBike battery pack off by its On/Off button (see battery pack operating instructions).
- Remove the on-board computer out of its holder.
If no power is drawn from the drive unit for about 10 minutes (e.g. because the eBike is not moving), the eBike system will shut down automatically to save energy.
Displays and configurations of the on-board computer
Energy supply of the on-board computer
If the on-board computer is in the holder 4, a sufficiently charged battery pack is inserted in the eBike and the eBike system is turned on, then the on-board computer is powered by the battery pack of the eBike.
If the on-board computer is removed from the holder 4, the energy is supplied via an internal battery pack. If the internal battery pack is weak when the on-board computer is switched on, "Attach to bike" will appear in text indication d for 3 s. The on-board computer will then turn off again.
To charge the internal battery pack, put the on-board computer back in the holder 4 (when a battery pack is inserted in the eBike). Switch the eBike battery pack on by its On/Off button (see battery pack operating instructions).
You can also charge the on-board computer via the USB port. Open the protective cap 8. Connect the USB port 7 of the onboard computer via a suitable USB cable to a standard USB charger or the USB port of a computer (5 V charging voltage, max. 500mA charging current). "USB connected" will appear in text indication d of the on-board computer.
If you do not use your eBike for a prolonged period of time, remove the on-board computer from its holder.
Store the on-board computer in a dry environment at room temperature. Regularly recharge the on-board computer's battery pack.
Switching on/shutting down the on-board computer
To switch on the on-board computer, briefly press the On/Off button 5. The on-board computer can also be switched on when it is not inserted in the holder (if the internal battery pack is sufficiently charged).
To switch off the on-board computer, press the On/Off button 5.
If the on-board computer is not inserted in the holder, it automatically switches off after 1 minute to save energy if no button is pressed.
Battery Charge-control Indicator
The battery charge-control indicator i displays the charge level of the eBike battery pack, not that of the on-board computer's internal battery pack. The charge level of the eBike battery pack can also be checked on the LEDs of the battery pack itself.
On indicator i, each bar of the battery pack symbol is equivalent to a capacity of approx. 20%

The eBike battery pack is fully charged.

The eBike battery pack should be recharged.

The LEDs of the charge-control indicator on the battery pack extinguish. The capacity for assisting
the drive has been used up, and assistance is gently switched off. The remaining capacity is made available for the lighting and the on-board computer. The indicator flashes.
The capacity of the eBike battery pack is enough for about 2 hours of lighting. This does not account for other consumers (e.g. automatic gearbox, charging external devices at the USB port).
If the on-board computer is removed from the holder 4, the last displayed battery charge level is saved.
Setting the Assistance Level
On the operating unit 10 you can set how much the eBike drive assists you while pedalling. The assistance level can be changed at any time, even while cycling.
Note: For individual versions, it is possible that the assistance level is pre-set and cannot be changed. It is also possible that less assistance levels are available for selection than listed here.
The following assistance levels (max.) are available:
- "OFF": The motor assistance is switched off, the eBike can be operated as a normal bicycle through pedaling.
- "ECO": Effective assistance at maximum efficiency for maximum cruising range
- "TOUR": Uniform assistance, for touring with long cruising range
- "SPORT": Powerful assistance for sportive riding off road as well as for urban traffic
-TURBO": Maximum assistance, supporting highest cadence for sportive riding
To increase the assistance level, press the "+" 13 button on the operating unit until the desired assistance level appears in the display b. To decrease the assistance level, press the button " - " 12.
The requested motor output is displayed in indicator a. The maximum motor output depends on the selected assistance level.
| Assistance Level Assistance Factor* (Derailleur) | |
| “ECO” | 50 % |
| “TOUR” | 120 % |
| “SPORT” | 190 % |
| “TURBO” | 275 % |
- The motor output can vary for individual versions.
When the on-board computer is removed from the holder 4, the last indicated assistance level is stored; the motor-output indicator a remains empty.
Switching the Push/Start Aid On/Off
With the speed version, the push aid can also be used as a start aid. The start aid is switched off at 18km / h
The push/start aid can make it easier for you to push or start the eBike. The speed of this feature depends on the selected gear and depending on the model, can reach a maximum of 6km / h or 18km / h . The lower the selected gear, the lower the speed of this function (at full capacity).
The push/start aid function may only be used when pushing or starting the eBike. If the wheels of the eBike have no contact with the ground when using the push aid, then there is risk of injury.
To switch on the push/start aid, press and hold the "WALK" 14 button on the operating unit. The eBike drive is switched on.
The push/start aid is switched off if one of the following occurs:
- you release the "WALK" 14 button,
- the wheels of the eBike are blocked (e.g. by actuating the brakes or impacting against an obstacle),
the speed exceeds 6 / 18km / h
Switching bike lights on/off
In the model in which the lighting is powered by the eBike system, the front and rear lights can be switched on and off at the same time via the on-board computer with button 2.
When the lighting is switched on "Light on" appears and when the lighting is switched off "Light off" appears for approx. 1 s in text indication d. The lighting symbol c is displayed when the light is on.
Switching the bike light on and off has no effect on the back lighting of the display.
Version Speed: Daytime running lights are always provided in this option. When you switch on the eBike system (see "Switching the eBike System On/Off", page English-3), the lights will also be switched on. The bike lights cannot be switched off with button 2.
Speed and Distance Indication
The speed indication f always displays the current speed.
The following functions are available in the function indication (combination of text indication d and value indication e):
- "Clock": Current time
- "Max. Speed": Maximum speed achieved since the last reset
- "Avg. Speed": Average speed achieved since the last reset
- "Trip time": Trip time since the last reset
- "Range": Estimated range of the available battery-pack charge (for constant conditions such as assistance level, route profile, etc.)
- "odometer": Display of the total distance travelled with the eBike (cannot be reset)
- "Distance": Distance covered since the last reset
To switch between display functions, press button "i" 1 on the on-board computer or button "i" 11 on the operating unit repeatedly until the required function is displayed.
To reset "Distance", "Trip time" and "Avg. Speed", switch to any of the three functions and then press and hold the "RESET" button 6 until the indication is set to zero. This also resets the values of the other two functions.
To reset the "Max. Speed", switch to this function and then press and hold the "RESET" button 6 until the indication is set to zero.
To reset "Range", switch to this function and then press the "RESET" 6 button until the display is reset to the value of the factory setting.
If the on-board computer is removed from the holder 4, all values of the features are saved and can still be displayed.
Displaying/Adapting Basic Settings
The basic settings can be displayed and changed regardless of whether the on-board computer is inserted in the holder 4 or not.
To access the basic settings menu, press and hold the "RESET" button 6 and the "i" button 1 until "Configuration" is displayed in text indication d.
To switch between the basic settings, press button "i" 1 on the on-board computer repeatedly until the required basic setting is displayed. If the on-board computer is inserted in the holder 4, you can also press button "i" 11 on the operating unit.
To change the basic settings, press the On/Off button 5 next to indication “-” to reduce or scroll down, or the lighting button 2 next to indication “+” to increase or scroll up.
If the on-board computer is inserted in the holder 4, it is also possible to change using buttons “-” 12 and “+” 13 on the operating unit.
To exit the function and save a changed setting, press the "RESET" button 6 for 3 s.
Error Code Indication
The components of the eBike system are continuously and automatically monitored. When an error is detected, the respective error code is indicated in text indication d.
Press any button on the on-board computer 3 or on the operating unit 10 to return to the standard indication.
The following basic settings are available:
- "clock": The current time can be set here. Pressing and holding the setting buttons fast-forwards the setting speed.
- "wheel circum.": You can change this value pre-set by the manufacturer by ± 5% . This value is displayed only when the on-board computer is in the holder.
- "English": You can change the language of the text indications. You can choose between German, English, French, Spanish, Italian, Dutch and Danish.
- "unit km/mi": The speed and distance can be displayed either in kilometres or miles.
- "time format": The time can be displayed either in the 12 hour or 24 hour format.
- "Shift recom. on/off": You can switch the indication of a shift recommendation on and off.
- "power-on hours": Indicates the total travel duration with the eBike (not changeable).
- "Displ.vx.x.x.x": This is the software version of the display.
- "DU vx.x.x.x": This is the software version of the drive unit. This value is displayed only when the on-board computer is in the holder.
- "Bat vx.x.x.x": This is the software version of the battery pack. This value is displayed only when the on-board computer is in the holder.
Depending on the type of error, the drive unit is automatically shut off, if required. Continued travel without assistance from the drive unit is possible at any time. However, have the eBike checked before attempting new trips.
Trouble-shooting actions may be performed by the owner except those explicitly noted as "Contact your Bosch eBike dealer".
| Code Cause Corrective Measure | ||
| 410 | One or more buttons of the on-board computer are blocked. | Check if any buttons are blocked, e.g. from dirt or debris. Clean the buttons, if required. |
| 414 | Connection problem of the operating unit | Have connections and contacts checked. |
| 418 | One or more buttons of the operating unit are blocked. | Check if any buttons are blocked, e.g. from dirt or debris. Clean the buttons, if required. |
| 422 | Connection problem of the drive unit | Have connections and contacts checked. |
| 423 | Connection problem of the eBike battery pack | Have connections and contacts checked. |
| 424 | Communication error among the components | Have connections and contacts checked. |
| 426 | Internal time-out error Restart the system. If the problem persists, contact your Bosch eBike dealer. | |
| 430 | internal battery pack of the on-board computer is empty | Charge the on-board computer (in the holder or via the USB port) |
| 440 | Internal error of the drive unit | Restart the system. If the problem persists, contact your Bosch eBike dealer. |
| Code | Cause | Corrective Measure |
| 450 | Internal software error | Restart the system. If the problem persists, contact your Bosch eBike dealer. |
| 490 | Internal error of the on-board computer | Have the on-board computer checked |
| 500 | Internal error of the drive unit | Restart the system. If the problem persists, contact your Bosch eBike dealer. |
| 502 | Bike lighting error Check the light and the associated wiring. Restart the system. If the problem persists, contact your Bosch eBike dealer. | Restart the system. If the problem persists, contact your Bosch eBike dealer. |
| 503 | Error of the speed sensor | Restart the system. If the problem persists, contact your Bosch eBike dealer. |
| 510 | Internal sensor error | Restart the system. If the problem persists, contact your Bosch eBike dealer. |
| 511 | Internal error of the drive unit | Restart the system. If the problem persists, contact your Bosch eBike dealer. |
| 530 | Battery pack error | Switch off the eBike, remove the eBike battery pack and reinsert the eBike battery pack. Restart the system. If the problem persists, contact your Bosch eBike dealer. |
| 531 | Configuration error Restart the system. | If the problem persists, contact your Bosch eBike dealer. |
| 540 | Temperature error | The eBike is outside of the permissible temperature range. Switch off the eBike system and allow the drive unit to either cool down or heat up to the permissible temperature. Restart the system. If the problem persists, contact your Bosch eBike dealer. |
| 550 | An improper load was detected. | Remove load. Restart the system. If the problem persists, contact your Bosch eBike dealer. |
| 602 | Internal battery pack error while charging | Unplug the charger from the battery pack. Restart the eBike system. Plug the charger into the battery pack. If the problem persists, contact your Bosch eBike dealer. |
| 602 | Internal battery pack error | Restart the system. If the problem persists, contact your Bosch eBike dealer. |
| 603 | Internal battery pack error | Restart the system. If the problem persists, contact your Bosch eBike dealer. |
| 605 | Battery pack temperature error | The eBike is outside of the permissible temperature range. Switch off the eBike system and allow the drive unit to either cool down or heat up to the permissible temperature. Restart the system. If the problem persists, contact your Bosch eBike dealer. |
| 605 | Battery pack temperature error while charging | Unplug the charger from the battery pack. Allow the battery pack to cool. If the problem persists, contact your Bosch eBike dealer. |
| 606 | External battery pack error | Check the wiring. Restart the system. If the problem persists, contact your Bosch eBike dealer. |
| 610 | Battery pack voltage error | Restart the system. If the problem persists, contact your Bosch eBike dealer. |
| 620 | Charging error | Replace the charger. Contact your Bosch eBike dealer. |
| 640 | Internal battery pack error | Restart the system. If the problem persists, contact your Bosch eBike dealer. |
| 655 | Multiple battery pack errors | Switch off the eBike system. Remove the battery pack and reinsert it. Restart the system. If the problem persists, contact your Bosch eBike dealer. |
| Code Cause Corrective Measure | |
| 656 | Software version error Contact your Bosch eBike dealer so that he can perform a software update. |
| No display Internal error of the on-board computer | Restart your eBike system by switching it off and back on. |
Power Supply of External Devices via USB Connection
With the USB connection, it is possible to operate and charge most devices whose power supply is possible via USB (e.g., various mobile phones).
Prerequisite for charging is that the on-board computer and a sufficiently charged battery pack are inserted in the eBike.
Open the protective cap 8 of the USB port on the on-board computer. Connect the USB connection of the external device to the USB port 7 on the on-board computer using a standard-compliant Micro A/Micro B USB 2.0 cable. Using a USB cable that is not standard-compliant or a cable/adapter combination can lead to damage to the on-board computer.
Notes on Riding with the eBike System
When does the eBike Drive Unit Operate?
The eBike drive unit assists you when riding, as long as you step into the pedals. Without pedaling, there is no assistance. The motor output always depends on the amount of your pedaling power.
When applying less pedaling power, the assistance or support will be lower than when applying a lot of pedaling power. This applies independent of the assistance Level.
The eBike drive automatically switches off at speeds in excess of 25 / 45km / h . When the speed falls below 25 / 45km / h , the drive is automatically available again.
An exception applies to the push-assistance function, in which the eBike can be pushed at low speed without pedalling. The pedals may also rotate when the push assistance is used.
The eBike can also be ridden as a normal bicycle without assistance at any time, by either switching off the eBike system or setting the assistance level to "OFF". The same applies when the battery pack is empty.
Interaction of the eBike System with the Bicycle Gears
The bicycle gears should be used as with a normal bicycle, even with eBike motor assistance (please observe the operating instructions of your eBike).
Independent of the type of gearing, it is recommended to briefly interrupt the pedaling while changing gears. This makes changing gears easier and reduces the wear of the drive train.
By selecting the right gear, you can increase the speed and range with the same pedaling effort.
For this reason, follow the shift recommendations provided by indications g and h on your display. If indication g is displayed, you should shift to a higher gear with lower cadence. If indication h is displayed, you should select a lower gear with higher cadence.
Gathering First Experience
It is recommended to gather first experience with the eBike away from roads with heavy traffic.
Try out the different assistance levels. As soon as you feel safe, you can participate in traffic with the eBike as with any other bicycle.
Test the operating range of your eBike under different conditions before planning longer and more challenging rides.
Influences on the Operating Range
The operating range depends on many factors, such as:
- Assistance level,
-Gear-switching behaviour, - Bicycle tyres and tyre pressure,
Age and condition of the battery pack, - Route profile (inclines) and road or path conditions (road or path surface),
- Head wind and ambient temperature,
- Weight of the eBike, rider and equipment/uggage.
For this reason, it is not possible to precisely predict the range before commencing a trip. General rules:
- For the same motor output of the eBike drive unit: The less power or force that you have to bring about to reach a certain speed (e.g. through optimal use of the gears), the less energy the eBike drive unit will consume, and the greater the range for a battery-pack charge.
- The higher the assistance level under otherwise same conditions, the lower the range.
Careful Handling of the eBike
Please observe the operating and storage temperatures of the eBike components. Protect the drive unit, on-board computer and battery against extreme temperatures (e.g. from intense sunlight without adequate ventilation). The components (especially the battery pack) can become damaged through extreme temperatures.
Maintenance and Service
Maintenance and Cleaning
Keep all components of your eBike clean, especially the battery-pack contacts and corresponding holder contacts. Clean them carefully with a soft, damp cloth.
All components including the drive unit may not be immersed in water or cleaned with a high-pressure cleaner.
For service or repairs on the eBike, please refer to an authorised bicycle dealer.
After-sales Service and Application Service
In case of questions concerning the eBike system and its components, please refer to an authorised Bosch eBike dealer.
For contact data of authorised Bosch eBike dealers, please refer to www.bosch-ebike.com
Transport
The battery packs are subject to the Dangerous Goods Legislation requirements. Private users can transport undamaged battery packs by road without further requirements.
When being transported by commercial users or third parties (e.g. air transport or forwarding agency), special requirements on packaging and labelling must be observed (e.g. ADR regulations). If necessary, an expert for hazardous materials can be consulted when preparing the item for shipping.
Dispatch battery packs only when the housing is undamaged. Tape or mask off open contacts and pack up the battery pack in such a manner that it cannot move around in the packaging. Inform your parcel service that the package contains dangerous goods. Please also observe the possibility of more detailed national regulations.
In case of questions concerning transport of the battery packs, please refer to an authorised Bosch eBike dealer. The Bosch eBike dealers can also provide suitable transport packaging.
Disposal

The drive unit, on-board computer including operating unit, battery pack, speed sensor, accessories and packaging should be disposed of in an environmentally correct manner.
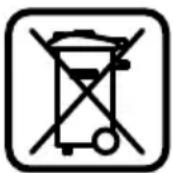
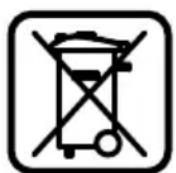
Do not dispose of eBikes and their components into household waste!
Only for EC countries:
According to the European Guideline 2012/19/EU, electrical devices/tools that are no longer usable, and according to the European Guideline 2006/66/EC, defective or used battery packs/batteries, must be collected separately and disposed of in an environmentally correct manner.
The integrated battery pack in the on-board computer may only be removed for disposal. Opening the housing shell can destroy the on-board computer.
Please return battery packs and on-board computers that are no longer usable to an authorised bicycle dealer.
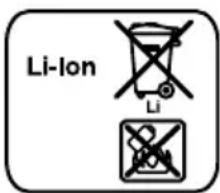
Li-ion:
Please observe the instructions in section "Transport", page English-8.
Subject to change without notice.
Lithium ion battery pack PowerPack
Safety Notes


Read all safety warnings and all instructions. Failure to follow the warnings and instructions may result in electric shock, fire and/or serious injury.
Save all safety warnings and instructions for future reference.
The term "battery pack" used in these operating instructions refers both to standard battery packs (battery packs with holder on the bike frame) and to rack-type battery packs (battery packs with holder in the rear rack/carrier), except when explicitly referring to the design type.
- Remove the battery pack from the eBike before beginning work (e.g. inspection, repair, assembly, maintenance, work on the chain, etc.) on the eBike, transporting it by car or plane, or storing it. Unintentional activation of the eBike system poses a risk of injury.
- Do not open the battery pack. Danger of short-circuiting. Opening the battery pack voids any and all warranty claims.

Protect the battery pack against heat (e.g., also against continuous intense sunlight), fire and immersing into water. Danger of explosion.
- Keep the battery pack not being used away from paper clips, coins, keys, nails, screws or other small metal objects, that can make a connection from one terminal to another. Shorting the battery-pack terminals together may cause burns or a fire. For short-circuiting damage caused in this manner, any and all warranty claims through Bosch shall be invalid.
Under abusive conditions, liquid may be ejected from the battery pack. Avoid contact. If contact accidentally occurs, flush with water. If liquid contacts eyes, additionally seek medical help. Liquid ejected from the battery pack may cause skin irritations or burns. -
Battery packs must not be subjected to mechanical impacts. There is a risk that the battery pack will be damaged causing vapors to escape. The vapors can irritate the respiratory system. Provide for fresh air and seek medical attention in case of complaints.
Vapours can escape in case of damage and improper use of the battery pack. Provide for fresh air and seek medical attention in case of complaints. The vapours can irritate the respiratory system. -
Charge the battery pack only with original Bosch battery chargers. When using non-original Bosch chargers, the danger of fire cannot be excluded.
- Use the battery pack only together with eBikes that have an original Bosch eBike drive system. This is the only way to protect the battery pack against dangerous overload.
Use only original Bosch battery packs approved for your eBike by the manufacturer. Using other battery packs can lead to injuries and pose a fire hazard. When using other battery packs, Bosch shall not assume any liability and warranty.
Read the safety warnings and instructions in the operating instructions of the charger and the drive unit / onboard computer as well as in the operating instructions of your eBike. - Keep the battery pack out of reach of children.
Product Description and Specifications
Product Features (see page 4-5)
The numbering of the product features refers to the illustrations on the graphics pages. All representations of bike components, with exception of the battery packs and their holders, are schematic and can deviate from your eBike.
A1 Holder of the rack-type battery pack
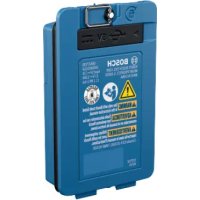
A2 Rack-type battery pack
A3 Operation and charge-control indicator
A4 On/Off button
A5 Key of the battery pack lock
A6 Battery-pack lock
A7 Upper holder of the standard battery pack
A8 Standard battery pack
A9 Bottom holder of the standard battery pack
C1 Battery charger
C6 Socket for charge connector
C7 Charge socket cover
Technical Data
| Lithium ion battery pack PowerPack 300 PowerPack 400 | ||
| Article number | ||
| - Standard battery pack | 0 275 007 509 | 0 275 007 510 |
| 0 275 007 511 | 0 275 007 512 | |
| - Rack-type battery pack | 0 275 007 513 | 0 275 007 514 |
| 0 275 007 522 | ||
| Rated voltage | V= 36 36 | |
| Rated capacity | Ah 8.2 11 | |
| Energy | Wh 300 400 | |
| Operating temperature | °C -10...+40 -10...+40 | |
| Storage temperature | °C -10...+60 -10...+60 | |
| Allowable charging temperature range | °C 0...+40 0...+40 | |
| Weight, approx. | kg | 2.0/2.4 |
| Degree of protection | IP 54 (dust and splash water protected) | |
| IP 54 (dust and splash water protected) | ||
Assembly
- Place down the battery pack only on clean surfaces. In particular, avoid soiling the charge socket and the contacts, e.g. by means of sand or soil.
Checking the Battery Pack Before Using for the First Time
Check the battery pack before charging it or using it with your eBike for the first time.
For this, press the On/Off button A4 to switch on the battery pack. When no LED of the charge-control indicator A3 lights up, the battery pack may be damaged.
When at least one, but not all LEDs of the charge-control indicator A3 is lit, then fully charge the battery pack before using for the first time.
Do not attempt to charge or use a damaged battery pack. Please refer to an authorised Bosch eBike dealer.
Charging the Battery Pack
- Use only the Bosch charger provided with your eBike or an identical original Bosch charger. Only this charger is matched to the lithium-ion battery pack used in your eBike.
Note: The battery pack is supplied partially charged. To ensure full battery pack capacity, completely charge the battery pack in the charger before using for the first time.
For charging the battery pack, read and observe the operating instructions of the charger.
The battery pack can be recharged at any time on its own or on the bike without shortening the lifespan. Interrupting the charging process does not damage the battery pack.
The battery pack is equipped with a temperature control indicator, which enables charging only within a temperature range between 0^ and 40^ .
When the battery pack is not within the charging-temperature range, three LEDs of the charge-control indicator A3
flash. Disconnect the battery pack from the charger until its temperature has adjusted.
Do not connect the battery pack to the charger until it has reached the allowable charging temperature.
Charge-control Indicator
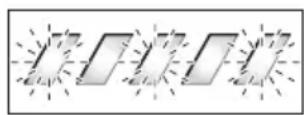
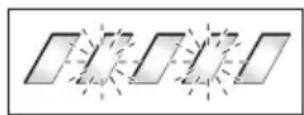
When the battery pack is switched on, the five green LEDs of the charge-control indicator A3 indicate the charge condition of the battery pack.
In this, each LED indicates approx. 20% capacity. When the battery pack is completely charged, all five LEDs light up.
The charge level of the switched on battery pack is also shown on the display of the on-board computer. When doing so, read and observe the operating instructions of the drive unit and on-board computer.
If the capacity of the battery pack is below 5% , all LEDs of the charge-control indicator A3 on the battery pack go out. However there is another display function of the on-board computer.
Inserting and removing the battery pack (see figures C-D)
Always switch the battery pack off when inserting or removing it from the holder.
In order for the battery pack to be inserted, the key A5 must be inserted into the lock A6 and the lock must be unlocked.
To insert the standard battery pack A8, place it with the contacts on the lower holder A9 on the eBike (the battery pack can be inclined up to 7^ to the frame). Tilt it into the upper holder A7 until it engages.
To insert the rack-type battery pack A2, slide it with the contacts facing ahead until it engages in the holder A1 of the rear rack/carrier.
Check if the battery pack is tightly seated. Always lock the battery pack with lock A6, as otherwise the lock can open and the battery pack could fall out of the holder.
After locking, always remove the key A5 from the lock A6. This prevents the key from falling out and the battery pack from being removed from unauthorised persons when the eBike is parked.
To remove the standard battery pack A8, switch it off and unlock the lock with the key A5. Tilt the battery pack out of the upper holder A7 and pull it out of the lower holder A9.
To remove the rack-type battery pack A2, switch it off and unlock the lock with the key A5. Pull the battery pack out of the holder A1.
Operation
Initial Operation
Use only original Bosch battery packs approved for your eBike by the manufacturer. Using other battery packs can lead to injuries and pose a fire hazard. When using other battery packs, Bosch shall not assume any liability and warranty.
Switching On and Off
Switching on the battery pack is one of the ways of switching on the eBike system. When doing so, read and observe the operating instructions of the drive unit and on-board computer.
Before switching on the battery pack or the eBike system, check that the lock A6 is locked.
To switch on the battery pack, press the On/Off button A4. The LEDs of indicator A3 light up and at the same time indicate the charge condition.
Note: If the capacity of the battery pack is below 5% , no LED on the charge-control indicator A3 lights up. It is only visible on the on-board computer, if the eBike system is switched on. To switch off the battery pack, press the On/Off button A4 again. The LEDs of indicator A3 go out. This also switches off the eBike system.
If no power is drawn from the eBike drive for about 10 minutes (e.g. because the eBike is not moving) and no button is pressed on the on-board computer or the operating unit of the eBike, the eBike system and therefore also the battery pack will shut down automatically to save energy.
The battery pack is protected against deep discharging, overcharging, overheating and short-circuiting through the "Electronic Cell Protection (ECP)". In case of hazardous situations, a protective circuit automatically switches off the battery pack.
When a defect of the battery pack is detected, two LEDs of the charge-control indicator A3 flash. In this case, please refer to an authorised Bosch eBike dealer.
Notes for Optimum Handling of the Battery Pack
The battery-pack life can be prolonged when being properly maintained and especially when being operated and stored at the right temperatures.
With increasing age, however, the battery-pack capacity will diminish, even when properly maintained.
A significantly reduced operating period after charging indicates that the battery pack is worn out and must be replaced. You can replace the battery pack yourself.
Recharging the Battery Pack prior to and during Storage
When not using the battery pack for a longer period, charge it to approx. 60% (3 to 4 LEDs lit on the charge-control indicator A3).
Check the charge condition after 6 months. When only one LED of the charge-control indicator A3 lights up, recharge the battery pack again approx. 60% .
Note: When the battery pack is stored discharged (empty) for longer periods, it can become damaged despite the low self-discharging feature and the battery-pack capacity may be strongly reduced.
It is not recommended to have the battery pack connected permanently to the charger.
Storage Conditions
Store the battery pack in a dry, well-ventilated location. Protect the battery pack against moisture and water. Under unfavourable weather conditions, it is recommended e.g. to remove the battery pack from the eBike and store it in an enclosed location until being used again.
The battery pack can be stored at temperatures between -10^ and +60^ . For a long battery-pack life, however, storing the battery pack at a room temperature of approx. 20^ is of advantage.
Take care that the maximal storage temperature is not exceeded. As an example, do not leave the battery pack in a vehicle in summer and store it out of direct sunlight.
It is recommended to not store the battery pack on the bike.
Maintenance and Service
Maintenance and Cleaning
Keep the battery pack clean. Clean the battery pack carefully with a soft, damp cloth. The battery pack may not be immersed in water or cleaned with a water jet.
When the battery pack is no longer operative, please refer to an authorised Bosch eBike dealer.
After-sales Service and Application Service
In case of questions concerning the battery packs, please refer to an authorised bicycle dealer.
Note down the manufacturer and the number of the key
A5. In case of loss of the keys, please refer to an authorised bicycle dealer. Please provide the name of the manufacturer and the number of the key.
For contact data of authorised Bosch eBike dealers, please refer to www.bosch-ebike.com
Transport
The battery packs are subject to the Dangerous Goods Legislation requirements. Private users can transport undamaged battery packs by road without further requirements.
When being transported by commercial users or third parties (e.g. air transport or forwarding agency), special requirements on packaging and labelling must be observed (e.g. ADR regulations). If necessary, an expert for hazardous materials can be consulted when preparing the item for shipping.
Dispatch battery packs only when the housing is undamaged. Tape or mask off open contacts and pack up the battery pack in such a manner that it cannot move around in the packaging. Inform your parcel service that the package contains dangerous goods. Please also observe the possibility of more detailed national regulations.
In case of questions concerning transport of the battery packs, please refer to an authorised Bosch eBike dealer. The Bosch eBike dealers can also provide suitable transport packaging.
Disposal

Battery packs, accessories and packaging should be sorted for environmental-friendly recycling.
Do not dispose of the battery packs into household waste!
Only for EC countries:
According to the European Guideline 2012/19/EU, electrical devices/tools that are no longer usable, and according to the European Guideline 2006/66/EC, defective or used battery packs/batteries, must be collected separately and disposed of in an environmentally correct manner.
Please return battery packs that are no longer usable to an authorised bicycle dealer.

Li-ion:
Please observe the instructions in section "Transport", page English-12.
Subject to change without notice.
Charger
Safety Notes


Read all safety warnings and all instructions. Failure to follow the warnings and instructions may result in electric shock, fire and/or serious injury.
Save all safety warnings and instructions for future reference.
The term "battery pack" used in these operating instructions refers both to standard battery packs (battery packs with holder on the bike frame) and to rack-type battery packs (battery packs with holder in the rear rack/carrier).

Keep the charger away from rain or moisture. The penetration of water into a battery charger increases the risk of an electric shock.
Only charge eBike-approved Bosch lithium-ion battery packs. The battery-pack voltage must match the battery-pack charging voltage of the charger. Otherwise there is danger of fire and explosion.
- Keep the battery charger clean. Contamination can lead to danger of an electric shock.
Before each use, check the battery charger, cable and plug. If damage is detected, do not use the battery charger. Never open the battery charger yourself. Have repairs performed only by a qualified technician and only using original spare parts. Damaged battery chargers, cables and plugs increase the risk of an electric shock.
Do not operate the battery charger on easily inflammat- ble surfaces (e. g., paper, textiles, etc.) or surround- ings. The heating of the battery charger during the charging process can pose a fire hazard.
Vapours can escape in case of damage and improper use of the battery pack. Provide for fresh air and seek medical attention in case of complaints. The vapours can irritate the respiratory system.
Supervise children. This will ensure that children do not play with the charger.
Children or persons that owing to their physical, sensory or mental limitations or to their lack of experience or knowledge, are not capable of securely operating the charger, may only use this charger under supervision or after having been instructed by a responsible person. Otherwise, there is danger of operating errors and injuries.
- Please read and observe the safety warnings and instructions enclosed in the operating instructions of the battery pack and drive unit/cycle computer as well as in the operating instructions of your eBike.
A short version of important safety warnings in English, French and Spanish with the following content can be found on the bottom side of the charger (marked with number C4 in the representation on the graphics page):
- For safe operation see manual. Risk of electric shock.
Dry location use only.
- Charge only batteries of the Bosch eBike Systems.
Other batteries may burst causing personal damage.
- Do not replace the plug assembly as risk of fire or electric shock may result.
Product Description and Specifications
Product Features (see page 6-8)
The numbering of the product features refers to the illustration of the battery charger on the graphics page.
C1 Battery charger
C2 Charger socket
C3 Plug-in connector
C4 Safety warnings, charger
C5 Charge connector
C6 Socket for charge connector
C7 Charge socket cover
A2 Rack-type battery pack
A3 Battery charge-control indicator
A4 Battery on/off button
A8 Standard battery pack
Technical Data
| Battery Charger Charger | ||
| Article number | 0 275 007 907 | |
| Rated voltage | V~ 207-264 | |
| Frequency | Hz 47 -63 | |
| Output voltage | V-- | 36 |
| Charging current | A | 4 |
| Charging time | ||
| - PowerPack 300 | h | 2.5 |
| - PowerPack 400 | h | 3.5 |
| Number of battery cells 30 - 40 | ||
| Operating temperature | °C -5...+40 | |
| Storage temperature | °C -10...+50 | |
| Weight according to EPTA-Procedure 01/2003 | kg | 0.8 |
| Degree of protection | IP 40 | |
| The values given are valid for a nominal voltage [U] of 230 V. For different voltages and models for specific countries, these values can vary. | ||
Operation
Initial Operation
Connecting the charger to the mains (see figure E)
Observe the mains voltage! The voltage of the power supply must correspond with the data given on the nameplate of the battery charger. Battery chargers marked with 230V can also be operated with 220V .
Plug the charger plug C3 of the power cord into the charger socket C2 of the charger.
Connect the mains cable (country-specific) to the mains supply.
Charging the removed battery (see figure F)
Switch the battery pack off and remove it from the holder of the eBike. For this, read and observe the operating instructions of the battery pack.
Place down the battery pack only on clean surfaces. In particular, avoid soiling the charge socket and the contacts, e. g. by means of sand or soil.
Insert the charger plug C5 of the battery charger into the socket C6 on the battery pack.
Charging the battery on the Bike (see figure G)
Switch the battery off. Clean the cover of the charge socket C7. Prevent especially the charge socket and the contacts from getting dirty, e.g. by sand or soil. Lift the cover of the charge socket C7 and plug the charge connector C5 into the charge socket C6.
- Charge the battery only in accordance with all safety instructions. If this is not possible, remove the battery from the holder and charge it in a more suitable location. When doing so, read and observe the operating instructions of the battery.
Charging Procedure
The charging procedure begins as soon as the charger is connected to the battery or the charge socket on the bike and the main power supply.
Note: The charging procedure is only possible when the temperature of the battery pack is within the allowable charging-temperature range.
Note: The drive unit is deactivated during the charging procedure.
The battery can be charged with and without the cycle computer. When charging without the cycle computer, the charging procedure can only be observed on the battery charge-control indicator.
When the on-board computer is connected, the back lighting of the display is switched on at low luminosity and "Charging/xx% charged" appears on the display.
The cycle computer can be removed during the charging procedure, or it can also be fitted after the charging procedure has begun.
The charging state is displayed by the battery charge-control indicator A3 on the battery and by the bars on the cycle computer.
When charging the main battery on the bike, the battery of the cycle computer can also be charged.
During the charging procedure, the LEDs of charge-control indicator A3 on the battery pack light up. Each continuously lit LED is equivalent to a charge capacity of approx. 20% . The flashing LED indicates the charging of the next 20% .
Use caution when touching the charger during the charging procedure. Wear protective gloves. Especially in high ambient temperatures, the charger can heat up considerably.
Once the battery is fully charged, the LEDs extinguish immediately and the cycle computer is switched off. The charging procedure is terminated. The charging state can be displayed for 3 seconds by pressing the on/off button A4.
Disconnect the charger from the main power supply and the battery pack from the charger.
When disconnecting the battery pack from the charger, the battery pack is automatically switched off.
Note: If you have charged on the bike, carefully close the charge socket C6 with the cover C7 after the charging procedure so that no dirt or water can get in.
If the charger is not disconnected from the battery after charging, after a few hours the charger will switch itself back on, check the charging state of the battery and begin the charging procedure again if necessary.
Troubleshooting - Causes and Corrective Measures
Cause Corrective Measure
Two LEDs of the battery pack flashing
Battery pack defective Refer to an authorised bicycle dealer
Three LEDs of the battery pack flashing
Battery pack too warm or too cold
Disconnect the battery from the charger until the charging temperature range has been reached.
Do not connect the battery pack to the charger until it has reached the allowable charging temperature.
Cause Corrective Measure
No charging procedure possible (no indication on battery pack)
Plug not inserted correctly Check all plug connections
Contacts of battery pack soiled
Carefully clean the contacts of the battery pack
Socket outlet, cable or charger defective
Check mains voltage, have charger checked through bicycle dealer
Battery pack defective Refer to an authorised bicycle dealer
Maintenance and Service
Maintenance and Cleaning
If the charger should fail, please refer to an authorised bicycle dealer.
After-sales Service and Application Service
In case of questions concerning the charger, please refer to an authorised bicycle dealer.
For contact data of authorised Bosch eBike dealers, please refer to www.bosch-ebike.com
Disposal
Battery chargers, accessories and packaging should be sorted for environmental-friendly recycling.
Do not dispose of battery chargers into household waste!
Only for EC countries:
According to the European Guideline 2012/19/EU for Waste Electrical and Electronic Equipment and its implementation into national right, battery chargers that are no longer usable must be collected separately and disposed of in an environmental correct manner.
Subject to change without notice.