
YM 2 - Yogurt maker TEAM - Free user manual and instructions
Find the device manual for free YM 2 TEAM in PDF.
| Brand | TEAM |
| Model | YM 2 |
| Product type | Yogurt maker |
| Capacity | 7 glass jars of 170 ml each (1.19 L total) |
| Power supply | 220-240 V ~ 50/60 Hz, 50 W |
| Dimensions (approx.) | 25 x 20 x 15 cm |
| Weight (approx.) | 1 kg |
| Materials | Glass jars, plastic lids, plastic base |
| Main functions | Making natural or flavored yogurts, integrated timer (hour indicator on the lid) |
| Included accessories | 1 yogurt maker lid, 7 glass jars with lids |
| Maintenance | Jars, lids, and cover washable in warm soapy water; base cleaned with a damp cloth; do not immerse the base |
| Safety | Do not immerse in water; do not use near heat sources; supervision required during use |
| Repairability | Repairs by a qualified after-sales service; power cord replaceable by a professional |
| Warranty | Consult after-sales service |
Frequently Asked Questions - YM 2 TEAM
User questions about YM 2 TEAM
0 question about this device. Answer the ones you know or ask your own.
Ask a new question about this device
Download the instructions for your Yogurt maker in PDF format for free! Find your manual YM 2 - TEAM and take your electronic device back in hand. On this page are published all the documents necessary for the use of your device. YM 2 by TEAM.
USER MANUAL YM 2 TEAM
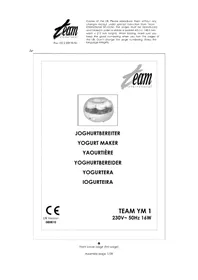
JOGHURTBEREITER
YOGURT MAKER
YAOURTIÈRE
YOGHURTBEREIDER
YOGURTERA
IOGURTEIRA
YOGURTERIA
APARAT PREPARAT IAURT
D
- Lid
- Base
- Glass pot of 170ml
- Illuminated switch
F
Please read these instructions carefully before using the appliance, and always follow the safety and operating instructions.
Important: People (including children) who are not able to use the appliance in a safe way, due to their physical, sensorial or mental capacity or their lack of experience or knowledge, must never use the appliance except if they are supervised by a person responsible for their safety or if they previously received instructions concerning the safe use of the appliance. Close supervision is necessary to prevent children from using the appliance as a toy.
☐ Check that your mains voltage corresponds to that stated on the appliance.
☐ Never leave the appliance unsupervised when in use.
From time to time check the cord for damages. Never use the appliance if cord or appliance shows any signs of damage. All repairs should be made by a competent qualified electrician ^1 . Should the cord be damaged, it must be replaced by a competent qualified electrician ^1 .
☐ Only use the appliance for domestic purposes and in the way indicated in these instructions.
☐ Never immerse the electric part of your appliance in water or any other liquid for any reason whatsoever. Never place it into a dishwasher.
□ Never use the appliance near hot surfaces.
☐ Never use the appliance outside and always place it in a dry environment.
☐ Never use accessories that are not recommended by the producer. They could constitute a danger to the user and risk to damage the appliance.
☐ Never move the appliance by pulling the cord. Make sure the cord cannot get caught in any way. Do not wind the cord around the appliance and do not bend it.
☐ Make sure to stand the appliance on a flat surface.
□ Always unplug the appliance from the power supply when it is not in use, especially if you leave the appliance unsupervised or if you assemble or disassemble it, before cleaning it or when you empty the receptacle.
☐ Only use this appliance for cooking purposes.
☐ It is absolutely necessary to keep this appliance clean at all times as it comes into direct contact with food.
1) Competent qualified electrician: after-sales department of the producer or importer or any person who is qualified, approved and competent to perform this kind of repairs in order to avoid all danger. In case of need you should return the appliance to this electrician.
FIELD OF APPLICATION/OF OPERATION
- Use the appliance for domestic purposes only and in the way indicated in these instructions.
- This appliance is intended to be used for domestic applications and similar applications such as:
Kitchen corners reserved for personnel in shops, offices and other professional environments.
Farms.
The use by clients of hotels, motels and other environments with a residential character.
Environments of the "bed and breakfast" type.
8 TEAM YM 2 - 100325
BEFORE THE FIRST USE
Before using your appliance for the first time, wash the lid of the appliance, the glass jars as well as the lids of the glass jars in warm soapy water. DO NOT USE ANY ABRASIVE PRODUCTS OR HARD UTENSILS. Rinse and dry all parts thoroughly. Do not immerse the motor block in water. You can clean it with a slightly damp cloth.
Prepare the following utensils: a high-sided saucepan, a ladle and a spoon. Ensure all these utensils and the glass pots and caps are sterilized before starting to make yogurt. Allow these utensils to air-dry.
WHICH MILK SHOULD YOU USE?
Any kind of milk can be used to make yogurt. According to your taste, or diet, you can choose:
Homogenized and sterilized long-life milk: this milk, whether whole or semi-skimmed, sterilized with high temperatures (long-keeping milk), can be used without being previously boiled. With this milk you will obtain the best yogurts, firm and without skin. Do not use UHT skimmed milk, you will obtain the best results with whole UHT milk.
Pasteurized milk: this milk is not sterilized. It still contains heat-resistant germs, undestroyed by pasteurization. Using this milk without previous boiling means that the developed flora will be different from the flora of the yogurt. Therefore, this milk should be boiled. Once it has cooled down, you can use it to make yogurt. This milk gives a creamier yogurt, with a thin skin on top of it which is formed by the cream that goes back up to the surface.
Raw milk (dairy milk): it is compulsory to make it boil. Ideally, the boiling should be quite long. In any case, do not use it without having it previously boiled. As for pasteurized milk, let it cool down before using it in your yogurt maker.
Powdered milk: with powdered milk, you can obtain very smooth yogurts. It sets easily and quickly.
We recommend trying various kinds of yogurt before choosing the one you prefer. Should you like a thicker yogurt, add powdered milk to the preparation (3 to 5 tablespoons, according to your taste).
FERMENT
To transform milk into yogurt, a ferment must be added, which will help the process to take place. You can find these ferments in powder (bought at the chemist's) or in another natural yogurt bought in a store.
SUGAR
You can sweeten your yogurts when eating them. You can also sweeten them when you prepare them, by adding sugar at the same time as the ferments. Make sure you whisk well until the sugar melts. You can also use a substitute in case you cannot use sugar. The amount of sugar depends on the taste of each person, but generally one or two teaspoons per pot is enough.
PREPARATION OF NATURAL YOGURTS
1) For 7 glass pots, measure 1190 ml of milk from the market or fresh milk or pasteurized milk, then pour it into a high-sided saucepan.
2) If necessary (according to the kind of milk used), the milk must be heated almost to the boiling point (approximately 95°C). Keep the milk at this temperature for about 3 minutes, then remove the pan from the heating source and allow the milk to cool to body temperature (36°C). Do not allow the milk to boil, otherwise the yogurt will taste or smell bad or will remain too soft.
3) If you use milk that does not need to be boiled, just heat it a little, then let it cool down to body temperature (36°C).
4) Add the ferment and stir.
a) Powder ferment: take a little milk out of your saucepan, pour it into a glass pot, add the ferment, close the glass pot and shake it vigorously in order to distribute the ferment evenly.
b) Ferment coming from another yogurt: in your saucepan with cooled down milk, stir one pot of natural yogurt (bought in a store or coming from a previous batch of yogurts).
5) Distribute the mixture over the 7 glass pots. DO NOT PUT THE LIDS ON.
6) Put the glass pots in the yogurt maker and put the lid on the yogurt maker.
7) Plug in your yogurt maker. It takes about 6 hours to make yogurts from whole milk, and about 8 hours to make yogurts from skimmed milk.
8) Digits are indicated on the handle of the lid (much like on a clock). When switching on the appliance, check the time of day and put the corresponding digit of the hour in front of the arrow. That way, you will remember the starting time and you will be able to calculate the elapsed time easily.
9) Press the switch. It turns on when the yogurt maker is working.
10) After 6 or 8 hours, check that the yogurts have set well. If they have not, that is because the ferment has not had time to act. Begin again starting from point 7. If the ferment has a good quality, it should be a success after the second try.
11) When the yogurls have set, switch off the appliance.
12) If the yogurts have set well, close the glass pots with their lids and put the glass pots in the refrigerator.
TIPS
Once you have made a first batch of yogurts with ferments, these are weakened and will give less smooth yogurts than natural yogurts. Keep one to have ferments for the next batch of yogurts. After 4 to 8 batches, according to the milk you chose and the conditions of use, we recommend that you use new ones.
Once the yogurt maker is plugged, do not move it and make sure it will not be affected by shocks or vibrations.
In some conditions of use, there can be much condensation. To gather water, we advise you to always open your yogurt maker by making the lid pivot on the rear part of your yogurt maker.
PRESERVATION
Since your yogurts are made without preservatives, the expiry time will be shorter than for yogurts sold in shops.
We recommend eating your yogurts within 7 days. This length will vary according to the quality and the freshness of the products used.
10 TEAM YM 2 - 100325
TO SERVE
Once the yogurt has cooled down, it can be served with natural flavour or with honey or sugar to sweeten the yogurt. You can also add fruit toppings. You can flavour the yogurt according to your personal taste.
FLAVOURED YOGURTS
You can either stir the flavour (fruits, chocolate, honey...) in each glass pot individually when the yogurt has cooled down or in the milk mix before dividing it into the glass pots. You can stir the flavour/the ingredients (fruits, chocolate, coffee, caramel, honey...) either individually in each pot (and thus make up to 7 different kinds of yogurt in one time) or in the preparation before you make your yogurts (in this case you can only make one kind of yogurt at a time).
You can use various fruits. The amount of fruits depends on your personal taste. Fresh fruits might contain acid, which kills the ferments and prevents the yogurt from setting. In this case, put fresh fruits in the already set yogurt or bake the fruits beforehand.
CLEANING
Unplug from outlet before cleaning.
The pots, their caps and the lid of the yogurt maker can be cleaned in hot soapy water. Do not immerse the body of the yogurt maker in water. Just clean it with a soft damp cloth.
PROTECTION OF THE ENVIRONMENT - DIRECTIVE 2002/96/EC
In order to preserve our environment and protect human health, the waste electrical and electronic equipment should be disposed of in accordance with specific rules with the
implication of both suppliers and users. For this reason, as indicated by the symbol — the rating label or on the packaging, your appliance should not be disposed of as unsorted municipal waste. The user has the right to bring it to a municipal collection point performing waste recovery by means of reuse, recycling or use for other applications in accordance with the directive.
FR MODE D'EMPLOI
POUR VOTRE SECURITE
Team International Romania Srl;
Str. Industriilor 56A, sector 3, Bucuresti CUI 16991287; R.C. J40/19685/29.11.2004
BG УПЪТВАНЕ
ВАЖНИ МЕРКИ ЗА БЕЗОПАСНОСТ

- JOGHURTBEREITER
- YOGURT MAKER
- YAOURTIÈRE
- YOGHURTBEREIDER
- YOGURTERA
- IOGURTEIRA
- YOGURTERIA
- APARAT PREPARAT IAURT
- D
- F
- FIELD OF APPLICATION/OF OPERATION
- BEFORE THE FIRST USE
- WHICH MILK SHOULD YOU USE?
- FERMENT
- SUGAR
- PREPARATION OF NATURAL YOGURTS
- TIPS
- PRESERVATION
- TO SERVE
- FLAVOURED YOGURTS
- CLEANING
- PROTECTION OF THE ENVIRONMENT - DIRECTIVE 2002/96/EC
- FR MODE D'EMPLOI
- POUR VOTRE SECURITE
- BG УПЪТВАНЕ
- ВАЖНИ МЕРКИ ЗА БЕЗОПАСНОСТ
Brand : TEAM
Model : YM 2
Category : Yogurt maker