
IAN 340472 - Uncategorized Livarno Lux - Free user manual and instructions
Find the device manual for free IAN 340472 Livarno Lux in PDF.
Download the instructions for your Uncategorized in PDF format for free! Find your manual IAN 340472 - Livarno Lux and take your electronic device back in hand. On this page are published all the documents necessary for the use of your device. IAN 340472 by Livarno Lux.
USER MANUAL IAN 340472 Livarno Lux
Double-sided adhesive tape (for LED controller)
Double-sided adhesive tape (on the back of LED strip)
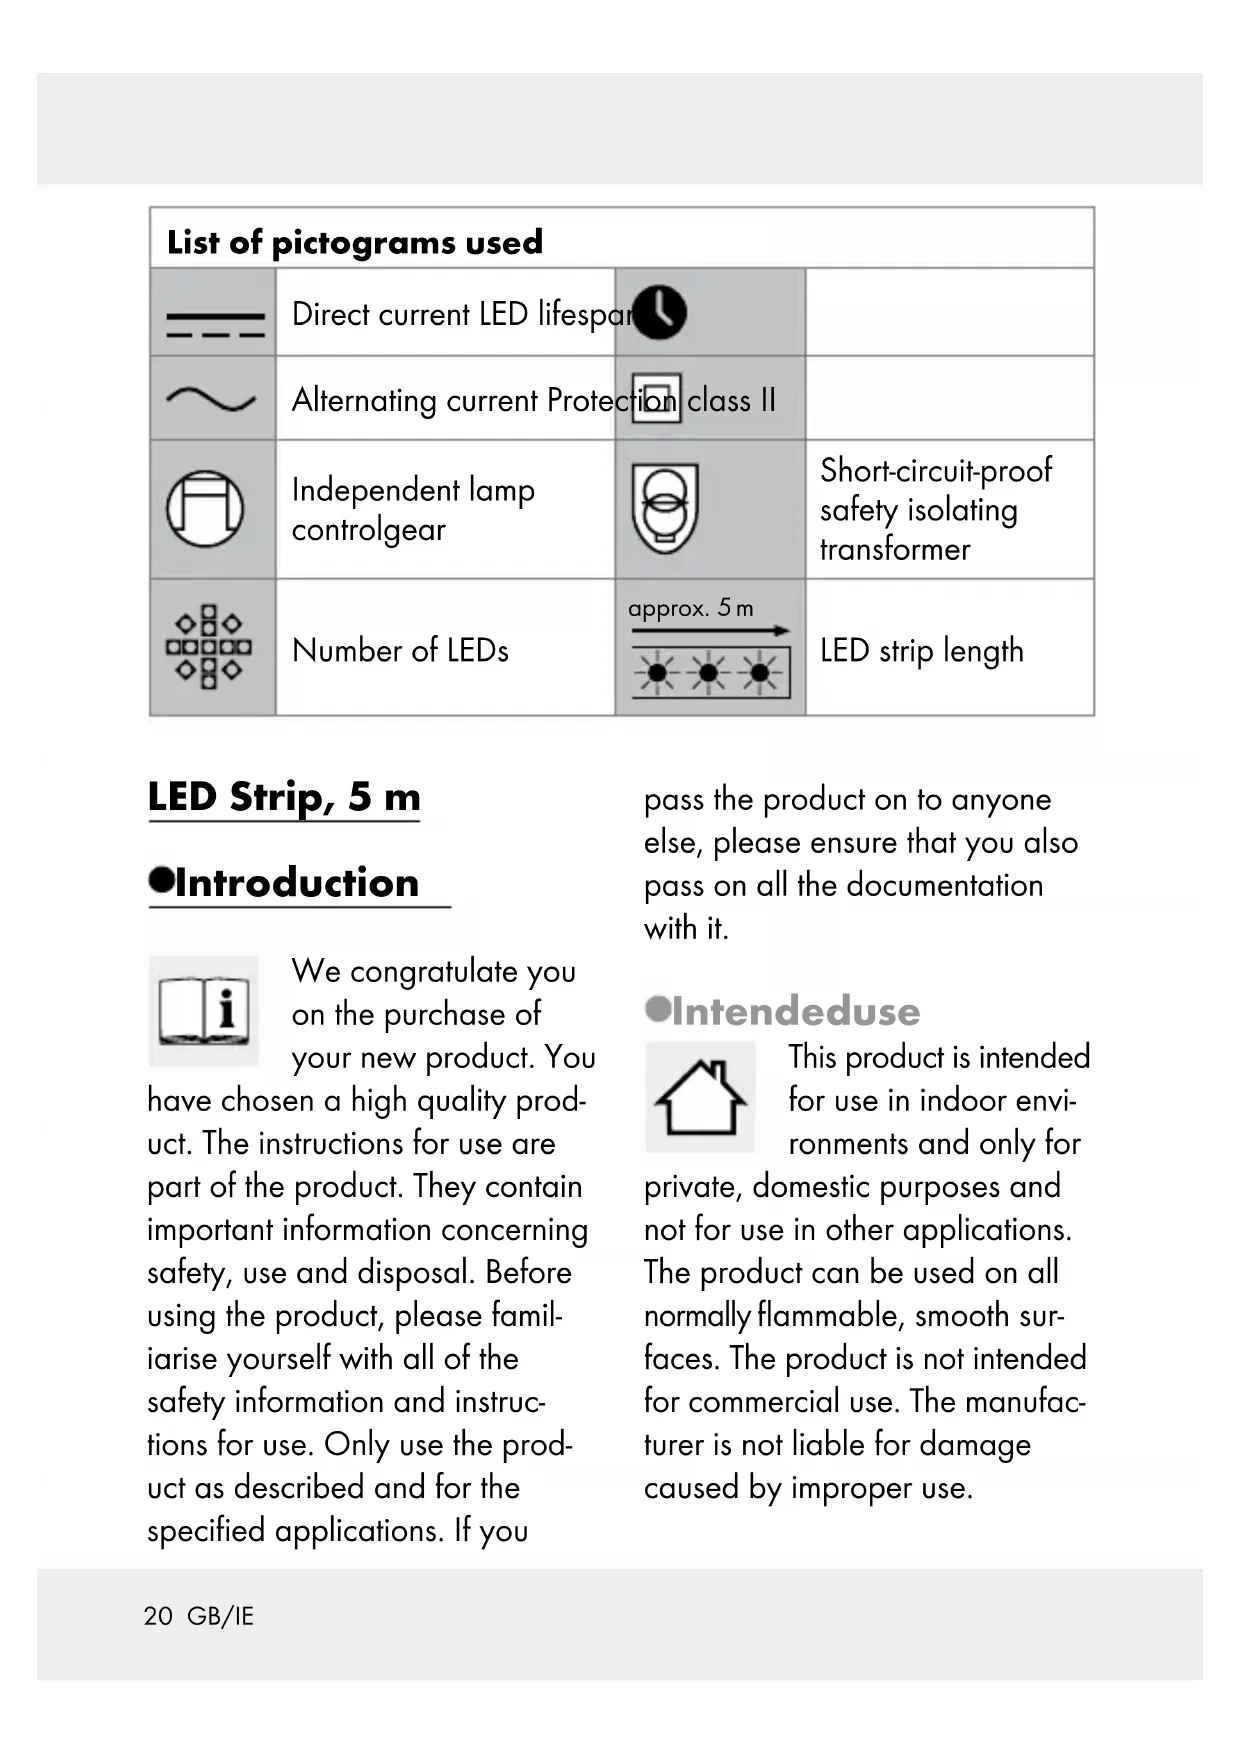
4-pin connector Technical data Power adaptor + LED Strip: Total power consumption: max. 24 W LED Strip: Input voltage: 12 V
max. 20 W Bulbs: 150 x LED; ap- prox. 0.13 W per LED (the RGB- LEDs cannot be replaced) Chromaticity coordinate: X < 0.27 or X > 0.530; Y < -2.3172 X² + 2.3653 X – 0.2199 or Y > -2.3172 X² + 2.3653 X - 0.1595 Power adaptor: Input voltage: 100–240 V∼ 50 / 60 Hz, 0.75 A Output voltage: 12 V , 2 A Protection class: Model no.: YS16-1202000E SELV: Safety extra low voltage Ta: Maximum rated ambient temperature Tc: Rated maximum operating temper- ature of the case of a controlgear22 GB/IE IR remote control: Battery: 3 V lithium battery, Type CR2025 Max. range: approx. 6–8 m Scope of delivery 1 LED strip 1 Double-sided adhesive tape (for LED controller) 1 Power adaptor with LED-Controller 4 Short Connection cable (10 cm) 4 Long Connection cable (50 cm) 1 4-pin connector 1 IR remote control 1 Lithium battery 16 Plastic clips 1 Operating instructions Safety notes
PLEASE KEEP THE INSTRUC-
TIONS FOR USE IN A SAFE
PLACE! Check the product for damage before use. Never use a dam- aged product. This product can be used by children aged from 8 years and above and persons with reduced physical, sensory or mental capabilities or lack of experience and knowledge if they have been given super- vision or instruction concern- ing use of the product in a safe way and understand the hazards involved. Children shall not play with the product. Cleaning and user mainte- nance shall not be made by children without supervision. The extremely high speed of the lights change during the colour change effect can under certain cir- cumstances result in visual impairment of children or predisposed persons (e.g. by mental illness). Never use the product if it is damaged in any way. Where breakage or damage to LEDs occurs the product23 GB/IE must not be used/energised but disposed of safely. Only use the product with the components described in these instructions. Do not attach objects to the product.
OVERHEATING! Do not operate the product inside the packaging or when it is rolled up. Protect the product from sharp edges, mechanical loads and hot surfaces. Do not expose the product to high temperatures or moisture, otherwise the product may be damaged. Do not secure with sharp sta- ples or nails. Never open a component of the electrical equipment or insert anything into a compo- nent of the electrical equipment. If the product is not in use for any length of time (e.g. holi- days), disconnect it from the power adaptor
The power cable cannot be repaired! Should the power cable be damaged, the prod- uct must be rendered useless and must be disposed off ap- propriately. Ensure that the available net- work voltage agrees with the required input voltage of the power adaptor before use (100–240 V∼). Always check the product for damage before connecting it to the power adaptor
Always unplug the power adaptor from the socket be- fore installation, dismantling or cleaning. This product does not contain any parts that can be serviced by the user. The LEDs cannot be replaced. The product is only suited for use with the included power adaptor (model no. (YS16-1202000E)
Do not use the product when covered or recessed into a surface. Interconnection shall be made only by the use of the supplied connectors. Any24 GB/IE open ends must be sealed-off before use. Do not connect this product to another manufacturer’s product. Please note that the power adaptor continues to draw a small amount of power even if the product is turned off as long as the power adaptor is plugged into a power outlet. To switch the product off com- pletely, unplug the power adaptor from the socket. The illuminants are not replaceable. If the illuminants fail at the end of their lives, the entire product must be replaced. Do not use the rope light when covered or recessed into a surface. Interconnection shall be made only by the use of the supplied connectors. Any open ends must be sealed-off before use. Do not connect this rope light to another manufacturer’s product. Safety instructions for batteries / rechargeable batteries KEEP BATTERIES
REACH OF CHILDREN! Swallowing batteries can cause chemical burns, perforation of soft tissue, and death. Severe burns may occur within 2 hours of swal- lowing batteries. Seek imme- diate medical attention. DANGER TO LIFE! Keep batteries / rechargeable batteries out of reach of children. If accidentally swallowed seek immediate medical attention. Swallowing may lead to burns, perforation of soft tissue, and death. Severe burns can oc- cur within 2 hours of ingestion. DANGER OF EXPLOSION! Never recharge non-rechargeable batteries. Do not short-circuit batteries /25 GB/IE rechargeable batteries and / or open them. Overheating, fire or bursting can be the result. Never throw batteries / re- chargeable batteries into fire or water. Do not exert mechanical loads to batteries / rechargeable batteries. Risk of leakage of batteries / rechargeable batteries Avoid extreme environmental conditions and temperatures, which could affect batteries / rechargeable batteries, e.g. radiators / direct sunlight. If batteries / rechargeable batteries have leaked, avoid contact with skin, eyes and mucous membranes with the chemicals! Flush immediately the affected areas with fresh water and seek medical at- tention! WEAR PROTEC- TIVE GLOVES! Leaked or dam- aged batteries / rechargeable batteries can cause burns on contact with the skin. Wear suitable protective gloves at all times if such an event occurs. In the event of a leakage of batteries / rechargeable bat- teries, immediately remove them from the product to prevent damage. Only use the same type of batteries / rechargeable bat- teries. Do not mix used and new batteries / rechargeable batteries. Remove batteries / recharge- able batteries if the product will not be used for a longer period. Risk of damage of the product Only use the specified type of battery / rechargeable battery! Insert batteries / rechargeable batteries according to polarity marks (+) and (-) on the bat- tery / rechargeable battery and the product. Use a dry lint-free cloth or cotton swab to clean the26 GB/IE contacts on the battery / re- chargeable battery and in the battery compartment before inserting! Remove exhausted batteries / rechargeable batteries from the product immediately. Before use DANGER TO LIFE BY ELECTRIC SHOCK! Before performing any work, first disconnect the product from the mains power. Remove the power adaptor
from the socket. Note: Remove all packaging materials from the product. Mounting (see Fig. A) Note: Clean the surface well onto which you wish to mount the product. The surface must be clean, free from grease and dry. Other- wise the stickiness of the double- sided adhesive tape (for LED controller)
or the double-sided adhesive tape (on the back of LED strip)
the adhesive on the back of the LED strip
and attach the LED strip
at the desired point. Connect the LED controller
that you align the +GRB markings on the LED controller
with the +GRB marking of LED strip
using the attached double- sided adhesive tape (for LED controller)
Please ensure that the power adaptor
is always acces- sible. Insert the power adaptor
into the socket before you turn on the product. Connecting the 2 LED strips (see Fig. A): Note: A maximum of two 5 m LED strips
can be connected by using the 4-pin connector
and operated with one LED con- troller
and one power27 GB/IE adaptor
. Otherwise there is the risk of overloading the com- ponents and fire. Simply connect the head of secondary light strip to the tail of first light strips. Note: Ensure when connecting the ends of the LED strip
ou align the +GRB markings on the ends of the strips with each other. Shorten the LED strip (see Fig. B): You are able to individually shorten the LED strip
. It can be cut with scissors at the marked position, as shown in Fig. B. The cut pieces can be connected together as shown in the diagram. Connect as described below: Remove the protective foil from the double-sided adhesive tape (on the back of LED strip)
at the ends of the component pieces of the LED strip
be- ing connected. Firmly press the end of one LED strip
onto the contact sp ikes of the connection cable
so that this pierces the strip conductor of the LED strip
from below (use suitable aid would be good because the process requires relative force). Note: Ensure that you align the +GRB markings on the connection cable
with the +GRB marking of LED strip
onto the newly-made connection from above. Note: The plastic clips
must engage to secure the connection. Proceed in the same manner for forming a contact on the other end of the connection cable
can move in every direc- tion, unlike the LED strip
The product contains sensitive solder joints. Do not lead the LED strip
around corners or kink. This could lead to damage of the solder joints and malfunction of the LED strip
.28 GB/IE Start-up Switching the product on / off using the IR remote control Note: The infrared receiver
located on the LED controller
directly at the infrared receiver
for best reception. The range of the IR remote control
is approx. 6–8 m. Note: Remove the insulating strips from the battery compartment be- fore using the IR remote control
for the first time. Ensure that there are no ob- stacles between the sender and the receiver. Press the ON button on the IR remote control
to turn on the lights. Press the OFF button on the IR remote control
switch off the lights. Controlling the light effects using the IR remote control The following functions are available: Button : Increase lights inten- sity in 8 steps Button : Reduce lights intensity in 8 steps Button : set red lights Button : set green lights Button : set blue lights Button : set white lights : select pre-mixed colours Button FLASH: 7 colours flash Button STROBE: stronger and weaker getting white lights29 GB/IE Button FADE: flowing colour change Button SMOOTH: RGB colours flash Note: The off button on the IR re- mote control
is only suitable for switching off temporarily. To switch off permanently, remove the power adaptor
from the socket. Changing the battery If the range of the IR remote con- trol
is reduced, you must change the battery
To do this, unlock the interlock by pushing it to center then pull the battery drawer out of the back of the IR remote control
and remove the battery
(see Fig. C). Insert a new battery as shown in the figure on the back of the IR remote control
Cleaning and care DANGER TO LIFE BY ELECTRIC SHOCK! Before performing any work, first disconnect the product from the mains power. Remove the power adaptor
from the socket. Use only a dry, lint-free cloth for cleaning. Disposal The packaging is made entirely of recyclable materials, which you may dispose of at local recycling facilities.