
DB 6003 CB - Iron BOMANN - Free user manual and instructions
Find the device manual for free DB 6003 CB BOMANN in PDF.
| Brand | Bomann |
| Model | DB 6003 CB |
| Product type | Iron |
| Power supply | 220-240 V~, 50-60 Hz |
| Maximum power consumption | 1800 W |
| Protection class | I |
| Net weight | Approx. 0.4 kg |
| Water tank capacity | Approx. 150 ml |
| Soleplate type | Stainless steel |
| Temperature setting | Variable thermostat (OFF, synthetic/silk, wool, cotton/linen, MAX) |
| Dry ironing | Yes |
| Steam ironing | Yes, with steam regulator (low, medium, high) |
| Steam shot function | Yes, via dedicated button (12) |
| Vertical steam | Yes |
| Spray | Yes, via button (13) |
| Anti-calc system | Self-cleaning function |
| Recommended water type | Distilled water only |
| Power cord length | 1.8 m (approx.) |
| Included accessories | Measuring cup |
| Maintenance | Clean soleplate with a damp cloth; do not immerse |
| Safety | Hot surface (caution burn), vertical stand, unplug before filling |
Frequently Asked Questions - DB 6003 CB BOMANN
User questions about DB 6003 CB BOMANN
0 question about this device. Answer the ones you know or ask your own.
Ask a new question about this device
Download the instructions for your Iron in PDF format for free! Find your manual DB 6003 CB - BOMANN and take your electronic device back in hand. On this page are published all the documents necessary for the use of your device. DB 6003 CB by BOMANN.
USER MANUAL DB 6003 CB BOMANN
Thank you for choosing our product. We hope you will enjoy using the appliance.
Symbols in These Instructions for Use
Important information for your safety is specially marked. It is essential to comply with these instructions in order to avoid accidents and prevent damage to the appliance:

WARNING:
This warns you of dangers to your health and indicates possible injury risks.

CAUTION:
This refers to possible hazards to the appliance or other objects.

NOTE:
This highlights tips and information.
General Notes
Read the operating instructions carefully before putting the appliance into operation and keep the instructions including the warranty, the receipt and, if possible, the box with the internal packing. If you give this appliance to other people, please also pass on the operating instructions.
- The appliance is designed exclusively for private use and for the envisaged purpose. This appliance is not fit for commercial use.
- Do not use it outdoors. Keep it away from sources of heat, direct sunlight, humidity (never dip it into any liquid) and sharp edges. Do not use the appliance with wet hands. If the appliance is humid or wet, unplug it immediately.
- When cleaning or putting it away, switch off the appliance and always pull out the plug from the socket (pull the plug itself, not the lead) if the appliance is not being used and remove the attached accessories.
- The appliance and the mains lead have to be checked regularly for signs of damage. If damage is found the appliance must not be used.
- Use only original spare parts.
- In order to ensure your children's safety, please keep all packaging (plastic bags, boxes, polystyrene etc.) out of their reach.

WARNING:
Do not allow small children to play with the foil. There is a danger of suffocation!
Special Safety Instructions for This Appliance
You will find the following symbol with warning character on the product:
WARNING: Hot surface!
Danger of burns!
The temperature of accessible surfaces can be very hot during and after operation.

WARNING:
- The sole plate becomes hot quickly and requires a long time to cool down. Do not touch.
- When not in use, place the iron vertically on the stand
- Choose a safe resting surface! The surface must be stable and level. Check the resting surface again for stability.

WARNING:
- The iron must be used and rested on a stable, heat-resistant surface. The surface should be level.
- Before filling the water tank remove the mains lead.
- The iron must not be left unsupervised while it is connected to the mains.
- The iron may not be used if it has been dropped, if there is visible damage or if it leaks.
- Do not repair the appliance by yourself. Always contact an authorized technician. If the supply cord is damaged, it must be replaced by the manufacturer, its service agent or similarly qualified persons in order to avoid a hazard.
- When turning on or cooling down, the iron and its cord must be out of reach of children who are younger than 8 years.
- This appliance can be used by children aged from 8 years and above and persons with reduced physical, sensory or mental capabilities or lack of experience and knowledge if they have been given supervision or instruction concerning use of the appliance in a safe way and understand the hazards involved.
Children shall not play with the appliance. - Cleaning and user maintenance shall not be performed by children.
- This appliance is not designed to be immersed in water during cleaning. Please follow the instructions that we have included for you in the chapter on "Cleaning".
- The tank should only be filled up to the maximum mark. Do not overfill! Maximum water filling quantity: approx. 150 ml .
- Please use only distilled water.
Intended Use
This appliance is used for ironing clothes and textiles.
It is intended for household use.
Any other use is regarded as not intended and may even result in damage to property or personal injury.
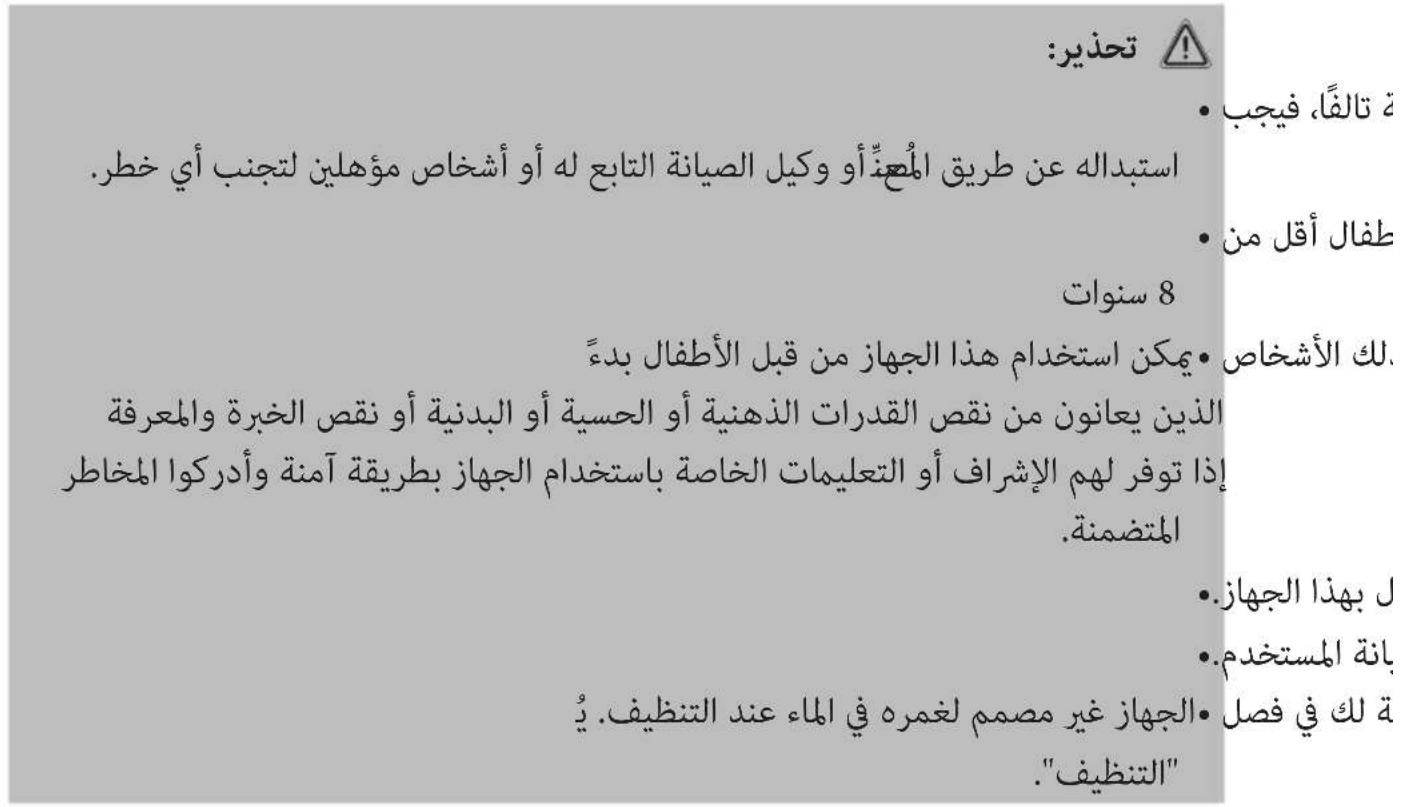
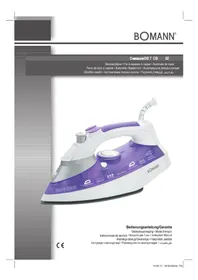
Overview of the Components
1 Flexible line cord entry
2 Control lamp
3 Stand
4 Transparent water tank
5 Temperature control markings
6 Stainless steel soleplate
7 Continuously adjustable temperature regulator
8 Steam control markings /Self-Cleaning
9 Spray nozzle
10 Filler opening for the water tank
11 Regulator for the steam quantity and the self-cleaning
12 Steam jet button
13 Spray button
14 Handle
Not Shown
Measuring cup
Notes on Use
Unpacking
- Remove any protective foils and stickers from the sole plate.
- Please unwind the lead completely.
Electrical Connection
Make sure that the iron voltage (see name plate) and the line voltage match.
- The mains plug should only be inserted into a correctly installed socket with earthing contact.
Connected Wattage
The maximum power consumption of the appliance is 1800 W. With this connected load a separate supply line protected by a 16 A household circuit breaker is recommended.

CAUTION: Overload!
- If you use extension leads, these should have a cable cross-section of at least 1.5mm^2
- Do not use any multiple sockets, as this appliance is too powerful.
Temperature Control on the Iron (7)
The symbols on the control correspond to the following settings:
OFF
off

(synthetics, rayon, silk)
low temperature (ironing without steam)

- (wool) medium temperature

Cotton, linen) high temperature
MAX
maximum temperature
- Turn woollen clothes inside out to avoid shiny spots on the fabric due to steam ironing. In addition, lay a thin cotton cloth onto the fabric.
- Select a low temperature setting for fabrics with additional surface treatment and iron them inside out.

NOTE:
The iron heats up faster than it cools down. Start ironing with the lowest temperature setting.
Water
- Please use only distilled water.
- Do not fill battery water, water from the clothes dryer and water containing additives (such as starch, perfume, softener or other chemicals) into the water reservoir.
- This could damage the iron due to residues forming in the steam chamber. These residues may cause impurities to the fabric when dropping out of the holes in the sole plate.
Operation
Before Initial Use
- Clean the ironing base with a slightly damp cloth.
- In order to remove all residues before initial use, please pass the iron a few times over an old clean cloth.
Ironing without Steam

NOTE:
- Sort out the garments according to their ironing temperatures.
- Always set the temperature control to "OFF" before connecting the appliance to a power point, or before disconnecting it. Please follow the temperature control markings (5).
-
Set the steam control (11) to the " position, following the steam control markings (8).
-
Place the iron on its stand.
- Only connect the appliance to a properly installed safety socket.
- Set the temperature on the temperature control (7). If you have sensitive items to iron, please begin with the lowest temperature.

NOTE:
The control lamp (2) on the iron shows that it is heating up. As soon as the control lamp goes off the operating temperature has been reached. Now you can start ironing.
Steam Ironing

WARNING:
The iron expels a large quantity of hot steam. Danger of burns.

NOTE:
- For this a high temperature is needed. Turn the temperature control (7) at least to the "●●" symbol.
- If the temperature is too low water may leak from the sole plate.
Fill the water tank with distilled water.
The tank volume is ca. 150ml . Fill the water tank to the max marking only.
- Place the iron with the sole plate in an upright position on a heat resistant surface.
- Open the water tank cover upwards.
- Fill the water reservoir at the refill opening (10). Use the supplied measuring cup.
- Close the water tank cover again.
Use the steam control (11) to adjust the amount of steam. Set the control to positions "or".
- The steam volume regulator audibly engages in the respective position.
- Steam escapes as soon as the iron is in a horizontal position.
- Extra steam can be added with the steam jet function. Press the steam jet button (12) intermittently.
- Spray Function (
In order to moisten a section of a garment to be ironed, press the spray button (13) intermittently.
- Vertical Steam Function
This can be used to produce a jet of steam in a vertical direction.

WARNING:
er direct the steam jet at people. Risk of burning!
- Hang your laundry on a clothes hanger and move the iron to approximately 3 - 5 cm away.
- Set the temperature control (7) to "MAX" position.
- Press the steam jet button (12) intermittently.

NOTE:
If the amount of steam emitted is too little, wait until the appliance heats up again.
- How Can I Replenish the Water During Operation?
- Set the steam control to the " position.
- Place the iron with the sole plate in an upright position on a heat resistant surface.
- Tum the appliance off by setting the temperature control knob to the "OFF" position.
- Remove the mains plug from the socket.
- Open the lid of the refill inlet and carefully pour in the water.
- Do not exceed the maximum line as marked on the water reservoir.
- Close the lid of the tank.
When You Have Finished
- Always turn the temperature control to "OFF" after use and remove the mains plug. The control lamp goes off.
- Empty the water tank in order to prevent the contents of the tank leaking.
- Allow the appliance to cool down before you put it away.
Self-Cleaning
- Half fill the water tank with water.
- Heat the appliance up to its maximum temperature. After the control lamp goes off remove the appliance from the mains supply.
- Now hold the iron horizontally over a sink. Slide the regulator (11) on the symbol and hold this. The regulator does not snap into place. Now rock the appliance backwards and forwards until the tank is empty.
- Place the appliance back on its stand and heat it up again. To clean the base now iron over a clean cotton cloth.
Cleaning

WARNING:
- Always remove the mains lead before cleaning!
- Wait until the appliance has cooled down completely!

WARNING:
- Under no circumstances should you immerse the appliance in water for cleaning purposes. Otherwise this might result in an electric shock or fire.

CAUTION:
- Do not use a wire brush or any abrasive items.
- Do not use any acidic or abrasive detergents.
- Clean the casing with a slightly damp cloth.
- Clean the sole plate and the rest with a slightly damp cloth.
Technical Data
Model: DB 6003 CB
Power supply: 220-240V\~,50-60Hz
Power consumption: 1400-1800 W
Protection class: I
Net weight: approx. 0.4kg
The right to make technical and design modifications in the course of continuous product development remains reserved.
This appliance has been tested according to all relevant current CE guidelines, such as electromagnetic compatibility and low voltage directives, and has been constructed in accordance with the latest safety regulations.
Disposal
Meaning of the Symbol "Dustbin"
Protect our environment; electrical appliances do not belong in household waste.
Use the collection points for the disposal of electrical equipment and submit your electrical and electronic equipment to these points that you will no longer use.
You help reduce the potential impact of incorrect disposal on the environment and human health.
You contribute to recycling, and other forms of recycling of electrical and electronic equipment.
Information concerning the disposal of appliances can be obtained from your local or municipal authorities.
Instrukcja obslugi
CTC Clatronic Sp. z 0.0
Ul. Brzeska 1
45-960 Opole
Usuwanie
Yka3bIbaeT Ha BO3MOxHHyO ONaCHOCTb IJI IN3dEINIA INpyrIX OKpyXaIOxN ppeDMETOB.

ПИМЕЧАЙ:
JaetcoBebnHOpMaIIO.
06uue 3ameyauHn
Ipeed hauanom 3KcNlyataun np6opbaBnHmateIbHO npouHTaTe npnaTaeMyu HCTpykUIO NO 3KcNlyataun m coxpaHNTe ee B HaJExKHOM MecTe, BMeTe C rapaHTnHBIM TaHOHOM, KaccOBbIM YekOM N, NO BO3MOXHOCTN, KAPTOHHO Kopo6koC yNaKoBOyHBM MaTePnAON. Ecn daTe Ko- My-Ni6o NOnOB3OBAtcba np6OpOM, O83aTeNbHO daTBe B pnuDau DaHHyo INCTpykUIO NO 3KcNlyataun.
-Поьзуйтесь пибором только чаТьим образим и по ha3haЧeMu. Пибор He пpeДha3HaЧeн ДЯ КOMМерчecKOrO ИСпОьЗOBaHЯ.
He nIb3yIeTcB np6bOp mOIO TkpbITbIM He6bOM. PpeDoxpaHnTe np6bOp OT kapbl, pRmblx CoNHeuHbIX Lyueh, BnaXHoCTN (HN B KOem Cnyuae He nOrpykaTe ero B Body) n yApob 06 octpble yrbl. He npKacaiTe b K np6bOp ByaXHbIM pyKaMn. Ecn np6bOp yBaXaHnncn HIN HamOK, Ty Xe BbIbTe BuJky n3 po3eKn.
- Pocne 3KcIpyaTun, MOtTaKe npHaIeXHOCTei, YNCTKe IIN NIOJOMKe pnp6opa Bcerda BbIHMaIte BnIKy n3 po3ETKn (TaNHTe 3a BNkY, a He 3a Ka6eJIb).
- Pn6bOp n Ka6eBcTeBOro NtAnHn He06xOIMOppeyIpaHo 6CneIOBaTb Ha HauuHne CteIOB NOBpeKDeHn. Pn 6bApXeHN NOBpeXdEHN NoJIb3OBA TbCBnPn6bOpm 3aIpeUaTbcR.
- Icnoj3yTe ToIbKO opuHaHaIbHbe 3aHaCTN.
- V3 coo6paqhen 6e3onacchoT nI py dTeen He octabJIyTe IexaTb ynaKOBky (IInactNKOBbie MeWK, KapTOH, neHONlact N T.D.) 6e3 npncmOTpa.

IPEDYUNPEXDEHNE:
He no3B0JIaTe DeTm IrpTaB C nOIN3TuNEHOBOI nIeHko. OnachocTB ydybja!
Oco6bIe yka3aHnI NO TexHnke 6e30nacHOCTN DnI 3TOrO yCTpO'cTBA
Ha n3dennn nmeotc sJeDyUoune npedynpeXdaUoune cIMBOJ:
.1j00000000000000000000000000000000000000
- 1.
#
:
!
1oL 2uSul
·
a 1
jglj jolj
"daolalgdoj
a 1
aJjul cui jai
JLJ 10000000000000000000000000000000000000000000
.
alaiabdi aowllg aoll 1531 iooi oeluai (
a aaa a a a a a a a a a a a a a a
j0 j5g jlll l j0 18g g ggl olae aed e
aalalalalalalalalalalalalal
:4.3
ab = 15 且 a5^3 + a6^3 + a_7^3 = 15
ab = 15g^2a_0 = 2000
.
.
A
DB 6003 CB.
60-50.240-220
1800-1400
1.
10.4
jyabil 1 3 4 aagaaig aai j 1
Lulu
4k - 1 = 0
s#e jol8b1 jol8b1 dc jol8b1 (2) sall cluaa cagg 1jaiiill ojodjcdjol8b1 jogssll cluaa gabii
S_ OBC = 12 · CO · BC = 12 × CD × 5
J
:
#
.01 jol yj 0j 000000000000000000000000000
4ab = 10
a0j 30000000000000000000000000000000000000000
JyIyI yIe "●jor j! (7) 0r
4ab = 5a
jao jao jao jao jao jao jao jao jao jao jao jao jao jao jao jao jao jao jao jao jao jao jao jao jao jao jao jao jao jao jao jao jao jao jao jao jao jao jao jao jao jao jao jao jao jao jao
S木弟形 COBD = S COD + S_ BDO
Jauuul uuiu uuiu
"0g 12e 15
pIgao 2000 1000000000000000000000000000000000000
.01
(7) g ≤ b 与 a b , a c , a d , a e , a f , a g
ailll lalx ygo sall oog jdo golgslg
Jz
OFF
S(1) 4. .
(,)
,diolio slgo
j()
#
abogoo 0joo 0o0o
a0j0j0(j)
gall 8joll 4oJ MAX
-
aBbGguaa aaaab goo uu 1aL0j.
a1 = 2,an + 1 = n2 + n3
Loojolololololololololol
ab = 10
a 100000000000000000000000000000000000000
.01
U
bao ao alo apocul 3
S木弟形 COBD = S COD + S_ BDO
.(sfoa sgo g jiao g jbcg Loo)cbo!
0.200 3 256164U
aalaa jao bslwloie waiall 8glll aoiu w
S OBC = S BOC + S_ CBA
山
00uJy uucuJy
aaiy aal ylae ae bai jll aie
- 0,0,0,0,0,0,0,0,0,0,0,0,0,0,0,0,0,0,0,0,0,0,0,0,0,0,0,0,0,0,0,0,0,0,0
aaii 1
1
ab = 10
i
1
Jooji "OFF" Jc [e] 0j, all a o j 0oai o oog b.2
EJIJJIJI JJIJUJI JJIJIJIJIJIJIJIJIJIJIJIJIJIJIJIJIJIJIJIJIJIJIJIJIJIJIJIJIJIJIJIJIJIJIJIJIJIJIJIJIJIJIJIJIJIJIJIJIJIJIJIJIJIJIJIJIJIJIJIJIJIJIJIJIJIJIJIJIJIJIJIJIJIJIJIJIJIJIJIJIJIJIJIJIJIJIJIJIJIJIJIJIJIJIJIJIJIJIJIJIJ
(5) j1 , j2 , j3 , k1 , k2 , k3 , ·s
Soll lalol golg.11 jol 3
(8) 可 .
Lgucu 10 do 15g61 goo
1u 100
u15.7) 0jall a j 60aill o 8o 8jll a j 60
- 1
aole cldus
Jlaljll Jl.
puiuuiiui iuius joo
- a1 = 12,a2 = 32,·s
J 1 J 1 1 1 1 1 1 1 1 1 1 1 1 1 1 1 1 1 1 1 1 1 1
a
a
.aaaljai gaaa
aJUy ju
(aldolololololololololololololololololololololololololololololololololololololololololololololololololololololololololololololololololololololol
151 (J0gll lIg g aai yal) 153 yssll
jglal plaewl jc gll cals lslw ic alld
1000 1000000000000000000000000000000000000
y 1 y
jlll l 100
ydu ydu jy d 1d l 1d 1d 1d 1d
jLwJbWJ:J !
.0g 1
:
g 1 Lw y
.01g561 Jolo
·L
S 与 D = I 且 S OBC = S BOC
Lgoo
.01j 100
.
. 1


GARANTIEKARTE
warranty card · garantiekaart · carte de garantie · scheda di garanzia · tarjeta de garantia · cartao de garantia · garantikort · karta gwarancyjna · zaruñni list · karta jamsta · carte de garantie · fapaunonha Kapta · zaruñni list · garancijski list · garanciajegy · rapahtiHmΦopMynp · fapaHTnHbI TaHO
juul 2021
DB 6003 CB
24 Monate Garantie gemäß Garantieerklarung - 24 months warranty according to warranty declaration - 24 maanden garantie volgens garantieverklaring - 24 mois de garantie selon la déclaration de garantie - 24 mesi di garanzia secondo la dichiarazione di garanzia - 24 measles de garantia de acquerdo con la déclaration de garantia - 24 menedes garanti i henhold til garantibetingelsene - 24 miese iace gwarancj na podstawie oswiadczenia gwarancjnego - záruka 24 miciću podle prohlášeni o záruche - 24 mjesecno jamstvo u skladu s jarmstvenom deklaracionj - 24 luni garantie conform déclaratioe de garantie - 24 mecija rapańica b cbofertcbrne c rapańicnHara deklapnca - 24-mescná záruka podla vhylánenia o záruche - 24-mesečna garancjica, skladno z garancijsko izjavo - 24 hónap garancia a garanciafeletetelekben leitart szerint - rapańir Na 24 micriji bijnóho napi npo rapańio - rapańir Na 24 mecna cornaccho zarneneHHbIM rapańHHbIM npaBnAM -
Kaufdatum, Handlsterpmel, Unterschrift - date of purchase, dealer stamp, signature - aankoopdzamum, dealtemspel, handelingen - date d'achat, tampon du concessionaire, signature - data del acquisto, timbre del rivenditore,irma - fecha de compa, sello del distribuidor,irma - data del comprar, carimbo do distribuidor, assinatura - kepodastrat, forhandlsterpmel, signatur - data-zakupu, pieciered spredawery, podais - datum zakeupeni, natzko proedgej, podis - datum kupovine, big trogova, petipis - cdata de achizje, tampila fumuzrovlui, seminatura - dara na ekymkra, lvevna i npodasana, plozma - datum nukupu, peclatka obchodniki/predajc podis - datum nukupu, big trogova, podis - vasiarsi datuma, kereskedes bebyegrjde, alasiras - da rata npodasiriin, nevka npodauan, plozma - da rata npodopertemji, ulamn npodaua, ploznuča
BOMANN®
www.bomann-germany.de
BOMANN®
C. Bomann GmbH
Internet: www.bomann-germany.de
Made in P.R.C.


- Symbols in These Instructions for Use
- WARNING:
- CAUTION:
- NOTE:
- General Notes
- Special Safety Instructions for This Appliance
- WARNING: Hot surface!
- Danger of burns!
- Intended Use
- Overview of the Components
- Not Shown
- Notes on Use
- Unpacking
- Electrical Connection
- Connected Wattage
- CAUTION: Overload!
- Temperature Control on the Iron (7)
- OFF
- MAX
- Water
- Operation
- Before Initial Use
- Ironing without Steam
- Steam Ironing
- - Spray Function (
- - Vertical Steam Function
- - How Can I Replenish the Water During Operation?
- When You Have Finished
- Self-Cleaning
- Cleaning
- Technical Data
- Disposal
- Meaning of the Symbol "Dustbin"
- Instrukcja obslugi
- Usuwanie
- ПИМЕЧАЙ:
- 06uue 3ameyauHn
- IPEDYUNPEXDEHNE:
- Oco6bIe yka3aHnI NO TexHnke 6e30nacHOCTN DnI 3TOrO yCTpO'cTBA
- #
- jglj jolj
- A
- 4k - 1 = 0
- J
- :
- 4ab = 10
- 4ab = 5a
- Jz
- ab = 10
- 山
- 1
- i
- jlll l 100
- GARANTIEKARTE
- DB 6003 CB
- BOMANN®
Brand : BOMANN
Model : DB 6003 CB
Category : Iron