
DMR050 - Radio MAKITA - Free user manual and instructions
Find the device manual for free DMR050 MAKITA in PDF.
| Product Type | AM/FM Radio with LED Flashlight |
| Brand | Makita |
| Model | DMR050 |
| Power Supply | Li-ion battery 14.4 V or 18 V (Makita) |
| AM Frequency Range | 522 - 1,629 kHz |
| FM Frequency Range | 87.5 - 108 MHz |
| Speaker | Diameter 51 mm, 8 ohms, 3 W |
| Output Power (18 V) | 3.0 W |
| Flashlight | LED 1.4 W x 3 |
| Dimensions (with BL1430 battery) | 263 x 75 x 196 mm |
| Weight (with BL1415 battery) | 0.95 kg |
| Weight (with BL1430 battery) | 1.14 kg |
| Radio only battery life (BL1415) | Approximately 11 hours |
| Radio only battery life (BL1830) | Approximately 25 hours |
| Flashlight only battery life (BL1415) | Approximately 3.5 hours |
| Radio + flashlight battery life (BL1415) | Approximately 2.5 hours |
| Number of presets | 3 per waveband (AM/FM) |
| Tuning methods | Scan, manual, presets |
| LCD backlight | Yes, key activation, duration 10 seconds |
| Maintenance | Clean with a soft, dry cloth. Do not use solvents. |
| Safety | Use only genuine Makita batteries. Do not immerse. Avoid metal dust. |
| Repairability | Refer to an authorized Makita after-sales service center. |
| Battery indicator | Icon on LCD screen and indicators on battery (model with letter B) |
| Included accessories | Battery and charger not included (depending on version) |
Frequently Asked Questions - DMR050 MAKITA
User questions about DMR050 MAKITA
0 question about this device. Answer the ones you know or ask your own.
Ask a new question about this device
Download the instructions for your Radio in PDF format for free! Find your manual DMR050 - MAKITA and take your electronic device back in hand. On this page are published all the documents necessary for the use of your device. DMR050 by MAKITA.
USER MANUAL DMR050 MAKITA
GB Flashlight Radio Instruction manual
natural_image
Line drawing of a Makital brand light bulb device (no text or symbols on body)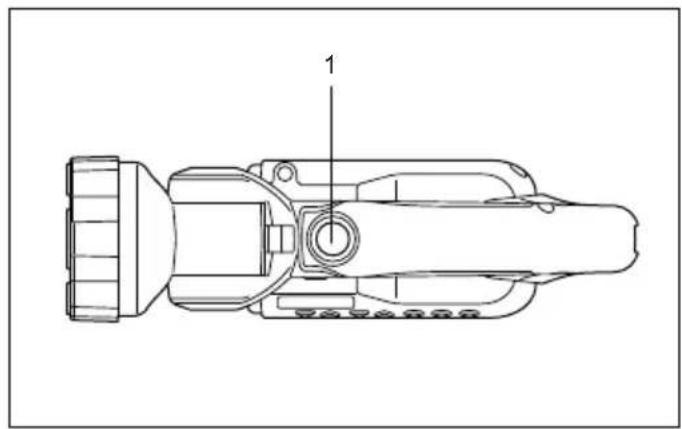
1
2
3
4
5

6
7
8
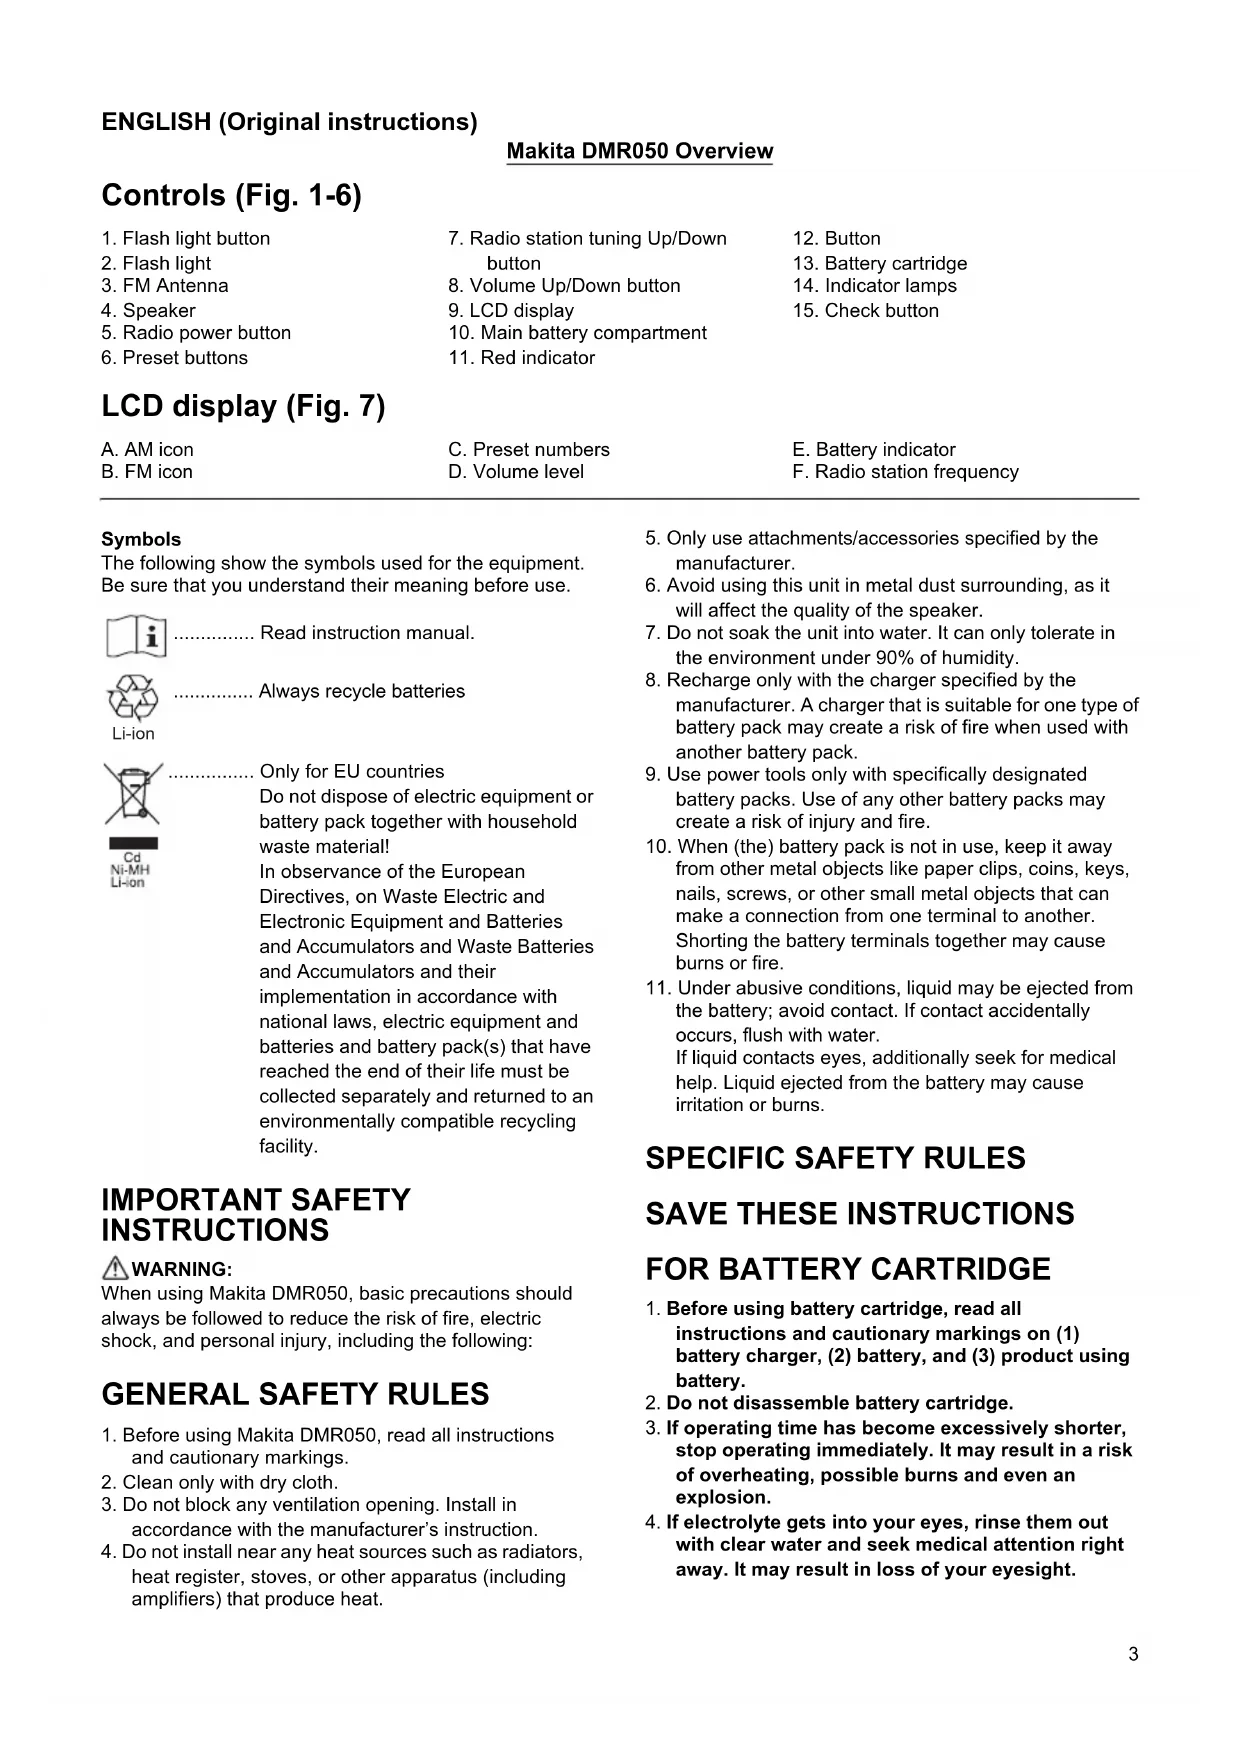
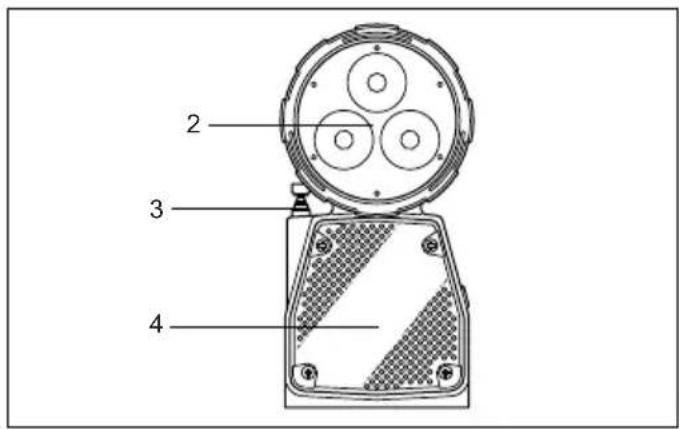
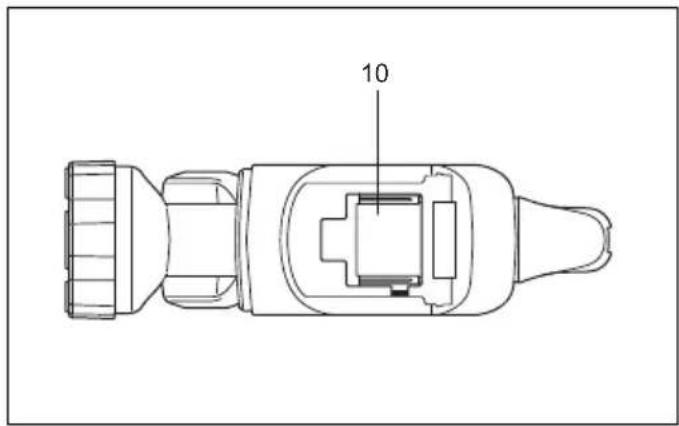
Controls (Fig. 1-6)
- Flash light button
- Flash light
- FM Antenna
- Speaker
- Radio power button
-
Preset buttons
-
Radio station tuning Up/Down button
- Volume Up/Down button
- LCD display
- Main battery compartment
-
Red indicator
-
Button
- Battery cartridge
- Indicator lamps
- Check button
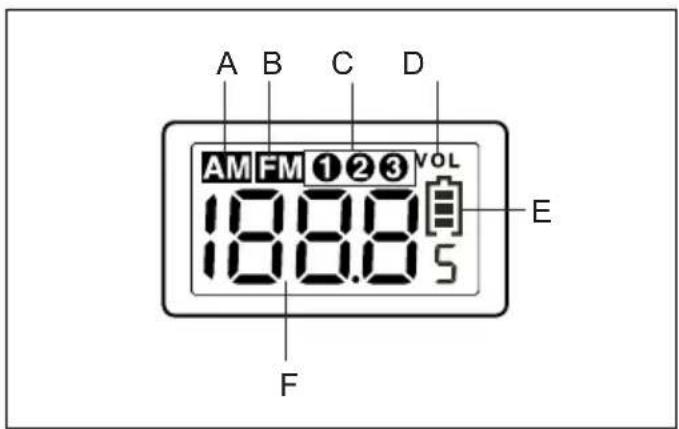
LCD display (Fig. 7)
A. AM icon
B. FM icon
C. Preset numbers
D. Volume level
E. Battery indicator
F. Radio station frequency
Symbols
The following show the symbols used for the equipment. Be sure that you understand their meaning before use.

Read instruction manual.

Always recycle batteries
Li-ion

Only for EU countries
Do not dispose of electric equipment or battery pack together with household waste material!
In observance of the European Directives, on Waste Electric and Electronic Equipment and Batteries and Accumulators and Waste Batteries and Accumulators and their implementation in accordance with national laws, electric equipment and batteries and battery pack(s) that have reached the end of their life must be collected separately and returned to an environmentally compatible recycling facility.
IMPORTANT SAFETY INSTRUCTIONS
WARNING:
When using Makita DMR050, basic precautions should always be followed to reduce the risk of fire, electric shock, and personal injury, including the following:
GENERAL SAFETY RULES
- Before using Makita DMR050, read all instructions and cautionary markings.
- Clean only with dry cloth.
- Do not block any ventilation opening. Install in accordance with the manufacturer's instruction.
-
Do not install near any heat sources such as radiators, heat register, stoves, or other apparatus (including amplifiers) that produce heat.
-
Only use attachments/accessories specified by the manufacturer.
- Avoid using this unit in metal dust surrounding, as it will affect the quality of the speaker.
- Do not soak the unit into water. It can only tolerate in the environment under 90% of humidity.
- Recharge only with the charger specified by the manufacturer. A charger that is suitable for one type of battery pack may create a risk of fire when used with another battery pack.
- Use power tools only with specifically designated battery packs. Use of any other battery packs may create a risk of injury and fire.
- When (the) battery pack is not in use, keep it away from other metal objects like paper clips, coins, keys, nails, screws, or other small metal objects that can make a connection from one terminal to another. Shorting the battery terminals together may cause burns or fire.
- Under abusive conditions, liquid may be ejected from the battery; avoid contact. If contact accidentally occurs, flush with water. If liquid contacts eyes, additionally seek for medical help. Liquid ejected from the battery may cause irritation or burns.
SPECIFIC SAFETY RULES
SAVE THESE INSTRUCTIONS
FOR BATTERY CARTRIDGE
- Before using battery cartridge, read all instructions and cautionary markings on (1) battery charger, (2) battery, and (3) product using battery.
- Do not disassemble battery cartridge.
- If operating time has become excessively shorter, stop operating immediately. It may result in a risk of overheating, possible burns and even an explosion.
-
If electrolyte gets into your eyes, rinse them out with clear water and seek medical attention right away. It may result in loss of your eyesight.
-
Do not short the battery cartridge:
(1) Do not touch the terminals with any conductive material.
(2) Avoid storing battery cartridge in a container with other metal objects such as nails, coins, etc.
(3) Do not expose battery cartridge to water or rain.
A battery short can cause a large current flow, overheating, possible burns and even a breakdown.
-
Do not store the tool and battery cartridge in locations where the temperature may reach or exceed 50^ C ( 122^ F).
-
Do not incinerate the battery cartridge even if it is severely damaged or is completely worn out. The battery cartridge can explode in a fire.
-
Be careful not to drop or strike battery.
-
Do not use a damaged battery.
-
The contained lithium-ion-batteries are subject to the Dangerous Goods Legislation requirements.
For commercial transports e.g. by third parties, forwarding agents, special requirement on packaging and labeling must be observed.
For preparation of the item being shipped, consulting an expert for hazardous material is required. Please also observe possibly more detailed national regulations.
Tape or mask off open contacts and pack up the battery in such a manner that it cannot move around in the packaging.
-
Follow your local regulations relating to disposal of battery.
-
To avoid risk, the manual of replaceable the battery should be read before use.
And the max discharging current of the battery should be greater than or equal to 8A.

CAUTION:
- Danger of explosion if battery is incorrectly replaced.
- Replace only with the same or equivalent type.
SAVE THESE INSTRUCTIONS.

CAUTION: Only use genuine Makita batteries.
Use of non-genuine Makita batteries, or batteries that have been altered, may result in the battery bursting causing fires, personal injury and damage. It will also void the Makita warranty for the Makita tool and charger.
Tips for maintaining maximum battery life
-
Charge the battery cartridge before completely discharged. Always stop tool operation and charge the battery cartridge when you notice less tool power.
-
Never recharge a fully charged battery cartridge. Overcharging shortens the battery service life.
-
Charge the battery cartridge with room temperature at 10^ C - 40^ C ( 50^ F - 104^ F). Let a hot battery cartridge cool down before charging it.
-
Charge the battery cartridge if you do not use it for a long period (more than six months).
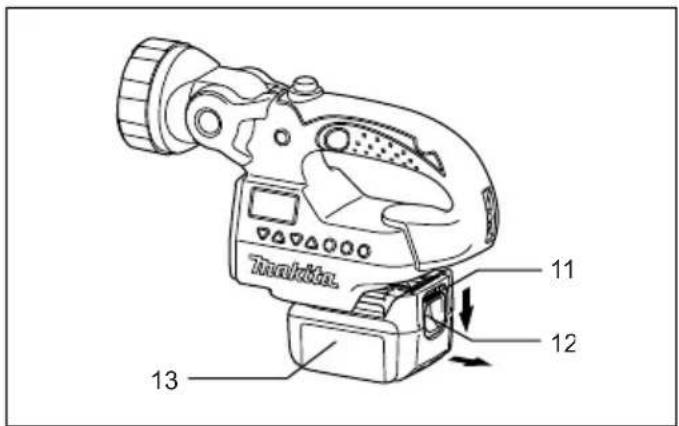
Installing or removing the slide battery cartridge (Fig. 5)
WARNING:
Recharge only with the charger specified for the battery. Use of any other batteries may create a risk of fire.
- Always switch off the tool before installing or removing of the battery cartridge.
- To remove the battery cartridge, slide it from the tool while pressing the button on the front of the cartridge.
- To install the battery cartridge, align the tongue on the battery cartridge with the groove in the housing and slip it into place.
Always insert it all the way until it locks in place with a click. If you can see the red indicator on the upper side of the button, it is not locked completely. Install it fully until the red indicator cannot be seen. If not, it may accidentally fall out of the tool, causing injury to you or to someone around you.
Battery life indication
There is a battery icon [icon] on the LCD indicating the battery life.
(b) battery life is more than 30%
( battery life is less than 30%
(: battery life is less than 10%
(:) battery is almost dying out. You should charge the battery immediately
Indicating the remaining battery capacity
(Only for battery cartridges with "B" at the end of the model number.) (Fig. 6)
Press the check button on the battery cartridge to indicate the remaining battery capacity. The indicator lamps light up for few seconds.
| Indicator lamps | Remaining capacity | ||
| Lighted Off Blinking | |||
| 75% to 100% | |||
| 50% to 75% | |||
| 25% to 50% | |||
| 0% to 25% | |||
| Charge the battery. | |||
| The battery may have malfunctioned. | |||
015658
NOTE:
- Depending on the conditions of use and the ambient temperature, the indication may differ slightly from the actual capacity.
Operating the radio

WARNING:
Avoid using this unit in metal dust surrounding, as it will affect the quality of the speaker.

WARNING:
Do not soak the unit into water. It can only tolerate in the environment under 90% of humidity.
This unit equips with three tuning methods- Scan tuning, Manual tuning and Memory presets recall.
Scan tuning
- Press the Radio power button [ ] to turn on the radio.
- Select the desired waveband (i.e. AM/FM) by brief pressing the Power button [1]
Note:
Make sure the antenna has been extended for the best FM reception. For AM band, rotate the radio horizontally to get the best signal.
Important:
Try to avoid operating the radio next to computer screen and other equipment which will cause interference to the radio.
- Press and hold the Radio Station Tuning Up/Down button [ ] over 0.5 seconds. The frequency will stop at the next available station.
- Press the Volume Up/Down button [] to get the optimal sound level. LCD display will show sound level changes (0-40 steps).
- To turn off the radio, press and hold the Power button [ ] until OFF is shown on the LCD display.
Manual tuning
- Press the Radio power button [ ] to turn on the radio.
- Select the desired waveband (i.e. AM/FM) by brief pressing the Power button [1]
Note:
Make sure the antenna has been extended for the best FM reception. For AM (MW) band, rotate the radio to get the best signal.
- Press the Tuning Up/Down Control [ ] until the desired frequency shown on the display.
- Press the Volume Up/Down button [] to get the optimal sound level.
- To turn off the radio, press and hold the Radio power button [ ] until OFF is shown on the LCD display.
Storing stations in presets memories
There are 3 memory presets for each waveband.
- Press the Radio power button [] to turn on the radio.
-
Tune to desired station using the steps previously described.
-
Press and hold the desired Preset button (approx. 3 sec) until the preset number stop flashing on the display. The preset number will appear in the display and the station will be stored under chosen preset button.
- Repeat this procedure for the remaining presets.
Note:
Stations stored in preset memories can be overwritten by following above procedures.
Recall stations from preset memories
- Press the Radio power button [] to turn on the radio.
- Select the desired waveband.
- Press the desired Preset button, the preset number and station frequency will appear in the display.
System reset
If your radio fails to work properly, or some digits on the display are missing or incomplete, carry out the following procedure.
Note:
To reset the system, you must put the radio in OFF mode.
- Press the Radio power button [ ] to turn off the radio.
- Press and hold both the preset button 3 [] and the Radio power button [] for approximately 5 seconds. When the LCD shows a display of all the icons, all the preset memories are back to factory default.
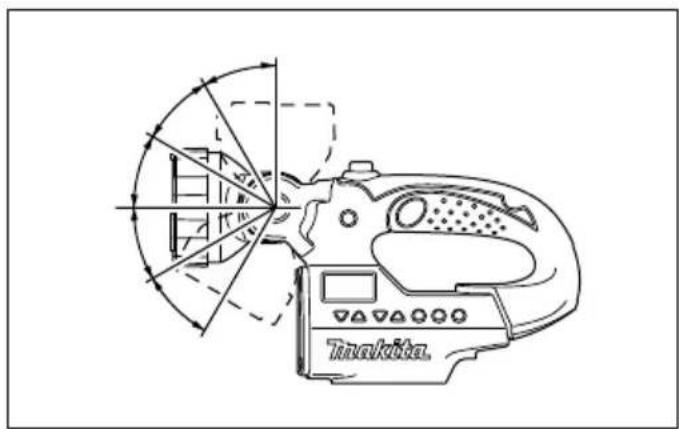
Using flash light (Fig. 8)
WARNING:
To reduce the risk of injury, do not look directly into the light when the work light is on.
WARNING:
To reduce the risk of injury, DO NOT operate work light without bezel assembly in place.
Using and adjusting the pivot head
Press the flash light button [] to switch on/off the flashlight when the radio is either on or off.
Note:
The pivot head can pivot to a range of 150 degrees and can be adjusted in 6 stages. Pivot head to desired position. Allow the detent to snap into place.
Important:
Do not forcibly pivot the head.
LCD back light
Press any control buttons, LCD display will illuminate for approx. 10 seconds.
Specifications
| Model DMR050 | ||||
| Power source D.C.14.4 V/18 V | ||||
| LED 1.4 W x 3 | ||||
| Tuning Frequency Range | AM: 522-1,629 kHz | |||
| FM: 87.5-108 MHz | ||||
| Speaker ø51 mm 8 Ω 3 W | ||||
| Output Power (18 V) 3.0 W | ||||
| Only Radio Only Light Radio/Light | ||||
| Operating time(with radio output power 100 mW) | BL1415 Approx. 11 hours Approx. 3.5 hours Approx. 2.5 hours | |||
| BL1415N Approx. 15 hours Approx. 5.0 hours Approx. 3.5 hours | ||||
| BL1430/BL1430B | Approx. 25 hours Approx. 8.5 hours Approx. 6.0 hours | |||
| BL1440 | Approx. 30 hours Approx. 11 hours Approx. 8.0 hours | |||
| BL1450 | Approx. 42 hours Approx. 16 hours Approx. 11 hours | |||
| BL1460B Approx. 45 hours Approx. 17 hours Approx. 12 hours | ||||
| BL1815 Approx. 11 hours Approx. 3.5 hours Approx. 2.5 hours | ||||
| BL1815N | Approx. 11 hours Approx. 3.5 hours Approx. 2.5 hours | |||
| BL1820/BL1820B | Approx. 17 hours Approx. 5.5 hours Approx. 4.0 hours | |||
| BL1830/BL1830B | Approx. 25 hours Approx. 8.5 hours Approx. 6.0 hours | |||
| BL1840/BL1840B | Approx. 30 hours Approx. 11 hours Approx. 8.0 hours | |||
| BL1850/BL1850B | Approx. 38 hours Approx. 14 hours Approx. 10 hours | |||
| BL1860B Approx. 45 hours Approx. 17 hours Approx. 12 hours | ||||
| Dimension(With Battery BL1430) | 263 mm x 75 mm x 196 mm | |||
| Net weight | 0.95 kg (with battery BL1415/BL1415N) | |||
| 1.14 kg (with battery BL1430/BL1430B/BL1440/BL1450/BL1460B) | ||||
| 0.99 kg (with battery BL1815/BL1815N/BL1820/BL1820B) | ||||
| 1.23 kg (with battery BL1830/BL1830B/BL1840/BL1840B/BL1850/BL1850B) | ||||
| 1.29 kg (with battery BL1860B) | ||||
Maintenance
To maintain product safety and reliability, repairs, maintenance or adjustment should be carried out by a Makita Authorized Service Center.
CAUTION:
- Never use gasoline, benzine, thinner, alcohol or the like. Discoloration, deformation or cracks may result.
A. Symbol AM
B. Symbol FM
A. Ikona AM
B. Ikona FM

- Controls (Fig. 1-6)
- LCD display (Fig. 7)
- Symbols
- IMPORTANT SAFETY INSTRUCTIONS
- WARNING:
- GENERAL SAFETY RULES
- SPECIFIC SAFETY RULES
- SAVE THESE INSTRUCTIONS
- FOR BATTERY CARTRIDGE
- CAUTION:
- SAVE THESE INSTRUCTIONS.
- CAUTION: Only use genuine Makita batteries.
- Tips for maintaining maximum battery life
- Installing or removing the slide battery cartridge (Fig. 5)
- Battery life indication
- Indicating the remaining battery capacity
- NOTE:
- Operating the radio
- Scan tuning
- Important:
- Manual tuning
- Storing stations in presets memories
- Recall stations from preset memories
- System reset
- Using flash light (Fig. 8)
- Using and adjusting the pivot head
- LCD back light
- Maintenance
Brand : MAKITA
Model : DMR050
Category : Radio