CT2400 - Baby monitors Comtel - Free user manual and instructions
Find the device manual for free CT2400 Comtel in PDF.
Frequently Asked Questions - CT2400 Comtel
User questions about CT2400 Comtel
0 question about this device. Answer the ones you know or ask your own.
Ask a new question about this device
Download the instructions for your Baby monitors in PDF format for free! Find your manual CT2400 - Comtel and take your electronic device back in hand. On this page are published all the documents necessary for the use of your device. CT2400 by Comtel.
USER MANUAL CT2400 Comtel
natural_image
Two white electronic devices with control knobs and speaker lights, one displaying a digital display and the other showing a power interface (no text or symbols visible)Instruction manual 31-40
text_image
Technical diagram of a portable air purifier with labeled parts and control buttonstext_image
Diagram showing three connected devices with labeled parts, likely for electrical or diagnostic purposes.natural_image
Line drawings of three different types of medical or robotic devices with arrows indicating motion (no text or symbols)natural_image
Line drawings of three different types of medical or electronic devices with directional arrows indicating motion (no text or symbols present)text_image
Technical diagram of a portable electric fan with labeled parts including power supply, cable, and charging device.natural_image
Line drawing of a curved object with directional arrows indicating flow or movement (no text or symbols)VORSICHTSMASSNAHMEN
natural_image
Line drawing of a small electronic device with a coiled cable and terminal connector (no text or symbols)a.
b.
text_image
Comtel 01.25MM Bodewungsreleitung Mode d'amplicar Instructioni per l'uso Instruction manualf.
c.d.e.

Garantie\*
© Copyright by COMTEL AG – Switzerland
CE 1177 Ⓙ
FEHLERBESCHREIBUNG
text_image
Technical diagram of a portable air fryer with labeled parts and control buttonstext_image
Diagram showing two connected electrical devices with labeled parts, including a numbered connection points.natural_image
Line drawings of three different types of medical or robotic devices with arrows indicating motion (no text or symbols)natural_image
Line drawings of three different backpacks with directional arrows indicating movement (no text or symbols)natural_image
Line drawing of a curved surface with directional arrows indicating movement or flow (no text or symbols)MESURES DE SECURITE
Accessoires standards
natural_image
Line drawing of a connected electrical component with a coiled cable (no text or symbols)a.
b.
text_image
Comtel CT-2001 Bedienungsanleitung Morte d'empfer Instruzioni per l'uso Instruction manuelf.
c. d. e.

Garantie\*
© Copyright by COMTEL AG – Suisse
text_image
Technical diagram of a portable air conditioner with labeled parts and component annotationstext_image
Diagram showing two connected electrical devices with labeled parts, including a numbered connection points.natural_image
Line drawings of three different mechanical device components with arrows indicating motion (no text or symbols)natural_image
Line drawings of three different backpacks with seatbelt and seatbelt device, showing a stepwise shift (no text or symbols)text_image
ria ③ ⑯ ⑰ ⑰natural_image
Line drawing of a curved surface with directional arrows indicating movement or flow (no text or symbols)PRECAUZIONI
natural_image
Line drawing of a small electronic device with a coiled cable and terminal connector (no text or symbols)a.
b.
text_image
COMTEL C:\2016 Bestanungsanleitung 31.41 Mode d'ampel 59.71 Instructioni per l'uso 28.48 Instruction manual 27.48f.
c.d.e.

© Copyright by COMTEL AG – Svizzera
Thank you for purchasing our CT-2400 digital baby monitor. Your unit has been manufactured and checked under the strictest possible quality control to ensure that each monitor leaves the factory in perfect condition. In the unlikely event you find any defects or have any problem, please contact our dealer or service center.
Please read this manual carefully to obtain maximum performance and extended service life from the unit.
Features
-Full digital technique operating in the 863-870MHz with zero interference
-Automatic hop and search for free channel
-Operating range 800m in open space
-Low radiating power (only 10% of normal DECT or 50% of ECO DECT)
-Night light on baby unit
-Low battery alert on both baby and parent unit
-Digitally adjustable microphone sensitivity
-Audio and visual alert for out of range
-Digital volume control
-LED sound level meter
-Optional Li battery and charger stand for parent unit
WARNING
The CT-2400 should not be regarded as a medical device. Premature babies or those considered to be at risk should be under the supervision of your doctor or health personnel.
Direct supervision of your baby at a regular interval by a responsible adult is strongly recommended in addition to using the CT-2400.
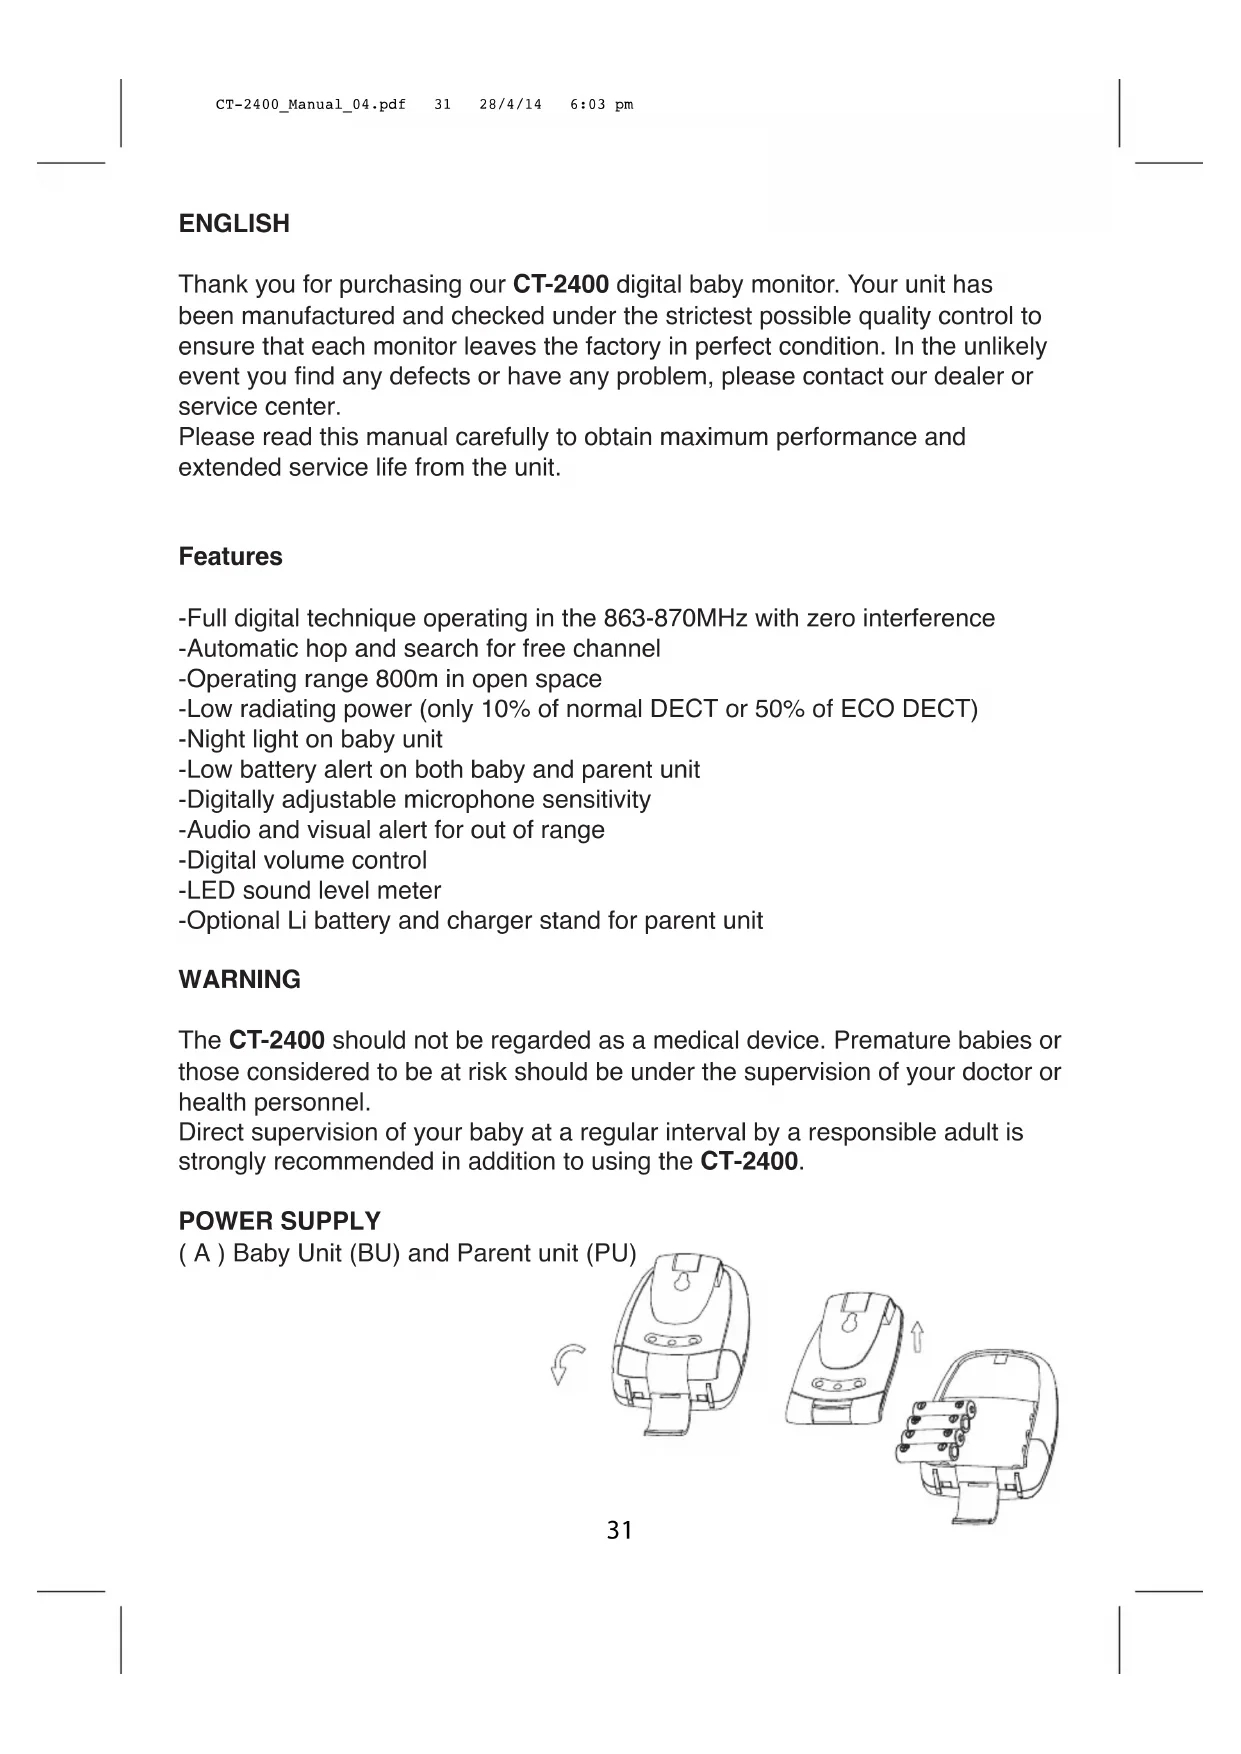
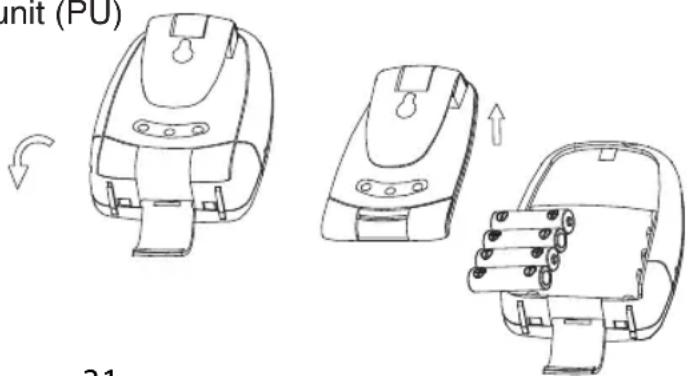
POWER SUPPLY
( A ) Baby Unit (BU) and Parent unit (PU)
text_image
init (PU) 211. Operation from batteries
Slide open the battery door. Insert 4 pieces AAA size (UM-3) alkaline batteries into the compartment. Observe correct polarities indication.
N.B. For best performance, do not mix use old and new batteries or alkaline and rechargeable batteries.
text_image
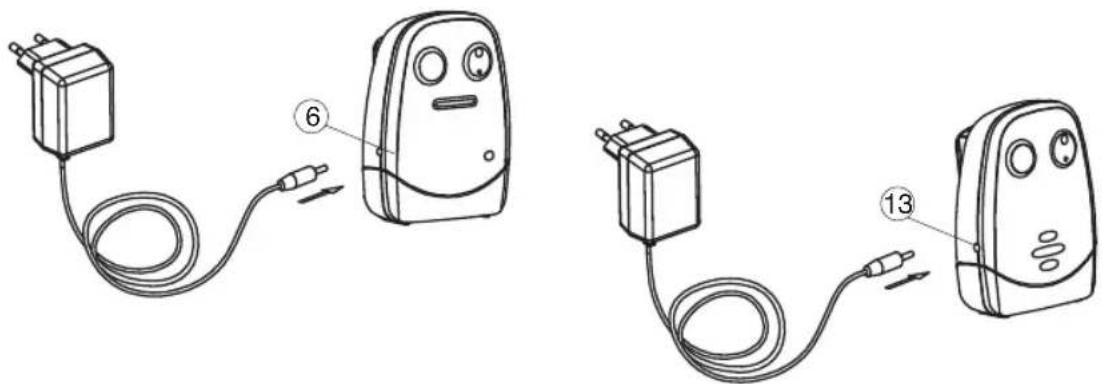
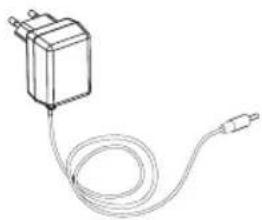
Diagram showing two connected electrical devices with labeled parts, likely for electrical or diagnostic purposes.2. Operation using AC adapter
The unit can be operated on AC mains using the supplied 6V AC adapter. Connect the output plug of adapter to DC jack 6 or 13, make sure the polarity is correct. The power supply from the battery will be cut off once the adapter's output plug is inserted into DC jack.
(B) Parent Unit (PU) equipped with Li battery
natural_image
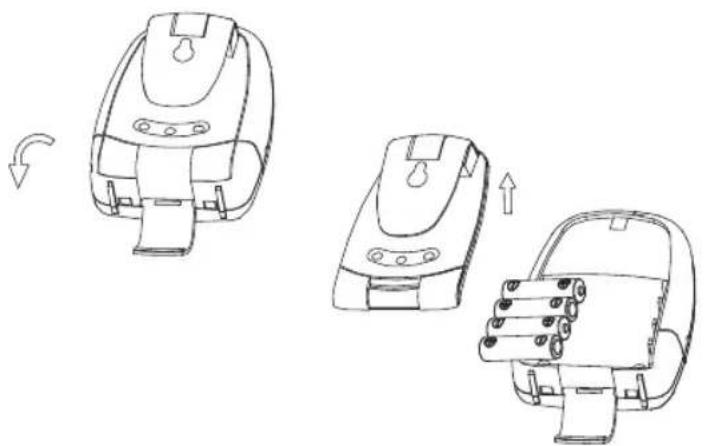
Line drawings of three different mechanical device components with arrows indicating motion (no text or symbols)1. Operation from battery pack
The Li polymer battery pack is partially charged and already installed in the unit.
To exchange battery pack, slide open the battery door in direction as shown, take out the battery pack and disconnect from socket.
text_image
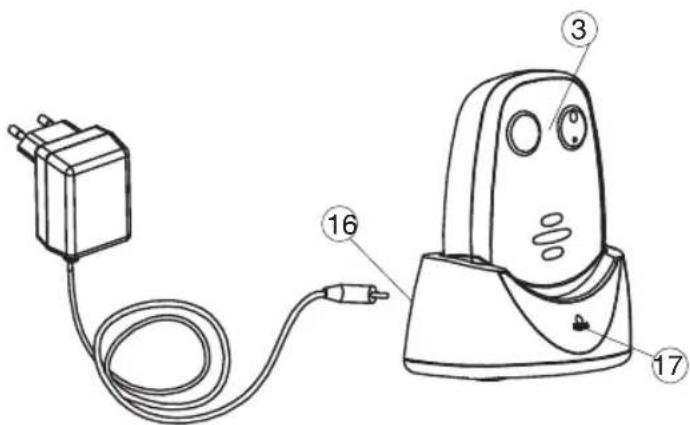
Technical diagram of an electric shock absorber with labeled parts including power supply, cable, and terminal components2. Operation from AC mains using the charger stand
Connect the output plug of supplied 6V AC adapter to DC jack 16 of charger stand, make sure the polarity is correct. With the unit being switched on, place it into the charger stand. The charging indicator 17 should light up red. Adjust the position of unit in case the indicator 17 does not light up. During charging, the power indicator 3 will have both red and green colour light up. Once the battery is fully charged up (normally it takes around 4 hours), the indicator 3 turns steady green only. Either you can take the unit out or keeping placing it in the charger stand will cause no damage to the battery. In the latter case, when the battery is being consumed and voltage falls to a certain level, the charger stand will automatically start charging up the battery again.
Note: Before using the parent unit for the first time, charge up the Li polymer battery for at least four hours.
CAUTION: BESURE THE BATTERY IN THE PARENT UNIT IS RECHARGEABLE TYPE BEFORE PLACING IT IN THE CHARGER STAND, OTHERWISE EXPLOSION MAY RESULT.
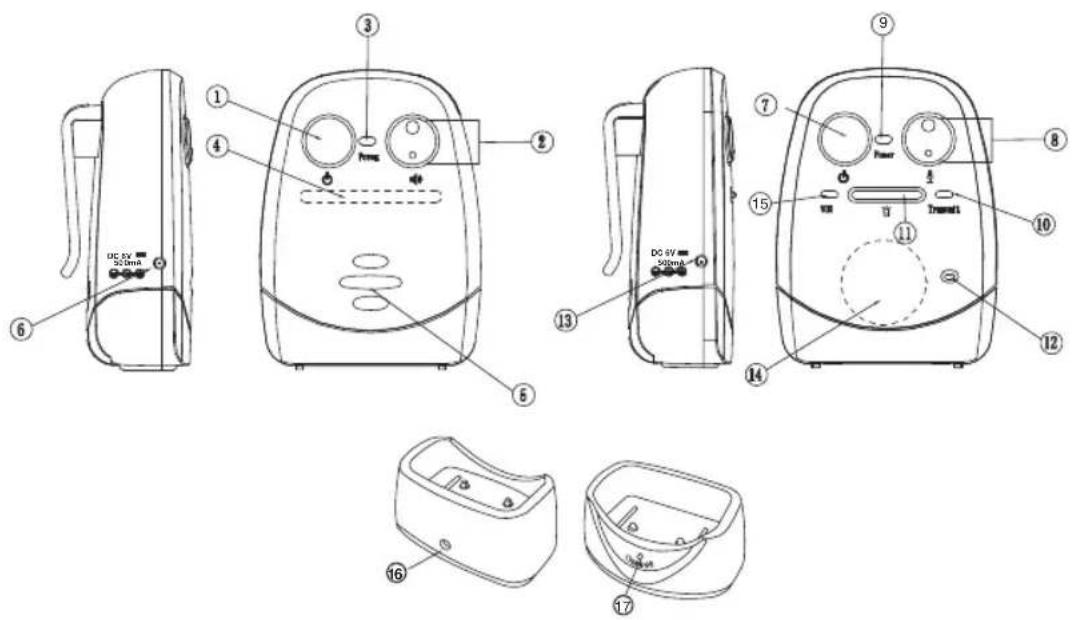
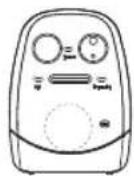
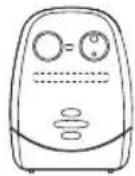
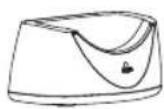
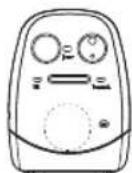
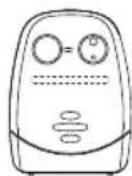
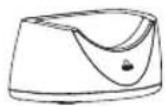
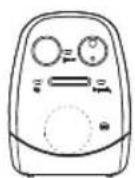
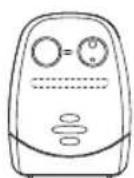
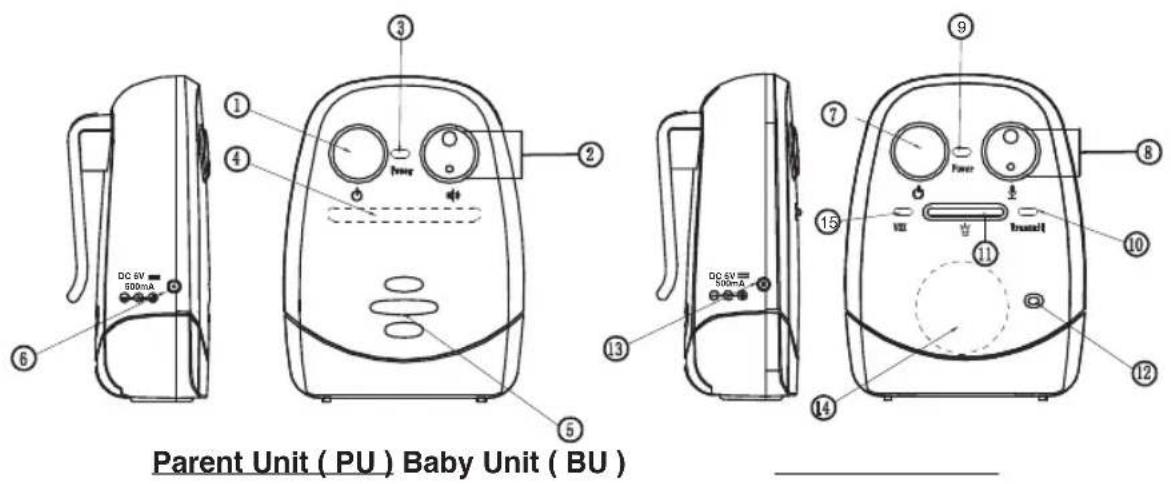
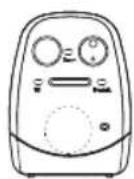
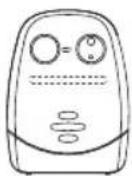
CONTROLS LAYOUT
text_image
Parent Unit ( PU ) Baby Unit ( BU ) DC 6V 300mA DC 6V 300mA DC 6V 300mA DC 6V 300mA DC 6V 300mA DC 6V 300mA DC 6V 300mA DC 6V 300mA DC 6V 300mA DC 6V 300mA DC 6V 300mA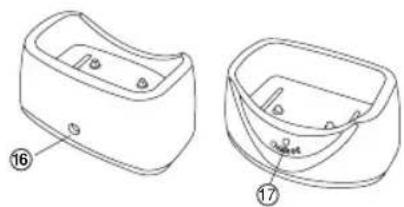
natural_image
Technical line drawing of a two-part mechanical housing or enclosure with labeled parts (no text or symbols present)Charger Stand
• Power ON/OFF switch
- Up /Down button
• Power/battery low indicator
- LED level meter
- Speaker
- DC jack
• Power ON/OFF switch
- Up/Down button
• Power/battery low indicator
- Transmit indicator
- Night light switch
- Microphone
- DC jack
- Night light
• Night light vox indicator
- DC jack
- Charging indicator
PAIRING
This process is to match the PU with BU so that they can communicate with each other while no other devices (even baby monitor of identical model) can interfere with you or receiving your signal.
The PU and BU are already paired when they are shipped from factory.
However, in case you still encounter interference, perform pairing again to achieve better privacy
- Press and hold the down button 2 of PU.
- Switch on the unit by long press of button 1. The power indicator 3 should start flashing green. Release both buttons.
- Press and hold the down button 8 of BU.
- Switch on the unit by long press of ⏻ button 7. The power indicator 9 should start flashing green. Release both buttons.
- Now press again down button 8 of BU, if pairing is successful, two beep sound will be heard in PU. The power indicator 3 and 9 of both BU and PU should show steady green.
- The baby monitor is now ready for operation and probably a feedback noise will be heard in speaker 5 of PU.
- In case the PU and BU cannot communicate with each other, repeat pairing process again.
OPERATION
Baby unit (BU)
- Place the BU about 1 m from the crib with the microphone 12 facing towards the baby. Switch on the unit by long press of ⏻ button 7, the power indicator 9 will show steady green. If this indicator starts flashing green, the battery level becomes low. Either replace with new battery or change using the supplied AC adapter as power supply.
-
Adjust the microphone sensitivity using the button 8 such that the unit will be set to transmit whenever the microphone 12 picks up a sound at your desirable loudness level. The transmit indicator 10 will blink every time these buttons are pressed, more number of blinks means the microphone is more sensitive to sound (maximum is 5 blinks and minimum is 1 blink). Press ● to increase and ● to reduce microphone sensitivity.
-
Once BU is in transmit mode, the transmit indicator 10 will light up red. The unit will return standby mode a few seconds after the microphone 12 stops picking up any sound and the transmit indicator 10 goes off.
-
The night light 14 can be set to permanently ON or vox (voice activated) by short press of the button 11 in following manner:

flowchart
graph LR
    A["OFF"] --> B["short press"]
    B --> C["Night light ON Intensity level 1"]
    C --> D["short press"]
    D --> E["Night light ON Intensity level 2"]
    E --> F["short press"]
    F --> G["Night light ON Intensity level 3"]
    G --> H["short press"]
    H --> I["OFF"]
    style A fill:#f9f,stroke:#333
    style B fill:#f9f,stroke:#333
    style C fill:#f9f,stroke:#333
    style D fill:#f9f,stroke:#333
    style E fill:#f9f,stroke:#333
    style F fill:#f9f,stroke:#333
    style G fill:#f9f,stroke:#333
    style H fill:#f9f,stroke:#333
Under VOX mode, the night light vox indicator 15 will light up. Once the microphone 12 picks up a sound, the night light 14 will be turned on and will fade off automatically a few seconds after the microphone 12 stops picking up any sound.
Parent unit (PU)
- Switch on the unit by long press of ⏻ button 1. The power indicator 3 will show steady green. If this indicator starts flashing green, the battery level becomes low.
Either replace with new battery or change using the supplied AC adapter as power supply. (For PU equipped with Li battery, place it inside the supplied charger stand to charge up the battery).
The LED level meter 4 will show the battery status for around 3 sec whenever the power is switched on, then it resumes to show the received signal level from baby unit.
Under normal operation, short press of the ⏻ button 1 at any time will show the battery status on the LED level meter 4.
-
Place the PU at a reasonable distance away from BU to avoid feedback. Too close a distance will create a screeching sound at the speaker 5.
-
Once the PU receives a signal, the LEDs in the level meter 4 will light up. The louder the baby's voice, the more number of LED will be lighted up. This feature is useful to alert the parents of baby's cry in case the volume of speaker 5 is turned low to keep the environment quiet,
-
The speaker volume can be adjusted using the button 2. The LED level meter 4 will show the setting. More LEDs light up means higher volume (maximum 5 LED).
When no LED lights up, the speaker 5 is totally muted. Press ● button to increase and button to reduce volume.
- Once the PU is beyond the communication range of the BU for over 30 sec, an out of range alarm will be heard together with all LEDs of level meter 4 start flashing to alert the parents. The alarm will only go off when the PU falls back within the communication range of BU.
To turn off the alarm sound, press either ● or ● of button 2. The LEDs of level meter 4 still keep flashing until the PU falls within the communication range of BU.
N.B. This alarm will also be heard in case the BU is switched off, or its battery has run down, or its power is cut off.
- Each time button 8 is pressed, a beep tone will be heard to validate your entry being recognized by the unit.
Both the BU and PU can be carried be around using the belt clip. To remove the clip, follow diagram as shown.
PRECAUTIONS
- Use only the supplied AC adapters, use of other adapters may cause damage to the CT-2400 baby monitor.
- When not using the monitor for a long period of time, remove all batteries from the PU and BU to avoid damage due to battery leakage.
- Disconnect the AC adapter from the wall outlet when the monitor is not to be operated.
- The CT-2400 is best performed within a temperature range of 0^ C to +50^ C
- Do not leave the monitor expose to strong sunlight for a long time or nearby any heat source, moisture and excessive environment.
- Do not open the cabinet, no serviceable parts inside.
STANDARD ACCESSORIES
a. 6V AC adapters x 2
b. Charger stand for PU (optional)
c. Baby unit
d. Parent unit
e. 3.7V Li polymer rechargeable battery pack
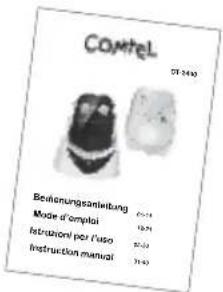
f. User manual
natural_image
Line drawing of a connected electrical component with a coiled cable (no text or symbols)a.
b.
text_image
Comtel CT 2440 Bezahlungenanleitung 6-11 Mode d'emploi 18-21 Instruzioni per l'uso 35-32 Instruction manual 31-40f.
c. d. e.

COMTEL AG, Rotzbergstrasse 7, CH-6362 Stansstad
Tel. 041 610 72 72 Fax: 041 610 72 74
www.comtel.ch
E-Mail: info@comtel.ch
CE 1177 Ⓙ
© Copyright by COMTEL AG – Switzerland
TROUBLE SHOOTING GUIDE
| Problem | Possible Causes | Solution |
| BU has no transmission | Mic sensitivity is too low | Adjust mic sensitivity higher using up button 8 |
| Battery has run down or switching power supply improperly connected | Replace with new battery or check connection | |
| BU always on | Mic sensitivity is too high | Adjust mic sensitivity lower using down button 8 such that transmitter become voice activated |
| Out-of-range alarm always on | BU battery has run down | Replace with new battery or use switching power supply |
| Distance between BU and PU exceeds the operating range | Move the BU and PU closer together | |
| Pairing is not successful | Perform pairing again | |
| Always showing low battery alert | Battery has run down | Recharge battery using charger stand or replace with new battery or use AC adapter |
| No battery inside PU | Put battery pack into battery compartment | |
| Battery pack is damaged | Replace with new battery pack | |
| Battery life is short | Night light is permanently switched on | Switch off night light |
| Many static noise and interference | BU is located near other electrical appliances | Remove the electrical appliances or re -locate the BU far away from source of interference |
| Too short communication range | Many steel structures between BU and PU | Re -locate BU & PU |
| BU battery has run down | Replace with new battery or use AC adapter as power supply |
Timco Engineering Inc.
P.O.Box 370
NEWBERRY, FL32669
U.S.A