
ICRP211 - Alarm clock radio Ices - Free user manual and instructions
Find the device manual for free ICRP211 Ices in PDF.

Frequently Asked Questions - ICRP211 Ices
User questions about ICRP211 Ices
0 question about this device. Answer the ones you know or ask your own.
Ask a new question about this device
Download the instructions for your Alarm clock radio in PDF format for free! Find your manual ICRP211 - Ices and take your electronic device back in hand. On this page are published all the documents necessary for the use of your device. ICRP211 by Ices.
USER MANUAL ICRP211 Ices
natural_image
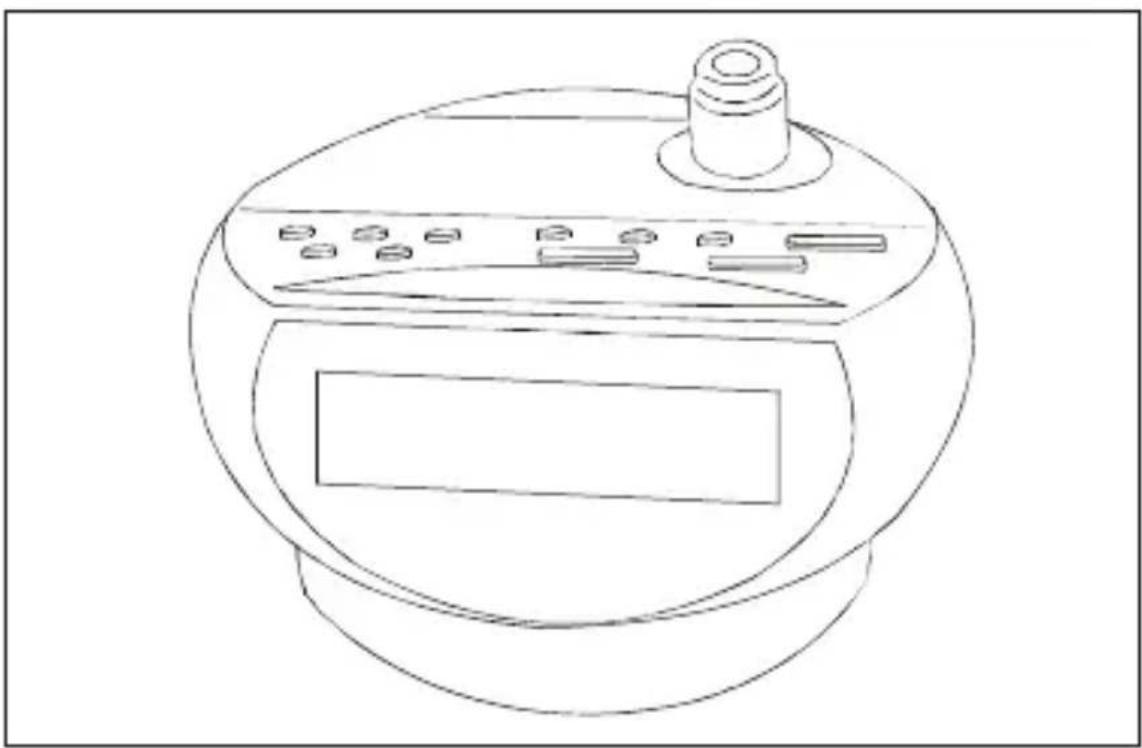
Line drawing of a kitchen appliance with a top handle and front panel (no text or symbols)INSTRUCTION MANUAL
SAFETY PRECAUTIONS
This is a delicate electronic unit;
* The apparatus shall not be exposed to dripping or splashing and that no objects filled with liquids, such as vases, shall be placed on apparatus.
* A minimum distance of 5cm should be left around teh apparatus for sufficient ventilations.
* No naked flame sources such as lighted candles should be placed on the apparatus.
* When replacing the battery, be sure to dispose of the old one in accordance with the current regulations. To this end, deposit it at a point which has been provided for this purpose, in order that it will be disposed of in a safe and environmentally-friendly way.
* The apparatus can be worked regularly between 10 to 40°C.
* To prevent fire or shock hazard, do not expose this appliance to rain or moisture.
* The ventilation should not be impeded by covering the ventilation openings with items, such as newspapers, table-cloths, curtains, etc.
WARNINGS
* To be completely disconnect the power input, the mains plug of apparatus shall be disconnected from the mains.
* The mains plug should not be obstructed OR should be easily accessed during intended use.
* The use of apparatus in moderate climates.
ATTENTION
To reduce the risk of electric shock, do not remove the cover. There are no user serviceable parts inside the unit.
Refer all servicing to qualified
personnel.
The lightening flash with arrowhead symbol within the triangle is a warning sign alerting the user of “dangerous voltage” inside the unit.
The exclamation point within the triangle is a warning sign alerting the user of important instructions accompanying the products.
WARNING
To reduce the risk of fire or electric shock, do not expose this appliance to rain or moisture.
* The marking information is located at the bottom side of apparatus.
* Battery shall not be exposed to excessive heat such as sunshine, fire or the like.
CAUTION
RISK OF ELECTRIC SHOCK DO NOT OPEN

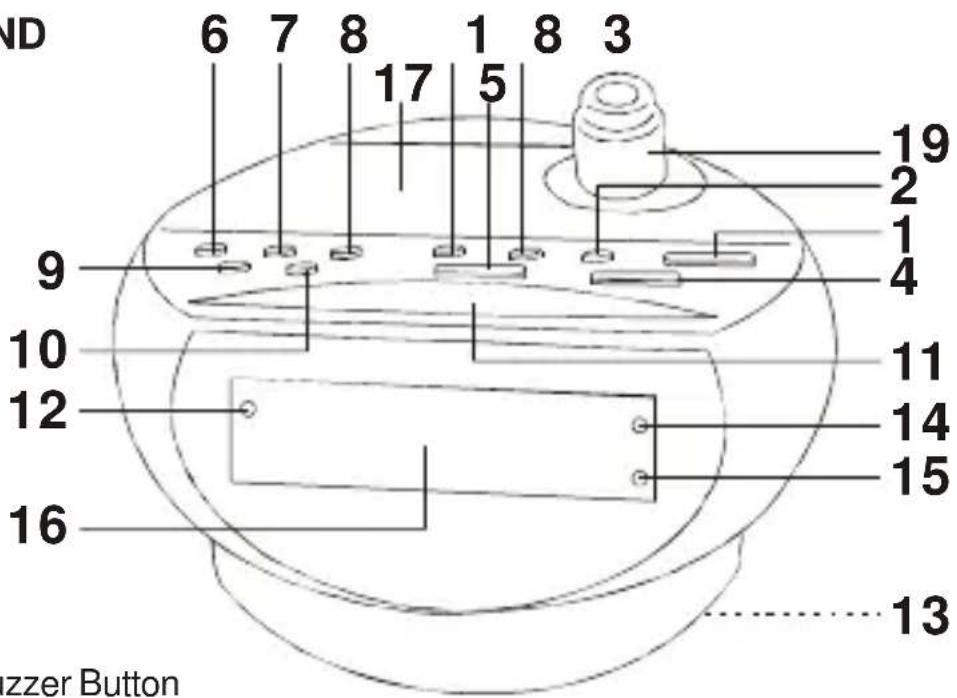
CONFIGURATION AND FUNCTIONS :
- ON Button
- Volume Up Button
- Volume down / Alarm Button
- Minute / Tuning Up Button
- Hour / Tuning Down Button
- Time Set / Memory Button
- Band Button
- Alarm Off Button
- Preset Button
- Snooze / Sleep Button
- Alarm Indicator
- Battery Compartment
- AM Indicator
-
FM Indicator
-
Alarm Mode - Radio / Buzzer Button
text_image
ND 6 7 8 1 8 3 17 5 9 10 12 16 19 2 1 4 11 14 15 13 zzer Button-
LED Display
-
Built-in Speaker
-
Projector ON / OFF Button
-
Projector - Focus Knob
The marking plate is indicated on the back side of the unit.
CONNECTING THE UNIT
Insert the wired plug correctly into a power outlet. The clock display will show "0 : 0 0" and you need to set the correct time. It will also return to show "0 : 0 0" if there has been a power out and no back-up battery is fitted.
TO SET THE TIME
Make sure the unit is in Standby mode, that means the AM or FM Indicator is not light on.
-
Press once the Time Set Button. Then the current time will be flashing.
-
Press the Hour Button to adjust the hour digit.
-
Press the Minute Button to adjust the minute digit.
-
Press once again the Time Set Button when it reaches the right time. Then the current time will stop flashing.
-
Press once the Time Set Button. Then the current time will be flashing.
- Press the Hour Button to adjust the hour digit.
- Press the Minute Button to adjust the minute digit.
- Press once again the Time Set Button when it reaches the right time. Then the current time will stop flashing.
RADIO OPERATION
- Press the ON Button until the display change to radio mode.
-
Select the AM or FM band by pressing the BAND Button. Then the AM or FM indicator will light on.
-
Tune a station by pressing the TUNING UP/DOWN Button. Pressing either TUNING UP/DOWN Button for more than 0.5 seconds to activate the automatic tuning mode. The automatic tuner will scan up or down and lock onto the next station. If the automatic tuning does not precisely tune into a radio station, press the TUNING UP/DOWN Button to adjust the tuning.
-
Adjust the volume by pressing VOLUME UP/DOWN Button. The volume indicator will be changing and represent the volume level.
-
To turn off the radio, press once the ON Button then it will return to Standby mode.
-
After tuned into a radio station, the unit will return to show the current time instead of the radio frequency after a few seconds. If you want to check the radio frequency, press once the TUNING UP or TUNING DOWN button then the unit will show the radio frequency for a few seconds.
STORES PRESET STATIONS
Up to 20 stations (10 AM and 10 FM) can be stored in memory :
- Tune to a desired station as described in above.
- Press the Time Set / Memory Button, the Preset Station Number will be flashing.
- Select your desired Preset Station Number you wish to store your station while the Number is flashing by pressing once or more times the Preset Button. When the desired number is flashing, press once again the Time set / Memory Button. Then the Number will stop flashing. Now the station is stored in the desired preset station. To replace a station stored in the memory, repeat all the stages described above. The new station will replace the previously stored one.
To receive Preset Stations :
- Under RADIO mode, select the waveband by pressing the Band Button.
- Press once or more times the Preset Button to select the desired Preset Station Number.
TO SET THE ALARM TIME AND THE ALARM MODE
Make sure the unit is in Standby mode, that means the AM or FM Indicator is not light on.
- Press once the Alarm Button. Then the alarm time will be flashing.
- Press the Hour Button to adjust the hour digit.
-
Press the Minute Button to adjust the minute digit.
-
Press once or more times the Alarm Mode Button to select which type of alarm you like as below :-
a) AM Indicator lights on : AM radio selected as alarm type.
b) FM Indicator lights on : FM Radio selected as alarm type.
c) AM and FM Indicators both light off : Buzzer selected as alarm type.
- Press once again the Alarm to complete the alarm time setting and the alarm time will stop flashing.
USE THE ALARM
Make sure the unit is in Standby mode, that means the AM or FM Indicator is not light on.
- Press once the Alarm Button to turn on the Alarm Indicator if the Alarm Indicator is already turned off.
- When it reaches the alarm time, you can hear the radio or buzzer sound depending on which alarm type you have selected before.
- Press once the Alarm Off Button to turn off the alarm sound then the radio or buzzer sound will be off.
- To canel the alarm function, press and hold the Alarm Button for about 2 seconds during the unit is in standby mode. Then the Alarm Indicator will light off.
Note : If you select AM or FM Radio as alarm type, make sure you have turned a desired station before using this alarm type.
SNOOZE OPERATION
To obtain approximatively further 9 minutes sleep, press the SNOOZE Button after the radio or the buzzer switch on at the preset wake-up time. This will silence the radio or the buzzer for 9 minutes. You can repeat this operation for up to about 1 hour.
GOING TO SLEEP WITH THE SOUND OF THE RADIO
- Press the Sleep Button once. This gives 90 minutes playing time of the radio.
- Press once again the Sleep Button will descrase the sleep time by 10 minutes.
GOING TO SLEEP AND WAKENING TO THE SOUND OF THE UNIT
-
Repeat steps described in "TO SET THE ALARM TIME "and "USE THE ALARM".
-
Press the SLEEP Button and set the period of time you want to listen to the radio before it switches off automatically.
-
The radio is now programmed to turn itself off after you go to sleep and the alarm will on automatically at the preset wake-up time.
USE THE PROJECTOR
- Press once the Projector ON / OFF Button to turn on the projector.
- The projector will project the current time straightly to a wall or ceiling.
- Turning the Pojector - Focus Knob to obtain a more clear image of the time projecting on a wall or ceiling.
- Press once more the Projector ON / OFF Button to turn off the projector.
BATTERY BACK-UP
Note: This clock radio has a back-up power system to ensure continuous operation of the clock and alarm in the event of a power failure. The switch from AC to battery power is automatic. However, under battery power, the clock display will not illuminate even though the clock maintains the correct time and stores the alarm time in the memory. The system operates on 3x1.5V "AA" size batteries (not included). We recommend the use of a long life battery to ensure maximum performance.
CHECKING THE TIME DURING NO SUPPLY OF AC POWER (WITH BACKUP BATTERIES)
When there is no supply of AC power but the unit is fitted with 3x1.5V "AA" size batteries (for backup), the display will not show any information. However, you can still check the current time by pressing once the SNOOZE button and the current time will be displaying for a few seconds.
It will also alarm when it reaches the preset alarm time if the unit is fitted with backup batteries.
ANTENNA
The unit has a flexible wire on the back of the unit and it should be extended to its full length for best reception white receiving FM radio. For AM, the radio is supplied with a built-in directional aerial, rotate the unit for the best AM reception.
SPECIFICATIONS
Power Source : AC230V \~ 50Hz
DC4.5V ——, 3x1.5V "AA" size batteries type (for clock back-up) (battery not included)
Frequency Range : FM 88-108 MHz
AM 540-1605 kHz
Dimensions : 141(L) x 131(D) x 98(H) MM
Weight: 0.48 KG
Weight and dimensions are approximate because we continually strive to improve our products, specifications may change without prior notice.

This product's packing materials are recyclable and can be reused. Please dispose of any materials in accordance with your local recycling regulations. This product consists of materials which can be recycled and reused if disassembled by a specialized company.
Batteries should never be thrown away or incinerated but disposed of in accordance with your local regulations concerning chemical wastes.

text_image
CE RoHS COMPLIANTiCES®
ICRP 211
WEKKERRADIO
natural_image
Line drawing of a kitchen appliance with a top handle and front panel (no text or symbols)HANDLEIDING
VOORZORGSMAATREGELEN
text_image
CE ROHS COMPLIANTiCES®
ICRP 211
RADIO-REVEIL

natural_image
Line drawing of a kitchen appliance with a top handle and front panel (no text or symbols)MANUEL D'UTILISATION