
VLT5 - Wall mount SANUS - Free user manual and instructions
Find the device manual for free VLT5 SANUS in PDF.
| Product Type | TV Wall Mount |
| Brand | Sanus |
| Model | VLT5 |
| Maximum Load | 79.3 kg (175 lb) |
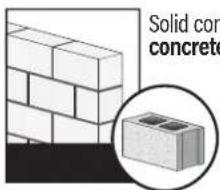
| Compatible Wall Types | Wood studs, poured concrete or concrete blocks (drywall not recommended without special kit) |
| Material | Steel |
| Color | Black |
| Wall Plate Dimensions (approx.) | 30 x 20 x 5 cm |
| Mount Weight (approx.) | 2.5 kg |
| Adjustments | Tilt, leveling, lateral shift |
| Cable Management | Yes (integrated) |
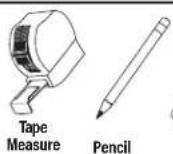
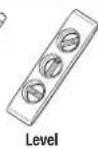
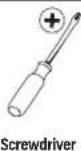
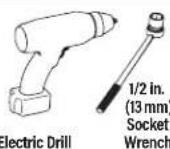
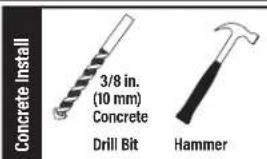
| Recommended Tools | Tape measure, pencil, level, stud finder, awl, screwdriver, drill bit, power drill, hammer, socket wrench |
| Package Contents | Mounting brackets, wall plate, TV screws, spacers, lag bolts, wall hardware |
| Safety | Do not install alone on drywall; wall must support 5 times the weight of the TV |
| Warranty | 5 years (Sanus standard) |
| Manufacturer | Legrand AV Inc. |
| Repairability | Spare parts available on request from customer service |
Frequently Asked Questions - VLT5 SANUS
User questions about VLT5 SANUS
0 question about this device. Answer the ones you know or ask your own.
Ask a new question about this device
Download the instructions for your Wall mount in PDF format for free! Find your manual VLT5 - SANUS and take your electronic device back in hand. On this page are published all the documents necessary for the use of your device. VLT5 by SANUS.
USER MANUAL VLT5 SANUS
A brand of □ legrand
THANK YOU FOR CHOOSING SANUS
natural_image
Digital display showing a vibrant sunset over rolling hills with purple and orange sky (no text or symbols visible)Want to watch a video that shows how easy this DIY project will be?
Watch it now at: SANUS.com/2647

Get it right the first time. HeightFinder™ shows you where to drill.

Check it out at: SANUS.com/2567

natural_image
Group of professionals in a modern office environment, one wearing headset, others seated in background (no visible text or symbols)Our install experts are standing by to help.

Call us at: US: +1 (800) 359-5520 EMEA: +31 (0) 495 580 852 UK: +44 (0) 800 056 2853
IMPORTANT SAFETY INSTRUCTIONS - SAVE THESE INSTRUCTIONS - PLEASE READ ENTIRE MANUAL PRIOR TO USE
Before getting started, let's make sure this mount is perfect for you!
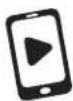
1 Does your TV weigh more than 79.3 kg (175 lb) including accessories?
No - Perfect!
Yes – This mount is NOT compatible. Visit MountFinder.Sanus.com or call US: +1 (800) 359-5520 (EMEA: +31 (0) 495 580 852; UK: +44 (0) 800 056 2853) to find a compatible mount.
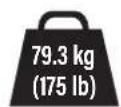
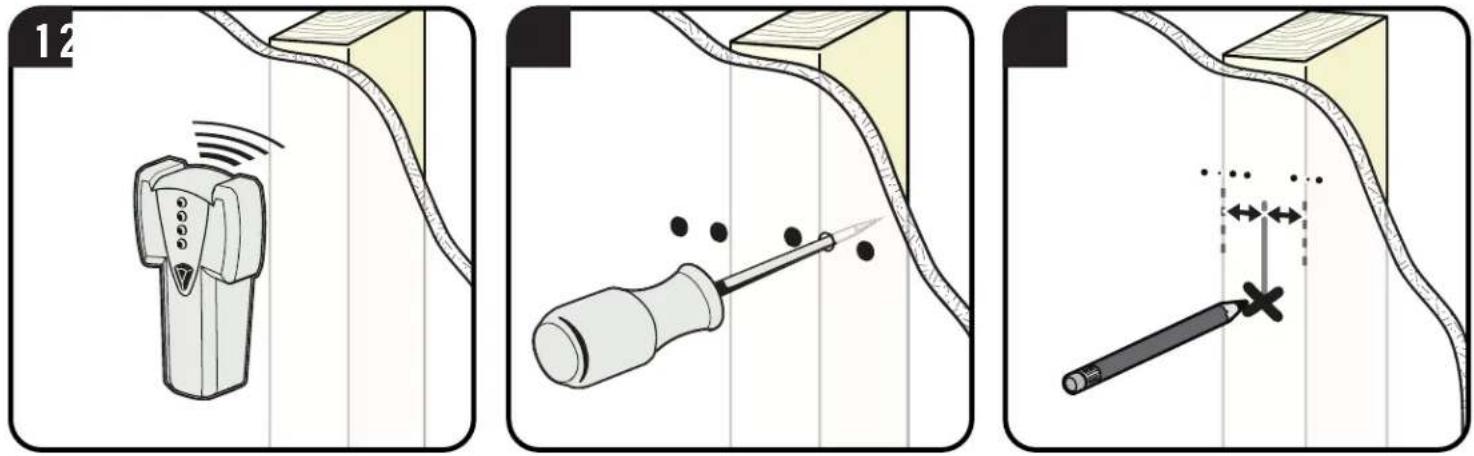
2 What is your wall made of?
CAUTION:
DO NOT install into drywall alone
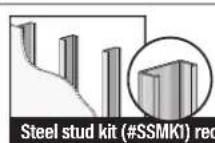
Drywall with steel studs?

Unsure?
Call Customer Service: US: +1 (800) 359-5520 EMEA: +31 (0) 495 580 852 • UK: +44 (0) 800 056 2853
3 Do you have all the tools needed?

4 Ready to begin?
Please read through these instructions completely to be sure you're comfortable with this easy install process. Also check your TV owner's manual to see if there are any special requirements for mounting your TV.
If you do not understand these instructions or have doubts about the safety of the installation, assembly or use of this product, contact Customer Service.
CAUTION: Avoid potential personal injuries and property damage!
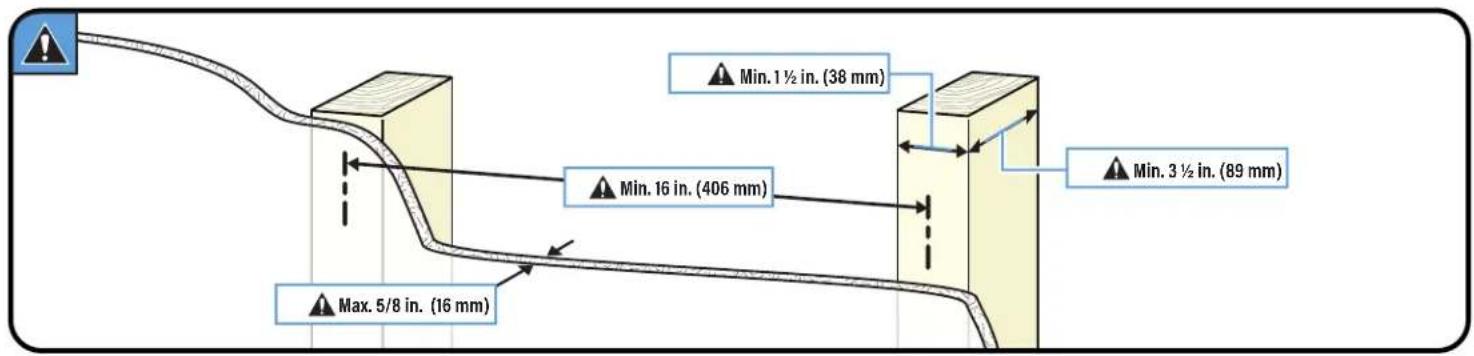
- This product includes directions and hardware for use with wood stud, solid concrete and concrete block walls – DO NOT install into drywall alone. For information on how to use this product with steel stud walls contact Customer Service and ask about the steel stud mounting kit.
- The wall must be capable of supporting five times the weight of the TV and mount combined.
- Do not use this product for any purpose not explicitly specified by manufacturer.
● Manufacturer is not responsible for damage or injury caused by incorrect assembly or use.
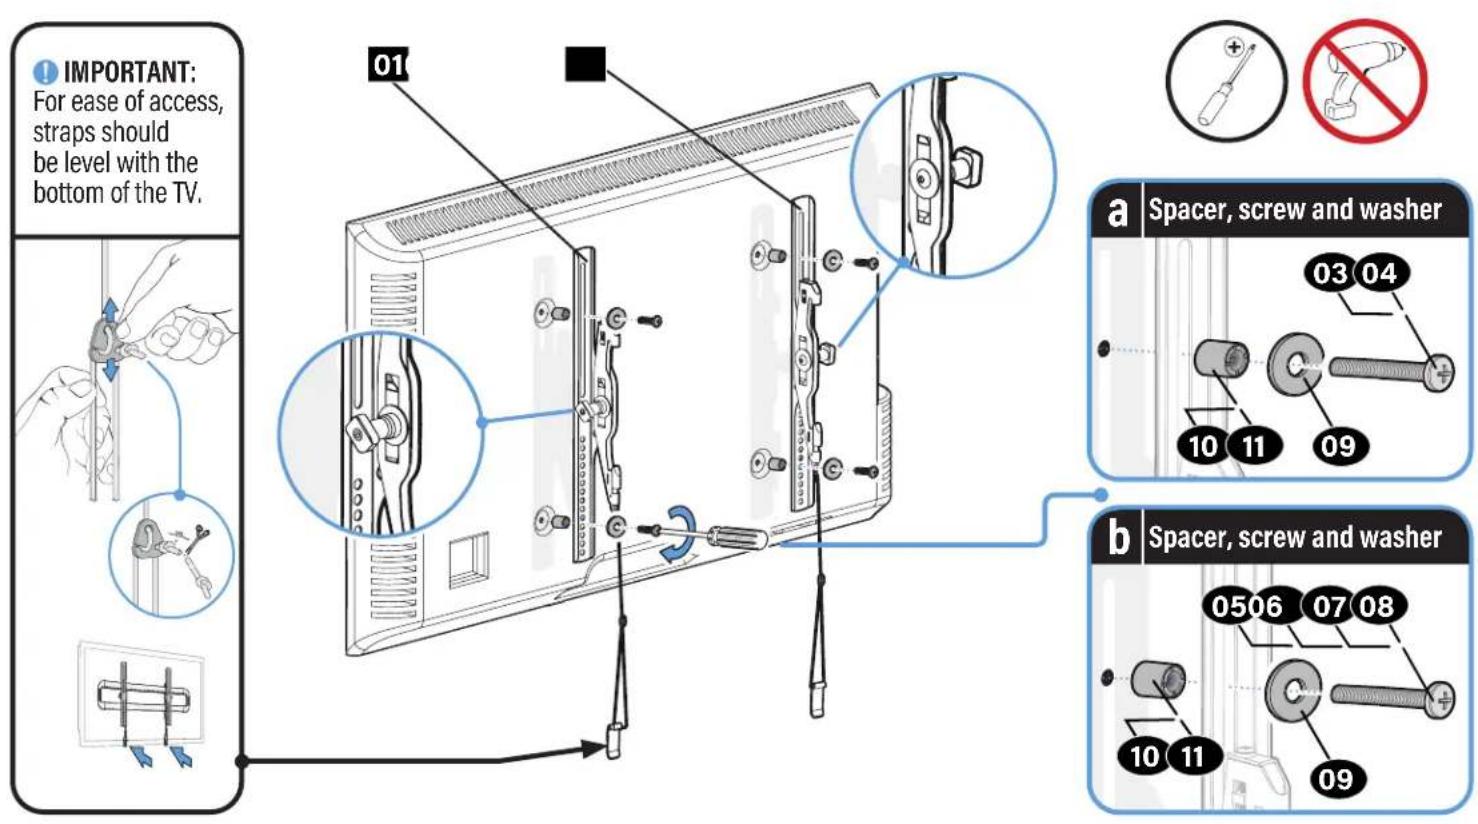
STEP 1 Attach Bracket to TV
Parts and Hardware for STEP 1
WARNING: This product contains small items that could be a choking hazard if swallowed.
Before starting assembly, verify all parts are included and undamaged. If any parts are missing or damaged, do not return the damaged item to your dealer; contact Customer Service. Never use damaged parts!
NOTE: Not all hardware included will be used.
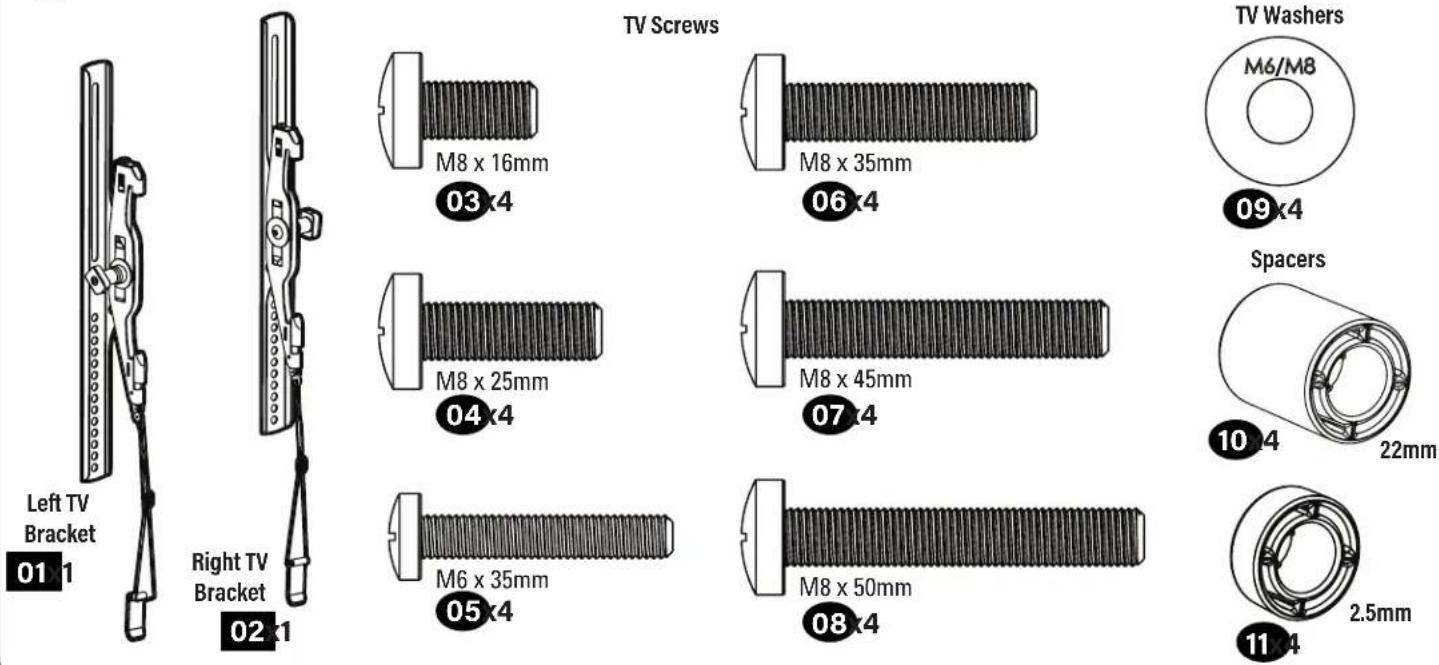
TV Washers
1-1 Select TV Screws
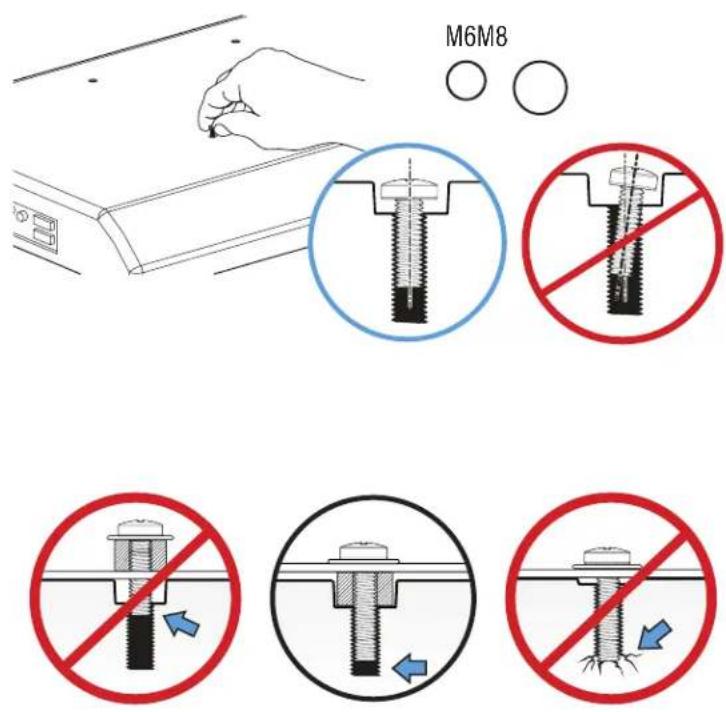
1-2 Spacers
NOTE: If your TV included inset spacers or wall mount adapters, use them UNDER the mount hardware.
natural_image
Illustration of a printer with a spool and rolled paper nearby (no text or symbols)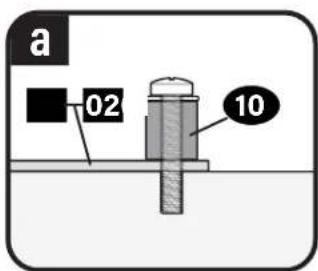
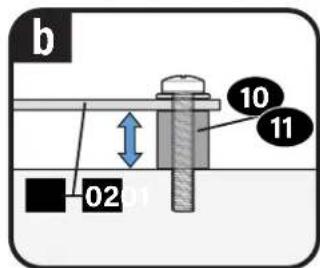
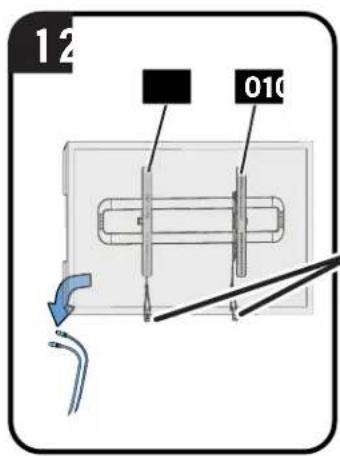
1-3 Attach TV Brackets
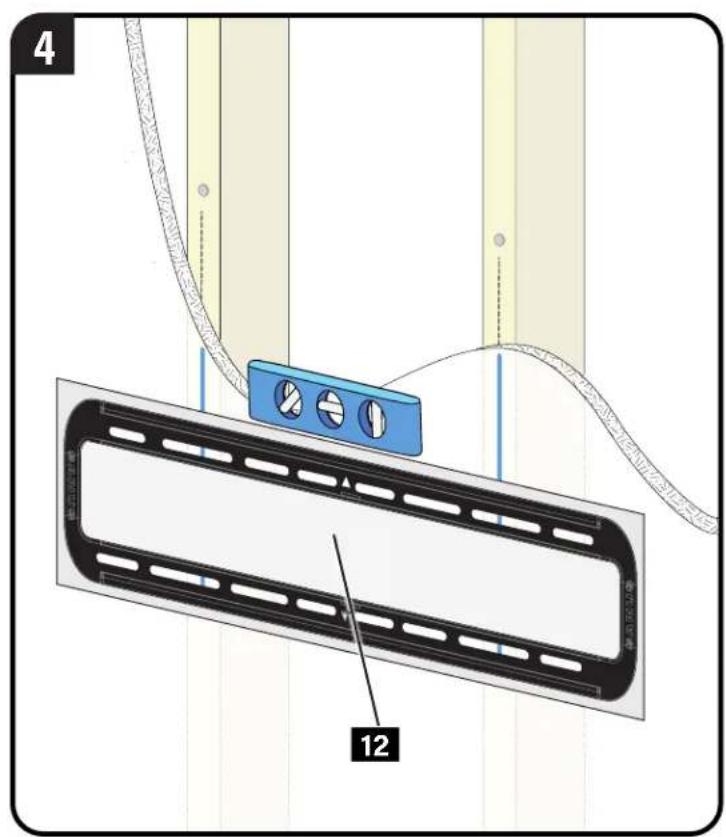
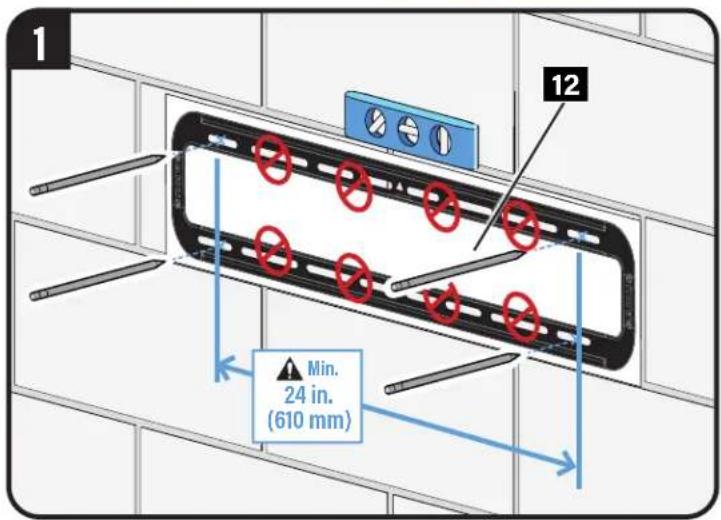
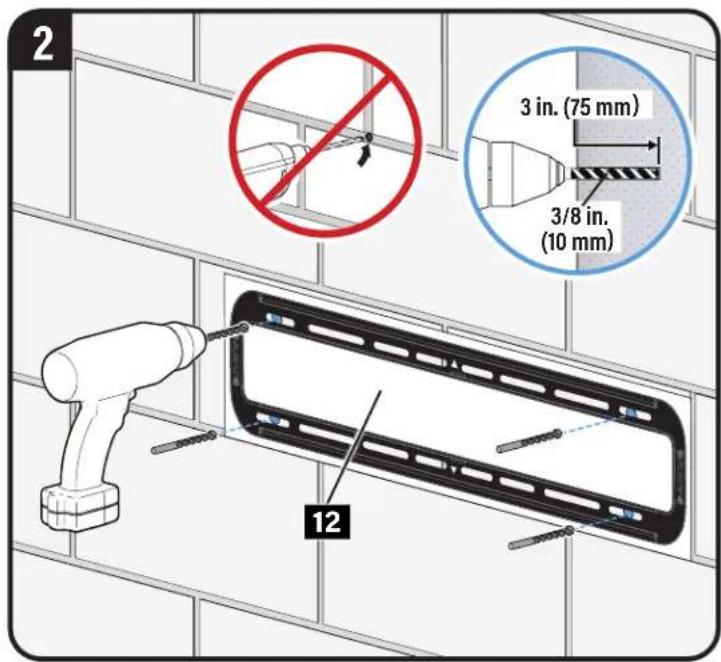
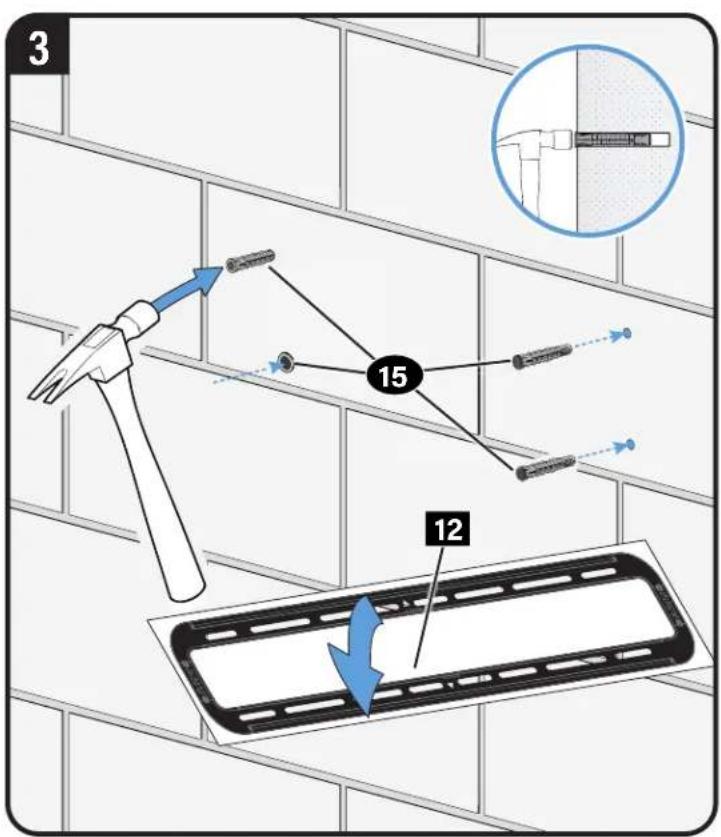
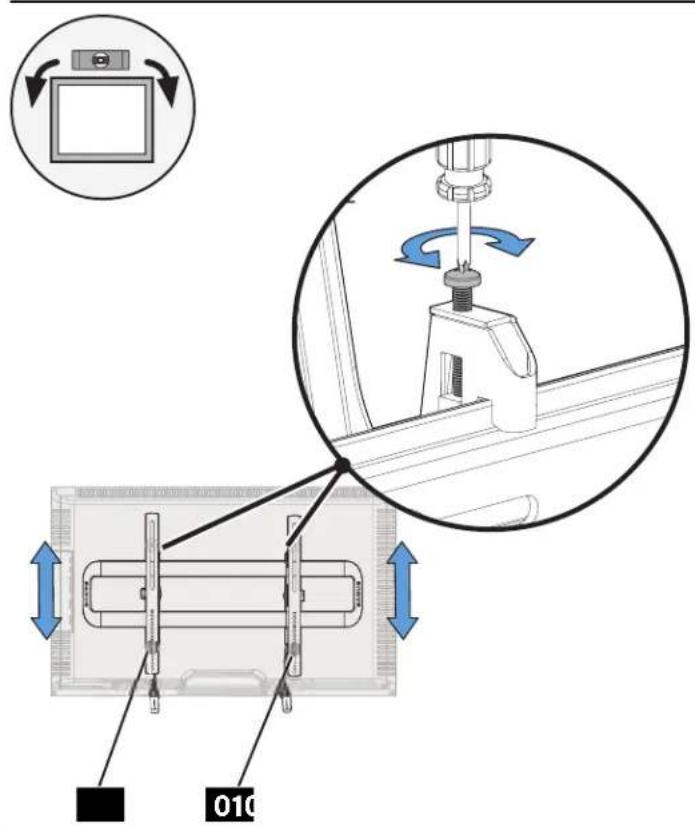
STEP 2 Attach Wall Plate to Wall
For wood stud installations, follow STEP 2A on PAGE 8
For concrete installations, follow STEP 2B on PAGE 12
Parts and Hardware for STEP 2
WARNING: This product contains small items that could be a choking hazard if swallowed.
Before starting assembly, verify all parts are included and undamaged. If any parts are missing or damaged, do not return the damaged item to your dealer; contact Customer Service. Never use damaged parts!

NOTE: Not all hardware included will be used.
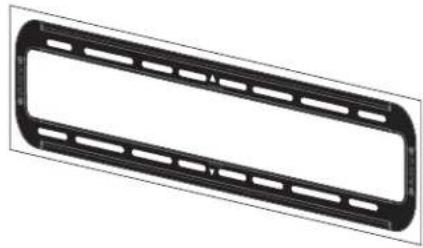
natural_image
Exterior view of a black rectangular frame with evenly spaced slots (no text or symbols)Wall Plate Template
12x1
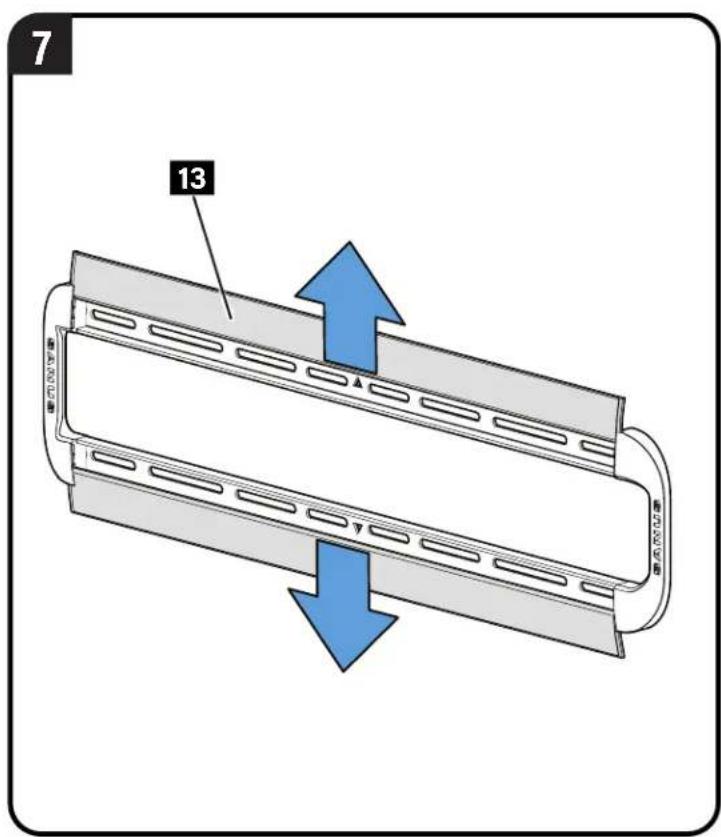
natural_image
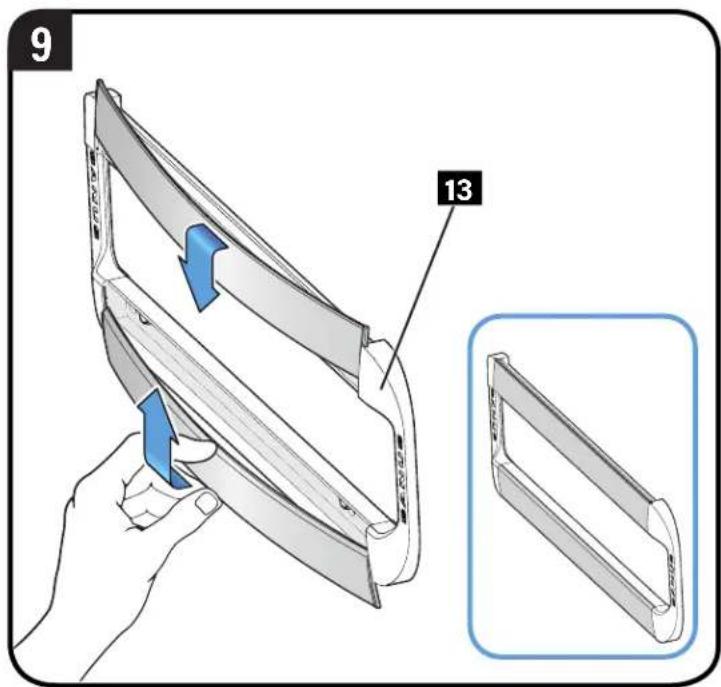
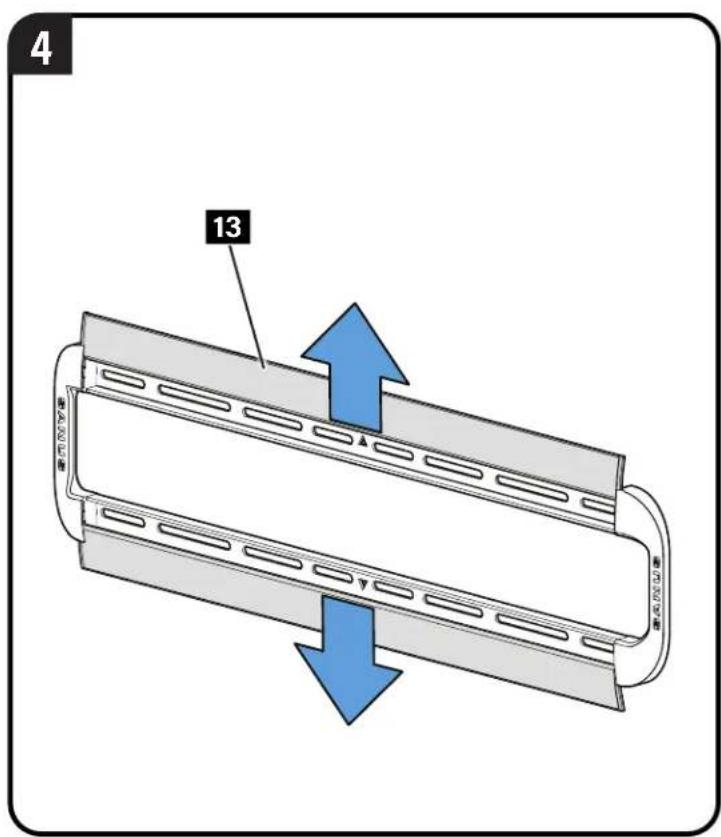
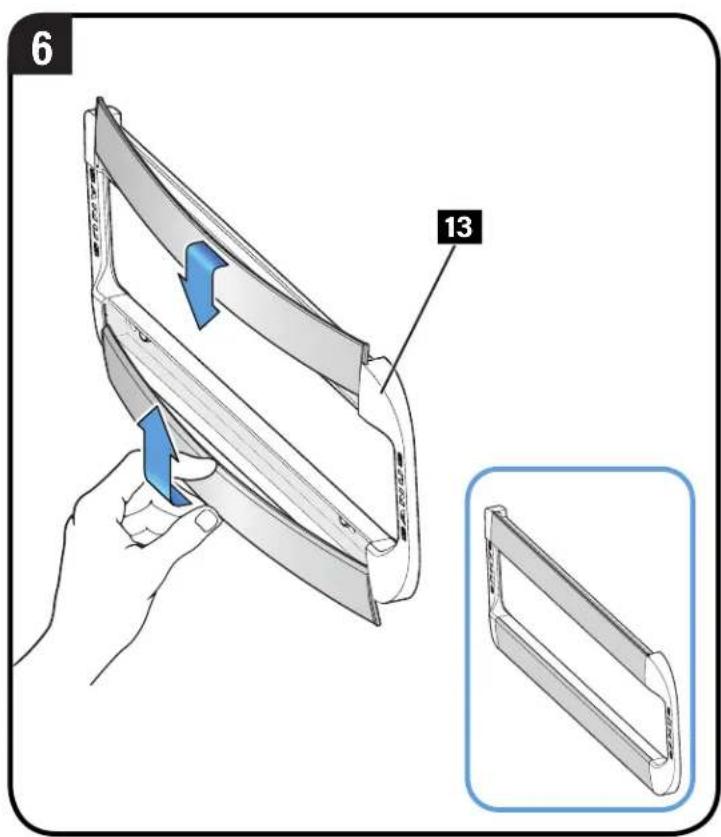
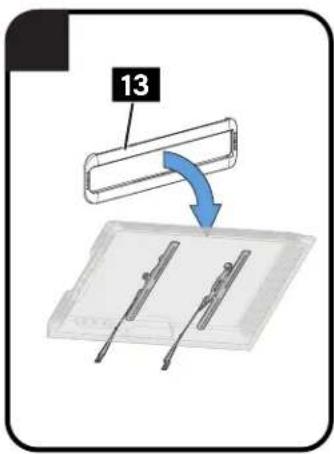
Technical line drawing of a cylindrical mechanical component with flanges (no text or symbols)Wall Plate
13
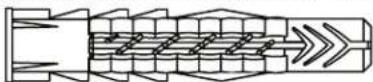
Concrete Anchor
For Concrete Installations ONLY

CAUTION: Do not use in drywall or wood
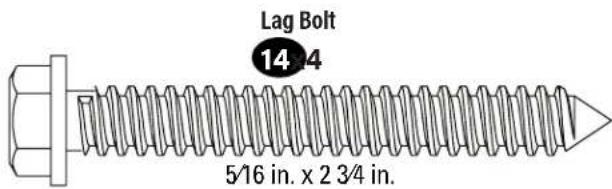
154
UX10 x 60R
STEP 2A

Stud Option
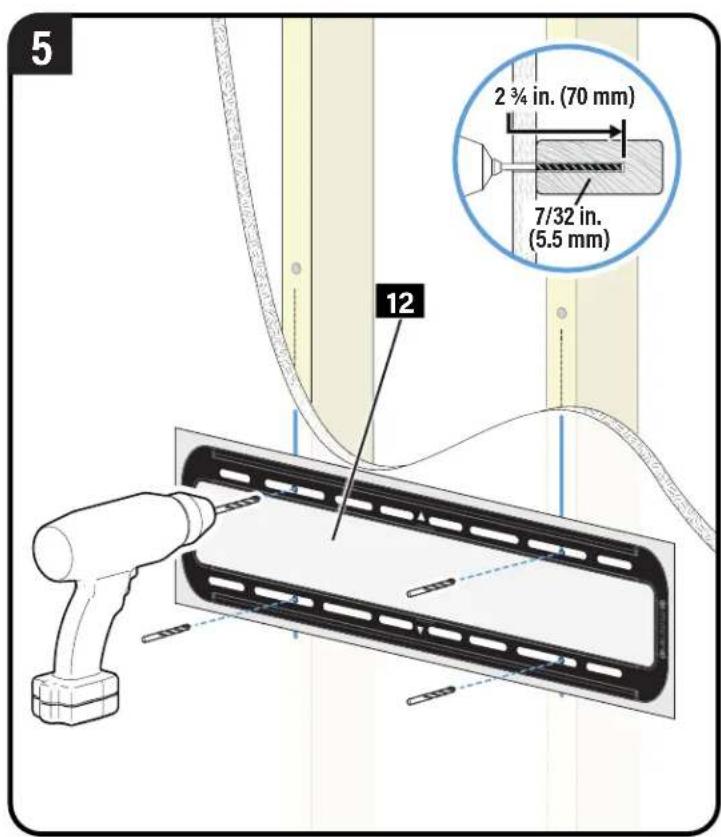
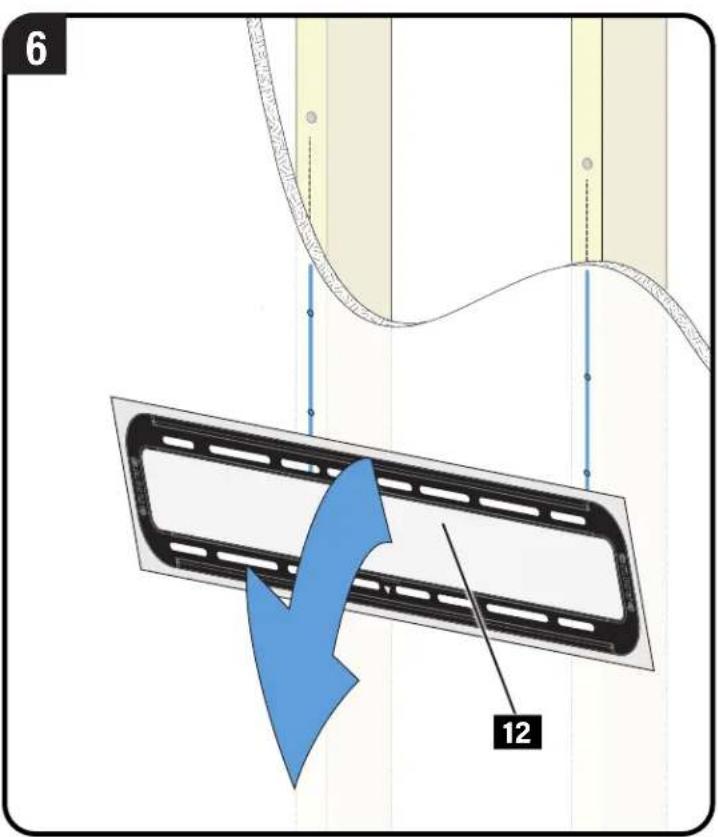
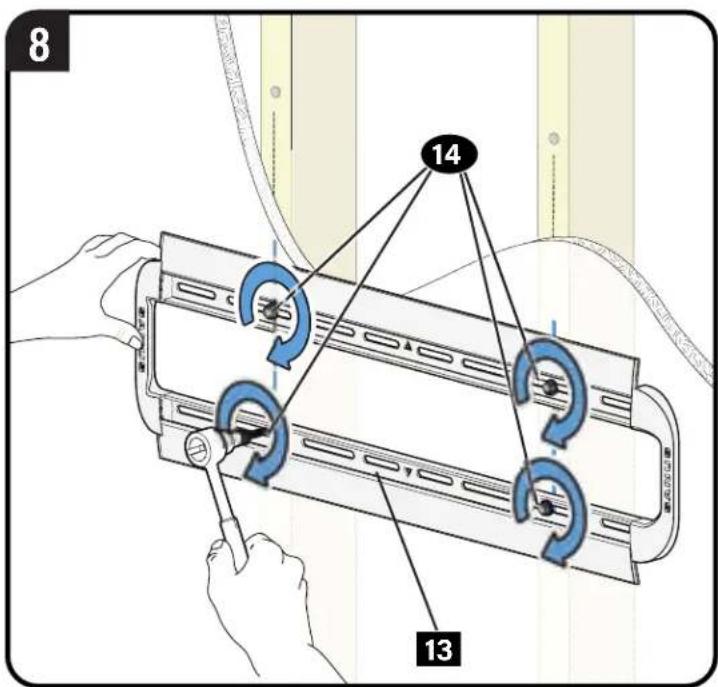
CAUTION: Avoid potential personal injury or property damage! All four lag bolts 14 MUST BE firmly tightened to prevent unwanted movement of the wall plate 13. Ensure the wall plate is securely fastened to the wall before continuing on to the next step.
Go to STEP 3 on PAGE 15.
STEP 2B
Concrete or Concrete Block Option
CAUTION: Avoid potential personal injuries and property damage! Mount the wall plate 13 directly onto the concrete surface.
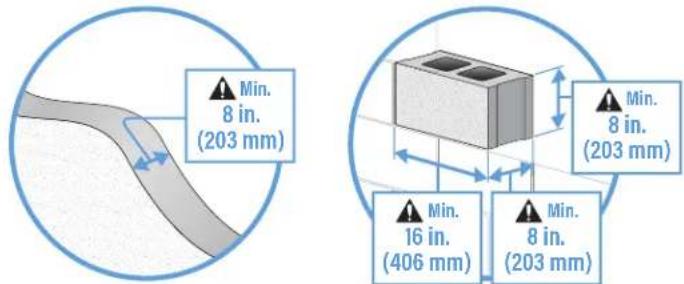
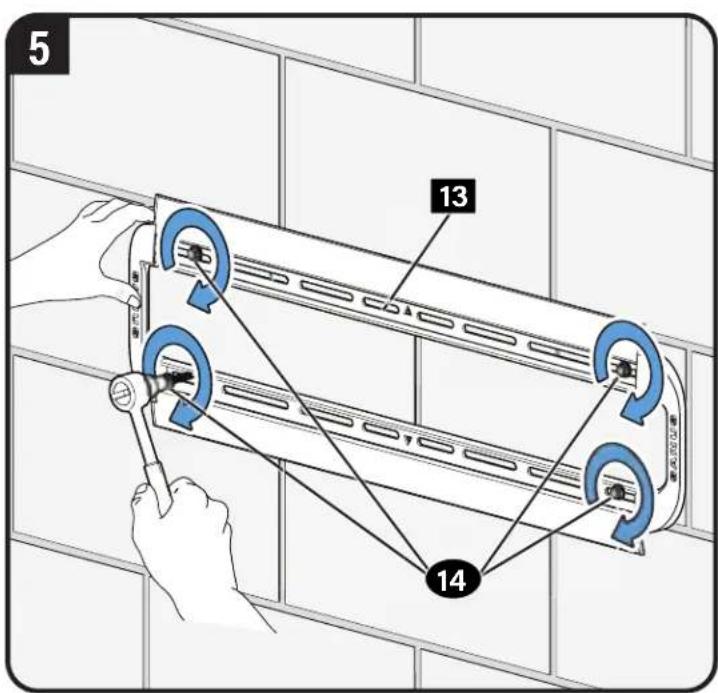
CAUTION: Avoid potential personal injury or property damage! All four lag bolts 14 MUST BE firmly tightened to prevent unwanted movement of the wall plate 13. Ensure the wall plate is securely fastened to the wall before continuing on to the next step.
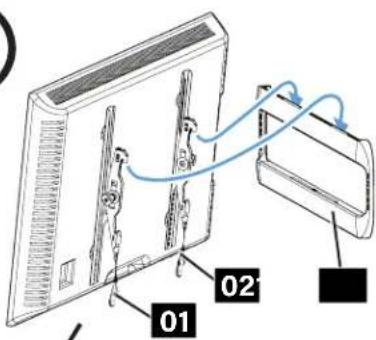
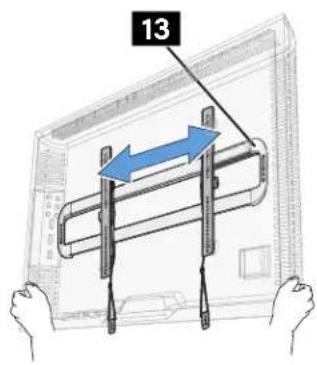
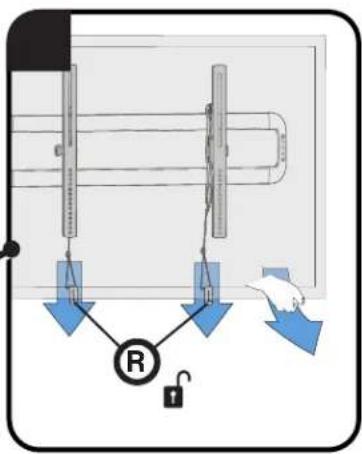
STEP 3 Attach TV to Wall Plate


CAUTION: Avoid potential
personal injury or property damage!
Always make sure your TV brackets
are in the locked position so the TV is
securely fastened to the wall plate 13.
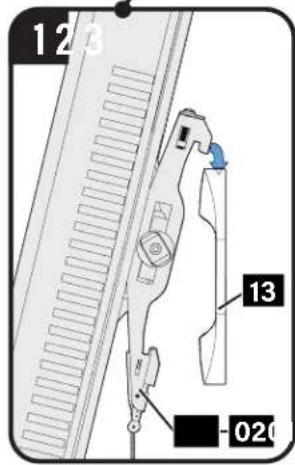

natural_image
Diagram of a mechanical device with a blue arrow indicating direction, showing a lever mechanism (no text or symbols present)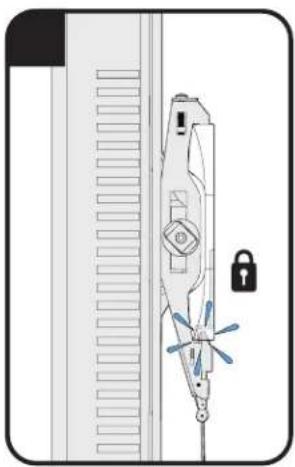
natural_image
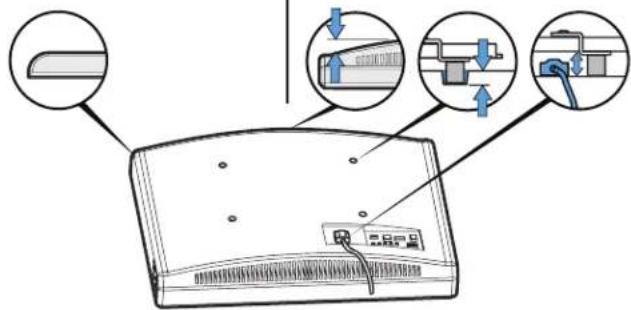
Diagram of a helicopter inside a device with a lock and gear mechanism (no text or symbols)Manage Cables
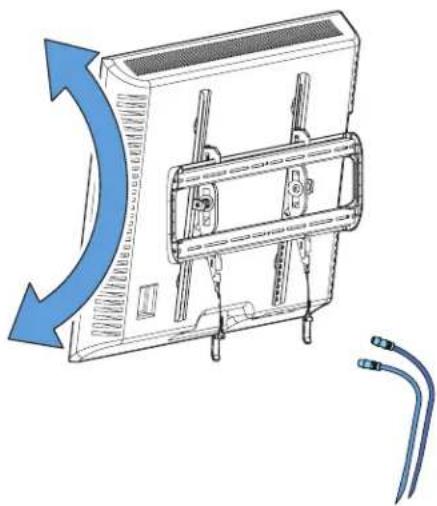
natural_image
Diagram of a device with a blue arrow indicating rotational motion, showing internal components and cable connections (no text or symbols)Adjustments
LEVELTilt
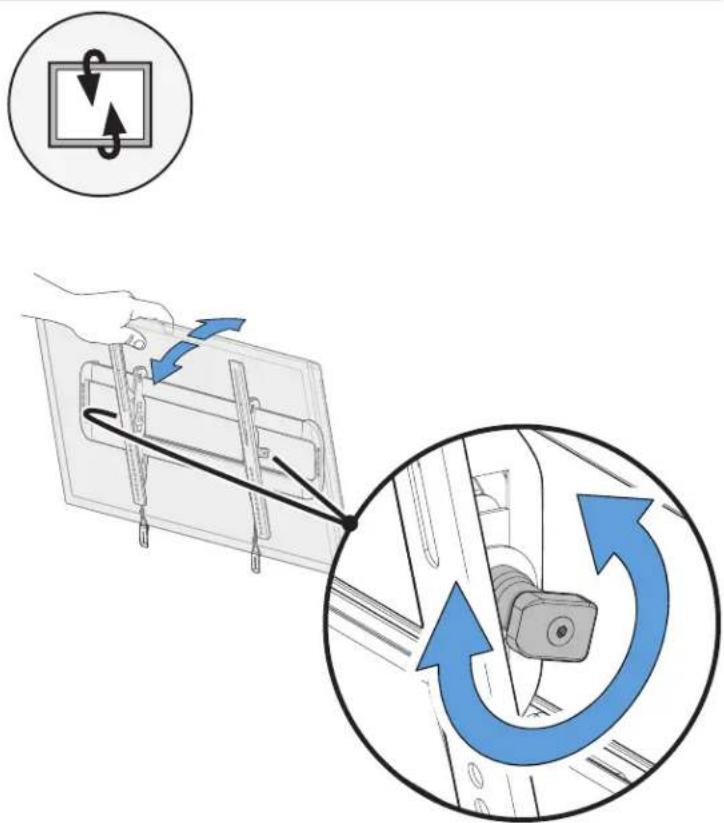
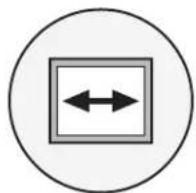
TV LATERAL SHIFT
REMOVING THE TV


CAUTION: Avoid potential personal injury or property damage! To prevent breaking the locking latch: always pull and hold the release cords down while pulling the TV away from the wall.
ESPAÑOL
Legrand AV Incand its affiliated corporations and subsidiaries (collectively, "Legrand"), intend to make this manual accurate and complete. However, Legrand makes no claim that the information contained herein covers all details, conditions, or variations. Nor does it provide for every possible contingency in connection with the installation or use of this product. The information contained in this document is subject to change without notice or obligation of any kind. Legrand makes no representation of warranty, expressed or implied, regarding the information contained herein. Legrand assumes no responsibility for accuracy, completeness or sufficiency of the information contained in this document.
Español
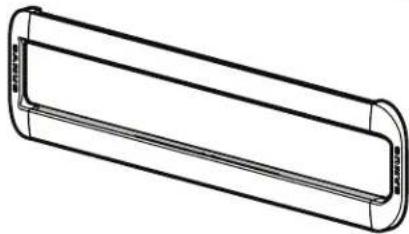
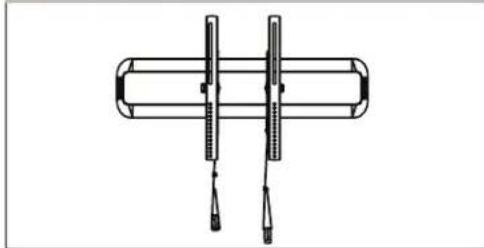
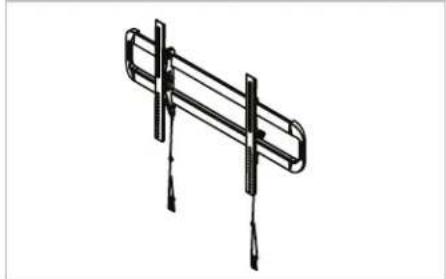
FULLY ASSEMBLED MOUNT
natural_image
Technical line drawing of a cylindrical mechanical component with two vertical supports and a central shaft (no text or symbols)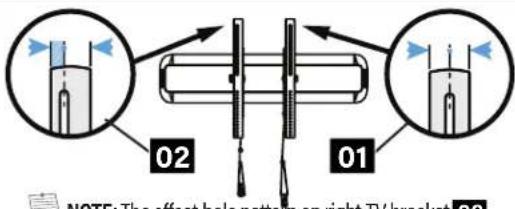
NOTE: The offset hole pattern on right TV bracket 02 is designed to accommodate a better range of TV hole patterns, while allowing proper engagement with the wall plate.
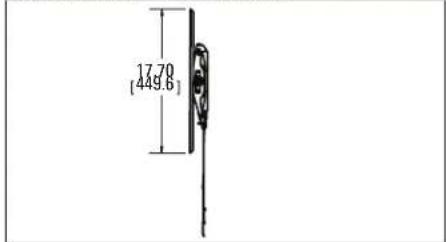
TOP VIEW - EXTENDED

TOP VIEW - RETRACTED
![2.19 [55.6]](/content/2026/02/414177/images/73bd97f735bdba16c5ec502cf12cea2c3236c7cf68e4556aef559d436428a639.jpg)
3-D
natural_image
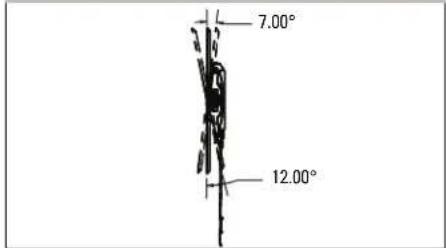
Pure mechanical diagram of a ladder with tassels, no text or symbols presentSIDE VIEW - EXTENDED
SIDE VIEW - RETRACTED
SANUS®
A brand of □ legrand
Thank you for choosing SANUS! Please take a moment to let us know how we did:
Legrand AV Inc.
6436 City West Parkway
Eden Prairie, MN 55344 USA
US: +1 (800) 359-5520
Legrand AV Netherlands B.V.
Franklinstraat 14
6003 DK Weert Netherlands
UK: +44 (0) 800 056 2853
EMEA: +31 (0) 496 580 852
Authorized Representative for the UK
Starline Holding Technology Ltd.
Unit C Island Road
Reading RG2 ORP UK
Legrand AV Inc. and its affiliated corporations and subsidiaries (collectively, "Legrand"), intend to make this manual accurate and complete. However, Legrand AV makes no claim that the information contained herein covers all details, conditions, or variations. Nor does it provide for every possible contingency in connection with the installation or use of this product. The information contained in this document is subject to change without notice or obligation of any kind. Legrand AV makes no representation of warranty, expressed or implied, regarding the information contained herein. Legrand AV assumes no responsibility for accuracy, completeness or sufficiency of the information contained in this document.
©2021 Legrand AV Inc. All rights reserved. SANUS is a brand of Legrand.
All other brand names or marks are used for identification purposes and are trademarks of their respective owners.
Legrand AV · 6436 City West Parkway · Eden Prairie, MN 55344 USA 6901-602957 00