
VML5 - Wall mount SANUS - Free user manual and instructions
Find the device manual for free VML5 SANUS in PDF.
| Product type | Wall mount |
| Brand | SANUS |
| Model | VML5 |
| Maximum TV weight | 34 kg (75 lb) |
| Wall compatibility | Wood studs (double or single), solid concrete, concrete blocks |
| Material | Steel |
| Main functions | Secure attachment, level adjustment (tilt), lateral shift, TV removal, cable management |
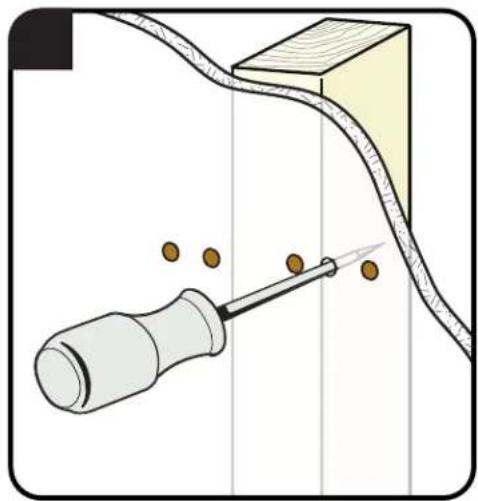
| Required tools | Measuring tape, pencil, level, stud finder, awl, screwdriver, drill bit, power drill, hammer, socket wrench |
| Safety | Do not exceed 34 kg; install on load-bearing studs or concrete; do not install alone on drywall |
| Maintenance and cleaning | Clean with a dry, soft cloth |
| Spare parts and repairability | Contact customer service for missing or damaged parts |
| Manufacturer | Legrand AV Inc. |
| Customer service (USA) | 1-800-359-5520 |
| Customer service (UK) | 0800-056-2853 |
Frequently Asked Questions - VML5 SANUS
User questions about VML5 SANUS
0 question about this device. Answer the ones you know or ask your own.
Ask a new question about this device
Download the instructions for your Wall mount in PDF format for free! Find your manual VML5 - SANUS and take your electronic device back in hand. On this page are published all the documents necessary for the use of your device. VML5 by SANUS.
USER MANUAL VML5 SANUS
VML5 Instruction Manual
We'll Make It Stress-Free
If you have any questions along the way, just give us a call.
1-800-359-5520 (UK: 0800-056-2853)
We're ready to help!
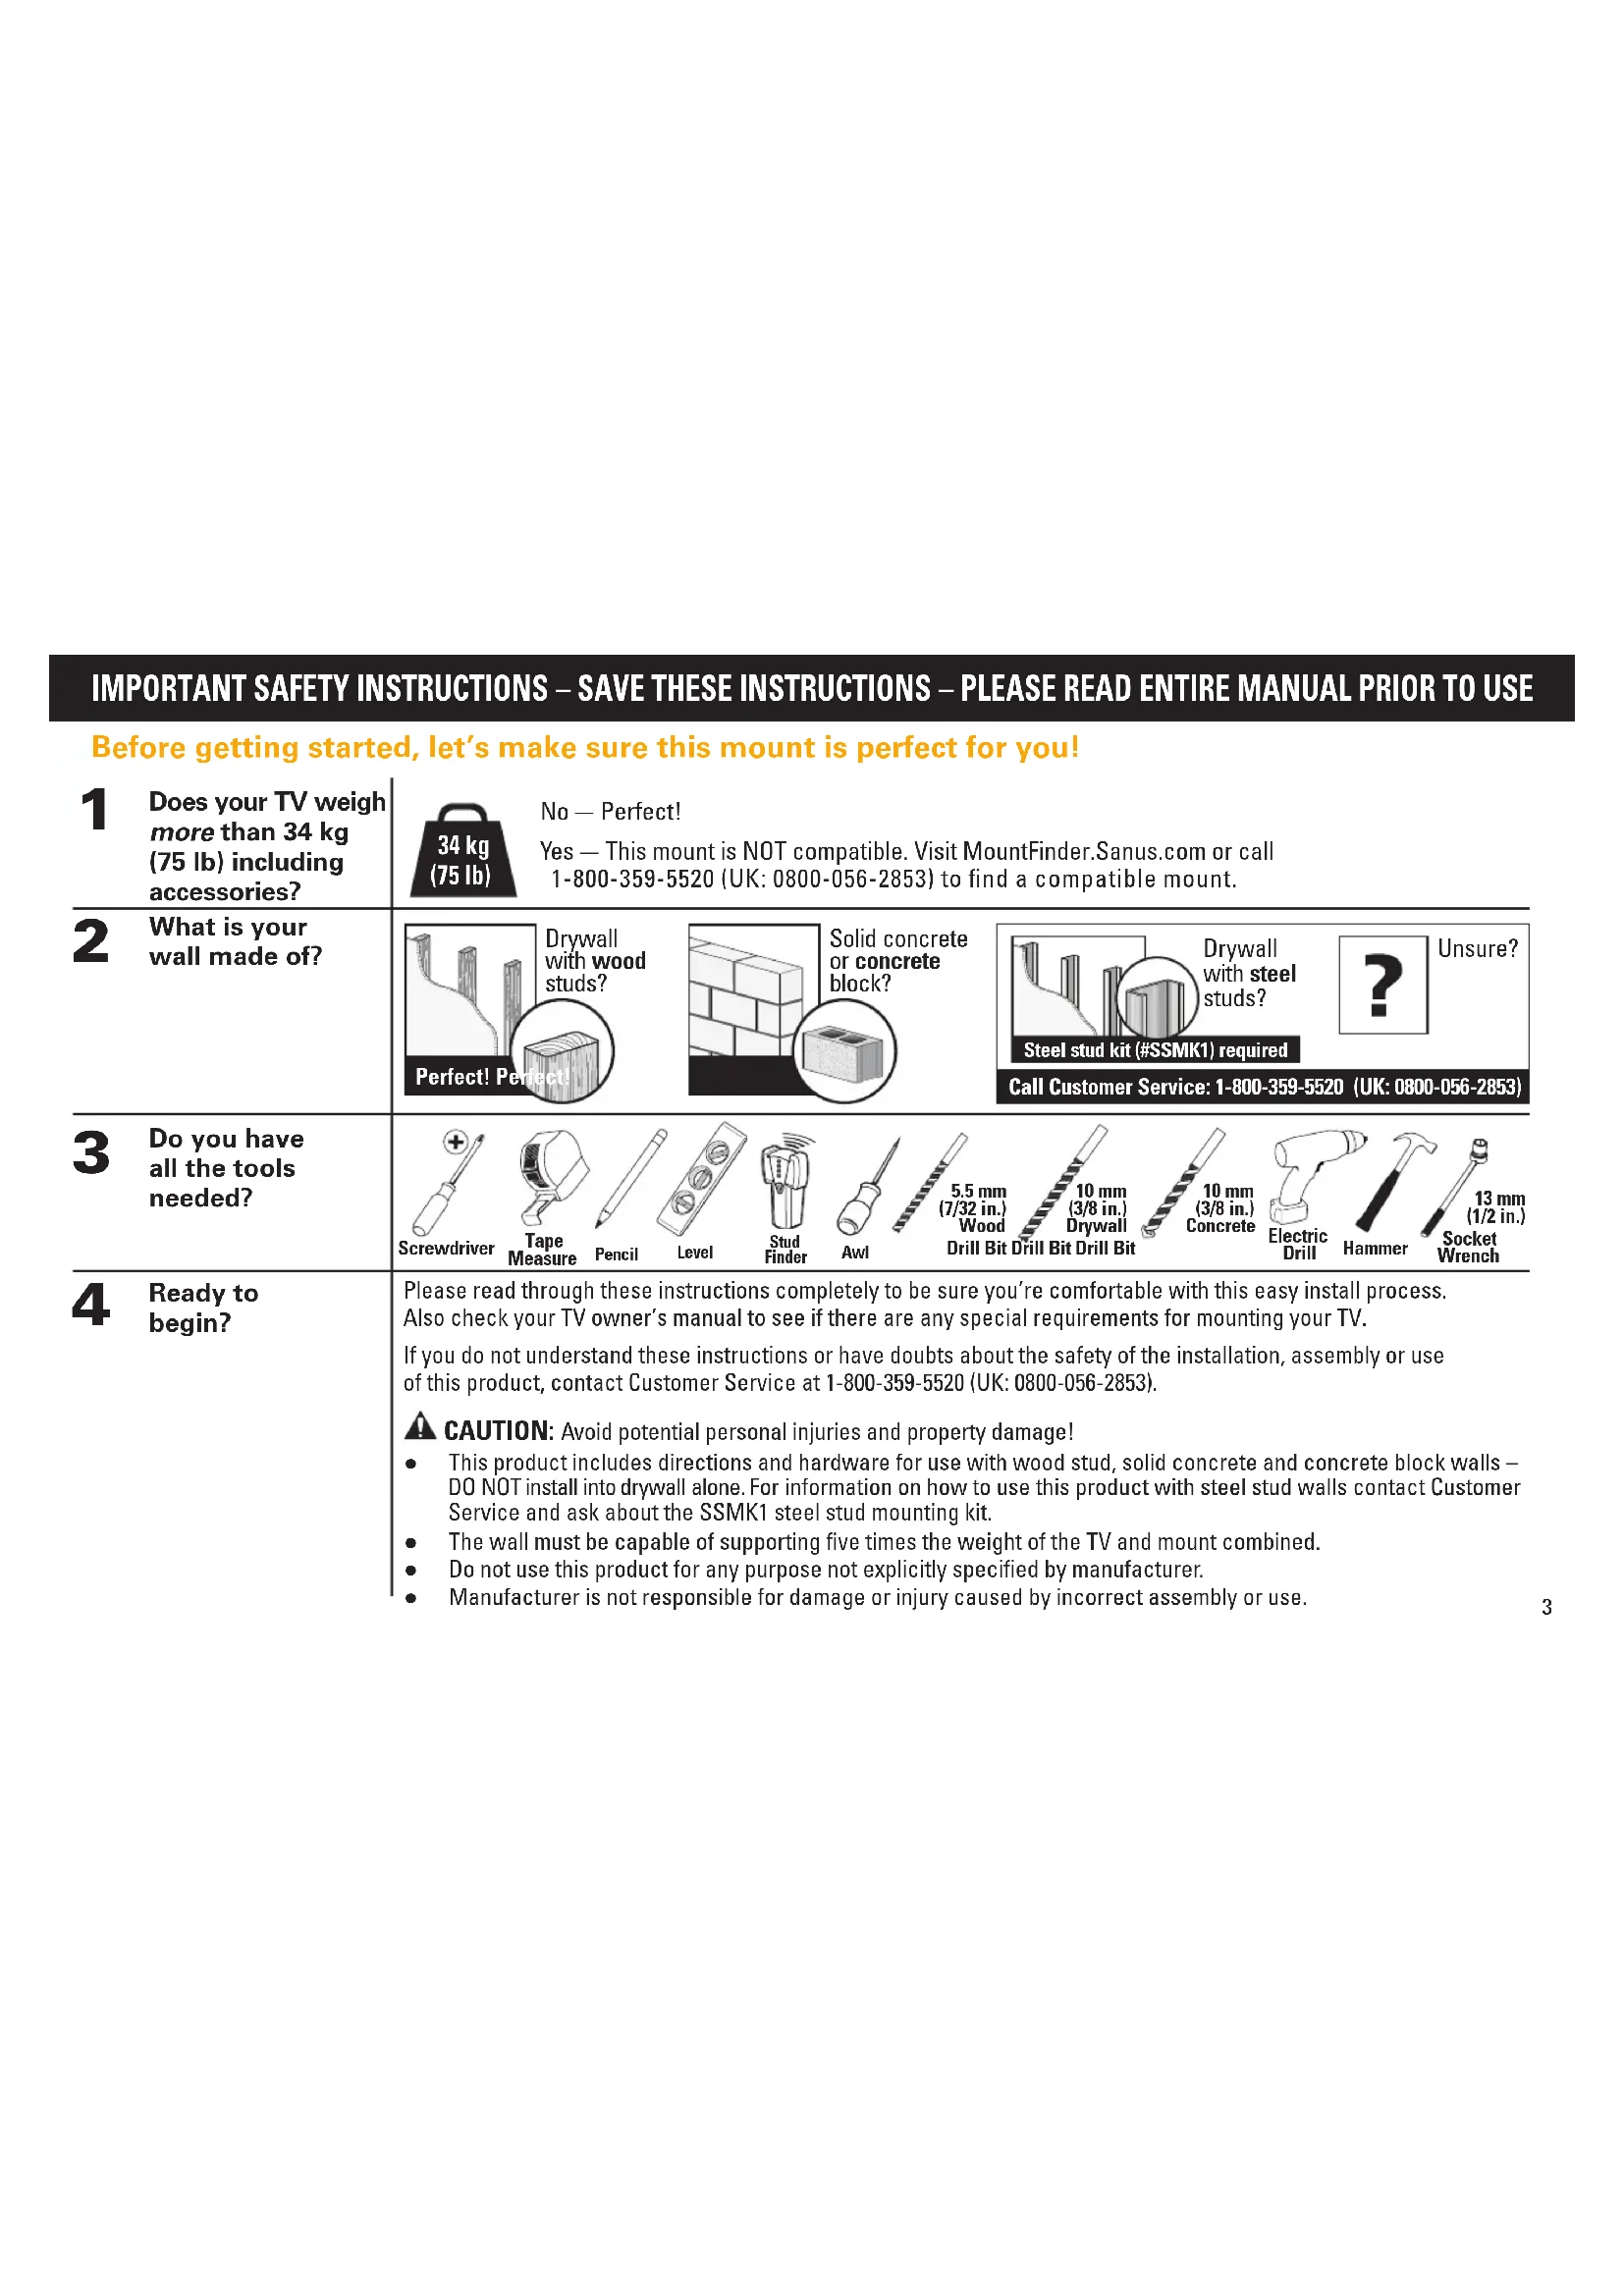
| 1 Does your TV weigh more than 34 kg (75 lb) including accessories? | 34kg (75 lb) | No - Perfect! Yes - This mount is NOT compatible. Visit MountFinder.Sanus.com or call 1-800-359-5520 (UK: 0800-056-2853) to find a compatible mount. | |||||||||
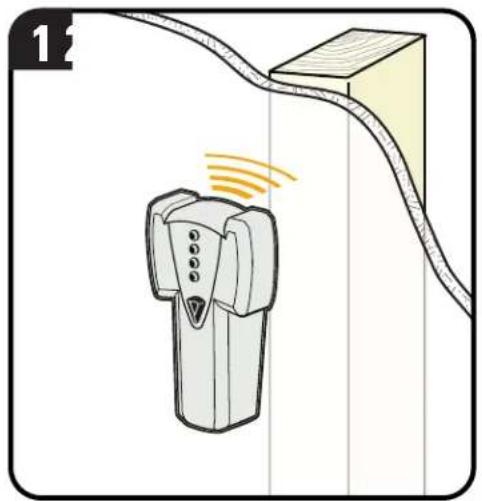
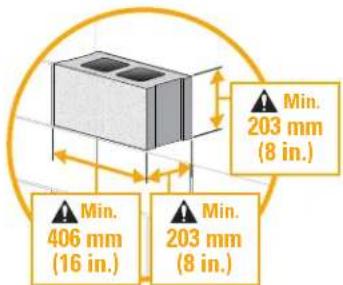
| 2 What is your wall made of? | Drywall with wood studs? Perfect! Perfect | Solid concrete or concrete block? | Drywall with steel studs? Steel stud kit (#SSMK1) required | ? | Unsure? | ||||||
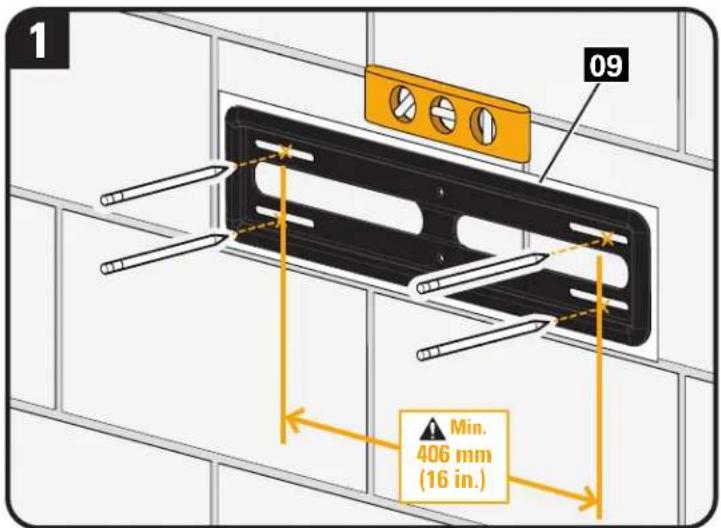
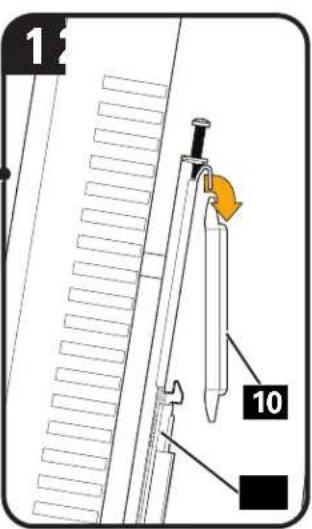
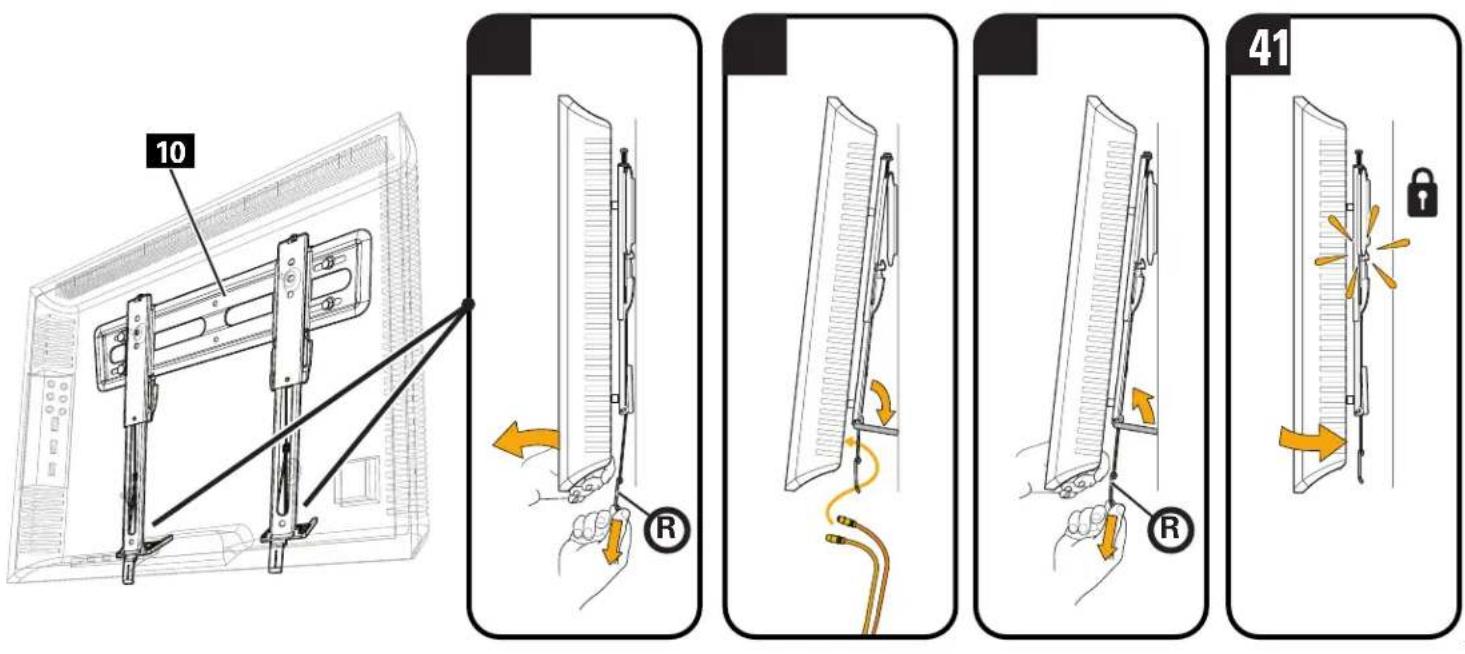
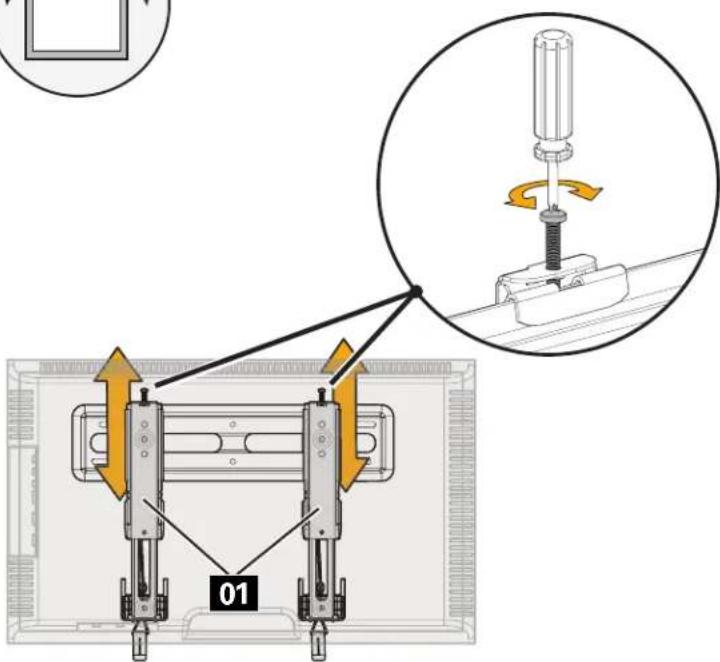
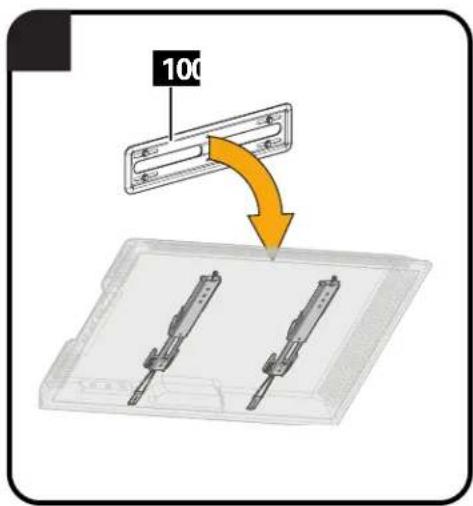
STEP 1 Attach Brackets to TV
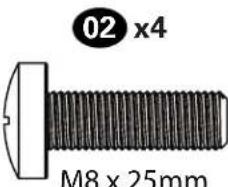
Parts and Hardware for STEP 1
WARNING: This product contains small items that could be a choking hazard if swallowed.
Before starting assembly, verify all parts are included and undamaged. If any parts are missing or damaged, do not return the damaged item to your dealer; contact Customer Service. Never use damaged parts!
NOTE: Not all hardware included will be used.
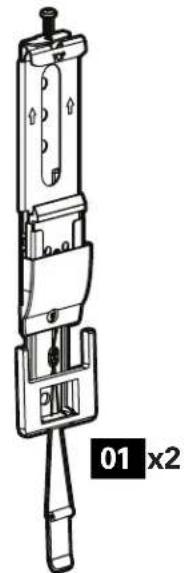
TV Brackets
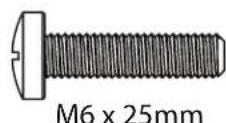
TV Screws

TV Washers
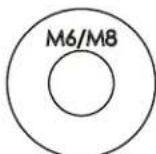
06x4

x4


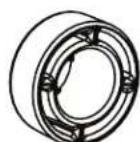
Spacers
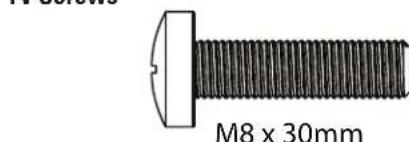
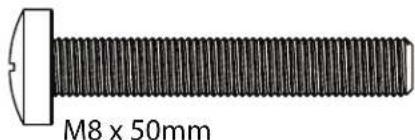
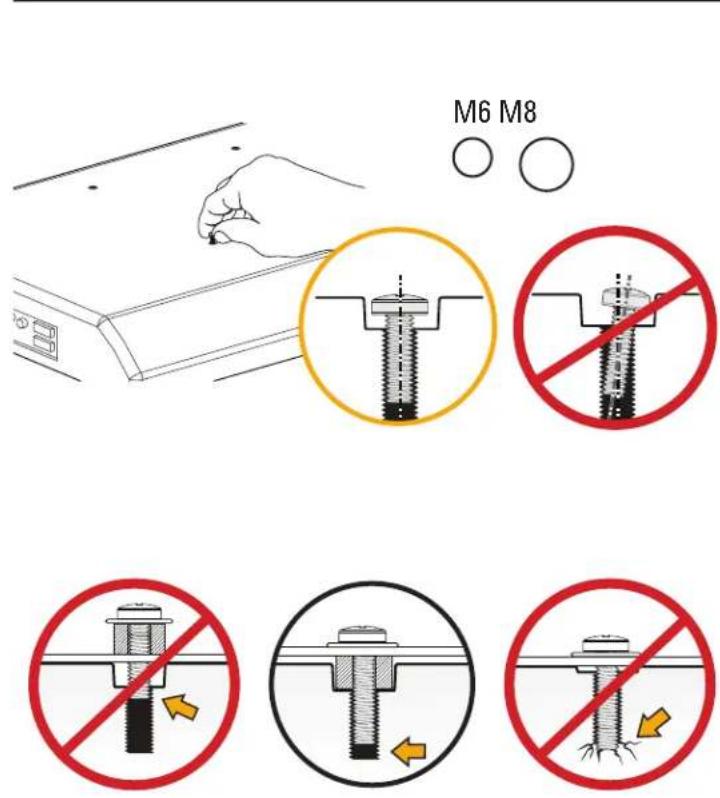
1-1 Select TV Screws
1-2 Spacers
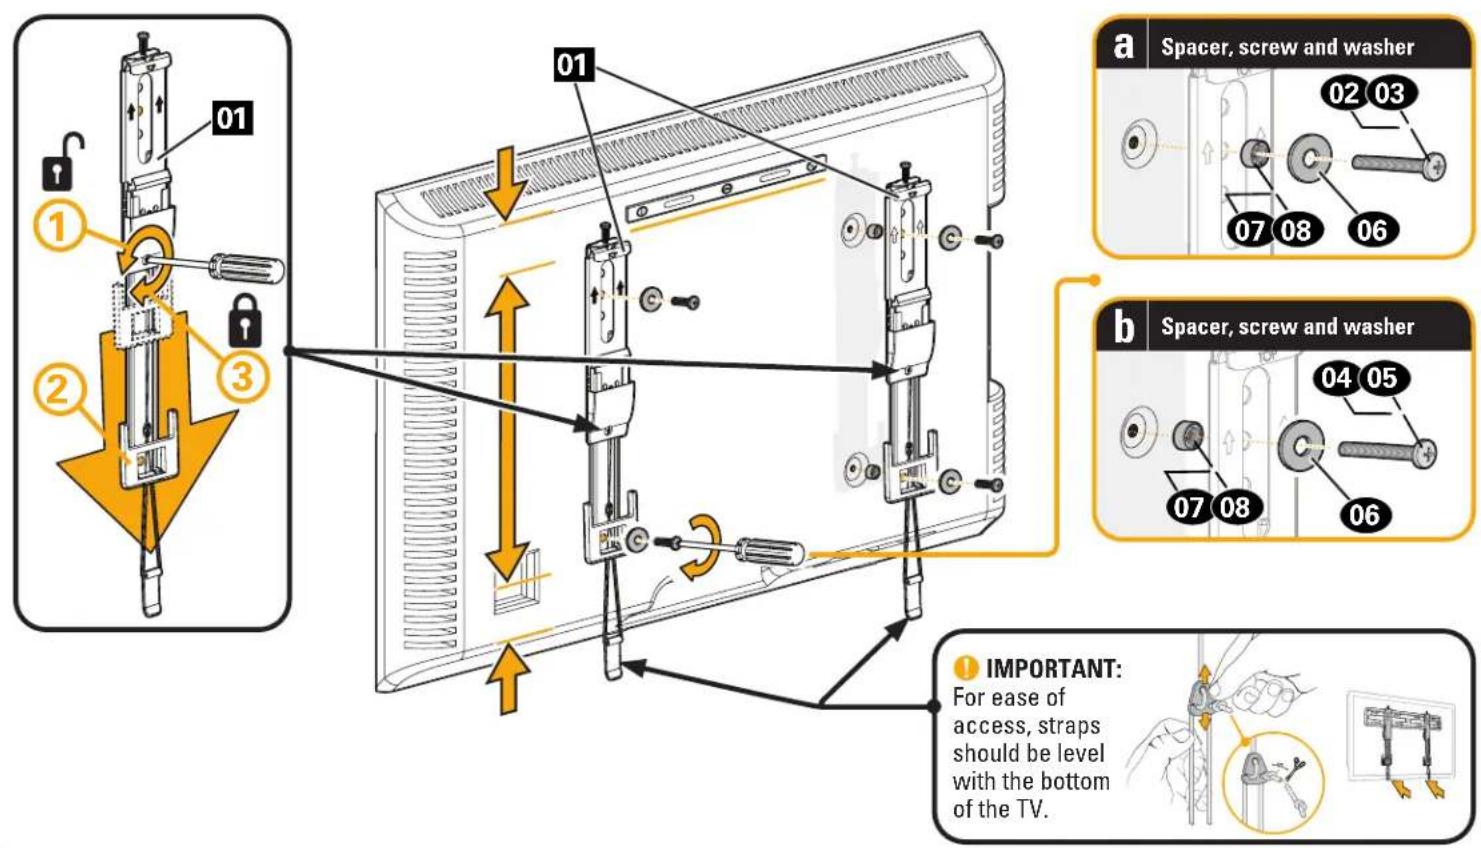
1-3 Attach TV Brackets
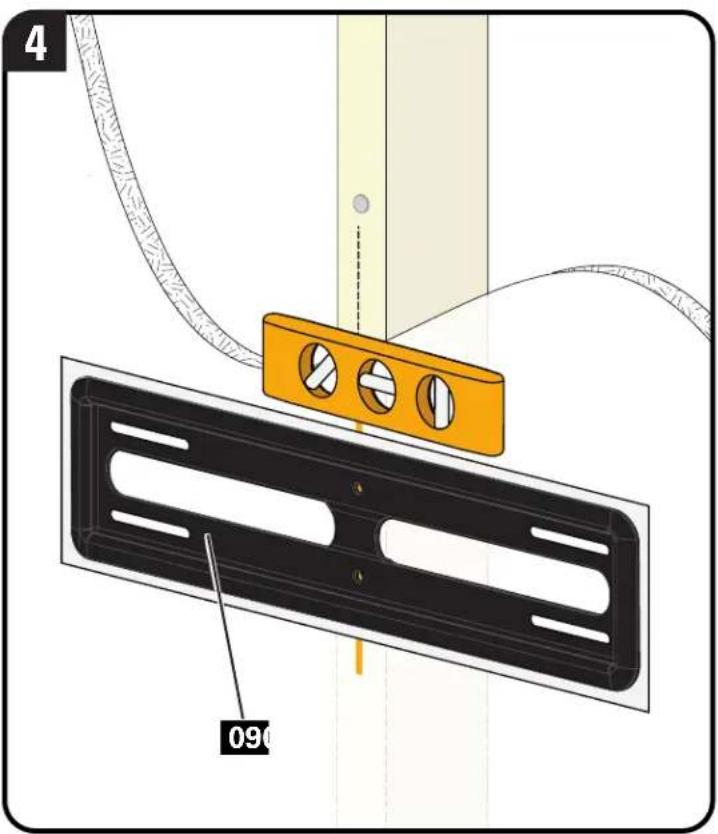
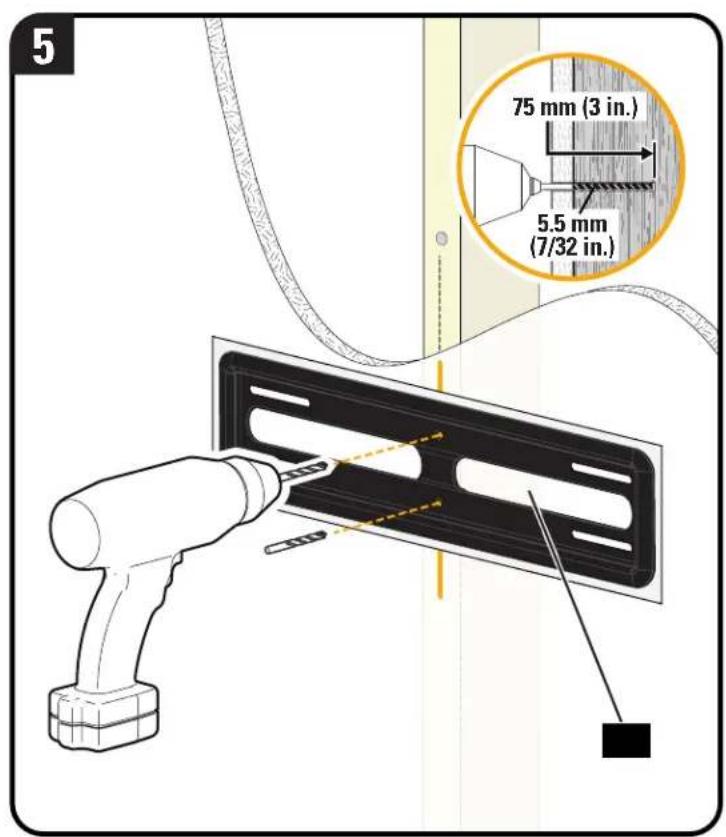
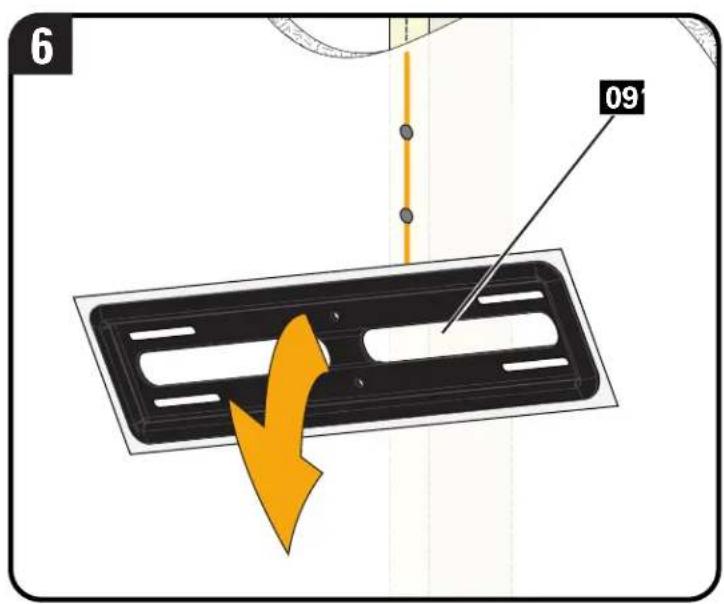
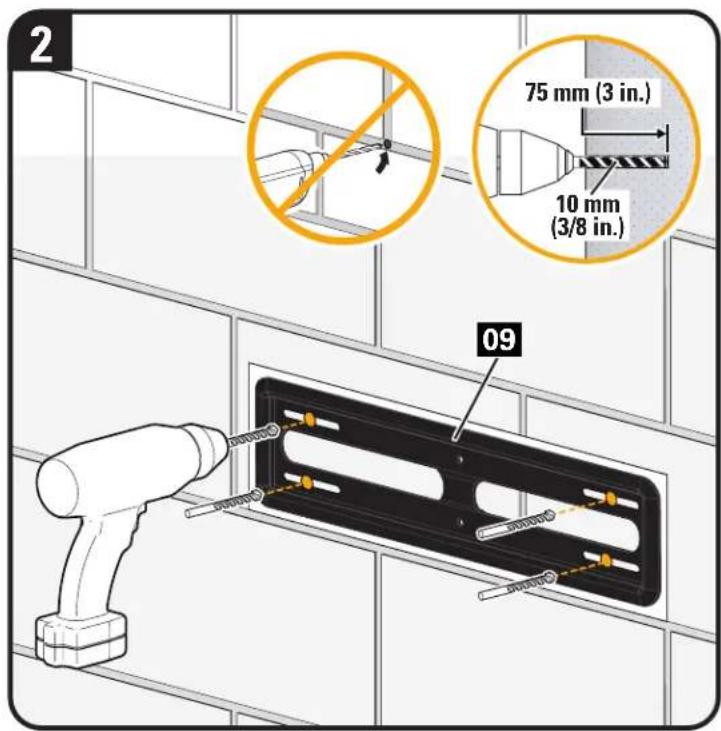
STEP 2 Attach Wall Plate to Wall
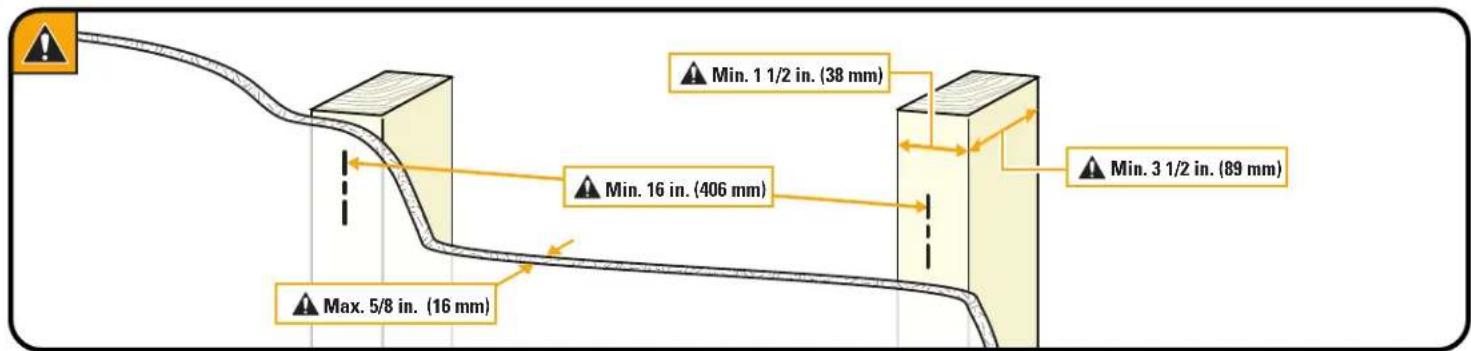
For wood stud installations (Double Stud), follow STEP 2A on PAGE 8
For wood stud installations (Single Stud), follow STEP 2B on PAGE 11
For concrete installations, follow STEP 2C on PAGE 14
Parts and Hardware for STEP 2
WARNING: This product contains small items that could be a choking hazard if swallowed.
Before starting assembly, verify all parts are included and undamaged. If any parts are missing or damaged, do not return the damaged item to your dealer; contact Customer Service. Never use damaged parts!
Wall Plate
10x1
Wall Plate
Template
09 x1
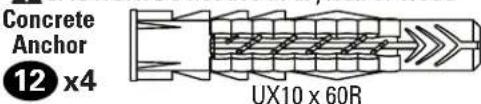
For Concrete Installations ONLY
CAUTION: Do not use in drywall or wood
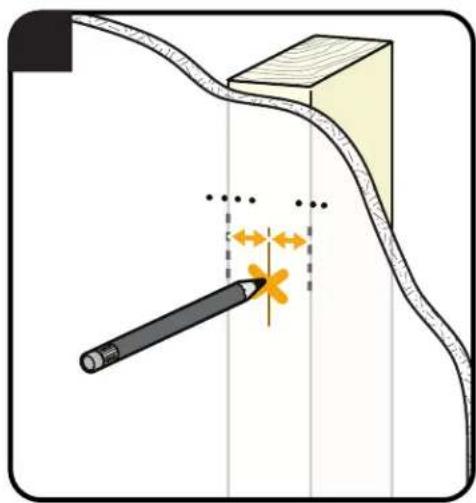
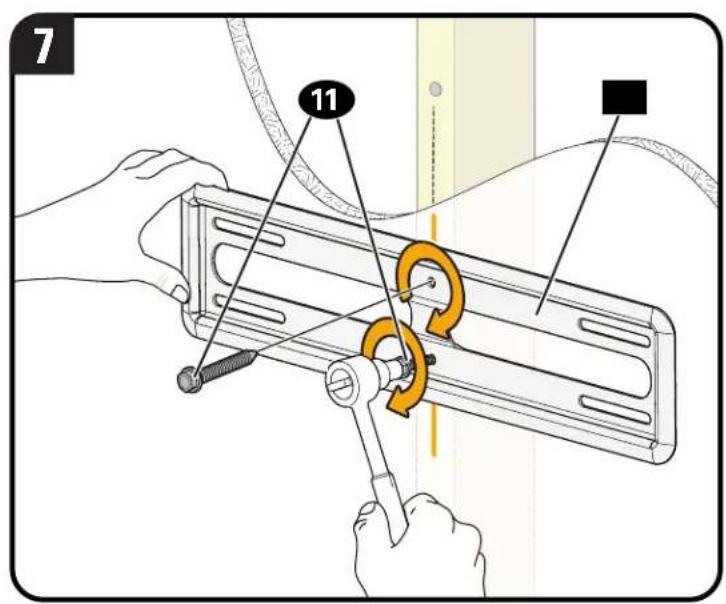
STEP2A
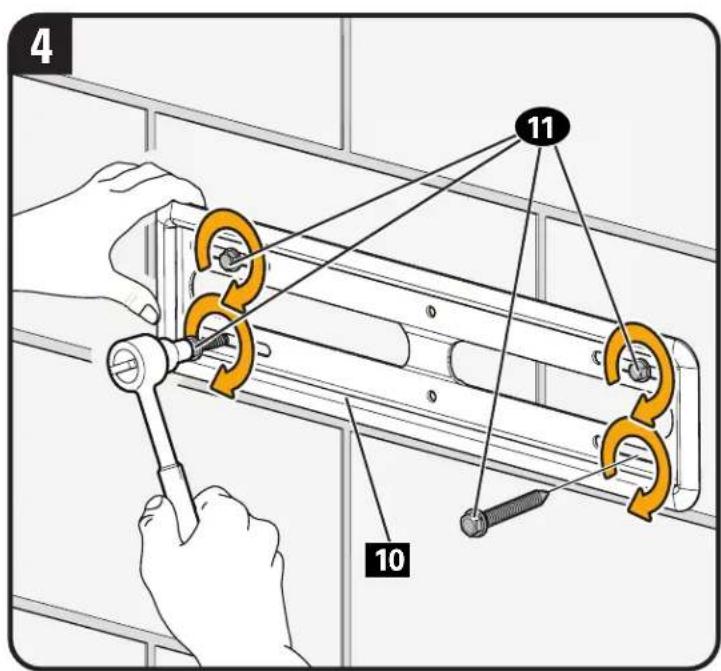
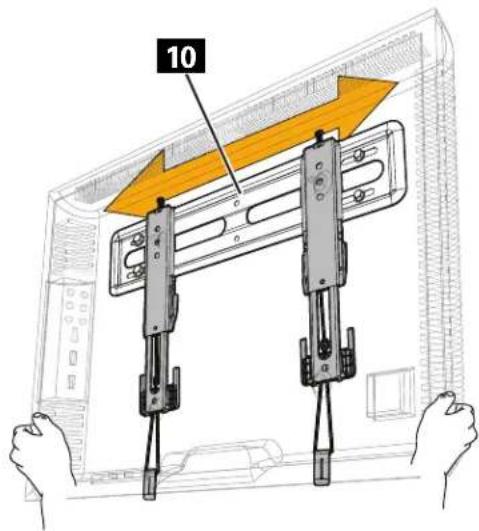
Wood Stud Option (Double Stud Install)
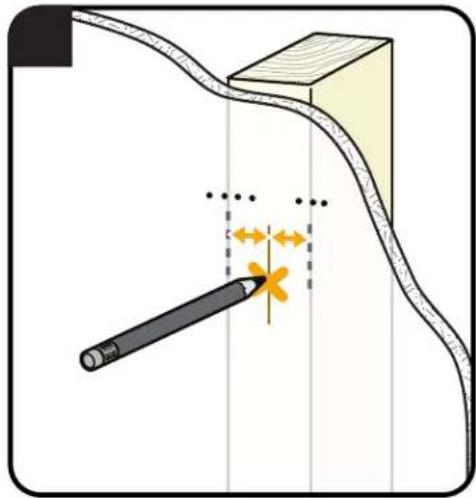
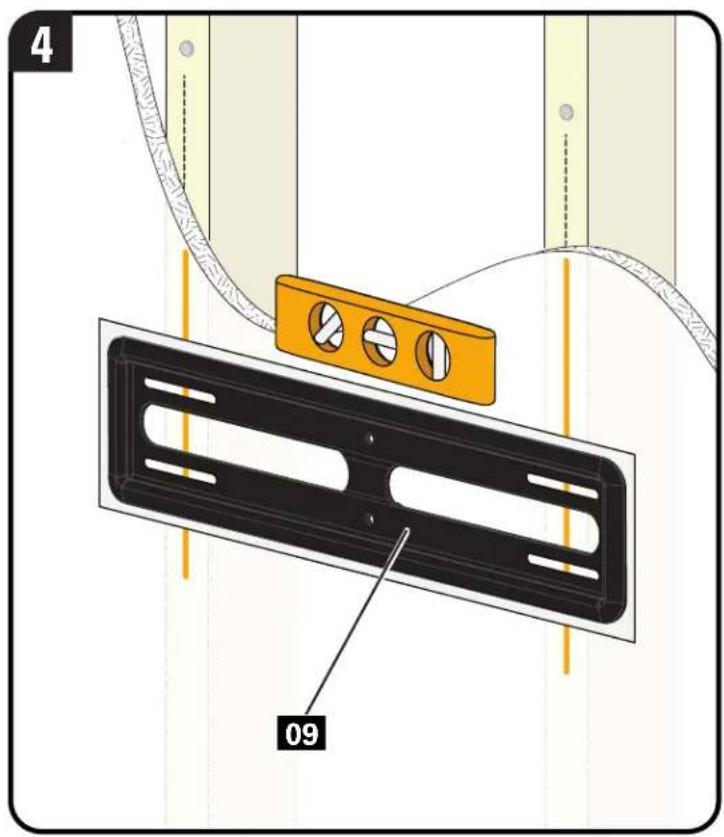
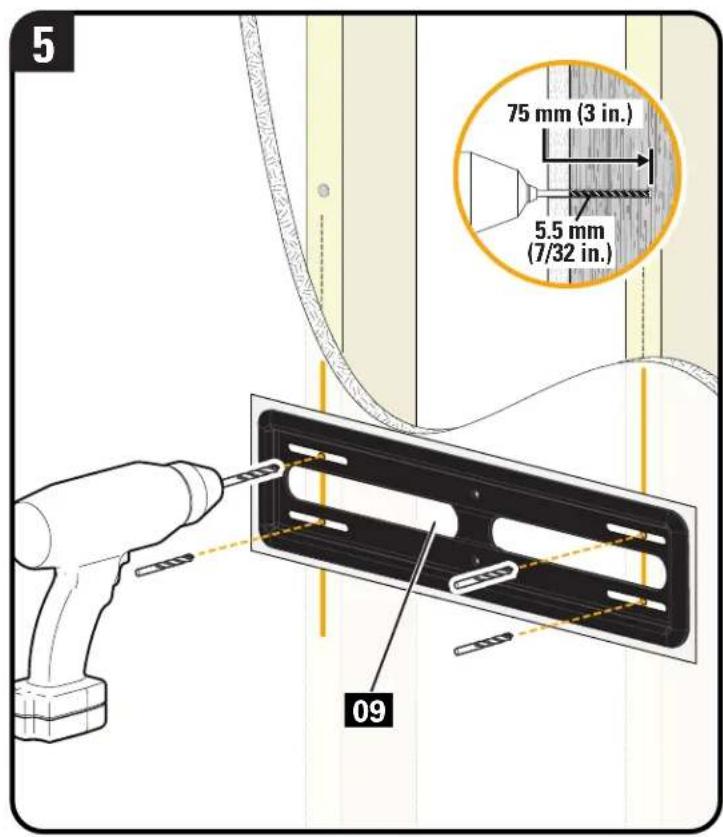
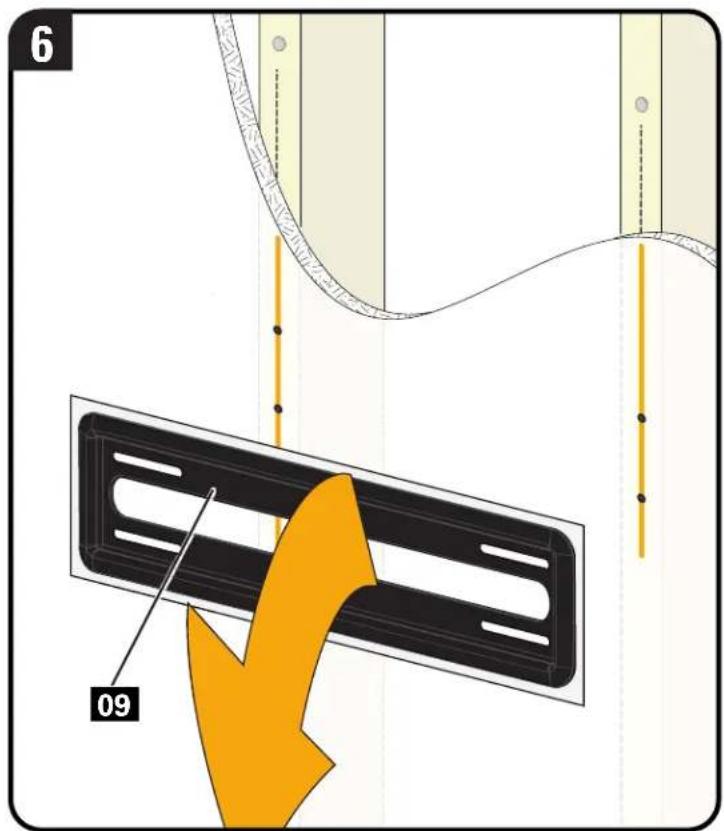
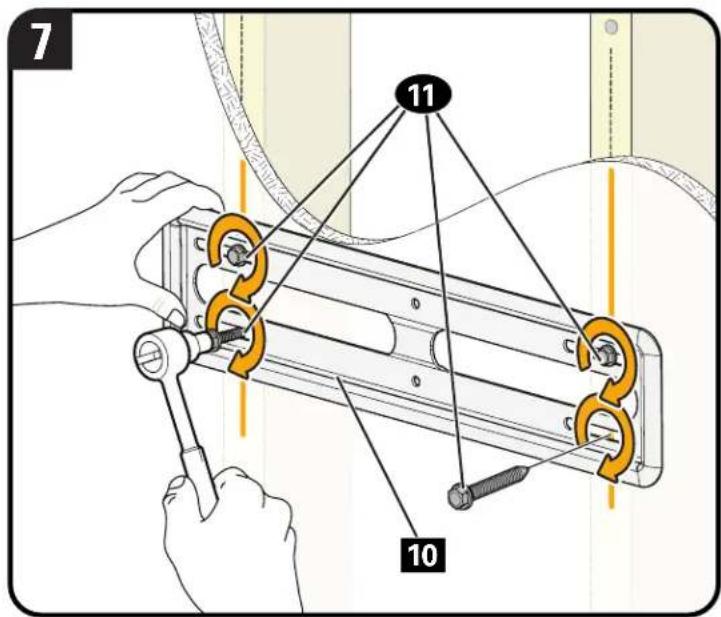
CAUTION: Avoid potential personal injury or property damage! All four lag bolts 11 MUST BE firmly tightened to prevent unwanted movement of the wall plate 10 Ensure the wall plate is securely fastened to the wall before continuing on to the next step.
Go to STEP 3 on PAGE 17.
STEP 2B Food Stud Option (Single Stud Install)
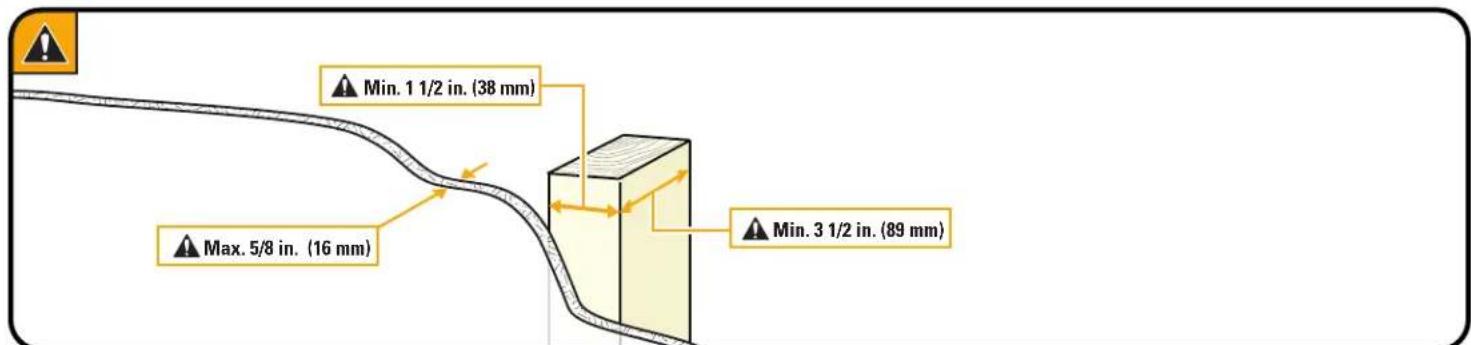
CAUTION: Avoid potential personal injury or property damage! The middle two lag bolts 11 MUST be installed into a wood stud - this product was not designed to be used in drywall alone.
CAUTION: Avoid potential personal injury or property damage! Both lag bolts MUST BE firmly tightened to prevent unwanted movement of the wall plate. Ensure the wall plate is securely fastened to the wall before continuing on to the next step.
Go to STEP 3 on PAGE 16.
STEP 2C plid Concrete or Concrete Block Option
CAUTION: Avoid potential personal injuries and property damage! Mount the wall plate 10 directly onto the concrete surface.

CAUTION: Avoid potential personal injury or property damage! All four lag bolts 11 MUST BE firmly tightened to prevent unwanted movement of the wall plate 10 Ensure the wall plate is securely fastened to the wall before continuing on to the next step.
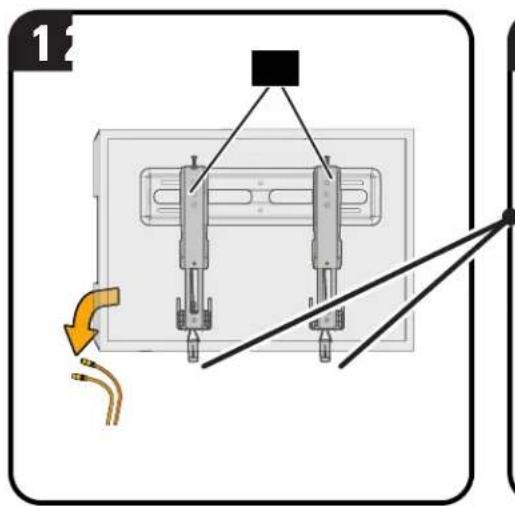
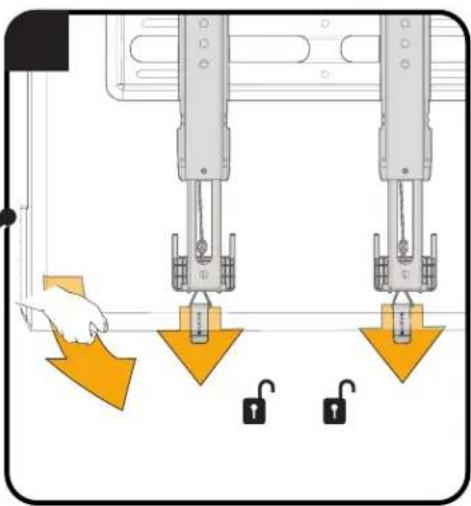
STEP 3 Attach TV to Wall Plate

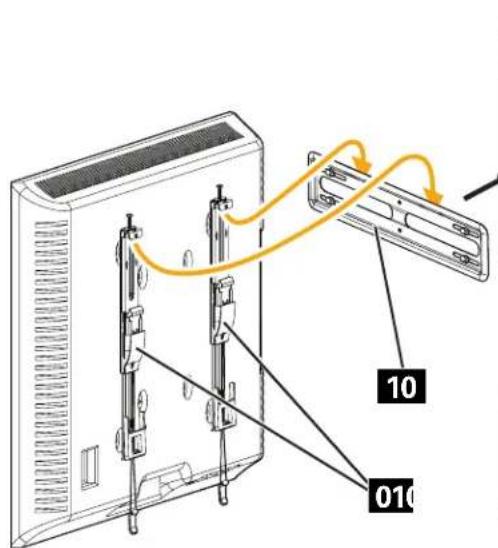
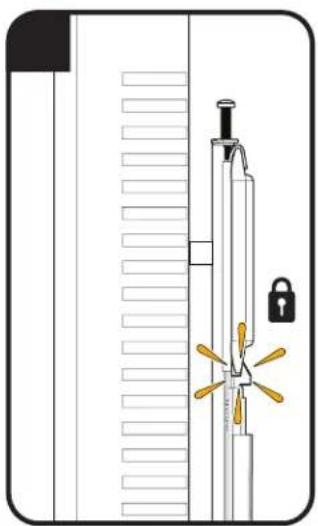
CAUTION: Avoid potential personal injury or property damage! Always make sure your TV brackets 01 are in the locked position so the TV is securely fastened to the wall plate 10.
Manage Cables
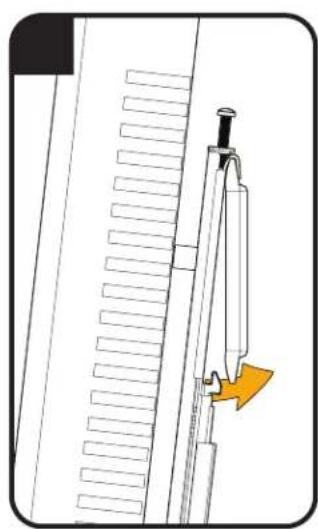
CAUTION: To prevent breaking the locking latch: always pull and hold the release cords R down while pulling the TV away from the wall.
CAUTION: TV is not secured to the wall when it is in the kick stand position. Assistance is recommended for this step.
Adjustments
LEVEL
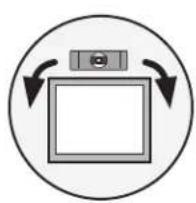
TV LATERAL SHIFT
REMOVING THE TV

CAUTION: To prevent breaking the locking latch: always pull and hold the release cords down while pulling the TV away from the wall.
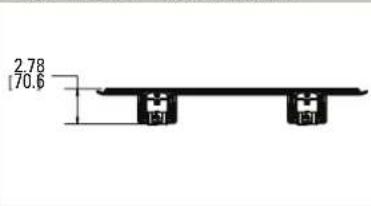
Dimensions
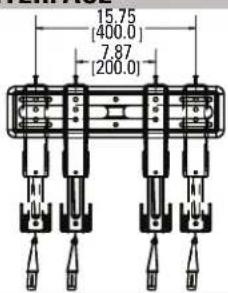
TV INTERFACE
in. [mm]
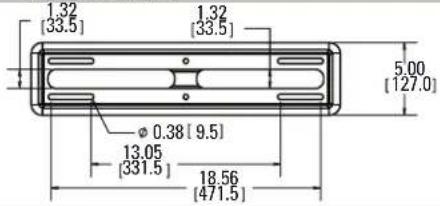
WALLPLATE
TOP VIEW-EXTENDED

3-D
SIDE VIEW-EXTENDED
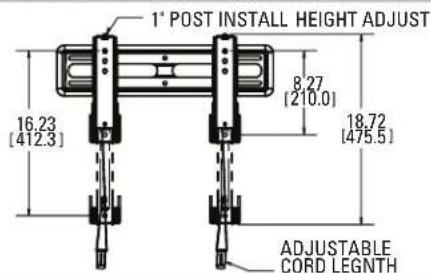
FULLY ASSEMBLED MOUNT
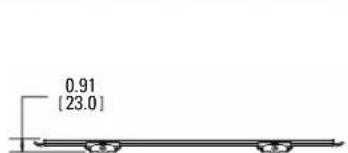
TOP VIEW - RETRACTED
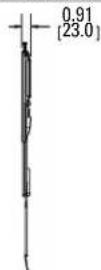
SIDE VIEW - RETRACTED

Troubleshooting
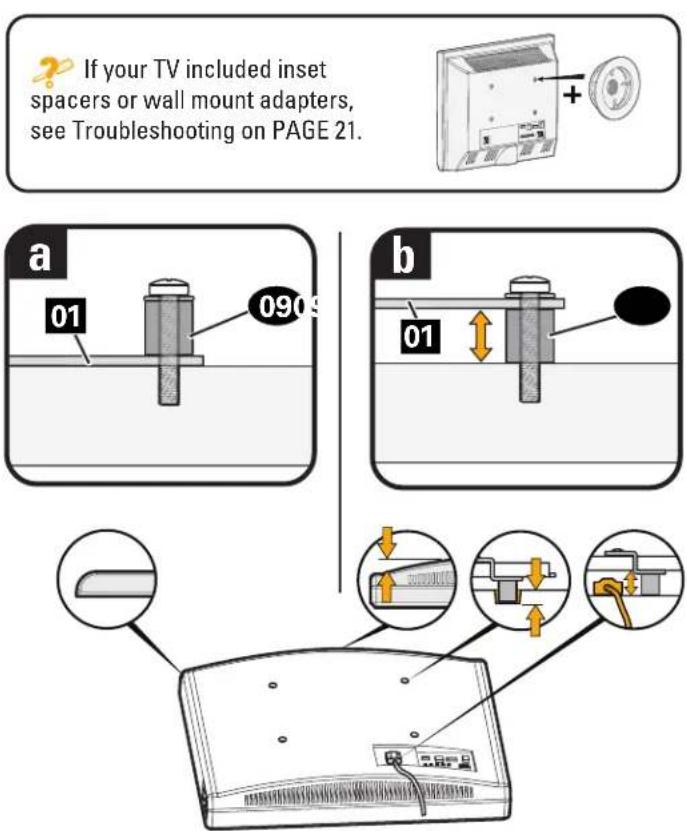
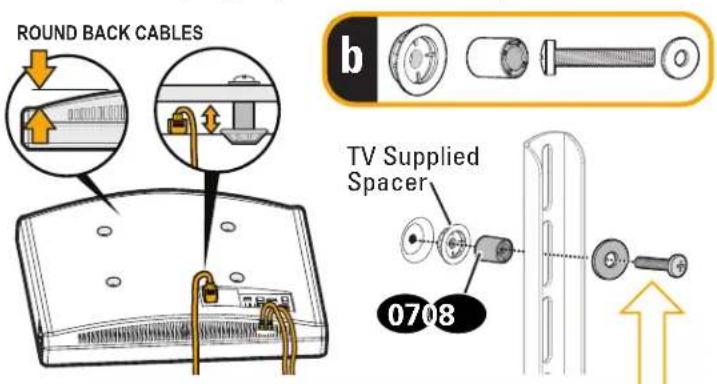
TV supplied spacers
TV Supplied Spacers
If you are uncertain about your hardware selection, contact Customer Service at 1-800-359-5520.
TV Supplied Spacer | Espaciador suministrado con el televisor | Entretoise fournie avec le téléviseur | Mit dem Fermseher mitgelieferter AbstandhalterBij tv geleverde afstandholder | TV:ns medfoljande distansbrickor | Komnneknha bryka | 电视随附的垫片 | テレビに含まるス・サ
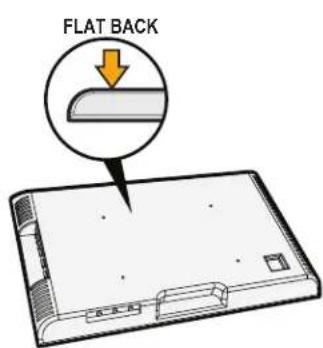
a: Use your TV supplied spacer for flat back TVs (AND you want your TV closer to the wall).

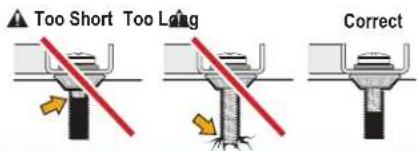
CAUTION: Avoid potential injury or property damage! Use the correct screw length for adequate thread engagement.
- Too short will not hold the TV.
- Too long will damage the TV.
b:Use your TV supplied spacer and spacer 07 or 08 for: Round (irregular) back TVs • Extra space needed for cables
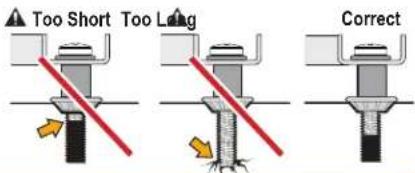
CAUTION: Avoid potential injury or property damage! Use the correct screw length for adequate thread engagement.
-Too short will not hold the TV. -Too long will damage the TV.
ESPANOL
m = 311 ;
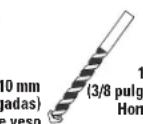
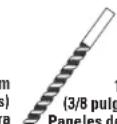
Broca
Legrand AV Incand its affiliated corporations and subsidiaries (collectively, Legrand), intend to make this manual accurate and complete. However, Legrand makes no claim that the information contained herein covers all details, conditions, or variations. Nor does it provide for every possible contingency in connection with the installation or use of this product. The information contained in this document is subject to change without notice or obligation of any kind. Legrand makes no representation of warranty, expressed or implied, regarding the information contained herein. Legrand assumes no responsibility for accuracy, completeness or sufficiency of the information contained in this document.
Espanol
Thank you for choosing SANUS! Please take a moment to let us know how we did:
Legrand AV EMEA Headquarters
Franklinstraße 14
6003 DK Weert
The Netherlands

SANUS.com
US: 1-800-359-5520
EMEA: +31 (0) 495 580 852
UK: 0800-056-2853
©2020 Legrand AV Inc. All rights reserved. SANUS is a division of Legrand.
All other brand names or marks are used for identification purposes and are trademarks of their respective owners.
©2020 Legrand AV Inc. All rights reserved. SANUS is a division of Legrand. SANUS and the SANUS logo are registered trademarks.
Legrand AV Inc. 6436 City West Parkway Eden Prairie, MN 55344 USA
6901-602617 00