SHS51001EU - Smart Home SMARTWARES - Free user manual and instructions
Find the device manual for free SHS51001EU SMARTWARES in PDF.


Frequently Asked Questions - SHS51001EU SMARTWARES
User questions about SHS51001EU SMARTWARES
0 question about this device. Answer the ones you know or ask your own.
Ask a new question about this device
Download the instructions for your Smart Home in PDF format for free! Find your manual SHS51001EU - SMARTWARES and take your electronic device back in hand. On this page are published all the documents necessary for the use of your device. SHS51001EU by SMARTWARES.
USER MANUAL SHS51001EU SMARTWARES
Smartwares safety & lighting
Broekakkerweg 15
| Introduction | 15 |
| Infinite possibilities with HomeWizard 16 | |
| Symbols in the manual 16 | |
| Precautions and safety instructions 17 | |
| What you will you find in the box of your set? 18 | |
| Intended use 18 | |
| Installation | 19 |
| Installation and use together with the HomeWizard 21 | |
| Assembling of the magnet contact 26 | |
| Changing batteries of a magnetic contact 26 | |
| Technical specifications 27 | |
| Warranty | 27 |
Introduction
Thank you for purchasing this set consisting of a magnetic contact and a wireless switchable lamp socket. This manual will accompany and assist you with the installation and operation of the set.
If you are the owner of a HomeWizard, you can connect your set to it. This manual describes how to do this.
We advise you to keep to the order of installation as described in this manual.
For questions or comments, please contact:
Smartwares safety & lighting
| Broekakkerweg 15 | Tel: +31 (0)161 - 455 363 |
| 5126 BD GILZE, | Website: www.smartwares.eu |
| The Netherlands | E-mail: info@smartwares.eu |
Infinite possibilities with HomeWizard
Do you have a HomeWizard? Connect your set and discover the possibilities.
Then you can, for example:
- switch your lights on and off at home while you are on holiday;
- program your coffee machine to switch on in the morning at a time you have set;
- switch devices on and off with your Smartphone from the bank.
Besides this set, there are several other products that you can easily connect to on your HomeWizard.
In combination with the free HomeWizard app, you experience complete control, safety and convenience.
For more information, visit www.homewizard.nl.
Symbols in the manual

DANGER
Indicates an immediate danger to human beings; it will, if not observed, contribute to irreparable injury or death.

WARNING
The user can cause (serious) injury to himself/ herself or can damage the product seriously. A warning indicates the possibility of damage to the user or to the product, when the user does not perform the procedures meticulously.
CAUTION
C E
A note with additional information to the user. A note alerts the user to possible problems.
This is the CE logo, which indicates that the product meets the legal requirements.
The WEEE logo indicates that this product cannot be discarded or disposed of together with household waste.
The crossed-out waste bin indicates that batteries must be collected separately.
Precautions and safety instructions
DANGER
- Do not allow children to install the product.
- Do not attempt to repair this product. Return the complete product to the shop of purchase if the product is damaged or if you have any doubt about the correct functioning.
WARNING
- Do not connect devices with a capacity greater than 3600 W. Connecting incorrect equipment can lead to failures, short circuit and fire.
- Do not expose this product to excessive heat, direct sunlight or moisture.
- Do not use the receivers in damp surroundings.
What you will you find in the box of your set?
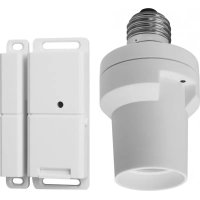
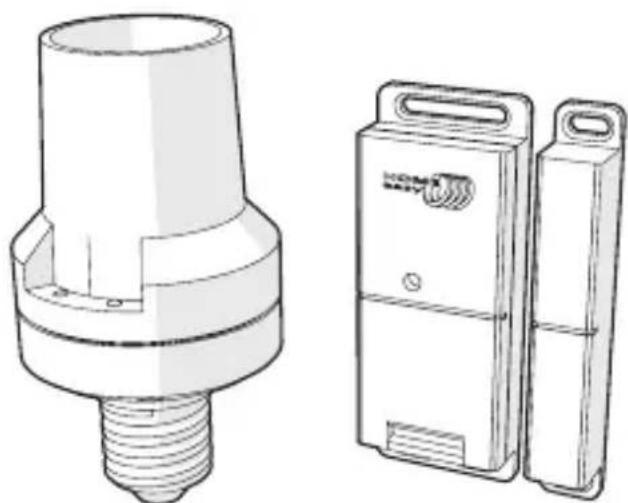
- One E27 wireless switchable lamp socket
- One magnetic contact
Intended use
The set consists of a wireless switchable lamp socket and a magnetic contact. The magnetic contact is intended to be placed at a door or window inside the house in such a way that when you open the door or window the magnetic contact is broken. After the contact has been broken, it transmits a signal. This signal can be picked up by compatible receivers including the wireless switchable lamp socket and the HomeWizard.
The wireless switchable lamp assembly needs to be turned into a lamp socket. The lamp, which had been turned into the wireless switchable lamp socket, can be switched on and off from a distance.
Any other use than the intended use described above is seen as unintended use. The manufacturer is not liable for any damage as a result of unintended use.
Installation
Placing the wireless switchable lamp socket in a lamp
- Turn off the switch of the lamp.
- Unplug the lamp from the socket. Has the lamp got no plug? Switch off the power at the main switch in your meter cupboard.
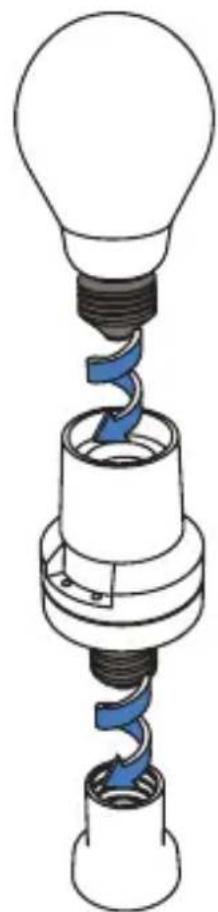
- Screw in a bulb into the wireless switchable lamp socket. Make sure that you use a lamp with the correct specifications.
- Screw the wireless switchable lamp socket on the E27 fitting of the lamp.
- Insert the plug of the lamp back in the socket or switch the power on at the meter cupboard.
- Turn on the switch of the lamp again. The red LED of the wireless switchable lamp socket goes on.
Activating the magnetic contact (first time use)
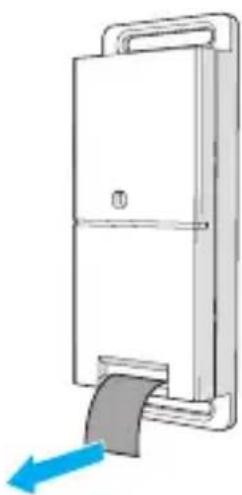
The magnetic contact is provided with a battery.
Activate the battery by pulling the plastic tab from the contact sensor. This is only necessary when used the first time.
Connecting the magnetic contact with the wireless switchable lamp socket
Note: make sure that you have installed the wireless lamp socket before you perform these steps.
To connect the magnetic contact with the wireless switchable lamp socket, do the following:
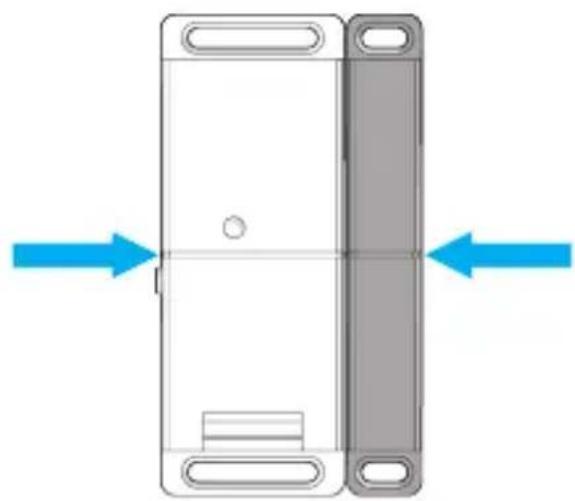
I. Place the touch sensor and the magnet against each other.
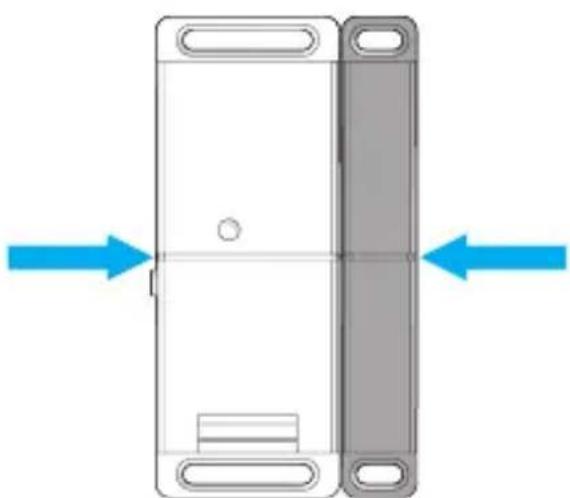
- Press the button of the wireless switchable lamp socket for three seconds. The LED will start flashing. The wireless switchable lamp socket is now in connecting mode.
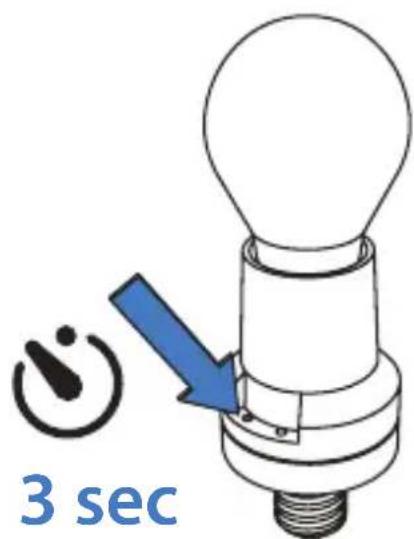
NOTE! The LED might flash after release. If the LED begins to flash during the press action, then it will not be linked.
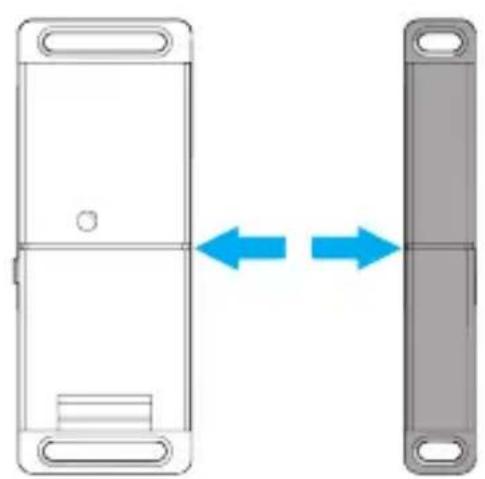
- Take the contact sensor and the magnet apart.
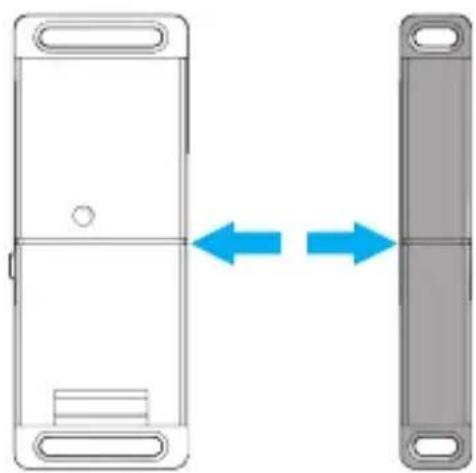
- Check whether the LED on the wireless switchable lamp socket lights up. Does the LED light up? You have now linked the wireless switchable lamp socket with the magnetic contact.
Resetting the linkages
To reverse all the prepared linkages, proceed as follows:
-
The red LED of the wireless switchable lamp socket lights up. Check this out.
-
Keep the programming button pressed for 6 seconds.
The LED starts to flash.
- Press the button again briefly.
The LED switches off.
All saved links are removed from the receiver.
Installation and use together with the HomeWizard
The devices from this set can be used in combination with the HomeWizard. The HomeWizard does not form part of this set. If you don't already have a HomeWizard then you must acquire it first. For more information, visit www.homewizard.nl.
Adding the wireless switchable socket to the HomeWizard
CAUTION
To perform the steps in this chapter, you must be in possession of a HomeWizard. Both the HomeWizard and the HomeWizard App need to be installed and functioning. For more information, see the manual of your HomeWizard.
To add the wireless switchable lamp socket to the HomeWizard, do the following:
- Open the HomeWizard app on your Smartphone or tablet and press the 'Menu' button in the upper left corner of the screen.
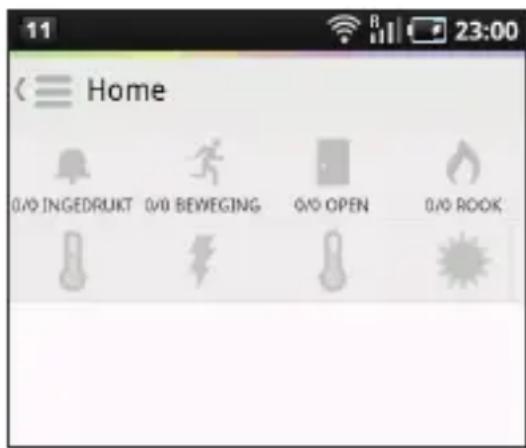
- Tap on 'New Sensor'.
The category screen appears.
Tip! Move your finger across the screen to search.
- Tap on 'Switch'.
- Tap on 'Name'.
Fill in a preferred name for the device and press 'OK' (Android) or 'Ready' (iOS).
- Press the button on the wireless switchable lamp socket for 3 seconds and then release it. The LED will start flashing. The wireless switchable lamp socket is now in connecting mode. Note! The LED might flash after
releasing the button. If the LED begins to flash while pressing the button, then the wireless switchable lamp socket is not linked.
-
Press 'Code' and then press 'Generate new code'.
-
In the upper right corner of the screen, press 'V' (Android) or 'Save' (iOS) to confirm. The message 'The switch has been added successfully' appears. The wireless switchable lamp socket has been added.
Adding the magnet contact to the HomeWizard
- Open the HomeWizard app on your Smartphone or tablet and press the 'Menu' button in the upper left corner of the screen.
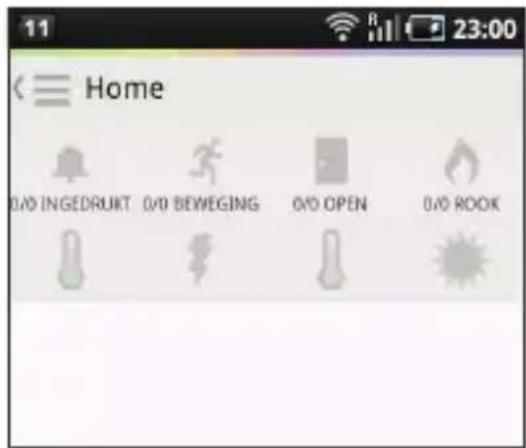
- Tap on 'New Sensor'.
The category screen appears.
Tip! Move your finger across the screen to search.
-
Press 'Contact sensor'.
-
Tap on 'Name'.
Fill in a preferred name for the device and press 'OK' (Android) or 'Ready' (iOS).
- Place the contact sensor and the magnet against each other.
-
Press 'Code' and then press 'Learn code'.
-
Take the contact sensor and the magnet apart. The contact sensor has been added when the message "The code was successfully received" appears.
Note! Keep the contact sensor near the HomeWizard while adding.
- In the upper right corner of the screen, press 'V' (Android) or 'Save' (iOS) to confirm. The message 'The contact sensor has been added successfully' appears. The contact sensor has been added.
Adding the wireless switchable lamp socket to the HomeWizard App
- In the Home screen of the HomeWizard app press 'Switches & Dimmers'. A drop-down list appears with the wireless switchable lamp socket that you added.
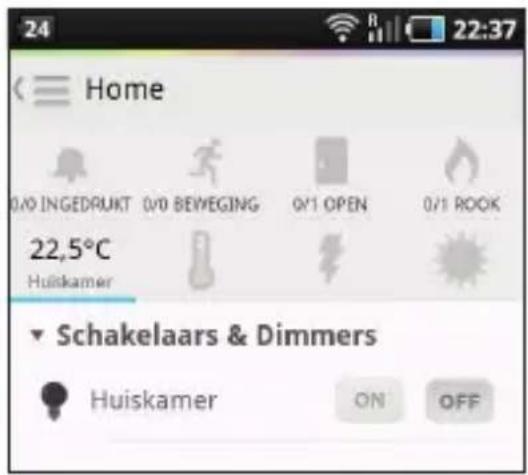
- Press 'ON' to turn on the wireless switchable lamp socket or press 'OFF' to turn off the wireless switchable lamp socket.
User's tip! Wireless switches can also be added with HomeWizard to:
1. A timer
Devices connected to HomeWizard can perform an action on a certain day and moment in time determined by you.
Example: During the week, you don't want to come home to a dark house and you therefore find the idea brilliant that the lights will be switched on automatically. This can be done using a timer.
2. An action
With an action you can bring devices linked to HomeWizard to perform one action.
Example: You have a contact sensor hanging at the front door. The moment the door opens, you want the light of the corridor to switch on automatically. This can be set in just one action. Via the HomeWizard you can also set whether or not the action should be active: for example, only when you are not at home.
3. One scene
With a scene, you can group multiple lamps. Thus, you can, as an example, switch on or off all lamps at once. It is also possible to provide scenes with switches to the wall, so that with one click for example all lights go out.
Go to www.homewizard.nl for more explanations on the above functions.
Assembling of the magnet contact
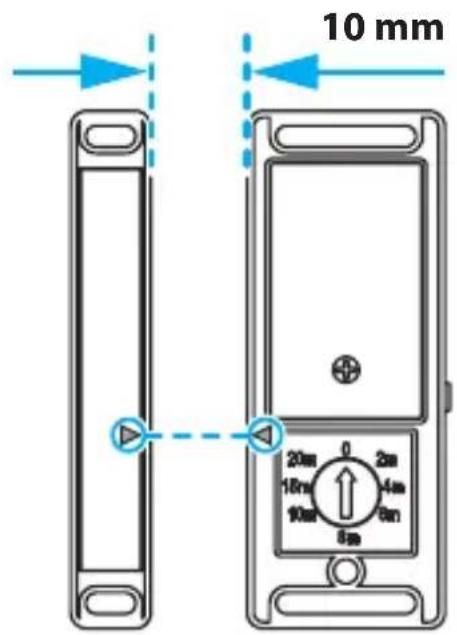
Attach the contact sensor to the desired place. Attach the magnetic component part (narrow part) to the moving part of a door or a window. NOTE! The arrow of the magnetic component part must point to the arrow of the transmitter and be aligned.
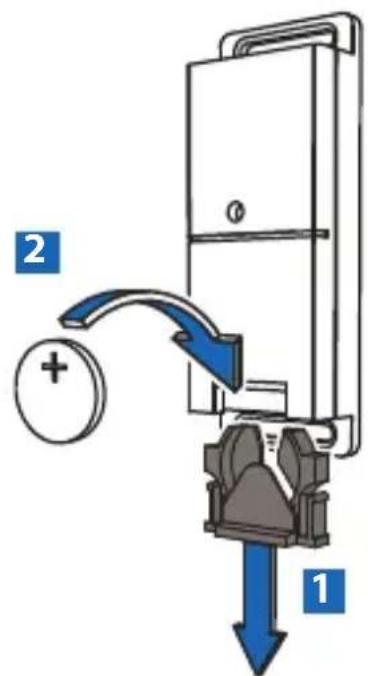
Changing batteries of a magnetic contact
I. Slide the battery holder from the contact sensor.
- Insert a new battery. Make sure that the + pole of the battery is on top.
Technical specifications
Switch
| Power supply 230 V | |
| Max capacity 3600 W | |
| Frequency 433 Mhz RF |
Remote control
| Location: Inside | |
| Width: 35 mm | |
| Mains voltage: 12 V/DC | |
| Channels: 4 | |
| Power Supply: Operates on batteries | |
| Height: 123 mm | |
| Frequency: 433 MHz | |
| Depth: 18 mm | |
| Max. range: 50 m | |
| Category: | Wireless remote control |
Battery
| Remote | I2V DC |
Warranty
This device has a limited two-year warranty. For the guarantee conditions go to: www.smartwares.eu.

GEBRAUCHSANLEITUNG
Inhaltsangabe
Smartwares safety & lighting
Broekakkerweg 15
5126 BD GILZE
Niederlande
Tel: +31 (0) | 61 - 455 363
Smartwares safety & lighting
| Broekakkerweg 15 | Tél: +31 (0)161 - 455 363 |
| 5126 BD GILZE | Site Web : www.smartwares.eu |
| Pays-Bas | Courriel : info@smartwares.eu |
Specifications techniques
Interrupteur
FR:0825560650 15ct/min
DE+49(0)1805010762