XF3 - Elliptical bike Batavus - Free user manual and instructions
Find the device manual for free XF3 Batavus in PDF.
Frequently Asked Questions - XF3 Batavus
User questions about XF3 Batavus
0 question about this device. Answer the ones you know or ask your own.
Ask a new question about this device
Download the instructions for your Elliptical bike in PDF format for free! Find your manual XF3 - Batavus and take your electronic device back in hand. On this page are published all the documents necessary for the use of your device. XF3 by Batavus.
USER MANUAL XF3 Batavus
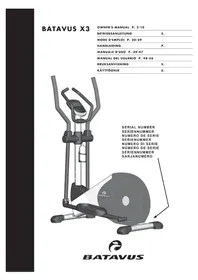
OWNER'S MANUAL p. 8-13
IMPORTANT SAFETY INSTRUCTIONS 8
ASSEMBLY 26
EXERCISING 10
CONSOLE 11
MAINTENANCE 12
TRANSPORT AND STORAGE 13
TECHNICAL SPECIFICATIONS 13
IMPORTANT SAFETY INSTRUCTIONS
Read this guide through carefully before assembling, using or servicing your fitness equipment. Please keep the guide somewhere safe; it will provide you now and in the future with the information you need to use and maintain your equipment. Always follow these instructions with care.
YOUR HEALTH
Before you start any training, consult a physician to check your state of health.
- If you experience nausea, dizziness or other abnormal symptoms while exercising, stop your workout at once and consult a physician.
To avoid muscular pain and strain, begin each workout by warming up and end it by cooling down (slow pedaling at low resistance). Don't forget to stretch at the end of the workout.
EXERCISING ENVIRONMENT
The equipment is not to be used outdoors.
- Place the equipment on a firm, level surface. Place the equipment on a protective base to avoid any damages to the floor beneath the equipment.
Make sure that the exercising environment has adequate ventilation. To avoid catching cold, do not exercise in a draughty place.
In training, the equipment tolerates an environment measuring +10^ to +35^ . The equipment can be stored in temperatures ranging between -15^ and +40^ . Air humidity in the training or storage environment must never exceed 90% .
USING THE EQUIPMENT
If children are allowed to use the equipment, they should be supervised and taught to use the equipment properly, keeping in mind the child's physical and mental development and their personality.
- Before you start using the equipment, make sure that it functions correctly in every way. Do not use a faulty equipment.
- Press the keys with the tip of the finger; your nails may damage the key membrane.
- Never lean on the interface.
- Never remove the side covers. Do not step on the frame casing.
Only one person may use the equipment at a time.
- Hold the stationary handlebar for support when getting on or off the equipment.
- Wear appropriate clothing and shoes when exercising.
- Protect the meter from sunlight and always dry the surface of the meter if there are any drops of sweat on it.
- The equipment has been designed for home use. The Batavus warranty applies only to defects and malfunctions in home use (24 months). Further information on warranty terms can be obtained from your national Batavus distributor. Please note that the warranty terms may vary from one country to another.
- Please note that the warranty does not cover damage due to shipping or negligence of adjustment or maintenance instructions described in this manual.
The equipment must not be used by persons weighing over 135kg
Make sure the equipment is unplugged before carrying out any assembly or maintenance procedures.
-
Do not attempt any servicing or adjustments other than those described in this guide. Everything else must be left to someone familiar with the maintenance of electromechanical equipment and authorized under the laws of the country in question to carry out maintenance and repair work.
-
This product must be grounded. If it should malfunction or breakdown, grounding provides a path of least resistance for electric current to reduce the risk of electric shock. This product is equipped with a cord having an equipment-grounding conductor and a grounding plug. The plug must be plugged into an appropriate outlet that is properly installed and grounded in accordance with all local codes and ordinances.
DANGER:
Improper connection of the equipment-grounding conductor can result in a risk of electric shock. Check with a qualified electrician or serviceman if you are in doubt as to whether the product is properly grounded. Do not modify the plug provided with the product - if it will not fit the outlet, have a proper outlet installed by a qualified electrician.
NOTE ABOUT SAFETY FOR UNITS WITH ELECTRICAL POWER
Before connecting the equipment to a power source, make sure that the local voltage matches that indicated on the type plate: the equipment operates at either 230 v or 115 v (north american version). Note! The equipment must be connected to a grounded wall socket. Do not use extension wires when connecting the equipment to the power source. Always switch off the power and unplug the equipment from the electrical outlet immediately after using!
To reduce the risk of burns, fire, electric shock or injury to persons:
- The equipment should never be left unattended when plugged in. Unplug the equipment from the outlet when not in use, before carrying out any maintenance
or repair procedures, and before moving the unit.
- Do not operate the equipment under a blanket or other combustive material. Excessive heating can occur and cause fire, electric shock or injury to persons.
- Do not connect the equipment to a power source, or operate the equipment if there is any sort of damage to the power cord or the unit itself.
- Do not connect the equipment to a power source or operate the equipment outdoors or in damp locations.
- Keep the power cord away from hot objects.
- Do not route the power cord beneath a carper or place any objects on the cord. Also make sure that the power cord does not run underneath the equipment.
- Do not alter (for example lengthen) the cord between the transformer and the unit.
NOTE ABOUT ASSEMBLING THE EQUIPMENT
Start by unpacking the equipment. The detailed assembly instructions can be found at the back of this guide. Follow the instructions in given order.
Before assembly, check the contents of the package. If a part is missing, please contact your dealer with the model, equipment serial no. and spare part no. of the missing part. You'll find a spare part list at the back of this guide. The hardware kit contents are marked with * in the spare parts list. The directions left, right, front and back are defined as seen from the exercising position. Keep the assembly tools, as you may need them e.g. for adjusting the equipment. Note that two people are needed for the assembly.
The packaging includes a silicate bag for absorbing moisture during storage and transportation. Please dispose of the bag once you have unpacked the equipment. Allow at least 100cm of clearance around
the equipment. We also recommend opening the package and assembling the product on a protective base.
SAVE THIS INSTRUCTION MANUAL
WELCOME TO THE WORLD OF
BATAVUS EXERCISING!
Your choice shows that you really want to invest in your well being and condition; it also shows you really value high quality and style. With Batavus Fitness Equipment, you've chosen a high quality, safe and motivating product as your training partner. Whatever your goal in training, we are certain this is the training equipment to get you there. You'll find information about using your exercise equipment and what makes for efficient training at Batavus's website at www.accellFITNESS.COM.
EXERCISING
Working out using an elliptical trainer is excellent aerobic exercise, the principle being that the exercise should be suitably light, but of long duration. Aerobic exercise is based on improving the body's maximum oxygen uptake, which in turn improves endurance and fitness. The ability of the body to burn fat as a fuel is directly dependent on its oxygen-uptake capacity. Aerobic exercise should above all be pleasant. You should perspire, but you should not get out of breath during the workout. You must, for example, be able to speak and not just pant while pedaling.
You should exercise at least three times a week, 30 minutes at a time, to reach a basic fitness level. Maintaining this level requires a few exercise sessions each week. Once the basic condition has been reached, it is easily improved simply by increasing the number of exercise sessions. Exercise is always rewarding for weight loss, because it is the only way of increasing the energy spent by the body. This is why it is always worthwhile to combine regular exercise with a healthy diet. A dieter should exercise daily, at first 30 minutes or less at a time, gradually increasing the daily workout time to one hour.
You should start slowly at a low pedaling speed and low resistance, because for an overweight person strenuous exercise may subject the heart and circulatory system to excessive strain. As fitness improves, resistance and pedaling speed can be increased gradually. Exercise efficiency can be measured by monitoring the pulse. The pulse meter helps you monitor your pulse easily during exercise, and thus to ensure that the exercise is sufficiently effective but not over-strenuous. Start your workout with slow tempo and low resistance.
Gradually increase tempo and resistance according to your own condition. Keep your head up and neck long in order to avoid stress on your neck, shoulders and back. Keep also your back straight. Make sure that your feet are centered on the foot pedals and that your hips, knees, ankles and toes are facing forward. Keep your body weight centered over your lower body regardless of whether you lean forward or stand upright. Stop your workout by gradually decreasing tempo and resistance.
Don't forget to stretch afterwards. To strengthen cardiovascular system, maintain low resistance but high tempo. Exercising with higher resistance and slow tempo strengthens correspondingly your back and hips.
HEART RATE
No matter what your goal, you'll get the best results by training at the right level of effort, and the best measure is your own heart rate.
The XF3 meter has a heart rate receiver compatible with Polar equipment, so you can also use Polar uncoded heart rate transmitter belts for heart rate measurement.
NOTE! If you are fitted with a pacemaker, please consult a physician before using a heart rate transmitter belt.
The most reliable heart rate measurement is achieved with a telemetric device, in which the electrodes of the transmitter fastened to the chest transmit the pulses from the heart to the console by means of an electromagnetic field. If you want to measure your heart rate this way during your workout, moisten the grooved electrodes on the transmitter belt with saliva or water. Fasten the transmitter just below the chest with the elastic belt, firmly enough so that the electrodes remain in contact with the skin while exercising, but not so tight that normal breathing is prevented. If you wear the transmitter and belt over a light shirt, moisten the shirt slightly at the points where the electrodes touch the shirt. The transmitter automatically transmits the heart rate reading to the console up to a distance of about 1m .
If the electrode surfaces are not moist, the heart-rate reading will not appear on the display. If the electrodes are dry, they must be moistened again. Allow the electrodes warm up properly to ensure accurate heart rate measurement. If there are several telemetric heart rate measurement devices next to each other, the distance between them should be at least 1.5m . Similarly, if there is only one receiver and several transmitters in use, only one person with a transmitter should be within transmission range. The transmitter is switched to an active state only when it is being used for measurement. sweat and other moisture can, however, keep the transmitter in an active state and waste battery energy. therefore it is
important to dry the electrodes carefully after use.
When selecting training attire, please note that some fibers used in clothes (e.g. polyester, polyamide) create static electricity, which may prevent reliable heart rate measurement. Please note that a mobile phone, television and other electrical appliances form an electromagnetic field around them, which will cause problems in heart rate measurement.
HAND GRIP PULSE MEASUREMENT
(HGP-VERSION)
Pulse is measured by sensors in the handlebars. Pulse is measured when the user of XF3 is touching both sensors simultaneously. Reliable pulse measurement requires that the skin is constantly touching the sensors and that the skin is slightly moist. Too dry or too moist skin weakens the reliability of hand pulse measurement.
HEART RATE IN TRAINING
First find your maximum heart rate i.e. where the rate doesn't increase with added effort. If you don't know your maximum heart rate, please use the following formula as a guide:
220-AGE
The formula gives an average value, the maximum varies from person to person. The maximum heart-rate diminishes on average by one point per year. If you belong to a risk group, ask a doctor to measure your maximum heart rate for you.
We have defined three different heart-rate zones to help you with targeted training.
BEGINNER 50 - 60% of maximum heart-rate
Also suitable for weight-watchers, convalescents and those who haven't exercised for a long time. Three sessions a week of at least a half-hour each is recommended. Regular exercise considerably improves beginners' respiratory and circulatory performance and you will quickly feel your improvement.
TRAINER 60 - 70% of maximum heart-rate
Perfect for improving and maintaining fitness. Even reasonable effort develops the heart and lungs effectively, training for a minimum of 30 minutes at least three times a week. To improve your condition still further, increase either frequency or effort, but not both at the same time!
ACTIVE TRAINER 70 - 80% of maximum heart-rate
Exercise at this level suits only the fittest and presupposes long-endurance workouts.
CONSOLE
BUTTONS
1. SELECTION DIAL
The selection dial functions in two ways:
A) Rotating the dial (+ / -) . By rotating the dial clockwise, you can scroll the menus to the right, and increase values or resistance. By rotating the dial counter-clockwise, you can scroll the menus to the left, and decrease values or resistance.
B) Pressing the dial (ENTER). By pressing the dial, you can accept the selection you made when rotating the dial.
2. START/STOP
Starts, pauses, and stops training. During training, pressing this button once activates the pause mode. Pressing the button again starts the program again.
3. RESET
Single push: return to the program menu. Long push: restarts the meter.
4. RECOVERY
Calculates your recovery heart rate index.
DISPLAY
Small window: Time (mm:ss), speed (km/h or ml/h), RPM (revolutions per min), distance (km or ml), energy consumption (kcal), heart rate (bpm) and power (W) are displayed.
Big window: Starts to automatically scan between the values of time - speed - RPM - distance - energy - heart rate - power every 6 seconds. Scanning can be stopped by pressing ENTER button. By pressing ENTER again you can change the big window to display information for the next value.
PROGRAMS
1. MANUAL PROGRAM
Set target time and/or distance and/or energy consumption and/or upper heart rate limit by using the SELECTION DIAL.
Start training by pressing START/STOP button.
If you have set target/targets, the target/targets start to count down. Adjust resistance with SELECTION DIAL.
2. PRESET PROGRAMS
Preset program profile is shown for two seconds while programs are browsed. Select desired preset program by using the SELECTION DIAL.
Set time for training and/or target distance and/or energy and/or upper heart rate limit by SELECTION DIAL.
Start training by pressing START/STOP button.
If you have set target/targets, the target/targets start to count down. During training you can scale the load by SELECTION DIAL.
3. USER PROGRAM
The program profile used last time is displayed. You can either start training with your personal memorized training targets by pressing START/ STOP or modify the program. The program profile bar (1/20) that can now be modified blinks. If you want to change, modify the blinking bar and confirm. Next bar will blink. After the last bar, the display switches back to the first bar. By pressing the ENTER button for 2 seconds you can finish the profile modifying. Now program is ready with your memorized personal training data (time, distance, energy targets and heart rate limit). Modify your targets if needed. Start training by pressing START/ STOP button.
If you have set target/targets, the target/targets start to count down. During training you can scale the load by SELECTION DIAL
4. HEART RATE XF3 (H.R.C.)
Select your age and confirm. Select between four different training intensities (55%, 75%, 90% or TARGET.) By selecting TARGET you can insert target heart rate.
Start training by pressing START/STOP button. If you have set target/targets, the target/targets start to count down.
During the training the equipment will automatically adjust the resistance so that your heart rate target will be reached and maintained.
5. CONSTANT WATT
Set target power in watts and target time and/or distance and/or energy consumption and/or upper heart rate limit by SELECTION DIAL.
Start training by pressing START/STOP button.
If you have set target/targets, the target/targets start to count down. During training the equipment will adjust resistance dependently on your pedaling speed, so that target power level is achieved and maintained. You can change the target power by SELECTION DIAL.
6. RECOVERY
Start the recovery calculation after training by pressing RECOVERY button. Recover heart rate calculation can be started only if the heart rate measurement is activated and the heart rate value is shown on the display. The measurement takes 60 seconds. After 60 seconds, the display shows your recovery index F1-F6 (F1 = best result). To get back to main menu, press RECOVERY button once again.
SETTING USER DATA
Right after restarting the meter you can choose the user. Select the user and confirm. Personal exercise data (time, distance, energy, heart rate limit and age) will be memorized and recalled as defaults every time when the user is selected.
ADDITIONAL NOTES
- For speed and distance you can choose either metric or English units by using the KM/ML switch located on the back cover of the meter. The power cord has to be unplugged and replugged to apply the change.
- If you are not training and buttons are not pressed, the meter switches into the Sleep mode after about four minutes. Room temperature is displayed.
- Training is paused for a maximum of 4 minutes by pressing the START/STOP button. Pressing the button again allows you to continue the paused training session using the previous training data.
- Entering training targets (time, distance, energy, heart rate limit) is possible only in the STOP mode (not during training).
- This equipment cannot be used for therapeutic purposes.
- Energy consumption is calculated based on average values. The energy expenditure is displayed in kilocalories. To convert this into joules, use the formula: 1Kcal = 4.187KJ
- If you are training with heart rate measurement (either chest belt or handgrip heart rate) you can set maximum heart rate limit. When limit is exceeded while training meter will give alarm beeps.
- Preset programs are divided into 20 steps. Duration of the one step depends on the time set for the whole training. If time is not set, duration of one step will be 100m in distance.
- Note that recovery index is in relation to the heart rate frequency in both the beginning and the end of the measurement.
- In H.R.C program heart rate target ranges (55%, 75% and 90%) are calculated as percent from your age predicted maximum heart rate (calculation formula: maximum heart rate = 220 - age).
- Automatic adjustment of the resistance during H.R.C program occurs upwards every 30 seconds and downwards every 15 seconds, if needed.
MAINTENANCE
The equipment requires very little maintenance. Check, however, from time-to-time that all screws and nuts are tight.
TECHNICAL SPECIFICATIONS
After exercising, clean the equipment with a soft, absorbent cloth. Do not use solvents.
- Never remove the equipment's protective cas
- The electromagnetic brake forms a magnetic field that may damage the mechanism of a watch, or the magnetic identification strip on a credit or cash card, should they come into immediate contact with the magnets. Never attempt to detach or remove the electromagnetic brake!
The electromagnetic brake is based on electromagnetic resistance; resistance level is electronically measured and shown as watt reading on the display. Due to the measurement system, your Batavus crosstrainer need not be re-calibrated when assembled, serviced and used according to this Owner's Manual.
MALFUNCTIONS
Despite continuous quality XF3, defects and malfunctions caused by individual components may occur in the equipment. In most cases it's unnecessary to take the whole device in for repair, as it's usually sufficient to replace the defective part.
If the equipment does not function properly during use, contact your Batavus dealer immediately. Always give the model and serial number of your equipment. Please state also the nature of the problem, conditions of use and purchase date.
If you require spare parts, always give the model, serial number of your equipment and the spare part number for the part you need. The spare part list is at the back of this manual. Use only spare parts mentioned in the spare part list.
TRANSPORT AND STORAGE
Please follow these instructions when carrying and moving the equipment about, because lifting it incorrectly may strain your back or risk other accidents:
Always switch the power off and unplug the power cord before you start moving the equipment around!
For transportation or moving of the device, two grown-ups are needed. Remain standing in front of the device on each side and take a sturdy grip at the handles. Lift the front of the device so as to lift the rear of the device on the wheels. Move the device and carefully put it down to its new place.
NOTE! Transport the equipment with caution over uneven surfaces, for example over a step. The equipment should never be transported upstairs using the wheels over the steps, instead it must be carried. We recommend that you use a protective base when transporting the equipment.
To prevent the equipment malfunctioning, store in a dry place with as little temperature variation as possible and protected from dust.
Length 182 cm
Width 71 cm
Height 168 cm
Weight 65 kg
The Batavus XF3 meets the requirements of the EU's EMC Directives on electromagnetic compatibility (89/336/EEC) and electrical equipment designed for use within certain voltage limits (73/23/EEC). This product therefore carries the CE label.
The Batavus model XF3 meets EN precision and safety standards (Class A, EN-957, parts 1 and 9) for fitness devices. The precision of the capacity measurement is secured during manufacturing by adjusting the brake with a dynamometer. Calculation of exercise capacity is based on rotation speed and moment.
Due to our continuous policy of product development, Batavus reserves the right to change specifications without notice.
NOTE! The instructions must be followed carefully in the assembly, use and maintenance of your equipment. The warranty does not cover damage due to negligence of the assembly, adjustment and maintenance instructions described herein. Changes or modifications not expressly approved by Batavus will void the user's authority to operate the equipment!
WE WISH YOU MANY ENJOYABLE TRAININGS WITH YOUR NEW BATAVUS TRAINING PARTNER!