
WAP8021 - Access Point LEVELONE - Free user manual and instructions
Find the device manual for free WAP8021 LEVELONE in PDF.
| Product Type | Wireless Access Point |
| Brand | LevelOne |
| Model | WAP8021 |
| Dimensions (L x W x H) | 150 x 100 x 30 mm |
| Weight | 200 g |
| Power Supply | PoE 802.3af or 5V / 2A power adapter |
| WiFi Standards | IEEE 802.11 b/g/n |
| Frequency Bands | 2.4 GHz |
| Maximum Data Rate | 300 Mbps |
| Network Ports | 1 x LAN 10/100 Mbps port with PoE |
| Wireless Security | WEP, WPA/WPA2-AES, MAC filtering |
| Management | Web Interface (HTTP/HTTPS), SNMP |
| Operating Modes | Access Point, Repeater, WDS Bridge |
| Default Configuration | IP Address: 192.168.188.253, Username: admin, Password: admin |
| Operating Temperature | 0 °C to 40 °C |
| Operating Humidity | 10 % to 90 % non-condensing |
| Maintenance and Cleaning | Disconnect the device before cleaning. Use a soft, slightly damp cloth. Do not use abrasive products. |
| Safety | Do not expose to water or extreme temperatures. Avoid shocks. Install in a ventilated area. |
| Spare Parts and Repairability | No user-serviceable parts. Contact LevelOne customer service for any repairs. |
| General Information | 2-year warranty. Made in China. Compliant with CE directives. |
Frequently Asked Questions - WAP8021 LEVELONE
User questions about WAP8021 LEVELONE
0 question about this device. Answer the ones you know or ask your own.
Ask a new question about this device
Download the instructions for your Access Point in PDF format for free! Find your manual WAP8021 - LEVELONE and take your electronic device back in hand. On this page are published all the documents necessary for the use of your device. WAP8021 by LEVELONE.
USER MANUAL WAP8021 LEVELONE
Quick Installation Guide
(WAP-8021)

level
V1.1
Digital Data Communications GmbH, Germany.
http://www.level1.com
Table of Content
English. 3
Deutsch. 4
Francais. 5
Espanol. 6
Portugues. 7
Italiano. 8
Figure 1. 9
Figure 2. 9
Figure 3. 9
Figure 4. 10
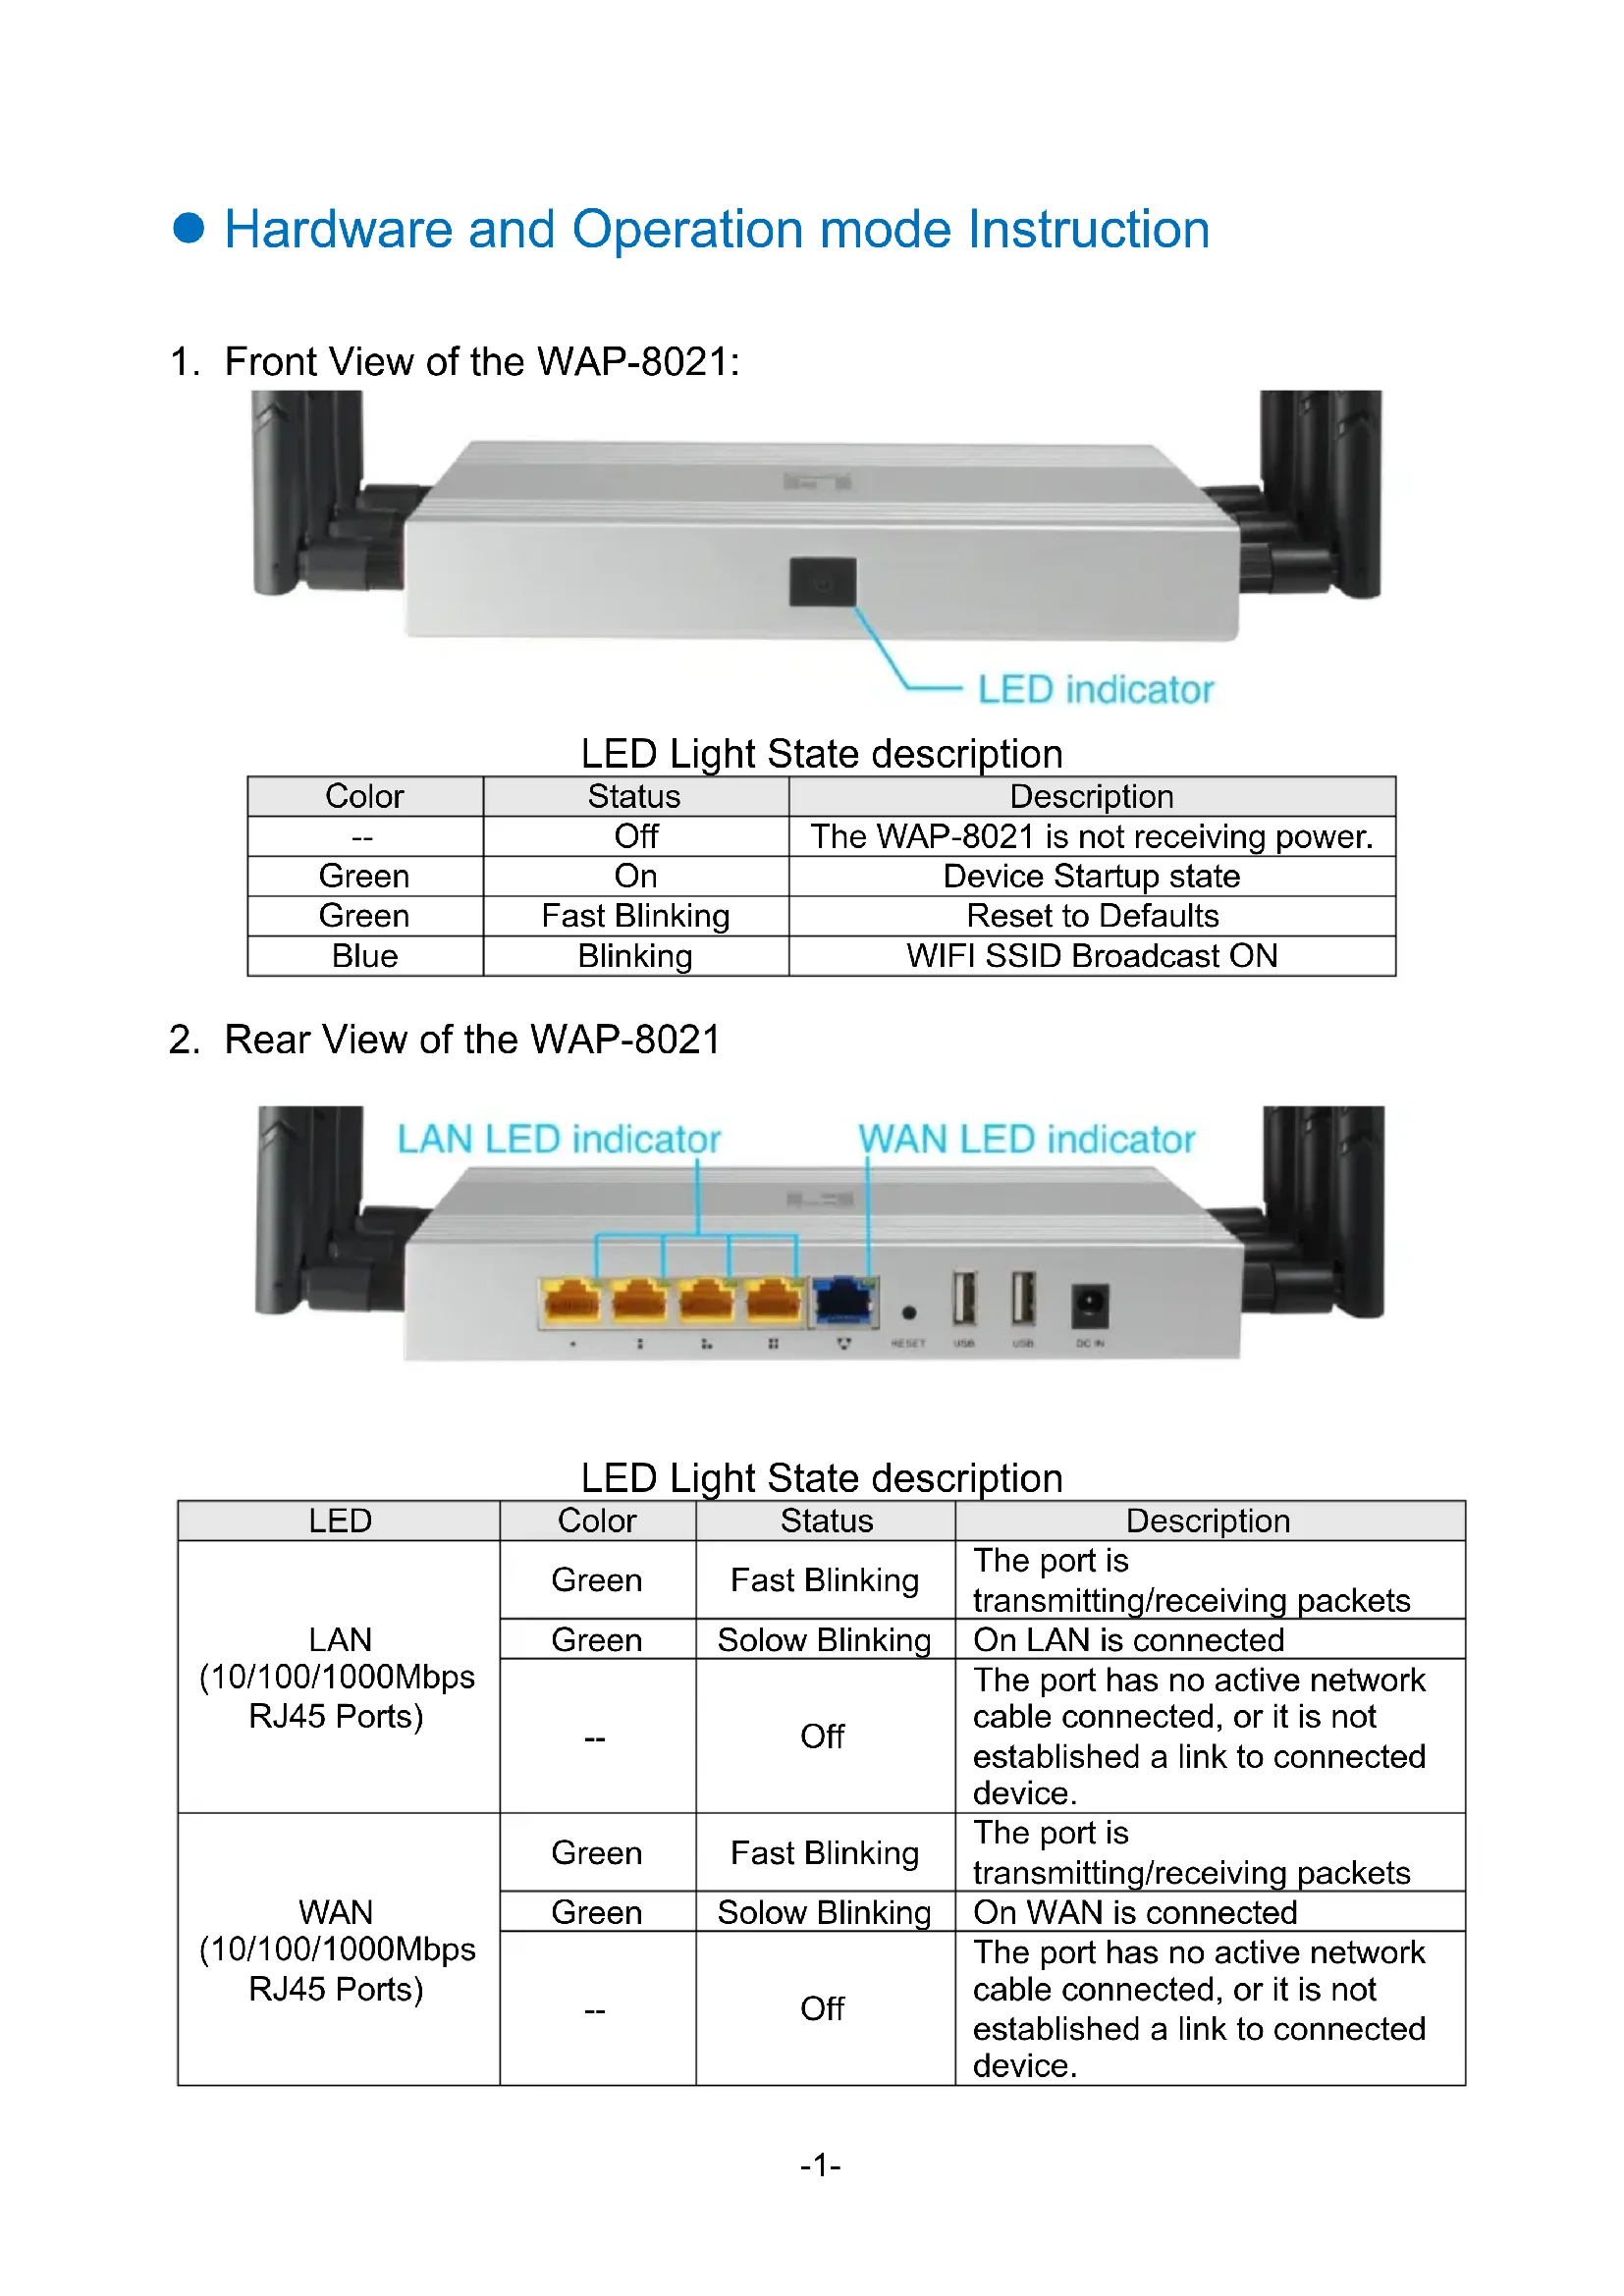
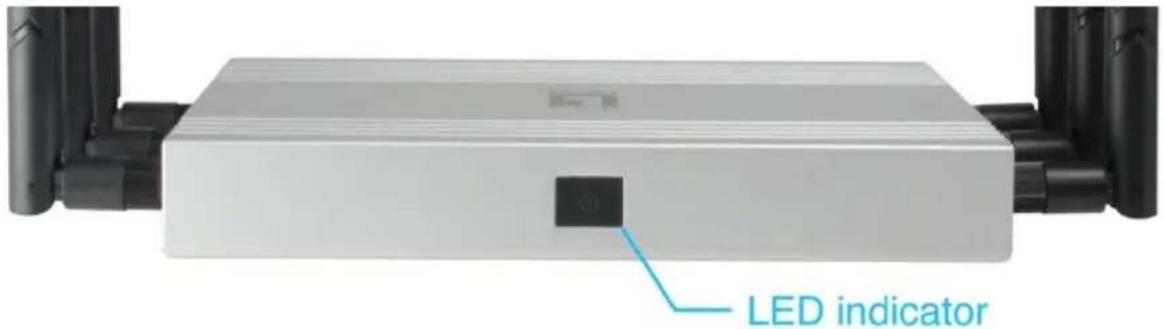
- Hardware and Operation mode Instruction
- Front View of the WAP-8021:
LED Light State description
| Color | Status | Description |
| -- | Off | The WAP-8021 is not receiving power. |
| Green | On | Device Startup state |
| Green | Fast Blinking | Reset to Defaults |
| Blue | Blinking | WIFI SSD Broadcast ON |
- Rear View of the WAP-8021
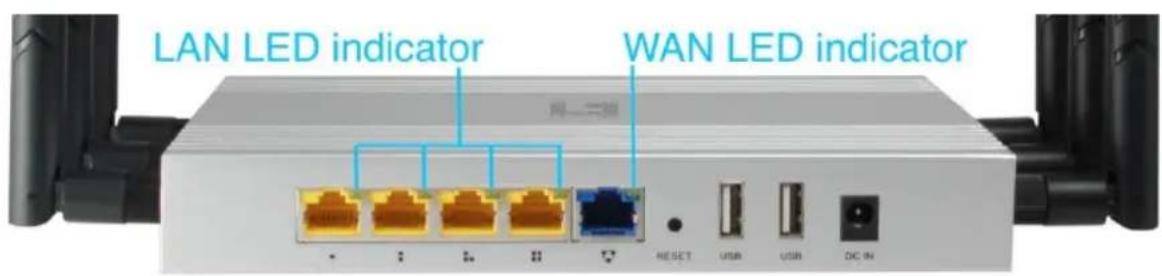
LED Light State description
| LED | Color | Status | Description |
| LAN(10/100/1000Mbps RJ45 Ports) | Green | Fast Blinking | The port is transmitting/receiving packets |
| Green | Solow Blinking | On LAN is connected | |
| -- | Off | The port has no active network cable connected, or it is not established a link to connected device. | |
| WAN(10/100/1000Mbps RJ45 Ports) | Green | Fast Blinking | The port is transmitting/receiving packets |
| Green | Solow Blinking | On WAN is connected | |
| -- | Off | The port has no active network cable connected, or it is not established a link to connected device. |
3. Interface Description
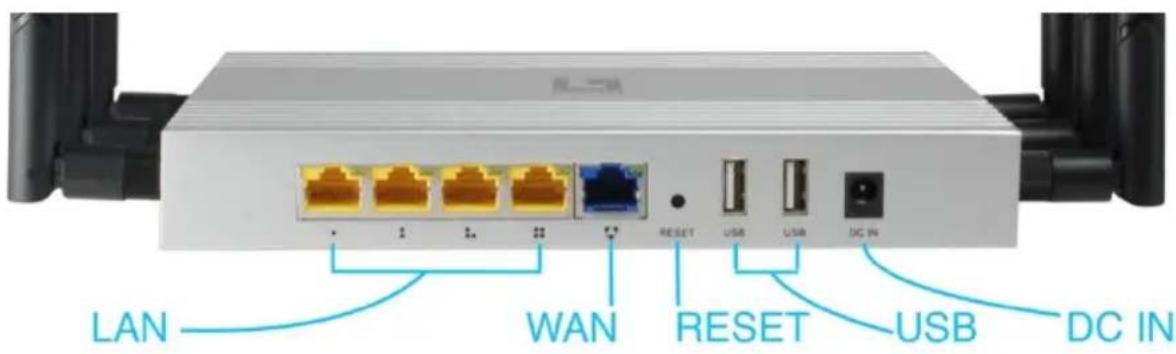
| LED/Button/Interface | Description |
| LAN port(10/100Mbps RJ45 port) | The LAN port is used to connect to network devices, such as a switch or PC / NB |
| WAN port(10/100Mbps RJ45 port) | The WAN port is used to connect to network devices, such as xDSL Modem RouterNote: The factory default is AP mode. WAN port functionality is available only in Gateway mode. |
| RESET(Reset to Default) | With the AP powered on, press the Reset button for 8~10 seconds until the Signal Strength LED blink faster than ever. The AP will restart itself and reset the device to factory default settings. |
| USB port | Toconnect with USB storage device.(Recommended Format to NTFS)WAP-8021 share the files in USB disk to public users through SAMBA server.Note: Storage/server functionality is available only in Gateway mode. |
| DC IN | 12V/1.5A DC input Power Adapter |
English
Hardware Installation
Power on the Device.
To power on the AP, you can use one of the following methods:
- Connect the power adapter.
Configuring the Device
To set up and manage the AP, you can use one of the following methods:
- Connect the access point and your computer to the same switch or router. Manage the access point from the computer. (Figure 1)
Software Installation
To login to the LevelOne AP, please perform the following steps:
- Check Your Network Settings to login web UI.
Please make sure your PC can get IP address automatically, so the router can communicate with your PC during configuration.
- Select "Control Panel" > "Network Connections".
- Right click the "Local Area Connection" and choose "Properties".
- Select the TCP/IP protocol for your network card.
-
Change the IP Address of PC: To configure the IP Address, click the network icon to open the Ethernet dialog to configure the IP Address. Select "Properties", choose "Internet Protocol (TCP/IP)" and select "Properties". Input the IP Address "192.168.188.2 ~ 192.168.188.250" and continue. (Figure 2)
-
Launch a Web browser (Microsoft Internet Explorer 8 for example), enter the AP's default LAN IP address 192.168.188.253 in the address bar, and then press Enter, as shown in the following picture. (Figure 3)
- Then enter the default user name of admin and password of admin in the User Name and Password fields, click "OK" to access the AP's Web GUI. (Figure 4)