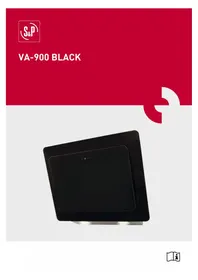
BOX900 INOX N - Basket Soler & Palau - Free user manual and instructions
Find the device manual for free BOX900 INOX N Soler & Palau in PDF.
| Brand | Soler & Palau |
| Model | BOX900 INOX N |
| Product type | Built-in hood |
| Estimated width | 90 cm |
| Minimum distance to cooking surface | 650 mm |
| Diameter of exhaust duct | 150 mm |
| Operating modes | Extraction or recirculation |
| Number of speeds | 3 (low, medium, high) |
| Control type | Push buttons |
| Lighting | Halogen lamp MAX 20W G4 12V |
| Grease filters | Metallic, washable every 2 months |
| Charcoal filters | Not supplied, replace every 4 months |
| Power supply | 230 V ~ 50 Hz (estimated) |
| Double insulation | Yes, no grounding needed |
| Installation | By a qualified professional |
| Maintenance | Regularly clean surfaces and filters |
Frequently Asked Questions - BOX900 INOX N Soler & Palau
User questions about BOX900 INOX N Soler & Palau
0 question about this device. Answer the ones you know or ask your own.
Ask a new question about this device
Download the instructions for your Basket in PDF format for free! Find your manual BOX900 INOX N - Soler & Palau and take your electronic device back in hand. On this page are published all the documents necessary for the use of your device. BOX900 INOX N by Soler & Palau.
USER MANUAL BOX900 INOX N Soler & Palau
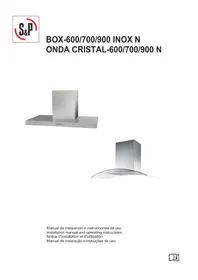
BOX-600/700/900 INOX N ONDA CRISTAL-600/700/900 N

natural_image
Exterior view of a stainless steel kitchen air conditioner unit (no text or symbols visible)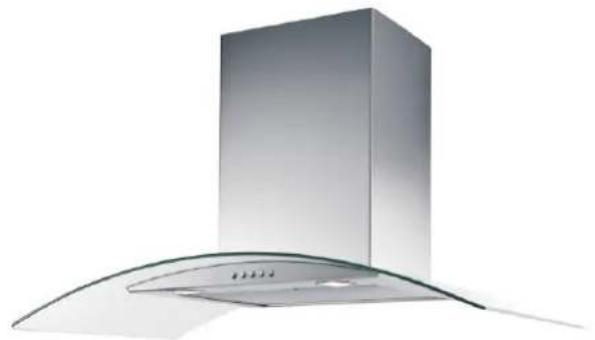
natural_image
Modern kitchen air conditioner unit with a metallic chimney and curved base (no text or symbols visible)Installation manual and operating instructions
text_image
Diagram illustrating hand positioning and movement of a device with labeled parts and directional arrowsFig.4
text_image
1 Ø6Fig.5
text_image
2 90°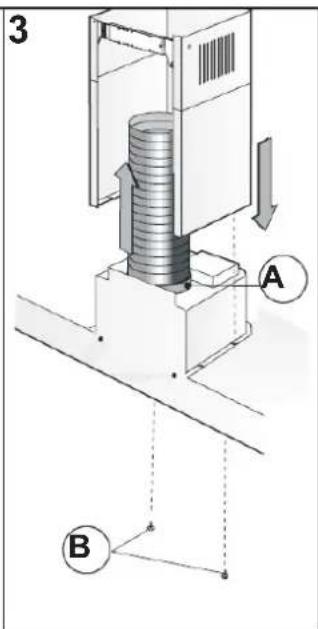
text_image
3 A B
natural_image
Technical illustration of a mechanical component with a 90-degree angle标注 (no text or symbols on the diagram itself)Fig.6
natural_image
Technical line drawing of a mechanical assembly with screwdriver and housing components (no text or symbols)Fig.7
natural_image
Diagram of a hand using a tool to interact with a device inside a container, showing motion arrows (no text or symbols)Fig.8

natural_image
Technical line drawing of a mechanical assembly with no visible text or symbolsFig.10
text_image
B C D E AFig.9
text_image
Technical diagram illustrating a mechanical assembly with labeled parts D and C, showing tool positioning and assembly steps.Fig.11

text_image
Technical diagram showing a mechanical assembly with labeled parts B and C, including a tool interacting with a circular component.Fig.12
GENERALIDADES
Thank you for purchasing this cooker hood. You have purchased a high-quality product manufactured in full compliance with applicable safety regulations and EU standards.
Please read this instruction book carefully, as it contains important information for your safety during the installation, use and maintenance of this product. Keep it at hand for future reference.
Please check that the appliance is in perfect condition when you unpack it, as all factory defects are covered by the S&P guarantee.
This cooker hood has been designed as:
.- Extractor version – Fig.1B
(to exhaust stale air to outside)
.- Filter version – Fig.1A carbon filters)
(recycling from indoor air through active
INSTRUCTIONS
1.- SAFETY AND INSTALLATION INSTRUCTIONS
- Do not connect the outlet of the hood to a duct where air is circulating or is used for evacuating fumes from devices powered by non/electric energy.
- If the hood and a burner/boiler/stove/oven, etc. are in operation simultaneously in the same room and the correct combustion of the latter appliances depends on ambient air, for safe operation, we recommend ventilating the room sufficiently to ensure that there is an adequate supply of fresh air from outside. This is necessary, as the hood exhausts ambient air that these devices need for correct combustion.
- For exhausting waste air to the outside, follow regulations in the country where it is being installed.
- Make sure that the exhaust duct is clean and unobstructed.
- For optimum efficiency of the hood, use an extract duct (as short as possible), avoiding angles. If a flexible conduit is fitted, stretch it out as much as possible.
- If it uses a connecting tube comprised of two or more parts, the upper part must be external to the bottom.
- Do not try to manipulate the filters when the hood is in operation.
- Do not touch the lamps if the appliance has been in operation for a long time.
- It is forbidden to cook food with open flames under the hood.
- Avoid open flames, as they are harmful for the filters and can cause fires.
-
Keep hot oil under control at all times to avoid it catching light.
-
Although the appliance has a power switch, a single pole switch with a minimum gap of 3 mm between contacts and adequate for the total current must be fitted between the appliance and the mains, in compliance with national regulations.
- This appliance is not intended for use by persons (including children) with reduced physical, sensory or mental capabilities, or lack of experience and knowledge, unless they have been given supervision or instruction concerning use of the appliance by a person responsible for their safety. Children must be supervised to ensure that they do not play with the product.
- Children must be supervised to ensure that they do not play with the product.
- Before carrying out any maintenance or cleaning operations, always disconnect the hood from the mains.
- When replacing bulbs always use bulbs of the same type and power, never more powerful.
- If the cleaning operations are not done respecting the instructions indicated in « OPERATION AND MAINTENANCE », there is risk of fire.
THE MANUFACTURER WILL NOT BE HELD LIABLE FOR DAMAGES TO PEOPLE AND/OR PROPERTY DUE TO NON-COMPLIANCE WITH THESE WARNINGS.
2. INSTALLATION
The assembly and electrical connections should be carried out by a qualified technician.
2.1.- Electrical connection
The unit is of the double insulated connection, therefore does not require an earth connection.
- Make sure the mains voltage and frequency coincide with those on the characteristics plate on the hood and the remote extraction unit.
- The electrical connection must be carried out as follows:
$$ \begin{array}{r l} & \text { Brown } = \text { L (Line) } \ \text { Blue } & = \text { N(Neutral) } \end{array} $$
- Although this is a device with a switch, When installing the hood, it is advisable to fit it in such a manner that the mains plug is accessible by the user. (Fig.2)
- In case of direct connection to the mains, the installer has a connection card inside of connection box.
- The hood must be centred with respect to the cooking surface, at a minimum height of 650 mm.
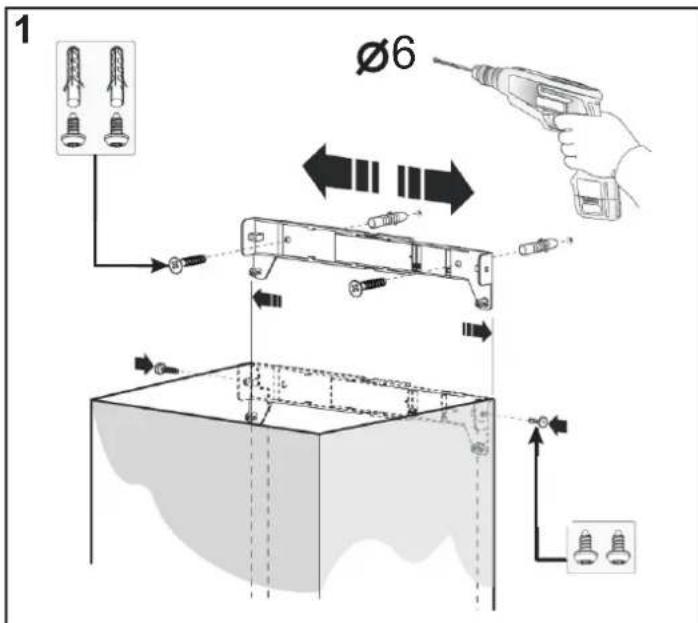
- Use screws and plugs, but first make sure that they are correct for the type of wall where the hood is to be fitted.
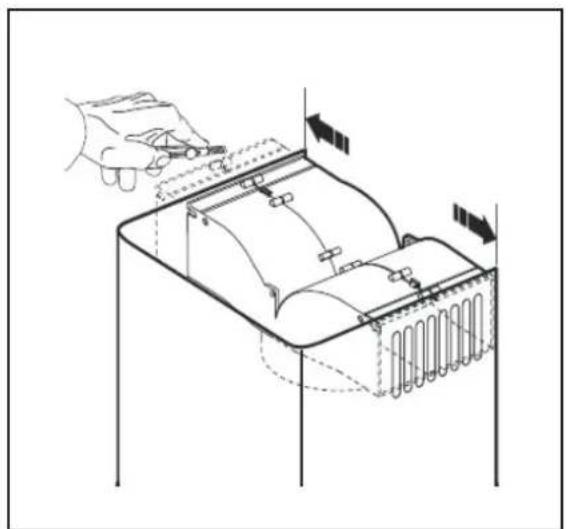
• Before setting Operations, remove the filter panels (Fig.4).
• Drill 6 holes A-B-C of 6, shown in (Fig.3). - Insert plugs and screws (Fig.3-A) without tightening completely, in such a manner that the hood can be supported from them.
Then attach the Hood body to the wall using two internal screws. (Fig.3-C). - Fix the decorative telescopic support (Fig.5-1). Make sure all screws are tight.
Extraction version:
- Using a joining pipe of diameter 150mm, connect output ring (Fig.5-3-A) and the discharge opening. Secure the connection joints, to avoid air leaks, with self adhesive tape.
Filter version:
- If your installation does not have a discharge opening to the outside, you will have to ask your supplier for active circular carbon filters, which are supplied as an accessory and are not included as standard equipment. For mount them, see (Fig.6).
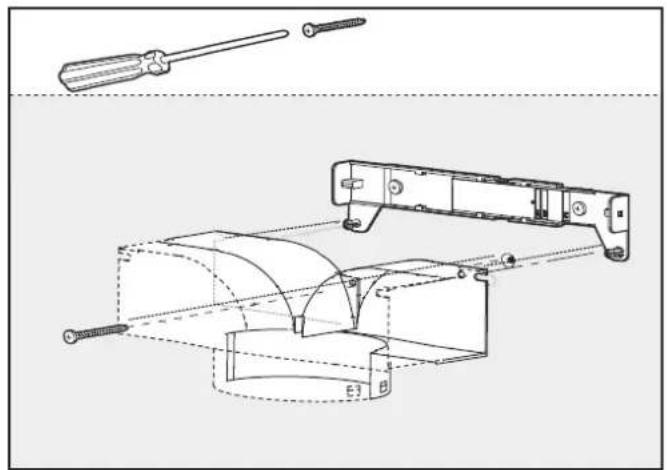
- Fix in the wall the plastic bracket just below the decorative telescopic support (Fig.7). The two pins of the support position have to fit with the holes of the plastic derivation.
- You can easily cut the plastic shunt to fit well inside the top of the telescopic cover and the air outlets are properly aligned with the exhaust grill. (Fig.8).
- Using a joining pipe of diameter 150 mm, connect output ring and the plastic shunt. Secure the connection joints to avoid the air leaks, with self adhesive tape. (Fig.10).
2.3.- Fitting the decorative telescopic cover
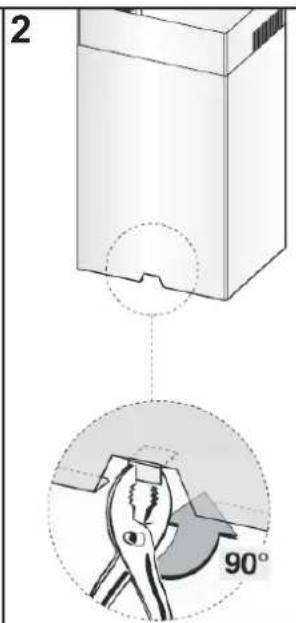
- Turn the tab in the inside of the lower part of decorative telescope (Fig.5-2), this will facilitate the fitting.
- Fix the lower part of the decorative telescopic cover with hood body using inner screws (Fig.5-3B).
- Extend the top of the decorative telescopic cover and secure it to the upper support with the two supplied screws. (Fig.5-1).
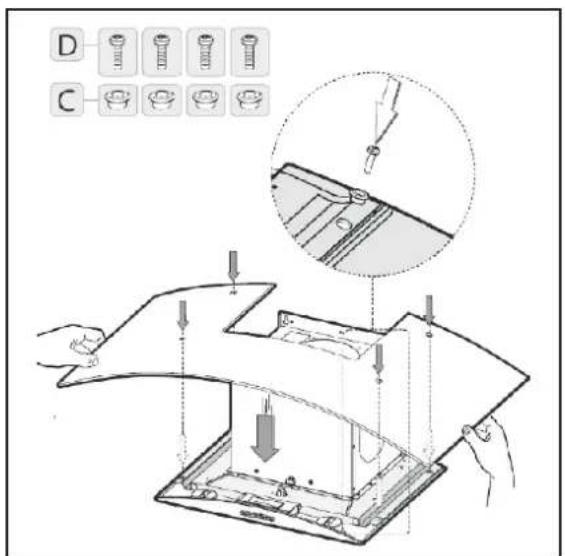
2.4.- GLASS FITTING (Only for ONDA CRISTAL model)
- Carefully place the glass on the hood and attach to it by placing the 4 rubber pins (C) and 4 screws (D) shown in (Fig.11).
3.- USE
- It is advisable to start the appliance before cooking and leave it in operation for 15 minutes after finishing cooking.
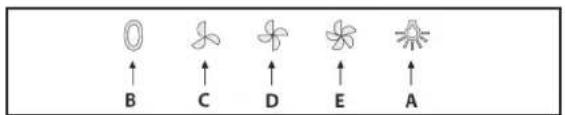
- Symbols for controls - push button type (Fig.9).
A ..... Light ON / OFF
B ..... OFF
C ...... Slow extraction speed
D ...... Medium extraction speed
E ...... Fast extraction speed
4.- MAINTENANCE
IMPORTANT! Before carrying out any cleaning or maintenance operation, disconnect the hood from the electricity supply.
- Satisfactory operation of the hood depends on the frequency with which maintenance operations are carried out and especially frequency with which the greaseproof active carbon filters are changed.
- The metal filters are used to trap the grease particles that are suspended in the air, which can obstruct the filters over time, depending on how often the device is used. In any event, to avoid fire hazards, the filters should be cleaned at least every two months according to the following instructions:
- Remove the filters (Fig.4) from the hood and wash them with a solution of water and neutral liquid detergent and leave the dirt to soften.
.- Rinse with plenty of warm water and leave to dry.
.- The filters can also be washed in the dishwasher.
- After a few washes, you may find that the colour of the aluminium filter panels has been altered. This shall not give rise to claims for replacement of same.
- The active carbon filters are not washable and can not be reused; they must be replaced at least every four months. Saturation of the active carbon depends on the use made of the hood, the kind of cooking and how often the external grease-proof filter is cleaned.
- Clean grease remains frequently from the fan and all the surfaces, using a cloth moistened with ethyl alcohol or neutral, non-abrasive liquid detergents.
- To replace the halogen bulbs (Fig.12), carefully remove the inner ring with screwdriver. Remove the bulb in the direction indicated by the arrow and change it for one of the same kind and characteristics MAX 20W G4 12V.
ATTENTION : Do not touch the bulb after long period of the device operating.
5.- REMOVAL FROM SERVICE, DISPOSAL AND RECYCLING

EU regulations and our commitment to future generations oblige us to recycle used materials; please remember to dispose of all unwanted packaging materials at the appropriate recycling points, and to drop off obsolete equipment at the nearest waste management point.
6.- TECHNICAL ASSISTANCE
S&P's large Technical Service network will guarantee adequate technical assistance. If a fault is observed in the unit, please contact any of the mentioned technical service offices and they will attend to your problem.
Any modification of the appliance by personnel not belonging to the Official S&P Services will result in the guarantee being void.
S&P RESERVES THE RIGHT TO MODIFY THE PRODUCT WITHOUT PRIOR NOTIFICATION.