USER MANUAL Innergy Gazelle
Checking the battery status
62
Placement and removal of the battery
63-64
Charging
65-67
THE DISPLAY
68-75
Attachment of the display
69-70
Display operation
71-72
Error messages on your display
73-75
REPAIRINGS
76-79
Replacing the taillight
76
Removing the front wheel
77
Connecting the motor cable
78
QUESTIONS AND ANSWERS
80-87

Disassembly of c parts should yes be carried out authorized Gazelle
LA BATTERIE
QUESTIONS ET REPONSES
108-115

natural_image
Close-up of a bicycle's front wheel and side-mounted sensor, highlighting the light bulb (no text or symbols visible)
natural_image
Close-up of a hand pressing down on a red textured vacuum cleaner's air vent (no text or symbols visible)

natural_image
Close-up of hands holding a silver cylindrical device with attached tubing (no visible text or symbols)
natural_image
Close-up of a white bicycle rear lift rack with black and red guide rails (no visible text or symbols)


natural_image
Close-up of a hand holding a white metal carabiner with a small electronic device (no visible text or symbols)

natural_image
Close-up of a bicycle seat frame with metal frame and wheels (no visible text or symbols)


natural_image
Close-up of a red and silver bicycle rear bumper with visible headlights and handle (no text or symbols)
Accu opladen in de fiets:
natural_image
Close-up of a hand holding a small electronic device with a red cover, next to a black rectangular device (no visible text or symbols)


natural_image
Electric battery charging setup with red and black components and a white cable (no visible text or symbols)
De display:
natural_image
Illustration of a digital pressure meter with dual buttons and a dial (no text or symbols visible)

natural_image
Close-up of a hand holding a small electronic device next to a mechanical tool (no visible text or symbols)


natural_image
Close-up of a hand holding a digital caliper with a red circle highlighting a small component (no visible text or symbols)

natural_image
Close-up of a hand holding a black and white digital stopwatch on a bicycle (no visible text or symbols)

De Display
natural_image
Close-up of a white power button with a black circular icon, no visible text or symbols
natural_image
Close-up of a white electronic device with a handle and indicator symbol (no readable text or numbers)


natural_image
Close-up of a hand using a tool to adjust or install a car wheel rim (no visible text or symbols)

natural_image
Close-up of a hand holding a metallic bracket mounted on a bicycle wheel (no visible text or symbols)

natural_image
Close-up of metallic mechanical components with red circles highlighting specific parts (no visible text or symbols)

natural_image
Close-up of a hand adjusting a bicycle wheel rim component (no visible text or symbols)
natural_image
Close-up of a bicycle's front wheel and headrest, highlighting the light bulb (no text or symbols visible)
natural_image
Close-up of a hand pressing down on a red textured vacuum cleaner's air vent (no text or symbols visible)
natural_image
Close-up of hands holding a metallic cylindrical device with white cables, no visible text or symbols
natural_image
Close-up of a white bicycle rear lift with black and red guide rails attached (no visible text or symbols)


natural_image
Close-up of a hand holding a white metal carabiner with a red button, no visible text or symbols
natural_image
Close-up of a bicycle seat frame with metal frame and railings (no visible text or symbols)


natural_image
Close-up of a bicycle's rear bumper with red LED light and mesh head (no text or symbols visible)
natural_image
Close-up of a hand holding a small electronic device with a red and black component, next to a white surface (no visible text or symbols)


natural_image
Electric battery pack with red and black components, connected by wires (no visible text or symbols)

Das Display:
natural_image
Illustration of a portable electronic device with dual buttons and a dial (no text or symbols visible)
natural_image
Close-up of a hand holding a small electronic device next to a mechanical tool (no visible text or symbols)


natural_image
Close-up of a hand holding a digital caliper with a red circle highlighting a small component (no visible text or symbols)

natural_image
Close-up of a hand holding a black and white digital stopwatch on a bicycle (no visible text or symbols)
Das Display
natural_image
Close-up of a white power button with a black circular icon, no visible text or symbols

natural_image
Close-up of a white electronic device with a curved handle and indicator lights, placed on a dark surface (no visible text or symbols)


natural_image
Close-up of a hand using a tool to adjust or install a car wheel rim (no text or symbols visible)

natural_image
Close-up of a hand holding a metallic bracket next to a car wheel (no visible text or symbols)

natural_image
Close-up of a metallic mechanical component with red circular annotations highlighting features (no readable text or symbols)


natural_image
Close-up of a hand adjusting a bicycle wheel component (no visible text or symbols)
Reparatur
natural_image
Close-up of a bicycle's front wheel and headrest, highlighting the light bulb (no text or symbols visible)
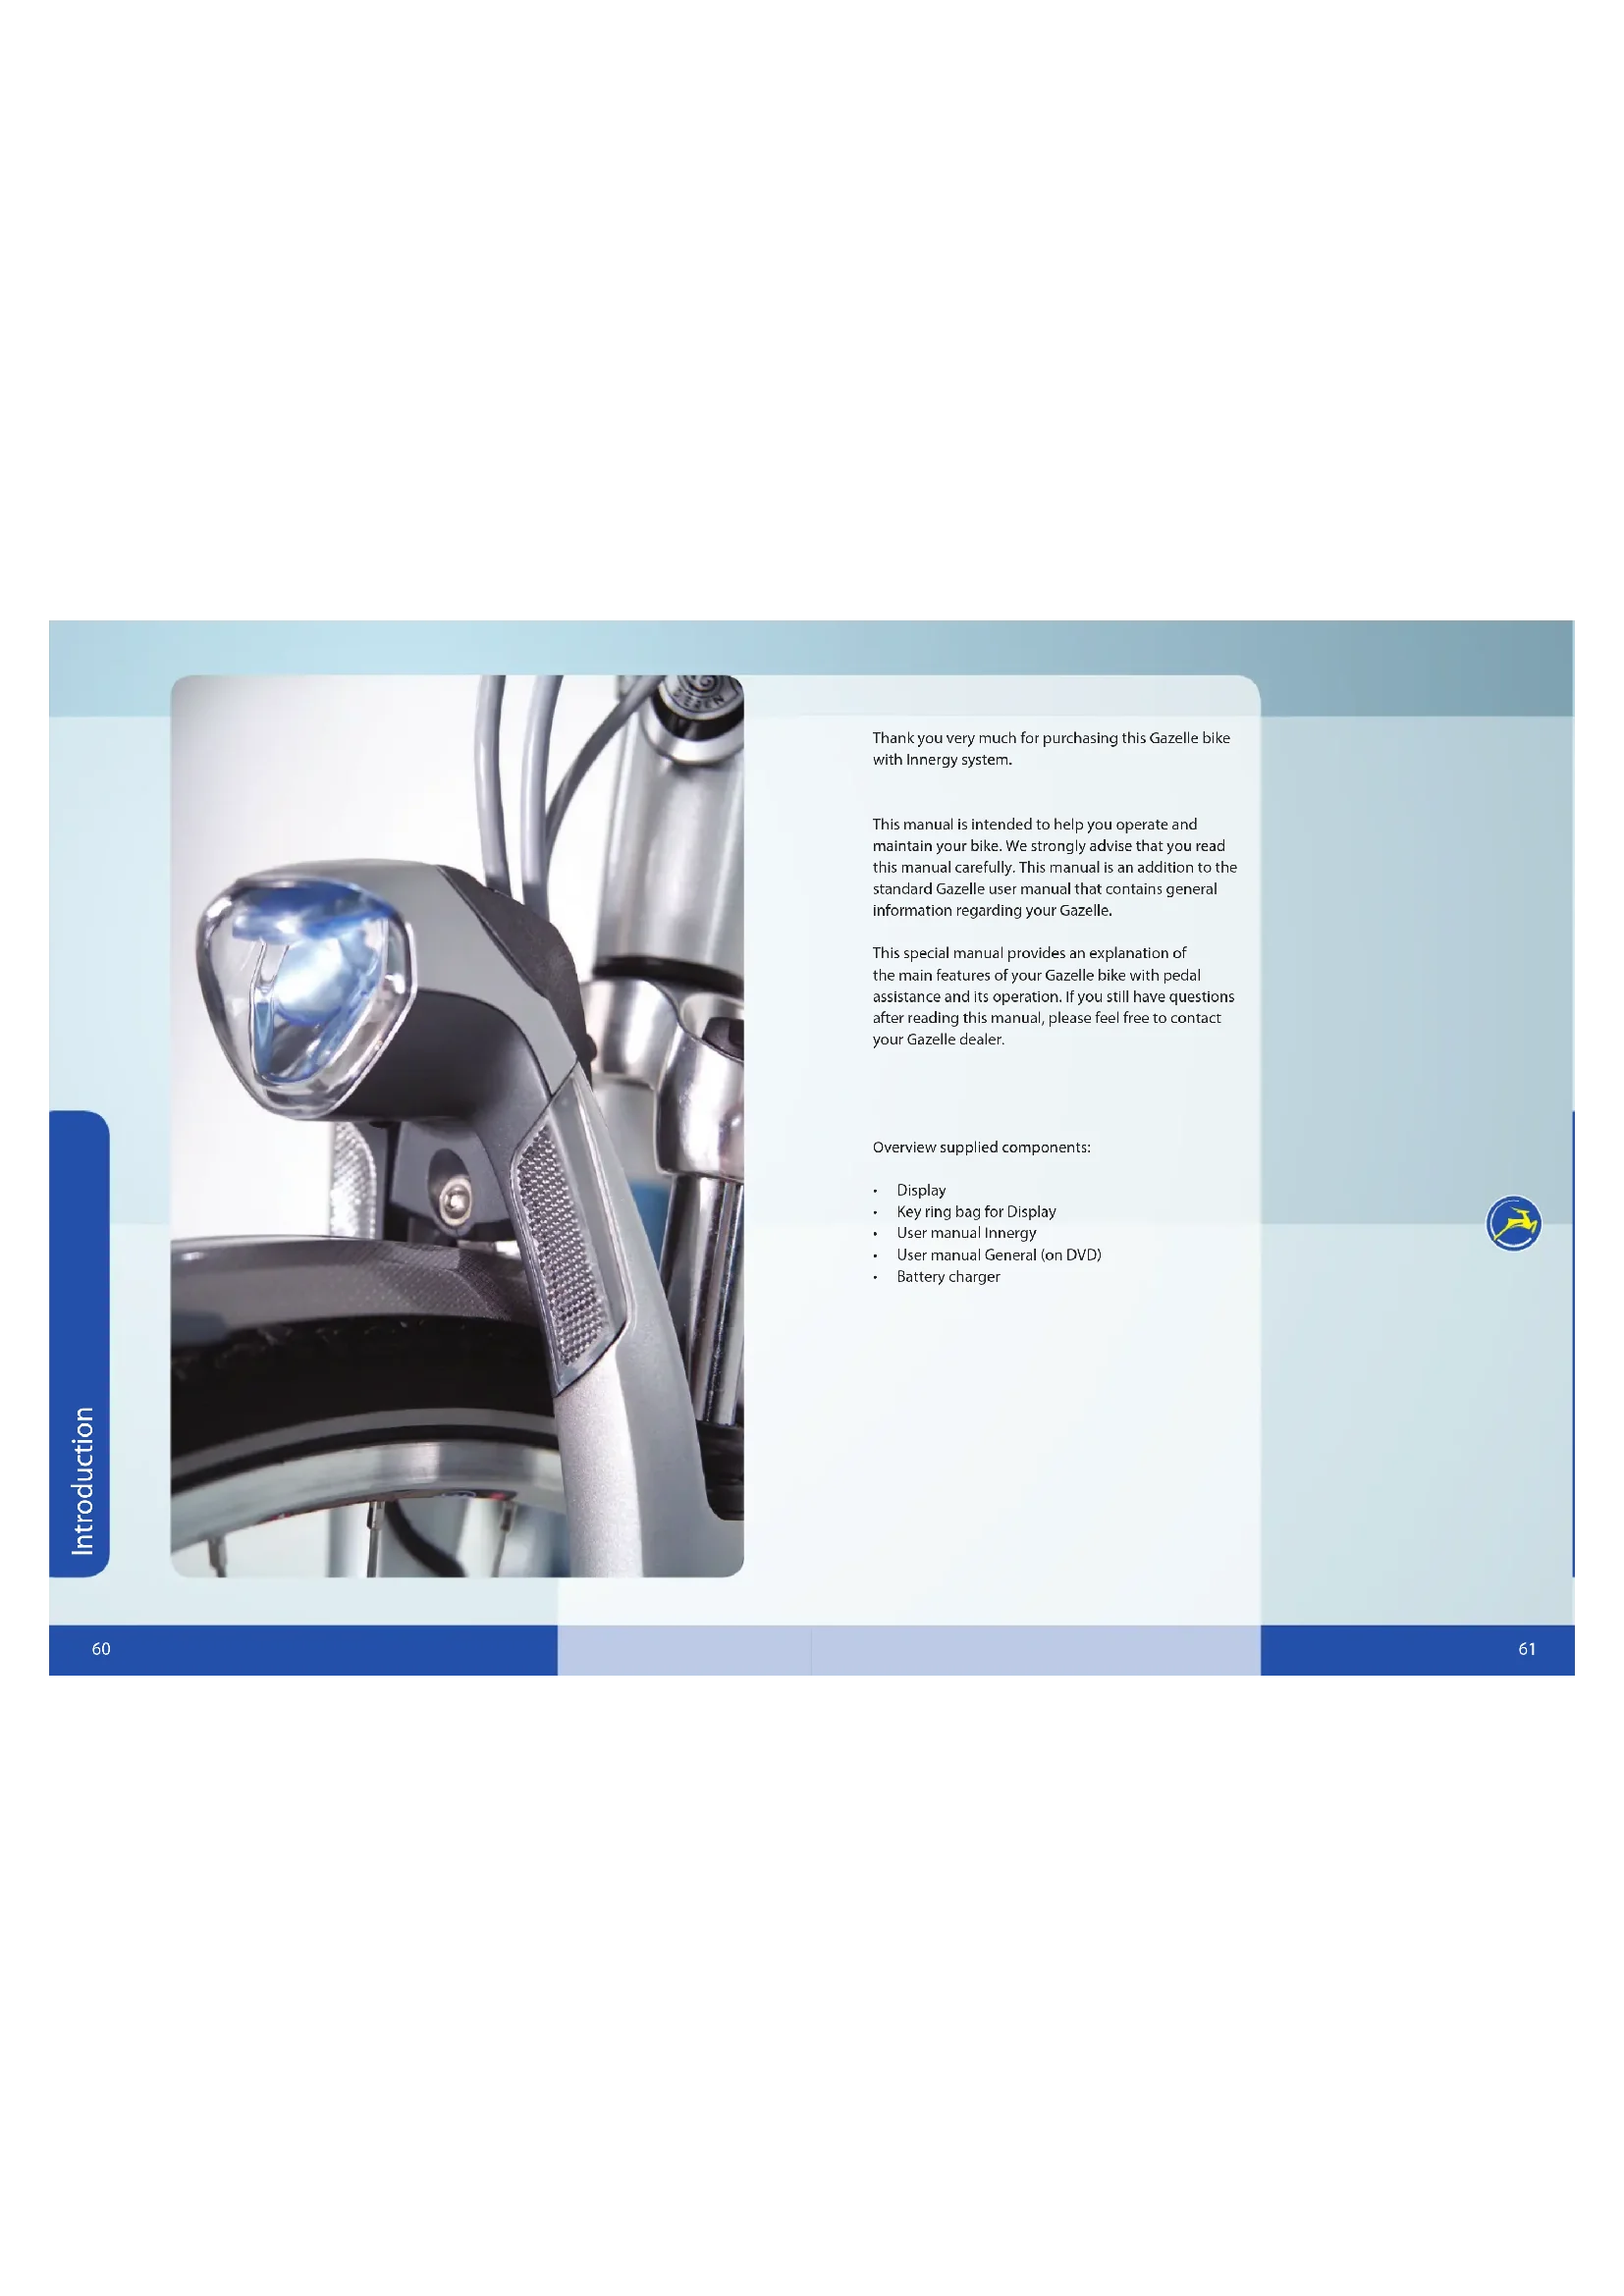
Thank you very much for purchasing this Gazelle bike with Innergy system.
This manual is intended to help you operate and maintain your bike. We strongly advise that you read this manual carefully. This manual is an addition to the standard Gazelle user manual that contains general information regarding your Gazelle.
This special manual provides an explanation of the main features of your Gazelle bike with pedal assistance and its operation. If you still have questions after reading this manual, please feel free to contact your Gazelle dealer.
Overview supplied components:
• Display
• Key ring bag for Display
- User manual Innergy
• User manual General (on DVD)
- Battery charger

natural_image
Close-up of a hand pressing down on a red and gray vacuum cleaner (no visible text or symbols)


natural_image
Close-up of a hand holding a silver cylindrical device with white tubing (no visible text or symbols)
Checking the battery status
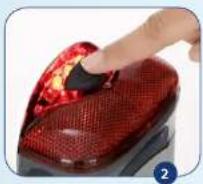
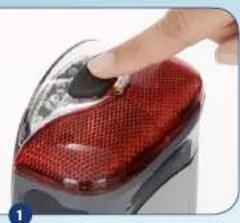
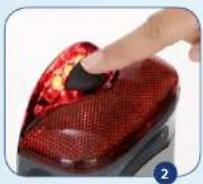
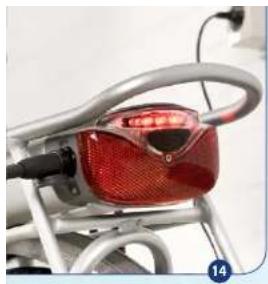
By pressing the button on the taillight, you can easily see how much battery capacity is left. (Photos 1 + 2)
The taillight consists of 5 LED light bulbs:
1 on the left, 3 in the back and 1 on the right.
• If all 5 light bulbs are on, it means that there is 100% capacity
• If 4 light bulbs are on, it means that there is 80% capacity
• If 3 light bulbs are on, it means that there is 60% capacity
• If 2 light bulbs are on, it means that there is 40% capacity
• If 1 light bulb is on, it means that there is 20% capacity
• If no light bulbs are on, you battery has between 0 and 20% capacity.

If your battery is out of power, there is still sufficient residual capacity left for your lights to stay on for a considerable amount of time.
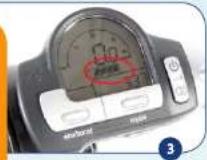
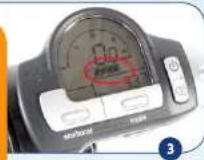
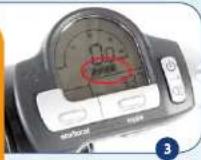
- If the battery has been slid into the bike correctly, you can also read the battery capacity off of the display (see chapter display, explanation display #6).
- The number of blocks that is shown on the display for the battery capacity equals the number of taillight bulbs that are on. (Thus, if 4 battery blocks are visible on the display this is equivalent to 4 burning LED light bulbs when the button on the taillight is pressed). (Photo 3)
Placement and removal of the battery
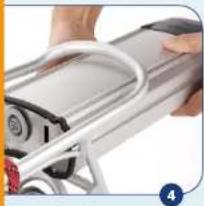
Placement
• Make sure that the bike sits firmly on the kickstand.
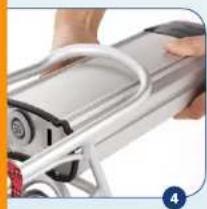
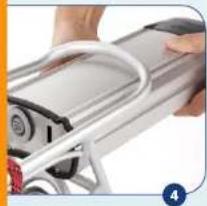
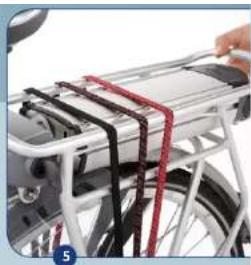
- Hold the battery with two hands, direct the front of the battery in a way so that the recesses on the sides of the battery line up with the battery guides on the luggage carrier. (Photo 4)
- Ensure that the bike key is in the battery lock and push the battery in a forward direction until it can't go any further. Beware: the bike key MUST be in the battery lock or else you can't completely push in the battery. (Photo 5)
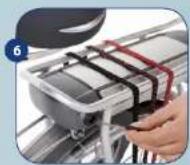
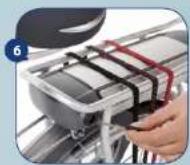
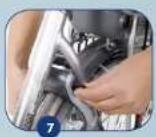
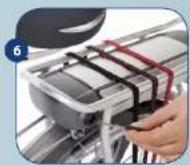
• Take the key out of the battery lock, put it back into the bike lock and unlock the bike. (Photos 6 + 7)
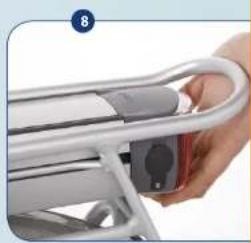
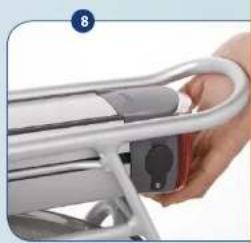
- Check if the battery is properly fixed by lightly pulling on the battery. (Photo 8)
- If this is not the case, you must repeat the 3 previous steps. If the battery has been slid in correctly, the display will be activated as well.
natural_image
Close-up of a white bicycle rear lift with black and red guide rails (no visible text or symbols)


natural_image
Close-up of a hand holding a white metal carabiner with a small electronic device (no visible text or symbols)

natural_image
Close-up of a bicycle seat frame with metal frame and wheels (no visible text or symbols)

Removal of the battery
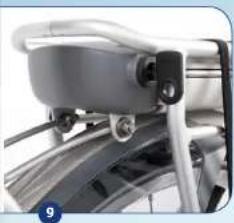
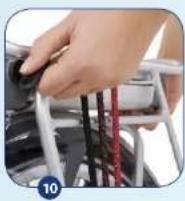
- Lock your bike (or use the spare bike key) and put the bike key in the battery lock. (Photo 9)
- Turn the key a quarter turn clockwise and carefully pull the battery to the back, using the handle on the battery's bottom side. (Photo 10)
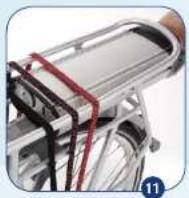
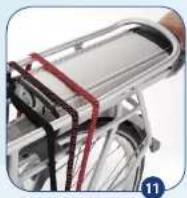
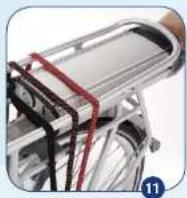
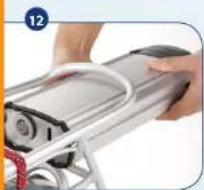
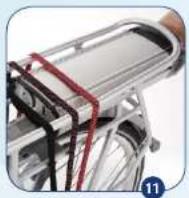
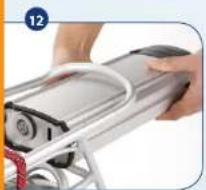
- Pull the battery to the back via the guides. For the last part, we advise you to support the battery with both hands. (Photos 11 + 12)
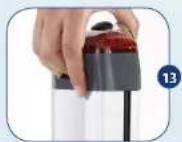
- The battery is ergonomically shaped and is fitted with a recessed grip that enables you to easily carry the battery with you. (Photo 13)
Charging

Your battery can be charged in the bike as well as separate from the bike with help from the supplied Innergy battery charger. You may NOT use any other charger. The total charging time is around 3.5 hours.
You must follow the below charging instructions:

Safety regulations for charging the battery.
- Only make use of the supplied Gazelle Innergy battery charger.
- Keep the charger and battery out of reach from small children and pets.
- Only charge the battery when you're inside (i.e. in places that offer protection against rain and extreme temperatures). Ensure proper ventilation and low humidity.
• The battery only charges at temperatures between
-5°C and 50°C (between 23°F and 122°F).
- If you charge the battery disconnected from the bike, put it on an even surface for proper stability. If you charge the battery in the bike, make sure that the bike sits stable.
- Do not cover the charger. Put the charger and battery on a hard surface (Thus, preferably not on a carpet!)
• Make sure that there is no dirt and/or moisture on the charger plug and the charger connector.
- Do not touch the power supply plug and the charger plug with wet hands.
- Do not drop the charger or battery.
- Do not use a damaged battery or battery charger. When in doubt, consult your Gazelle dealer.
- Do not use the battery and/or the charger for other purposes.
- Do not charge the battery in direct sunlight (thus, do not put the battery in the window!).
• We advise you not to charge the battery in an unheated shed in wintertime.
• Always connect the battery to the charger first before putting the power plug in the socket.

natural_image
Close-up of a red and silver bicycle rear bumper with visible headlights and handle (no text or symbols)
Charging the battery in the bike:
• Comply with the above charging instructions.
- Park the bike solidly on its kickstand in the vicinity of a power socket.
- Open the rubber cover cap of the battery charge plug, on the rear left at the taillight, and put in the power plug of the charger.
- Put down the charger securely and put the power plug in the socket.
• If a LED light bulb in the taillight starts flickering, you have properly connected the charger.
- If the battery is charged completely, the light bulbs in the taillight will no longer be on and the light on the charger will still be green.
- If you are finished charging, first remove the power plug from the battery and put the cover cap back over the charge plug. Then take the power plug from the charger out of the socket.

Once or twice a year, ride around until the battery is completely discharged. This is because completely discharging and then recharging the battery has a positive impact on its operational life.
Charging the battery separate from the bike:
• Comply with the above charging instructions.
- Remove the battery from the bike in accordance with the previously given instructions.
- Put the battery on a flat, hard surface in the vicinity of a power socket.
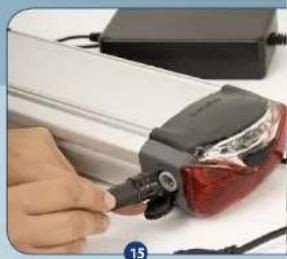
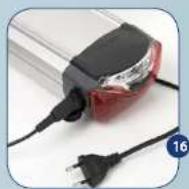
- Open the rubber cover cap of the battery charge plug, on the rear left at the taillight, and put in the power plug of the charger. (Photo 15)
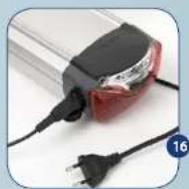
• Make sure that the power plug sits firmly in the battery. (Photo 16)
- Put the power plug in the socket.
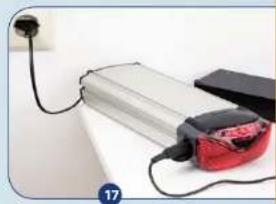
- If an LED light bulb in the taillight starts flickering, you have properly connected the charger. The flashing LED indicates the condition of the battery. The LED starts on the far right side and moves to the right. LED indicates a condition that is approximately 20% charged. When the flashing LED is at the far right, this means that the battery is fully charged. On the charger itself a green light will be on, indicating that the charger is in use. (Photo 17)
- If you are finished charging, first remove the power plug from the battery and put the cover cap back over the charge plug. Then take the power plug from the charger out of the socket.
natural_image
Close-up of a hand holding a small electronic device with a red and black component, next to a white surface (no visible text or symbols)


natural_image
Electric battery pack connected to a black plug and a red plug, with a white wall and cable (no visible text or symbols)

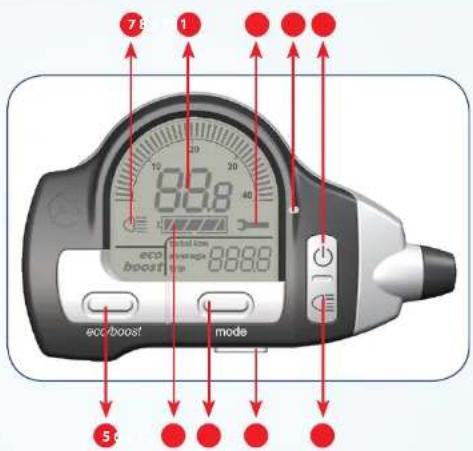
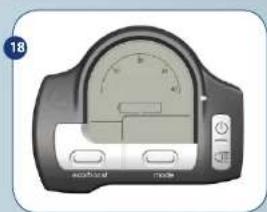
The display:
1 Pedal assistance on/off
2 Lights on/off manually
3 Display release
4 Mode button; for showing "total km", "average" and "trip"
5 Eco/boost button; for determining the degree of assistance
6 Battery capacity
7 "Lights on" symbol
8 Speed indicator
9 "Maintenance required" symbol
10 Automatic light sensor
Attachment of the display
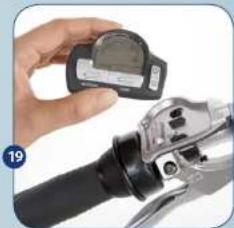
The supplied loose display (see above) can easily be attached to the display holder. The display holder is located on the left-hand side of your handlebars. Note: The display itself does not contain a battery. As soon as you take the display out of the holder, it will not show any information.
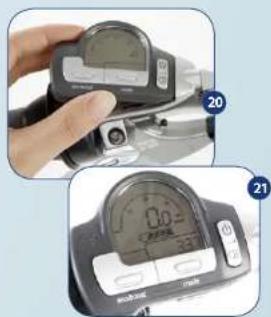
• Take the display between your thumb and index finger. (Photo 19)
- First click the right side of the display into the holder and then push down the left side. (Photo 20)
- If the display is attached correctly and the battery has been slid into the bike properly, the display shows speed, battery capacity and total number of kilometres. (Photo 21)
- If this is not the case, then check to see if the display and/or battery are properly attached to the bike.
natural_image
Illustration of a digital pressure meter with dual buttons and a dial (no text or symbols visible)

natural_image
Close-up of a hand holding a digital measuring device next to a mechanical tool (no visible text or symbols)


natural_image
Close-up of a hand holding a digital multimeter with a red circle highlighting a small component (no visible text or symbols)
natural_image
Close-up of a hand holding a black and white digital stopwatch on a bicycle (no visible text or symbols)

Removing and/or locking the display

To prevent theft and/or damage, we advise you to take the display with you after completion of your bike ride.
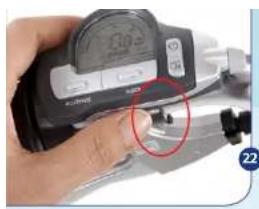
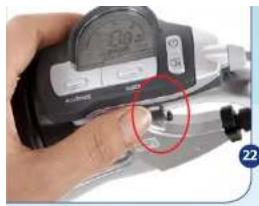
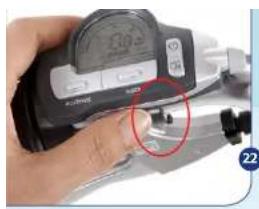
- You can easily remove the display by pushing button #3 (see overview image of the display). This releases the display. (Photo 22)
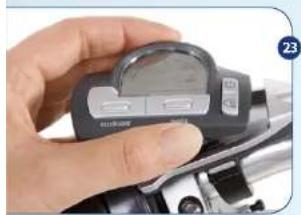
Remove the display by taking it out of the display holder under an angle. (Photo 23)
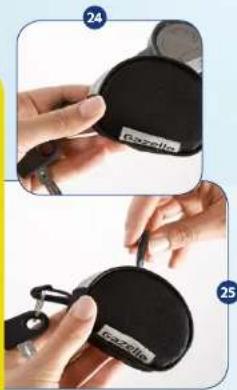
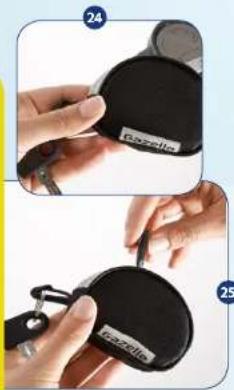
• You can simply store the display in the bike key bag that comes with the bike. (Photo 24 + 25)
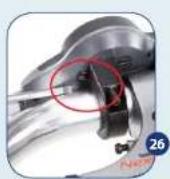
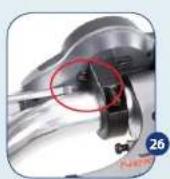
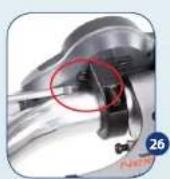
- If you prefer to leave the display attached to the bike, we advise you to flip the small pawl at the holder's right bottom side, using a flat screwdriver (Photo 26). In doing so you activate the display lock. However, we advise you to take the display with you when you park the bike.
Display operation
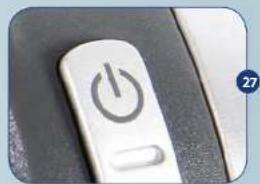
• The display features 4 buttons:
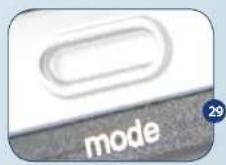
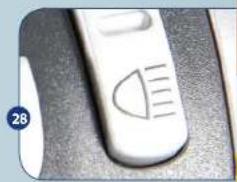
1 On/off button for the pedal assistance (Photo 27)
If you press this button, you activate the pedal assistance. It is standard for the assistance to start in the "eco" mode. By pressing this button another time, you switch off the assistance again.
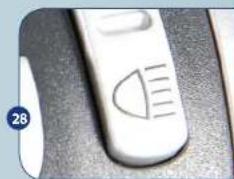
If you press this button, you manually switch on the bike's lights and the display lighting. By pressing this button again, you switch them off.
This button covers the following functions:
"Total km" = total number of kilometres covered on this bike since the beginning.
"Average" = your average speed during the current trip (or during your last trip if you consult this function while standing still).
"Trip" = total number of kilometres covered during this bike trip.

You can reset "trip" to 0 by keeping the Mode button pressed in for 3 seconds.
natural_image
Close-up of a white power button with a black circular icon, partially visible on a dark surface (no text or symbols)

natural_image
Close-up of a white electronic device with a curved screen and indicator lights (no visible text or symbols)


This button covers 2 modes.
Eco = the mode for long lasting assistance.
Boost = the mode for short, powerful assistance.
If you have pressed the on/off button and have switched on the system, the system automatically starts in the "eco" mode. Press the eco/boost button 1 time if you want to bike with boost assistance. To switch back to eco, press the eco/boost button once more. This button has no function if you haven't switched on the pedal assistance first via the on/off button (1).

Your dealer can set both modes precisely according to your wishes. Thus you can find your optimum balance between the level of pedal assistance in relation to road and riding characteristics on one side and radius of action on the other.

Make sure to never press more than 1 button at a time. If you inadvertently have done so, press the eco/boost button for 3 seconds in order to return to your normal display settings.
Error messages on your display
- Your display can show error messages. Below it is explained what the messages mean and what action you need to take.
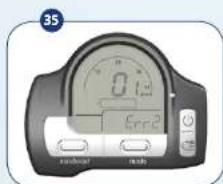
- On the lower right of your display the indication "Err" will show, followed by a number. "Err" stands for error message. The decimal in the speedometer forms the second part of the error message.
- If the display shows a wrench, it means that you have to take the bike to the dealer and that you can't ride with pedal assistance.
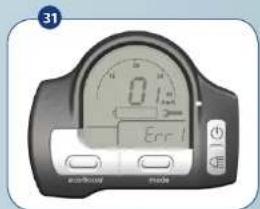
Err 1.1 This battery is not registered for this bike
You can't ride with this battery because the bike doesn't recognise the battery's serial number. Go back to the dealer with your bike, the receipt and the battery. Your dealer will register this and other batteries for you. This also applies to, for instance, the battery from your spouse's bike or a spare battery. As long as the dealer hasn't registered this battery, the pedal assistance will not function. (Photo 31)
Tip: If more people in your household own a Gazelle Innergy, have the dealer register all batteries in all bikes. Then it doesn't matter what battery you put in what bike.
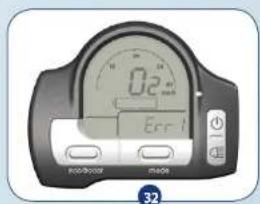
Err 1.2 Battery temperature (was) too high when charging
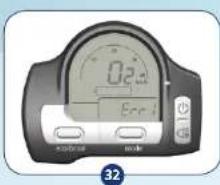
The battery temperature has exceeded 55°C (131°F). Make sure that the bike is not exposed to direct sunlight or is parked against a heater. If you charge the battery separate from the bike, make sure that it doesn't sit on or next to the heater or in direct sunlight. As soon as the battery has cooled off, it will resume charging. This message will disappear from the display automatically. If you frequently get this message, we request you to contact your dealer. (Photo 32)

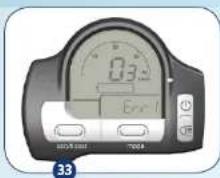
Err 1.3 Battery temperature (was) too high when discharging
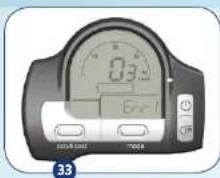
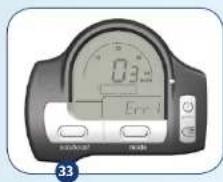
The temperature inside the battery has become too high during cycling. This can happen under conditions of extreme heat and great exertion. Ride without pedal assistance or don't use the bike until the battery has cooled off. As soon as the battery has cooled off, you can use it again. (Photo 33)

Err 1.4 Error in communicating with the battery
Remove the battery and place it back. If this doesn't help, you must go to your dealer. He will then check the bike and battery for you and fix the malfunction. (Photo 34)
Err 2.1 Error in the file system
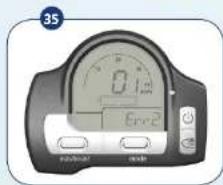
An error has occurred in the bike control unit. This message should disappear automatically. You can continue to bike. If this message recurs, we advise you to go to your dealer so that he can fix the malfunction. (Photo 35)
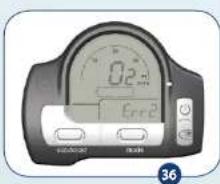
Err 2.2 Temperature in the bike control unit too high
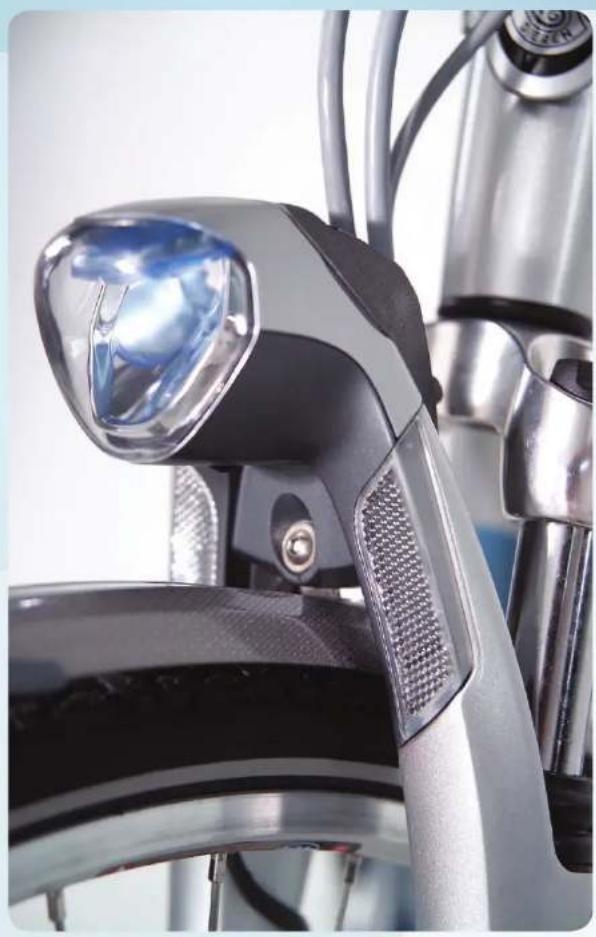
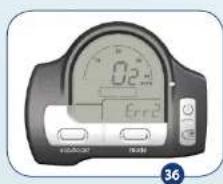
The temperature in the bike control unit (which is located in the headlight) has become too high. This malfunction can occur upon very long lasting and extensive use. If this message appears during cycling, we advise you to ride without pedal assistance for a while, until the bike control unit has cooled off. This message should disappear automatically. (Photo 36)
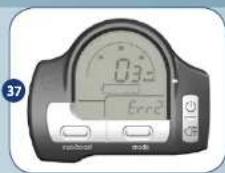
Err 2.3 Power supply to the motor too great
This malfunction must be corrected by the bike itself. If this malfunction occurs, the bike automatically turns the motor off to prevent damage. If this message occurs frequently, we advise you to go to your dealer so that he can fix the malfunction. (Photo 37)
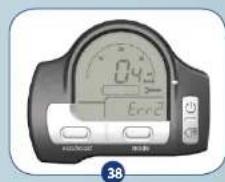
Err 2.4 Motor sensors do not function correctly
Check if the motor cable is attached properly. Follow the instructions under "removing the front wheel" to open the connector box on the front fork. Check if the connection of the motor cable is still firmly attached in the connector box. If the malfunction isn't solved, you must contact your dealer. (Photo 38)
Err 2.5 No or Incorrect speed pulse from motor
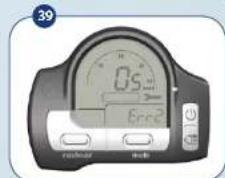
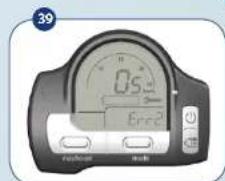
Your display doesn't show a speed whereas the other functions of the display work correctly. Go to your dealer to have this malfunction fixed. (Photo 39)
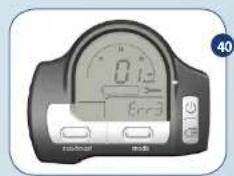
Err 3.1 Pedal power measurement error
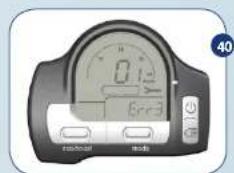
An error has occurred within the module that has to translate the delivered pedal power and the requested degree of assistance into the extent of motor support. If this error message is shown, the system was not able to recalibrate itself. Go to your dealer to have this malfunction fixed. (Photo 40)

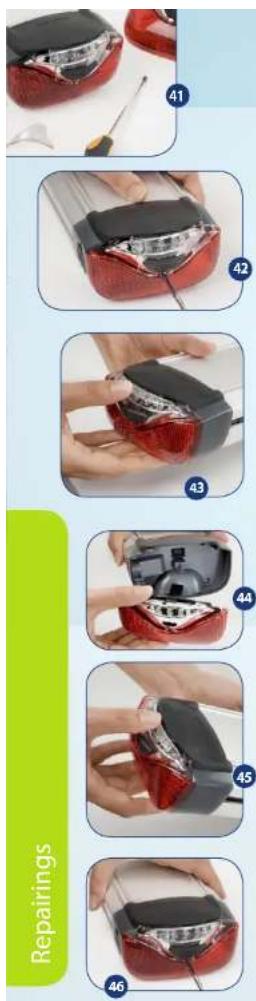
Replacing the taillight
- If the taillight is damaged, you must replace it to prevent moisture from entering into the battery. (Photo 41)
- Loosen the screw of the taillight using a Phillips screwdriver. (Photo 42)
- Hold the taillight with one hand and use your other hand to hold the battery. Now pull the taillight loose from the battery. (Photos 43 + 44)
- Press on the new taillight. Make sure that it fits tightly in all corners and other places and that the rubber upper flap goes over the taillight. (Photo 45)
- Tightly screw the taillight back onto the battery. (Photo 46)
Removing the front wheel
- The below instructions are an addition to the actions described in the general Gazelle user manual. You must first follow the below instructions before you can remove the front wheel.
- Remove the battery from the bike (see previous instructions).
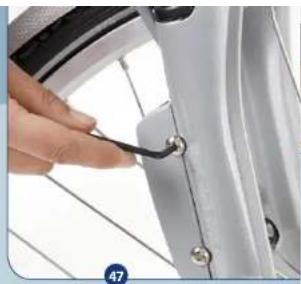
- Loosen the two screws of the connector cap on the front fork using a size 4 Allen key. (Photo 47)
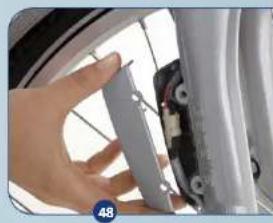
- Remove the front part of the cap. (Photo 48)
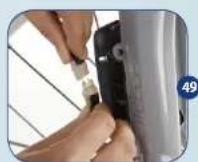
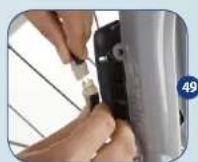
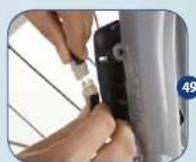
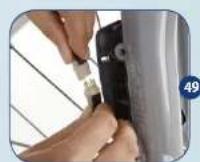
- Carefully take the plug connection out of the cap with dry hands and pull the two plug halves apart. (Photo 49)
- Avoid all contact with the contact pins of the plugs.
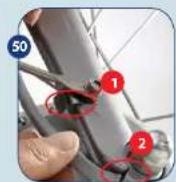
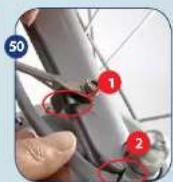
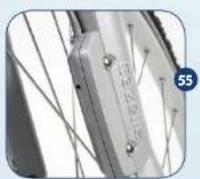
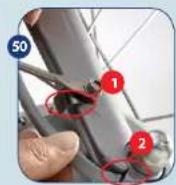
- Hold the bottom part of the cable and carefully take it out of the 2 cable guide brackets. Make sure that you do not damage the cable and plug. The upper bracket is located in the area of the mudguard attachment (see 1 on Photo 50), the lower bracket is situated beneath the front axle's cap nut (see 2 on Photo 50).
- Now loosen the cap nuts and follow the instructions for replacing a wheel in the general user manual.
natural_image
Close-up of a hand using a tool to adjust or install a car wheel rim (no text or symbols visible)
natural_image
Close-up of a hand holding a metallic bracket next to a car wheel (no visible text or symbols)


natural_image
Close-up of a metallic mechanical component with red circular annotations highlighting features (no readable text or symbols)

natural_image
Close-up of a hand adjusting a bicycle wheel component (no visible text or symbols)
Repairings
Connecting the motor cable
• Make sure that you have remounted the front wheel to the bike in accordance with the instructions.
• Make sure that the cable from the motor axle falls into the front fork's recess at the underside, or else you will damage the motor cable.
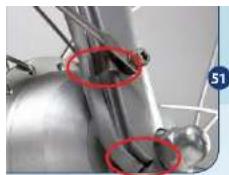
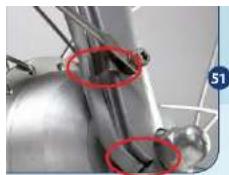
• Make sure that the motor cable is clamped behind the 2 cable guide brackets and firmly press the cable to the recess in the front fork. (Photo 51)
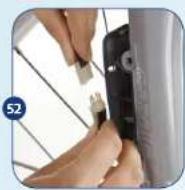
- Reconnect the two parts of the plug connection and place the cables back into the connector cap. (Photo 52)
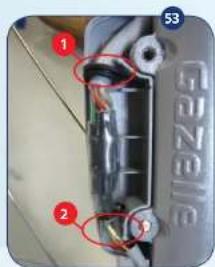
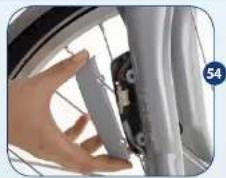
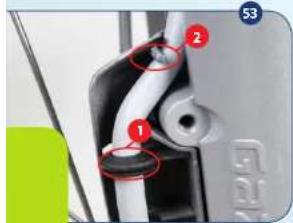
• Make sure that the rubber ring is clamped tightly onto the upper rib (1) in the box. Also take care to see that the cable runs behind the guide pawl (2) on the top and bottom side. (Photo 53)
- When a replacement is made, you must also replace the pull tie. This is necessary to guarantee water tightness.
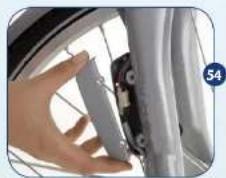
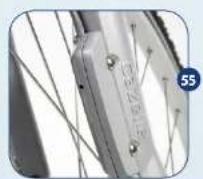
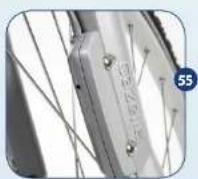
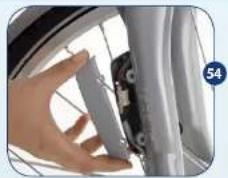
- Attach the front part of the cap with the 2 Allen screws. Make sure that the two halves connect properly and that no cables interfere.
(Photos 54 + 55)
- Slide the battery back into the bike and check if the display is working.

Questions and Answers
Question: How does the bike work?
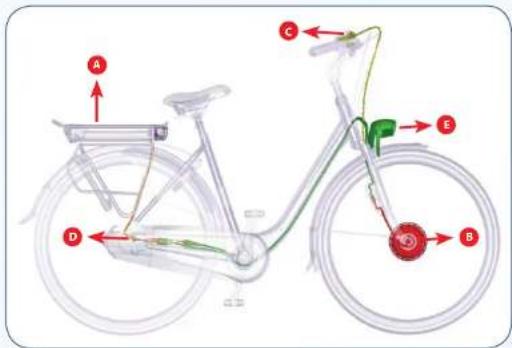
Answer: The Innergy system consists of 5 main components:
a) The battery - integrated into the luggage carrier
b) The motor - situated within the front wheel hub
c) The display - placed on your left handlebar
d) The torque/pedal - mounted onto the bike's rear drop-out. This power sensor sensor is hidden behind your chain case or
chain guard cover, depending on the model you choose.
e) The bike control unit - integrated into the headlight. The force that you apply to the pedals is translated into a signal to the bike control unit (e) by the torque/pedal power sensor (d). If you have turned on the pedal assistance via the display (c), a signal is sent to the bike control unit as well. The bike control unit translates both signals into high or low motor support (b).
The energy needed to let the whole system function is delivered by the battery (a).
Question: Is the amount of pedal assistance adjustable?
Answer: Yes, absolutely. The unique feature of this system is that your dealer, in both the "eco" and "boost" mode, can set the assistance according to your wishes because these might deviate from the factory settings for both modes. If you would like your battery to deliver a greater action of radius than average, the dealer can slightly diminish the amount of assistance offered in the eco mode. If you prefer an increased assistance (e.g., because your bike companion has more strength than you and thus cycles faster), the dealer can easily adjust this for you. This way, you can add between 50 and 200% of power to your pedalling.
Question: What is the radius of action for the various pedal power modes?
Answer: As a rule, the eco mode is programmed in such a way that the bike will provide long lasting assistance. This varies between 40 and 75 kilometres (app. 25 and 45 miles), depending on your weight, pedal power, the bike gears you use, the weather conditions, the requested amount of assistance and the battery age. As a rule, the boost mode is programmed to provide greater support so that you receive more powerful assistance for a short period of time. Cycling in the boost mode will cause your battery to run out of power sooner. How soon depends, again, on the amount of assistance programmed by your dealer, your weight, pedal power, the bike gears you use, the weather conditions and battery age. With the factory setting, this is between 25 and 40 kilometres (app. 15 and 25 miles).

Question: Doesn't it require a lot of effort to ride the bike if you turn off the motor or when the battery is out of power?
Answer: No, the bike is fitted with a brushless DC motor and a magnetic friction-free torque meter, as a result of which a turned-off motor gives no noticeable resistance. Furthermore, the bike is equipped with 7, 8 or 24 gears so that you can select a suitable low gear.
Question: How fast can I go with this bike?
Answer: That's up to you. However, at speeds above app. 16 kilometres per hour (app. 9,8 miles per hour) the pedal assistance will diminish. At 25 kilometres per hour (app. 15 miles per hour), the assistance drops to 0% . This is a legal requirement for bicycles with motor assistance.
Question: Isn't a bike with the Innergy system really heavy?
Answer: Definitely not as heavy as you might think, although the battery and motor obviously result in weight gain. The lightweight motor weighs about 3.0 kilograms (6.6 pounds) and the detachable battery 2.5 kilograms (5.5 pounds). Thus, in total you have to add 5.5 kilograms to the weight of the "standard bike". The Orange Innergy, for instance, weighs in at 26.8 kilograms (59 pounds).
Question: Can my dealer perform maintenance on the electronics?
Answer: Yes. Your Gazelle dealer received special training to do maintenance and repairs on your bike. In addition, he has special computer software to quickly fix a possible malfunction and can always fall back on Gazelle's Service and Warranty department.
Question: Can I get on the bike in the same way as with a regular bike?
Answer: Basically, yes. The bike is programmed in such a way that the assistance responds less quickly and is less powerful at speeds of 0-5 kilometres per hour (app. 0-3 miles per hour). Do be sure not to ride off in too high of a gear; this requires less energy from you and the battery.
Answer: Yes, as long as you don't apply too much force to the pedal. If you lean on the pedal with your full body weight, you'll notice that the bike wants to take off. As soon as you take most of the pressure off of the pedal, this will no longer be the case.
Question: Can I ride my bike in the rain?
Answer: Yes, the Innergy components are resistant to splashing water and continue to function normally when it rains. However, the system can't withstand immersion in any kind of fluid or treatment with a high-pressure sprayer. Therefore, never clean your bike with a high-pressure sprayer!
Question: How often do I need to take the bike back to the Gazelle dealer for servicing?
Answer: None of the Innergy components requires more servicing than the other bike parts. The frequency depends upon use.

Question: What is the service life of the battery?
Answer: The battery can completely (100%) discharge about 600 times. Then, the energy content declines and the battery can only be charged up to 60% at a maximum. In the case of partial discharging, only the part that is discharged has to be taken into consideration. If the battery is always discharged only 20%, for example, it can be charged 3000 times.
Question: Should I put my battery in the charger when I'm not using it?
Answer: No, that isn't necessary. You can store the battery in a dry, non-humid place or leave it in the bike.
Question: How long does it take to charge my battery?
Answer: It takes app. 3.5 hours to fully charge a battery that is out of power. Obviously you can also partially charge your battery, e.g. while having lunch on the road. That way you can increase your radius of action during lunch. Comply with the charging instructions at all times.
Question: How powerful is my battery?
Answer: The battery capacity is 7 ampere and it has a voltage of 36V . This means that the battery can contain 252Wh of energy when fully charged. At a weight of only 2.5 kilograms (5.5 pounds), this gives a very high energy density (energy per kilo of battery weight) of 100.8Wh / kg .
Question: What should I do when I'm not using the battery for a while?
Answer: You don't have to do anything. If you don't use the battery for 2 weeks or more, it switches to a sleep mode that ensures that the battery won't go dead and the capacity is retained. You reactivate the battery by putting it back in the bike or pressing the button on the taillight.
Question: Are there any special external charging stations?
Answer: These aren't necessary, because you can easily remove the battery from the bike and can put the flat plug of the charger into any power socket. On top of that, the charger is so small and light that it will always fit into a (bike) bag. Thus, when you're on the road you can charge your battery with this charger in a restaurant, your hotel room or car (using a standard 12v/230v power inverter that you plug into your car's cigarette lighter).
Question: Is the battery protected against theft?
Answer: Yes, in 2 ways. The battery is attached to the frame with a separate battery lock. This lock uses the same key as your bike's lock. In addition, each battery contains a unique serial number. This battery serial number is stored digitally within the bike operation unit. If the number in the battery doesn't correspond with the numbers that are stored within your bike, the assistance won't work. Therefore, a separate battery is of no use to a thlef!
Question: When it's freezing, the battery seems to contain less energy. Why is that?
Answer: Batteries function less well at temperatures below -5 degrees Celsius (23 degrees Fahrenheit). This gives no problems, apart from the fact that the battery can't be discharged completely.
Question: If I do not use my bicycle for a few days, will the battery be discharged?
Answer: If the bicycle is not used for 3 days, the battery will go into a so-called "deep sleep" mode. This mode can be turned off by pressing the black button (at the back of the rear light).

Question: Are batteries available separately and if so, is it wise to have a spare one?
Answer: Separate batteries are available via the Gazelle dealer. If the capacity of a single battery does not suffice to provide your desired radius of action, an additional battery is advisable (these can be ordered as individual accessories at your Gazelle dealer). Also, if you don't have the opportunity to charge the battery in between 2 long trips a second battery comes in handy. Make sure, however, that the Gazelle dealer registers both of these batteries in your bike (the bike memory contains sufficient space for multiple batteries).
Question: Can I also use the battery from my spouse's bike?
Answer: Yes, that is possible if your dealer has programmed the corresponding battery number into your bike as well. If this is not the case, your display will show error message 1.1. If so, take both of your bikes and batteries to the dealer. Then he will programme both batteries into both bikes, so that it will no longer matter what battery you take out of the charger.
Question: Will my lights still work if the battery has run out of power?
Answer: The battery will always contain some residual energy capacity. This energy is more than sufficient to keep your lights on for several more hours.
Question: Does my bike meet the European legal requirements for bikes with motor assistance?
Answer: Yes, bikes with motor assistance are not allowed to provide assistance at speeds over 25 kilometres per hour (15 miles per hour). The Gazelle bikes with Innergy system meet this requirement and no (proof of) number plate is needed for them.
Question: Do I need to have third-party insurance when I ride a Gazelle Innergy?
Answer: No, this is no obligation.
Question: What terms of service and warranty apply?
Answer: The terms of service and warranty that are described in the general Gazelle user manual. In addition, the following specific warranty conditions apply: With normal treatment, use and maintenance, Gazelle gives a 2-year warranty on the motor, the display, the pedal power sensor and the bike control unit. Wear is not covered by the warranty. With regard to the battery, a warranty for 600 full charges is given.

natural_image
Close-up of a modern electric scooter's front wheel and side-mounted sensor (no visible text or symbols)
natural_image
Close-up of a hand pressing down on a red textured vacuum cleaner's air vent (no text or symbols visible)

natural_image
Close-up of hands holding a metallic device with white tubing (no visible text or symbols)
natural_image
Close-up of a white bicycle rear lift with black and red guide rails attached (no visible text or symbols)


natural_image
Close-up of a hand holding a white metal carabiner with a red button, no visible text or symbols

natural_image
Close-up of a bicycle seat frame with metal frame and wheels (no visible text or symbols)


natural_image
Close-up of a red and silver bicycle rear bumper with visible headlights and handle (no text or symbols)
natural_image
Close-up of a hand holding a small electronic device with a red and black component, next to a white lab or electronic device (no visible text or symbols)


natural_image
Electric battery charging setup with red and black components and a white cable (no visible text or symbols)

L'afficheur :
natural_image
Illustration of a portable electronic device with dual dials and control buttons (no readable text or symbols)

natural_image
Close-up of a hand holding a small electronic device next to a mechanical tool (no visible text or symbols)

natural_image
Close-up of a hand holding a digital caliper with a red circle highlighting a small component (no visible text or symbols)

natural_image
Close-up of a hand holding a black and white digital stopwatch on a bicycle (no visible text or symbols)

L'afficheur
natural_image
Close-up of a white power button with a black circular icon, no visible text or symbols
natural_image
Close-up of a white electronic device with a curved handle and indicator lights, placed on a textured surface (no visible text or symbols)


natural_image
Close-up of a hand using a tool to adjust or install a car wheel rim (no visible text or symbols)

natural_image
Close-up of a hand holding a metallic bracket mounted on a bicycle wheel (no visible text or symbols)


natural_image
Close-up of metallic mechanical components with red circles highlighting features (no visible text or symbols)


natural_image
Close-up of a hand holding a bicycle tire component (no visible text or symbols)
Réparations