Astra - Baby monitors Levana - Free user manual and instructions
Find the device manual for free Astra Levana in PDF.



Frequently Asked Questions - Astra Levana
User questions about Astra Levana
0 question about this device. Answer the ones you know or ask your own.
Ask a new question about this device
Download the instructions for your Baby monitors in PDF format for free! Find your manual Astra - Levana and take your electronic device back in hand. On this page are published all the documents necessary for the use of your device. Astra by Levana.
USER MANUAL Astra Levana
MANUAL MANUEL MANUAL
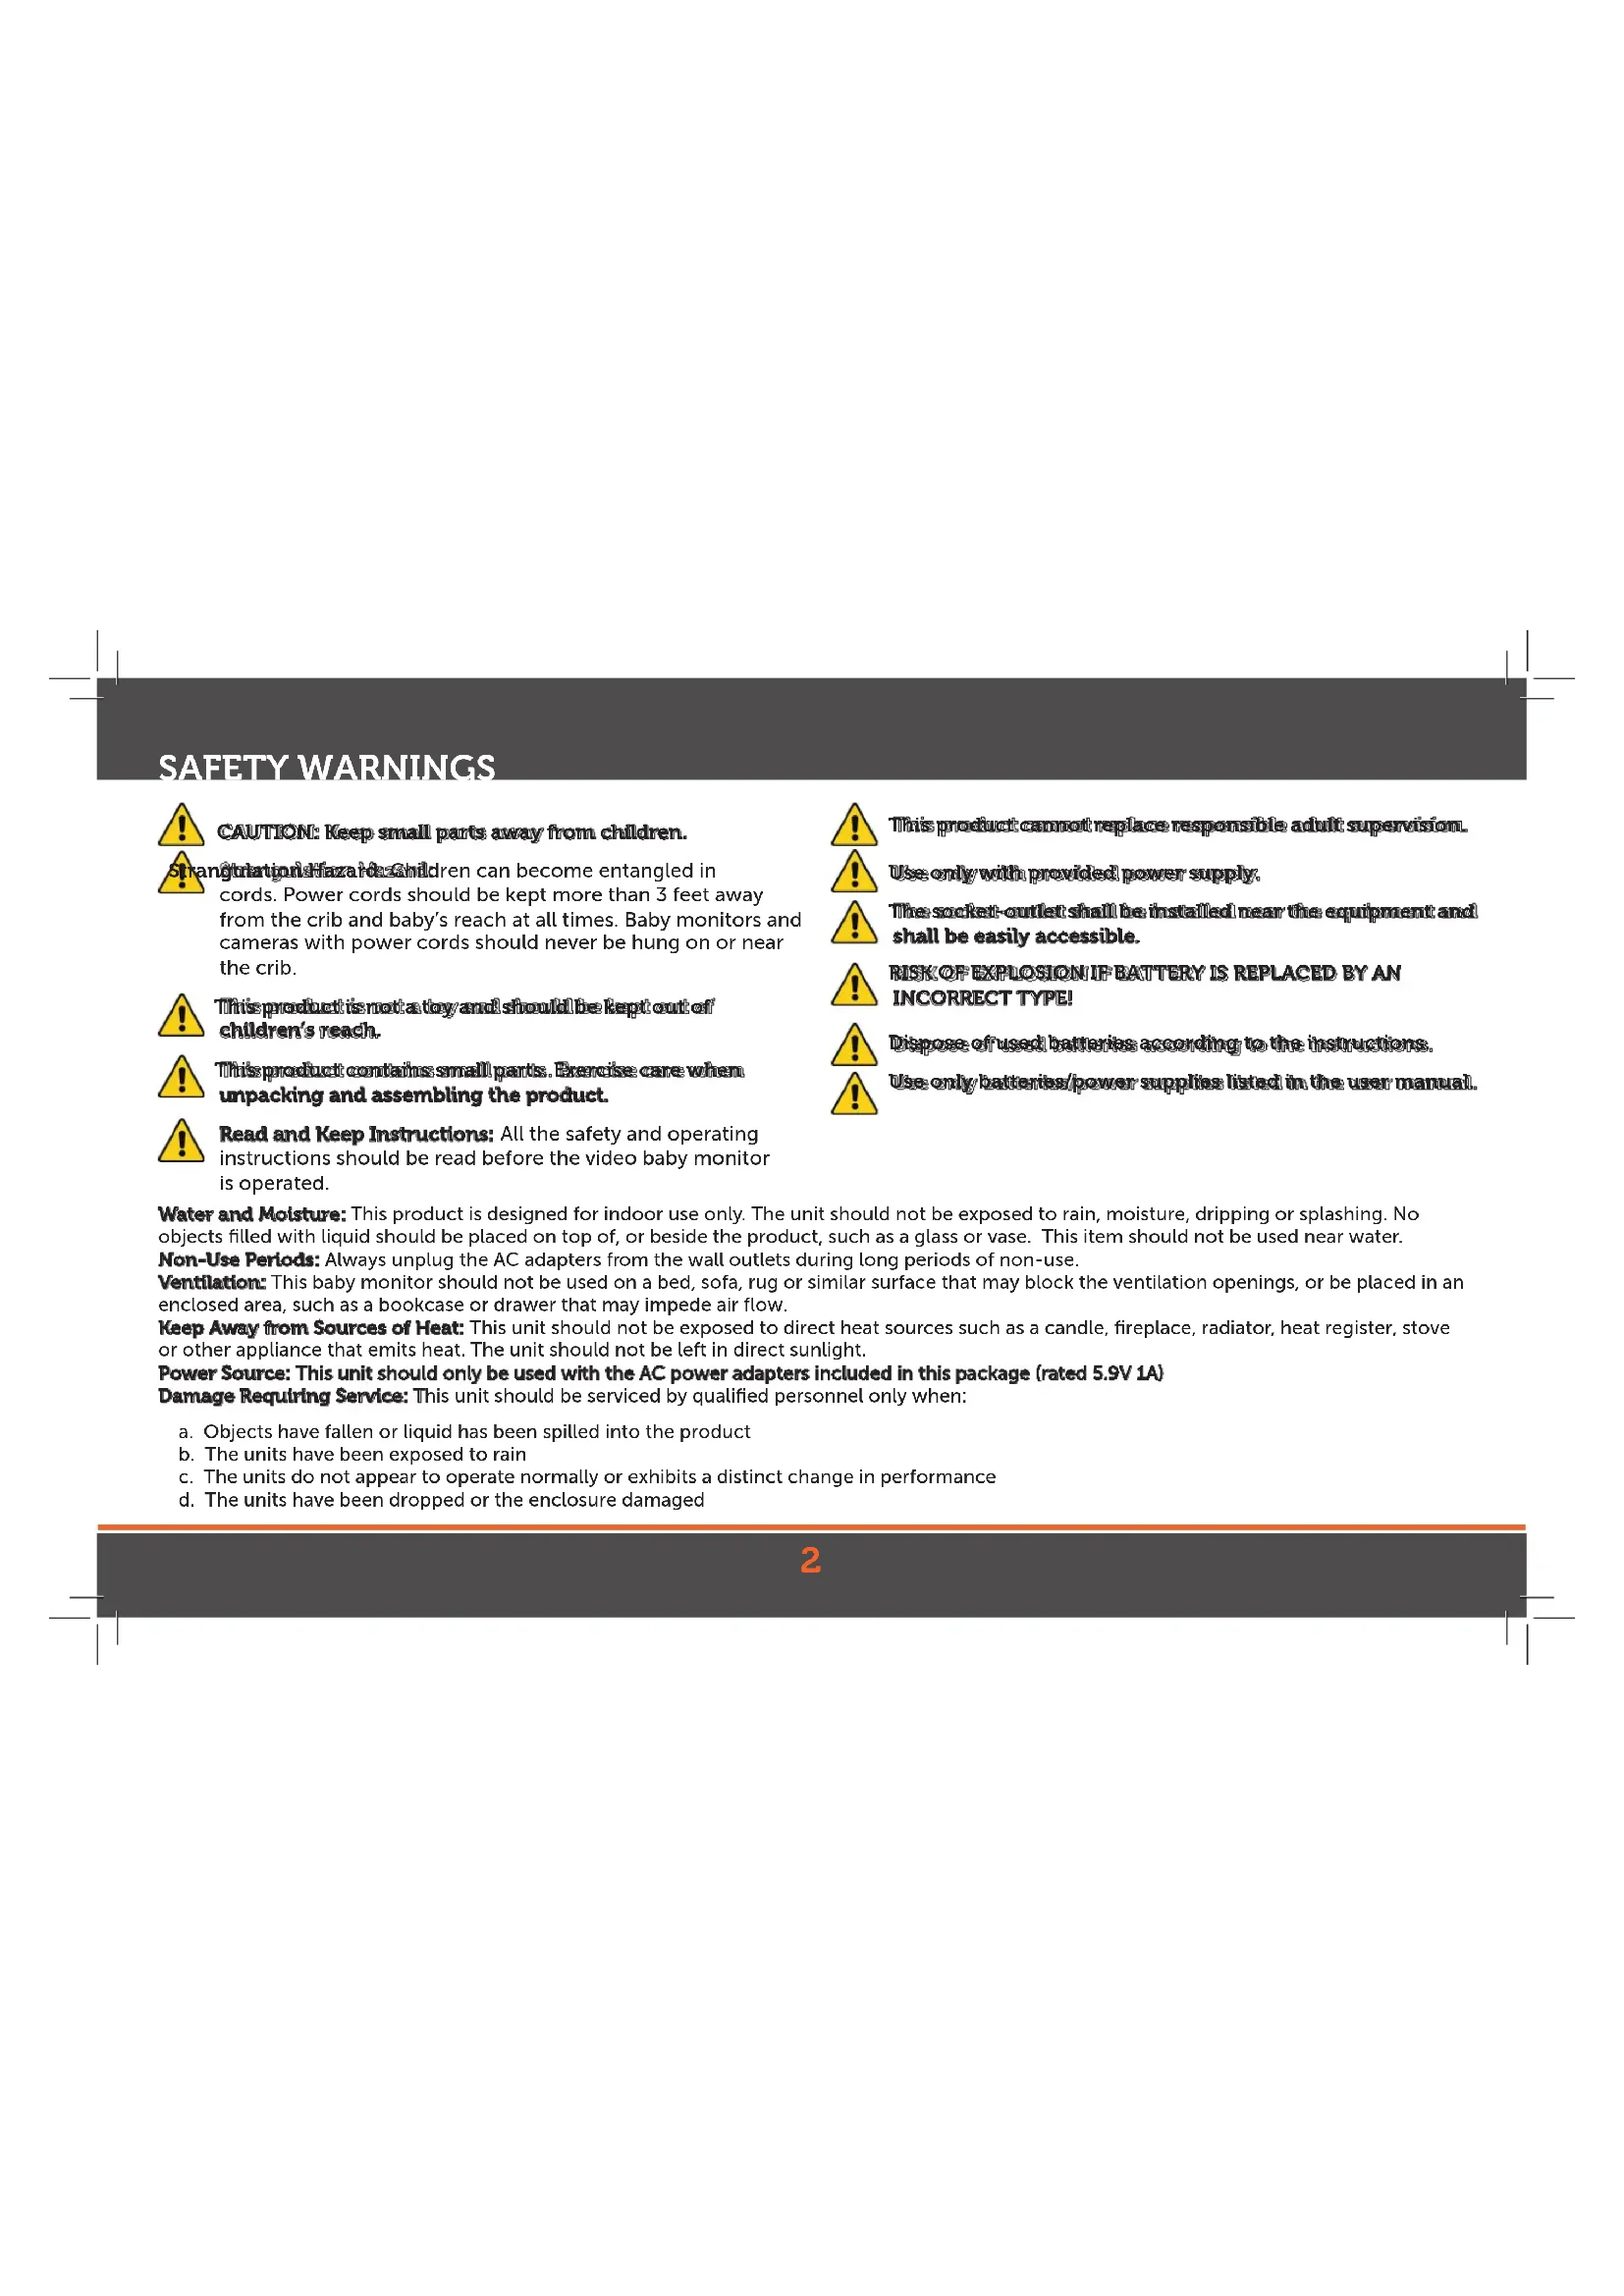
natural_image
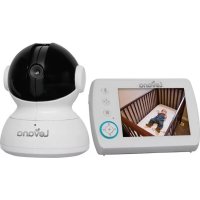
Two white baby care devices: a digital display showing a sleeping baby in a crib, and a modern device labeled 'Levana' (no visible text or symbols on the device body beyond branding)
CAUTION: Keep small parts away from children.
CAUTION: Keep small parts away from children.

Regulation: Hazard: Children can become entangled in cords. Power cords should be kept more than 3 feet away from the crib and baby's reach at all times. Baby monitors and cameras with power cords should never be hung on or near the crib.

This product is not a toy and should be kept out of children's reach.

This product contains small parts. Exercise care when unpacking and assembling the product.

Read and Keep Instructions: All the safety and operating instructions should be read before the video baby monitor is operated.

This product cannot replace responsible adult supervision.

Use only with provided power supply.

The socket-outlet shall be installed near the equipment and shall be easily accessible.

RISK OF EXPLOSION IF BATTERY IS REPLACED BY AN INCORRECT TYPE!

Dispose of used batteries according to the instructions.

Use only batteries/power supplies listed in the user manual.
Water and Moisture: This product is designed for indoor use only. The unit should not be exposed to rain, moisture, dripping or splashing. No objects filled with liquid should be placed on top of, or beside the product, such as a glass or vase. This item should not be used near water.
Non-Use Periods: Always unplug the AC adapters from the wall outlets during long periods of non-use.
Ventilation: This baby monitor should not be used on a bed, sofa, rug or similar surface that may block the ventilation openings, or be placed in an enclosed area, such as a bookcase or drawer that may impede air flow.
Keep Away from Sources of Heat: This unit should not be exposed to direct heat sources such as a candle, fireplace, radiator, heat register, stove or other appliance that emits heat. The unit should not be left in direct sunlight.
Power Source: This unit should only be used with the AC power adapters included in this package (rated 5.9V 1A)
Damage Requiring Service: This unit should be serviced by qualified personnel only when:
a. Objects have fallen or liquid has been spilled into the product
b. The units have been exposed to rain
c. The units do not appear to operate normally or exhibits a distinct change in performance
d. The units have been dropped or the enclosure damaged
FCC STATEMENT

This device complies with part 15 of the FCC Rules. Operation is subject to the following two conditions:
(1) This device may not cause harmful interference.
(2) This device must accept any interference received, including interference that may cause undesired operation.
FCC WARNING
This equipment has been tested and found to comply with the limits for a Class B digital device, pursuant to Part 15 of the FCC Rules. These limits are designed to provide reasonable protection against harmful interference in a residential installation.
This equipment generates, uses and can radiate radio frequency energy and, if not installed and used in accordance with the instructions, may cause harmful interference to radio communications. However, there is no guarantee that interference will not occur in a particular installation. If this equipment does cause harmful interference to radio or television reception, which can be determined by turning the equipment off and on, the user is encouraged to try to correct the interference by one or more of the following measures:
- Reorient or relocate the receiving antenna.
- Increase the separation between the equipment and the receiver.
- Connect the equipment into an outlet different from that to which the receiver is connected.
- Consult the dealer or an experienced radio/TV technician for help.
IC STATEMENT / DÉCLARATION IC:
This device complies with Industry Canada licence-exempt RSS 210 standard(s). Operation is subject to the following two conditions: (1) this device may not cause interference, and (2) this device must accept any interference, including interference that may cause undesired operation of the device.
Changes or modifications not expressly approved by the party responsible for compliance could void the user's authority to operate the equipment.

Please visit our website at www.myLEVANA.com for information about your product's warranty
We take quality very seriously. This is why all of our products come with a one-year warranty from the original purchase date against defects in workmanship and materials. If you have warranty or support issues please contact us using any of the following methods:
Web: www.mylevana.com
Support: www.mylevana.com/support
LEVANA Canada Canada
4080 Montrose Road
Niagara Falls, ON
Canada L2H 1J9
60 Industrial Parkway #Z64
Cheektowaga NY
USA 14227
Warranty Terms
- LEVANA ^® products are guaranteed for a period of one year from the date of purchase against defects in workmanship and materials. This warranty is limited to the repair, replacement or refund of the purchase price at LEVANA's option.
- This warranty becomes void if the product shows evidence of having been misused, mishandled or tampered with contrary to the applicable instruction manual.
- Routine cleaning, normal cosmetic and mechanical wear and tear are not covered under the terms of this warranty.
- The warranty expressly provided for herein is the sole warranty provided in connection with the product itself and no other warranty, expressed or implied is provided. LEVANA assumes no responsibilities for any other claims not specifically mentioned in this warranty.
- This warranty does not cover the shipping cost, insurance or any other incidental charges.
- You MUST contact LEVANA at www.mylevana.com/support before sending any product back for repair. You will be sent a Return Authorization form with return instructions. When returning the product for warranty service, please pack it carefully in the original box with all supplied accessories, and enclose your original receipt or copy, and a brief explanation of the problem (include RA #).
- This warranty is valid only in Canada and the continental U.S.
- This warranty cannot be re-issued.
TABLE OF CONTENTS
SAFETY INSTRUCTIONS 2
FCC STATEMENT....3
WARRANTY 4
WHAT'S INCLUDED....6
BUTTONS AND CONNECTIONS - MONITOR 7
BUTTONS AND CONNECTIONS - CAMERA....8
SETUP....9
Battery installation....9
Connecting Power to the Monitor / Charging Battery....10
Connecting Power to the Camera 10
Screen Icons 11
OPERATION 12
Turn the Monitor ON / OFF....12
Pairing the Cameras & Monitor....12
Placement of the Monitor 13
Placement of the Camera 13
Mounting the Camera on a Tabletop Safely 13
Mounting the Camera on a Wall Safely 14
Night Vision....15
Adjusting the Camera Angle 15
Using the ZOOM Function....15
Volume....16
Using the Talk to Baby™ Two-Way Intercom....16
Selecting a Lullaby....17
Using Power Save 17
Changing the Camera View....18
Setting the Brightness....18
Using PEEP Mode 19
Contacting Customer Support....20
TROUBLESHOOTING....21
MAINTENANCE 21
SPECIFICATIONS....22
WHAT'S INCLUDED
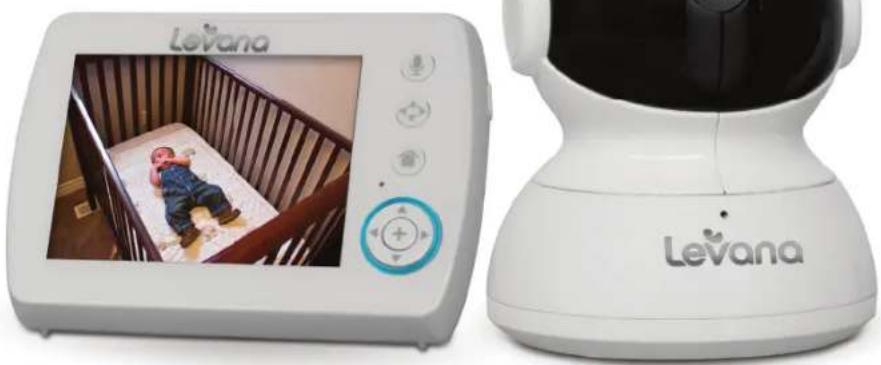
• Pan/Tilt/Zoom Night Vision Camera
• Baby Video Monitor
- Rechargeable Battery
• 2 Power Adapters
- Quick Start Guide
• 1 Year Warranty
• Lifetime Customer Support
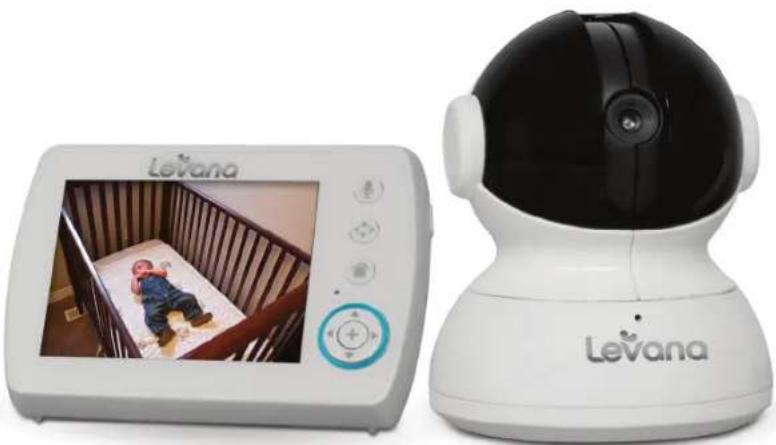
natural_image
White Levana mobile phone displaying a baby on a bed, alongside a black and white device with a camera (no visible text or symbols)This product is not a toy. This product contains small parts. Exercise care when unpacking and assembling the product.
Battery life of 48 hours based on 10 audio activations while in power save (PEEP) mode. Battery lasts an average of 10 hours with continuous audio/video usage.
Night vision range up to 12ft under ideal conditions. Objects at or beyond this range may be partially or completely obscured, depending on the camera application. Optimum range is 200ft when signal is passing through walls or floors. Microwave ovens (when in use) may cause signal disruption at close range. Buildings with metal frames may also cause signal disruption. Maximum transmission range is 750 feet.
This product does not replace responsible adult supervision. Check on your child at regular intervals and make sure your monitor is always adequately charged.
Strangulation Hazard: Children can become entangled in cords. Power cords should be kept more than 3 feet away from the crib and baby's reach at all times. Baby monitors/cameras with power cords should never be hung on or near the crib.
We reserve the right to change models, configuration, or specifications without notice or liability. Product may not be exactly as shown.
©2013 LEVANA®. All rights reserved. LEVANA®, the LEVANA® logo, Astra™ and other LEVANA® marks may be registered. All other Trademarks are the property of their respective owners.
MONITOR
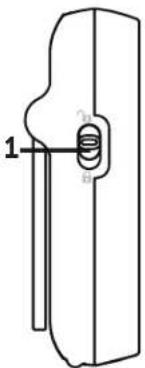
- LOCK/UNLOCKBUTTON Disables ALL function buttons in the LOCK position
- LODSCREEN
- POWER & SCREEN ON/OFF
- POWERINPUT
- TALKTOBABY™ Press and hold to talk, release to listen
- PAN & TILL BUTTON
- MENU
- MICROPHONE
- COLORFEBIANGINGLEDBRINGG Changes color with sound intensity/battery charge
- SELECTION / ZOOM BUTTON
- DIRECTIONAL ARROWS / VOLUME CONTROL
- ANTENNA Extend to improve signal
- TABLE STAND
- SPEAKER
- BATTERY COMPARTMENT
text_image
1 2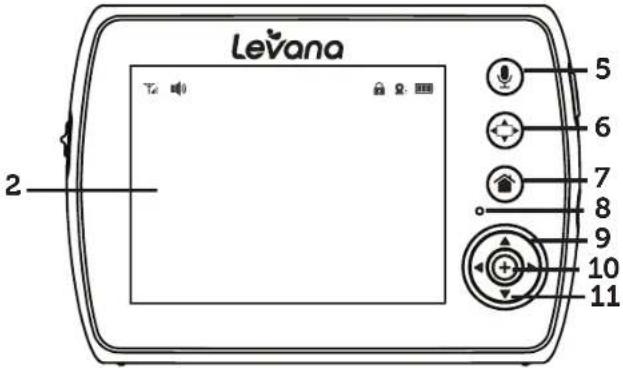
text_image
LeVana 2 5 6 7 8 9 10 11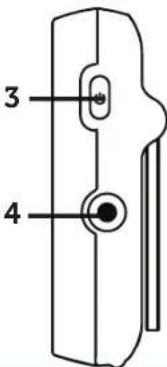
text_image
3 4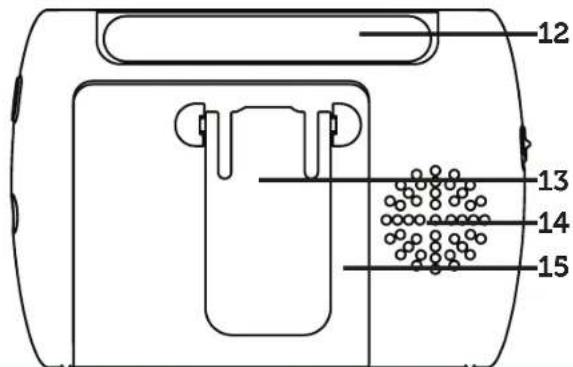
text_image
12 13 14 15CAMERA
text_image
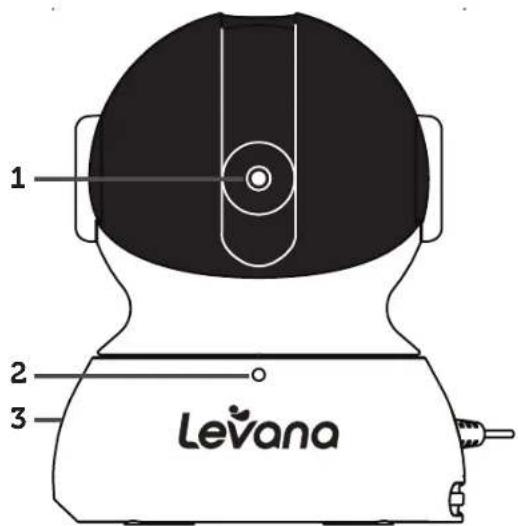
1 2 3 Levana- PTZCAMERA
- MICROPHONE
- POWERLEDD
- NIGHTVISION LIGHTSENSOR
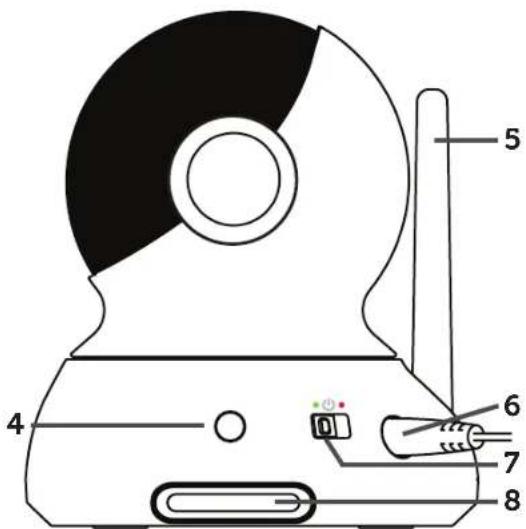
text_image
4 5 6 7 8- ANTEMMA
- POWERINPUT
- POWERON/OFF
- SPEAKER
SETUP
LET'S GET STARTED!
Battery Installation
- Gently remove the BATTERY COMPARTMENT COVER on the back of the monitor by sliding down.
- Insert the battery; the battery connectors on the battery should line up with the connectors inside the battery compartment.
- Slide the BATTERY COMPARTMENT COVER back into place.
- For extended periods of non-use, please remove battery from baby monitor.
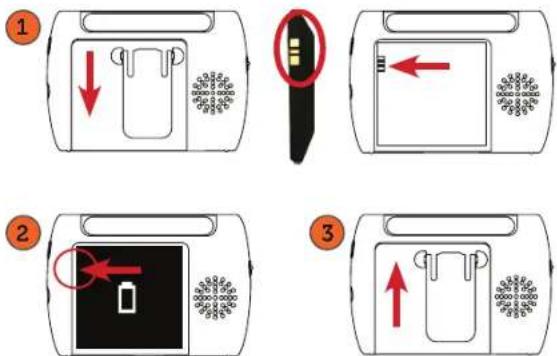
Get the Most Out of Your Rechargeable Battery

Fully charge battery (4 hours) before first use.

To maximize battery life, charge battery before ttery is fully drained.

Avoid extreme heat or cold as this will affect the life the battery.

Turn LCD screen OFF; press POWER button on the side of the monitor ONCE.

PEEP Mode: After 45 seconds of inactivity, monitor enters standby/sleep mode.

Adjustable Brightness: Decreasing screen brightness extend battery life.
SETUP
Connecting Power to the Monitor / Charging Battery
- Connect the small end of power adapter marked MONITOR ☐ into the DC input on the side of the monitor as shown in the diagram. Connect the other end of the adapter into an available wall outlet. For safety reasons, ONLY use the adapters included in the package.
- Press and hold the POWER ⏻ button on the side of the monitor to turn the monitor ON.
- The icon in the top right corner of the main screen will show you the battery power status.
- The LED Ring on the front of the monitor also indicates the battery power status.
SOLID BLUE = BATTERY FULLY CHARGED QUICK FLASHING BLUE = BATTERY LOW
SLOW FLASHING BLUE = BATTERY CHARGING FLASHING PINK = PAIRING UNSUCCESSFUL
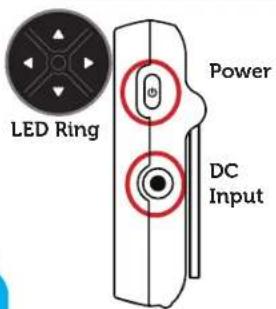
text_image
LED Ring Power DC Input
text_image
EMPTY CHARGING FULL CHARGING FULLConnecting Power to the Camera
- Take the second power adapter and connect the small end of the power adapter marked CAMERA into the DC input on the side of the camera base as shown in the diagram. For safety reasons, ONLY use the adapters included in the package.
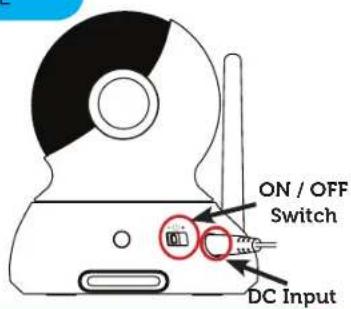
text_image
ON / OFF Switch DC InputNote: Baby monitors and cameras with power cords should never be hung on or near the crib as it is a strangulation hazard. Power cords should be kept no less than 3 feet away from the crib and the baby's reach at all times.
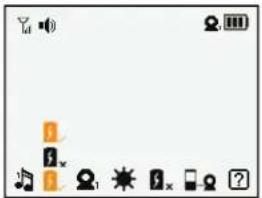
SCREEN ICONS
SIGNAL STRENGTH
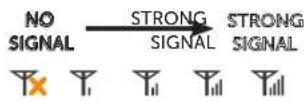
PTZ / VPIZ / PTZ
PEEP MODE
OFF LOMOWMEDIMEDIUMHIGHHIGH

BATTERY STRENGTH

ZOOM

VOLUME

POWER SAVE
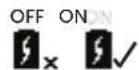
LULLABIES

TALK TO BABY™

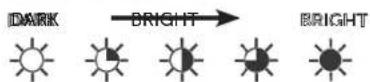
BRIGHTNESS
CAMERA
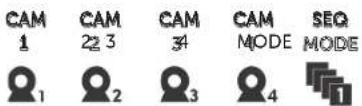
SUPPORT

PAIRING
text_image
PAIRING CAM 1 CAM 2 2 3 CAM 3 4 CAM 4 -♀ ♀1 ♀2 ♀3 ♀4OPERATION
Turn the MONITOR ON/OFF
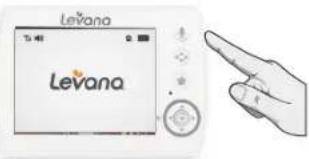
- Press and hold the POWER ⏻ button on the side of the monitor to turn the monitor ON.
- Press and hold the POWER ⏻ button again to turn OFF the monitor.
text_image
Levana 15.40 Levana 2.00 0.00 0.00 0.00 0.00 0.00 0.00 0.00 0.00 0.00 0.00 0.00 0.00 0.00 0.00 0.00 0.00 0.00 0.00 0.00 0.00Pairing the Camera(s) and Monitor
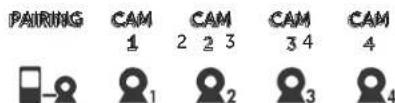
The camera and monitor come paired (connected) to each other automatically. However, if upon opening this package the devices do not automatically connect and transmit, you may do so manually. To pair additional cameras, repeat steps 1 to 3 and be sure to assign a different camera number to each additional camera.
Note: Before you begin pairing, be sure to have the monitor and the camera(s) side by side.
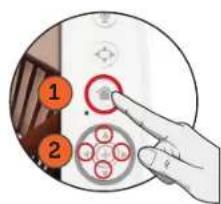
- To pair your camera and monitor, press the MENU ↑ button. Using the navigational arrows ◀ on the front of the monitor, highlight the PAIRING icon and press the SELECT ⊕ button once to select.
- Use the navigational arrows ▲ to highlight the the icon.
- Press the SELECT ⏻ button. When you see flashing next to camera icon, quickly press and hold the PAIRING button on the BOTTOM of the camera. A checkmark √ will appear next to camera confi rming pairing is successful. Video/audio will be transmitted automatically.
text_image
Diagram showing a hand pressing a button on a device with numbered labels 1 and 2 pointing to the button.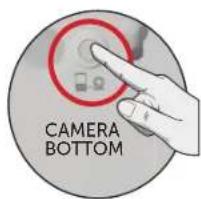
text_image
CAMERA BOTTOMNote: Repeat steps above when pairing additional cameras.
OPERATION
Placement of the Monitor
This monitor can be placed on a tabletop.
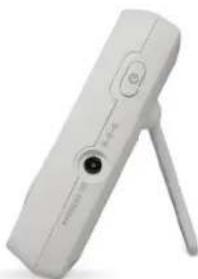
- You can place the monitor on a tabletop by using the retractable table stand on the back of the monitor. When not in use, simply tuck the table stand away into the back of the monitor until you hear a "click".
natural_image
White remote control device with a stand and control knob (no visible text or symbols)Placement of the Camera
This camera can be placed on a tabletop or hung on the wall above the area being monitored.
- Place the camera within 15 feet of the area being monitored for best picture results.
- Do not place objects within 2 feet of the field of vision of the camera as the night vision will not activate correctly if objects are too close.
Mounting the Camera on a Tabletop Safely:
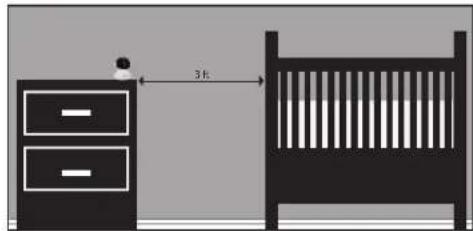
- Place the camera on a tabletop no less than 3 feet away from your baby's crib.
- Feed the power cord down the back of the table or use wall clips (not included) to secure the cord away so the baby cannot reach it.
- Plug in the power cord, check the monitor to ensure that you are getting a good view of your child and there are no obstructions.
natural_image
Simple line drawing of a bedroom layout with a cabinet, bed, and wall (no text or symbols)Note: Baby monitors and cameras with power cords should never be hung on or near the crib as it is a strangulation hazard. Power cords should be kept no less than 3 feet away from the crib and the baby's reach at all times.
OPERATION
Mounting the Camera on a Wall Safely:
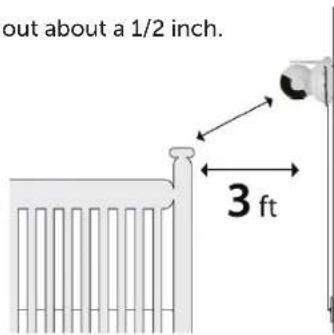
Before drilling the holes, it is important to check the reception and camera positioning in the intended location on the wall. Ensure you are hanging the camera no less than 3 feet away from baby's crib.
Note: Baby monitors and cameras with power cords should never be hung on or near the crib as it is a strangulation hazard. Power cords should be kept no less than 3 feet away from the crib and the baby's reach at all times.
- Pre-drill two holes in the wall using a 3/16", 4.8mm drill bit.
- Insert a screw (not included) into each wall anchor and tighten until the screws only stick out about a 1/2 inch.
- Plug the power cord into the power input of the camera.
- Locate the wall mounting holes on the bottom of the camera base.
- Slide the holes over the screws sticking out of the wall.
- Confirm that the camera is secure, if it is loose you may have to tighten the screws more.
- Use wall clips (not included) to secure the power cord away from the crib or the baby's reach.
-
Connect the other end of the adapter into an available wall outlet.
-
Insert wall anchors (not included) into each hole and tap gently with a hammer until the anchor is flush with the wall.
text_image
out about a 1/2 inch. 3 ftOPERATION
Night Vision
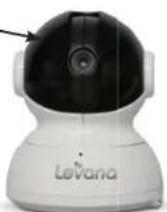
The camera is equipped with NEW Invisible IR (infrared) LEDs which keep the nursery dark. The LEDs are located on the front of the camera and allow you to see up to 12 feet in complete darkness so you can check on your baby at any time of night. The night vision LEDs will activate automatically when the Light Sensor on the side of the camera detects that the light levels are too low.
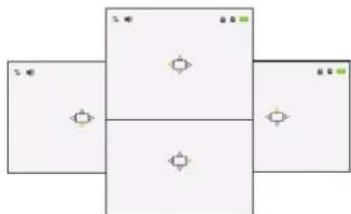
Adjusting the Camera Angle - PTZ
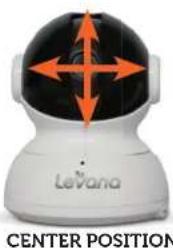
The camera is equipped with Pan / Tilt / Zoom (PTZ). You can adjust the angle 300° degrees horizontal and 110° degrees vertical from the center position.

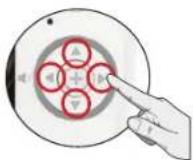
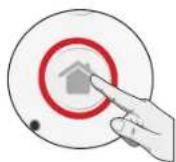
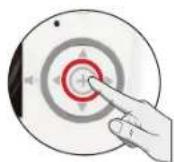
Using the ZOOM Function
natural_image
Pure diagram of a cross-shaped layout with directional arrows, no text or symbols present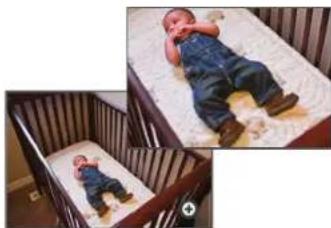
natural_image
Two baby bedding cases in wooden crates, one lying on a white blanket and the other with hands placed on a small boat (no text or symbols visible)INVISIBLE LEDs
natural_image
White robotic device with black dome and orange directional arrows, labeled 'CENTER POSITION' at bottom (no other text or symbols)
OPERATION
Volume
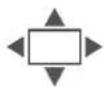
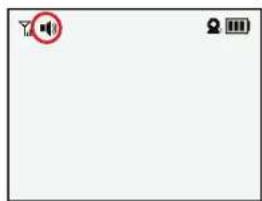
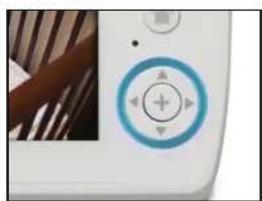
Use the navigational arrows to increase /decrease /mute the VOLUME.
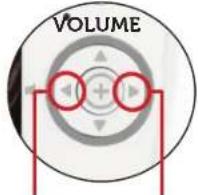
Decrease / Increase
natural_image
Blank white image with a red speaker icon and control buttons (no text or symbols)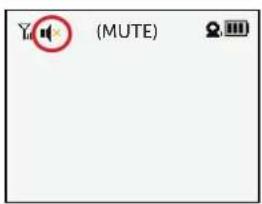
text_image
Yd (MUTE)Note: Placing the monitor and camera too close together will create feedback. DECREASE or MUTE the volume and move the camera away from the monitor.
Using the Talk to Baby™ Two-Way Intercom
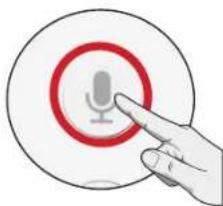
With the simple press of a button you can talk to your child at any time without entering the nursery.
- To talk, press and hold the 🖱 button on the front of the monitor and release to listen.
- To talk when using multiple cameras, select the camera in the MENU and press the 🎨 button, release to listen.
natural_image
Hand pointing at a circular icon with a microphone symbol (no text or labels)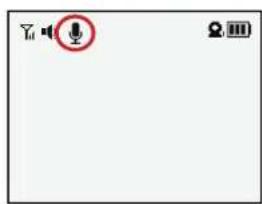
text_image
Screenshot of a media player interface with speaker icon and playback controls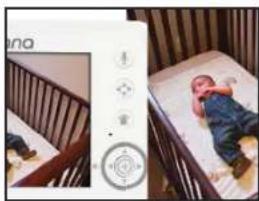
natural_image
Interior view of a baby crib with a baby lying on the back and a baby on the backrest, alongside a white control panel (no visible text or symbols)Note: To optimize the effectiveness of the PTT (Press to Talk) function, please hold the monitor at least 6-8 inches away from your face.
OPERATION
Setting a lullaby
Choose from three different lullabies to soothe your baby to sleep.
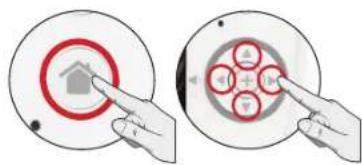
- To select a lullaby, press the MENU button. Using the navigational arrows on the front of the monitor, highlight the LULLABY icon.
- Use the to toggle to select the LULLABY icon of your choice and press the SELECT button once to select.
- To turn OFF the lullabies, select the 🎨 and press the ⭕ button once to select.
text_image
Diagram showing two hand gestures interacting with a house icon and a circular diagram with four circles, likely illustrating a home control or navigation system.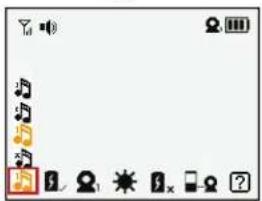
text_image
Mobile phone status bar screenshot showing music and audio icons with a highlighted play buttonUsing Power Save
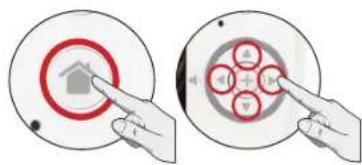
When Power Save is ON, the monitor will enter Standby/Sleep Mode after 1 minute of inactivity. In Standby/Sleep Mode when audio is detected the system will automatically switch to the Live View Mode.
- To set Power Save, press the MENU button. Using the navigational arrows on the front of the monitor, highlight the POWER SAVE icon
- Press the SELECT ⭕ button once to select.
- To return to continuous live view, press the MENU ↗ button.
text_image
Mobile phone status bar screenshot showing app icons including play, music, radio, and othersOPERATION
Changing the Camera View
- To change the camera view, press the MENU button. Using the navigational arrows on the front of the monitor, highlight the CAMERA icon.
- Use the to toggle to select the CAMERA icon of your choice and press the SELECT ⊕ button once to select.
- Select 📄 to cycle through cameras 1 through 4 and press the SELECT ⚠ button once to select.
- To return to continuous live view, press the MENU ↑ button.
Setting the Brightness
Brightness Mode sets the brightness of the screen. Brightness Mode also extends the battery life.
- To set the Brightness Mode, press the MENU button. Using the navigational arrows on the front of the monitor, highlight the BRIGHTNESS icon.
- Use the to toggle to your desired brightness and press the SELECT + button once to select.
text_image
Diagram showing two states of a home control interface with icons and labels, likely illustrating a home control or navigation system.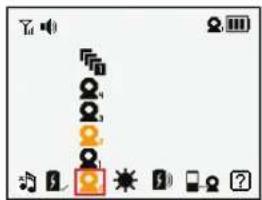
text_image
Camera menu interface with playback, audio, and sound icons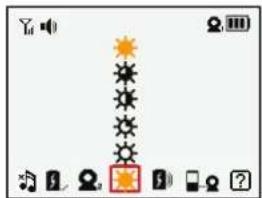
text_image
Weather icon selection panel showing sun, moon, and alarm symbols with a highlighted orange square iconOPERATION
Using PEEP Mode
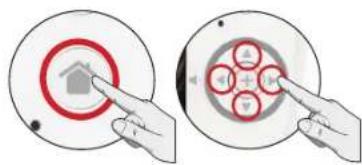
When in PEEP Mode, the monitor enters standby/sleep mode after 1 minute of inactivity. When sound is detected, the screen changes to live view.
- To access live view manually when the screen is off, press the POWER Button ONCE.
-
PEEP Mode extends the battery life over 48 hours.
-
To set PEEP Mode, press the MENU button. Using the navigational arrows on the front of the monitor, highlight the selected PEEP Mode icon.
- Use the to toggle to the desired PEEP Mode icon and press the SELECT button once to select.
- To return to continuous live view, press the MENU ↑ button.
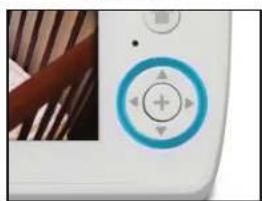
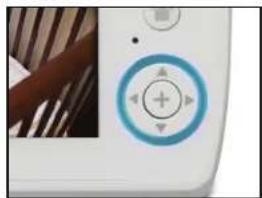
The LED Ring on the front of the monitor also indicates the level of the sound in the room is with colors.
SOUND SENSITIVITY COLORS
DISCON. / WHISPER / MURMUR / COOING / CHATTER / YELLING


text_image
Diagram showing two hands interacting with a house icon and a circular diagram with labeled elements, likely illustrating a home control or security concept.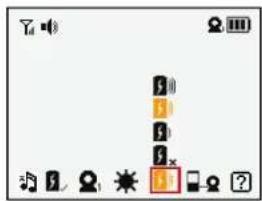
text_image
Mobile phone status bar screenshot showing battery, switch, and app icons with a highlighted battery iconLED Ring
natural_image
Close-up of a white electronic device's control panel with a blue circular button and directional arrows (no text or symbols visible)OPERATION
OPERATION
Contacting Customer Support
Customer Support is just a click away whenever you need it! Our customer support team can be reached by live web chat or on our website at www.mylevana.com/support. Our experts will be happy to assist you in English, French and Spanish.
-
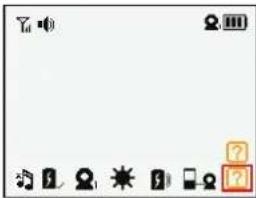
To access Customer Support, press the MENU button. Using the navigational arrows ◆ on the front of the monitor, highlight the SUPPORT ? icon press the SELECT ⊕ button once to select.
-
This will take you to the screen which displays our Customer Support information. Press the MENU button once to EXIT the Customer Support screen.
text_image
Mobile phone status bar screenshot showing app icons and a question mark icon
Support: www.mylevana.com/support
Web: www.mylevana.com
Online Live Web Chat: www.mylevana.com
TROUBLESHOOTING
ISSUE POSSIBLE SOLUTION
| Equipment does not function • Confirm that the camera and monitor are ON• The battery may be depleted; charge battery• The power adapters may not be properly connected |
| No reception • Camera and monitor may not be properly paired; follow PAIRING instructions• Camera may be too far away from the monitor• Extend the antenna on the monitor |
| Reception Interference (static) • The camera and monitor may be too far apart• The battery power may be too low• Other electronic devices may be interfering with the signal• The camera or monitor may be placed too close to many metal objects |
| Feedback (screeching, static) • The camera and monitor may be too close together• The volume on the monitor may be set too high |
| Noise (static, beeping) • Battery power may be too low |
| The buttons are not working • LOCK/UNLOCK Button is in LOCKED position; move to UNLOCK position |
| Picture works but there is no sound • Volume setting may be too low |
| Picture is black and white • Night vision LEDs may be ON; increase the amount of light in the room being monitored |
| Day/night vision is whitewashed• Ensure that night vision light sensor is pointed away from a wall and is not covered. |
| The rechargeable battery will not charge• The power adapters may not be connected• Battery pack may not be properly connected inside the battery compartment |
Maintenance
- Clean the surfaces of the camera and monitor with a soft, fluff-free cloth
• If the units become dirty, use a lightly damp cloth to wipe surfaces, taking care to not allow water into any openings - Never use cleaning agents or solvents
SPECIFICATIONS
| MONITOR MONITOR | |||
| Monitor Type | TFT LCD | Talk to Baby | Yes |
| Screen Size 3.5" Lullabies Yes | |||
| Resolution 320x240 Battery Type Li-ion | |||
| Frame Rate 25 FPS Battery Capacity | 1800 mAH | ||
| LCD Brightness | Adjustable: 0,1,2,3,4 | Battery Connection | Charging Contact |
| Frequency | 2.4GHz | Battery Life (video + audio on) | 10 hours |
| Private Signal | Yes | Battery Life (LCD off) | 10 hours |
| Technology | Digital FHSS | Battery Life (PEEP Mode) | Up to 48 hours |
| No. of hop/sec | 300 | Battery Low - Visual Warning | Yes |
| No. of hopping channels | 19 | Battery Low - Audible Warning | Yes |
| Channel bandwidth | 3.375 MHz | PEEP Mode (Power Save): | Yes |
| Data Rate | 3 Mbps | Volume Indicator LED | Yes |
| Transmission Power | +19 dBm | Key Lock | Yes |
| Max Transmission Range | 750ft | Housing Material | ABS Plastic |
| Optimum Transmission Range | 200ft | Power Adapter Input | 100~240VAC |
| Expandable | Up to 4 Cameras | Power Adapter | 6V 800mA DC |
| Zoom | 2x | Limited charge voltage | 4.2V |
| Scan View | Yes, 8 seconds/camera | Operating Temperature | 0 to 50 Degrees Celsius |
| Speaker | Yes | Dimensions | 4 1⁄2" x 1" x 3 1⁄4" |
| Microphone | Yes | Weight | 0.35 lbs |
SPECIFICATIONS
| CAMERA CAMERA | |||
| Image sensor CMOS Housing Material ABS Plastic | |||
| Resolution 640 x 480 Wall Mountable Yes | |||
| Viewing Angle 50 Degree Power Adapter Input 100~240VAC, 50/60Hz 150mA | |||
| Focal Length 2.8mm Power Adapter 6V 800mA DC | |||
| Optimal Focal Distance | 2-10ft | Operating Temperature | 0 to 50 Degree Celsius |
| PTZ | Yes | Dimensions | 31/2 "x 4" x 4 1⁄2" |
| Range of Motion - Horizontal | 300 | Weight | 0.55 lbs |
| Range of Motion - Vertical | 110 | ||
| Frequency | 2.4GHz | FCC | |
| Private Signal | Yes | FCC ID: SMH-30018BU | |
| Technology | Digital FHSS | FCC ID: SMH-30018PU | |
| Max Transmission Range | 750ft | ||
| Optimum Transmission Range | 200ft | IC | |
| Number of IR LEDs | 8 | IC: 4593A-30018BU | |
| IR Wavelength | 940nm | IC: 4593A-30018PU | |
| Night Vision Distance | 15ft | ||
| Battery Operable | No | ||
| Microphone | Yes | ||
| Speaker | Yes | ||
NOTES
CONSIGNES DE SÉCURITÉ

Web: www.mylevana.com 4080 Montrose Road 60 Industrial Parkway #Z64
Niagara Falls, ON Cheektowaga NY
Canada L2H 1J9 USA 14227
Conditions de la garantie
natural_image
White and black LeVana mobile phone devices with a baby photo on the left (no visible text or symbols on device body)text_image
Levana Levananatural_image
Simple line drawing of a bedroom with a cabinet and a baby crib, no text or symbols presentnatural_image
Pure diagram of overlapping rectangular blocks with directional arrows, no text or symbols present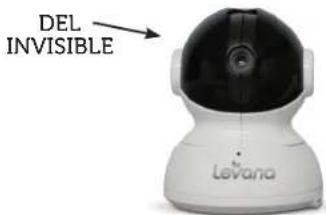
text_image
DEL INVISIBLE Levananatural_image
Two baby crib beds in wooden crates, one lying on the other with visible banding and feet (no text or symbols)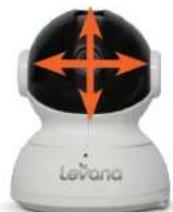
natural_image
Blank white image with a red speaker icon and control buttons (no text or symbols)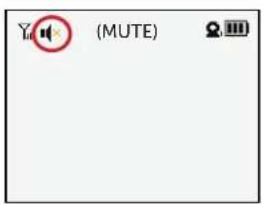
text_image
Yd (MUTE)natural_image
Hand pointing at a circular icon with a microphone symbol (no text or labels)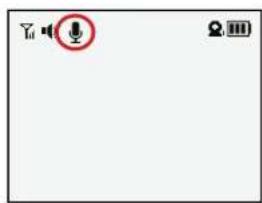
text_image
Screenshot of a media player interface with speaker icon and playback controls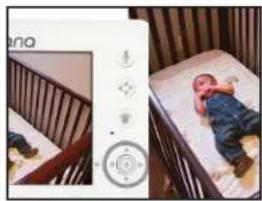
natural_image
Digital baby crib with a baby lying on the back of a wooden bed, alongside a white control panel (no visible text or symbols)text_image
Diagram showing two states of a home control interface: one with a target icon and the other with a circular diagram containing four switches.
text_image
Mobile phone status bar screenshot showing music and audio icons with a highlighted play button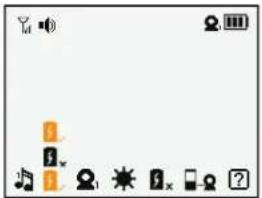
text_image
Mobile phone status bar with icons for start, stop, alarm, and nextFONCTIONNEMENT
text_image
Diagram showing two states of a home control interface with red circular indicators and a house icon, likely illustrating a home control or system state.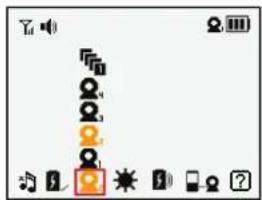
text_image
Mobile phone status bar screenshot showing camera icons and navigation buttons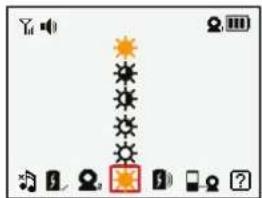
text_image
Mobile phone status bar with icons for alarm, notification, and app iconsFONCTIONNEMENT
Utiliser le mode PEEP
natural_image
Two diagrams showing a hand interacting with a circular interface element, one pointing at the center and the other with a grid of circular elements (no text or symbols)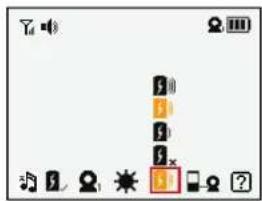
text_image
Mobile phone status bar screenshot showing app icons and a highlighted '1' buttonAnneau DEL
natural_image
Close-up of a white electronic device's control panel with a blue circular button and directional arrows (no text or symbols visible)FONCTIONNEMENT
text_image
Mobile phone status bar screenshot showing app icons and a red question mark icon
Soutien: www.mylevana.com/support
Site Web: www.mylevana.com
Clavardage en direct: www.mylevana.com
DÉPANNAGE
QUESTION SOLUTION POSSIBLE
Web: www.mylevana.com 4080 Montrose Road 60 Industrial Parkway #Z64
Niagara Falls, ON Cheektowaga NY
Canada L2H 1J9 USA 14227
natural_image
White and black LeVana mobile phone devices with a baby photo on the left (no visible text or symbols on device body)text_image
Diagram showing a hand interacting with a device with a highlighted button and power symbol, labeled with number 2.ÍCONOS DE LA PANTALLA
text_image
Levana Levananatural_image
Simple line drawing of a bedroom with a cabinet and a bed, showing a 3-inch width measurement (no text or symbols)natural_image
Blank white image with a red circle containing a speaker icon and control buttons (no text or symbols)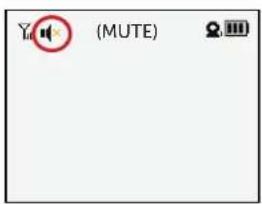
text_image
Yd (MUTE)natural_image
Hand interacting with a circular icon featuring a microphone and red ring (no text or symbols)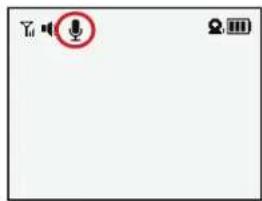
text_image
Screenshot of a media player interface with audio symbol and playback controls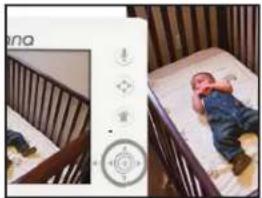
natural_image
Two baby crib beds with a baby lying on the back, one showing a finger icon and the other displaying a circular button (no text or symbols visible)text_image
Diagram showing two states of a home control interface with a target and circular button, likely illustrating a home control or digital display.
text_image
Mobile phone status bar screenshot showing music and audio icons with a highlighted play button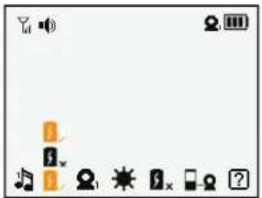
text_image
Mobile phone status bar screenshot showing app icons including home, phone, radio, and othersFUNCIONAMIENTO
text_image
Diagram showing two states of a home control interface with a target and circular diagram, likely illustrating a home control or digital display.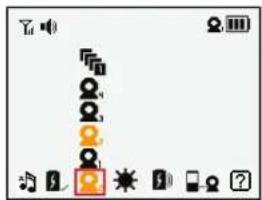
text_image
Camera menu interface with icons for settings, navigation, and display options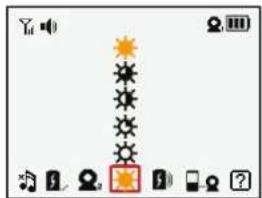
text_image
Camera menu interface showing weather icons and a highlighted sun icon with an orange starFUNCIONAMIENTO
Uso de Modo PEEP
text_image
Diagram showing two states of a home control interface with labeled buttons and a target symbol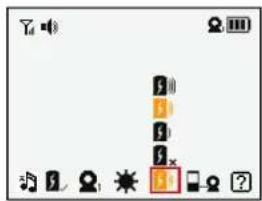
text_image
Camera menu interface showing playback controls and status bar with play button highlightedAnillo LED
natural_image
Close-up of a white appliance control panel with a blue circular button and indicator lights (no text or symbols visible)FUNCIONAMIENTO
text_image
Mobile phone status bar screenshot showing notification, navigation icons, and a question mark icon