DD 18 V LI - Screwdriver Toolcraft - Free user manual and instructions
Find the device manual for free DD 18 V LI Toolcraft in PDF.
Document temporarily unavailable
The manual is currently being transferred to our new server. It will be accessible again in a few hours. Thank you for your patience.
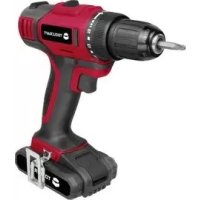
| Product Type | Cordless Screwdriver |
| Brand | Toolcraft |
| Model | DD 18 V LI |
| Dimensions (L x W x H) | 205 x 75 x 212 mm |
| Weight | 1.36 kg (with battery) |
| Power Supply | Li-ion battery 18 V, 2.0 Ah |
| Charger | 100-240 V AC, 50/60 Hz; charging time ~1 h |
| No-load speed | 1st gear: 0-400 rpm; 2nd gear: 0-1500 rpm |
| Max torque | 40 Nm |
| Number of torque positions | 19 (including 18 with friction coupling + 1 for drilling) |
| Chuck | Quick-release drill chuck, 1 to 10 mm |
| Max drilling capacity | Wood: 35 mm; Steel: 10 mm |
| Main functions | Drilling, screwing, LED light, belt clip, lock-on switch |
| Maintenance and cleaning | Clean with a dry, soft cloth; do not use aggressive detergents |
| Safety | Double insulation (class II), overload protection, automatic shutdown in case of overheating |
| Spare parts | Specific replacement battery, screwdriver bits, charger |
| Reparability | Repairs exclusively by a specialist workshop |
| Delivery contents | Drill/driver, charger, battery, double bit PH2/SL5.5, case, instruction manual |
| General information | Intended use: screwing and drilling in wood, plastic, metal; for dry indoor use |
Frequently Asked Questions - DD 18 V LI Toolcraft
User questions about DD 18 V LI Toolcraft
0 question about this device. Answer the ones you know or ask your own.
Ask a new question about this device
Download the instructions for your Screwdriver in PDF format for free! Find your manual DD 18 V LI - Toolcraft and take your electronic device back in hand. On this page are published all the documents necessary for the use of your device. DD 18 V LI by Toolcraft.