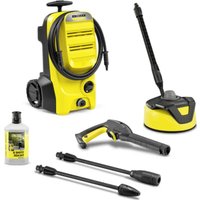
USER MANUAL K 6.250 EU Kärcher
K 6.250 K 6.260 K7.260 K7.350
German 5
English 16
French 26
Italian 37
Dutch 48
Spanish 59
Portuguese 70
Danish 81
Norwegian 91
Swedish 101
Finnish 111
Greek 121
Turkish 133
Russian 143
Hungarian 155
Czech 165
Slovenian 175
Polish 185
Romanian 196
Slovak 206
Croatian 216
Serbian 226
Bulgarian 236
Estonian 248
Latvian 258
Lithuanian 268
Ukrainian 278
Register and win! www.kaercher.com
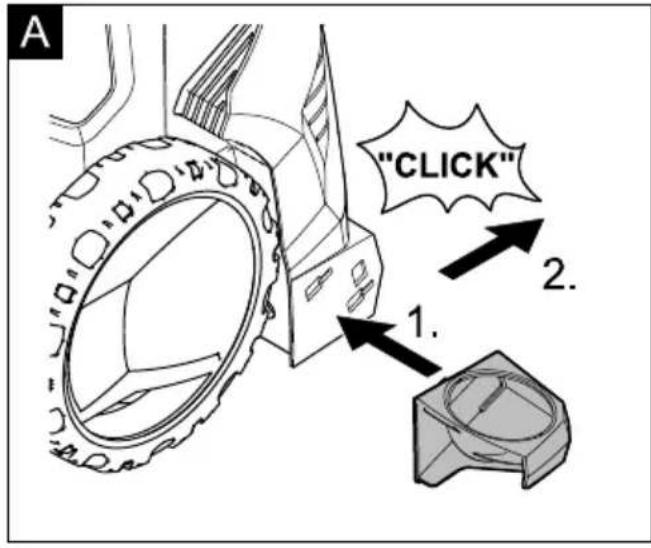
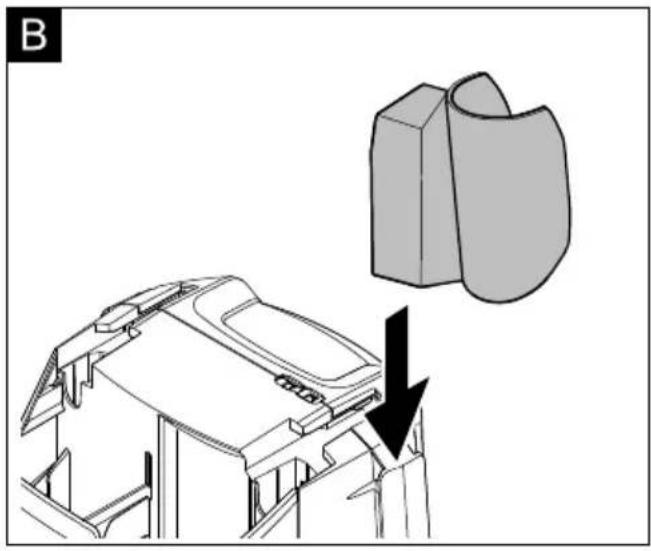
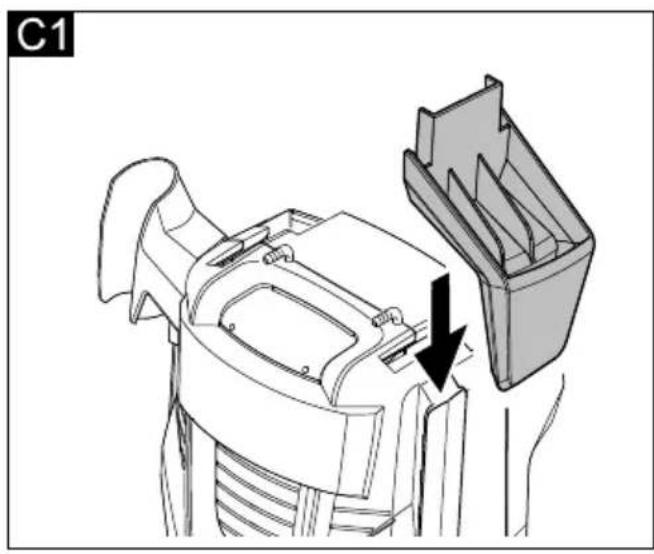
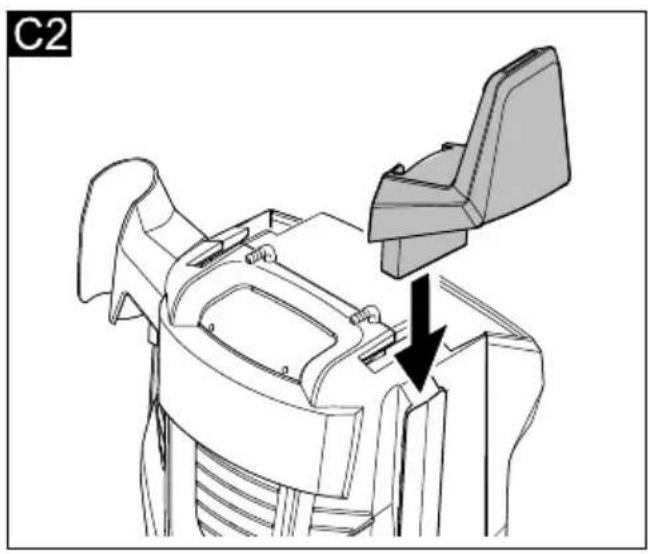
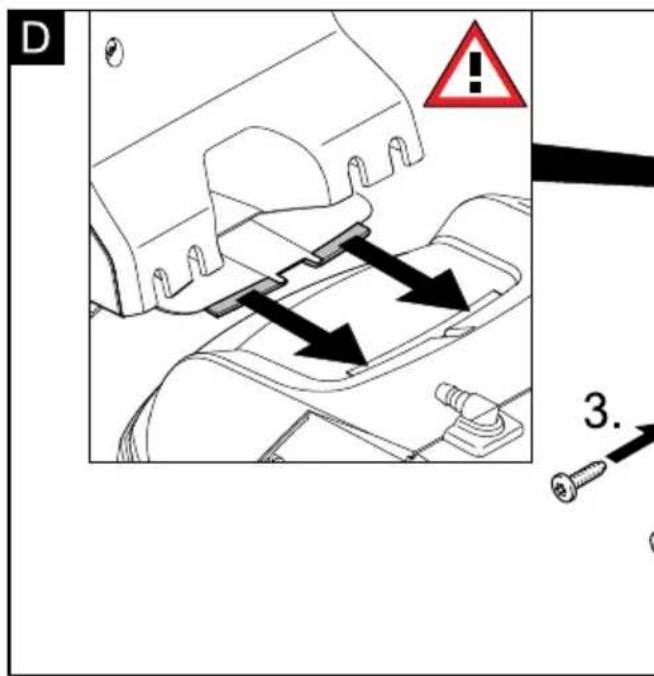
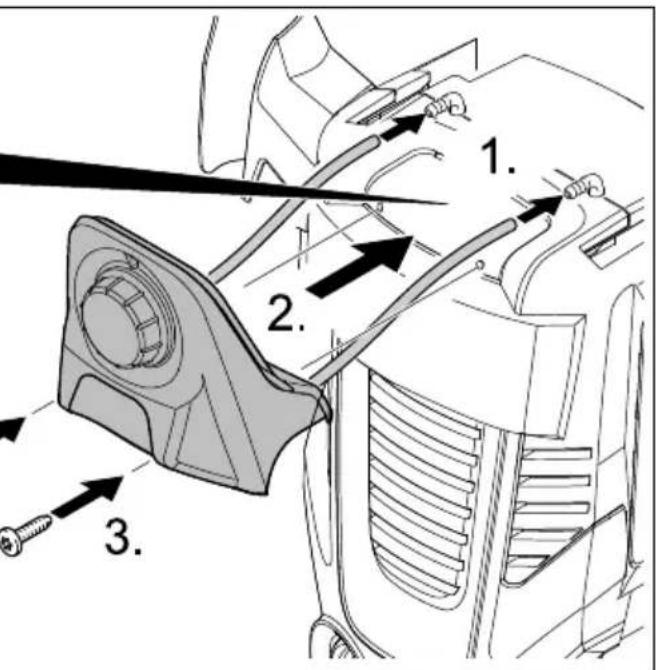
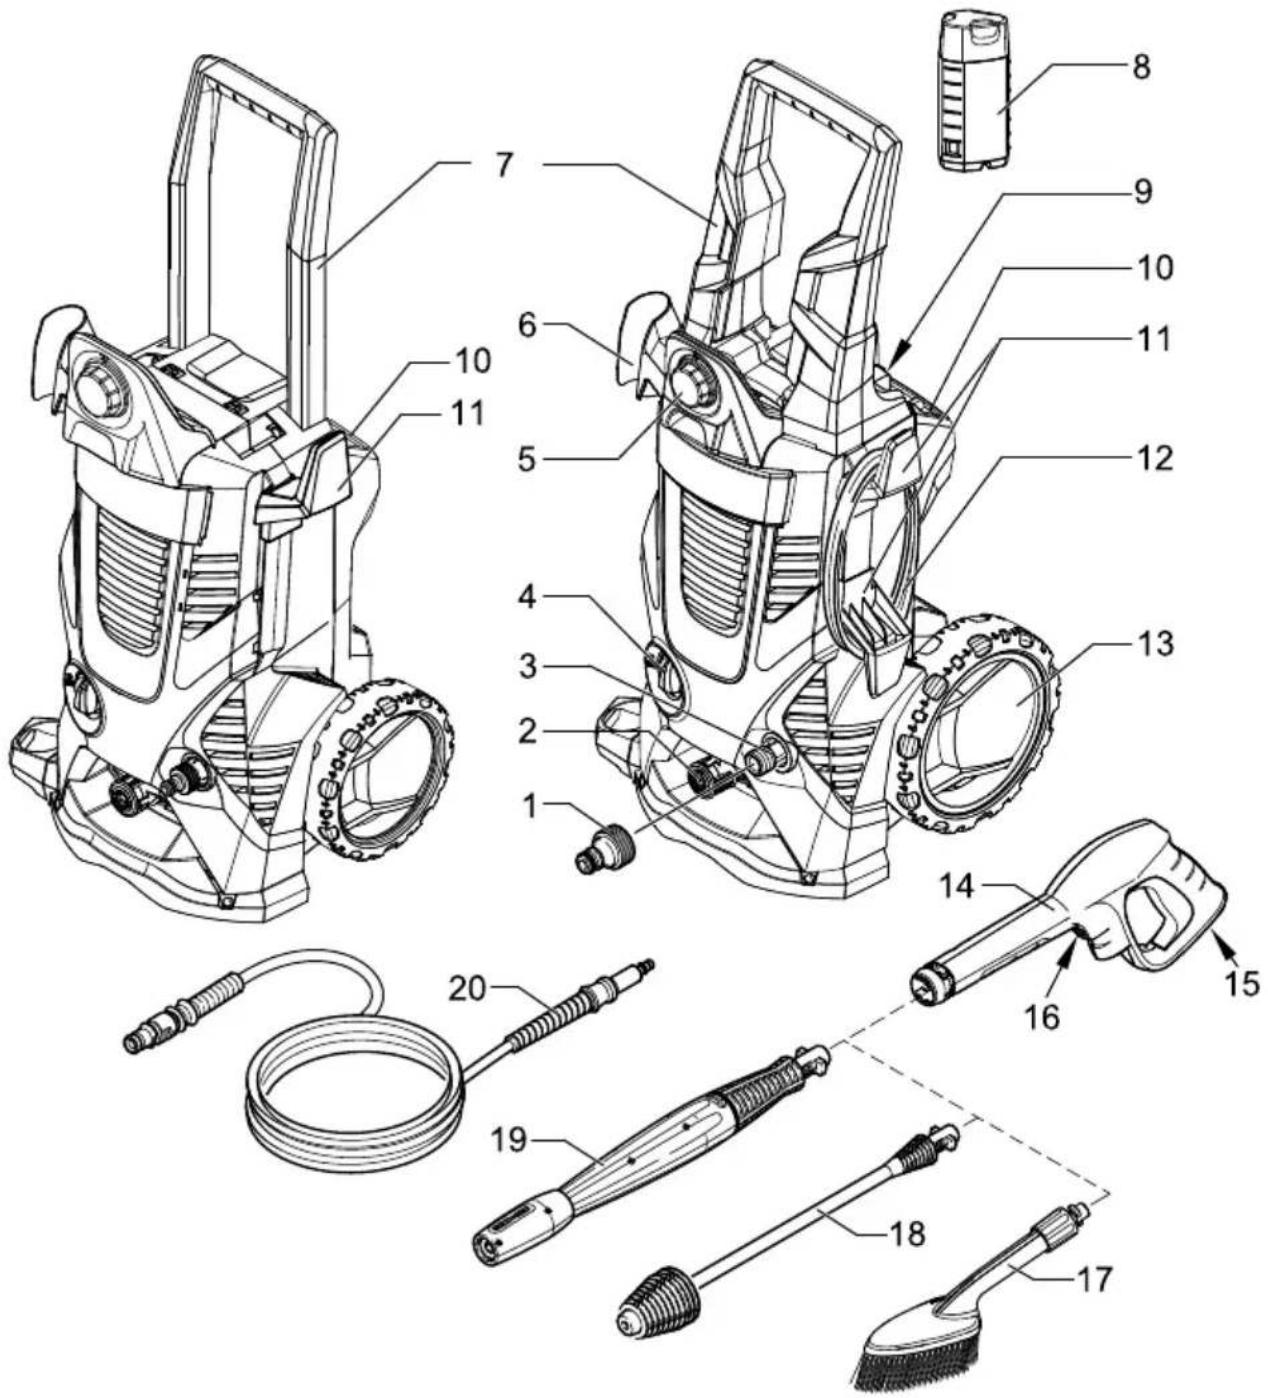
Table of Contents
71364 Winnenden (Germany)
Tel.: +49 7195 14-0
Fax: +49 7195 14-2212
Contents
General information EN - 1
Safety instructions EN - 2
Operation EN - 4
Description of the Appliance EN - 4
Transport EN - 7
Storage EN - 7
Maintenance and care EN - 8
Troubleshooting EN - 8
Technical specifications EN - 9
CE declaration EN - 10
Dear Customer,

Please read and comply with these original instructions prior
to the initial operation of your appliance and store them for later use or subsequent owners.
Proper Use
This high-pressure cleaner is designed for domestic use only:
to clean machines, vehicles, buildings, tools, facades, terraces, garden equipment etc. using a high-pressure water jet (and detergents if required). with accessories, replacement parts and detergents approved by KARCHER. Observe the instructions provided with these detergents.
Environmental protection

The packaging material can be recycled. Please do not place the package in the ordinary refuse for disposal, but go for the proper recycling.
Old appliances contain valuable materials that can be recycled. Please arrange for the proper recycling of old
appliances. Please dispose your old appliances using appropriate collection systems.
Notes about the ingredients (REACH)
You will find current information about the ingredients at:
The warranty terms published by the relevant sales company are applicable in each country. We will repair potential failures of your appliance within the warranty period free of charge, provided that such failure is caused by faulty material or defects in manufacturing. In the event of a warranty claim please contact your dealer or the nearest authorized Customer Service centre.
Please submit the proof of purchase. (See address on the reverse)
Symbols in the operating instructions
Danger
Immediate danger that can cause severe injury or even death.
Warning
Possible hazardous situation that could lead to severe injury or even death.
Caution
Possible hazardous situation that could lead to mild injury to persons or damage to property.
Symbols on the machine
- High-pressure jets can be dangerous if improperly used. The jet must not be directed at persons, animals, live electrical equipment, or the appliance itself.
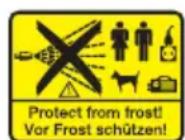
- Frost can destroy the not completely drained appliance. Store the appliance in a frost-resistant room during winter.
Safety instructions
Danger
- Never touch the mains plug and the socket with wet hands. The appliance must not be used if the power cord or important parts of the appliance, e.g. high-pressure hoses, trigger gun, or safety devices are damaged. Check the power cord and mains plug for damage before every use. If the power cord is damaged, please arrange for it to be replaced immediately by an authorized repair agent or a skilled electrician. Check the high-pressure hose for damage before every use. Please arrange for the immediate replacement of a damaged high-pressure hose. The appliance may not be used in areas where a risk of explosion is present. If the appliance is used in hazardous areas (e.g. filling stations), the corresponding safety provisions must be observed. High-pressure jets can be dangerous if improperly used. The jet must not be directed at persons, animals, live electrical equipment, or at the appliance itself. The high-pressure jet must not be directed at other persons or directed by the user at him/herself to clean clothing or footwear. Never use the appliance to clean objects containing hazardous substances (e.g. asbestos). Vehicle tires or tire valves are susceptible to damage from the high-pressure jet and may burst. The first indication of this is a discoloration of the tire. Damaged vehicle tires/tire valves are highly dangerous. Ensure that a distance of at least 30 cm is observed when cleaning with the jet! ■ Risk of explosion! Do not spray flammable liquids.
Never draw in fluids containing solvents or undiluted acids and solvents! This includes petrol, paint thinner, and heating oil. The spray mist thus generated is highly inflammable, explosive, and poisonous. Do not use acetone, undiluted acids, and solvents as they are damaging to the materials from which the appliance is made.
Warning
The mains plug and the coupling of an extension cable must be watertight and must never lay in the water. Unsuitable extension cables can be hazardous. Only use extension cables outdoors which have been approved for this purpose and labelled with a sufficient cable cross-section: 1 - 10 m: 1.5 mm²; 10 - 30 m: 2.5 mm² Always fully unroll electrical cables from the cable drum. High-pressure hoses, fixtures and couplings are important for the safety of the appliance. Only use high-pressure hoses, fixtures and couplings recommended by the manufacturer. This appliance is not intended for use by persons with reduced physical, sensory or mental capabilities. The appliance must not be operated by children or persons who have not been instructed accordingly. Children should be supervised to prevent them from playing with the appliance. The operator must use the appliance correctly. When working with the appliance, he must consider the local conditions and pay due care and attention to other persons, in particular children, who are nearby. Do not use the appliance when there are other persons around unless they are also wearing safety equipment. Wear protective clothing and safety goggles to protect against splash back containing water or dirt.
Caution
In case of extended downtimes, switch the appliance off at the main switch / appliance switch or remove the mains plug. Do not operate the appliance at temperatures below 0°C. Observe a distance of at least 30 cm when using the jet to clean painted surfaces to avoid damaging paintwork. - Never leave the appliance unattended when it is in operation. Make sure that the power cable or extension cables are not damaged by running over, pinching, dragging or similar. Protect the power cable from heat, oil, and sharp edges. All current-conducting parts in the working area must be protected against jet water. The appliance may only be connected to an electrical supply which has been installed in accordance with IEC 60364. The appliance may only be connected to alternating current. The voltage must correspond with the type plate on the appliance. For safety reasons, we recommend that you operate the appliance only via a earth-leakage circuit breaker (max. 30 mA). Cleaning operations which produce oily waste water, e.g. engine washes, underbody washes, may only be carried out using washing stations equipped with an oil separator. This appliance was designed to be used with detergents which are supplied or recommended by the manufacturer. The use of other detergents or chemicals may compromise the safety of the appliance.
Safety Devices
Caution
Safety devices protect the user and must not be modified or bypassed.
Power switch
The appliance switch prevents unintentional operation of the appliance.
Lock trigger gun
This lock locks the lever of the trigger gun and prevents the inadvertent start of the appliance.
Overflow valve with pressure switch
The overflow valve prevents the permissible working pressure from being exceeded. If the lever on the trigger gun is released, the pressure switch turns off the pump, and the high-pressure jet is stopped. If the lever is pulled, the pump is turned on again.
Prerequisites for the appliance's stability
Caution
Create stability for the appliance prior to all work on or with the appliance to prevent accidents or damage.
- The stability of the appliance is warranted when it is placed onto an even surface.
Operation
Scope of delivery
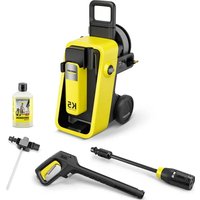
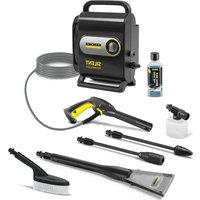
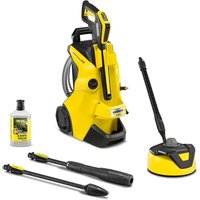
The scope of delivery of your appliance is illustrated on the packaging. Check the contents of the appliance for completeness when unpacking.
In the event of missing accessories or any transport damage, please contact your dealer.
Description of the Appliance
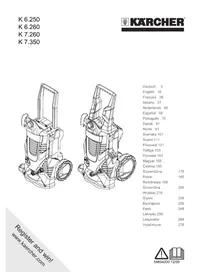
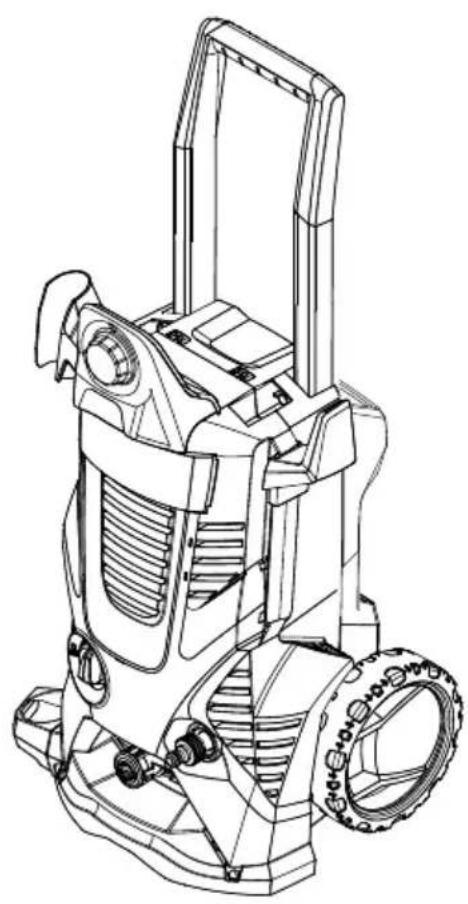
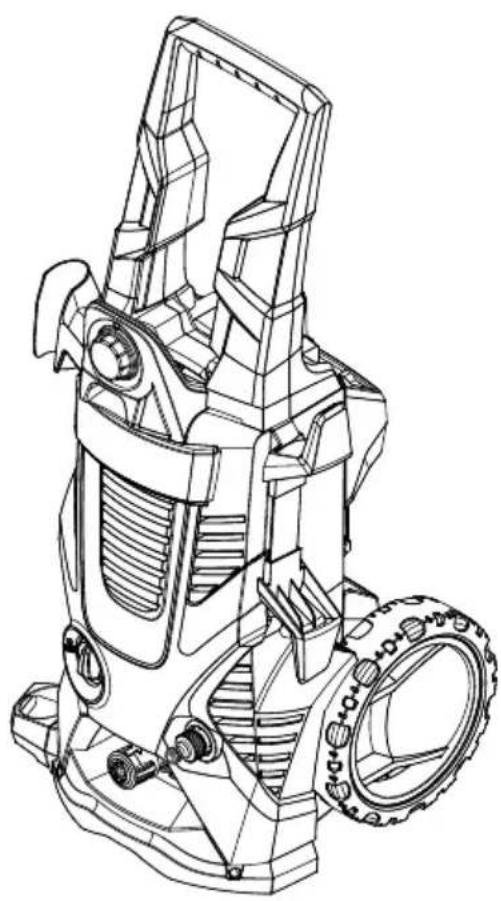
These operating instructions describe the basic models of the high pressure cleaners shown on the front cover. These operating instructions describe the maximum equipment. Depending on the model, there are differences in the scopes of delivery (see packaging).
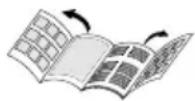
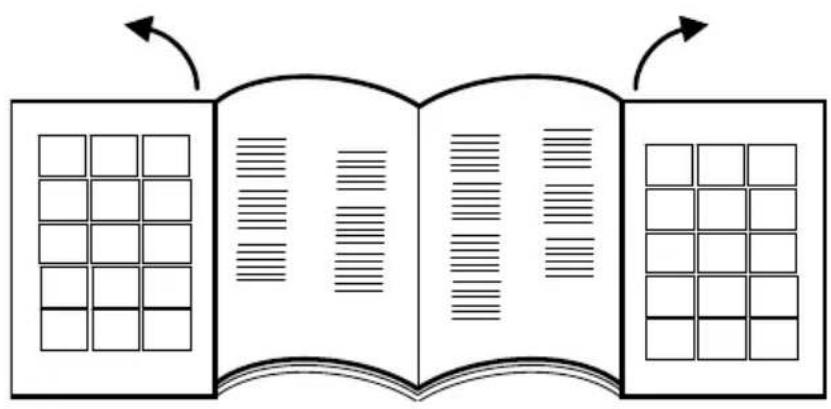
Illustrations on fold-out pages!
1 Coupling element for water connection 2 High pressure connection 3 Water connection with integrated sieve 4 Appliance switch "0/OFF"/_I/ON" 5 Dosage regulator for detergent 6 Storage for trigger gun 7 Transport handle 8 Detergent reservoir with locking lid 9 Storage of detergent reservoir with detergent connection 10 Storage for accessories 11 Storage hook for mains connection cable 12 Mains cable with mains plug 13 Wheels 14 Trigger gun 15 Lock trigger gun 16 Key to detach the high-pressure hose from the trigger gun 17 Washing brush 18 Spray lance with Dirtblaster 19 Spray lance with pressure regulation (Vario Power) 20 High pressure hose
Special accessories
Special accessories expand the possibilities of using your appliance. Please contact your KÄRCHER dealer for further information.
Before Startup
Mount loose parts delivered with appliance prior to start-up.
Install the storage for hand-spray gun
Illustration A
Place the bottom holder into the recesses and push forward until it audibly locks in. Illustration B: Insert the top holder and push down all the way.
Install the storage hook for the mains connection cable
Option
Illustration C1
Install the bottom storage hook. Illustration C2: Install the top storage hook.
Install the dosage regulator for detergent
You will need the 2 included screws as well as a Philips screwdriver PH 2.
Illustration D
Insert both detergent hoses onto the hose fittings.
Install the dosage regulator and connect using 2 screws.
Install the transport handle
Option
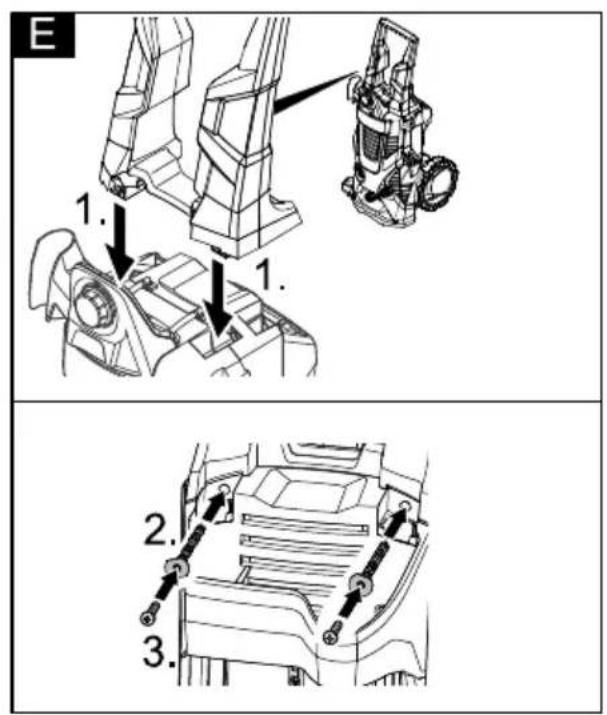
Illustration E
Attach the transport handle, insert the bolts into the bores and screw them in.
Connect the high pressure hose to the hand spray gun
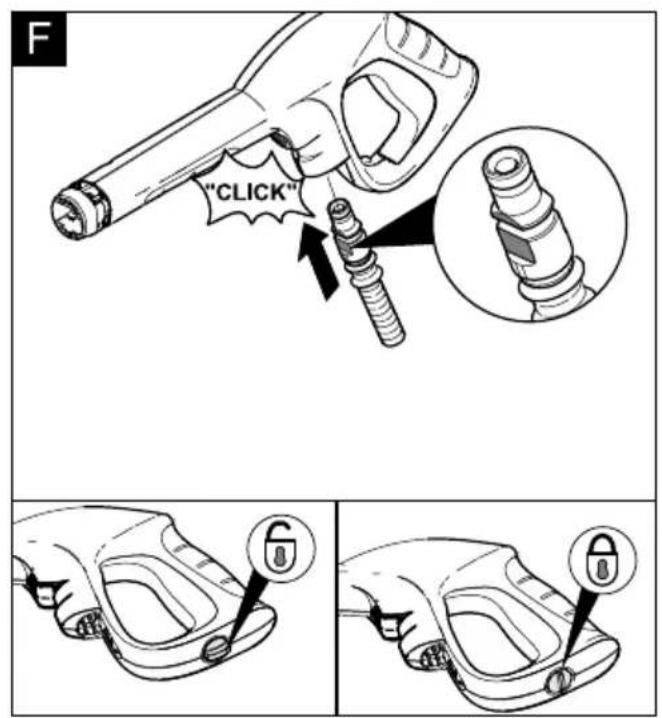
Illustration F
Push the high pressure hose into the trigger gun until it locks audibly.
Note: Make sure the connection nipple is aligned correctly.
Check the secure connection by pulling on the high-pressure hose.
Water supply
Warning
According to the applicable regulations, the appliance must never be used on the drinking water supply without a system separator. Use a suitable system separator manufactured by KÄRCHER; or, as an alternative, a system separator as per EN 12729 Type BA. Water flowing through a system separator is considered non-drinkable.
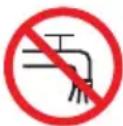
suitable system separator manufactured by KÄRCHER; or, as an alternative, a system separator as per EN 12729 Type BA. Water flowing through a system separator is considered non-drinkable.
Note: Impurities in the water can damage the high-pressure pump and accessories. For protection, the use of the KÄRCHER water filter (optional accessory, order no. 4.730-059) is recommended.
Observe regulations of water supplier.
Observe regulations of water supplier.
For connection values, see type plate/technical data.
Use a fibre-reinforced water hose (not included) with a standard coupling. (Minimum diameter 1/2 inch (13 mm), minimum length 7.5 m).
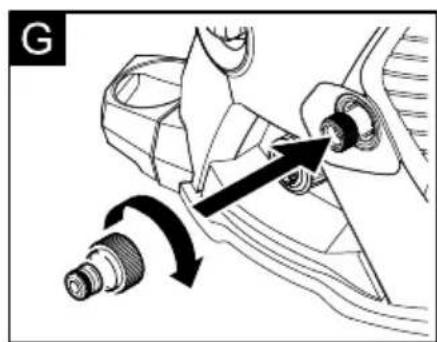
Illustration 6
Screw the coupling element (supplied) to the water connection on the appliance.
Push the water supply hose onto the coupling unit, then connect it to the water supply.
Drawing in water from open reservoirs This high-pressure cleaner is suited to work with the KARCHER suction hose with backflow valve (Optional accessory, order no. 4.440-238) to draw in surface water, e.g. from water butts or ponds (see specifications for max. suction height).
Fill the KÄRCHER suction hose with backflow valve with water, screw to water supply and hang into the water butt. Appliance ventilation: Switch the appliance on with the high-pressure hose detached and operate (max. 2 minutes) until the water exits the high-pressure connection without bubbles. Switch off appliance and reconnect high-pressure hose.
Start up
Caution
Dry runs lasting longer than two minutes lead to damages to the high pressure pump. If the appliance does not build up pressure within two minutes, switch it off and proceed as instructed in the Chapter "Troubleshooting".
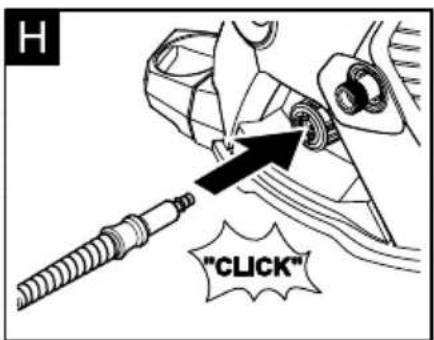
Illustration H
Insert the high pressure hose tightly into the quick coupling on the appliance, it will lock in audibly.
Note: Make sure the connection nipple is aligned correctly.
Check the secure connection by pulling on the high-pressure hose.
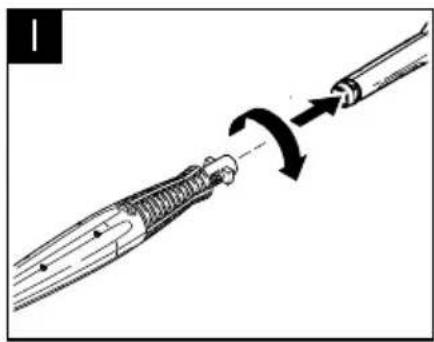
Illustration 1
Push the spray lance into the trigger gun and fasten it by turning it through 90°. Then completely open the water tap. Insert the mains plug into the socket. Turn on the appliance "I/ON".
Operation
Danger
The trigger gun is subjected to a recoil force when the water jet is discharged. Make sure that you have a firm footing and are also holding the trigger gun and spray lance firmly.
Caution
Prior to cleaning, make sure that the high pressure is placed safely on level ground. Wear protective goggles and protective clothing during the cleaning process.
Unlock the lever on the trigger gun. Pull on the lever of the trigger gun; the device will switch on.
Note: Release the lever of the trigger gun; the device will switch off again. High pressure remains in the system.
Spray lance with pressure regulation
Carrying out the most common cleaning tasks. The work pressure can be stagelessly regulated between "Min" and "Max".
Release the lever on the trigger gun. Turn the spray lance to the desired position.
Note: Suitable for working with detergent; for this, turn the spray lance to the "Mix" position.
Set the dosage regulator to the desired suction volume for detergent.
Spray lance with Dirtblaster
For particularly dirty items or areas.
Caution
Car tyres, paint or sensitive surfaces such as wood should not be cleaned with the dirt blaster, as there is a risk of damage.
- Not suitable for use with detergents.
Washing brush
Note: Suitable for use with detergents. Set the dosage regulator to the desired suction volume for detergent.
Working with detergent
Please use exclusively KÄRCHER detergents and care products to carry out the respective cleaning task, as these were specifically developed for your appliance. The use of other detergents and care products may lead to premature wear and can invalidate your warranty claims. Please obtain information at your local dealer or request information directly from KÄRCHER.
Notes regarding the detergent: The most commonly used detergents can be purchased ready to use in their detergent reservoirs with locking lids. This will make the pesky refilling and filling processes redundant.
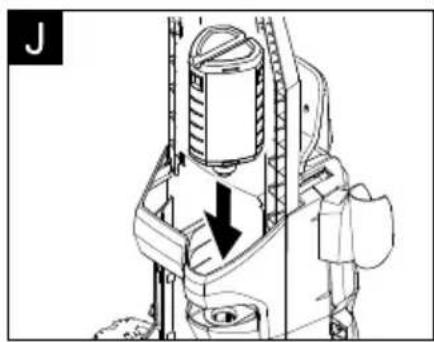
Illustration J
Remove the lid from the detergent reservoir and press the detergent reservoir into the detergent connection with the opening facing down.
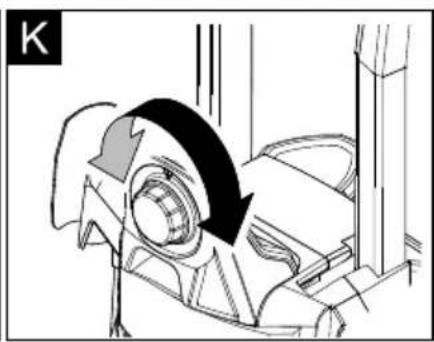
Illustration K
Adjust the suction volume of the detergent solution by means of the dosage regulator for detergents. Use spray lance with pressure regulation (Vario Power). Turn the spray lance to "Mix" position. Note: This will mix the detergent with the water stream.
Note: If required, the washing brushes can be used to work with detergent.
Recommended cleaning method
Spray the detergent sparingly on the dry surface and allow it to react, but not to dry. Spray off loosened dirt with the high-pressure jet.
Interrupting operation
Release the lever on the trigger gun. Lock the lever on the trigger gun. During longer breaks (more than 5 minutes), also turn the appliance off using the "0/OFF" switch.
Finish operation
Caution
Only separate the high-pressure hose from the trigger gun or the appliance while there is no pressure in the system.
Remove the detergent reservoir from the intake and close it with the lid. To store, place into the intake rotated by 180°. Release the lever on the trigger gun. Turn off the appliance "0/OFF". Turn off tap. Detach the appliance from the water supply.
Caution: When disconnecting the supply or high pressure hose, warm water may leak from the connections after operation.
Press the lever on the trigger gun to release any remaining pressure in the system. Lock the lever on the trigger gun. Pull out the mains plug.
Transport
Caution
In order to prevent accidents or injuries, keep in mind the weight of the appliance during transport (see Specifications).
When transporting by hand
Lift appliance by the carrying handle and carry it. Pull the appliance by its transport handle.
When transporting in vehicles
Prior to horizontal transport: Remove the detergent reservoir from the intake and close it with the lid. Secure the appliance against shifting and tipping over.
Storage
Caution
In order to prevent accidents or injuries, keep in mind the weight of the appliance when selecting a storage location for it (see Specifications).
Storing the Appliance
Park the machine on an even surface. Press the disconnect on the hand spray gun and remove the high pressure hose from the hand spray gun. Push the casing of the quick coupling for the high pressure hose toward the rear and disconnect the high pressure hose from the appliance. Insert the hand spray gun with the spray lance into the holder for the hand spray gun. Stow away the mains cable, the high-pressure hose and accessory at the appliance.
Prior to extended storage periods, as during the winter, also observe the instructions in the Care section.
Frost protection
Caution
Protect the appliance and its accessories against frost.
The appliance and its accessories can get destroyed through frost if there are any water residues in them. To avoid damage to them:
Completely drain all water from the appliance: Switch the appliance on with detached high-pressure hose and detached water supply (max. 1 minute) and wait, until no more water exits at the high-pressure connection. Turn off the appliance. Store the appliance and the entire accessories in a frost-safe room.
Maintenance and care
Danger
Turn off the appliance and remove the mains plug prior to any care and maintenance work.
Maintenance
The appliance is maintenance-free.
Cleaning
Prior to longer periods of storage, e.g. in the winter:
Completely drain all water from the appliance: Switch the appliance on with detached high-pressure hose and detached water supply (max. 1 minute) and wait, until no more water exits at the high-pressure connection. Turn off the appliance.
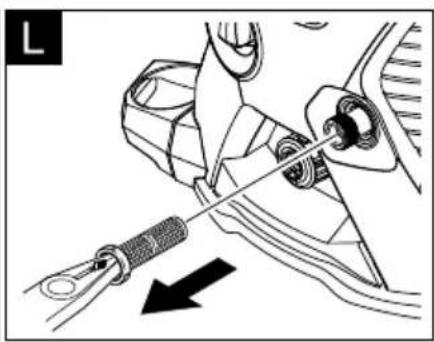
Illustration L
Pull out the sieve in the water connection using flat-nose pliers and clean under running water.
Spare parts
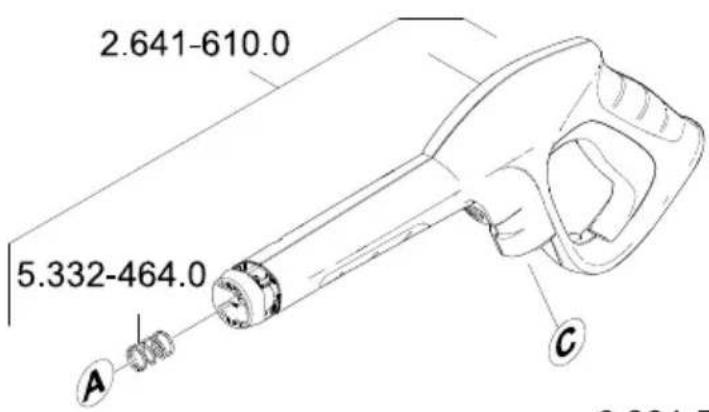
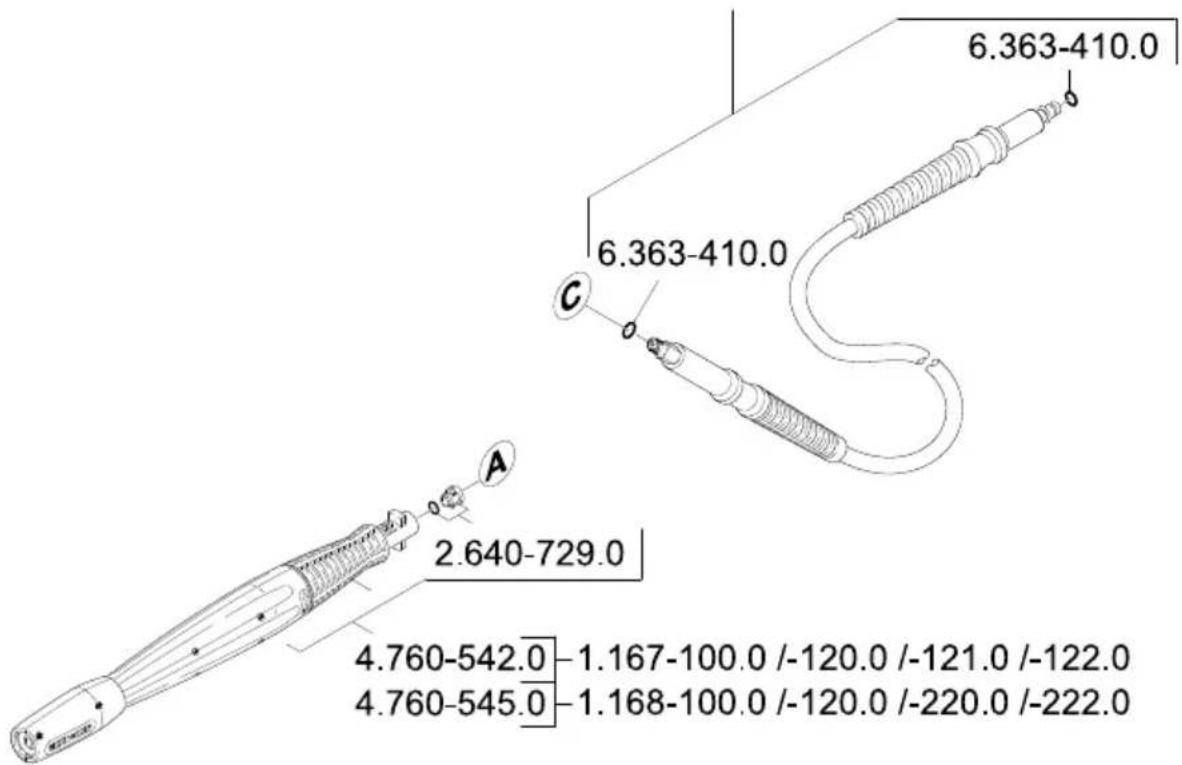
Use only original KARCHER spare parts. You will find a list of spare parts at the end of these operating instructions.
Troubleshooting
You can rectify minor faults yourself with the help of the following overview. If in doubt, please consult the authorized customer service.
Danger
Turn off the appliance and remove the mains plug prior to any care and maintenance work. Repair works may only be performed by the authorized customer service.
Appliance is not running
Pull on the lever of the trigger gun; the device will switch on. Check whether the voltage indicated on the type plate corresponds to the voltage of the mains supply.
Check the mains connection cable for damages.
Pressure does not build up in the appliance
Check the setting at the spray lance. Ventilate the appliance: switch it on with the high-pressure hose detached and operate it (max. 2 minutes) until water exits the high-pressure connection without bubbles. Switch off the appliance and reconnect the high-pressure hose. Check the water supply. Pull out the sieve in the water connection using flat-nose pliers and clean it under running water.
Appliance does not start, motor hums
Cause: Voltage reduction due to weak mains supply or when using an extension cable.
When switching on, first pull the lever of the trigger gun and then switch the appliance switch to "I/ON".
Strong pressure fluctuations
Clean the high-pressure nozzle: remove dirt and debris from the nozzle bore using a needle and rinse it through with water from the front. Check the water flow quantity.
Appliance is leaking
Slight leakage from the appliance pump is normal. If the leakage increases, contact the authorized customer service.
No detergent infeed
Use a spray lance with pressure regulation (Vario Power). Turn the spray lance to "Mix" position. Check the settings at the dosage regulator for detergent. Check the detergent suction hose for kinks.
Technical specifications
| | K6.250 | K6.260 | K7.260 | K7.350 |
| Water connection |
| Max. feed temperature °C 60 | | |
| Min. feed volume l/min 11 12 | | | | | |
| Max. feed pressure MPa 0,6 | | |
| Max. Suction height m 1,0 | | |
| Electrical connection |
| Voltage
1~50 Hz | V 220 - | 240 230 | | | |
| Connected load kW 2,5 3,0 | | | | | |
| Mains fuse (slow-blow) A 16 | | |
| Protective class | | I |
| Protection class | | IP X5 |
| Performance data |
| Working pressure | MPa | 13 15 | | | |
| Max. permissible pressure | MPa | 15 16 | | | |
| Water flow rate | l/min | 8,8 9,2 | | | |
| Dimensions and weights |
| Length | mm | 362 | 407 |
| Width | mm | 459 |
| Height | mm | 972 | 730 | 972 |
| Weight, ready to operate with accessories | kg | 20,1 | 20,5 | 22,2 | 22,8 |
| Detergent flow rate | l/min | 0 - 0,3 |
| Recoil force of trigger gun | N | 20 22 | | | |
| Values determined as per EN 60335-2-79 |
| Hand-arm vibration value
Uncertainty K | m/s2 | <2,5 |
| m/s2 | 0,3 |
| Sound pressure level LpA | dB(A) | 76 | 75 |
| Uncertainty KpA | dB(A) | 3 | 3 |
| Sound pressure level LWA + Uncertainty KWA | dB(A) | 93 93 | |
Subject to technical modifications!
CE declaration
We hereby declare that the machine described below complies with the relevant basic safety and health requirements of the EU Directives, both in its basic design and construction as well as in the version put into circulation by us. This declaration shall cease to be valid if the machine is modified without our prior approval.
Product: High-pressure cleaner
Type: 1.167-xxx
Type: 1.168-xxx
Relevant EU Directives
2006/95/EC (to 28.12.2009)
2006/42/EC (from 29.12.2009)
2004/108/EC
2000/14/EC
Applied harmonized standards
EN 55014-1: 2006
EN 55014-2: 1997 + A1: 2001
EN 60335-1
EN 60335-2-79
EN 61000-3-2: 2006
EN 61000-3-3: 2008
EN 62233: 2008
Applied conformity evaluation method
Appendix V
Sound power level dB(A)
K 6.250, K 6.260,
Measured: 90
Guaranteed: 93
K 7.260, K 7.350,
Measured: 89
Guaranteed: 93
The undersigned act on behalf and under the power of attorney of the company management.

71364 Winnenden (Germany)
Phone: +49 7195 14-0
Fax: +49 7195 14-2212
Table of contents
Illustrations, see fold-out pages!
71364 Winnenden (Germany)
Telephone: +49 7195 14-0
71364 Winnenden (Germany)
Tel.: +49 7195 14-0
Fax: +49 7195 14-2212
Contents
71364 Winnenden (Germany)
Tel.: +49 7195 14-0
Fax: +49 7195 14-2212
Table of contents
71364 Winnenden (Germany)
Tel.: +49 7195 14-0
Fax: +49 7195 14-2212
Index
The pump does not reach the service pressure
71364 Winnenden (Germany)
Tel.: +49 7195 14-0
Fax: +49 7195 14-2212
Table of contents
General notes DA - 1
Mounting the transport handle
Option
Figure E
S. Reiser Head of Approbation
71364 Winnenden (Germany)
Tel.: +49 7195 14-0
Fax: +49 7195 14-2212
Table of contents
71364 Winnenden (Germany)
Tel.: +49 7195 14-0
71364 Winnenden (Germany)
Tel.: +49 7195 14-0
Fax: +49 7195 14-2212
Table of contents
71364 Winnenden (Germany)
Tel.: +49 7195 14-0
71364 Winnenden (Germany)
Tel.: +49 7195 14-0
Fax: +49 7195 14-2212
Table of contents
cihazı and water bubble-free at high pressure®,®,®,®,®,®,®,®,®,®,®,®,®,®,®,®,®,®,®,®,®,®,®,®,®,®,®,®,®,®,®,®,®,®,®,®,®,®,®,®,®,®,®,®,®,®,®,®,®,®,®,®,®,®,®,®,®,®,®,®,®,®,®,®,®,®,®,®,®,®,®,®,®,®,®,®,®,®,®,®,®,®,®,®,®,®,®,®,®,®,®,®,®,®,®,®,®,®,®,®,®.
Reconnect the device and high-pressure hose.
Commissioning
Caution
→ Completely drain the water from the device: High-pressure hose and water supply®,®,®,®,®,®,®,®,®,®,®,®,®,®,®,®,®,®,®,®,®,®,®,®,®,®,®,®,®,®,®,®,®,®,®,®,®,®,®,®,®,®,®,®,®,®,®,®,®,®,®,®,®,®,®,®,®,®,®,®,®,®,®,®,®,®,®,®,®,®,®,®,®,®,®,®,®,®,®,®,®,®,®,®,®,®,®,®,®,®,®,®,®,®,®,®,®,®,®,®,®.
(maximum 1 minute) and high pressure, connections, wait until no more water comes out. Turn off the device.
Figure
71364 Winnenden (Germany)
Tel.: +49 7195 14-0
CnMbOJIbIBypyKOBoDcTBeNo 3KcNPyaTaun
Onachocmb
Hn HnocpecmeHno 2po3aueu onachocmu, Komopar npubodum K mxeblm yeebAm Uu K Cmepmu.
IpeynpejdeHue
Дя bo3MOxHou nomeuauNbHO onachou cumyaquu, Komopar moxem npueecmu K mxeblm yeebym uU K cmepu.
BHumaHue!
Дя bo3moKHOJ nomeHuaJIbHo onaCHOcumyaauu, komopar moXem npueecMu Kne2kUM mpaemam uNu noBneYbMamepuaIbHbI yuep6.
CnmbolbHa npnbope

When used improperly, the high-pressure water jet can be dangerous. It is forbidden to direct the water jet at people, animals, live electrical equipment, or at the device itself.
Frost can cause damage to a completely drained device. Store the device in a room protected from frost.
Safety instructions
Danger
Do not touch the mains plug and socket with wet hands. Switching on the device is prohibited if the mains cable or essential components of the device, for example, the high-pressure hose, hand spray gun, or protective devices, are damaged. Before starting work with the device, check the mains cable and the mains plug for damage. A damaged mains cable must be replaced immediately by an authorized
customer service / electrician.
Before starting work, the high-pressure hose must be checked for damage. A damaged high-pressure hose must be replaced immediately. Operation of the device in potentially explosive areas is prohibited. When using the device in hazardous areas (e.g., at petrol stations), the relevant safety regulations must be observed. The high-pressure water jet can be dangerous if used improperly. It is forbidden to direct the water jet at people, animals, live electrical equipment, or at the device itself. It is also not permitted to direct the water jet at other people or at yourself to clean clothing or footwear. Do not clean objects containing substances harmful to health (e.g., asbestos) with the water jet. Car tires/tire valves can be damaged by the water jet under pressure and burst. The first sign of this is a change in the color of the tire. Damaged car tires/tire valves pose a danger to life. When cleaning tires, maintain a distance of at least 30 cm between the spray nozzle and the tire. Explosion hazard! Do not spray flammable liquids.
Suction of liquids containing solvents, as well as undiluted acids or solvents, is not permitted! Such substances include, for example, petrol, paint solvents, and heating oil. The mist formed from such substances is highly flammable and explosive. Do not use acetone, undiluted acids, or solvents, as they destroy the materials from which the device is made.
Warning
The extension cable and the electrical element must be grounded and must not be damaged. Necessary extensions may pose a danger. Outside the room, only use extension cables approved for use and appropriately marked with sufficient cross-section: 1-10m: 1.5mm², 10-30m: 2.5mm². The extension cable must always be fully unwound. High-pressure hoses, fittings, and couplings are of great importance for the safety of the device. In this regard, only use high-pressure hoses, fittings, and couplings recommended by the device manufacturer. These devices are not intended for use by persons with limited physical, sensory, or mental capabilities. Operation of the device by children or persons who have not been instructed is prohibited.
It is necessary to supervise children to ensure they do not play with the device.
The user must use the device in accordance with its intended purpose. They must be aware of local conditions and pay attention when working with the device near other people. Do not use the device when other people are in the working area unless they are wearing protective clothing. To protect against flying debris and dirt, wear appropriate protective clothing and safety goggles.
Attention!
During long breaks in operation, the device should be switched off using the main switch / device switch or disconnected from the power supply. Operation of the device at temperatures below 0°C is not permitted. When working on painted surfaces, maintain a distance of 30 cm from the nozzle to the surface to avoid damaging the paint. It is forbidden to leave the device running unattended. Care must be taken that the power cord and extension cables are not damaged by driving over them, crushing, stretching, etc. The power cord and extension cables must be protected from heat, oil, and damage from sharp edges. All current-carrying parts in the working area must be protected from water jets.
The device may only be connected to an electrical outlet that is properly installed by an electrician and complies with the standard of the International Electrotechnical Commission (IEC) 60364. The device should only be connected to an AC power supply. The voltage must correspond to the specifications on the device's nameplate. For safety reasons, it is recommended to use a device with a residual current device (max. 30 mA). Work areas where flammable liquids containing mineral oil, such as diesel fuel or motor oil, are used may only be processed in specially designated areas equipped with oil separators. This device was developed for use with cleaning agents that are supplied or recommended by the device manufacturer. The use of other cleaning agents or chemicals may adversely affect the safety of the device.
Protective devices
Attention!
Protective devices serve to protect the user. Modifying protective devices or disregarding them is not permitted.
Switch on the device
The built-in switch prevents accidental operation of the device.
The pressure relief valve prevents excessive pressure during operation.
If the trigger of the spray gun is released, the metering unit
stops the pump, and the water jet under high pressure stops. When the trigger is pressed again, the pump restarts.
Stability conditions
Attention!
Before performing any work with or on the device, it is necessary to ensure stability to avoid accidents or damage.
- The stability of the device is guaranteed only if it is installed on a level surface.
Controls
Scope of delivery
The device's equipment is indicated on the packaging. When unpacking the device, check the completeness.
If missing parts or damage incurred during transport are found, the trading organization that sold the device should be notified.
Description of the device
This operating manual describes the basic models of high-pressure cleaners shown on the cover. This operating manual provides a description of the device with the maximum
equipment. The equipment varies depending on the model (see packaging).
Damage. On the fold!
1 Connection element for water connection, 2 High-pressure connection, 3 Water supply connection with integrated mesh filter, 4 Main switch "0/OFF" / "I/ON" (0/off / I/on), 5 Detergent dosage regulator, 6 Storage for hand spray gun, 7 Handle, 8 Detergent tank with closure cap, 9 Storage space for detergent tank with connection element for detergent, 10 Storage space for accessories, 11 Brackets for storing the hose, 12 Mains cable with mains plug, 13 Wheels, 14 Hand spray gun, 15 Lock for hand spray gun, 16 Release button for high-pressure hose from hand spray gun, 17 Detergent, 18 Jet tube with nozzle for removing dirt, 19 Jet tube with pressure regulator (Vario Power), 20 High-pressure hose
Special accessories
Special accessories expand the possibilities of using the device. More detailed information can be obtained from the trading organization of the KARCHER company.
Before starting work
Before starting operation of the device, install the supplied loose parts.
Assembling the storage location for the hand spray gun
Figure A
Insert the lower holder into the recess and push it forward until it clicks.
Figure B
Insert the upper holder and press it down until it stops.
Installing the brackets for storing the hose
Parameter
Figure C1
Install the lower brackets. Figure C2 Install the upper brackets.
Installing the pressure regulator of the cleaning agent
To install, you need 2 supplied screws and one Phillips screwdriver.
Figure D
Install the metering valve for the cleaning agent. Install the pressure regulator and secure it with the screws.
Installing the handle for transport
Figure E
Press the transport handle, insert the bolts into the holes, and tighten them.
Connecting the high-pressure hose to the hand spray gun Figure F
Insert the high-pressure hose into the hand spray gun until it clicks into place.
Note: Ensure the correct positioning of the connection piece.
Check the secure fit by pulling on the high-pressure hose.
Commissioning
Warning
According to applicable regulations, the device must not be operated without a system separator on the drinking water line. Use a suitable system separator from KARCHER or an alternative system separator that complies with EN 12729 or BA. Water that has flowed through a system separator is considered non-potable.
Note: Contaminants in the water can cause damage to the high-pressure pump and accessories. To protect it, it is recommended to use a KARCHER water filter (special accessory, order number 4.730-059).
Water inlet
Follow the instructions of the water supply company.
The connection parameters are indicated on the type plate and in the "Technical data" section.
Use a water hose made of flexible material (not included in the delivery) with a standard coupling. (Diameter:
Minimum 1/2 inch or 13 mm; recommended length 7.5 m).
Figure
Connect the coupling supplied with the device to the water inlet element. Attach the water hose to the coupling of the device, then connect it to the water supply.
Water intake from open reservoirs
This high-pressure cleaner is equipped with a suction hose from KARCHER and a check valve (special accessories, order no. 4.440-238) and is intended for suctioning water from open reservoirs, e.g., from rain barrels or pools (maximum suction height see "Technical data").
Fill the KARCHER suction hose with the check valve with water, attach it to the water connection element and hang it in the rain barrel.
Removing air from the device: Switch on the device without the connected high-pressure hose and let it run (no longer than 2 minutes) until water comes out of the high-pressure hose without air bubbles. Switch off the device and reconnect the high-pressure hose.
Before starting work
Caution!
Running dry for more than 2 minutes leads to damage of the high-pressure pump. If the device does not build up pressure within 2 minutes, switch it off and proceed according to the instructions in the chapter "Troubleshooting".
Figure H
Drain hose with dirt removal nozzle
Protection against freezing
Attention!
Protect the appliance and accessories from frost.
The appliance and accessories can be damaged by frost if water is not completely removed from them. To avoid damage:
→ Completely drain the water from the appliance. Turn on the appliance without the high-pressure hose connected and without water supply (for a maximum of 1 minute) and wait until water stops flowing from the high-pressure hose. Turn off the appliance. Store the appliance and all accessories in a frost-protected room.
Care and maintenance
Danger
When performing any care and maintenance work on the appliance, it must be switched off and the mains plug must be pulled out of the socket.
Maintenance
The appliance does not require preventive maintenance.
Cleaning
Before longer storage periods, e.g., in winter:
→ Completely drain the water from the appliance. Turn on the appliance without the high-pressure hose connected and without water supply (for a maximum of 1 minute) and wait until water stops flowing from the high-pressure hose. Turn off the appliance.
Figure
Use the device with the help of a high-pressure cleaner filter element for water supply to increase its throughput.
Spare parts
Use only original spare parts from KARCHER. The description of spare parts can be found in the operating instructions.
Help in case of malfunctions
Minor malfunctions can be fixed independently with the help of the following description.
In case of doubt, contact the authorized customer service.
Danger
When carrying out any maintenance or repair work on the device, it must be switched off and the mains plug must be pulled out of the socket. Repair work and work on electrical components may only be carried out by the authorized customer service.
Device does not work
→ Pull out the trigger of the spray gun, the device switches on. → Check that the voltage indicated on the type plate matches the voltage of the power source. → Check the mains cable for damage.
Device does not switch on, motor hums
Cause: Voltage drop due to weak mains or when using an extension cable.
→ When switching off, first pull out the trigger of the spray gun, then set the device switch to the "ON" (I/ON) position.
Strong pressure fluctuations
Clean the high-pressure nozzle: Remove dirt from the nozzle opening and rinse it with water. → Check the amount of water supplied.
The device's unreliability is due to technical features. In case of severe unreliability, contact an authorized service center.
The cleaning agent is not being sucked in
Use the suction tube with pressure regulator (Vario Power). Turn the suction tube to the "Mix" position. Check the pressure regulator of the cleaning agent. Check the suction hose for the cleaning agent for kinks.
Technical data
71364 Winnenden (Germany)
Tel.: +49 7195 14-0
Fax: +49 7195 14-2212
S. Reiser Head of Approbation
71364 Winnenden (Germany)
Tel.: +49 7195 14-0
Fax: +49 7195 14-2212
71364 Winnenden (Germany)
Tel.: +49 7195 14-0
Fax: +49 7195 14-2212
Table of contents
General instructions SL - 1
Safety instructions SL - 2
Use SL - 3
Device description SL - 4
Transport SL - 7
Storage SL - 7
Relevant EC directives:
2006/95/EC (until 28.12.2009)
71364 Winnenden (Germany)
Tel.: +49 7195 14-0
S. Reiser Head of Approbation
71364 Winnenden (Germany)
tel.: +49 7195 14-0
fax: +49 7195 14-2212
Table of contents
Dear customer,
Transport in vehicles
Respected EC directives:
2006/95/EC (until 28.12.2009)
2006/42/EC (from 29.12.2009)
2004/108/EC
2000/14/EC
Harmonized standards used:
EN 55014-1: 2006
EN 55014-2: 1997 + A1: 2001
EN 60335-1
EN 60335-2-79
EN 61000-3-2: 2006
EN 61000-3-3: 2008
EN 62233: 2008
71364 Winnenden (Germany)
Tel.: +49 7195 14-0
Fax: +49 7195 14-2212
Contents
General instructions SK - 1
71364 Winnenden (Germany)
Tel: +49 7195 14-0
Fax: +49 7195 14-2212
Table of contents
General notes HR - 1
Safety instructions HR - 2
Operation HR - 3
Device description HR - 3
Transport HR - 7
Storage HR - 7
Care and maintenance HR - 8
Troubleshooting HR - 8
Technical data HR - 9
CE declaration HR - 10
Dear customer,

Before first use of your device, read these original
71364 Winnenden (Germany)
Tel.: +49 7195 14-0
71364 Winnenden (Germany)
Tel.: +49 7195 14-0
(Read the instructions on the page before use)
Symbols used in the manual
Danger
For immediate danger that could lead to serious injury or death.
Warning
For a possible dangerous situation that could lead to serious injury or death.
Caution
For a possible dangerous situation that could lead to minor injury or material damage.
Symbols
The high-pressure jet can be dangerous if used incorrectly. Do not

direct the jet at people, animals, live electrical equipment, or the device itself.
- Freezing can damage the device if it is not drained. Store the device in a frost-protected room.
Safety instructions
Danger
Never touch the plug and socket with wet hands. Do not work with the device if the power cord or important parts of the device, such as the pressure hose, high-pressure gun, or safety devices, are damaged. Before use, check the power cord and plug for damage. Damaged power cords and plugs must be replaced immediately by an authorized service technician. Before each use, check the pressure hose for damage. Replace damaged hoses immediately. Work in explosive environments is prohibited. Safety markings must be provided when working with the device in hazardous areas (e.g., at petrol stations). The high-pressure jet can be dangerous if used incorrectly. Do not direct the jet at people, animals, live electrical equipment, or the device itself.
Do not use the device near flammable objects or explosive atmospheres. Do not point the device at people or animals. Do not aim at objects that contain hazardous substances (e.g., asbestos). The air flow from the device and the ventilation of the device can be affected or obstructed by high voltage. The first sign of this is the overheating of the device. Damaged ventilation slots and vents can lead to dangerous consequences. When cleaning, maintain a distance of at least 30 cm! Risk of explosion! Do not spray flammable liquids. Never spray liquids containing solvents or undiluted acids and solvents! Such are, for example, gasoline, solvents for glue or paint. Strongly sprayed steam is highly flammable, explosive, and toxic. Do not use devices with undiluted acids and solvents, as they attack the device's materials.
Warning
The extension cable and plug must be in good condition and must not be immersed in water. Damaged extension cables can be dangerous. When using outdoors, use only approved and properly marked extension cables with sufficient cross-section: 1-10 m: 1.5 mm²; 10-30 m: 2.5 mm². Always unwind the extension cable completely.
The markings for work clothing, protective equipment, and goggles are important for the safety of the device. Use only the manufacturer-recommended work clothing, protective equipment, and goggles. This device is not intended for use by persons with limited physical, sensory, or mental capabilities. The device must not be used by children, young people, or unauthorized persons. Children must be supervised to ensure they do not play with the device. The user must use the device according to the instructions. They must comply with local regulations and be careful when working with the device near other people. Do not use the device if other persons are nearby unless they wear protective clothing. For protection against water or dust, wear suitable protective clothing and protective goggles/mask.
Caution
During longer breaks, disconnect the device from the mains or remove it from the socket. Do not use the device at temperatures below 0°C to avoid damage. When cleaning, ensure a minimum distance of 30 cm between the steam jet and the surface being cleaned. During operation, the device must not be left unattended. Be careful that the device's cable or extension cord is not damaged or crushed by sharp edges.
pulling, bending, or other. Keep the cable away from heat, oil, and sharp edges.
The electrical parts and elements of the device must be protected from water spray. The device may only be connected to electrical contacts made by an electrician in accordance with IEC 60364. Connect the device to the mains power. The voltage must match the voltage indicated on the device's rating plate. For safety reasons, it is recommended to operate the device via a residual current device (max. 30 mA). Cleaning that involves removing oil-containing parts, e.g., when changing the filter and the lower part of the housing, must be done with a drip tray for oil. This device is designed for use with cleaning agents supplied or recommended by the manufacturer. The use of other cleaning agents or chemicals may affect the reliability and safety of the device.
Accessories
Caution
Accessories for the protection of users must not be modified or replaced.
Device switch
The device switch prevents unintentional starting of the device during operation.
Pneumatic pre-switch
The pneumatic pre-switch prevents exceeding the maximum permissible operating pressure.
If the trigger of the spray gun is released, the pneumatic contact switches off the pump, preventing high pressure. If the trigger is pressed again, the pump switches on again.
Stability requirements
Caution
Before any work with the device, ensure stability to avoid accidents or damage.
- The stability of the device is guaranteed if it is placed on a level surface.
Maintenance
Scope of delivery
The delivery scope is shown on the packaging. When unpacking, check that the contents are complete.
For accessories or during transport, contact your dealer.
Description of the device
These operating instructions describe the basic models of the high-pressure cleaning device. The maximum equipment is described in these operating instructions. Depending on the model, there are differences in the scope of delivery (see packaging).
See the diagrams on the opening page!
1 Connection coupling for water supply 2 Water connection for high pressure 3 Water hose with integrated sieve 4 Device switch "0/OFF" / "I/ON" 5 Pressure regulator for cleaning agent 6 Storage compartment for detergent spray gun 7 Transport handle 8 Detergent reservoir with cap 9 Connection of detergent reservoir to detergent 10 Storage compartment for accessories 11 Storage hook for power cable 12 Power cable with plug 13 Wheels 14 Spray gun 15 Lock for spray gun 16 Button for releasing the working pressure from the spray gun 17 Brush for cleaning 18 Spray lance with dirt blaster 19 Spray lance with adjustable pressure (Vario Power) 20 Working pressure indicator
Special accessories
The special accessories allow you to use your device in various ways. You will receive more detailed information from your KARCHER dealer.
Before starting the device
Mount the accessories freely to the device parts before starting the device.
Mounting the storage compartment for the spray gun Figure A
Place the lower part of the spray gun into the recesses and push it forward until it clicks into place.
Figure B
Place the upper part of the spray gun and press it down until it locks.
Mounting the storage hook for the power cable
Legend
Figure C1
→ Mount the lower cup for storage. Figure C2 → Mount the upper cup for storage.
Mounting the pressure regulator for cleaning agent
Two supplied bolts and a screwdriver with Phillips head PH 2 are required. Figure D → Place the two markings for cleaning agent on the outlet. Place the pressure regulator and secure it with 2 bolts.
Mounting the transport bracket
Legend
Connecting the marking for low-pressure work with the spray gun
Figure E → Place the transport bracket, insert the bolts into the holes and tighten them. Figure F → The marking for low-pressure work must be placed in the spray gun until it clicks into place.
Note: Pay attention to the correct direction of the connecting hose.
Check the secure connection by pulling the marking for low-pressure work.
Water connection
Warning
According to the applicable regulations, operation on the drinking water supply without a system separator is not permitted.
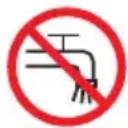
Use a suitable system separator from KARCHER or, as an alternative, a system separator according to EN 12729 type BA. Water flowing through a system separator is considered non-potable water.
Warning: Immersion in water can damage the device under high pressure and accessories. To protect against this, use the water filter from KARCHER (special accessory, order no. 4.730-059).
Connection to the water supply
Observe the regulations of the water supply company.
For connection parameters, see the table in the device/technical data.
Use a water hose (not included in delivery) with a standard coupling. (Diameter minimum 1/2 inch or 13 mm; length minimum 7.5 m).
Figure
Screw the coupling, supplied with the device, onto the water connection of the device. Attach the water hose to the coupling of the device and connect it to the water supply.
Suction of water from open containers
This device, operating under high pressure, is suitable for working with the KARCHER suction hose with return valve (special accessory, order no. 4.440-238) for suctioning water from open reservoirs, e.g., rain barrels or water tanks (maximum suction height, see technical data).
Fill the suction hose with the return valve with water, immerse it in the water collection container. Deaerate the device: turn on the device without the hose under pressure and wait (max. 2 minutes) until water comes out without bubbles from the high-pressure outlet. Turn off the device and reconnect the hose under pressure.
Operation
Caution
Dry running for more than 2 minutes can damage the high-pressure pump. If the device does not build up pressure within 2 minutes, turn it off and follow the instructions in the chapter "Troubleshooting".
Figure H
Attach the high-pressure hose to the quick coupling of the device, ensuring it is securely fixed.
Instruction: Follow the correct sequence of the spray gun. Check the tightness of the connection by first marking it for work under pressure.
Figure
→Place the required spray pattern on the gun for manual spraying by turning it 90° → Open the water supply valve. → Plug the device into the socket. → Turn on the device "I/ON".
Operation
△Danger
High-pressure water jet can cause injury. Ensure a stable stance, wear protective goggles and gloves for high-pressure spraying, and the required spray pattern.
Warning
Before starting the spraying, make sure that the device for high-pressure spraying is placed on a stable base. When spraying, use protective goggles and protective clothing.
→Lock the trigger of the gun for manual spraying. →Select the position, the device turns on.
Instruction: If the trigger is released again, the device turns off. The high pressure is maintained in the system.
Required for spraying with adjustable pressure (Vario Power)
For the most common painting jobs. The working pressure can be adjusted continuously between "Min" and "Max".
Release the trigger of the gun for spraying by hand. The required spray pattern must be turned to the desired position.
Instruction: For work with paint preparations, for this turn the adjusting knob to the "Mix" position.
Set the regulator to adjust the required amount of paint preparation for spraying.
Spray lance for cleaning agents
For intensive cleaning.
Caution
Do not spray on motor vehicles, painted or sensitive surfaces such as wood with varnish for cleaning agents, risk of damage.
It is not suitable for working with detergent.
Detergent tank
- Note: Detergent working mode.
Set the regulator to the desired amount of detergent for spraying.
Working with detergent
For the appropriate cleaning task, use only KARCHER cleaning and care products, as they are specially developed for use with your device. The use of other cleaning and care products can lead to rapid wear and tear and void the warranty. Please, inform yourself at the specialized trade or request information from KARCHER.
Instructions for cleaning agents: The most well-known KARCHER cleaning agents for these devices can be purchased ready for use in the detergent tank with a screw cap. This eliminates the need for filling and mixing.
Figure J
→ Remove the cap of the detergent tank and attach the detergent tank with the opening facing up to the detergent outlet.
Figure K
Set the amount of detergent solution to be sprayed with the detergent dosing regulator. → For spraying with adjustment of the spray lance (Vario Power), the spray lance must be turned to the "Mix" position. Note: When using detergent, the spray lance is mixed with water.
Instruction: The device is intended for use with cleaning agents only.
Recommended cleaning method
→ Apply a small amount of cleaning agent to the dry surface and let it act (but not dry out). The dissolved dirt is then removed with a scraper under high pressure.
Work interruption
→ Release the trigger of the spray gun. → Lock the trigger of the spray gun. → For longer work interruptions (over 5 minutes), switch off the additional device "0/OFF".
End of work
Attention
Only operate the device under the specified water pressure from the spray gun or from the tap, if the system has a water supply.
→ Remove the cleaning agent reservoir from the opening and close it with the cap. For storage, place it with the opening turned 180° in the opening.
Release the trigger of the spray gun. → Switch off the device "0/OFF". → Close the water tap. → Disconnect the device from the water supply.
Attention: When disconnecting the supply hose from the device after operation, hot water may escape.
→ Press the trigger of the spray gun to release the system pressure. → Lock the trigger of the spray gun. → Drain the device.
Transport
Attention
To avoid accidents or damage during transport, take into account the weight of the device (see technical data).
Transport
-> Lift the device for holding and carrying. -> Carry the device for transport.
Transport in vehicles
-> Before transporting, empty the fuel tank and close the fuel tap. -> Secure the device against slipping and overturning.
Storage
Warning
To avoid damage or deformation when choosing a storage location, consider the weight of the device (see technical data).
Storing the device
-> Place the device on a flat surface. -> Press the separator button on the spray lance for high-pressure cleaning and remove the high-pressure cleaning gun. -> Attach the quick-release coupling for the high-pressure cleaning gun and insert the high-pressure cleaning gun. -> Place the spray lance for high-pressure cleaning with the storage bracket for the spray lance. -> Store the accessories, high-pressure cleaning gun, and high-pressure cleaning gun holder.
For longer storage, e.g., in winter, follow the additional instructions in Chapter Maintenance.
Frost protection
Warning
The device and accessories must be protected from frost.
The device and accessories can be damaged by frost if they are not completely drained of water. To avoid damage:
-> Drain the device completely of water: Turn on the device without connecting the high-pressure cleaning gun and without water supply (max. 1 minute) and wait until water stops coming out of the water outlet.
The device is designed for use with water. Keep the device away from children.
The device and its accessories should be stored in a place protected from freezing.
Maintenance and care
Safety
Before cleaning the device, it must be switched off and disconnected from the mains.
Maintenance
The device does not require maintenance.
Cleaning.
For longer storage, for example during winter:
Drain the device completely of water: Switch on the device without the high-pressure hose connected and without water supply (max. 1 minute) and wait until water stops coming out of the high-pressure outlet. Switch off the device. Figure L -> Pull the trigger of the water gun and clean it under running water.
Spare parts
Use only original KARCHER spare parts. You can find the spare parts list at the end of the operating instructions.
The device does not reach operating pressure
Check the nozzle setting on the spray lance. -> Bleed the device: Switch on the device without the high-pressure hose connected and wait (max. 2 minutes) until water comes out without bubbles from the high-pressure outlet. Switch off the device and reconnect the high-pressure hose. -> Check the water supply. -> Pull the trigger of the water gun and clean it under running water.
The device does not start, the motor hums
PpuHa: CnadaHe Ha HanpexeHuemo npadu cna6a eEekmpuecka Mpeka unu npu u3non36aHe Ha ydbjnxumen.
→Привклочьанetoпьрви3дьрnaite Te loctaHa NiuctoJeTa 3a рьчHo npbckaHe, cIeД TOBa NOCTaBeTe npkeKbcBaçaHa ypeDa Ha ,I/ON".
CnHn Kone6aHnB HanaHaHeTo
→ Почистване на Дюзвисоко
налягache: МaxHEte 3ambpcBaHnЯта
OT OTBopa на Дюзатa сnomoцTa Ha
Иглa ИИЗпlaКНЕТСВODa HAnpeД. →ПовереTe ДeбиТа НВОдaТa.
YpeIbT He e XepMeTnueH
Maikata Jnnca Ha xepMeTnHocT Ha ypeDa e obycnoBena Texnueckn. Pnp CnHa Jnnca Ha xepMeTnHocT ce o6bpHeTe KbM OTOPn3napaN cepBN3.
IOnnCTBaUTo CpeDCTBO He ce 3acMykBa
→ Да ce n3noJ3Ba Tpb6a 3a pa3npackBaHe c perylnipaHe Ha HanraheTo (Vario Power) Tpb6ata 3a pa3npbckBaHe Da ce 3aBbptn B noJooKeHne „Mix". →Пюверете настpoикataHa perулаторДоЗнране 3a почпсь�TO cpeДСТВО. → Пюовере BCMyKaTeHnЯ МарКуч 3a NOчиCTBaIo CpeДСТВО 3a OгьНаТи MecTa.
TexHnueckn daHHN
| | K6.250 | K6.260 | K7.260 | K7.350 |
| Зхсанован с вора |
| Темпера typа на постывашиatingа вора (макс.) | °C | 60 |
| Дебит за постывашиatingа вора (мен.) | П/Мин | 11 | 12 |
| Налаягене на постывашиatingа вора (макс.) | MPa | 0,6 |
| Макс. Височина на засмунке | M | 1,0 |
| Еlektрическо зхсанован |
| Напlexенье1~50 Hz | V 220 - | 240 230 | |
| Присьединоелна мошност кW 2,5 3,0 | | | |
| Предимател (иентен) | A | 16 |
| Клас зашида | | I |
| Градус на зашида | | IP X5 |
| Данни за мошността |
| РавOTно налariaнe | MPa | 13 | 15 |
| Мakсимално дожUCTимо налariaнe | MPa | 15 | 16 |
| Дебит, вора | П/Мин | 8,8 | 9,2 |
| Мерки и тergla |
| Дыжina | MM | 362 | 407 |
| Широчиna | MM | 459 |
| Височиna | MM | 972 | 730 | 972 |
| Тerglio, в Готовност за павotas с рлиадлжности | КГ | 20,1 | 20,5 | 22,2 | 22,8 |
| Дебит, пениати за почиствае | П/Мин | 0 - 0,3 |
| Сира на оtmора на пистолета за ручно пльсканe | N | 20 | 22 |
| Установени стойност сблаласно EN 60335-2-79 |
| Стойност на виславице в облacr代表大会 на длиanta - р党中央а
Несигурност K | M/сек2
M/сек2 | <2,5
0,3 |
| Нимо на звука LpA | dB(A) | 76 | 75 |
| Heystочимьост КрA | dB(A) | 3 | 3 |
| Нимо на звухова мошност LWA + Heystочимьост KWA | dB(A) | 93 93 | |
3ana3bame cu npaebomo ha mexHuYeCKu u3MeHeHua!
CE - Декларачnia
C hactoToDeknapnpame,Ye
UNTupaHaTa No-DoJy MaunHa
cBOTBETCTBa NO KOHZeIeIaIaIaIaIaIaIaIaIaIaIaIaIaIaIaIaIaIaIaIaIaIaIaIaIaIaIaIaIaIaIaIaIaIaIaIaIaIaIaa
KOHCTpyKU, KaKTo I No Haun H
Product: Steam boiler/
steam generator for operation under
pressure
Type: 1.167-xxx
Type: 1.168-xxx
Applied directives of the EC:
2006/95/EC (until 28.12.2009)
2006/42/EC (from 29.12.2009)
Conforms to the essential safety and health requirements of the Machinery Directive, provided that it is used in accordance with the instructions.
This declaration loses its validity if the machine is modified without prior consent.
Product: Steam boiler/
steam generator for operation under
pressure
Type: 1.167-xxx
Type: 1.168-xxx
2004/108/EO
2000/14/EO
Harmonized standards:
Harmonized standards:
EN 55014-1:2006
EN 55014-2: 1997 + A1: 2001
EN 60335-1
EN 60335-2-79
EN 61000-3-2: 2006
EN 61000-3-3: 2008
EN 62233: 2008
Annex Method for assessment of
conformity:
Annex V
Noise level dB(A)
K 6.250, K 6.260
Measured: 90
Warranty no. 93
:
K 7.260, K 7.350,
Measured: 8 9
Warranty no. 93
:
Instructions for use and combustion on the controlled body.
H. Jenner
CEO
S. Reiser
Head of Approbation
71364 Winnenden (Germany)
Tel.: +49 7195 14-0
Fax: +49 7195 14-2212
Table of Contents
General Notes ET - 1
Safety Notes ET - 2
Handling ET - 3
Parts of the Device ET - 3
Transport ET - 7
Storage ET - 7
Water Supply from Water Tap
Product: High-Pressure Washer
Type: 1.167-xxx
Type: 1.168-xxx
71364 Winnenden (Germany)
Tel: +49 7195 14-0
Head of Appropriation
71364 Winnenden (Germany)
Tel.: +49 7195 14-0
Fax: +49 7195 14-2212
Contents
General instructions LT - 1
2006/95/EC (until 2009-12-28)
2006/42/EC (from 2009-12-29)
2004/108/EC
2000/14/EC
Harmonized standards applied:
EN 55014-1: 2006
EN 55014-2: 1997 + A1: 2001
EN 60335-1
EN 60335-2-79
EN 61000-3-2: 2006
EN 61000-3-3:2008
EN 62233: 2008
Conformity assessment procedure applied:
Annex V
Sound power level dB(A)
K 6.250, K 6.260,
Measured: 90
Guaranteed: 93
K 7.260, K 7.350,
Measured: 89
Guaranteed: 93
71364 Winnenden (Germany)
Tel.: +49 7195 14-0
Fax: +49 7195 14-2212
Main instructions for self-service work on the device.
Follow the safety instructions.
Power consumption. See the table in the technical data.
→ Use a water hose made of material resistant to pressure (not included in the delivery) with a standard coupling. (Diameter: minimum 1/2 inch or 13 mm; recommended length 7.5 m).
Manometer
→ Connect the coupling from the kit to the device element for water supply.
Put the water hose on the coupling of the device, after you have connected it to the water supply.
Pumping water from open containers
This high-pressure device with the KARCHER suction hose and check valve (special accessory, order number 4.440-238) is intended for suctioning water from open reservoirs, ponds, or from containers with clean water (maximum suction height see in the "Technical data" section).
Connect the high-pressure hose to the water inlet with the check valve, tighten it to the connection element, and raise it into the working position. → Vent the device: Switch on the device and, without the high-pressure gun connected, let it run (no more than 2 minutes) until water exits the high-pressure gun without air bubbles. Switch off the device and reconnect the high-pressure gun.
Commissioning
Remove!
Running dry for more than 2 minutes leads to damage to the high-pressure pump. If the device does not build up pressure within 2 minutes, switch it off and proceed according to the instructions in the chapter "Troubleshooting".
Figure H
Lock the high-pressure gun into the bayonet coupling located on the device until it clicks into place.
Note: Observe the correct position of the coupling nipple.
Check the fastening by pulling on the high-pressure gun.
Figure
→ Press the hand spray gun onto the spray lance and lock it by turning it 90°. The water tap is now open. Insert the plug into the socket. → Switch on the device (I/ON).
Operation
Danger!
The water jet coming out of the nozzle under high pressure can cause injuries to the hand or foot. For this reason, keep a safe distance and do not point the hand spray gun with the spray lance at yourself or others.
Remove!
Before starting work, make sure that the high-pressure device is placed on a level surface. During work, wear protective goggles and protective gloves.
→ P036nokyBaTn BaXiNb pyHoro nictOnety-po3nnIObaya.
→Notarynt3aBaxinb,anapat yBIMKHeTbcra.
Bka3IBka: JaKuo BaXinb 3HOBy 3BiJbHnTbcra, anapaT 3HOby BUMKHeTbcra. Bucokni Tnck 3aJIuHaeTbcra B cnCTemi.
CtpymeHeBa Tpy6ka 3 peRyIIOBaHHaM TnCKy (Vario Power)
PekomeHIOBaHi MeToOn OuNueHHa
→ P03nHnTn HeBey KjIbKicTb 3acO6y
ДЯ YIeHHa cyxN NOBepXHIO Ta
3aJIuHHTn DiYrN (He BucNxAtn). 3MnIte po3uHHeHn 6pyd cTpymHeM BnCOKOro TnCKy.
IpnlaT a npHaJexHocTi MoKytb nOcTpaxkDaTN BiD MOpO3y, kUo 3 Hx NOBHiCTIO He cnUeHO BDOy. Ipy YnHKHeHH NaKOJXeHB.
3 anapaty cnid zilkom BuaNTn BOy. BMkaTn anapat 6e3 npEHaHoro IaHra BucOKoTo TcCKy i 6e3 npEHaHoro BOOnocTaAHN (MaKcMym Ha 1 XBUNHy) Ta noyeKaTn DOtN, DOKN pPnnHHTbcBNTik BOiN 3i IaHry BucOKoTo TcCKy. BumKhItb anapaT.
36epiratnpicpi3ycima akcecyapamny TeNnomy npmimiueHHi.
Pnctpi He npaioe nid Tnckom
→ IpeBipTuHaCTpoOBaHHa CTpyMNHOI Tpy6Kn. →BudanenHn noBITpia3 npncTpoU: BvmkHytn npncTpii 6e3 niKluoyehoro BucOKoHaipHO rO 7aHra Ta nOueKaTH (He 6ilbwe 2 xBNiIN), NOKN 3 BucOKoHaipHO 7aHra He nOuHe BHXODHTB0da 6e3 6yIb6aWok nobitpr. BmKhTy npncTpii Ta 3aHOBO npneDHaTH 7laHr BUCOKO TNCKy. →Перевирту подаовна вди. →BntaHtB 3 donomoroIO nlockory6iB MepeXeBn fIbTp 3 eIemaHTy dJa BOdONocTauHH Ta npOMnTe NOro y npotoChHi BDi.
Anapat He BMnKaeTbcra, DBNrHy rynTb
IpuuHa: IadiHHa Hapyu uyepe3 cna6ky eIekmpomepexy a6o npu buKOpucmaHn i nooexyaeya.
→Прии ВIMКнEHнI HacampeEd BNTTIN BaJIb pyHOrO niCToJeTy- po3nIIHOBaay,NotIM yCTaHObitb BIMKau anapaty B noLoXeHHra "I/ON" (I/YBIMK.).
BéniKi nepenadn Tncky
Cleaning the high-pressure hose: Only remove the hose from the spray gun and rinse it with water. →Check the amount of water supplied.
The device is not airtight
The device's lack of airtightness is due to technical characteristics. In case of significant leaks, contact an authorized service center.
The device cannot be used
→ Use the spray lance with adjustable pressure (Vario Power) and turn the spray lance to the "Mix" position. →Check the pre-filter of the device. →Check the usability of the device for the intended use.
Technical specifications
Complies with Directive EC
2006/95/EC (until 28.12.2009)
2006/42/EC (from 29.12.2009)
2004/108/EC
2000/14/EC
Applied harmonized standards
EN 55014-1: 2006
EN 55014-2: 1997 + A1: 2001
EN 60335-1
EN 60335-2-79
EN 61000-3-2: 2006
EN 61000-3-3:2008
EN 62233: 2008
According to the measurement method of conformity
Supplement
Sound power level dB(A)
K 6.250, K 6.260
Output: 9 0
Guaranteed: 93
K 7.260, K 7.350,
Output: 8 9
Guaranteed: 93
Those who sign are responsible for the device and the operating instructions.

71364 Winnenden (Germany)
Tel.: +49 7195 14-0
Fax: +49 7195 14-2212
5.963-420.0 11/09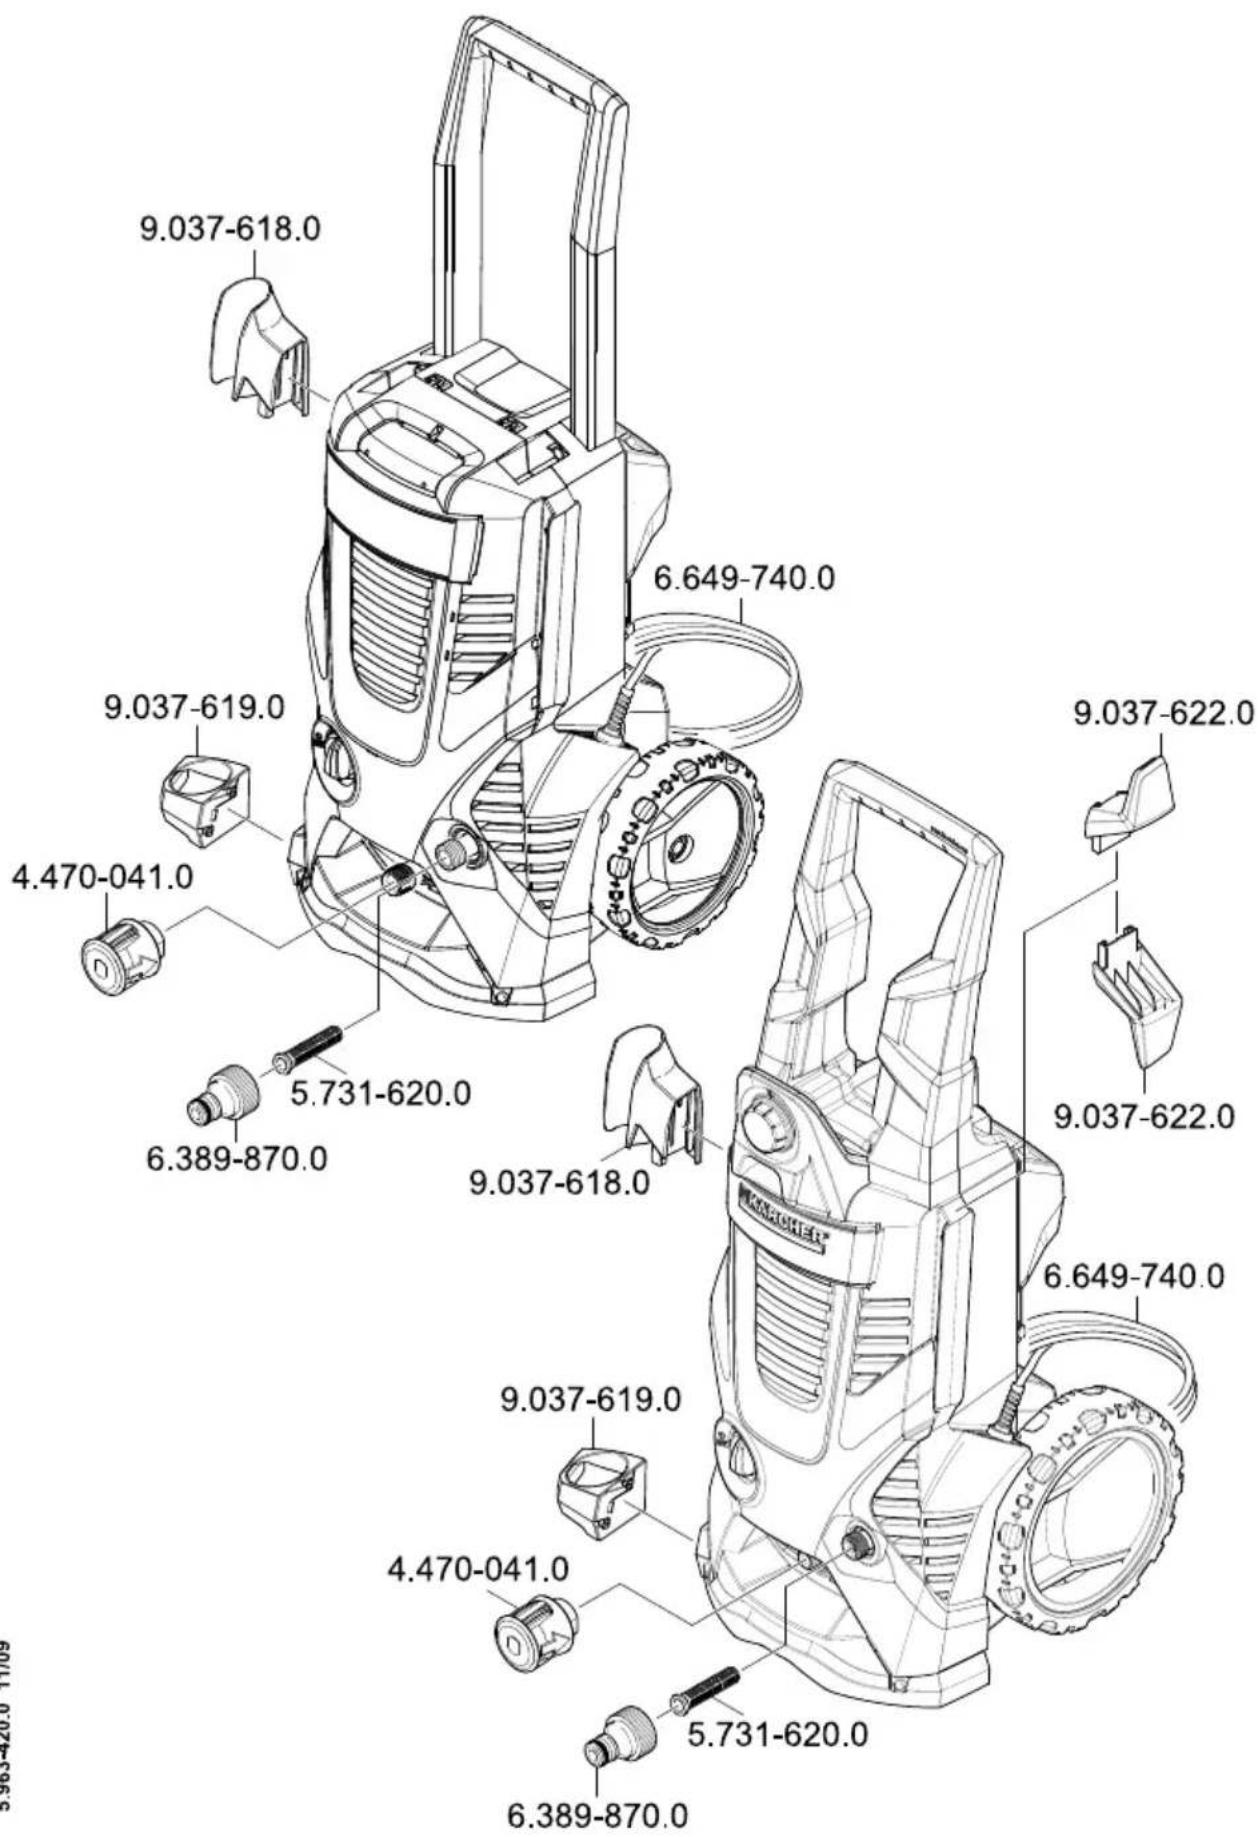
6.391-785.0-1.168-220.0/-222.0 6.391-870.0-1.168-120.0 2.641-721.0-1.168-100.0/-122.0 6.391-869.01-1.167-121.0 2.641-721.0-1.167-120.0
5.963-420.0 11/09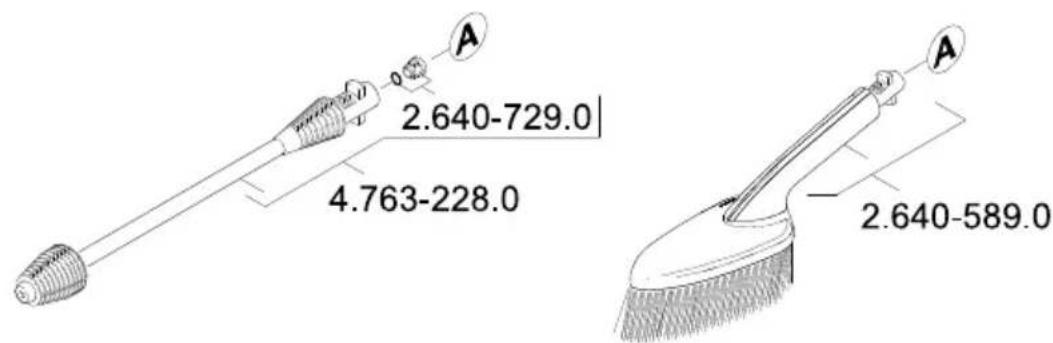
A Alfred Karcher Ges.m.b.H. Lichtblaustrasse 7 1220 Wien (01)250600
AUS Kärcher Pty. Ltd. 40 Koornang Road Scoresby VIC 3179 (03) 9765-2300
B/LUX Karcher N.V. Industriebeg 12 2320 Hoogstraten B:0900 10027 LUX:0032 900 10027
BR Kärcher Industria e Comércio Ltda. Av. Prof. Benedicto Montenegro 419 CEP 13.140-000 - Paulinia - SP 0800 176 111
CDN Kärcher Canada Inc. 6975 Creditview Road Unit #2 Mississauga, Ontario L5N 8E9 1-800-465-4980
HK Karcher Limited Unit 10,17/F. APEC Plaza 49HoiYuenRoad KwunTong,Kowloon (02)357-5863
Karcher S.p.A. Via A.Vespucci 19 21013 Gallarate (VA) 848-998877
IRL Karcher Limited 12 Willow Business Park Nangor Road Clondalkin Dublin 12 (01) 409 77 77
KOR Karcher Co.Ltd.(South Korea) Youngjae B/D,50-1,51-1 Sansoo-dong,Mapo-ku Seoul 121-060 032-465-8000
MAL Karcher Cleaning Systems Sdn. Bhd. No.8,Jalan Serindit 2 Bandar Puchong Jaya 47100 Puchong, Selangor (03)58821148
MEX Karcher Mexico, SA de CV Av. Gustavo Baz No. 29-C Col. Naucalpan Centro Naucalpan, Edo. de Mexico C.P. 53000 Mexico 01 800 024 13 13
NZ Karcher Limited 12 Ron Driver Place East Tamaki, Auckland (09)274-4603
P Neoparts-Com.eInd.Automóvel,S.A. Av. Infante D.Henrique,Lote 35 1800-218 Lisboa 218558300
PL Kärcher Sp. zo.o. UI. Stawowa 140 31-346 Krakow (012)6397-222
PRC Kärcher Cleaning Systems Co., Ltd. Part B, Building 30, No. 390 Ai Du Road Shanghai Waigaoquiao 200131 (021)5046-3579
RO Karcher Romania s.r.l. Sos.Odaii Nr.439 013606 Bucuresti 0372709001
RUS OOO «Kepxep> 109147,MockBa yn.TaraHcKa,Д.34,ст.3 +74952283945
S Kärcher AB Tagenevagen 31 42502 Hisings-Karra (031)577-300
SGP Karcher Asia Pacific Pte. Ltd. 5 Toh Guan Road East
01-00 Freight Links
Express Distripark Singapore 608831 6897-1811
SK Kärcher Slovakia, s.r.o. Beniakova 2 94901 Nitra 037 6555 798
TR Kärcher Servis Ticaret A.S. 9 Eylül Mahallesi 307 Sokak No. 6 Gaziemir / Izmir (0232) 252-0708
TWN Karcher Limited 5F/6. No.7 Wu-Chuan 1st Rd Wu-Ku Industrial Zone Taipei County (02) 2299-9626
UA Karcher Ukraine Kilzeva doroga, 9 03191, Kyiv (044) 594 75 75
UAE Karcher FZE Jebel Ali Free Zone RA 8, XB1, Jebel Ali, Dubai (04) 8836-776
USA Alfred Karcher, Inc 2170 Satellite Blvd Suite 350 Duluth, GA 30097 678-935-4545; 877-527-2437
ZA Kärcher (Pty.) Limited 144 Kuschke Street Meadowdale Edenvale 1614 (011) 574-5360
KARCHER www.kaercher.com