Grass 1055 ZSH - Lawn mower GARLAND - Free user manual and instructions
Find the device manual for free Grass 1055 ZSH GARLAND in PDF.

| Product Type | Self-propelled lawn mower (walk-behind) |
| Brand | Garland |
| Model | Grass 1055 ZSH |
| Engine | Honda 4-stroke, 160 cc, 2.8 kW |
| Cutting diameter | 50 cm |
| Cutting height | 25-65 mm (adjustable, 7 positions) |
| Grass bag capacity | 55 L |
| Dry weight | 30 kg |
| Fuel | Unleaded 95 gasoline |
| Engine oil capacity | 0.55 L (oil 20W-40) |
| Guaranteed sound power level | 96 dB(A) |
| Maximum engine speed | 2800 rpm |
| Self-propulsion | Yes (drive bar) |
| Cutting modes | Grass collection, side discharge, mulching |
| Safety devices | Safety switch bar, rear and side deflectors, mulching plug |
| Routine maintenance | Housing cleaning, oil check, filters, spark plug, blade sharpening (by authorized service) |
| Warranty | 2 years (manufacturing defects) |
Frequently Asked Questions - Grass 1055 ZSH GARLAND
User questions about Grass 1055 ZSH GARLAND
0 question about this device. Answer the ones you know or ask your own.
Ask a new question about this device
Download the instructions for your Lawn mower in PDF format for free! Find your manual Grass 1055 ZSH - GARLAND and take your electronic device back in hand. On this page are published all the documents necessary for the use of your device. Grass 1055 ZSH by GARLAND.
USER MANUAL Grass 1055 ZSH GARLAND
natural_image
Black and white photo of a GARK lawn mower with visible blades and wheels (no text or symbols)
EN Instruction manual
natural_image
Two mechanical clamps with different end caps and mounting features (no text or symbols)text_image
Labeled diagram of a lawn mower with numbered parts for identificationnatural_image
Pure mechanical diagram showing a black bracket with bolt holes and two bolts, no text or symbols presentnatural_image
Pure mechanical diagram showing a tool interacting with a curved pipe or duct (no text or symbols)natural_image
Diagram showing a cable being inserted into a clip, with an arrow indicating the insertion direction (no text or symbols present)6.2.2. MONTAJE DEL SACO
natural_image
Silhouette of a box with a handle and a small object on top, resembling a lamp or stand (no text or symbols)6.2.3. MONTAJE DE LA SALIDA LATERAL
natural_image
Black and white illustration of a car wheel and dashboard (no text or symbols)natural_image
Abstract line drawing with curved arrows and a central star-like shape (no text or symbols)natural_image
Silhouette of a person pushing a lawn mower (no text or symbols)natural_image
Diagram showing a mechanical tool with a spring and a separate view of a handle (no text or symbols)natural_image
Silhouette of a person pushing a lawn mower (no text or symbols)natural_image
Close-up of a car wheel and tire assembly (no visible text or symbols)natural_image
Line drawing of a lawn mower with visible blades and wheels (no text or symbols)natural_image
Line drawing of a lawn mower with a mounted device (no text or symbols)Corte mulching:
natural_image
Line drawing of a lawn mower with a mounted lawn pump (no text or symbols)text_image
0.6mm-0.7mmGlasswelt Lawn machinery products
C/ La Fragua, 22 Pol. Ind. Los Rosales 28933 MÓSTOLES (Madrid) ESPAÑA
NOTAS
INDEX
- Introduction 30
- Security measures 31
- Warning symbols 36
- Machine symbols 37
- Machine description 38
- Start up instructions 40
- Using the machine 44
- Maintenance and service 47
- Trouble shooting 51
-
Transport 53
-
Storage 53
-
Recycling or disposal of your machine 53
-
Warranty conditions 54
CE Declaration of conformity 55
TRANSLATION OF THE ORIGINAL INSTRUCTIONS
Ref.:GCCGRASS1055ZSHM0115V1
DATE OF PUBLICATION: 09/01/2015
DATE OF REVISION: 09/01/2015
1. INTRODUCTION
Thank you for choosing this Garland machine. We are confident that you will appreciate the quality and performance of this machine, which will facilitate your task for a long period of time. Remember that this machine has the most extensive and expert technical assistance network which you can consult for the maintenance, troubleshooting and purchase of spare parts or accessories.

Warning! Read all safety warnings and all instructions. The failure to observe all warnings and instructions below can result in fire and/or serious injury. Before using this machine, carefully read the information in this manual on correct setup and safe techniques.

Only cut grass. Do not use this machine for other unintended purposes. For example: do not use the lawnmower to mulch, to cut hay or bushes, and do not use it as a mill. Using the mower for things other than the designed operations may result in dangerous situations.

Save all warnings and instructions for future reference. If sold in the future, remember to give this manual to the new owner.
The expression “Switch in open position” means that the switch is switched OFF and “Switch in closed position” means that the switch is turned ON.
Remember that the machine operator is responsible for the damages and accidents caused to other people or things.
The manufacturer will not be liable in any way for damages caused by improper or incorrect use of this machine.
2. SECURITY MEASURES
To avoid mishandling this machine please read all instructions in this manual before using it for the first time. All information included in this manual is important for your personal safety and that of the people, animals and things surrounding you. If you have any questions regarding the information contained in this manual ask a professional or go to the point of sale where you purchased this machine to resolve it.
The following list of hazards and precautions include the likely situations that may occur during the use of this machine. If you encounter a situation not described in this manual use common sense to use the machine in the most secure way possible, or if you see danger, do not use the machine.
2.1. USERS
This machine has been designed to be manipulated by grown ups who have read and understood these instructions. This machine may not be used by persons (including children) with diminished physical, psychic or mental capacities, or lack of experience or knowledge.
⚠ Warning! Do not allow underage persons to use this machine.
⚠ Warning! Do not allow people who do not understand these instructions to use this machine. Before using this machine, familiarize yourself with it ensuring that you perfectly know where the controls and safety devices are, and the manner in which it must be used. If you are an inexperienced user we recommend you practice doing a simple job and, if possible, in the company of an experienced person.
The cutting tool of this machine is very sharp. It is dangerous to use this machine improperly.
Warning! Only lend this machine to persons who are familiar with this type of machine and know how to use it. Always lend the machine along with the user instruction manual so the new user can carefully read it and understand it.
This machine is dangerous in the hands of untrained users.
2.2. PERSONAL SAFETY
Stay alert, watch what you are doing and use common sense when operating this machine.
Avoid inhaling the exhaust gases. This machine produces hazardous gases such as carbon monoxide, which can cause dizziness, fainting or death.
Do not use this machine when you are tired or under the influence of drugs, alcohol or medication. A moment of inattention while operating this machine can cause serious personal harm.
Never use the machine with defective guards, or without safety devices, for example deflectors and/or a grass catcher, in its place.
Do not modify the machine controls or regulations of the engine speed.
Remove all keys or hand tools from the machine and the work area before starting the machine. A wrench or tool left near the machine may be touched by a part of the machine in motion and could project itself causing personal injury.
Do not exceed yourself. Keep both feet firmly in place on the ground and maintain balance at all times. Do not use this machine on slopes of more than 15^ .
Cutting on mounds can be dangerous. Stay alert when working or moving on bumpy ground or wet grass. Be especially careful when changing direction on a slope.
Do not put hands or feet under the lawnmower.
Keep all parts of body away from the blade when the machine is running. Before starting the lawnmower, be sure that the blade is not in contact with any object.
Keep all parts of body away from cutting elements and moving parts when the machine is running. Before starting the machine, make sure that the cutting element is not in contact with any object. A moment of carelessness during the performance of the machine may cause your clothing or other part of the body to be cut by a cutter from the tool.
Hold the lawnmower with both hands on the handlebar and always put your body behind the lawnmower. If you are an inexperienced user, we recommend first practicing on a flat surface.
If the machine vibrates abnormally, stop the engine, inspect the machine and look for the possible cause and repair. If you cannot find the cause of the problem take the machine to the service technician.
Do not touch the machine's exhaust pipe while the engine is running or shortly after stopping it. The exhaust pipe of this machine reaches high temperatures during operation of the engine and maintains these high temperatures for a few minutes after stopping it.
Do not leave the machine running unattended. If you have to leave the machine unattended, turn off motor, wait for the cutter to stop and unplug the wire from the spark plug.
Do not attempt to remove the cut material from the work area while cutting tool is in motion. Be sure that the machine is switched off when performing debris cleanup.
Store idle tools out of the reach of children.
2.2.1. WORK AND SAFETY CLOTHING
Dress properly. Do not wear loose clothing or jewelry. Keep your hair, clothing and gloves away from moving parts. Loose clothing, jewelry or long hair can be caught in moving parts.
Use this machine with appropriate footwear. Never use this machine barefoot or with sandals or open-toed shoes.
Use eye and hearing protection
Use this machine wearing long pants.
The use of additional safety clothing and security measures will reduce the risk of personal injury.
You should always have the following with you:
- Tools.
• Signal tape for the work area.
• Mobile phone (For use in the case of emergency).
2.3. SAFETY IN THE WORK AREA
Do not operate this machine in explosive atmospheres as well as in the presence of flammable liquids, gases and dust.

Do not start the machine in a room or enclosure. The exhaust fumes and fuel fumes contain carbon monoxide and harmful chemicals. In case of a ton of gases produced by poor ventilation,
remove all that impedes the flow of clean air from the work area to improve ventilation and do not return to work in the area unless you have correctly ventilated the area and are certain that ventilation is sufficient as to not happen again this concentration.

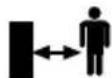
The area within a radius of 15 meters around the machine should be considered risk area in which no one must enter while the machine is running (Security Area). When necessary, use ropes and warning signs to mark the Security Area.
Maintain children and curious persons away from the work area while operating this machine. Distractions can cause a loss of control. Make sure that children, people or animals do not come into your work area
When the work must be performed simultaneously by two or more persons, always check the presence and location of others in order to maintain a sufficient distance between each person to ensure safety.
Do not use this machine at night, with fog or low visibility which will not allow you to see the working area clearly.
Keep the work area clean and work with good lighting.
Only use this machine with daylight or with good artificial light. Cluttered and dark areas cause accidents. Inspect and remove any objects that can cause damage to you or the machine.
Do not use this machine in areas where there is wiring or underground pipes. Inspect your work area and remove all stones, wood, wire, and foreign objects that may be dismissed by the cutting tool.
2.4. SAFETY IN THE USE OF FUELS

IMPORTANT: The fuel used for this machine is highly flammable. If the fuel or the machine ignites, smother the fire with a dry powder fire extinguisher.
Petrol and oil are hazardous; avoid contact of gasoline or oil with the skin and eyes. Do not inhale or swallow them. Immediately see your doctor if you ingest fuel or oil. If they come into contact with fuel or oil clean with soap and water as soon as possible, if you then continue to feel irritated skin or eyes immediately consult a doctor.

Do not refuel fuel in closed or poorly ventilated places. Fumes from the fuel and oil contain hazardous chemicals. In the case of a concentration of gases produced by insufficient ventilation, remove all that impedes the flow of clean air from the area in order to improve ventilation. Do not return to the area unless you have properly ventilated the area and are certain that ventilation is sufficient so this concentration does not happen again.

Petrol and oil are extremely flammable and explosive under certain conditions. Do not smoke and keep flames, sparks or heat sources away from the machine.
Do not smoke while transporting fuel, when you fill out the deposit or when you are working.
Do not refuel fuel in locations where there is the presence of open flames, sparks or heat sources. Fill the tank always in well-ventilated areas and with the motor stopped. In the event of a fuel leak, be sure to clean these leaks completely before starting, move the machine away from the spillage area and avoid any source of ignition until all vapors are gone.

Add fuel before starting the machine. Never remove the cap of the fuel tank while the engine is running or when the machine
is hot.
Make sure the cap of the fuel is tightly and correctly closed while you are using the machine. Make sure to correctly and tightly close the cap on the fuel after refilling.
Always store fuel in approved containers that comply with the European standards.
2.5. CARE AND USE OF THIS MACHINE
Only cut grass. Do not use this machine for other purpose not intended. For example: do not use the lawnmower to mulch, to cut brush or bushes, and do not use it as a mill. Using the mower for other than the envisaged operations may result in dangerous situations.
Use only machine accessories, tooling, etc. in accordance with these instructions and as intended, taking into account the working conditions and the taking into account the working conditions and the work to develop. The use of this mower for uses other than the designated operations may result in dangerous situations.
Check that all the safety devices are installed and in good condition.
Remember that the machine operator is responsible for the dangers and accidents caused to other people or things. The manufacturer will not be in any way liable for damages caused by improper or incorrect use of this machine.
The cutting tool is very sharp. Not following the instructions may cause severe damage.
Keep your body away from the cutting tool while using the machine.
Do not force this machine. Use this machine to the correct application. Using the machine for the type of work meant to be done will allow you to work better and more safely.
Do not use this machine if the switch does not change between “open” and “closed”. Any machine that cannot be controlled with the switch is dangerous and must be repaired.
Before starting work with the machine, check that the milling tools are not in contact with any object and that they can move freely.
Do not use the machine on steep slopes where your safety cannot be guaranteed. If you are working on slopes slow down your work pace and ensure you have a good stability.
Keep this machine maintained and in proper condition. Check that the moving parts are not misaligned or locked, that there are no broken parts or other conditions that may affect the operation of this machine.
Whenever this machine is damaged, repair it before use. Many accidents are caused by poorly maintained machines.
Keep the machine handles dry and clean. Greasy or oily handles are slippery and cause loss of control over the machine.
After hitting any object inspect the mower for possible damage. If the blade is bent, some casing is broken, or if you see any other problems that may affect the operation of the machine do the necessary repairs or take your unit to the technical service.
Turn off the machine, disconnect the spark plug and make sure that the cutting tool is stopped before making any adjustments, filling with fuel, changing accessories,
cleaning, transportation and storage of this machine. Such preventive safety measures reduce the risk of accidental starting of this machine.
If the machine starts to vibrate in a strange way, turn it off and examine it to find the cause. If you cannot discover the reason take the machine to the service technician. The vibrations are always an indication of a problem in the machine.
Stop the engine whenever you leave the machine alone.
Reduce the rotation system of the motor when you turn off the engine. If the engine is equipped with a fuel valve, cut the fuel when the engine has stopped.
2.6. SERVICE
Please have your machine periodically checked by a qualified repair service using only original spare parts. This will ensure that the safety of this machine is maintained.
3. WARNING SYMBOLS
Warning labels indicate required information for the use of the machine.

Warning: Danger!


Carefully read this manual before starting or using the machine.
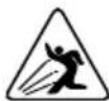
Danger! Danger of flying materials and objects. Beware of objects that can be discharged.
Keep unprotected people away from the work area.
Danger! Risk of finger amputation. Keep feet and hands away from the cutting tool.

Hot Surface! Burn risk.


Danger! Lethal Gases! Do not use this machine in enclosed or poorly ventilated areas.


Danger! Flammable fuel. Risk of fire or explosion. Never fill the fuel tank with the engine running.

Do not smoke or get flames near the fuel or machine.

Check that there are no fuel leaks.
Attention! Before carrying out maintenance or repair work, shut off the machine and disconnect the spark plug.
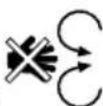
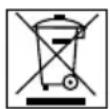
Dispose of your appliance organically. So do not throw in trash containers.

Comply with the CE directives (EU standards).

Guaranteed sound power level Lwa dB(A).

You must wear adequate protection for the ears and eyes.
Release the trigger switch to stop the machine.
natural_image
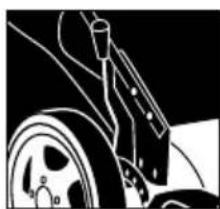
Technical line drawing of two mechanical clamping tools (no text or symbols)Press the traction bar against the handlebar and the lawnmower's traction will be operational.

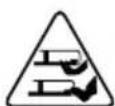
Danger! Do not use the mower without the grass catcher bag or deflector in place.
Risk of finger amputation. Keep feet and hands away from the cutting tool

Keep children away from this machine.

Do not use the mower without the grass catcher bag and the protector raised up.

Remove all stones, Wood, wires, and strange objects which may be flown by the cutting tool before starting the machine.

Do not use this mower on slopes over 15°. Cutting on mounds could be dangerous.
4. MACHINE SYMBOLS
In order to guarantee safe and proper use and maintenance of the machine, the following symbols appear on the machine.


Fuel tank. Do not smoke or bring flames close to the fuel or the machine.

Engine oil tank.
Warning! Hot Surface! Risk of burns.
Air lever positions:
START

Cold-starting position.

RUN
Normal working position.
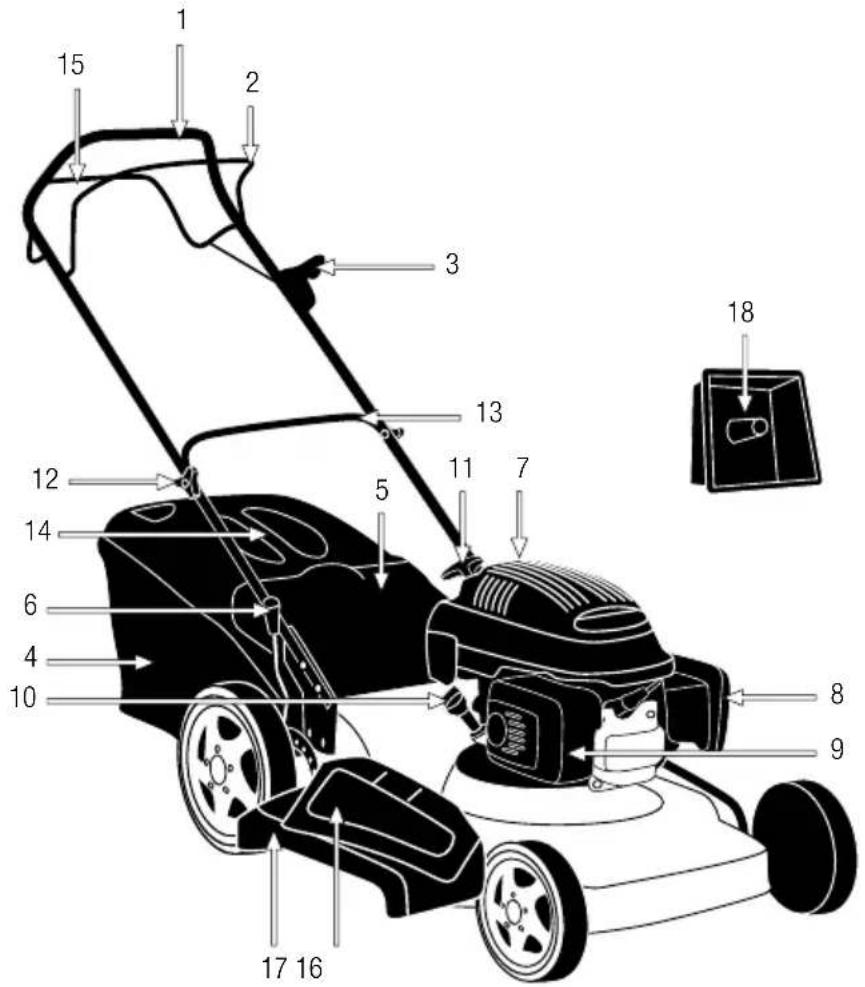
5. MACHINE DESCRIPTION
5.1. CONDITIONS OF USE
Only use this machine to cut grass. Do not use this machine for other unintended purposes. For example: do not use the lawnmower to mulch, to cut brush or bushes, and do not use it as a mill. Using the mower for operations other than those designed may result in dangerous situations. Use this machine outside, in dry environments and at temperatures between 5 °C and 45 °C.
Remember that the machine operator is responsible for the injuries and accidents caused to other people or things. The manufacturer shall not be in any case responsible for damages caused by improper or incorrect use of this machine.
5.2. DETAILED DESCRIPTION OF THE PRODUCT
- Upper handlebar
- Safety switch bar
- Air lever
- Bag
- Rear output cover
- Height adjustment lever
- Fuel tank cap
- Air filter cap
- Muffler
- Oil fill cap
- Starter handle
- Wing nut
- Lower handle
- Handle for the bag cover
- Traction bar
- Side output cover
- Side output deflector
- Mulching plug
- Traction speed adjusting lever
text_image
Labeled diagram of a lawn mower with numbered parts for identificationImages and drawings in this manual are approximate and may not correspond with the actual product.
5.3. TECHNICAL CHARACTERISTICS
| Description Lawnmower | |
| Brand Garland | |
| Model GRASS 1055 ZSH | |
| Engine 4 stroke Honda | |
| Cubic capacity (cm3) 160 | |
| Power (kW) 2,8 | |
| Maximum engine revolution power (min-1) 2.800 | |
| Fuel consumption at maximum power (g/h) 0,748 | |
| Cutting height (mm) 25-65 | |
| Cutting width (mm) 502 | |
| Size of the bag (l) 55 | |
| Oil capacity in the crankcase (l) 0,55 | |
| Vibration levels (m/s2) | 6,91 |
| Sound pressure level LpA LpA (dB(A)) | 82,4 |
| A-weighted sound power level Lw (dB(A)) | 95,71 |
| Guaranteed sound power level Lw (dB(A)) | 96 |
| Weight (kg) | 30 |
The above technical characteristics can be modified without prior notice.
6. START UP INSTRUCTIONS
6.1. UNPACKING AND LIST OF MATERIALS
This machine includes the following items that you will find inside the box:
- Machine.
- Upper handle.
- Lower handle.
- Bag.
- Mulching cap.
• Lateral output deflector.
• Upper handle screw and wing nut (2). - Lower handle nuts.
• Lower handle screws.
• Cable engagement circlip. - Instruction manual.
Carefully remove all items from the box and make sure that all listed items are present. Carefully inspect the product to ensure that there are no damaged elements.
If you find any damaged or missing parts, do not use the machine until the defect has been repaired or all the missing pieces replaced. Using the machine without all of its parts or with defective parts can cause severe personal injury.
6.2. ASSEMBLY
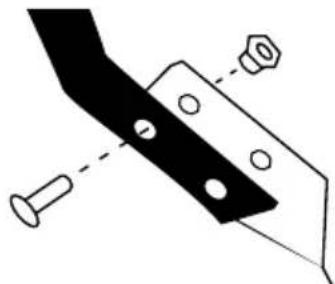
6.2.1. ASSEMBLING THE HANDLEBAR
Place the lower handlebar and once the screws have been inserted tighten the nuts.
natural_image
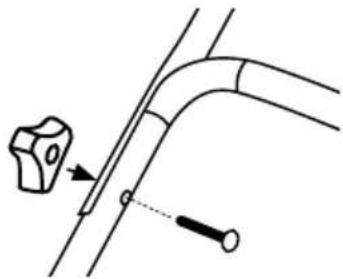
Pure technical diagram of a mechanical component with bolt holes and dashed alignment lines (no text or symbols)Position the upper handle on the lower handlebar and once the screws have been inserted tighten the wing nuts.
natural_image
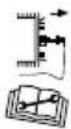
Pure mechanical diagram showing a tool interacting with a curved pipe or duct (no text or symbols)Place the cable engagement circlip.
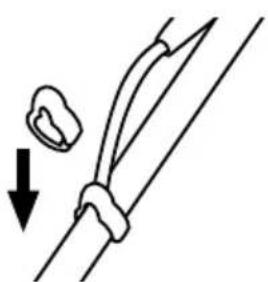
natural_image
Diagram showing a cable being inserted into a clip, with an arrow indicating the insertion direction (no text or symbols present)6.2.2. ASSEMBLING THE SACK
Lift the rear outlet cover and engage the protrusions on the chassis of the bag rear cover axle.

natural_image
Silhouette of a box with a handle and a small object on top, no text or symbols present6.2.3 ASSEMBLING THE LATERAL EXIT

natural_image
Black and white illustration of a car wheel and steering wheel (no text or symbols)Lift the cover from the side exit and install the side deflector.
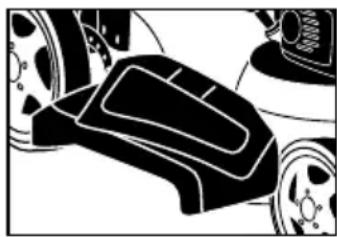
6.2.4. ASSEMBLING THE MULCHING PLUG
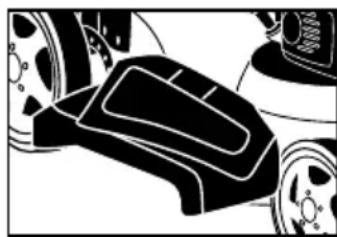
Lift the rear outlet cover and install the mulching plug in the rear output channel as shown in the figure. Then lower the rear output cover.
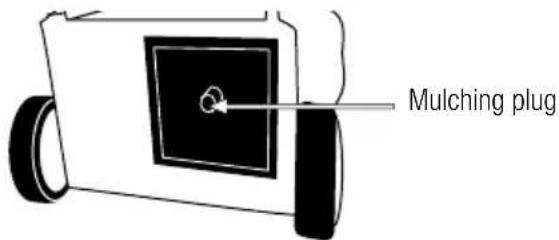
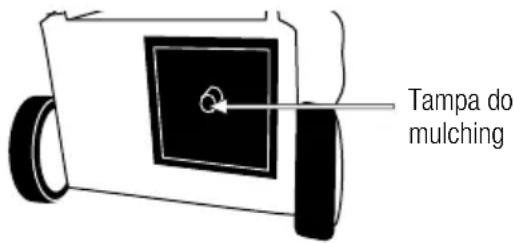
text_image
Mulching plug6.2.5. FUEL

IMPORTANT: The fuel used for this machine is highly flammable. If the fuel or the machine ignites, put out the fire with a dry
powder extinguisher.

Petrol and oil are extremely flammable and explosive under certain conditions. Do not smoke and keep flames, sparks or heat away from the machine.
Use unleaded gasoline 95 octane.
Do not use fuel that has been stored for longer than 2 months. A fuel stored for too long will cause the starting of the machine to be more difficult and result in unsatisfactory engine performance. If the fuel
has been in the machine's tank for longer than two months, empty the tank and replace it with fuel in perfect condition.
FILLING THE FUEL TANK
- Choose a suitable area to perform this operation.
- Remove the fuel tank cap and fill with fuel.
- Tightly close the fuel tank's cap and remove all the fuel that spilled with a dry cloth.
WARNING:
Stop the engine before refueling.
Do not start the machine in a room or enclosure. The exhaust gases, fumes from the fuel and oil contain carbon monoxide and harmful chemicals. In the case of a concentration of gases produced by poor ventilation, remove everything that prevents the flow of clean air from the work area in order to improve ventilation. Do not return to work in the area until you are sure that you have properly ventilated the area and are clear that ventilation is sufficient as to not happen again in this concentration
Do not refuel fuel in locations where there is the presence of open flames, sparks or heat sources. Fill the tank always in well-ventilated areas and with the motor stopped. Not overflow the fuel to overfill the fuel tank. In the event of a fuel leak be sure to remove these leaks completely before starting, move the machine away from the area of spillage and avoid any source of ignition until all vapors are gone.
Separate yourself at least 3 meters from the refueling area before starting the machine.
Add fuel before starting the machine. Never remove the cap of the fuel tank while the engine is running or when the machine is hot.
Do not use fuels such as ethanol or methanol. These fuels will damage the engine of the machine.
6.2.6. ENGINE OIL
Read carefully the engine instruction manual.
For transportation reasons, your machine's engine comes from the factory without any oil in it. Before starting the engine for the first time you must put oil the engine.
This engine uses quality oil for 4-stroke, 20w-40 viscosity.
The capacity of the engine's crankcase is 0, 6l.
Filling the oil sump:
- Place the machine on a flat, horizontal and uncluttered surface.
- Unscrew the oil filler cap.
- Insert the filled 0, 6l of oil tube.
- Wait 1 minute for the oil to completely go down to the crankcase.
- Clean the dipstick from the oil with a cloth.
- Insert the rod and screw on the oil cap.
- Unscrew the plug again and check the mark left by oil on the dipstick. The mark left by the oil must be between the minimum and maximum marks.
- If the mark is below the minimum, add a little more oil and recheck.
- If the mark is above the maximum, you will have to remove oil from the crankcase. To do this, tilt the machine and let out a little oil (put a container at the end of the tube to prevent oil spilling on the machine or the ground).
6.3. START-UP
6.3.1. CHECKPOINTS BEFORE COMMISSIONING
Do not use machine is if it is damaged or incorrectly regulated.
Use this machine for the purpose for which it was designed. Any other use may be dangerous for the user, for the machine and for persons, animals and things that may be around.
Check:
- The machine completely and look for loose and damaged parts (screws, nuts, etc.).
- That there are no fuel leaks.
- The crankcase oil level.
- The air filter is clean. Clean the filter if necessary.
Tighten, repair or replace everything you need before using the machine.
Do not use any accessory on this machine outside of those recommended by Garland since its use could result in serious injury to the user, machine, and the people, animals and things close to the machine.
Before starting the lawnmower, make sure that the moving parts of the machine are not in contact with any object.
6.3.2. STARTING THE ENGINE
Start the engine carefully, in accordance with the instructions, and feet away from the blade.
Do not tilt the lawnmower when starting the engine unless the machine has to be tilted for starting. In this case, more than absolutely necessary do not tilt it, and lift only the part farthest from the operator.
6.3.2.1. COLD-STARTING THE ENGINE
Place the machine on a flat and stable surface in order to start it.

text_image
START NPlace the air level in the "START" N position.

natural_image
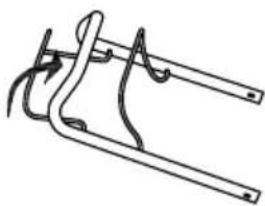
Abstract line drawing with curved arrows and a star-like shape (no text or symbols)Push the safety switch bar until it touches the upper handle.

natural_image
Silhouette of a person pushing a lawn mower (no text or symbols)Place yourself behind the mower as shown in the figure and pull the Starter rope until the engine starts.

text_image
RUN IIIPlace the air lever In the normal working positon "RUN" III.
Allow the engine to warm up for a few minutes before starting to use the machine.
6.3.2.2. STARTING WITH A HOT ENGINE
Place the machine on a flat and stable surface in order to start it.

text_image
RUN IIIPlace the air lever in the normal working position "RUN" III.
Push the safety switch bar until it touches the upper handle.
Place yourself behind the mower and pull the Starter rope until the engine starts.
If after a few tries the engine does not start, follow the instructions for starting cold-starting the engine.
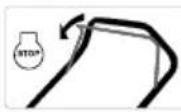
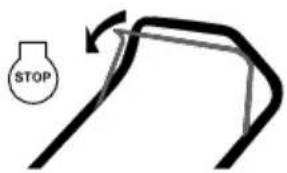
6.4. STOPPING THE ENGINE
text_image
STOPTurn of the engine by releasing the safety switch.
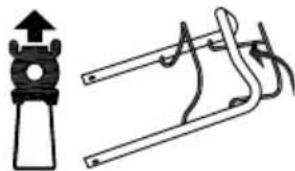
6.5. TRACTION DRIVE
natural_image
Simple line drawing of a mechanical clamp or bracket (no text or symbols)
Press the traction handle against the handlebar, as shown in the figure, and the mower traction will start operating.
6.6. CHECKPOINTS AFTER STARTING THE MACHINE
It is important to pay attention to the possible individual parts or and the temperature of the machine. If you detect any anomaly in the machine immediately stop and check it carefully.
In case of any malfunction or problem take the machine to a service technician to be repaired.
Under no circumstances must you continue to use the machine if the operation does not seem appropriate.
Do not use the machine if it is damaged or improperly adjusted.
7. USING THE MACHINE
⚠️ Use this machine only for the designated purposes. Using this chainsaw for any other use is dangerous and can cause bodily harm and/or damage to the machine.
Do not start the machine in a room or enclosure.

The exhaust gases and fuel and oil vapors contain carbon monoxide and harmful chemicals. In case of a concentration of gases produced by poor ventilation, remove all that impedes the flow of clean air to improve ventilation from the work area and not return to work in the area unless you have properly ventilated area and have clear that ventilation is sufficient so that does not happen this concentration again.
Work only in daylight or good artificial light. Do not use this machine at night, with fog or with a low visibility which do not allow you to clearly see the working area.
Whenever possible, avoid using this machine when the ground is wet. Pay special attention if you use this machine when it is raining or after it has rained, as the ground will be slippery and you could slip and fall.
Do not use this machine on slopes greater than 15^ . Cutting on hilly areas can be dangerous.
Be alert when you walk on slopes or wet grass. Slopes always cut horizontally, not cut bottom up or top down. Be especially careful when changing direction on a slope.
Never cut with the mower in reverse or by pulling it. Be alert when you back up or pull the mower towards you.
Do not tilt the machine with the engine running except in the special case that you have to start cutting an area with tall grass. This is the only case in which you can raise the front wheels slightly to facilitate entry of the mower to the work area. Stop the lawnmower's engine if you tilt it to cross surfaces other than grass and when transporting the lawnmower to and from the area to be cut.

Do not go near the machine's cutting tool when it is running. Danger! Risk of finger amputation.
Keep hands and feet away from the blades.
Do not solely rely on the security features of this machine.
It is necessary to pay attention to the possible loosening or overheating of the parts of the machine. If you detect any anomaly immediately stop the machine and check it carefully.
In case of mechanical failure take the machine to the technical service for repair. You should not continue working if you notice that the operation is not correct.
Remember to always use the machine with clean hands and without any fuel or oil remains.
Clean the work area and remove all obstacles that may cause accidents. Check the work area when going to work and remove all items that could become entangled in the cutting tool. Also remove all the objects that the cutting tool can violently eject while in operation.
Do not allow anyone to enter the work perimeter. This work perimeter must be 15 meters and is a danger zone.
You must turn off the engine when you are moving between work areas.
Never leave this machine unattended.

Be careful not to touch the hot parts of the machine while the engine is running or after use, such as exhaust, spark plug or high voltage cables.
Do not use other accessories this machine except those recommended by our company since its use could cause severe damage to the user, people close to the machine and the machine itself.
Always follow the safety rules given in this manual.
7.1. HOLDING AND GUIDING THE MACHINE

natural_image
Silhouette of a person pushing a lawn mower (no text or symbols)While working, always hold the lawnmower with both hands on the handlebar.
Stand behind the mower and direct it while walking behind it.
This lawnmower is self-propelled. Do not push the mower; allow it to continue at its speed and limit yourself to directing the machine in the work area.
7.2. ADJUSTING THE CUTTING HEIGHT
WARNING! Stop the machine and wait until the blade stops before proceeding to adjust the height. Blades need a few moments to stop completely after you turn off the engine.
natural_image
Close-up of a car wheel and tire assembly (no visible text or symbols)To regulate the cutting height adjustment, press the mower level away from the lawnmower and move it forward or backward to the desired height.
7.3. CUTTING WITH THE LAWNMOWER
This mower has 3 different cut settings (cutting with debris collection, with lateral discharge and mulching cut. Before you begin working, you must configure the mower to set it one of the three possible ways.
Cutting with debris collection:
In this setting, the mower will cut the grass and send it to the collector bag. The grass will be cut and the rest of grass cut within the bag. For the debris collection setting, place the bag in the back of the machine and make sure that the lateral outlet cover is closed and the mulching plug is not installed.
natural_image
Line drawing of a lawn mower with visible blades and wheels (no text or symbols)Cutting with lateral discharge:
In this setting, the cut grass exits the side of the lawnmower and the grass debris remains on the lawn. In this case the machine must not have the bag installed, the rear output cover should be closed, and the mulching plug and lateral deflector must be installed.
natural_image
Line drawing of a lawn mower with a mounted device (no text or symbols)Mulching cut:
In this setting the mowed grass will be on the lawn, but unlike the lateral discharge cutting setting, the cut grass is crushed into small particles that are deposited on the lawn thus generating an organic fertilizer that
provides nutrients and helps maintain moisture. For this setting the bag and side deflector must not be installed. The mulching plug should be installed and the rear output cover and side cover must be closed.
natural_image
Line drawing of a lawn mower with a mounted pump (no text or symbols)Place the mower in a corner of the lawn area to be cut and set the desired cutting height.
Check that the bag is properly installed; make sure that the blade is not in contact with any object, and start the mower.
Walk on the grass to the rhythm of the mower.
Do not tilt the machine with the engine running except in the case that you have to start cutting tall grass, which is the only case in which you may raise the front wheels slightly to facilitate entry of the mower to the work area.
Note: If the grass is very high it will be difficult for you to start the engine. If the grass is very high, you should slightly raise the lawnmower's front wheels, forcibly pushing down with the handle, and start your lawnmower in this position. Once the engine has acquired the normal engine speed slowly lower the mower wheels while the machine starts to cut. Alternatively, if next to the lawn area there is a flat surface free of objects and without grass (Earth, screed, concrete), start the lawnmower in the clear area and entering the grass area by slightly lifting the front wheels of the lawnmower.
If the engine's rotation speed goes into excess or it stops, it means that the grass is too high for the lawnmower's cutting capacity and forcing this can be harmful to the machine. In this case, make a first cut at the machine's maximum height and then a second cut at the desired height.
7.4. EMPTYING THE BAG
Empty the lawnmower's bag as soon as you notice it is full. You will notice that the bag is full because the mower will stop picking up the cut grass as well, leaving many remains on the ground.
Whenever you are going to empty the bag, turn off the engine and check that the blade has stopped before removing the bag.
- Lift the lid from the rear exit.
- Lift the sack.
- Remove the bag back.
- Empty the bag.
- Lift the lid from the rear exit.
- Place the bag by hooking the protrusions on the chassis of the bag to the recess of the handlebar attachment.
7.5. RECOMENDATIONS
Always cut the grass when it is dry. Avoid mowing the lawn when it is wet after having watered or after having rained.
Cut less than 2 cm of grass at a time. If your lawn is very high, it is advisable to make successive passes with the 2 cm cutting height every time. So no it will force both machine.
Cut your lawn often, at least once a week in spring and summer.
Do not always make the same route when mowing. It is best to change your route to avoid the grass being cut in the same direction.
If you need to move the mower between two lawn areas always first switch off the mower.
Sharpening the blade: A dull blade requires more energy. A dull blade also cuts badly and makes the grass yellow.
To obtain a green and bushy lawn, it is necessary to frequently cut and aerate it regularly, providing the necessary manure or fertilizer.
The cutting frequency will depend on growth (May-June). You will need to cut one or two times a week.
At other times of the year, it will be enough to cut it only once a week.
8. MAINTENANCE AND SERVICE
Read carefully the engine instruction manual.
Perform the following maintenance operations and care when you have finished working with the machine to ensure the smooth running of this machine in the future. For complete maintenance, we recommend you take the lawnmower to your service technician.
Perform maintenance with the frequency indicated in the following table:
| Operation | Before each use | After the first 2 hours of use | Every 5 hours of use | Every 25 hours of use | Every 50 hours of use | Every 100 hours of use | Every 300 hours of use | First use of the season | After the last use of the season |
| Check that there are no loose parts | ● | ||||||||
| Check the status of the blades | ● | ||||||||
| Check the oil level | ● | ||||||||
| Change the engine oil | ● | ● | ● | ● | ● | ● | |||
| Clean the air filter | ● | ● | ● | ||||||
| Check the spark plug | ● | ● | |||||||
| Sharpen the blade ● ● ● |
It is necessary to stop the engine and check that the cutting tool is stopped before cleaning or transporting the machine.
It is necessary to stop the engine cleaning or transporting the machine.
Before performing any maintenance or repair on the machine make sure that the engine has stopped and remove the spark plug pipe.
Only perform machine maintenance with the machine on a flat, cleared surface.
Do not attempt to repair the lawnmower when it is on or in motion.
WARNING! Do not modify the machine or cutting elements (blade). Improper use of these elements can cause SERIOUS PERSONAL DAMAGE OR DEATH. Use only suitable replacement for this machine in order to obtain a proper performance of the machine.
This replacement can be found in the official distributors of the machine. The use of other spare parts can cause risks, damage to the user, people around and the machine.
Do not adjust the carburetor. If necessary, take your machine in for service. Carburetor adjustment is complicated, and only the technical maintenance service must do them. Incorrectly setting the carburetor may cause damage to the engine and will be cause for cancellation of the warranty.
⚠️ Removing the security devices, improper maintenance, or replacements with non-original spare parts can cause injury.
8.1. MAINTENANCE AND CARE AFTER USE
Perform the following maintenance operations and care when you have finished working with the machine to ensure the smooth running of this machine in the future.
8.1.1. GENERAL CHECKPOINTS AND CLEANING
Keep the machine clean, especially the area of the fuel tank and areas close to the air filter.
Cleaning of the area of the blade:
- Stop the engine and allow the engine to cool.
- Tilt on the side opposite to the mower air filter, so that the air filter is on top.
- Remove any grass clippings using a scraper and brush.
- Once you have removed the grass clippings you can use a stream of water for a more thorough cleaning. Direct the water jet towards the blade, the inside of the casing and nozzle exit from the crankcase into the collecting bag. Never direct the high-pressure cleaner jet to the transmission or engine parts. If water gets in the ignition system or carburetor, damage and failures occur.
- Replace the mower in normal position (all four wheels on the ground), start the mower and let it run for a couple of minutes.
Starting the lawnmower after cleaning is important because:
- Having lopsided the engine, the engine oil must return to the crankcase. Starting the engine will encourage this return.
- If you have used water for cleaning the engine there will be unintentional wetness.
Start the engine and let it run a couple of minutes so the heat from the engine evaporates any water remaining in the area of the engine.
Collecting bag:
You can use water to clean the collecting bag. Make sure the bag is perfectly dry before reinstalling it.
Other areas:
Clean the rest of the machine with a cloth dampened in water. Never use gasoline, solvents, detergents, water or any other liquid.
8.1.2. CHECKING THE COLLECTING BAG
Check the bag. If the bag is worn or deteriorated, install a new one.
8.1.3. CHECKING THE ENGINE'S OIL LEVEL
- Place the machine on a flat, horizontal and uncluttered surface.
- Unscrew the oil filler cap.
- Clean the dipstick from the oil with a cloth.
- Insert the rod and screw on the oil cap.
- Unscrew the plug again and check the mark left by oil on the dipstick. The mark left by the oil must be between the minimum and maximum marks.
- If the mark is below the minimum, add a little more oil and recheck.
- If the mark is above the maximum, you will have to remove oil from the crankcase. To do this, tilt the lawnmower and let out a little oil (put a container at the end of the tube to prevent oil spilling on the machine or the ground).
The sharpening of the blade should be done by the service technician. Do not sharpen the blade. The blade should be sharp to guarantee the right cutting angle and the balance of the blade. Sharpening the blade without being an expert may cause excessive vibrations that can cause damage to your machine and problems for the user.
Take your blade to be sharpened if, when mowing, small strands at the tips of the grass remain and yellow quickly.
8.2. PERIODIC MAINTENANCE
⚠️ Read carefully the engine instruction manual.
Perform regular inspections of the machine in order to ensure effective operation of the machine. For a complete maintenance service, we recommend you to take the lawnmower to your service technician.
Always use adequate replacement parts in order to obtain a proper performance of the product and avoid damage and risks to machine and user.
Replacement parts should be purchased at the official service dealer. The use of non-official spare parts may cause risk of accident, injury to the user and scrapping of the machine.
8.2.1. AIR FILTER
The dirt in the air cleaner will cause a reduction in the performance of the machine. Check and clean this element. If you notice damage or alterations to the filter, replace it with a new one.
Note: The engine must never operate without the air filter installed.
8.2.2. CHANGING THE ENGINE OIL
Perform the oil change only while the engine is still hot.
WARNING! You must not throw old oil in a pipeline network or on the Earth.
The contamination of groundwater and
water tables is subject to heavy fines. There are
special collection places at service stations. If not, any municipal authority will give you the relevant information.
Note: You have two procedures at your disposal to empty the engine oil. You can drain the oil by loosening the drain screw located at the base of the filling canal or you can use the Garland engine oil cleaner (ref.: 7199000020, not included with the machine, which can be found at your nearest Garland dealer) and suck the oil through the filling tube of the machine.
For easy implementation, cleaning, and safety, we recommend that you clean the oil.
To change the oil:
- Place the machine on a flat, horizontal and uncluttered surface.
- Empty the engine oil:
(a) If it sucks the used oil: remove the engine oil plug and vacuum the motor oil by inserting the Garland vacuum cleaner tube (REF.: 7199000020, not included with machine) to the bottom.
b) If you choose to empty the drain through the drain plug, please note the trajectory that the oil will take when falling into the chassis of the lawnmower, place a large container to catch all of the oil before it spills on the ground.
We recommend that you put a big plastic covering in the area in which you will change the oil so that oil does not fall on the ground. Once the work area is prepared, remove oil drain plug and slightly tilt the lawnmower so that the oil comes out and falls into the container.
Empty the engine oil into a suitable container so that you can carry it to a proper clean point. Insert the filled 0, 6l of oil tube.
Wait 1 minute for the oil to completely go down to the crankcase.
Clean the dipstick from the oil with a cloth.
Insert the rod and screw on the oil cap.
Unscrew the plug again and check the mark left by oil on the dipstick. The mark left by the oil must be between the minimum and maximum marks.
If the mark is below the minimum, add a little more oil and recheck.
If the mark is above the maximum, you will have to remove oil from the crankcase. To do this, tilt the machine and let out a little oil (put a container at the end of the tube to prevent oil spilling on the machine or the ground).
8.2.3. CHECKING THE SPARK PLUG
When it comes to starting a machine, the most common problems are produced by a dirty spark plug or one in poor condition. Clean and check the spark plug regularly. Check that the electrode gap is correct (0.6 - 0.7 mm).
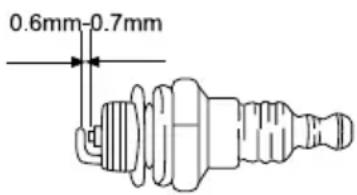
text_image
0.6mm-0.7mm9. TROUBLE SHOOTING
If the machine does not start, check the compression of the engine and the spark from the spark plug. Depending on the symptoms that you notice, you can discover the probable cause and solve the problem.
| The cylinder's compression is normal | The spark plug is OK | Probable Cause Corrective | Action |
| YES YES | No fuel in the tank Fill fuel tank with fuel | ||
| The gasoline filter is dirty Clean the filter | |||
| There is water in the fuel Replace fuel | |||
| The gasoline used is not the right kind | Change the fuel with one with proper octane | ||
| The carburetor is dirty | Send your machine to the service technician | ||
| YES No | The switch is “O” Turn the switch to “I” | ||
| The spark plug is dirty Clean the spark plug | |||
| The spark plug pipe is not connected Connect the spark plug | |||
| No compression | YES | The spark plug is loose Tighten the spark plug | |
| The piston and its segments are worn | Send your machine to the service technician | ||
| The cylinder is scratched | Send your machine to the service technician | ||
| The engine does not turn | Cold engine | Send your machine to the service technician | |
If the engine motor does not work properly (lack of power, unstable idling, etc.) below is a series of symptoms, their probable cause and solutions.
| Symptom Probably cause Corrective action | ||
| The machine beeps | Worn segments Send your machine to the service technician | |
| Used piston Send your machine to the service technician | ||
| Crankshaft clearance Send your machine to the service technician | ||
| Slack in the clutch Send your machine to the service technician | ||
| The engine overheats | Dirty exhaust pipe Send your machine to the service technician | |
| Unsuitable fuel Replace the fuel | ||
| Dirty carburetor Send your machine to the service technician | ||
| The engine does not turn over | Dirty air filter Clean the filter | |
| Dirty air filter Clean the filter | ||
| Poorly-adjusted carburetor Send your machine to the service technician | ||
| The engine stops or does not maintain an idle state. | Poorly-adjusted carburetor Send your machine to the service technician | |

Read carefully the engine instruction manual.
In the case of not being able to solve the problem, take your machine in for a service check. To locate the after-sales service nearest to your location, please contact the point of sale where you purchased the machine.
10. TRANSPORT
Never lift or transport the rotary tiller while the engine is running. It is necessary to always turn off the engine when transporting the machine between different working areas.
Once the machine is turned off, wait 5 minutes to allow it to cool before transporting it. The machine's exhaust pipe will remain hot after turning off the engine.
If you have to raise the machine, check the weight of the machine in the technical characteristics before lifting it to ensure that it is a weight that you can withstand.
If you are transporting the rotary tiller in vehicles, secure it firmly to prevent it from slipping or tipping over.
11. STORAGE
Once the machine is off, wait 5 minutes for it to cool down before storing the machine. The machine's exhaust pipe will remain hot after turning the engine off. Do not ever store the machine in places near flammable materials (dried grass or wood...), gas or fuels.
Be sure to store the machine in a place not accessible to children or that it creates possible danger for anyone and that is dry, clean and at a temperature between 0^ C and 45^ C.
Before storing the machine follow the directions in the maintenance chapter.
If you plan to store the machine in a closed place, first empty the fuel. Vapors could come into contact with a flame or hot body and ignite. If the fuel tank has to be emptied, this must be done outdoors and according to the regulations of recycling.
To reduce the risk of fire, keep the engine, muffler and fuel tank clean by eliminating the remains of cut material, oil and grease.
12. RECYCLING OR DISPOSAL OF YOUR MACHINE
Protect the environment. Recycle this machine's used oil by taking it to a recycling center. Do not pour used oil in drains, land, rivers, lakes, or seas.
Dispose of your appliance sustainably. We should not get rid of machines with domestic waste. Plastic and metal components can be classified according to their nature and recycled.
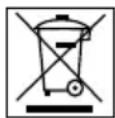
The materials used to pack this machine are recyclable. Please do not throw the packaging away with domestic trash. Throw these packages away at an official collection point.

13. WARRANTY CONDITIONS
13.1. WARRANTY PERIOD
- According to the following described terms (1999/44 CE) the warranty period is 2 years from the purchase date, and it will cover faulty pieces owing to an incorrect manufacture.
13.2. EXCLUSIONS
Garland warranty will not cover:
- Pieces worn out due to wear and tear.
- Bad use, negligence, lack of maintenance.
- Failures that turn out because of an incorrect use of the product, Garland will not be responsible if the replaced parts of the machine are not from Garland and if the machine has been modified in any way.
13.3. TERRITORY
- Garland warranty covers the country.
13.4. IN CASE OF INCIDENCE
- The warranty should be correctly filled in with all the information requested, and the invoice or the purchase ticket should be attached.
WARNING!
TO GUARANTEE THE CORRECT FUNCTIONING OF THE MACHINE AND MAXIMUM SECURITY, WE ASK YOU TO READ THE INSTRUCTION MANUAL FULLY AND CAREFULLY PRIOR TO USING THE MACHINE.
DECLARATION OF CONFORMITY (CE)
Who has signed below, Juan Palacios, authorised by Glasswelt S.L., with the following address C/ La Fragua 22, 28932, Móstoles, España, declares that the products brand Garland models GRASS 1055 ZSH (DY200-160SM) with serial number of year 2015 on (the year of manufacture is clearly indicated on the tool identification plate, followed the serial number) and whose function is “machine with grass-cutting attachment(s) where the cutting device operates in a plane approximately parallel to the ground and which uses the ground to determine the height of cut by means of wheels, air cushion or skids, etc., and which utilises an engine or an electric motor for a power source. The cutting devices are either rigid cutting elements”, comply with all the requirements stated by the Directive 2006/42/EC of the European Parliament and of the Council of 17 May 2006 on machinery, and amending Directive 95/16/EC.
These tools also comply with the requirements of the following community directives:
- Directive 2004/108/EC of the European Parliament and of the Council of 15 December 2004 on the approximation of the laws of the Member States relating to electromagnetic compatibility and repealing Directive 89/336/EEC.
- Directive 2000/14/EC of the European Parliament and of the Council of 8 May 2000 on the approximation of the laws of the Member States relating to the noise emission in the environment by equipment for use outdoors.
- Commission Directive 2010/26/EU of 31 March 2010 amending Directive 97/68/EC of the European Parliament and of the Council on the approximation of the laws of the Member States relating to measures against the emission of gaseous and particulate pollutants from internal combustion engines to be installed in non-road mobile machinery.
The examinations of the European Community Directives have been carried out by the following notified bodies whose Certificate numbers figure below:
• 2006/42/EC, Certificate number: 141001077SHA-V1.
• Intertek Testing Services.
• Harmonized Standard: EN ISO 5395-1: 2013, EN ISO 5395-2: 2013, 2006/42/EC.
| Power (kW) 2,8 | |
| A-weighted sound power level LwA (dB(A)) 95,71 | |
| Guaranteed sound power level dB(A) (ISO 5395-1:2013, Annex F) 96 |

Juan Palacios
Product Manager
Móstoles 09-01-2015

text_image
Glasswelt LAWN MACHINERY SPECIALISTSC/ La Fragua, 22 Pol. Ind. Los Rosales 28933 MÓSTOLES (Madrid) ESPAÑA
TABLE DE MATIERES
Conforme directives CE.

natural_image
Two mechanical clamps with different end caps and mounting features (no text or symbols)text_image
Labeled diagram of a lawn mower with numbered parts for identification6. INDICATIONS POUR LA MISE EN SERVICE
6.1. DESASSEMBLAGE ET LISTE DE MATERIELS
natural_image
Pure mechanical diagram showing a bracket with bolt holes and a nut, no text or symbols presentnatural_image
Pure technical diagram of a pipe joint with a tool, no text or symbols presentnatural_image
Diagram showing a cable being inserted into a clip, with an arrow indicating the insertion direction (no text or symbols present)6.2.2. MONTAGE DU SAC
natural_image
Silhouette of a rectangular box with a handle and a triangular stand, no text or symbols present6.2.3. MONTAGE SORTIE LATÉRALE

natural_image
Black and white illustration of a car brake lever and wheel (no text or symbols)text_image
Bouchon mulching6.2.3. CARBURANT

natural_image
Abstract line drawing with curved arrows and intersecting lines, no text or symbols presentnatural_image
Silhouette of a person pushing a lawn mower (no text or symbols)natural_image
Silhouette of a satellite or spacecraft with no visible text or symbolsnatural_image
Diagram showing a mechanical tool with curved blades and a separate view of a handle with an upward arrow (no text or symbols)6.6. POINTS DE VERIFICATION APRES LA MISE EN MARCHE
natural_image
Silhouette of a person pushing a lawn mower (no text or symbols)natural_image
Close-up of a car wheel and tire assembly (no visible text or symbols)natural_image
Line drawing of a lawn mower with visible blades and wheels (no text or symbols)natural_image
Line drawing of a lawn mower with a mounted pump (no text or symbols)Coupe mulching:
natural_image
Line drawing of a lawn mower with a closed lid and wheels (no text or symbols)text_image
0.6mm-0.7mm9. RESOLUTION DES PANNES
natural_image
Two mechanical clamps shown side by side, one upright and one angled (no text or symbols)text_image
Labeled diagram of a lawn mower with numbered parts for identificationnatural_image
Pure mechanical diagram showing a bracket with bolt holes and a dashed line indicating alignment (no text or symbols)natural_image
Pure mechanical diagram showing a tool interacting with a curved pipe or duct (no text or symbols)natural_image
Diagram showing a cable being inserted into a clamp, with an arrow indicating the insertion direction (no text or symbols present)6.2.2. MONTAGGIO DEL SACCO RACCOGLITORE
natural_image
Silhouette of a box with a handle and a triangular stand, no text or symbols present6.2.3. MONTAGGIO DELL'USCITA LATERALE
natural_image
Black and white illustration of a car steering wheel and dashboard (no text or symbols)natural_image
Abstract line drawing with curved arrows and a star-like shape (no text or symbols)natural_image
Silhouette of a person pushing a lawn mower (no text or symbols)natural_image
Technical line drawing of a mechanical clamp or tool with an upward arrow indicator (no text or symbols present)natural_image
Silhouette of a person pushing a lawn mower (no text or symbols)natural_image
Black and white line drawing of a car wheel and tire (no text or symbols)natural_image
Line drawing of a lawn mower with magazine and wheels (no text or symbols)natural_image
Line drawing of a lawn mower with a mounted motor (no text or symbols)Taglio mulching:
natural_image
Line drawing of a lawn mower with a mounted lawn pump (no text or symbols)text_image
0.6mm-0.7mmnatural_image
Two mechanical clamping tools shown in line drawings: a cylindrical device with an upward arrow and a lever mechanism (no text or symbols)text_image
Labeled diagram of a lawn mower with numbered parts for identificationnatural_image
Pure technical diagram of a mechanical component with no text or symbolsnatural_image
Pure technical diagram of a pipe joint with a tool, no text or symbols presentnatural_image
Simple line drawing of a rope knot with a hook and a separate loop, no text or symbols present6.2.2. MONTAGEM DO SACO
natural_image
Silhouette of a box with a handle and a triangular stand, no text or symbols present6.2.3. MONTANDO DA SAÍDA LATERAL
natural_image
Black and white illustration of a car wheel and dashboard (no text or symbols)Levante a tomada de lado cobrir e instalar o defletor de lateral.
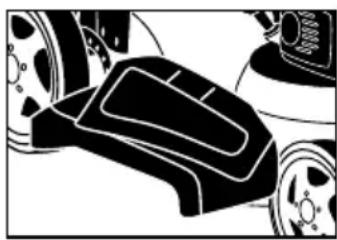
6.2.4. MONTAGEM DA TAMPA MULCHING
Levante a tampa da saída traseira e instale a tampa de mulching no canal de saída traseira, como mostra a figura. Abaixe a tampa de saída traseira.
text_image
Tampa do mulching6.2.5. COMBUSTÍVEL

natural_image
Abstract line drawing with curved arrows and a star-like shape, no text or symbols presentnatural_image
Silhouette of a person pushing a lawn mower (no text or symbols)natural_image
Technical line drawing of a mechanical tool with a separate view showing a handle and lever mechanism (no text or symbols)natural_image
Close-up of a car wheel and tire assembly (no visible text or symbols)natural_image
Line drawing of a lawn mower with magazine and wheels (no text or symbols)Corte com descarga lateral:
natural_image
Line drawing of a lawn mower with a mounted device (no text or symbols)Corte mulching:
natural_image
Line drawing of a lawn mower with a mounted pump (no text or symbols)text_image
0.6mm-0.7mmnatural_image
Two mechanical clamping tools with no visible text or symbolsnatural_image
Pure mechanical diagram showing a bracket with bolts and a pin, no text or symbols presentnatural_image
Pure technical diagram of a pipe joint with two pins, no text or symbols presentnatural_image
Diagram showing a cable being inserted into a clip, with an arrow indicating direction (no text or symbols present)natural_image
Silhouette of a rectangular box with a curved cutout and a triangular stand, no text or symbols present.natural_image
Black and white illustration of a car's steering wheel and dashboard (no text or symbols)natural_image
Silhouette of a mechanical joint or clamp (no text or symbols)natural_image
Abstract line drawing with curved arrows forming a loop (no text or symbols)natural_image
Silhouette of a person pushing a lawn mower (no text or symbols)natural_image
Silhouette of a satellite or spacecraft with no visible text or symbolsnatural_image
Silhouette of a mechanical device with 'RUN III' text above it (no other symbols or text)natural_image
Technical line drawing of a mechanical clamp or tool with a separate view of its handle (no text or symbols present)natural_image
Silhouette of a person pushing a lawn mower (no text or symbols)natural_image
Close-up of a car wheel and tire assembly (no visible text or symbols)natural_image
Line drawing of a lawn mower with visible blades and wheels (no text or symbols)natural_image
Line drawing of a lawn mower with visible blades and wheels (no text or symbols)Κοπή λίπανσης:
natural_image
Line drawing of a lawn mower with a mounted lawn pump (no text or symbols)text_image
0.6mm-0.7mmIs this your first toll of this type?
SEE YOUR SERVICE MANUAL
FOR FULL WARRANTY DETAILS
PARA INFORMAÇÕES DETALHADAS SOBRE GARANTIAS
É FAVOR CONSULTAR O MANUAL QUE ACOMPANHA A MÁQUINA
LIRE LA NOTICE POUR LES DÉTAILS
SUR LA GARANTIE
TIPO DE MÁQUINA
TYPE OF MACHINE
TYPO DE MAQUINA
TYPE DE MACHINE
MODELO
MODEL
MODELO
MODÈLE
FECHA DE COMPRA
DATE OF PURCHASE
DATA DE COMPRA
DATE D'ACHAT
DISTRIBUIDOR
DEALER
REVENDEDOR
DISTRIBUTEUR