BO953CAL - Cooker BOMPANI - Free user manual and instructions
Find the device manual for free BO953CAL BOMPANI in PDF.

Frequently Asked Questions - BO953CAL BOMPANI
User questions about BO953CAL BOMPANI
0 question about this device. Answer the ones you know or ask your own.
Ask a new question about this device
Download the instructions for your Cooker in PDF format for free! Find your manual BO953CAL - BOMPANI and take your electronic device back in hand. On this page are published all the documents necessary for the use of your device. BO953CAL by BOMPANI.
USER MANUAL BO953CAL BOMPANI
USO ACCESSORI DEL FORNO
0 145 1,0 kW - Plaque Normale
0 180 1,5 kW - Plaque Normale
PUISSANCES DES ELEMENTS
resistance sole 1,1 kW
RECOMMANDATIONS IMPORTANTES:
Technical data and specifications 19
Installation 20-22
Ventilation 20
Positioning 20
Fitting the feet 20
Balancing the lid 20
Gas cylinder connection 20
Gas connection 20
Adapting to different types of gas 21
Replacing the injectors 21
Regulating the air 21
Minimum setting 21
Electrical connection 21
Electric ignition 21
Safety device 22
For the user 22-25
Ventilation 22
Igniting the burners 22
Igniting the gas oven 22
Igniting the gas grill 22
Safety device 22
Electrical switch-on 22
Using the gas hob 23
Using the electric hot-plates 23
Using the gas oven 23
Using the gas or electric grill 23
Using the static electric oven 4 23
Using the static electric oven 4 New 23
Using the multifunction electric
oven with 4 cooking programs 24
Using the multifunction electric oven 24
Using the rotisserie 24
Using the minute minder 24
Using the single-control cooking timer 24
Warming compartment 24
Using oven accessories 24
Removing the oven door. 24
Advice and precautions 24
European Directive 2002/96/EC (WEEE) 25
European Regulation 1935/2004 25
Figures 58-60
- Thank you for choosing one of our quality products, capable of giving you the very best service. To make full use of its performance features, read the parts of this manual which refer to your appliance carefully. The Manufacturer declines all responsibility for injury or damage caused by poor installation or improper use of the appliance.
- To ensure its appliances are always at the state of the art, and/or to allow constant improvement in quality, the manufacturer reserves the right to make modifications without notice, although without creating difficulties for users.
- When ordering spare parts, inform your dealer of the model number and serial number punched on your appliance's nameplate, visible inside the warming compartment or on the back of the cooker.
- APPLIANCE COMPLYING WITH THE FOLLOWING DIRECTIVES:
- EEC 2009/142/CE (ex 90/396)
- 2006/95/EC Low Voltage (replaces 73/23/EEC and subsequent amendments)
- EEC 2004/108 (radio-frequency interference)
- European Regulation 1935/2004 (materials in contact with food)
- European Regulation 1275/2008
- EEC 40/2002
- EEC 92/75
-2002/96/EC (WEEE) - 2005/32/CE (Energy-using Products)
FOREWORD
- Refer only to the headings and sections covering accessories actually installed on your cooker.
Technical data and specifications
| Nominal external dimensions | Cookers 96 PB |
| Height at hob | cm 85,0 |
| Height with lid raised | cm 141,0 |
| Depth with door closed | cm 59,0 |
| Depth with door open | cm 100,0 |
| Width | cm 90,0 |
| Usable dimensions | Oven | Electric oven |
| Width | cm 39,5 | cm 39,5 |
| Depth | cm 42,0 | cm 40,0 |
| Height | cm 31,5 | cm 31,5 |
| Volume | I. 52,0 | I. 50,0 |
ELECTRIC HOTPLATES
0 145 1,0 kW - Normal hotplate
0 180 1,5 kW - Normal hotplate
HEATING ELEMENT POWERS
bottom element 1,1 kW
top-bottom element 1,1-1,5 kW
oven circular element 2,0 kW
grill 2,0 kW
fan 25 W
oven light 15 W
Cat.: see nameplate on cover; Class 1 or 2.1
Type "X" cookers
EQUIPMENT
All models are equipped with safety device for oven and grill burners.
Depending on the models, cooker may also have:
- Safety device for one or more hob burners
- Electric ignition on top burners
- Electric ignition on oven and grill burners
- Oven thermostat (or tap)
Electric oven lighting
- Rotisserie
- Grill burner
- Mechanical timer
- One or more electric hotplates
For the LAYOUT OF HOB BURNERS see the models illustrated in figure 1 at the back of this manual.
For the ELECTRIC WIRING DIAGRAM see figure 2 at the back of this manual.
The electrical power is stated on the nameplate visible inside the warming compartment (if present) or on the back of the cooker.
A copy of the nameplate is glued to the cover of this manual (for gas or gas-electric products only).
Useful information concerning the energy consumption of electric ovens.
This information completes and expands on the figures provided on the technical data sticker supplied with the instruction manual.
| Oven96 PBStatic | Oven96 PBFan | Oven96 PBMultifunc. 4 | Oven96 PBMultifunc. | |
| EU environmental qualitymark. | No No | No | No | |
| Time required to cook anormal load in conventionalmode in minutes. | 53,4 | ... | 53,7 | 53,7 |
| Time required to cook anormal load in fan modein minutes. | ... | 55,8 | 51,6 | 55,8 |
| Power consumption instand-by setting in Watts. | ... | ... | ... | ... |
| Usable area of the drippingpan in cm2 | 1156 | 1156 | 1156 | 1156 |
GB
Installation
Table 1 Liquid gas G30-G31 Natural gas G20
| Table 1 Liquid gas G30-G31 Natural gas G20 | |||||||||
| Burner Diameter | (mm) | Thermal powerkw(p.c.s.*) | By-pass1/100(mm) | Nozzle1/100(mm) | Flow*g/h*** | ** | Nozzle1/100(mm) | Flowl/h | |
| Nomin. | Ridot. | ||||||||
| Rapid(Big)R | 110 | 2.80 | 0.80 | 45 | 83 | 204 | 200 | 123 | 267 |
| Semi Fast(Medium) S | 86 | 1.65 | 0.58 | 35 | 65 | 120 | 118 | 97 | 157 |
| Auxiliary(Small) A | 66 | 1.00 | 0.40 | 32 | 50 | 73 | 71 | 77 | 95 |
| Triple Ring (TC)Economic | 145 | 4.00 | 1.50 | 70 | 98 | 291 | 286 | 145 | 381 |
| Oven (Thermostat) | - | 3.00 | 1.00 | 47 | 86 | 218 | 214 | 130 | 286 |
| Oven (Tap) | - | 3.00 | 1.30 | 52 | 86 | 218 | 214 | 130 | 286 |
| Grill | - | 2.00 | - | - | 70 | 145 | 143 | 110 | 191 |
| Supplypressures | Nominal (mbar)Minimum (mbar)Maximum (mbar) | 28-302035 | 201725 | ||||||
- At 15^ C and 1013 mbar-dry gas
Propane P.C.S. = 50,37 MJ/Kg G 31
* Butane P.C.S. = 49,47 MJ/Kg G 30
Natural P.C.S. = 37,78 MJ/m ^3 G 20
City P.C.S. = 15,87 MJ/m³ G 110
INSTALLATION
The appliance must be installed by qualified staff working in accordance with the regulations in force.Before installing, ensure that the appliance is correctly preset for the local distribution conditions (gas type and pressure). The presetings of this appliance are indicated on the nameplate shown on the cover. This appliance is not connected to a flue gas extractor device. It must be installed and connected in accordance with the regulations in force. This appliance may only be installed and may only operate in rooms permanently ventilated in accordance with national regulations in force.
VENTILATION
The rooms in which gas appliances are installed must be well ventilated in order to allow correct gas combustion and ventilation.
The air flow necessary for combustion is at least 2m^3 /h for each kW of rated power.
POSITIONING
Remove the packaging accessories, including the films covering the chrome-plated and stainless steel parts, from the cooker.
Position the cooker in a dry, convenient and draft-free place. Keep at an appropriate distance from walls which may be damaged by heat (wood, linoleum, paper, etc.).
The cooker may be free-standing (class 1) or between two units (in class 2 st 2-1) the sides of which must withstand a temperature of 100^ and which must not be higher than the working table.
FITTING THE FEET (LEVELLING)
Cookers are equipped with adjustable feet to be screwed into their front and rear corners respectively. The feet allow the height of the appliance to be adjusted, in order to set it flush with the adjoining unit, to level it with other worktops and to ensure even distribution of the liquids in pans. See fig. 3.
BALANCING THE LID (present only in a few models)
Models equipped with plate glass lids are fitted with special balanced springs. These are fitted into the hinge to provide smooth, gentle lid closure.
GAS CYLINDER CONNECTION
Make the connection to the butane-propane cylinder using an approved hose from 75 to 80~cm long, following the route shown in figure 4.
The hose must not touch the side near the oven. The maximum gas cylinder size is diameter 31 cm and height 60 cm, with capacity from 10 to 13 kg.
CONNECTING TO THE GAS SUPPLY
Before connecting the cooker, check that it is preset for the gas to be used. Otherwise, make the conversion as described in the section headed "Adapting to different gas types". The connection is on the right; if the pipe has to pass behind the cooker, it must be kept low down where the temperature is about 50 degrees C.
- Rigid connection (see Figure 5, diagram D):
The connection to the mains gas supply may be made using a rigid metal pipe (D). Remove the hose connector and screw the rigid union onto the threaded connection of the gas train. The union for rigid connection is amongst the cooker accessories. - Connection using a rubber hose (see Figure 5, diagrams B and C):
Connect a rubber hose carrying the conformity mark currently in force to the hose connector. The hose must be replaced at the date indicated, and must be secured at both ends using standard hose clamps. It must be absolutely accessible to allow its condition to be checked along its entire length.
- Connection using a metal hose (see Figure 5, diagram D): Make the connection using a hose which complies with national standards, screwing it onto the connector with a ring seal, which is delivered amongst the cooker accessories.
- After installation, check that all connections are airtight.
- For operation with butane/propane, check that the gas pressure is as indicated on the nameplate.
IMPORTANT:
- Use only standard rubber hoses. For LPG, use a hose which complies with the national regulations in force.
- Avoid sharp bends in the pipe and keep it well away from hot surfaces.
GB
Installation
References to the regulations covering the gas connection to the appliance: ISO 7-1.
ADAPTING TO DIFFERENT TYPES OF GAS
If the cooker is not already preset to operate with the type of gas available, it must be converted. Proceed as follows:
- Replace the injectors (see table on page 20);
- regulate the primary air flow;
- regulate the minimum settings.
N.B.: every time you change the type of gas, indicate the new type of gas on the serial number label.
REPLACING THE HOB BURNER INJECTORS (Fig. 6)
- Remove the grid, the burner caps (A), and the burners (B);
- Unscrew and remove the injector in the bottom of each injector holder (C);
- replace the injector in accordance with the table in page 20 using a 7mm socket wrench, tighten and screw right down;
- check that the system is gas-tight;
- replace the burners, the burner caps and the grid.
IMPORTANT:
- Never over-tighten the injectors;
- after replacing, check that all the injectors are airtight.
REPLACING THE OVEN BURNER INJECTOR (Fig. 7)
- Loosen the screw which secures the bottom of the oven;
- remove the oven bottom (pulling it forward);
- remove the oven burner, after taking out the screw which secures it;
- replace the injector using a 7 mm socket wrench.
REPLACING THE GRILL BURNER INJECTOR (Fig. 8)
- Remove the burner after taking out the two screws which secure it;
- replace the injector using a 7 mm socket wrench.
IMPORTANT:
- Never over-tighten the injectors;
- after replacing, check that all the injectors are airtight.
REGULATING THE BURNER AIR
Refer to the table below (indicative values) for regulation of the gap H in mm (fig. 8 for the grill).
| Burner G20 20 | mbar G3028-30 | mbar G31 37mbar |
| Oven | - | - |
| Grill | 4 | 8 |
Check operation of the burner:
- Ignite the burner at maximum flame;
- the tongue of the flame must be clear and with no yellow tip, and must adhere closely to the burner. If too much air is supplied, the flame detaches from the burner and may be dangerous. If the air supply is insufficient, the flame has a yellow tip and soot may form.
SETTING HOB BURNER MINIMUM LEVELS
If the cooker is to work on bottled gas (butane/propane), the tap by-pass must be screwed right down. The cooker may be equipped with type A taps, with by-pass inside (accessed by inserting a small screwdriver into the rod) or type B taps, with by-pass on the outside on the right (accessed directly). See figure 9.
If the cooker is to work on natural gas, proceed as follows for both types of tap:
- Ignite the burner at maximum flame;
- pull off the knob, without using a lever against the control panel, which might be damaged;
- access the by-pass with a small screwdriver and back off by all
3 turns (turning the screwdriver anti-clockwise);
- turn the tap rod anti-clockwise again until it stops: the burner will be at maximum flame;
- screw the by-pass slowly back in, without pushing the screw-driver, until the flame has apparently shrunk to 1/4 of the maximum size, checking that it is sufficiently stable even in quite strong draughts.
SETTING OVEN BURNER MINIMUM LEVELS
If the cooker is to work on bottled gas (butane/propane), the thermostat by-pass must be screwed right down.
If the cooker is to work on natural gas, proceed as follows:
- Remove the oven bottom (loosen the screw to remove the bottom);
- ignite the oven burner, turning the knob pointer to the maximum setting;
- shut the oven door;
- access the thermostat or tap by-pass (see fig. 10);
- back off the thermostat by-pass by about 3 turns;
- after 5 or 6 minutes, turn the knob pointer to the minimum setting;
- slowly re-tighten the by-pass, watching the flame decrease in size through the window in the closed oven door until the tongue of the flame is about 4mm long. Never keep the flame too low. It must be stable even when the oven door is opened or closed quickly;
- turn off the burner and replace the oven bottom.
CONNECTING TO THE ELECTRICAL MAINS
Before making the connection, check that:
- the mains voltage is as indicated on the nameplate;
- the earth connection is in good working order.
For direct connection to a power mains, a device that ensures disconnection from the mains must be installed, with a opening distance for the contacts that allows for a complete disconnection under conditions of category III electrical overload, in conformity with the installation instructions.
If the appliance power lead is not fitted with a plug, use an approved standard type, remembering that:
- the green-yellow wire must be used for the earth connection;
- the blue wire is the neutral;
- the brown wire is live;
- the lead must never touch hot surfaces over about 75 degrees C;
- replacement leads must be of type H05VV-F of suitable size (see diagrams in fig. 2).
- if the appliance is supplied without lead, using type H05VV-F cable of suitable size (see diagrams in fig. 2).
The plug must be easily accessible after the appliance is installed.
IMPORTANT: the manufacturer declines all liability for damage due to failure to comply with the regulations and standards in force. Check that the appliance is correctly connected to the earth (see diagrams in fig. 2 at the back of the manual).
FOR COOKERS WITH ELECTRIC IGNITION
If no spark is generated, do not keep on trying as this might damage the generator.
Possible causes of malfunctions:
- spark plug damp, dirty or broken;
- electrode-burner gap not correct;
- spark plug wire broken or without sheathing;
- spark discharging to earth (to other parts of the cooker);
- generator or microswitch damaged;
- air has built up in the pipes (particularly if the cooker has been out of use for a long time);
- air-gas mixture incorrect (poor fuel setting).
THE SAFETY DEVICE
To check that the valve is working properly, proceed as follows:
- ignite the burner and leave it to work for about 3 minutes;
GB
Installation
For the user
- turn off the burner by returning the knob to off position (
- after 90 seconds for hob burners, 60 seconds for oven and grill burners, turn the knob pointer to the "on" position;
- release the knob in this position and move a burning match towards the burner; IT MUST NOT IGNITE.
Time needed to excite the magnet during ignition: 10 seconds approx.
Automatic tripping time, after flame has been turned off: not more than 90 seconds for hob burners; not more than 60 seconds for oven and grill burners.
IMPORTANT:
- Before doing any work inside the cooker, disconnect the mains plug and shut the gas tap.
- Never use matches to check the gas circuit for leaks. If a specific control device is not available, foam or very soapy water can be used.
- When re-closing the hob, check that the electrical wires of the spark plugs (if present) are not close to the injectors, so that they cannot run across them.
HOW TO USE THE COOKER
VENTILATION
All gas cooking appliances produce heat and moisture in the rooms where they are installed. Take care to ensure that the kitchen is well ventilated; keep the ventilation openings unobstructed or install an extractor hood with fan.
In case of intensive or prolonged use, additional ventilation may be required; open a window, or increase the extractor fan power.
IGNITING THE HOB BURNERS
- Press the knob and turn it anti-clockwise until it reaches the symbol on the control panel (maximum flame position);
- at the same time, move a burning match towards the burner head;
- to reduce the flame, turn the knob further in the same direction until its pointer is against the symbol (minimum flame position).
FOR HOB BURNERS EQUIPPED WITH SAFETY DEVICE
- Press the knob and turn it anti-clockwise until it reaches the symbol on the control panel (maximum flame position);
- move a burning match towards the burner, keeping the knob pressed right dow for about 10 seconds;
- then release the knob and check that the burner remains on. Otherwise, repeat the operation.
IGNITING THE OVEN BURNER
- Open the oven door;
- press the knob and turn it anti-clockwise to the maximum flame position;
- move a burning match towards the hole in the centre of the oven bottom and press the knob right down (see fig. 11);
- check that the burner has ignited, looking through the hole in the centre of the bottom, keeping the knob pressed all the time;
- after about 10 seconds, release the knob and check that the burner remains on. Otherwise, repeat the operation.
IGNITING THE GRILL BURNER (GAS GRILLS)
- fit the knob guard (see fig. 13);
- press the oven knob and turn it to the right until it reaches the stop;
- move a burning match towards the perforated burner pipe and press the knob right down (see fig. 10);
- check that the burner has ignited, keeping the knob pressed down;
- after about 10 seconds, release the knob and check that the burner remains on. Otherwise, repeat the operation.
SAFETY DEVICE
Burners equipped with this device have the advantage that they are protected if they accidentally go out. If this occurs, the supply of gas to the burner concerned is automatically cut off, preventing the hazards deriving from a leak of unburnt gas. The gas supply must be cut off within no more than 60 seconds for the oven and grill burners or 90 seconds for the hob burners.
FOR COOKERS WITH ELECTRIC IGNITION
All the above applies, except that the match is no longer required; a spark is obtained by pressing the button on the control panel once or more, or by pressing the knob of the burner to be ignited.
If electronic ignition is difficult with some types of gas, set the knob on the low (small flame) setting.
- For cookers with electric ignition of the oven and grill burners, ensure the oven door is completely open when these burners are ignited;
- Do not operate the ignition device for more than 10 seconds when igniting the oven and grill burners. If the burner has not lit after these 10 seconds, stop using the device, leave the door open and wait one minute before trying again to ignite the burner. If the
GB For the user
ignition device malfunctions again, light the burner with a match and call the after-sales service.
IMPORTANT:
- Difficulty in igniting burners is normal if the cooker has been out of use for some time. The air accumulated in the pipes will be expelled in a few seconds;
- Never allow too much unburnt gas to flow from the burners. If ignition is not achieved within a relatively short time, repeat the procedure after returning the knob to the off position () ;
- when the oven and grill are lit for the first time, a smell may be noticed and smoke may come out of the oven. This is because of the surface treatment and oily residues on the burners.
HOW TO USE THE HOB BURNERS
Use pans of diameter suitable for the burner type. The flames must not project beyond the base of the pan. Recommended sizes:
- for auxiliary burners = pans of at least 8 cm
- for semi-rapid burners = pans of at least 14 cm
- for rapid burners = pans of at least 22 cm.
N.B.: Never keep the knob at settings between the maximum flame
symbol and the off position (
FOR COOKERS EQUIPPED WITH ELECTRIC HOTPLATES
The different heat settings are obtained as follows:
- 1 = minimum setting for all hotplates;
- 6 = maximum setting for normal and rapid hotplates (with red disc);
-0=off.
Pans must never be smaller in diameter than the hotplates and their bottoms must be as flat as possible (see fig. 14).
IMPORTANT:
- Never leave hotplates on without pans, except when first used; leave for about 10 minutes to dry oil or moisture residues;
- if the hotplate is to be out of use for a long time, apply a little grease to its painted surface;
- do not allow spills to burn onto the hotplate, requiring the use of abrasive cleaners.
- After igniting the burner, leave the oven to heat up for about 10 minutes;
- place the food for cooking in an ordinary oven dish and place it on the chrome-plated shelf;
- place the food in the oven, using the shelf on the third pair of runners whenever possible, and turn the knob pointer to the desired setting;
- cooking can be observed through the window in the door with the oven light on. This will avoid opening and closing the door frequently, unless oil or fat has to be added to the dish.
N.B.: For cookers without thermostat:
- with the knob on the maximum setting = 270 degrees C
- with the knob on the minimum setting = 150 degrees C
- All other temperatures between 150 and 270 degrees C are obtained approximately by positioning the knob between the maximum and minimum settings.
Never leave the knob in positions between the maximum symbol
and the off setting ()
- fit the knob guard (see fig. 13);
- light the burner and wait a few minutes to give the burner time to warm up;
- place the foods on the chrome-plated shelf;
- insert on the highest runner;
- insert the drip tray on the bottom runner;
- gently close the oven door, resting it against the knob guard;
- after a few minutes, turn the food to expose the other side to the infrared radiation (the cooking time depends on the type of food and personal taste).
The table below "Food to be grilled" will serve as a guide.
N.B.: the first time the grill is used smoke will come out of the oven. Before inserting foods for cooking, wait until any oil residues on the burner have completely burnt away.
he grill must only be used at its full rated heat.
IMPORTANT: accessible parts may be hot when the grill is in use! Keep children well away.
| Food to be grilled | Time minutes | |
| 1st side | 2nd side | |
| Thin pieces of meat | 6 | 4 |
| Fairly thick pieces of meat | 8 | 5 |
| Thin fish or fish without scale | 10 | 8 |
| Fairly thick fish | 15 | 12 |
| Sausages | 12 | 10 |
| Toasted sandwiches | 5 | 2 |
| Small poultry | 20 | 15 |
HOW TO USE THE ELECTRIC GRILL WITH GAS OVEN
- ignite the grill heating element;
- place the foods on the chrome-plated shelf;
- insert on the highest runner;
- insert the drip tray on the bottom runner;
- gently close the oven door;
- after a few minutes, turn the food to expose the other side to the infrared radiation (the cooking time depends on the type of food and personal taste).
To see table " Food to be grilled"
The grill element in the top of the oven is switched on by turning the thermostat knob clockwise to the grill symbol on the control panel.
The red light will come on to show the element is in operation.
STATIC ELECTRIC OVEN 4
With different heating elements controlled using a selector switch and regulated by a thermostat, starting from the 0 (off) position, as the knob is turned clockwise the settings available are:
- symbol :the oven light is switched on (it will always remain on even when the knob pointer is turned to the other settings).
- symbol :grill (in top of oven) is switched on.
- symbol _H roaster switches on with grill on.
- symbol oven top and bottom elements switch on (conventional cooking function).
N.B. - The yellow light switches on and off as the thermostat is tripped.
Before placing food for cooking inside, allow the oven to heat up for at least 10 minutes.
STATIC ELECTRIC OVEN " 4 New "
With different heating elements controlled using a selector switch and regulated by a thermostat, starting from the 0 (off) position, the knob can be turned clockwise to the following settings:
- symbol :oven lamp on (it will remain on even if the knob pointer is turned to the other settings).
- symbol :slow cooking using the bottom element; the oven temperature is regulated using the thermostat knob.
- symbol :conventional "static" oven cooking, the oven temperature is controlled using the thermostat knob.
- symbol :grill on.
N.B. - The yellow light switches on and off as the thermostat is tripped.
Before placing food inside, allow the oven to heat up for at least 10 minutes.
GB
MULTIFUNCTIONS ELECTRIC OVEN 4 POSITIONS
With different heating elements controlled using a selector switch and regulated by a thermostat, starting from the 0 (off) position, the knob can be turned clockwise to the following settings:
- symbol 桑:oven lamp on (it will remain on even if the knob pointer is turned to the other settings).
- symbol conventional "static" oven cooking, the oven temperature is controlled using the thermostat knob.
- symbol ①inking with fan oven, on one or two levels, the oven temperature is controlled using the thermostat knob.
symbol grill on;
N.B. - The yellow light switches on and off as the thermostat is tripped. Before placing food inside, allow the oven to heat up for at least 10 minutes.
MULTI-FUNCTION ELECTRIC OVEN
With different heating elements controlled using a selector switch and regulated by a thermostat, this oven offers various cooking methods.
There are three principle sources of heat:
a) Forced heat diffusion (fan oven).
b) Spontaneous heat diffusion (static oven).
c)Infra-red rays (grill).
Starting from the 0 (off) position and turning the selector knob clockwise, the following settings are obtained:
symbol oven light and red light on, fan running.
- symbol :conventional oven cooking without fan, the oven temperature is regulated by means of the thermostat knob.
- symbol :fan oven cooking on one or two levels, the oven temperature is regulated by means of the thermostat knob.
- symbol : fan oven cooking on one or two levels, the oven temperature is regulated by means of the thermostat knob.
- symbol :grill (in top of oven) on, the thermostat knob must be on the maximum temperature setting.
- symbol :grill (in top of oven) on, the thermostat knob must be on the maximum temperature setting. The roaster is in operation.
- symbol x + z : fan oven cooking and grill (in top of oven) on, the oven temperature is regulated by means of the thermostat knob. The roaster is in operation.
In all positions except zero (0) the red warning light and the oven light are on.
NOTE: The yellow warning light comes on according to thermostat variations. Before putting food in to be cooked, the oven should be pre-heated for at least 10 minutes.
HOW TO USE THE ELECTRIC GRILL WITH ELECTRIC OVEN
- For models with "Electric Oven" only, controlled by two knobs separately (selector-thermostat), grilling is permitted with the door closed, without using the front side. Temperatures above 200^ must not be used when grilling with the door closed.
HOW TO USE THE ROTISSERIE
a)Grilling with the door open.
- fit the control knob guard as shown in fig.15.
- ignite the grill burner, or switch on the grill element;
- impale the meat for cooking on the spit and fix it in the centre of the two forks;
- insert the end of the spit into the motor drive socket;
- remove the handle from the spit;
- place the drip tray on the bottom runner of the oven;
- gently close the oven door, resting it against the knob guard;
- start the rotisserie motor by pressing the switch on the symbol.
- baste the meat from time to time. When cooked, screw the handle onto the spit and remove from the motor drive socket.
b)Grilling with the door closed.
- as above without using the knob protection as shown in fig.15
CAUTION: The spit forks may have sharp points. Handle with care.
HOW TO USE THE MINUTE MINDER (Fig. 16)
Set the cooking time considered necessary by turning the timer knob clockwise. An alarm will sound at the end of the preset time.
WARMING COMPARTMENT (Fig. 17)
To open the warming compartment, open the flap door with one hand. To close the warming compartment, simply press the flap door back into place.
HOW TO USE OVEN ACCESSORIES
- The oven shelf is designed to take normal oven dishes for cooking sweets or roasts, or is used without a pan for cooking foods under the grill.
- The drip pan under the grill is used to collect juices, which drip from the food that is cooked directly on the grill. The drip pan can also be used for cooking
- Remember that cooking times may vary if food is cooked on two shelves at the same time.
REMOVING THE OVEN DOOR
The door can be removed for easier oven cleaning, proceeding as follows:
- fully open the door.
- insert two small coins (e.g. 10 Euros) into the two slots in the hinges.
- close the door until the coins start to prevent it closing further (fig. 18).
- close the door some more and lift it off, holding it at the sides and moving it slightly forward; this is the point at which the door can be removed easily.
- to put the door back in place, return the hinges to their positions, checking that they have fitted into their seats.
- lower the door completely and remove the coins inserted earlier.
- fully close the door.
- always inspect the oven door gasket and if worn have it replaced at once by the after-sales service.
GENERAL PRECAUTIONS
- Always disconnect the power supply before any work inside the oven or where live parts may be accessed.
- Never use the warming compartment for storing inflammable liquids or items which do not withstand heat, such as wood, paper, aerosol cans, matches, etc.
- Make frequent checks on the rubber connection hose, ensuring that it is well away from hot surfaces, that there are no sharp bends or kinks, and that it is in good condition. The hose must be replaced at the latest at the indicated date and must be secured at both ends using a standard hose clamp.
- If taps become stiff to operate over time, contact the After-Sales service.
- Wash enamelled or chrome-plated parts with soapy lukewarm water or non-abrasive detergents. A metal brush may be used to remove deposits from hob burners and flame caps. Dry thoroughly.
- Never use abrasives to clean enamelled or chrome-plated parts.
- Do not use vapor jets to clean the appliance.
- Do not use too much water when washing the hob. Take care that no water or other substances enter the burner housing holes, as this may be dangerous.
- The spark plugs for electric ignition must be kept clean and dry; always check after use, particularly if there have been drips or overflows from pans.
- Remove any spilt liquids from the lid before opening it.
- Never close glass lids until the hob burners or hotplates have cooled completely; it might shatter or crack.
- Never knock enamelled parts or ignition spark plugs (where present).
- The main or wall gas tap should be turned off when the cooker is not in use.
GB
-
Never move the cooker by means of the handle.
-
This appliance must not be used by those with reduced mental or motor capacities (including children), or by those who are not experienced or know how to work it, unless supervised or instructed on its use by safety personnel. Children must be supervised to ensure that they do not play with the appliance.
- The cooker does not have an installation stand.
CAUTION: The use of a gas cooking appliance results in the production of heat, moisture and products of combustion in the room in which it is installed. Ensure that the kitchen is well ventilated especially when the appliance is in use: keep natural ventilation holes open or install a mechanical ventilation device (mechanical extractor hood).
CAUTION: This appliance is for cooking purposes only. It must not be used for other purposes, for example room heating.
No liability is accepted for injury or damage caused by poor installation or improper use of the cooker.
In case of malfunctions, particularly gas leaks or short-circuits, contact your engineer without delay.
EUROPEAN DIRECTIVE 2002/96/EC (WEEE): INFORMATION FOR THE CONSUMER
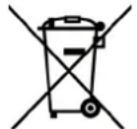
Fig. A
This information is strictly addressed to those who have a product showing the symbol below (Fig.A). This symbol is indicated on the technical data sticker (rating label) placed on the product itself. This symbol indicates that the appliance is considered as Waste Electrical and Electronic Equipment and complies with the European directive 2002/96/EC (WEEE).
Therefore this product is not to be treated as household waste. Instead it shall be handed over to the applicable collection point for the recycling of electrical and electronic equipment or it can be handed back to the retailer when you want to purchase a new equivalent product.
The consumer is responsible for a correct disposal of the product towards an appropriate collection point.
Otherwise the consumer can be exposed to a penalty sanction by laws in force for waste disposal.
Appropriate separate waste collection followed by recycling the product, the treatment and compatible environmental disposal contributes to avoid negative effects towards the environment and health and helps to recycle material which the product is composed of. For more detailed information regarding the available waste collection systems of this product please contact your local city office or contact the retailer where the product was purchased.
The manufacturers and importers will obey to their responsibility for recycling, treatment and compatible environmental disposal by participating directly and through a joint cooperative system.
EUROPEAN REGULATION NO 1935/2004 - MATERIALS IN CONTACT WITH FOOD. NOTICE TO USERS.

The symbol shown here, which appears on the packaging, indicates that the materials in this product which may come into contact with food are compliant with the requirements of European Regulation No 1935/2004.
Inside the oven chamber, food might come into contact with oven shelves, dripping pans, pastry trays, oven door glazing, rubber gaskets, rotisserie spits, and the sides of the oven itself.
On the hob, contact is possible with pan stands, burners and the hob skin.
In the food-warmer, contact may occur with the sides of the compartment.
RU
Copexahne
BcTyIeHne
Директва 2002/96/EC (WEEE). 26
TexHHueckne daHHbIe H XapaKTePcTHKn 27
YcTaHOBka 28-30
BcHTnJIaHnI NOMCCHN 28
Pa3MeHHe 28
IopKJIIOUeHHe Kra3OpacnpdeJeHTeJbHOc cETn 28
HactpoKaHa pa3JnHbIe TnBt Ra3a 28
3aMeHa KHKJIepOB 28
PeryJnpoBka noaH Bo3dyxa 28
PeryIupOBKa MHHMaJIbHOrO IJaMeHN 29
IopKIOueHHe KJIeKTPocetn 30
3Jektpueckoe 3axnraHne 30
IpeoXpaHHTeBHOcra3OKOHPOJIbHOe yCTpOHTBO 30
Hnfoopmaaia JIJI noTpeBHTeJei 30-33
Bentnlaa nOmeHH 30
3axnraHne ropeJok 30
BkJIOueHHe ra3OBON dYXOBKn 30
BkHueHnCra3OBOrO rHJIA 30
PpeOxpaHHTeJIbHOe yCTPOHCTBO r30KoHTpOJr 30
3Jektpnueckoe 3axnraHne 30
HcnoJb3OBaHHe ra3OBbIX ropeJok paOoueH
IOBepxHocTHIHTbI 30
HcnoB3OBaHHc 3JCKTPHccknx KOHΦOpok 30
HcnoJIb3OBaHHe r3OBoI dYXOBKn 30
HcnoB3OBaHHe ra3OBOrO HnH 3JekTpueckoro rPHra 31
HcnoB3OBaHHe KOHBekunHOHHoT 3JektpueckOn dyXOBKn ...31
HcnoIb3OBaHHe 3JIeKTPHueCKOINyXOBKN CCHCTEMOH
BENTNAH 31
HcnoJIb3OBaHHe 3JekTpuecko KOMBHHPOBaHHO
DyXOBKn 31
3JIeKTPuECKA CTATnueCKA DxOBKA
C DByM OPRAHAMN UYPABNEHIN 31
HcnoJb3OBaHHc 3JIcktpnueckoN
MHOROyHKUHOHaJIbHOI DYXOBKN 32
3JEKTPHueCKA DYXOBKA CCHCTEMOH BEHTINJIAHH "4" 32
3JIEKTPNUECKA/UYXOBKA CCHCTEMOIBEHHTHJIUM"4New" 32
HcnoJb3OBaHne TaHmepa 32
HcnoJb3OBAHnC nporpaMMnpyoUeO
yctpoHCTBa6e3YacOB 32
OTeJIeHHe pa3OrpeBa TapeJIOK 33
PekOMeHaUNI NO TexHnke 6e3oNaCHOCTN 33
PncyHK 58-60
Haia pMa 6IarOapnBac 3a BbOp H NOKyKpy OHOro H3 HaHHx BlicOKokaueCTBeHHbIX H3deJH. Mbl ropno HAeemc, UTO B BaHx pykax Haun IINHTb 6yDyT FyHKIOHNPOBaTb C MaKCHMaJIbHOOTdAey H HAnLyUHHMn pezYbTaTAM, ONpABdbBa BCE Baun OKnDaHHN. C TOH IeJbIO IIpeJIAraeEM Bam BHIMaTeJbHO IIpoHTaTB HaCToHIIee pyKOBocCTBO H nPnDEpkHBaTcB tex Ero yka3AHN, Tpepeh NDt O npbOxpA h ChCTeMax, KOTOpBMn OChAeHa BaHn PInTA. PhApPKa - H3ROTOBHTeB CHHMaet C c6eB BCRAyO OTBcTCTBEHHOCb 3a NOBpeKDeHJ, HHCnPABHOCTHn HecuactThbc CJuyan, Bb3BaHHbIe HecO6IOHeHHem peKOMEHaJIN IO YcTAHOBKe N kcnjlyaTaUN NlNTbI.
-ДЯТOrO,уTObI BbIyckaTb IJIHTbI B COOTBETCTBH N C COBpeMeHHbIMn TexHOJIOHueCKHM peWHeHNMy H/HINДЯ NOCTOHRHO IOBbIeHHaKcEcbHaIHX H3dclH,pa6pHKa OCTaBIAET 3a coBOI npABO BHeCEHHaKaHX-JIn6o H3MeHeHH JAnke 6e3 npCdBapHTcIbHORO pCdynpckdCHHry,HTO,OHaKO,Hc Bbl3bIbAcT np6JIem HIN 3aTpPyDHeHH pN EKCIlyaTaUHH.
- EcJH Bo3HNKHeT Heo6XOnHMocb 3aKa3a 3aNuaCTen, HAno CdeJaTa 3aInpoc Baewemy npOabuy, rde CnEduy tKa3aTb HOpem MoCJIH N HOMep cepHH PHTB, «PpOHTAMNoBaHHbIe Ha φabPHOH OIO3HaBaTebHO TabInuKc. 3Ta TaBnUka MOKeT 6bITb paCNO JIOKeHa BHyTPn OTDeJeHHpaOOrpeBa TaPeJIOK (ecJH eCTb) HIN Ha 3aHCH CTOpOHC IIHTbl.
-NTHTa COOTBETCTBYET HOPMaTHBaM
- CEE 2009/142/ (ex - 90/396)
-2006/95/CE no Hn3KOMy HanpJKeHIO (3aMeHReT 73/23/EEC nocJeDyOuJe nonpaBKn)
- CEE 2004/108 (po urovn[ radiopomex)
- EBPOIENCKNI PEGIAMEHT N2 1935/2004 (kontaktirovanie s pijevymi produktami)
-EBPONEENCKN PEGLAMEHT N 1275/2008
-CEE 40/2002
-CEE92/75
-2002/96/EC (WEEE)
- 2005/32/CE (Energy-using Products)
IIOJICHEHNE
B HactoIeM pyKOBoDCTBe npedctabJIaHOT HHTepc ToJbKO Te npaparpaI nn pa3deJIb, rIe roBOpHTbcra O np6opax, KOtOpBMn ochaueHa Baasa nIHTa.
Директва 2002/96/EC (WEEE):Инфорmaцьдпг NOIb3OBaTeJIe

(pnc.A)
DahhIe CBeHEnHn PpeHa3NaueHbI NmBb TOnbKO nIy ObaTaTeNe IpmbOpOB, IMHeOux CNMBON (PUC. A) Ha CamOKJIeAeC8 3TNKeTc C TexHnueCKMn DaHHbIMn, HAKJIeEHHO Ha N3dEHN (NaCnOPTa Ta6NnuKa).
3TOT CnMBOI O6OHaueaET, YTO npOdyKUIN KNaCCNpUPOBaH a NO DeiCTBykUIM HOpMaB KaueCTBe 3JIeKTpuYeCKOrO INI 3JIeKTPoHHORO O6OpyIDOBAHIN, INTO OHA COOTBeTCTByET INpeKTHBE 2002/96/EC (WEEE). CNeIOBAteJIbHO, B KOHc CBOero Cpoka 3KcIIpyATAuIN OHA DOJXHNA Nepepa6aTaIBaTBcR OTeJIbHO OT 6blTOBbIX OTxODOB, NYTEM BeCnJIaTHOH CdaH N BYHK T C6opa 3JIeKTPuYeCKoro IN 3JIeKTPoHHORO O6OpyIDOBAHIN, INI JcDaBaA ee DInCTPb6bIbOTopy B MOMENT NOKYIKN HOBOr, 3KBUNaHEHTHO O6OpyIDOBAHIN. POJB3OBaTEJIb HeCET OTBeTCTBeHHOCt 3a CdaHy np6Oba B KOHc ERO 3KcIIpyATAuIN B NyHtBi c6Opa BTOpcbpb, B nPTNBOM CNYaE K HEmy 6bUdY T pImMeHeHb CaHKUIN, PpeDyCMOTpeHHbIe 3aKOHOJaTeJIbCTBOM B OBlaCTN OTXODOB.
IinΦepeHnnpoBHHb c6op OTxOOB dnn IX nocJeDyUoSei nepepa60TK, 6pa60TK u Tynl3aun, COBMecTmblx C OkpykaHOse cpeOn, No3BOJAEr I36EkaTb OTpuCAteNbHOro BO3dEChTBnHa npnpOdy N3doOpBbe, a TaKKe cnOCo6CTByET NOBTOPHOMY nCNOb3OBAHNIO MaTePnaIOB, IN3 KOTOpBX IN3ROTOBHeHa npOkyu. DnI NOUYehn 6oee DeTaIbHoINHFPmaUNo 6 IMeOuxxCnCTeMax c6opa OTxOOB CneDeyET o6paatbc B MecTHyIO CnykSy IO nepepa60TK OTxOOB, INI Jx E B Mara3IN, B KOTOpOM 6bl KNIIEN Pnp6Op.Ipon3BOIDTEIN INMnTOptepb Hecyt OTBeTcBeHHocTb 3a nepepa60TK, 6pa60TK u Ytnl3aUn, He 3aPr3HnOUIne OkpykaHOuy CpeSy, KaK HenocpeDCTBeHHO, TaK IN yuactByA KONNEKTNBHOINCTeMe.
EBPONEENCKN PEGLAMEHT No 1935/2004 - MaTePnaIbI, npedHa3NaeHHbIe DnA KOHTaC nIuIeBbIMn IpOdyKTamN. HOpmaun NOJb3OBaTeJAM.

PnBBeHbHbHa pncyHke cHMBoJ, KOtOpb HmEeTcHa ynaKOBKe, Yka3bIbAeT Ha To, YTO MaTePnAJIbI 3TOrO N3DeNIA, BO3MOXHO BCTynaIOUe B KOHTaKT C NIISeBbIMN PPOdyKTAMN, COOTBeTCTBYOT Tpe6OBaHnM EBponeckoro perJaMeHaTa 1935/2004.
BHytpn noNoCTn dYxOBKn nIeBbIe npOdykTbMOryT BcTyNaB B KOHTaKT C: peWetKamN dYxOBKn, IpOTNBHMyN, PINTAMN DnA BblneKn KOHNTEpCKNX N3dEJIIN, CTKNIOM DBepCuI dYxOBKn, pe3HOBbIMN yNlNOTHeHnARMn, BEpTeJOM, CTEHKAMN dYxOBKn.
Ha nIte - c peWetkamn, KOHΦopKamn m MetaJInecko nOBepxHOCTbIO nIITbl.
BraNke dna pa3oRpeBa nuiu-cero cTeHKamn.
RU
TexHnueckne daHHbIe H XapaKTePncTnKn
coippoTHBJIeHHe noDa 1.1 KBT
COINPOTNBJIeHHe CBOda 1,1-1,5 KBT
KpyROBoe COIpOToNBJIeHHe dyXOBKn 2,0 kB
rPHb 2.0kBT
KpbIbuaTka 25BT
OCBeWeHHe DyXOBKn 15B
IIOJHARMOUHOCTb3JEKTPNUECKOJ DYXOBKN
ctaHueckaydyxOBka 2,21 KBT
DyXOBKa CnCTeMoN BeHTHJrIuH 2,0 KBT
MHOROpyHKUHOHaJIbHaA dyXOBKa 2.7 KBT
KaT:cmOTpnΦaBpHHyTO TaBJIHKy Ha 06JIOKKe
Klaacc 1 nn Jc 2 1
CTeHb TcIIIN3OJIaUNX
| 3JELKTPHOCKA CTA TINPECKA JIUXOBA 96 PB | 3JELKTPHOCKA JIUXOBA C CHCTTMOR BEHTHUDHIH 96 PB | 3JELKTPHOCKA JIUXOBA C CHCTTMOR BHTHUDHIH 96 PB | |
| Mapkinpobka EC 3KOKOLUCHOCKOKAчecTba. | No | No | No |
| Вреть в мину tax, 3atрачениоддд-sta'tmneyckoi roTOBki HOPMaJIbHOrO KOJIuChecTbA npodukToB... | 53,4 | ... | 53,7 |
| Вреть в мину tax, 3atрачениоддд-beHTNlmpuyemoi roTOBki HOpMaJIbHOrO KOJIuChecTbA npodukToB. | ... | 55,8 | 51,6 |
| ПOTpeблене в BaTTax B peximme OЖидадия. | ... ... | ... | |
| Полознaya плобадь пotитвая в см? | 1156 | 1156 | 1156 |
KOMIIIEKTAUH
IIHTB Bcex MoJeYKOMNJIeKTOBaHbI PpeOxpaHHTeHBHbIM yCTpOncTBOM Ira TpeJOK dyXOBKn rpnna.
KpOMe TORO, B 3aBnCHMOCTH OT MOeJIH, B KOMIIJCKTAuHIO IANTbI BXOJHT:
IpcdoxpaHHTcHbHOc yCTPOHCTBO rAOKOHPTOJIA OHOHnHECKoJIbKHX ropeIOK paOoeH IOBepXHOCTN IINTbI
-3Jektpnueckoe 3axHraHHe ropeIOK pa6ooye NOBepxHocTH
3aKTHueckoe 3aKaHraHne rOpELOK dYXOBKn HrpnJIA
- TepMoperyTOp (HIN KpaH)ДЯ DYXOBKN
3NcKtpnueckOeOCBCHNCdyXOBKN
- Bepre
-ForepaIkaIraIrpnIa
-MexaHueckn TaMeP
-0dHa HnH HeckoJbKO 3eKtpHuCeckHX KOHOpOK
Ta6nua 1 CxKxHbI ra3 G30-G31 PnpOndhIra3 G20
ycIOBnpepyHPOBaHHaHHoI HHTbI yKa3aHbI Ha 3THKeTke Ha 06JIOKc.
3TaIHTaHe CoeHHHeHa C yCTPOHCTBOM OTBODa IPOyKTOB TOpEHHa. TaKoe yCTPOHCTBO DOJIKHO 6bITb YCTAHOBJeHO N NOJKIOUeHO K IINTe B COOTBeTcTBHN C DeHCTBYIOIHMH N IOJOKeHHM N OycTAHOBKe H EKCIJIyAToHH.
YcTaHOBKaIINITpa3pcWactCToJbKO BIOCTOARHNO IpOBCTPHBaCMBX IOMeIIeHHXcoJIaCHO DeICTBYIOIHMMHaHOHaJBHMnpaBNJaM.
BEHTHJRAIIN IOMEIEHHJ
B NOMeueHHn, rde npednoJaraetc yctaHObKa ra3OBbIX nIHT,doJIckH bytb NocToHHbI pHTOK CBCKCRO BO3dyxa, 1TO O6ccncuHbae TROPHe Ra3a H No3BOJareT XOpOwYbBEHTNJIaHIO.
B yactHOCTH, KOJIHCCTBO CBOKcRO BO3yxa, HCO6XoHNMOrO JIra IopHHra3a, JOJHXHO bItb He MeHbIIe, YEM 2 M/uaac Ha KaJkDIn KBT HOMHaJIbHOYCTaHOBJIEHON MOIHOCTH.
PA3MEUENHE
BbHyTb IIHTy N3 yNakOBKn H ChrTb C Hee BCE yNakOBOuHbIe MaTePnAJIbI, B TOM YHCJe 3aUHTHOE IJIeHOUHOE IOKpbITHe XpOMHpOBaHbIX NCTaJIbHbIX HEPXKaBeIOUHX qACTe.
YcTaHOBHTb PINTy B XopoIO NPOBETPNBaEMOM CYXOM NOMEeHHN 6e3CKBO3HKOIB.PNTaHE DOJIJKHA COINPHKacATbcr C HeycToHnBbIMNK DeIcTBNO TEMpePaTybl MaTePnaJAMN. PpE ee YcTaHOBKe CObIOaTb 6e3ONaCHOe PaCtOraHHoe OT TaKHX NOBCpxHOCTe (KaK dpeBo, JINHOJeM, 6yMaRa H.T.D.)
ПлNTа можт ecTанabиBaTcBсamocToTeNbHo (Knacc 1) nIи КМeЖуДБУМЯЗЕмТами МeБИN (В Класse 2 ST 2-1),бОКOBиHы KOTopbIxdoNJIKbHb bIeApKINaBt TempepaTy pO 100°C, c BbICoToH He 6Oone pa6OeHOBePxHOCTnПЛТь.
MOHTAX HOKEK (HIBEINPOBAHNE)
IIHtB OcHaIeHb peryIHypeMbH HOKKaMn, KOTOpbIe npHKpyHBAOTc CHN3y C YeTbIePcx CTopoH. Ipn NOMOHNHOKe MOHO pcrYIHPoBaTB BICOTy IIHTbI DAIB BaIpaBHBAHH CC yPOBHAOTHOCHTEJIbHO HxOJHueCPRJOM KYXOHHO Me6JIH II DpABHOMepHO paCpEeJeHH JIKKOCTeB KAcTpIOJAX Pn IINrTOBTJIeHH HIIHH.CMOTPH PH 3.
YPABHOBEUHBAHNEKpbuIKN
PINTbI CO CTKJIHHHON KpbHIKOYKOMJIIEKTOBaHbCNEHJaJIbHbIMN npyKHnHM ypaBHOBCWBAHn. 3TH BCTaBICHBc B WapHnpypKHNbOeCEHBAOT MRTKOE 3aKpbBAHHe KpbHKn 6e3 XJIOKA.
TOKIOUHHEKΓA3OBOMYAJIHOHY
IIOKJIIOHHe IINbIK RaOBOMy 6aJIHOHy C 6byTAHOm- npOnaHOM yCIOB3yHTC COOTBCTCTByIOHH HOPMAM PC3HHOBbIIaHaR dIHHOIOT 75 Do 80 cm. paIOJIOKeHHe KOtOporo NOKa3Ho Ha pHC. 4. IIIaHr HC DoJIXCH 3aTpaHbAte bCTeKN IIITbI PdOM C dyXOBKOi. MaKcHMAbHbHe pa3MepbI Ra3OBOrO 6aJIHOHa - DnaMetp 31 cm., Bbcota 60 cm., BMEcTHMOcTb OT 10 Do 13 Kr.
IOJIKIIOUOEHNE K I'3OPACIIPEDEJINTEJBHOH CETN
PpckcHm NOKIIOHTb IINTy Kra3OpacnpocdIHTCBHOH cTn y6eHTbcra, YTO TIN RA3a COBnaAaeT C TEM, HA KOtOpbI IINTa HAcTPOeHa. B npOTHBOM cAYue dEnCTByTE corlaCHO ONHCANHO nparpaFa HaCtPOka Ha pa3JNUHbe TINbIra3a>. PnH NOKIOUeHHN IHTb RaOBOH ⅢaHr DOJIKeH pOxOAnTh cnpBa. ECLN WLaHr npoxoANT C3aHN OH DOLIKCH PACNOJaTaBCB HNNKHe qactH IINTb. B 3010 He IIHTa HarpeBaetcdo 50^
CoeHHHeHc C H6KoM TaJIHueckO TpyoB (pHc.5-A) CoeHHHeHb BbIIOJIHReTc npN IOMOUI TpyoB, COOTBeTCTByIOIIe IeCTByIOHM HaIOHOHaJIbHbIM cTaHApTAM. TpyoHaBHnHBAeTc Ra HTyep, Ha KOtOpBn PpeBaPteJbHo yTaHaBJIHBAeTc yILOTHTeJbHaa npoklaJaKa.
CoeHHHeHcpe3HHOBbIMIHaHROM(pHC.5Bn5-C) CoeHHHeHBeINIOJHReTcNpH NOMOJIpe3HHOBOrO IHaHa,MapKa KaTOPOrCOOTBcTCTByET DeiCTBYIOHM HaIOHOJAIBHbM CTaHApTaM.Oba KOHuaIIaHaTgdoJIKHb6bITb3aKpeJIeHbCTaHdAPTHbIM
RU
YCTAHOBKA
3aXHMAMH. B yCTaHOBJIeHHbI cPOK HeoBXoJHMO pOnH3BODHTb 3aMCHy IlaHaIgA II DOCTyI K HcMy DIOJIckH 6bITb OJIeTCH IJIa KOHTPOJRA eRO COCTOJHnI NO BcEN IINHe.
IocIe NODKIOUCHHHI IHTbIK Ra3OpacnpceJIHTcJIbHOH cETN Heo6xOIMMO IPOBepHTb Ra3OHnpoHHaEMOCt bIITyIEpOB H COeHHCHHI.
-ДЯФУHKUHNOHPOBANHA ByTaH/ПponaHE HeoXOHNMO yBeHTbcra,уTO DAJIeHHe ra3a ceTH COOTBeTcByET DaJIeHHIO, yKa3AHOMy Ha φa6pHHOH OON3HaBaTcMbHO TaJIHcK.
BHIMAHHE
HcnoJb30BaTb TOJIbKO CTaHdApTHbIC H6KHC MCTaJIHueCKHC Tpy6bl HIN pe3HHOBble IIIaHTN.
-PeryJrTop daBJeHnI DOJIKeH COOTBeTcTBoBaTb HOpMaTHBaM.
CoeHHHeHpe pAMnbo COOTBeTcTByeT HOpMaM ISO 228-1.
- H36eRaTb CHIbHbIX H3rHbO B H nepeKaTH TpybI HIN IIaHa I CTapaTbCRA HC INPcHOHATB CRO K pa3OrpCTbM CTCHKAM IINTbI.
HACTPOHKA HA PA3JINHbIE THIIbI 7A3A
B cIyue, ecHn HcIOJIb3yEmb JIJI yHKUHOHNPOBaHIN PJIHTb Ra3 OTJHuaTcR OYka3aHHoro, Heo6XoHMO HaCTpOHTb PJIHTy, DeHCTByr CICdyuOHMM O6pa3OM:
-3aMeHHTb XHKJIepbl (B COOTBeTCTBHN C TaBJIeH Ha cTpahHue 28).
-BbIIOJIINITbpeRyJInpOBkyNoaUNBo3dyxa.
BbHIOJIHNb pcryJINPOBky MHHMaJIbHOrO IJaMeHH BCCX rOpC JOK.
IppHMeaHHe: IIpN KaKDoi CMeHe Ra3a HaKaJIeHBaTb Ha pa6pHuO Ta6JNUKy Ha3BaHHe HOBOrTHnA r3a,Ha KOTOpB HAcTpOeHa nIHTa.
3AMEHA KHKJIEPOB FOPEJOK PAOQEN IOBEPXHOCTN IINTbl (pnc.6)
-CHaTbpeWtKy,paCCeKaTeHnPiMaMeHN(A)HropeJKN(B);
OTBHTHTb H CHrTb KHKJIep, paCNOJIOKeHHbI Ha DHe KaKDoRo DePkaTeJIa KHKJIepa (C);
-3aMEHHTb HHexEeTOpB1 B COOTBeCTBHH C TaJIHei, INpHBedEHHOHa CTp.28, 3aBHTHTb H3aTHHyTB Hx DO yIIOpa.
- IpoBepHTb repMeTHuHocTb r3a.
- yCTaHOBHTb Ha npexHcE MeCTo rOpEJIKN, paccekatJH IJaMeHH H peWETKY.
BAKHbIEPEKOMEHdAUHH
- HN B KOEM C Lyuae He 3aTnBAtb NJHnHe HHKeKToPbI
-ПОНЗБЕДЯЗAMEHY,ПРOKОHTPOJHPOBAТь REPMETHUHOCTB RA3a.BCEX HJKEKTOPOB
PEYJHPOBKAIODAUHBO3DVAXAGOPEJKAM
BHHMaTeJbHo paccMOTpHTe HnKeepHBeDeHHyTO tabNHy (opeHTHpOBOuHbIe daHHbIe) JIpeRyJIHPOBaHHa NpaMaETpHa BbpaxeHHOro BMM.8JITgNJI.
PpOBepuTB yHKnHOpOBaHne TpeJok
PEYJHPOBKA MHHMMAJIbHOI OJIAMEHN TOPEIOK PABOUEI NOBEPXIOCTN IINTbI
B cIyuae,ccn IIN Ta yHKUHOHpyeT Ha CxKHeHHOM Ra3e (I/II), perYInpuOHb BHT DoJkeH 6bTb 3aKpyueH IO Ynopa.
JIHTa MoKet 6bITb OChAHeHa KpaHAM THNa A, C yCTaHOBJIeHHbIM BHyTPn peRyJINPOBOUHbIM BNHTOM (peRyJINPOBaTb KOtOpbIM MOXHO npN NOMOHN MaJEHbKOI OTBepTKu Uepe3 CTepeKeHb) HJN TnHa B»C hapxHBm peRyJINPOBOUHbIM BNHTOM C npaBOI CTopoHbI (cRO MOXHO peRyJINPOBaTb HeIOCPedCTBeHHo), CMOTPN PNC.9.
EcnIaHfYHKUHOHPOBAHHnIHTbIHCNOb3yTeHaTpyaJIbHbI
Ta3,TO Hc3aBHCHMOOTTHNa KpaHa DeHCTBOBaTb CJeDyUOHNM O6pa 3OM:
-3axrnte ropejky uycTaHOBHTe MaKcHMaJbHoe nJaM.
-CHMHNTe pykny peYIITopa,NotAHyB eHa c6b,He HaXHMnHa nepeHIO IO nHeJIb IIITb BO H36eKaHHe ee NOBpeKdEHH.
Ipn NMOUIN MaJIeHbKOI OTBepTKN OTKpyTHTe peRyJINPOBOHbIN BHT Ipi6JI3NTeJIbHO Ha TPh O6Opota (Bpaaua OTBepTKY IpOTNB YacOBOI CTpeJKN).
-TOBEPHHTe eue pa3 cTepeKHeb KpaHa IPOTHUBaCOBOI CTpeJKNdo ERO 6IOKHPOBKn. B 3TOM cIyae 6yDeT MaKCHMaJIbHOe PJaMa.
OcHb McIeHHo 3aKpyTHc peRyIHpOBuHbBHT, Hc HaxHMaHa OTBePky, Do Tex Nop, NOKa NlaMa He yMeHbWHTcra Ha 3/4. IpnETOM ObpaTHc OCOOC BHHMaHHe HA To, TTo6bl NlaMa 6blIO doCTaTOUHO yCTOUYBBM DaKe IIpH yMepeHHOM ITOKE BO3dyxa.
PeyIINPOBKA MHHIMMAJIbHOFO IJIAMEH NIOPEJKN DYXOBKN B cIyuae, ecIII INa FyHKUHOHNpye H aCkHexeHOM r3e (I/II), pcryIINPOuHb BNHT DOJIKeH 6bIb 3aKpycH Do yNopa.
Ecln DJIyHKUHNOHPOBAHN IINTHb HcNOJb3yeTcHaTypaJIbHbI ra3,TO HC3aBHCmO OT TnPa KpaHa PcryJHpOBKa MHHMaJIbHOIJIaMeHN BIIIOJINHEETc CJeDyIOHM Opba3OM:
-CHrTb DHO DYXOBKN (YTObblBHyTb DHO,HEOxOJHMO OTBHTNTB BHT).
-3aXHTe ropeKy dYxOBKn H yCTaHOBHTe yka3aTeJb peRyHnPOBOuHOHpyKN B NOLOXCHNC MAKCHMaJIbHOrO IAmCHN.
-3akpoHTeBepuydyXOBKN
HaHHTpepyJInpOBOuHbBn BnHT TepMOpCryJITopa HnKpaHa (Pnc.10)
- OTKpyTHTe peRyJHPOBOUHb BNHT npH6JH3HTeJbHO Ha TpH o6o-pota.
-Yepe3 5-6 MHHyT yCTaHOBHTe yKa3aTeJb pyKn B NOJIOKeHHe
MHHMaJIbHOIPOJIaMCHN
-MeJIeHHo 3aKpyTHepeRyIHPOBOuHbBHT,Ha6IIOda yMCHbIiHHC IIaMCHN Ycpc3 CTKIO B DBCPUC dyXOBKn (DBCPua 3aKpIbTa)doTexnop,IOKA KOHyC IIaMeHN He yMeHbHITcno 4MM.IPi6JIN3HTeJIbHO.He peKOMEHyETcra CIIHkOM yMeHbHaTb IIAmOHO IOJIXHO 6bITbCTaHbHbIM daKc PnH bICTpOM OTKpbIBAHHH 3aKpbIBAHHH DBepUd dyXOBKn.
BbIKJIOHTe ROpEJKy H yCtAHOBHTe DHO dYXOBKN Ha MecTO.
IIOKJIIOUeHNE K 3JIeKTIPOCETN
IpeKJde qem NOkIOuATb PHTy K 3JIeKTPoCeTH, Heo6xOdHMO y6eINtbcra, YTO:
HaipxHHe BHeHcE CHT COOTBcTCTByeT npaMeTpam, yKa3aH HbIM Ha a6pHOn OTo3HaBaTeJbHO TaJnUKe
-po3ETKa 3a3emJIeHHNfYHKUHOHNPyET
IINBbINHHeNn npMOro NIOKIIIOHeHn K cTeH HeO6XoIMNOIgROBtB yCTpOInCTBO, KOToPOe 6yET ObecneuBaTb OTKIOUHeHne OTcTn, paCToHHe OIKpbITn KOHTaKTOB B KOTOpOM DoJNKHO No3BOJrTB NOIHoe OTKIOUHeHn B yCNoBnX NepeHaPjxHeHn KaTeOpn III n B COOTBeTCTBn B IpaBUNAMn YcTaHOBKn.
EcHnPiHTa yKOMNIEKTOBaHa CeTeBbIM WHyPOM 6e3 BNIKH, TO IINIOIKJIOUeHHM OMOHO HcIOJIb3OBAt b CTAHdApTHyIO BNIJKY. PnI 3OM HeoXoDmO yuHTbIAbT cJeDyIOoee:
KJTO-3EJIeHbI IPOBOD DOJIIXEH HcIOJIb3OBaTbcra DJIa 3a3eMJIeHH
roIybo npoBd HcHTpaH
-KOPnHHeBbI pOBOd JIAHaHpJxKeHHcETH
- Hpy He DoJKeH CoPNKaCaTbcra Co CTeHKaMn NHTbI, HarpeBaIOUIMNcra 60Jee 75^
B Cnyae 3ameHbI ceTeBOrO Hhypa HcnoJb3OBaTb Hhyp TnHa HO5VV-F IOxOJIeero CeueHHN (CMOTPN CXEmbHa pnc.2).
-ecJH NHTA NOCTaBJIeHa 6e3 ceTeBOrO IHHypa, INPn IIOKIIIOUeHHN HcIIOb3OBAbT IIHyp TINa HO5VV-F IOxOJIeero CeueHHN (CMOTpn CXEMbHa pnc.2).
OHa DoJXHa 6bITb NERKO DOCTyHnOH NOcNE yCTaHOBKn PnIbopa COrnaCHO INCHTpKUINM.
BHIMAHHE:
IPOH3BOJNTCJIb HC HCCCT OTBCTCTBCHHOCTH 3a IOBpCKJOHHB, Bb3BaH HHe HecOJIIODeHHEM BbIIeYKa3aHHbIX Tpe6OBaHH N DeIcTBYIOINX IpaBnI NO TCXHHKc 6c30NaCHOCTH pNIOJOKJIIOUChHH NINTb. O8a3aTeJIbHo IPOBepbTe, YTO IPOBOJ 3a3emJIeHHN NINTb IpaBnJIbHO COeHNHe C CeTbIO 3a3EmJIeHHN (CMOTPH CXEmH Ha pHC.2).
RU
YCTAHOBKA INHΦOPMAUJIДЛЯ NOTPEBNTEJIEN
IINITbI, OCHAUEEHHbIE CNTTEMON 3JIEKTP03AXHFGAHN
EcnH NCKpa Hc BbHbAcTcH, He yNOpCTByntc, T. K. MoXHO NOBpe
HITb ReHepaTOp.CnCTema 3axHraHH MoKeT He cpa6aTbBaTb NO CcDyOuHM pNpHHAM:
-BJaxKaH,HeHCpBHaHn3aRpy3HeHHaCBeqa.
HcnpaBnIbHO yCTaHOBIOHO paCToHHc Mckdy 3JCKTPODOM I ropeJIKO.
- TOKONPOBODAIIN IPOBOIDOK CBEH NOBpeJDeH JIN OROJEH.
HCKPOBOI pa3pA yXoAHT B 3cMJIIO (B ppyHX hactx IANTbI).
- NOBpeKdEh ReHepaTOp HIN MHKpoBbIKIIOuHaTeJIb.
CKONLCHNC BO3dyxa B Tpy6oNpOBOaX (OCO6cHNO NocJe JINTeJIbHOIepNoJa HeCNIOJb3OBaHHI JNTbI).
- HenpaBnJbHO COCTaBJeHa Ra3OBo3yHHa CMeCb (HenpaBnJbHoe TOpEHHe)
PPEDOXPAHNTBHOE YCTPOHCTBOA3OKOHPOJIA
JIa KOHTPOJIyHKKUHOHPOBAHNAKJAnaHa Ra3OKOHPOJIeHCTBOBaTb CICdyOUM Opa3OM:
-3axrnte ropeky n octabte ee BkJIOueHHo npH6n3HTeJIbHO Ha 3MHNYtbl.
BbIKIOHTC rOpAky H NOBCpHHTc pyuKy pCrYJrTOpa BNOIOKCHNC 3aKpbITo,06O3HaueHHOE CnMBOJOM (
Hcpc3 90 ckyH B cIyue KOnIrpOJIra IopcIOK paOocn IOBcpx HocTH N Upe3 60 cekyH B cIyue A ropeJok dYXOBKN TpNJr IOBCPhytb pykY B NOJOOKCHNC OTKpbTO.
-0ctabBte pyky B 3TOM IIOJOKeHHH N npH6JIH3HTb 3aJKeHHyIO CCNHKY KROpeJIke: IOPEJIKA HE JOIJKHA 3AKEUBCN.
Bo Bpem 3aKHTAHn Tpe6yIOr npH6JIH3HTeJIbHO 10 cekHyD IJIABO36yXDEHHMaHHTA.
KlaanrtaOKoHTPOJIcpaabTaBbAeT aBtOMaTHueCKHIOCJIe BkIIOeHHIIaMeHH He BoJee Yem Upe3 90 ckyHd IJIra TopeJOK paOoeH IOBepXHOCTN HINTbH Npe3 60 ckyHd IJIra TopeJOK dYxOBKn HrpNJ
PPEUYIPEKDEHNE
Ipea onepaunne no HCTKe HIN TeXObcLyKBAHNO OTKIOHTe IINTy OT 3JeKTPOCeTn 3aKpbBaHTe KpaH NOaHra3a.
IIN NOIKHIOUeHHN IINTbK HCTOuHHKy IODaUN Ra3a He IPOBepaTe RepMeTHNUoCTb CTbIKOB Pn NOMOIN NJaMaEH. ECJNB Baaem pacnopjKeHHN Het CneuaJIbHbIX PnHbOpOB DJI KOTPOJIra3OHENPOHNuaeMOCTH, MOKHO NCHIOJIb3OBAbTIeHNY JIN KOHTPOJIrTPnPOBaHHyIOMbJIbHyIO BODY.
- YcTaHaBJIbBaH Ma MecTo pa6OuyIO NOBepxHOCTb IIHTbI y6eITTEcB, UTO 3JekTpHuEcKHe npBOJKN CBeueH (ecJIN HMeIOTc) He cOpHpKaAcIoTcA KHKJIcpaMH H He NpeckpbIAOT HX.
KAKNCIOJB3OBATbIHTY
BEHTNJIAIINI NOMEIEHHN
3KcIyataaRa3OBONPiHTbCOIPBOXdaCTcB BbDCCHHcM TnIObTHBJIaJHOCTNBIOMeHH,ΓeOHa yCTaHOBJHe.10TOMy, HeoXoIMMO ObecneHTb BEHTJIaIIO NOMEIIeHIN I NOdepXHBaTbOTKpblIMECTCBeHHbEHTJIaIIOHIIbe OTBepCTH INY cTaHOBHbBTBbTTKHOI 3OH.
B cIyuc dIHTcJIbHOrO H IHTCHCnBHOrO HCIOJIb3OBaHHI IINtbl BO3HKAeT HeoXoIHMOCTb DOnIOJIHHTeJIbHOI BEHTIJIAHH, KaK, HApHmep,OTKpblbOKHO HJIN YBCJIHcHTb MOUHOCTb BblHYKdCHHOI BEHTNJAUN II BBITJXHO T OHTa.
BKJIOEHHIPOELOK PAOQUENOBEPXHOCTH JNTbI
-HaKMHTe H NOBepHHTe peryHnPOBOHyO pyky npOTHB acOBOn CTpeJKN H yCTaHOBNtB OTMeTKy HAIpOTNB CNMBOL, Oo3HaueH-HORo Ha NpeDHei NaHeJN PINTb (NOJOKeHHe MaKCHMaIbHOro nJaMCHH).
-3aTeM NOIDHeCHTe 3aKkeHHyIO cINHky K RopeJIke.
IyMCHbHCHNIIaMCHNIOBOPaHBaHTcpyKBYTOMKHeHapBAJIeHH,ycTaHaBHJIbAorOTMeTKyHaIPOTHB CnMBOJIa (NOJIOKeHHmHHMaJbHOrO IIaMeHH).
BKJIOUeyHNE TOPEJOK PAOUYEN IOBEPXHOCTH, OCHAUeHHbIX KJIATAHOM FA3OKOHPTPOJIA
HaKMHTe H NOBEPHHTe peRyJnHPoBOuHypoPyKy npOTHB uacOBOn CTpeJIKN YcTaHOBHTE OTMETky HAIpOTHB CmMBOJI, Oo03haueH-Horo Ha NpeEdHe NaHeJN PJIHTbI (NOJIOKeHHe MaKCHMaJbHoro nnJaMCHH).
-3aTEM NOHeCHTe 3aXKeHHyO CnHcy K TopeJIke H HaKMnTe Ha pyKy Do ynpa H DePKeHTe cc npHXaToB TeCHHNpHbJIn3HeTbHo 10 cekyH.
-OTnyctHTe pyuKy H y6eHntecb, YTO ropeJka 3aXrJacb. B npOTN-BHOM cIyuae NOBtOpHTc BCC CHaJa.
BKIOUQEHNETOPEIKN DYXOBKN
-OTKpoTeIbepuIyXOBKN
HaKMHTc Ha pyuKy HIOBcPHNTc Cn POTHB HAcOBON CTpcIKN DO NOJOKeHHMAKCHMaJIbHOrO NJaMeHH.
-3aTeM NOHHeCHTe 3aXKeHHyIO CnHcy K IeHTpaJIbHOMy OTBepCTTHo Ha IHe dyXOBKN H aKMMTE Ha pyuKy Do yNopa (CMOTpn PHc. 11).
Hc OTnycka pyuyn y6cnHTccb B TOM, yTO rOpCJa 3aJrJaCb. NaJIOaI IJIaMn cepes nHTpaJIbHOe OTBepCTne Ha dHe dyxoBKN
- Pn6JH3NTeJIbHO uepe3 10 cekyHIO OTNcyTHe pyky H npOBepbTe, He nOtyXJa JIN RopeJIka. B IpOTHBHom Clyuae NOBTOpHTb BCE CHaHaJa.
BKJIOUHHEIHOPEIKNTPNJ(A3OBbINTPNJb)
-YctahOBHTe PAnHKy DIA 3aHNTbpeYJINPOBOuHbXpyEeOTnToKa ropqero Bo3dyxa, kak yka3aHO Ha pHc.13.
-HaXMMTe Ha peryIINPOBOUHyIO pyuKy dyXOBKn n NOBepHHTe ee BnpaBO DO KOHua.
3aTcM NOHCCHTC 3aXKCHHYO CINHky K IcpfOpHPOBaHHOn Tpy60peIKN HaxMMTe Ha pykY Do yNopa (CMOTpn pnc.10).
He otnyckay pyuky y6eHntecb, yTO rOpeJa 3aXrIacb.
- Pn6Ibn3nteJIbHO uepe3 10 cekyHn OTNcyTHe pyky n y6eHNTecB, UTO ropeJka He NOTyXJa. B IpOtnHBOM clyuae NOBtOpHTe BCE CHauaJa.
PPEDOXPAHHNTJIbHOE YCTPOHCTBO FA3OKOHPTOJIa
IpeHMyIeCTBO OCHaIIeHHbIX 3THM yCTPOHCTBOM RopeJOK COCTOHT B TOM, TTO B CJIyae HENPON3BOJbHO rAWeHn IaMeHN cpaBaTbBAeC hCTema 3aIITb. DeIcTBNTeJbHO, B OTOM CJIyae ABtOMaTHueCKH npeKpaaetc NODaHa rA3a K NOTUxWeH RopeJIke, NO3BOJra TaKM O6pa3OM N36EkaTb ONaCHocTN yTeuKNr3a. NocLe HENPON3BOJbHO rAWeHn PIAmeHN KJIaNaH rA3OKoHTpONc pBaTaIBaET ABtOMaTHueCKH He 60Jeee Chem Upe93 90 ckyHd dIg RopeJOK paOoyen IOBepXHOCTN PJIHTbI upe93 60 ckyHd dIg RopeJOK dyXOBKn H rPHJIA.
RU
HHΦOPMAUJIЯДЛЯ NOTPEBNTEJIEN
IJIHTbI, OCHAIIEHHbIE CNTTEM0N 3AXHIGAHINOT 3JEKTPUeCKOH NCKPbI
PnHn3axnraHn TaKoJKe KaONHcHo BbHHe, 3a HckNIOueHHem TOrO,TOBmETo CnHKn HcNOJIb3yeTcHckPa, NOyHaMaJn PHaKaTHn, DaKe MHOrOKpaTHOM, pacNoJIOxehHOH Ha nepeDHeH NaHeHn KOnKN, Hn HKe HaKHMaH a PyKoRtKy rOpEkn, KOtopa D0JHKha 6bTB BKIOUeHa. B cJyuae, ecn IopeJaHa 3axnraTeCn, NONpOBoBaTb eHpe pa3, yctAHOBn peryIHPoBOuHyIO pykY B NoJIOXeHHe MHHMaJIbHOrO IIJaMeHH
- EcHn PHTa OCHHe HcTeMoN 3KeKTPo3axrHaHr TopeJOK DxyXOBKn HprH, pH IN BkIOUeHHO6BaTcIbHO DecpKaTb DBepyDyXOBKn NOJHOCTbO OTKpbITOn.
Bo BpemB KJIIOUCHHn ROPcIOK DxyOBKn H rphJIA OCHAICHbIX CnCTeMOI 3JIeKTPo3aJHHAHH, He HAXHMITE Ha KHONKY 3aJHKrAHH 60Jee Yem Ha 10 cekyHd. EcnH uepe3 10 cekyHd ropejka He 3axReTcR, OTNcyTHTE KHOKNY, OTKPOHTe DBepuy DxyOBKn H NOIOXJITe NkpanHe Mepe MHHTy PPEKJe Qm NOBTOPTb BKJIOueHne. ECJIN Kc RoPeJKA He BKIOuACTcNo nPnPHHC HOCnPapBHOCT ChCTcMbI 3JIeKTPo3aJHHAHH, To 3aXHTe TopeJIky BpyHyIO npn NOMOIIH CNHKn, a 3aTe MblOBOHTC CnCuaJIHCTa No TCxO6cLyKHBaHHIO. PPEDYIPKDEHHE
-06bHNO NocJe DHTeBHO HeHCIOJb3OBAHn PINTb cpa3y He ydaetc 3aKeueb TopeJIKN. Pepe 3axHHaHHem DOCTaTOUHO NOOXDaTb HECKOJIbKO CeKYH, NOKa He BbIeT CKONHBHINCB TpyoBnPOBdox BO3dyX.
-CTapaHTecb, YTO6bI BMeCTe C BbIyCKaEMbIM H3 ROpeJIOK BO3dYxOM HC BbIIIO MHOrO rA3a. EcHn ROpckA Hc 3aXrTeC8B TeCHHH HeCKoJIbKHX cekyH, NOBtOpHTe 3aXnraHHe, npeBapHTeJIbHO IOBCpHyB pcreyIpnoBOuHy OpyKBy IIOJOKeHc 3aKpbBaHn (●), a 3aTEM BHOBb OTkpBb ee.
-KoIaDyXOBKa HIN rPHJb HcNOJIb3yIOrBnepBbIe, H3 OTBepCTHMyxOBKn MOKCT IOBHTbcA DbIM HcPiTHbI 3aIIaX, BblBaHHbIpa3OrpeBaHHem 3MaJIHpOBAHHORo NOKpbTHe CTeHOK DxyOBKn HOCtAKOB MacJIHHCTOn CMA3KN TOpCJOK.
HCHIOJIb3OBAHNE KOHΦOPOK I A3OBONIINITBI
HcnoJb3yIte KAcTpOJI H C dHaMaETpOM dHa. NOxOJaIeRO K daH Homy pa3Mepy KOHΦOpKn. IIaMn He DoJXHO BbIPbIBaTbcra H3 NOJ KAcTpOJIH. PekOMChdYetCra
-MAJIOIPOeIKHcNOJB3OBaTBKAcTpOJINHaMeTpOM8cm.
-ДЯ cpeHHeI ropeJIKN HcnoJIb3OBaTb KaCTpOJIH DHaMeTpOM 14 CM.
-ДЯ 60ЛьшоI RopeJIKN HcnoJb3OBaTb KAcTpHIn DHaMeTpOM 22 CM.
INKORda He ycTaHaBJIbAHTe pyky B nPOMexyTOHoe NOJIOxHe MeKdy CHMBOJOM MaKcHMaJIbHOTo IJaMeHHIIOJIOXCHHCM 3aKpbBaHHa
JIHTbIC 3JEKTPHueCKHM KOHΦOPKAMH
KOHΦOPKN HMCOT pa3JIHUYI HHTCHCNCBHOCTb HaPCBaHH B 3aBN CHMOCTN OT NOJOKeHH peryJITopA.
-NOJIOKeHHe1=MHHMaJIbHOeHaRpeBaHHe BcEx KOHΦoPOK
IIOLOKCHNC6=MAKHMajbHOCHaPcBAHNCObIHbIX HbICTpbIX KOHΦOPOK (CKpaChbIMDHCKOM)
-IOLOXCHNC0-BbIKIHOCHNCBCCX KOHOPOK.
He HcnoJb3yUte KacTpOJH C dHaMeTpOM dHa MeHbIe dHaMeTpA KOHOpKn. DHO KAcTpOJH DOJXHO 6bITb KaK MOXHO BOJIe e IIIOCKHM, qTObI JyUWe npHJIeTaB K NOBepXHocTH KOHOpKn (CMOTPH pHC.14).
IPEJUYIPEXJEHNE
He octabJHHTe KOHOpky BKIOUeHHoB 63 KAcTPOJIN. EJIN JBe HcnoJIb3yeTe KOHOpky BnepBBe, To peKOMeHNyETcOCTaBHt b ee BKIOUeHHoI pN6JIH3NTeJbHO Ha 10 MHyT dA TTO, YTO6bl npocuyHTb BJIaRy II OCTaTKn CMA3KN Ha ee NOBepXHOCTH.
EcH KOnΦopKa He HcNoJb3yeTcB TeYeHH dIHTeJbHO repHOa BpEmEH, pckOMeHdyETcCJIerka Cma3aTb JnPOBOi Cma3KoI ee 3MaJIHpOBaHHyIO NOBcpxHOCTb.
H36eIaTe IIpIMHeHHaabpa3HBbIX cpeCTB IIpH OCHTE NOBepXHOCTN KOHΦOpKN.
HCTIOb3OBAHNE TAOBOH DYXOBKN
IocLe BkHueHHraOpKn3aKpOHTe KpbuHKy HOCTaBbTe DxyOBky B TeueHH 10 MHHY TJIpa3oRpeBaHH.
YIOKHTe INHFOTOBIAcmyO HnHny Ha 0bHuHyo cKOBOPOdy 6c3 pyKN HIOCTaBbTe ee Ha XPOMHPOBaHHyio peHETky.
IOMCCTHTc pcWtky Bmctc co cKOBOPoDn B dyXOBKy Ha 3 10 CTyneHb, H yCTaHOBHTe yka3aTeJIb pyuKn peYJrTOpa B JxJaemoe NOJIOKeHHe.
3a npHrTOBcHHeM HnHm MOxHO HaJIOdaTb Uepc 3acTeckHHyO DBepydyXOBKn pH BkIIOeHHOM 3JEKTPueCKOM OCBeHHeHH. TaKM Obpa3OM MoXHO H36KaTa Tb NOCToHHORO OTKpbBaHHaDBcp II,ecINB 3TOM Het ONpeJeHHHO HAIOHOCTH, Ka,HaHPMeP, POJIHTb rOTOBJeeec8 bIO Do KHPom.
IPMHMEUAHHE:IIIINIT6e3TePmOperyJrTopa
pyka pepyJHTopa B IOLOKeHH MaKcHMaJIbHOrO HArpeB 270°C
pyuka peryJIaTopa B NOLOXKeHH MHHMaJIbHOro HarpeBa 150°C
-Bce npomexytohhe TemnepaTypb MeJy 150°C n 270CyctaHaBJIbBAOTcI pN6JIH3NTeJIbHO MeJy NOJOXKeHHMIMHMaJIbHOrO H MaKCHMaJIbHOrO HaPcBa.
HnKOrHa He yctaHaBJIbHaTe pyky peryJrTOpa B npomexyTOHc NOIOxKHe Mekdy CHMBOJaM MaKCHMaIbHoro HarpeBa HOTKIOUeHHyXOBKn
Hcnob3OBAHNEA3OB0TOPTJIA
- YcTaHOBHTe PAnHKy 3aHNTbpeRyHnPOBOHbXpyEeOT NO-TOKa Ropqero BO3dyxa, KaK yKa3aHo Ha pHc.13.
-3axrnte ropeIky H NOdoxHNTe HeckoJIbKO MHHyT, Noka HarpeeTcayDyXOBka.
-
Pa3mecHTHe Ha peIeTke IpiHrTOBJIHEMOe Ha rPiJle KyyHaHbe.
-
yCTaHOBHTpe pIeTKy B DxyOBKY B cAmoe BepxHee NOJIOKeHHe.
-
Uytb Hnke peileTkn nocTaBbTe npOTHBHeH.
-3akponTe DBepy DxyOBKn, npHcJOnHa ee K 3aunTHoN PAnHe.
Yepe3 HcckoJIbKO MHHyT NepeBcPHnte XapHBWUOcH Ha rPHIe NnHMy TaKHM Obpa3OM, YTObI Obe cToPOHb INoDBeprJHCb OINHaKOBOMy DCHTBIO HfPaKaPacHO R3JyCHNn 3aXapHJNCp PABHOMePHO. (BPEM IPrHOTOBJeHHraBcHIT OT TnIIa IPOdyKTA H INHNBHydAJIbHOrO BKyca).
PnHrTOBJIeMoE Ha rPHJle 6JIOJIO.
BHIMAHHE: PnH nCIOB3OBaHHn rPHI HApYKbIc qAcTH dYXOBKN MOryT CIIbHO HaPBeBaTbc. He NoDnYckaiTe JTeEN 6JIH3KO K dYXOBKC.
HCTIOJIb3OBAHNE FA3OBOFO FPHJIA HClIOJIb3OBAHNE FA3OBOI JYXOBKN
-3aKHTe RopeKny H NOOJHTE HeCKoJIbKO MHHyT, NOKa HarpeTeY dyXOBKa, HJN Kc BKIOHTc 3ckTPnCCKyO CnHPaIb rHJ.
- Pa3MecHTHe Ha peIeTke npHrTOBJIReMoE Ha rPHJle KUHaHbe.
- YcTaHOBHTpepeKy B DxyOBky B caMOe BepxHee NOJIOKeHHe.
- 4yTb Hxke peHtKn NOCTaBbTe npOTHBHb.
-3akponTe DBepu DyXOBKn.
RU
HHΦOPMAUHЯДЛЯ NOTPEHTEJIEN
-Yepe3 HeckoIbKO MmHyT NepeBepHHTe XapHBuIocHa rPnIe NIIy TaKIM O6pa3OM, YTO6bl Obc CTOpOHb IIOBcprIINCb ODHaKOBOMy DCI CTBHO HHPaPaPacHO H3JlyeHHN 3axApNIINcb paBHOMepHO. (BpEM IIPIrTOBILCHH 3aBNCHT OT Tnna PPOdyKTaN HNDHBdyaJIbHO Bkyca).
IpHrTOBnEMOe Ha rPHJe 6JIO
BHIMAHHE. nHnHcIObOaHHn rHJIa HApyKHe yAcTH dYxOBKn MOrTy cHbHO HarpeBaTcR. He NOIpyKaIte DeTe 6N3KO K dYxOBKe.3JCKTPHcckKa CnHPaJIb dYxOBKn, paCIOIOKcHHaB B CbPXHe CC aCTH, BKIOUaETc nPH NOMOIN NOBOPota peryJInpOBOuHoi pyKN IOacOBON CTpeJcK. OTMCTKa yKa3aTCJIHa PyUKe DOJXHa COBNaAdaTB CnMHBOJOM rHJIHa NaPeJHEn NaHeJe PJIHTb.II INKIOUeHHn rHJIa 3arOpaeTcK kPachHa JAmNoUka, oO3HaauoJaaBKIOUCHNE 3IKTPHcckCOI CnHPaJIH.
3JIKTPNUECKA CTATNUECKA DYXOBKA C DBYMR OPRAHAMU YNPABJEHNI
JaOadpa pa3HnHbIM HArpcBaIOuHm 3JcMCHTa, INPBODHMbIM B DeIcTBHe NocpeDCTBOM NepeKIOUaTeJI H peTyIINpyEMbIM pN IOMOHTepMOPeRyTAToPA, HauHHa C HyIeBOr NOLOKeHHo (BbIKIOUCHO) H IOBOPaHbA pyKy No YacOBou CTpcIAKC MOxHO yCTaHOBHTbe E CJeDuOnne NOJOKeHHa
IcxOaI n3 noJoxeHn 0 (BbIKIOueHo) n Bpaauyky no
Yacobon CTepeKe, yCTaHaBnBaIOTc CNeDyUOJIne NIOJKeHINr:
-CMBOJ 3axKraHne JAmMbI dyXOBKn (KOToPA86yDet NOCTOARHO rOpetb, TaKKe I pRyKa3aTeJe pyHKN,yCTaHOBJIeHHOM BO BCEx dpyrNX nONOXeHNx).
-CIMBOI 3aJnraHne rPnJI (Ha nlaΦOHe dYxOBKn).
-CIMB0J:BKJIIOUeHHe BepTeJa npn BKJIIOUeHHOM rpuJe.
-CMBOI : BKIOUeHHe CONpOTBnEHHa CBOda IN CONPOTBnEHnnoDa (CTaTneckaФyHKuH).IPNMEUAHNE -XENTa INDnKATOPHna lamNoOka 3aRopaETcB 3aBNCIMoCTn OT BKIOUeHn TepMOperyJnToPA. IpexJe Yem NOMeCTnB DxyOBky npOdyKtbl IJRA XapKn, OHa DoJnxHa pa3OrpeTBcR B TeueHHe He MeHee 10 MInHyT.
JIEKTPNUECKA KOHBEKUHOHHA DYXOBKA
4 New
JaRoDappa3JHbHM HArpeBaIOUHM 3JIeMeHTaM, npHBODMbIM B DeIcTBHe NocpeDCBOM NepeKIOuHaTeIa I peryIHypeMbIM pNl NOMOHTepMOPeYJITopa, HauHHaC HUYeBOrO NOJOxEHn0 (BbIKIOUHO) INOBOpaunBa pyuKy no HaCOBoI CTpeJIke MOXHO yCTaHOBHt ce B CJeDuOnne IOJOKeHH.
-CHMBOJ BKJIIOUeHHe JAMIOUKN DYXOBKN (JAMIOUKA BKIIIOuHaETcK KOrda yKa3aTeJIb peYJITOPa yCTAHOBJIeH B JIO6OM H3 06O3HaueHHbIX NOJOeHHI).
CHMBOJ : MeJIeHHoe HaIpeBaHHe DxyOBKn. Temnepatypa DxyOBKn peryJInpyetc npn NMOUIN TepMoperyJrTopa.
- CHMBOJ BKJIIOUcHHe KOHBeKuHN 《CTaTHueCKoH》DyXOBKN. TemnepaTypa DyXOBKn peRyIHpyeTc npN NMOUIN TepMOperyJrTopa.
-CHMBOJ :BKJIIOUeHHeIgPnJIa
PIMMEAHHE-JKeTnA INDnKaTOPHaJaMnOuKa 3arOpaETcB 3aBNCMOCTOn OT BkNIOUeHnI TepMOpErJyTAToPa. IpeKJe CEM NOMeCTNTB B DxyOBKy pOdyKTbI JnJxkapKn, OHa DoJIxHa pa3OrpeTBcB TeHeHne He MeHee 10 MNHyT.
3JEKTPHCKA DYXOBKA CCHTEMOH BEHTNJIURIN "4"
JaRoDappaJINHbIM HarpEbaIOHM 3JIeMeHTaM, nPHBOINMbIM B DeIcTBHe NocpeDCBOM nepeKIOUaTeJn H peryJHPyeMbIM npn NOMOITN TepMOPeryJITopa, NaHHaC HHyJEBOrO NOJOKeHHa (BbIKIOueHO) H NOBopauHBa pyky no cacoBoi CTpeJIke MOxHO yCTaHOBHt C B CcDcyIOHc NOIOXCHII.
-CHMBOJI KIOUeHHe JAMIOOKN DXYOBKN (JAMIOOKA BKIOOaETcK KOrda yKa3aTeCb pCryJIArTOpa YCTaHOBCh B JIObOM H3 06o3HaCH HBIX NOJOKeHH).
CHMBOJI :ΦyHKIIOHIIPOBAHHe KpbJIbuaTKI.
-CHMBOJI KJIOUeHHe dyXOBKn C BO3dyXoYBkOHa OJHOM HIN HECKOJIbKHX yPOBHAX. TemnepaTypa dyXOBKn peryJNpyetc npH NOMOIIT TepmOperyJITopa.
CHMBOJI BKIOUcHNC TPHJIA
3AMEUAHHE:KJTAHINDKAToPHaJaAMNoQKa 3aKnraetcB 3ABNCMHOCHTOT BKJIIOUEHHN TepMOCTATA.
PpeKJe Yem CTaBHTb B DyXOBky npOyKtB IJIa BapKH, OHa DoJHKHpa3oRpeTbCBA TceHHe NO KpaHcN Mcpe 10 MHyT.
3JEKTPHueCKAIOINHΦYHKUNHOHAIbHAJ DYXOBKA
JaIopappa3JINHbIMHarpeBaIOHMMJIeMeHTaM,PnHBODHMbIMB DeICTBHe NOCpeDCTBOMpeekJIOyateJIHperyJInpyeMbIMpN NOMOHTepMOPcryJITOPa,3OTTHIN dyXOBKn ppcNOCTABAACT MHOBO3MOKHOCTeINpHiROTOBJeHHNHNHaOCHOBTpe pa3JINHbIXCNOCOBHarpcBaHH
a) BbHyjKeHHoe pacnpoCpaHHeHne TEnJa (dyXOBKa C Bo3dyXoYbKoH)
B) ECTCtBeHHoc paCnpoCTpaHcHc TcIIa (KOHBeKUN HIN KOHBckUHOH na dyXOBKa).
c) INHpaKpaCHoH3nyeHHe (rPnIb)
HaHHa C HylcBOrO NoIOxHn 0 (BbIKIHOHO) n IOBopaHBApe rYJrTOp no YacOBOn CTpeJIke MOXHO BbIpaTb OdHO n3 cJeDyHOHX NOIOxCHn
-CHMBOJ 6 BKJIQUHHeHC JAMIOUKN DYXOBKN KpaCHOHNaMOUKN yka3aTeJI.ФYHKUNHOHHPOBAHNC KpbJIbuaTKN
- CnMBOJ : BKJIIOHCHNE KOHBCKUHN «CTAHTHIECKO» DXYOBKN. TcM nepaTpya dYXOBKH peryIHPyETc npH NOMOIN TepMOPeryIATopa.
- CHMBOJ : BKJIQUHHeNc DXYOBKN C BO3DyXOyBKOJ Ha OJHOM HJIN HECKOJIbKHX yPOBHAX. TemnepaTypa DxyOBKn peryIHPyETc npn NOMOII TepMOpERYTAToPA.
-CHMBOJI KIOUeHHe DyXOBKn C Bo3DyXoDyBKOHa OJHOM HIN HECKOJIbKHX yPOBHX. TemncpaTypa DyXOBKn pCryIHypyeTc npn IOMOH TepMOperyTota.
-CMHBO BKLIOUHHe rPHII (B BepxHn YAcTH dyXOBKN).PeRyINHOBOUHn pyuKa TepMoperyIaTopa DOJxHa 6bITb pyuKa TepMoperyIaTopa DOJxHa 6bITb yCTaHOJIcHa B COOTBCTCTBYIOCC MaKCHMaIbHOI TempePAType NOJOKeHHne.
CHMBOJ B: BKIOUeHHe rPHJI (B BepxHn qactn IyXOBKn).PeryIHOBOUHARpyka TepMOpeRyJITOPa DOJIXHa 6bITb pyKa TepMOpEYJITOPa DOLIXHa 6bITb yCTaHOBJCnA B COOTBCTCTBYUCC MAKHMALHOI TEMNEPATyPeNoLOXKeHHe. BepTe np6oTaert.
-CMBOI 1:rotOBKa C nCnOJb30BaHHe M BeHTnJIaUN I npINr (Ha pnafohe dYxOBKn), Tempepa DyXOBKn peryInpyeTc npn NmOuN pyKu TepmoperynrTopa. BepTe npa6Taet.
BO BCCX NOIOJCKHNX,3a HCKHIOUCHNcHm HyJIa, IPOHCNOHT 3aKnIa HHe KpaCHO HINDKaTOPHO JAMIOOUKN JAMMnIyXOBKn.
3AMEHHE:KITaHnHkKaTOpHaJaAMIOUka 3aKHaCTcB 3aBN CHMOCTHOT BKJIIOUeHHTePMOCTaT.
IpeKJe YEM CTaBHTB B DyXOBky npOyKtB IJIa BapKn, OHa DOJkHa pa3orpeTbC B TeueHne NO KpaHHe Mepe 10 MHHY.
KAKIOLb3OBATbC8JNEKTPUeCKIMΓPNIEMB 3JIeKTPUeCKOДYXOBKE
-ПишТОЛьКоДЯМоDEнeС“3NeKTPnueCKOДуXOBKO”,ynpaBJIЯEMbIX DByMЯ pa3dJIbHbIMn pyuKaMn (ceJIeKTOp -TePMOperyJrTOp),MOxHO roTOBHTb Ha rPnIe npn 3aKpbITOnDBepue,He nONb3yrcb 3aunToNpyeK.
Pn roTOBKe Ha rPnne C 3aKpbIToN DBepue HeNb3r HcNoJIb3OBA Tb Tempeatypbl, npeBbIwaOuune 200^
HcnoJIb3OBAHNE BEPTEA
a)Дпгг�OTOBнннHa rPnE C OTKpbIToH DBep
YcTaHOBHTC PAnHky DnAaHTbI pcryIHpOBOHbIX pyck OT NO TOKa TOpRHeRo BO3NyXa, Ka yKa3aHo Ha pnc.15.
3aKHTc TOpEJky rPHJH HIN BKNIOHTC 3NCKTPCHCCKYIO CnHPaJIb rPHJ.
- IomeCTHe KycOK Mca JIJI NOJkaPbHaHH Ha BepTe, 3aKpeHb CTO CnCuaJIbHbIMN BnJIkAmH
- BcTaBbTe OCTPHe BepTeJa B CTyNtUy MHKpOdBHrAteJIa
CHHMMTCBCPTcJaCnCuaIbHyOpyKy
- YcTaHOBnTe PpOTHBeHb CaMOM H3y DxyOBkH.
-3akponTe DBepu dyXOBKn, npHcJHOHa ee K 3aunTHoN pHaKe.
-3aynctteBepTeJHaKHMaHa CteuaIbHbB BbKIOaTeJIb
-BpemrOTBpemHnNOINBaHTeKHpOMMco.KordaMRC6yDTeROTOBO.3aKpyTHTCHaBCPTcI CnCuaJIbHyO pyky H BblbTc CROH3CTynHsMbKOdBHraTeJIA
b) npnroToBHeHn Ha rpnIe c 3akpbTOn DBepei.
- KaYka3aHO BbIe, 6e3 nCnOlb3oBaHn8 3aUHTbI pyuKn, KaK noka3aHo Ha pnc.15
BHIMAHHE! BHJKN BepTea MoTy HMeTb 3aoCTpeHHbIe KOHJIb, IO3OTOMy npn HCNOJIb3OBaHH Hx CcAcYct IPOBBAITb OCTopoHOCTb.
DXYXOBKACTEPMOPEYJITOPOM
Ecln BO Bpem npHrTOBJIeHHI HIIH 6yUT 3ameHb IpePaIbI TEMpeaTpbl HIN OTKIOHeHHI DeHCTBHTeBHON TEMpeaTpbl OT yctAHOBJIeHHI, HeoXdHMBO BIsBaTcneuaJHCTa N pOBepHTb FyHKUHOHPoBAHHe TepMOperyJTATopa.
HCHIOJIb3OBAHNE MEXAHNUECKO TAIIMEPA (pHc. 16)
YCTaHOBHTe BPCMn, HcO6XoHMOE DIAI INPHOTOBJIeHHN IIINH, NOBOPaunBa pyKy TaHMePa No YacBOH CTpeJKe. NcTeueHHYNCTaHOBJEHHO BpEmEH Bbl ycJIbHIte 3BOHOK, H3BCIIaIOHN O6OKOHHaHH PnIRTOBJIeHH.
OTJEJHEHNEPA30FPEBA TAPENOK
Yro6bl OTKpbIb OTdeneHne pa3orpeBa TapeNOK noHNMMTe pyKoI OTKnHyIO NaHEnb (CMOTpn pnc.17).
YTo6b3aKpbItbOTdeneHne DOCTaTOHNO ONyCTnTb OTKnIDHy nHaHeJIb.
INHADJIEKHOCTN DYXOBKN
- Ha peiEky DxyOBkN CTABRTcH MHeIOHecc B NPOdaXe NPOTHBHH DIAI PPHTOTOBJIeHH CnaIKHX 6JHO, JAPKORO H3 Mca H T.D. Mco MoKHO paCNOJIOKHTb PpAMo Ha peiEKe, - TaKOH cNoocb Ha3bIbAcTcR MaCO Ha rPHIC.
- PpOtnBHeB pa3MeuaeTcra nD peWTeKoN cnyknt dna c6opaCTeKaIOUeO Coka pPnroTaBnIBaEBMbIX npOdyKTOB Ha peWetke. PpOtnBHeB MoXHO NcONNb3OBaTB N DnA rTOBKn 6HNOd.
- EcJn BapKa npOn3BOAnTcB DxyOBKe C ChCTeMoH BeHTNJaUHH,TO MOXHO OIOHBpeMeHH NOmecTtB DBe peIETKN. Pn 3OM HxKHO HMeTb B BNy, YTO ecJIn pOpykTB OTJNuOTcM MeKdy COBoI NO KaueCTBy H KOJIHyCCTBy, TO, CCTcCTBCHHO, H CpOKn FOToBHOCTM MOYr 6bITb pa3HbIMN.
DEMOHTAKDBEPLbI DXYOBKIN
0 145 1,0 kW - Disco Normal
0 180 1,5 kW - Disco Normal
0 145 1,0 kW - Kavovikn Eotia
0 180 1,5 kW - Kavovik' Eotia
IXEIE EETION
katawavioaon 1,1 kW
πáw avtiotao
1,1-1,5 kW
Kuklki n avtiotaon pfoupvou
2.0 kW
grill 2,0 kW
avεμιστίρας 25 W
φως φούρνου 15 W
OAIKH IEXYH AKEKTPIKOY OYOPOY
2,21kW
Directiva 2002/96/EC (RAEE) .57
Reglamento Europeo n° 1935/2004. 57
Figuras 58-60
0 145 1,0 kW - Placa normal
0 180 1,5 kW - Placa normal
= SEMI-BAPIDE
=SEMI-BAPID
=Nonv6bictpa
= SEMI-RAPIDO
= nHTaxus
= SEMIRBAPIDO
B = BAPIDO
= BAPIDE
= BAPID
=5bICTpar
= RAPIDO
TQXUC
=BAPIDO
TC = TRIPLO CORONA
=TRIPLE COURONNE
=TRIPLE BING
=CTPOHNOKOPHOH
DnameHM
ULTRA RAPIDO
TpiAπεπiaKauaonC
=TRIPLE CORONA
P1 = PIASTA 0180
= PLAQUE 0180
= HOTPLATE 0180
=3JEKTPPOKOHOPKA0180
= DISCO 0180
=80Tia 180
=PLACA 0180
P2 = PIASTA 0145
= PLAQUE 0 145
= HOTPLATE 0145
=3JIKTPOKOHQPGKA0145
= DISCO 0145
=80145
=PLACA 0145