USER MANUAL FS3611 IT FAGOR
User installation and operation manual
CERTIFICADO DE GARANTIA / CERTIFICAT DE GARANTIE CERTIFICADO DE GARANTIA / WARRANTY CERTIFICATE
COD.: kg.
N.:
Antes de instalar y usar el aparato lea cuidadosamente el manual de instrucciones Avant dinstaller et d'utiliser l'applareil, liquez attentivement ce manuel d'utilisation Antes de instalar e utiliser o apalheiro leia cuidadosamente o manual de instruções Before installing and use of the appliance please read carefully the instruction book
INDICE/INDEX/INDICE/CONTENTS
ESPANOL 3
INSTALACION Y MONTAJE 4 - 9
USO DEL APARATO Y CONSEJOS PRÁCTICOS 10 - 23
MANTENIMIENTO Y LIMPIEZA DEL APARATO 24 - 26
INSTALLATION AND ASSEMBLY 88-93
USING THE WASHING MACHINE. PRACTICAL TIPS 94 - 107
MAINTENANCE AND CLEANING 108 - 110
SAFETY AND TROUBLESHOOTING 111-113
ENVIRONMENTAL NOTE 114
CONDICIONES DE GARANTIA (VALEDERO UNICAMENTE EN ESPAÑA)
Compartment Préavage
Compartment Lavage
Compartment Additif liquide (assouplissant...)

IMPORTANT
CONDITIONS OF GUARantee
FAGOR ELECTROMESTICOS, S. COOP., Guarantee this new product for one year from the date of purchase.
During that time FAGOR'S engineers will replace or repair any defective parts free of charge. This guarantee covers the product for domestic use only and the appliance must have been supplied, installed and use in accordance with FAGOR'S instructions. Consequential losses and accidental damage to the product are not covered by the guarantee.
TO QUALIFY FOR BENEFITS UNDER THE GUARANTEE, YOU MUST BE ABLE TO PROVIDE PROOF OF DATE OF PURCHASE TO FAGOR'S ENGINEERS AND MUST SHOW THIS DOCUMENT ON ANY SERVICE VISIT.
This guarantee is in addition to your statutory and other legal rights which will not be excluded or in any way diminished.
- Valid for United Kingdom only
TO BE RETAINED RETAINED BY CUSTOMER (THE GUARANTEE CERTIFICATE AND CONDITIONS OF GUARANTEE DOCUMENTS).
- IN IRELAND, THE FAGOR DISTRIBUTOR WILL GUARANTEE THE PRODUCT.
In other Countries, FAGOR products will be guaranteed by the FAGOR distributors according to their conditions.
FAGOR UK
Lancastrian Office Center
Ground Floor, Duck Worth House
Talbot Road
Old Trafford
M32 OEU MANCHESTER
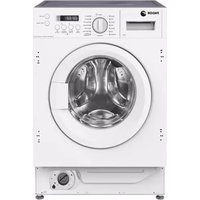
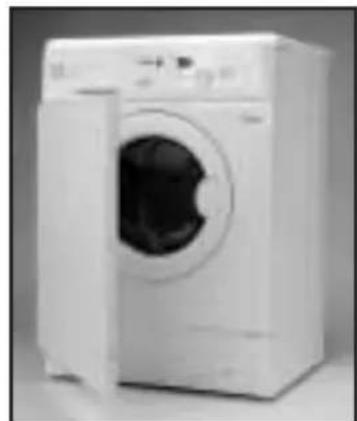
WASHING MACHINE
INSTALLATION AND ASSEMBLY
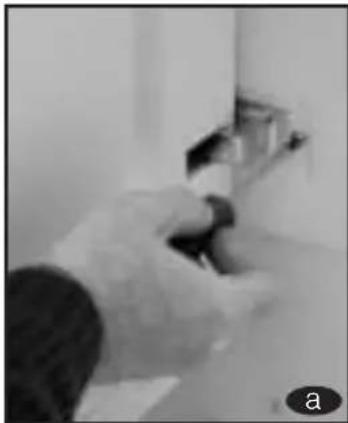
1 UNPACKING AND UNBLOCKING THE WASHING MACHINE
UNPACKING
UNBLOCKING
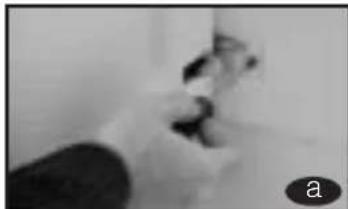
a Remove the screws holding the plastic covers to the back of the washing machine.
Loosen and remove the 3 blocking screws.
Cover the holes with the plastic covers you have just removed.
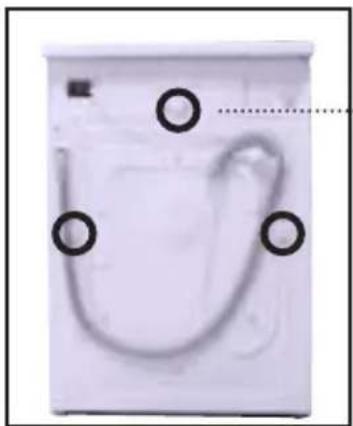
IMPORTANT
Do not throw the blocking screws away. You may need to move the washing machine at a later date.

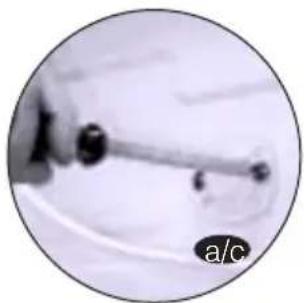
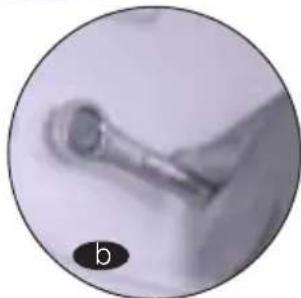
CONNECTION TO THE WATER SUPPLY NETWORK
The water supply hose is inside the drum.
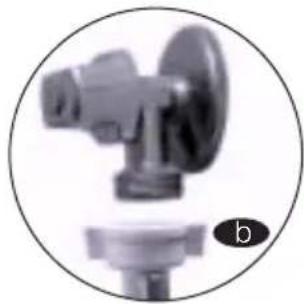
a Connect the bent end of the hose to the threaded inlet of the electrovalve located at the rear of the washing machine.
b Connect the other end of the hose to the water intake. Then securely tighten the connection nut.
A fixed drain outlet at a distance of 50 - 70cm from the floor is recommended.
Ensure that the drain hose is not overtight and that it is not twisted or bent.
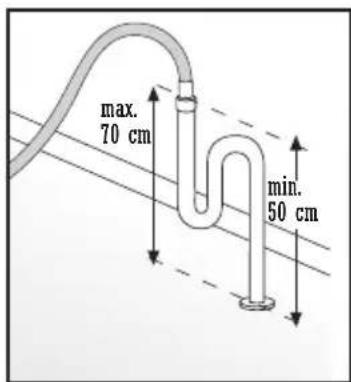
IMPORTANT
It is important that the hose bend is correctly fastened to the outlet, to prevent any risk of it becoming detached and causing flooding.
If your washing machine has a hot water intake, connect the tube with the red threaded end to the hot water tap, and to the electrovalve with the red filter.

LEVELLING
Use the adjustable legs to level the washing machine. This will reduce noise level and prevent it from moving during use.
4
ELECTRICAL CONNECTION
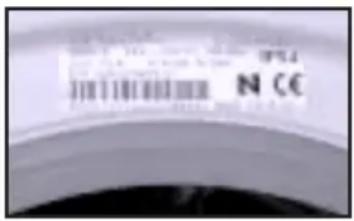
Consult the reference plate located on the loading door of the washing machine before making the electrical connections. Ensure that the voltage reaching the plug is as appears on the plate.
Do not remove the reference plate. The information on it is important.
IMPORTANT
It is very important to correctly earth the washing machine. The electrical installation, plug, socket, fuses or automatic switch and counter must be correctly dimensioned for the maximum power indicated on the reference plate. If the power supply cable is damaged, it must be replaced by a cable or special unit provided by either the manufacturer or your after-sales service.
(5)
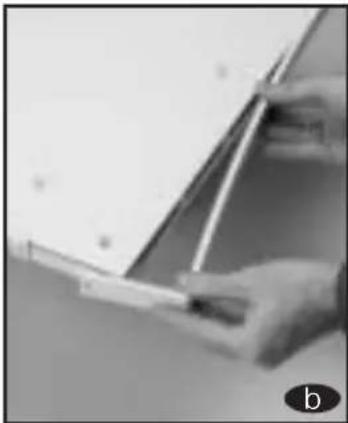
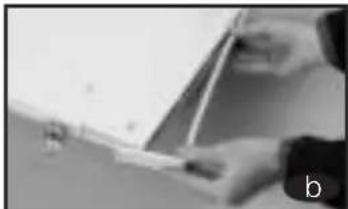
PANELLING
Decorative panels or facing may be fixed to the front of the washing machine to match your kitchen furniture. This is a simple process. The facing or panels must not be over 5 mm thick.
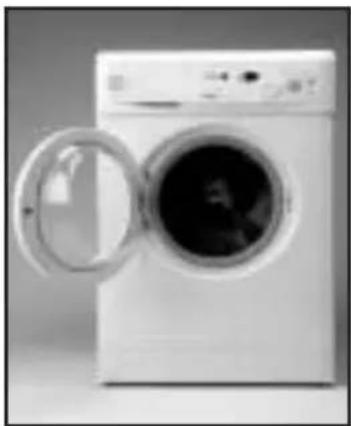
a Remove the screws from the hinges, and remove the washing machine door by sliding it out to the side.
b Remove the screws from the lower protection frame and remove it. Extract the panel supplied with the washing machine.
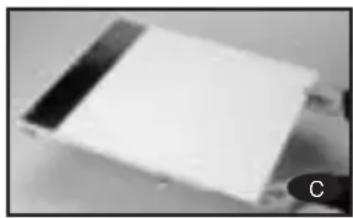
Cf the new panel is 3 mm thick or more, put it in place. If it is thinner than this, place it over the panel provided with the washing machine.
To replace the door with the new decorative panel, repeat steps a, b and c.
The height of the door on which the panel can be placed can also be adjusted, to align it with the rest of your kitchen furniture.
a Remove the screws from the hinges, and remove the washing machine door by sliding it out to the side.
Remove the screws from the lower protection frame and remove the frame. Extract the panel supplied with the washing machine.
The lower part of the door and the lower protection frame are divided into 7 sections of 10mm Use the sections as needed to adapt the decorative panel to the new dimensions.
d Replace the decorative panel and the lower protection frame and then replace the door.

On Fagor washing machines, the door opening direction can also be changed.
a Remove the screws from the hinges, and remove the washing machine door by sliding it out to the side.
b Remove the screws from the lower protection frame and remove the frame.
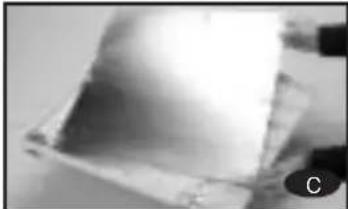
Extract the panel supplied with the washing machine and remove the inner plate by taking out the screws holding it in place.
Remove the hinges and place them on the opposite side of the door.
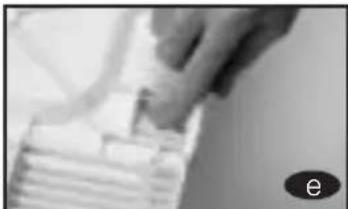
e Remove the door protection cover and place it on the opposite side, where the hinges were.
f Mount the plate, the door panel and the lower protection frame again. Then mount the door.
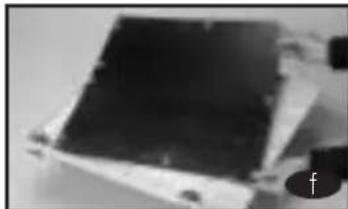
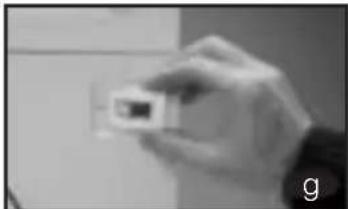
g Remove the fastening latch located on the front of the washing machine by removing the screw holding it in place, and place it where the upper hinge was before.
h Also remove the protection buffer and place it where the lower hinge was before.
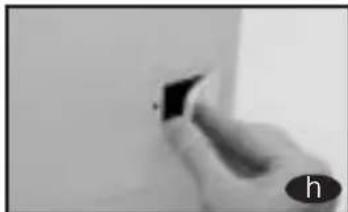
Put the door in place, inserting the hinges and sliding it gently to the side, in its new location. Adjust the screws.


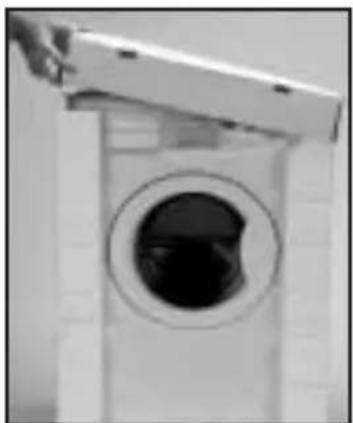
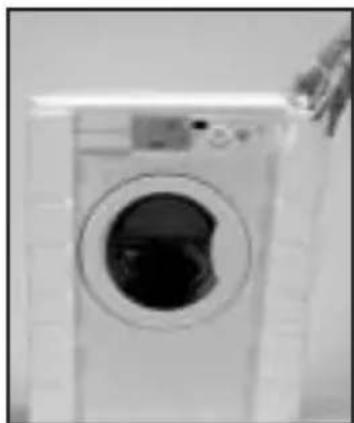
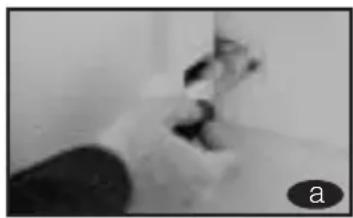
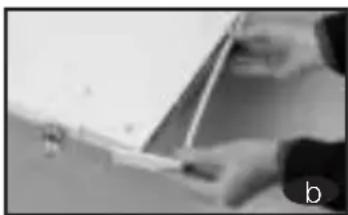
6 INSTALLING THE WASHING MACHINE UNDER A WORKTOP
The washing machine may be fitted underneath a kitchen worktop. If you need to change the worktop over the washing machine, order the protection plate from the Technical Assistance Service (902 10 50 10) and proceed as follows:
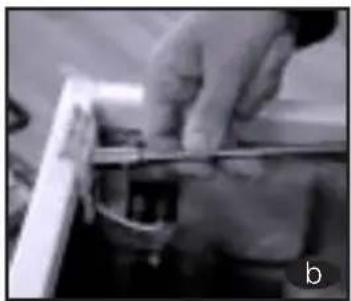
a Remove the washing machine top by taking out the side screws and knocking it slightly towards the rear.
b Extract the screws and remove the parts holding the top in place.
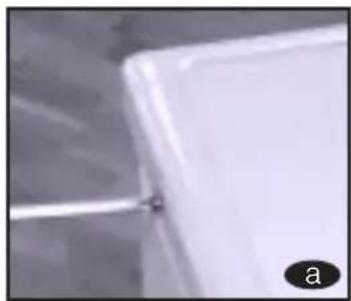
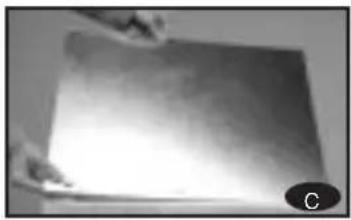
Out the protection plate in place and screw it to the washing machine so that it can then be inserted in the place you wish.
7 PRE-CLEANING
When the washing machine has been correctly installed, we recommend you run programme 5 at 60^ with no load of clothes and no detergent. This is to check that the installation, the connections and the draining system are all correct, and to thoroughly clean the inside of the washing machine before any wash programmes are run.
Select programme 5 and 60^
Press On/Off button
USING THE WASHING MACHINE. PRACTICAL TIPS
1 PREPARING GARMENTS FOR WASHING
Before placing the clothes in the drum, make sure all the pockets are empty. Any small objects may obstruct the drain pump.

Separate the clothes according to fabric or manufacture. We recommend using the delicate programmes for sensitive fabrics. There is a special wool programme for woollens.
IMPORTAI
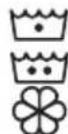
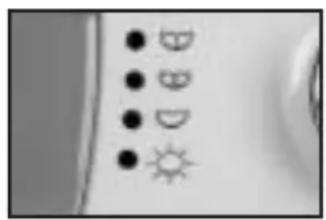
normal dry delicate dry no dry

Make sure beforehand that your woollens can be machinemashed.
Make sure beforehand that drying programmes can be used with your garments.
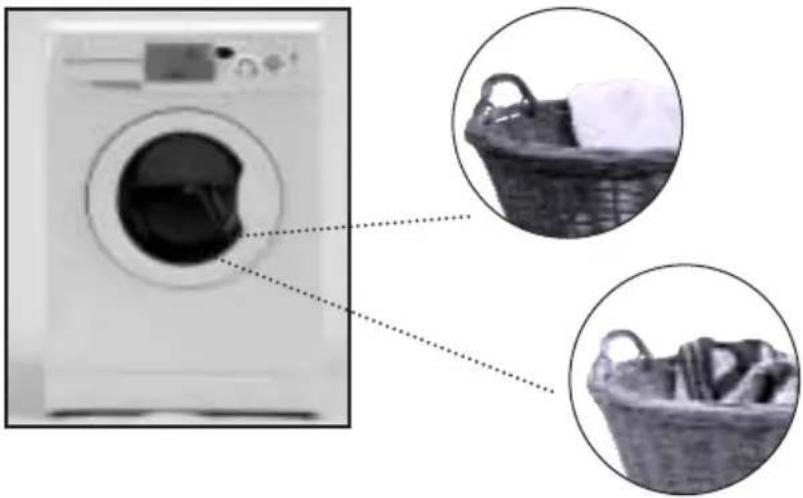
Separate clothes according to amount of soil.
a lightly soiled garments should preferably be washed using a short cold wash programme.
b programme without prewash should be used for medium-soiled garments.
Heavily soiled garments can be washed using a long programme with prewash.
Separate the clothes according to colour. Wash whites and coloureds separately.
IMPORTANT
Remember to load the washing machine to its full capacity, as this means savings on water and energy.
Whenever possible, we recommend that you wash garments of different sizes within the same wash programme. This improves the washing action and also aids the correct distribution of the garments in the drum on spin-drying, and the washing machine will therefore be quieter.
2 USING DETERGENT AND ADDITIVES
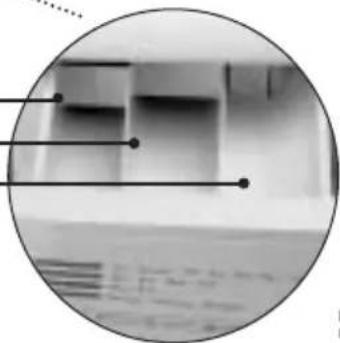
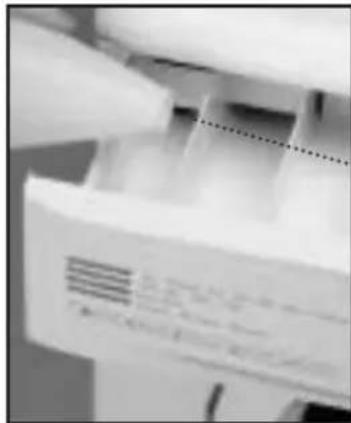
Place the detergent or additive in the detergent drawer before the wash programme begins. The drawer is divided into three compartments.
Prewash compartment
Wash compartment
Liquid additive compartment (fabric softeners etc.)
IMPORTANT
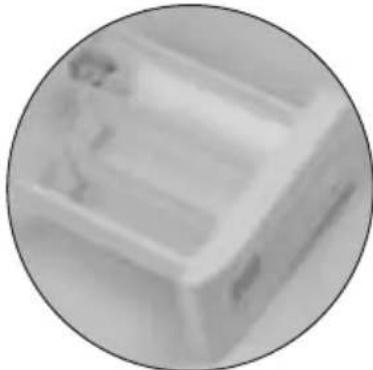
The level of liquid must never be higher than the MAX reference mark printed on the compartment wall.
Liquid detergents may also be used in this washing machine. An optional detergent compartment is to be used for this, which can be acquired from the Technical Assistance Network 902 10 50 10.
902 10 50 10
Place this optional compartment inside the wash compartment.
Remember that the amount of detergent to be used will always depend on:
The amount of clothes to be washed.
How heavily the clothes are soiled.
The hardness of the water (Information on water hardness in your area can be obtained from the competent local authorities).

ECO-NOTE
Remember that concentrated detergents exist which are more environment- and nature-friendly.
The use of more detergent than necessary will not improve your washing results, and apart from costing you money it will have a negative effect on the preservation of the environment.
We therefore recommend you follow the detergent manufacturer's instructions.
3
SELECTING A WASH PROGRAMME
There are four types of programmes:
a Normal programmes
Delicate programmes
cWool programmes
Auxiliary programmes
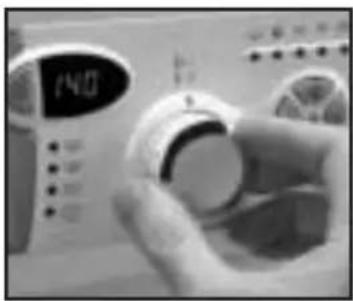
To select a wash programme, proceed as follows:
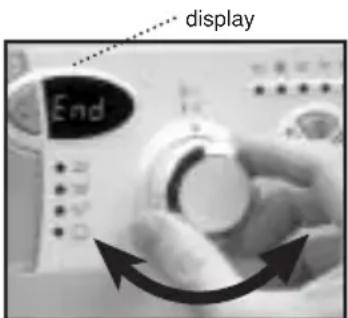
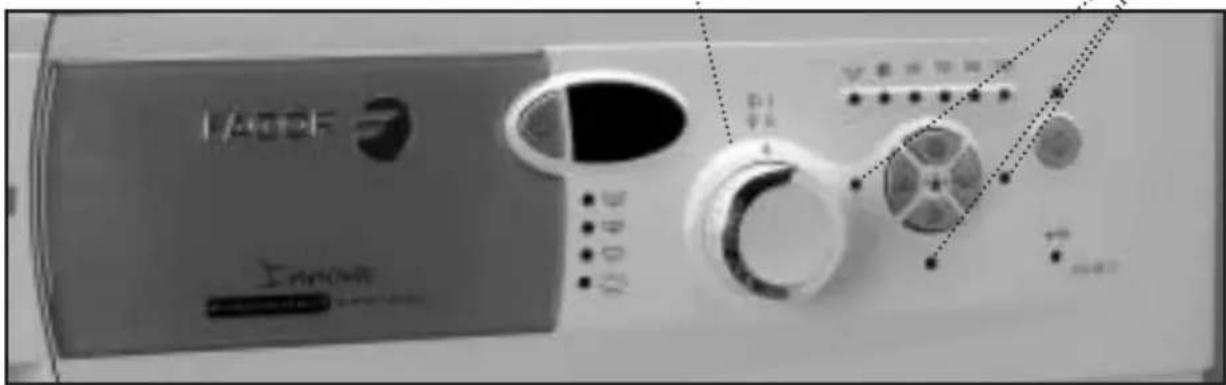
- Switch the washing machine ON by pressing the programme selector dial, which will come out.
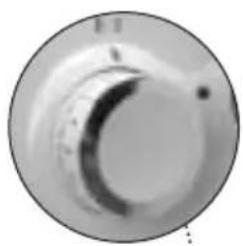
- Select the wash programme by turning the Programme Selector Dial.
When this is done the spin speed light for this programme will come on.
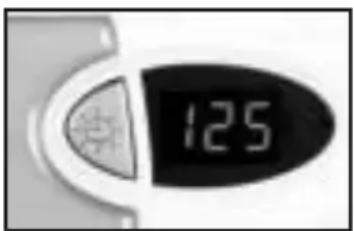
If your washing machine has a display, it will light up for a few seconds when the programme is selected, showing P + programme number (P01, P02, etc). It will then show the approximate programme duration in minutes.
The time shown on the display will vary according to the stage the programme is at.
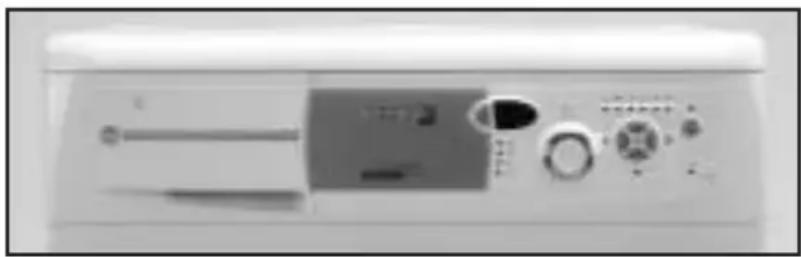
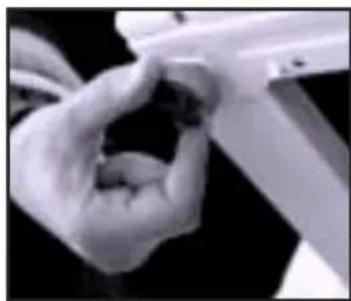
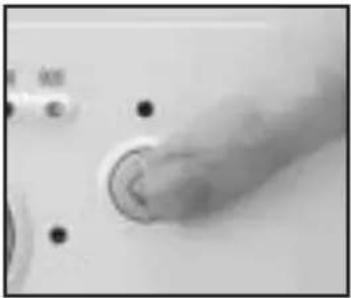
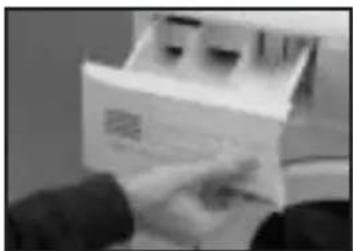
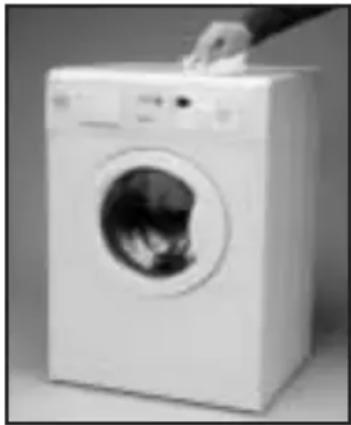
- If your washing machine is of the fully integrable type, instead of pressing the programme selector dial you should press the button on the middle of the control panel as shown in the photo.


ECO-NOTE
We recommend you choose a wash programme without pre-wash whenever possible. This will save you money and help protect the environment.

SELECTING WASHING AND DRYING
This consists of selecting a wash programme, as described in the previous section, and then selecting a drying time using the button next to the display. An "0" will appear on the display and the drying phase LED will light up; both will flash together until the On button is pressed. When the drying minutes button is pressed again, the time appearing on the display will increase minute by minute from 20 to 180. If you press and hold down the time button, the time will advance 10 minutes per second. While washing is in progress you can view the drying time by pressing the button once. You can also press it more than once to modify the drying time. In this case, the washing machine will stay on pause until the On button is pressed again.
Selecting drying only.
Turn the programming dial to ON and then select the drying programme as described in the previous section. If you decide to take out the clothes before the drying time selected is up, turn the display to zero. (If this is not done the remaining time will still be in the memory the next time the washing machine is switched on).
IMPORTANT
If you choose a wash + dry option the load must not be over 4 kg. (1.5 kg for delicat e wash programmes).
| PROGRAMME | RECOM-MENDED TEMPERATURE | FABRIC TYPE | POSSIBLE OPTION BUTTONS | MAX. LOAD(KG) | WASH PRO-DUCT COM-PARTMENT | PROGRAMME DESCRIPTION | TOTAL CONSUMPTION (KWh/litre) | APPROX. DURATION (minutes) |
| Extra Price | Time reduction | Easy Ion | Select spin | Spin suppress | Anti-crease | For 6 kg washing machines | For 6 kg washing machines |
| 1 | Normal cold Cold deli cate colours YES 6 | Cotton/Linen Normal wash, rinses, automatic additive absorption 0.15/49 90 very light soil if desired and long final spin | | | | | |
| 2 | Quick 30°C | 30 | Cotton/Linen SHORT wash, rinses, white's/colours very light soil if desired and long final spin | YES | NO | YES | 1.5 | automatic additive absorption | 0.20/30 | 30 |
| 3 | Normal 30°C | 30 | Cotton/Linen delicate colours light soil | YES | 6 | Normal wash, rinses, automatic additive absorption if desired and long final spin | 0.40/49 | 120 |
| 4 | Normal 40°C | 40 | Cotton/Linen fast colours light soil | YES | 6 | 0.65/49 | 125 |
| 5 (*) | Normal 60°C | 60 | Cotton/Linen fast colours medium soil | YES | 6 | 1.14/49 | 140 |
| 6 | Normal 90°C | 90 | Cotton/Linen whites heavy soil | YES | 6 | 1.90/55 | 125 |
| 7 | Prewash 60°C | 60 | Cotton/Linen whites/fast colours heavy soil | YES | 6 | | Prewash, normal wash, rinses, automatic additive absorption if desired and long final spin | 1.45/60 | 135 |
| PROGRAMME | RECOMMENDEDTEMPERATURE | FABRIC TYPE | POSSIBLE OPTION BUTTONS | MAX.LOAD(KG) | WASH PRODUCT COMPARTMENT | PROGRAMMEDESCRIPTION | TOTAL CONSUMPTION(KWh/litre) | APPROX. DURATION(minutes) |
| Extra RinseTime reduction | Easy Ion | Select Spin | Spin suppress | Anti-crease | | For 6 kg washingmachines | For 6 kg washingmachines |
| 8 | Delicate cold Cold cotton delicate colours | Synthetic/mixYES 3 0.15/55 70very light soil | | | and gentle final spin | | | | |
| 9 | Delicate 30°C cottondelicate colours | Synthetic/mix Delicate wash, rinses,ES 3 automatic additive 0.35/55 75light soil absorption if desired | | | | | |
| 10 | Delicate 40°C cottondelicate colours | Synthetic/mixYES 3 0.60/55 80medium soil | | | | | | |
| 11 | Wool 35°C | WOOL 35 | Wool/mix WOOLwash, rinses,wool whites/colourslight soil | YES | NO | YES | 1 | automatic additive absorption ifdesired and gentle final spin | 0.50/60 | 40 | | |
| 12 | Rinse | - | Cotton/cotton mixSynthetic/DelicateWool/wool mix | YES | NO | YES | 6 | | Rinse, automatic additiveabsorption if desiredand long final spin | 0.05/30 | 25 | | |
| 13 | Spin dry | - | Cotton/cotton mixSynthetic/DelicateWool/wool mix | NO | YES | NO | 6 | - | Drain and long final spin | 0.05/0 | 10 | | |
| 14 | Normal dry | - | Cotton/Linen | - | 4 | - | Normal dry | 2.8/48 160 | | | |
| 3 | 1.8/27 100 | | | |
| 15 | Delicate dry | - | Synthetic/mix | - | 1.5 | - | Delicate dry | 1.2/26 | 95 | | |
| 16 | Drain / End | - | Cotton/cotton mixSynthetic/DelicateWool/wool mix | NO | 6 | - | Drain and end of programme.Takesprogramme to final position | 0.00/0 | 2 | | |
| NOTE: the kWh and litre consumptions and programme durations are shown for the full load, and may vary depending on type and amount of clothes, water supply pressure, etc.(*) Energy label data based on this programme, in accordance with EN60456. | |
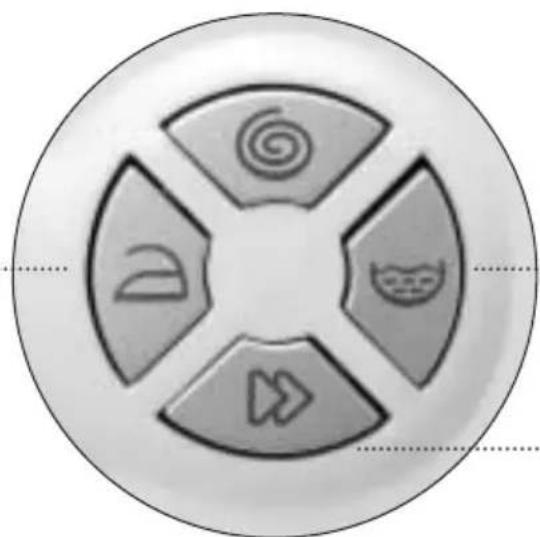
4 SELECTING ADDITIONAL FUNCTIONS
The wash options should always be selected after choosing the wash programme. If the programme is changed during the selection, the options previously selected will be cancelled out.
After switching on the washing machine (with the programme dial out, or using the central switch on fully integrable models), select the desired options. The corresponding pilots beside each selection switch will light up when they are selected.
The following options are available:
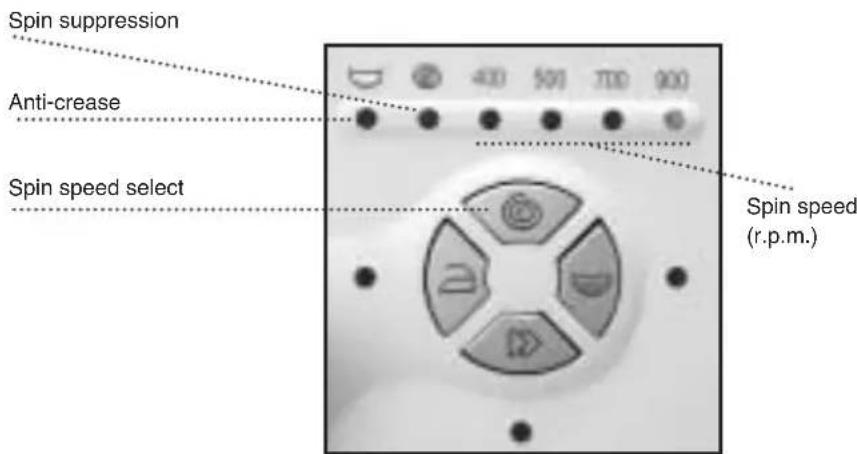
The programme selected has its own particular spin speed. This is shown on the row of pilot lights at the top. If necessary, the spin speed can be changed, the spin-dry can be skipped, or the anti-crease option can be used.
To do this, press the spin speed select button one or more times until the desired option lights up.
This stops the cycle after the last rinse, and the clothes remain wet. When the function is deactivated the washing machine continues the programme, draining and spinning. This is handy for when you are not at home, for example, and you want to delay the
spin dry until you arrive, to prevent the clothes becoming creased after spinning and being left in the drum.
This option allows you to run a programme without the final spin. This is used to avoid the formation of creases when washing special materials.
This increases the final rinse given to the clothes. It is suitable for large loads and for washing clothes belonging to people with sensitive skin.
It increases water consumption!
When this option is selected the programme time is reduced by up to a third (see programme table). If your washing machine has a display, the new time will be shown when it is pressed.
This option prevents the clothes from creasing by running a special programme with several special rotations, which fluff up the clothes after spinning and make them easier to iron.
Easy iron Extra rinse
Wash time reduction
The wash options should always be selected after the wash programme has been chosen. The drying time can be selected before or after the options.
A drying programme will not admit any wash options.
IMPORTANT
If the programme is changed, or the programme selector dial pressed in (OFF) (central switch on fully integrable model), while the additional functions which have been described are being selected, all the functions chosen up to this point will be cancelled.
Selecting the safety lock
Safety lock function
The safety lock ensures that the programme and wash options selected will not be affected if any of the buttons are accidentally pressed (by children, for example).
Activating the safety lock
The safety lock is activated by pressing the Extra Rinse and Easy Iron buttons at the same time and holding them down for at least 3 seconds. The On button light will then start to flash, showing that the safety lock is on, and the washing machine will start up. The safety lock should be activated after having selected the wash programme and all its options plus the desired time delay.
Deactivating the safety lock
The safety lock is cancelled out when the wash programme ends and when the END light comes on. If you wish to deactivate the safety lock before the programme has finished, press the EXTRA RINSE and EASY IRON buttons and hold them down for at least 3 seconds. The light will then go off and the washing

machine will remain in pause status.
Using OFF (pressing the dial in, or using the central switch on fully integrable models) will not cancel the safety lock.
When the washing machine is started up again the programme will continue to run from where it has left off.
Any change of programme during the selection will cancel out the options previously selected. The options will also be lost if the washing machine is switched OFF or if there is a power cut.
(5)
STARTING UP THE WASHING MACHINE
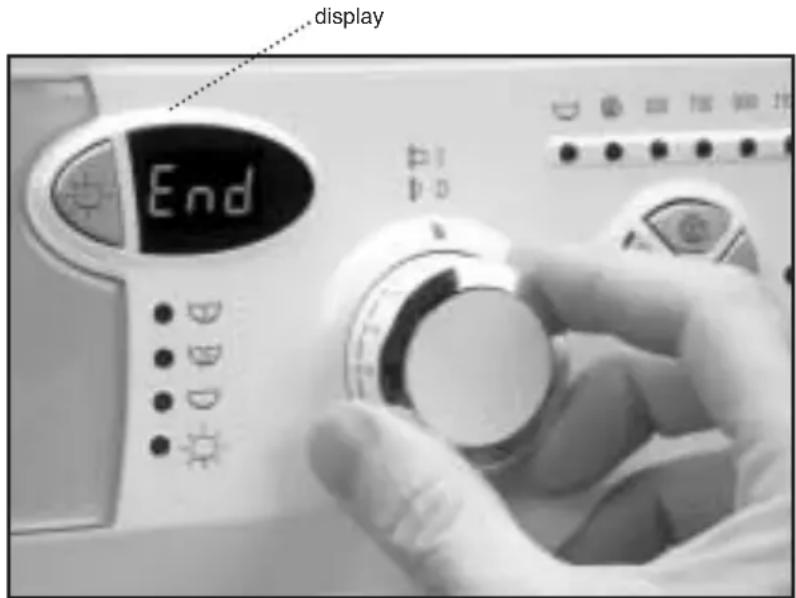
To start the washer-dryer, press the On button. The display above the button will light up, and the washing machine will begin to run the programme selected together with the options.
The display will show the minutes left until the selected programmes end, whether these are wash, wash+dry, or just dry.
When the full time has elapsed it will show "0", and when the door lock is released it will show "END".

IMPORTANT
If you need to add or remove a garment while the washing machine is on, select
Pause and check that the water level is not above the door overflow level and that the temperature inside the washing machine is not hot.
When you press the On button again, washing will resume from the phase of the cycle where it left off.

WASH PROGRAMME PHASES
The phases of the programme that are active will successively appear as the programme progresses. Any of the option buttons can be selected provided that the wash phase they affect has not ended and the programme allows this option.
When the washing machine is running, certain actions can cause the washer-dryer to PAUSE. These are:
- Deactivating the child lock.
- Pressing the On button.
- Pressing the drying minutes button more than once within 3 seconds.

prewash

wash

rinse

dry
In these cases the previously selected wash options and drying time will be maintained, and when the On button is pressed again the washing machine will continue to function from the point at which it left off. In these cases clothes may be taken out of the washing machine as long as the load door can be opened.
IMPORTANT
If the programme is changed on the dial during washing, the previously selected programmes and options will be cancelled out.

POWER CUTS
If a power cut occurs, when the electricity comes back the washing machine will continue to run from where it left off (it has a memory
of several hours). The same will happen if OFF and then ON are pressed.
8
IMPORTANT
To reduce spindrying noise: level the washing machine using its adjustable legs.
- Whenever possible, wash different-sized clothes together in the same wash programme, as this aids the distribution of the clothes in the drum when spinning.
- All the models have a spin-dry safety system which prevents spin-drying from taking place if the clothes are incorrectly balanced in the drum. This is to prevent excessive vibration or thumping.
ECO-NOTE
To protect the environment, your washing machine is provided with a system enabling it to adapt to different conditions of use (load and fabric types). This means that during the wash process the amount of water you can see through the door may appear rather low, but there is no cause for concern as washing and rinsing efficiency will still be optimum.
If the clothes should come out
too wet, redistribute them uniformly in the drum and spin-dry them again.
WASHING MACHINE
MAINTENANCE AND CLEANING
After each wash, leave the load door open for a while to allow the air to circulate inside.
From time to time, depending on the hardness of your water, it is recommendable to run a full wash cycle using a decalcifying product. This will extend the life of your washing machine.
IMPORTANT
The washing machine should be disconnected from the mains before any cleaning or maintenance is carried out.
(1)
CLEANING THE DETERGENT COMPARTMENTS
The detergent compartments should be cleaned whenever there is any washing product residue left inside them.
a pull outwards on the detergent drawer to remove it completely.
Use warm water and a brush to clean the compartments.
c Also clean the siphons of the additive compartment.
Then replace the drawer.
2
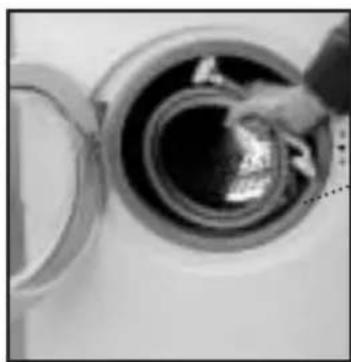
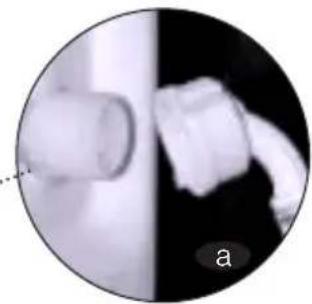
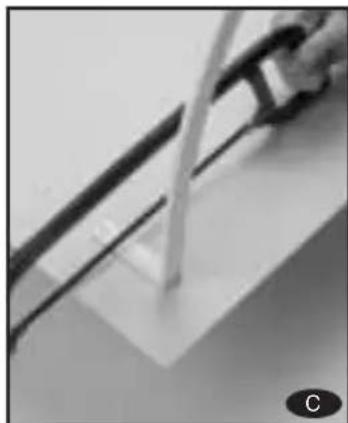
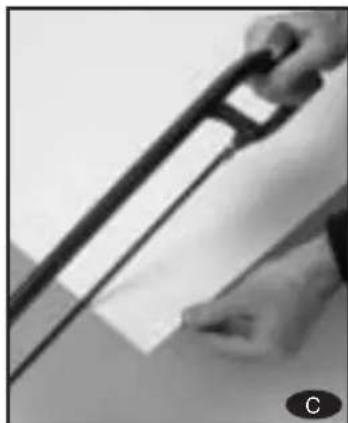
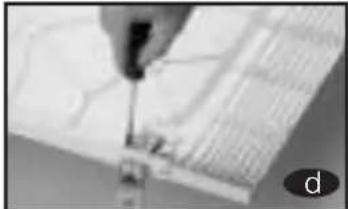
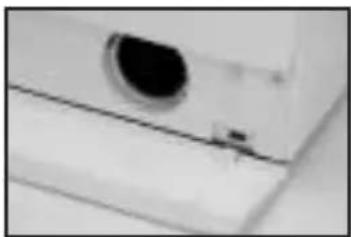
CLEANING THE ACCESSIBLE FILTER
The accessible filter will need to be cleaned if the drain pump is obstructed by any foreign objects.
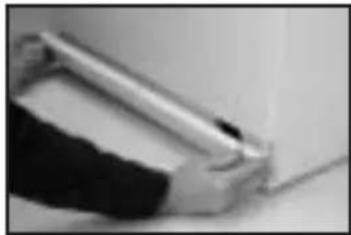
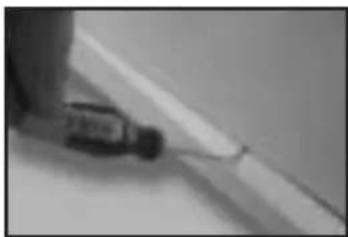
a Remove the plinth by pulling gently on its sides and turning it downwards, and release the clips. If there is no side access, introduce a small screwdriver in the three slots on the upper part of the base, in order to lever it and loosen the hooks.
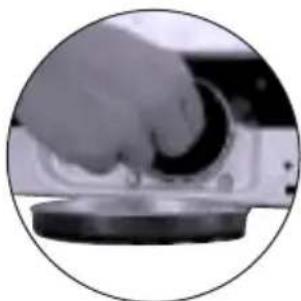
b Put a plate or similar container underneath it to catch the water that will come out when the filter is removed.
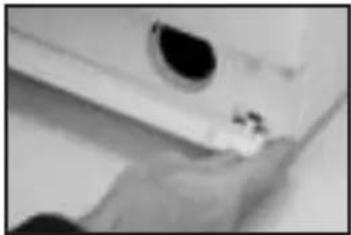
Half- or quarter-turn the filter to the left. Water will start to come out.
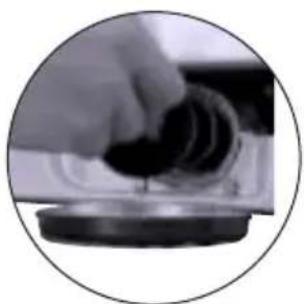
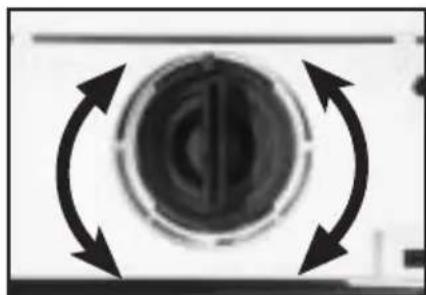
d When all the water has come out, turn the filter several times until it can be completely removed.
e Remove the objects or fluff caught in the filter.
Put the filter and plinth back in place again.
IMPORTANT
To avoid burns, do not carry out this procedure when the water is at a temperature of over 30^ .
3
CLEANING THE OUTER SURFACE
The outside of the washing machine should be cleaned with warm soapy water or a gentle cleaning agent. Do not use abrasive cleaning products or solvents.
It should then be thoroughly dried with a soft cloth.
WASHING MACHINE
SAFETY AND TROUBLESHOOTING
If you detect any problems with your washing machine, you will probably be able to rectify them yourself by consulting the following instructions. If this is not the case, unplug the appliance and contact the TECHNICAL ASSISTANCE SERVICE.

IMPORTANT
Never open up the appliance yourself. There are no fuses or similar components inside it which can be changed by the user.
- Why won't the washing machine switch on?
This may be due to the following:
- There is no voltage in the mains network.
- The electrical installation fuses have cut out.
- The washing machine is not connected to the mains.
- The On/Off switch has not been pressed (the light for this button should be steadily lit).
- The programme selector dial is pressed in.
- The washing machine door is not correctly closed. If this is detected, the Prewash and End displays will flash or F04 will appear on the washing machine display. Check the door and shut it correctly.
- Why is the washing machine vibrating or making excessive noise?
This may be due to the following:
- The inside fixing screws have not been taken out.
- The washing machine is not correctly levelled.
- Why is the washing machine not filling up with water?
- When this fault is detected the Wash and Rinse lights will flash, or, if your washing machine has a display, F01 will appear.
- The cause of the fill failure may be that the water supply is cut off, the washing machine inlet tap is turned off, or the washing machine inlet filter is obstructed.
- So, the possible solutions are: wait until the water comes back on again, turn the inlet tap to open position, or remove the water supply hose and clean its filter.
- Why is the washing machine not draining or spinning?
- When this fault is detected the Rinse and End lights will flash, or, if your washing machine has a display, F02 will appear.
- The reasons for this failure may be: obstruction of the washing machine drain pump, obstruction of the building drain pipes, or incorrect electrical connection of the pump.
- Solution: if the cause is obstruction of the pump, it can be accessed as described in section 2, Maintenance and Cleaning.
- Why is the washing machine not spinning?
- When this fault is detected the Prewash and Wash lights will flash, or, if your washing machine has a display, F03 will appear.
- The reason for this failure is that the clothes are unevenly distributed in the drum and it cannot spin because an excessive level of vibration would be produced.
- Solution: Take the washing machine back to spin point.
- Is it better to put the detergent in the compartment, or directly in the drum?
Washing powder "tablets" are being increasingly used nowadays, which are placed directly in the washing machine drum. These tablets wash the clothes well and do not damage them. However, other washing powders or liquids contain aggressive components which can harm the clothes if they come into direct contact with them. For these situations it is better to use the detergent compartment.
- Why can't I see any water in the drum?
This may be due to the fact that the washing machine is provided with an environment-friendly system which is able to adapt to the load and type of fabrics, adjusting the levels of water and energy used. So, although the water level you can see through the door may look low, there is no cause for concern as washing and rinsing efficiency will still be optimum.
- Why is water coming out of the detergent drawer?
This may be because the detergent drawer or compartments need cleaning. They are simple to clean and the procedure is described in Maintenance and Cleaning; 1. Cleaning the detergent compartment.
- Why can't I open the door when the washing machine stops?
Modern washing machines are provided with user safety systems. One such system prevents the washing machine from being opened until the drum is guaranteed to have stopped completely. About 2 minutes must elapse before the door can be opened.
-
Other problems
-
The washing machine can detect other faults. When this is the case, all the wash phase indicators will begin to flash, or different error messages will appear on the display (F05, F06, etc. . . . . . . F10).
-
These failures may be due to very different causes.
-
You should call the OFFICIAL TECHNICAL SERVICE.
WASHING MACHINE
ENVIRONMENTAL NOTE

In order to preserve the environment, when this appliance is no longer useful please take it to an official collection or recycling centre for used materials.
Before disposing of the used appliance, cut the connection cable to remove the plug, to prevent it from being used again.
Fagor Electrodomésticos, S. Coop.
Apartado 49
Tel. (943) 71 91 00 / 01
Fax (943) 796881
Bo San Andres, 18
20500 MONDRAGON (Guipuzcoa)
www.fagor.com
e-mail: info@fagor.com