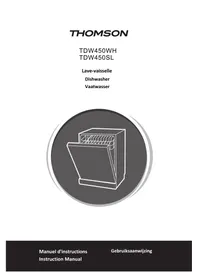
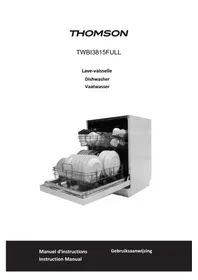
Thomonix SILENCE - Dishwasher THOMSON - Free user manual and instructions
Find the device manual for free Thomonix SILENCE THOMSON in PDF.
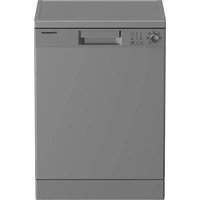
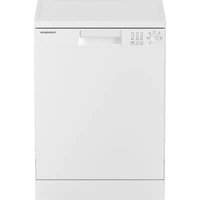
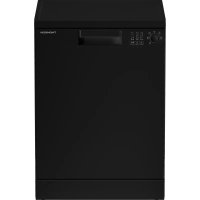
| Product Type | Freestanding Dishwasher |
| Brand | Thomson |
| Model | Thomonix SILENCE |
| Capacity | 15 place settings |
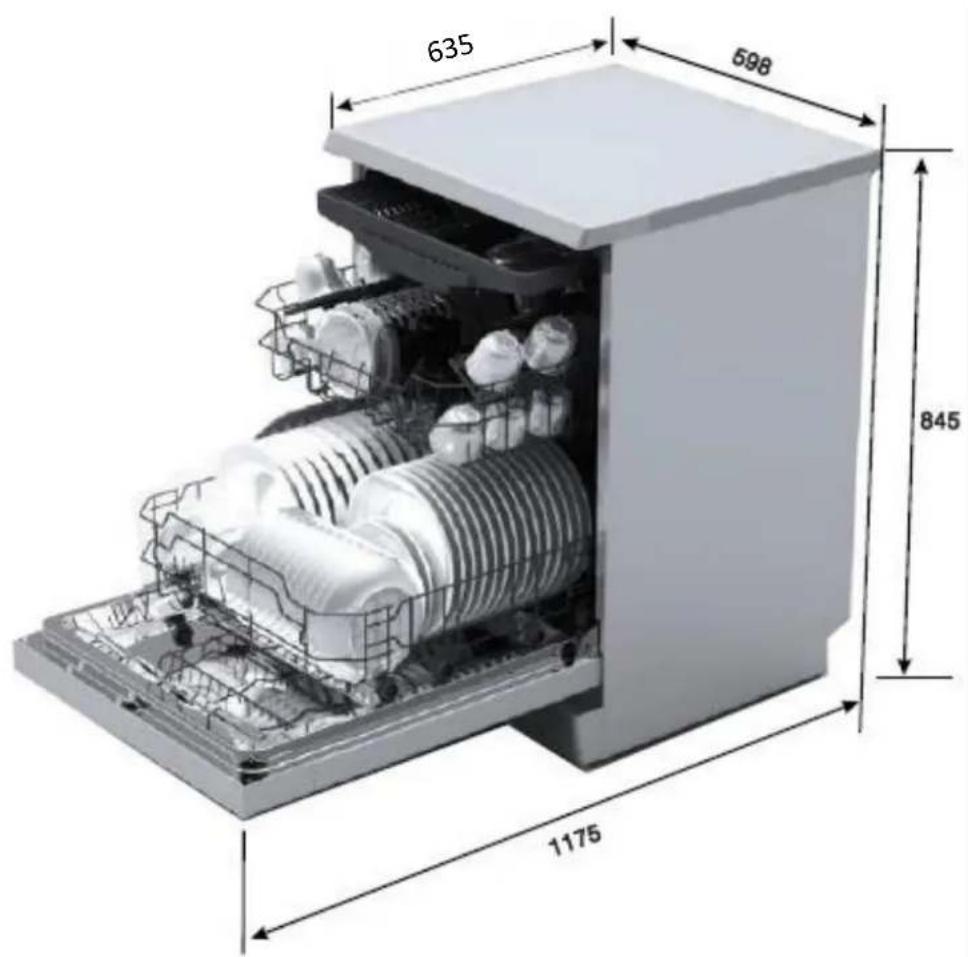
| Dimensions (H x W x D) | 845 x 598 x 635 mm |
| Weight | 45 kg |
| Electrical Supply | 220-240 V~ 50 Hz, 1760-2100 W |
| Energy Class | A+++ |
| Water Consumption (Eco cycle) | 10 L |
| Noise Level | 40 dB(A) |
| Wash Programs | Auto, Intensive, Normal, Eco, Glasses, 90 min, Quick, Rinse |
| Functions | Extra Dry, Express, Delay Start (1-24h), Wash Arm Selection |
| Tub Material | Stainless Steel |
| Water Softener | Yes, adjustable (H1 to H6) |
| Upper Basket | Height Adjustable |
| Cutlery Tray | Yes, adjustable positions |
| Safety | Overflow Protection, Automatic Shut-off |
| Water Pressure | 0.04 - 1 MPa |
Frequently Asked Questions - Thomonix SILENCE THOMSON
User questions about Thomonix SILENCE THOMSON
0 question about this device. Answer the ones you know or ask your own.
Ask a new question about this device
Download the instructions for your Dishwasher in PDF format for free! Find your manual Thomonix SILENCE - THOMSON and take your electronic device back in hand. On this page are published all the documents necessary for the use of your device. Thomonix SILENCE by THOMSON.
USER MANUAL Thomonix SILENCE THOMSON
natural_image
Cutaway view of a white kitchen appliance showing internal components like washing machines and dishwashers (no text or labels visible)FICHE PRODUIT ......26
AVERTISSEMENTS
natural_image
Coiled white cable with a small connector at the end (no text or symbols visible)natural_image
Line drawing of a hand holding a tool with a handle (no text or symbols)natural_image
Technical line drawing of a mechanical assembly with no visible text or symbolsnatural_image
Close-up of a hand holding a grid-like object with diagonal lines, no visible text or symbolsnatural_image
Row of eight different kitchen utensils in a row, including fork, spoon, fork, spoon, spoon, and spoon (no text or symbols visible)natural_image
Front view of a blue industrial machine with metal grid and control panel (no visible text or symbols)natural_image
Illustration of a blue industrial machine with mesh structure and downward arrow indicating compression or reduction (no text or symbols)natural_image
3D rendering of a blue and gray metal rack with grid pattern (no text or symbols)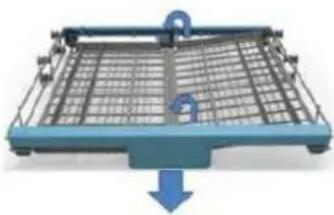
natural_image
3D illustration of a blue shopping cart with a downward arrow indicating price or movement (no text or symbols)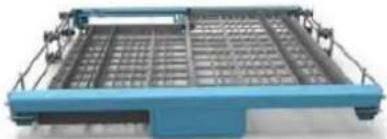
natural_image
Blue industrial machine tray with mesh grid and metal frame (no visible text or symbols)natural_image
3D rendering of a blue and gray industrial machine tray with a downward arrow indicating compression or clearance (no text or symbols visible)natural_image
3D rendering of a blue tray with metal racks and grid pattern (no text or symbols visible)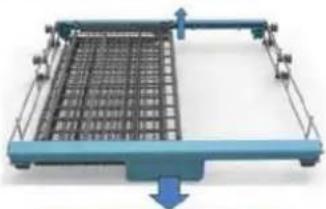
natural_image
3D rendering of a mechanical tray with grid pattern and blue frame (no text or symbols)natural_image
Blue industrial machine tray with grid and metal frame (no visible text or symbols)natural_image
Exterior view of a modern office building (no signage)natural_image
Hand pressing a button on a device (no visible text or symbols)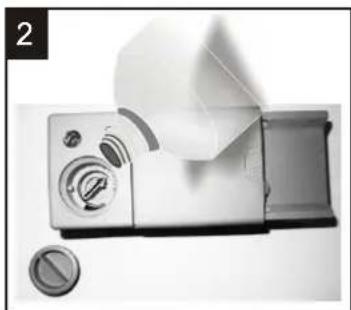
natural_image
Close-up of a white digital camera module with control knobs and a paper roll, no visible text or symbols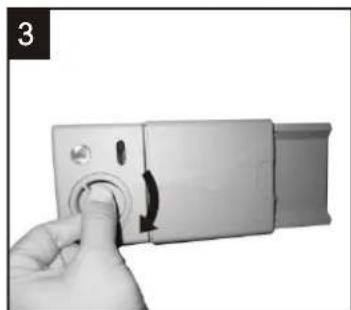
natural_image
Hand pressing a button on a device panel (no visible text or symbols)natural_image
Exterior view of a modern office building (no signage)natural_image
Hand holding a white photo camera module with a dial and control knob (no visible text or symbols)Démontage des Itres
natural_image
3D rendered mechanical component with a black arrow indicating direction (no text or symbols)Neoyage de la porte
natural_image
Interior view of a rectangular electronic device with internal components and a black arrow pointing to a section (no visible text or symbols)Hotline Darty France
Connecng to the Mains Water Supply....8
Levelling 9
OPERATION 9
General Warnings and Recommendations....10
Loading the Baskets ....10
Using the Water Soener....13
Using the Rinse Aid and Detergent Dispensers....15
Washing Programmes ....17
Starng the Dishwasher ....18
CLEANING AND MAINTENANCE....19
Cleaning the Filter Unit....20
Cleaning the Door 20
Cleaning the Spray Arms ......20
Frost Precauons 21
TROUBLESHOOTING....21
PRODUCT FICHE 24
WARNINGS
This appliance is intended to be used in household and similar applicaons such as:
- sta kitchen areas in shops, oces and other working environments;
- farm houses;
– by clients in hotels, motels and other residential type environments; - bed and breakfast type environments.
This appliance can be used by children aged from 8 years and above and persons with reduced physical, sensory or mental capabilities or lack of experience and knowledge if they have been given supervision or instrucon concerning use of the appliance in a
safe way and understand the hazards involved. Children shall not play with the appliance. Cleaning and user maintenance shall not be made by children without supervision.
If the supply cord is damaged, it must be replaced by the manufacturer, its service agent or similarly qualified persons in order to avoid a hazard.
For the details concerning the method and frequency of cleaning, please see secon “Cleaning and maintenance” on pages 19&20.
The door should not be le in the open posion since this could present a tripping hazard.
WARNING: Knives and other utensils with sharp points must be loaded in the basket with their points down or placed in a horizontal posion.
The new hose-sets supplied with the appliance are to be used; old hose-sets should not be reused.
For the details on how to load the dishwasher please see secon "Loading" on pages 10-13.
The minimum permissible inlet water pressure is 0.04 MPa. The maximum permissible inlet water pressure is 1 MPa.
The plug must be remained easily
accessible aer installaon of the appliance.
The maximum number of place sengs to be washed by this dishwasher is 1 place sengs. 5
Regarding the instrucons for the all necessary spaces with dimensions, the method of xing and how the appliance is to be xed to its support, refer to the secon "INSTALLATION".
IMPORTANT SAFETY INSTRUCTIONS
- The dishwasher must only be used for the washing of household dishes and cooking utensils.
- Never disconnect the appliance from the mains socket by pulling on the mains cord, always grasp the plug.
- Never touch the dishwasher when barefoot or with wet hands or feet.
- Do not open the door during a wash cycle as hot steam and water may be ejected.
- If you are discarding an old appliance with a lock / latch ed to the door, ensure that it is in a disabled condion to avoid the entrapment of children when playing.
- Do not let children climb on the dishwasher door or place any heavy object on it while it is open, as this could unbalance the appliance.
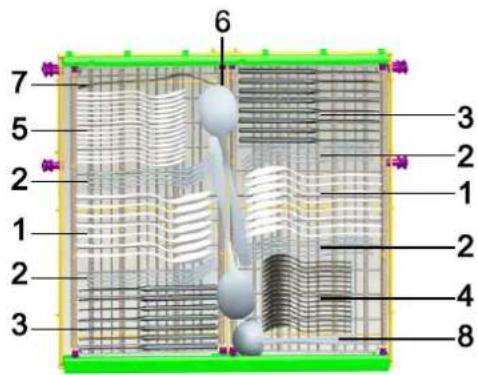
DESCRIPTION
Front View (Interior)
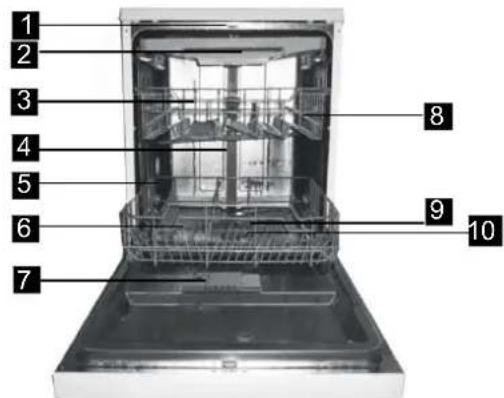
- Top spray arm
- Cutlery rack
- Upper basket
- Inner pipe
- Lower basket
- Salt container
Rear View
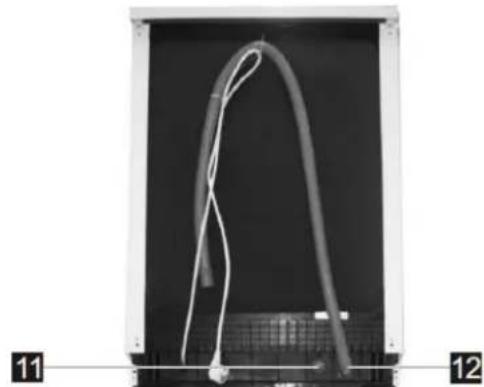
natural_image
Close-up of a curved white cable or wire inside a black rectangular frame, with no visible text or symbols.- Detergent / rinse aid dispenser
- Cup shelves
- Lower spray arm
- Filter assembly
- Water inlet valve
- Drain hose
Control Panel
Overview

Le part of the control panel


Power buon
Right part of the control panel
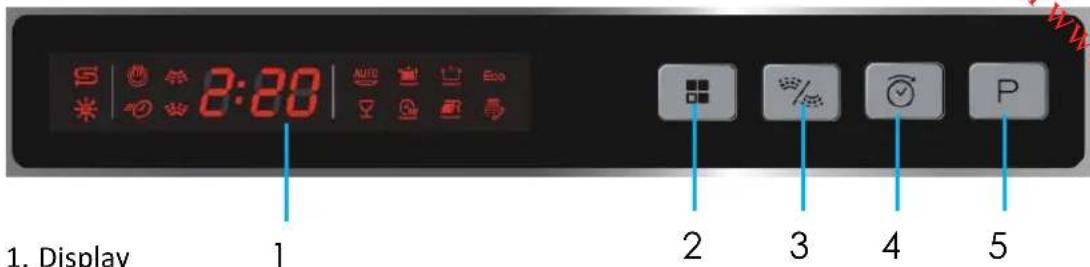
1. Display
• To show washing programme me and indicator lights:

Auto

Intensive

Normal

Eco

Glass

90 min

Rapid

Soak
• To show delayed start me, water hardness seng and error codes
• To show status indicator lights

Rell salt

Rell rinse aid
• To show dual spray indicator lights:
Designate the washing programme to the upper ( ) or lower ( ) basket.

- To show extra dry

express indicator lights
- Funcon buon
- Press to select extra dry or express funcon.
- Dual spray buon
- Allows you to designate the washing programme to the upper ( ) or lower () basket, or both.
-
Delayed start buon
-
P Washing programme buon
Front display

The display on the front of the dishwasher shows the remaining washing me, delayed start me and error codes.
BEFORE INSTALLING YOUR DISHWASHER
Before connecng your dishwasher to the power supply, check that the voltage stated on the rang label of your appliance corresponds to the voltage in your home. The appliance must be grounded. The manufacturer is not responsible for damages that may occur as a result of usage without grounding.
WARNING: Disconnect electrical power before installing your dishwasher.
INSTALLATION INSTRUCTIONS
Your dishwasher can be installed in various locaons in your kitchen as long as there is space and accessibility to connect your dishwasher to the water/drainage and electrical supply.
Do not connect an extension lead to the appliance to avoid potenal safety hazards.
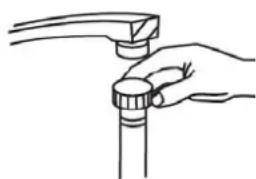
Connecng to the Mains Water Supply
Inlet hose (Cold water supply)

natural_image
Coiled white cable with a small connector at the end (no text or symbols visible)The water inlet hose from the machine terminates in a 3/4" female connector. The water supply should therefore terminate in a similar male connector and should have a stopcock close by in the pipe.
natural_image
Line drawing of a hand holding a tool with a handle (no text or symbols)Connect the straight connector of the inlet hose to the water supply securely ensuring that the washers are securely in place at both ends of the hose.
Water Pressure
For best operang results, incoming water pressure should be between 0.04 MPa and 1MPa. Incoming water supply for the dishwasher is controlled by a ‘pressure switch’, so if the household water pressure is low, dishwasher ll me will increase or may not operate.
WARNING: Please close the hydrant aer using.
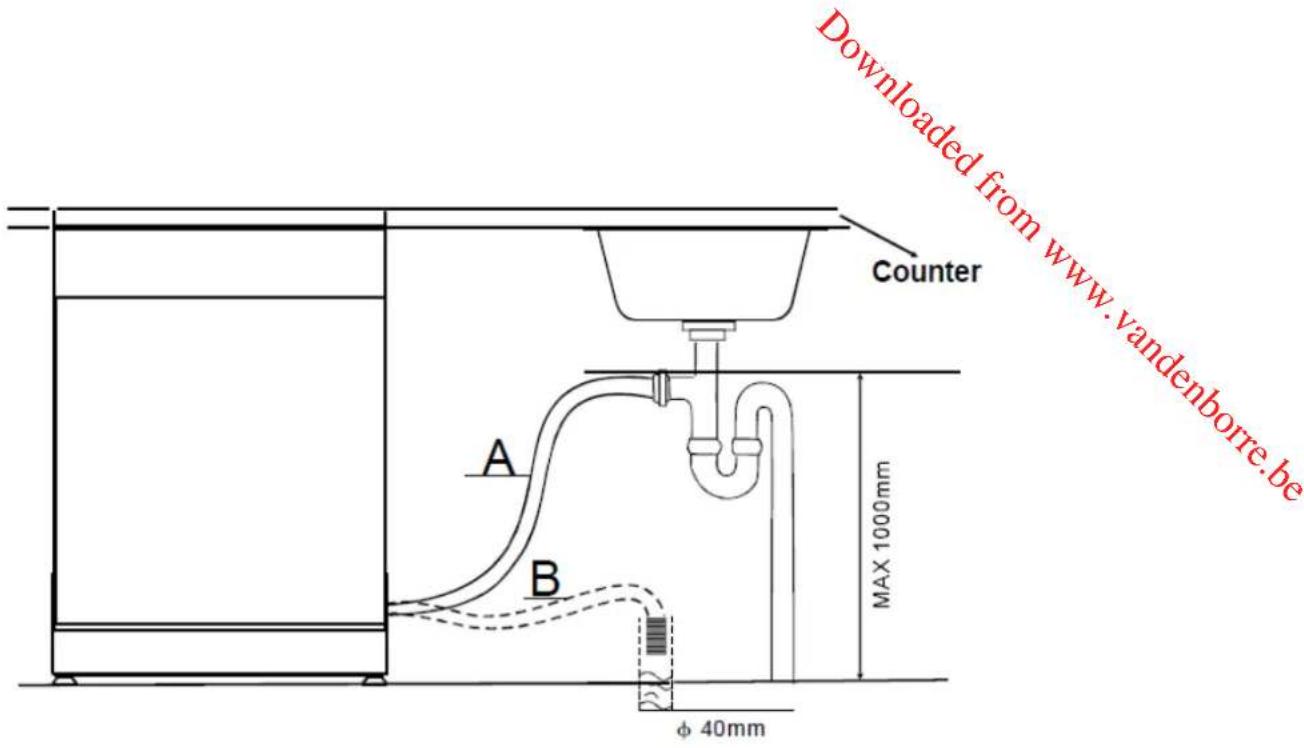
Connecng to the water outlet
Insert the drain hose into a drainage pipe or standpipe.
The end of the hose should be dropped into a drainage pipe, the maximum height of which should be 1000 mm above the base of the dishwasher. The end of the hose must not be immersed in water to avoid the back ow of it.
To allow for an air gap around the end of the drain hose, the diameter of the standpipe should be at least 40 mm.
If leaks are detected, immediately shut the water supply and check the hose connecons fully. Re-ghten the connecons if necessary.
If for any reason you are unable to stop the leak yourself please seek advice from a qualified plumber.
Levelling
Place the dishwasher on an even, stable surface.
It is very important that the dishwasher is perfectly levelled in order to avoid it to malfuncon. You can level the dishwasher by adjusting the feet at the base of the appliance.
OPERATION
Your dishwasher cleans by spraying a mixture of clean water and detergent (under pressure) against the soiled surface of dishes. The water is pumped through a rotang spray arm, drained through a liter removing food and soiled parcles and pumped back through the spray arm.
Soiled water is pumped out and replaced with clean water at the end of each cycle (how many mes depends on the cycle being used).
NOTE:
Hard water condions will adversely affect washability performance of your dishwasher. Hard water condions will also contribute to "Lime" (white lm substance) deposits and/or "Scaling" on the stainless steel surface of the dishwasher tub and heater element located in the sump underneath the removable liter screen.
To minimise these condions, it is recommended to periodically operate/rinse the inside of the dishwasher (empty) using 1 cup of white vinegar (at least once a week).
General Warnings and Recommendations
Before using the dishwasher for the rst me, it is advisable to read the following recommendations concerning dish types to be washed and their loading.
Before loading the dishes into the baskets it is necessary to:
- Remove coarse food remains, e.g. bones, which may clog the liter or damage the wash pump.
- Soak any pots or pans with burnt-on food remains on the boom then load them into the basket.
There is no need to pre-wash the dishes under running water before loading them into the basket.
WARNINGS:
- Make sure that the dishes are securely in place so that they cannot p over or obstruct the rotaon of the spray arms during the washing cycle.
- Containers such as cups, bowls, glasses and pots should always be loaded with the opening facing downwards and with any cavies at an angle, to allow the water to drain out.
- Do not stack dishes.
- Do not place glasses too close together because they may knock against each other and break.
- Load large items which are most difficult to clean into the lower basket.
- Make sure that the items being washed are dishwasher-safe.
Items which are not dishwasher-safe:
- Wooden dishes, pots or pans
- Handcraed items
- Plasc dishes (except when marked dishwasher-safe)
- Dishes and objects in copper, n, zinc or brass
- Aluminium dishes
- Silverware
- Glass and crystal
- Decorated items
Loading the Baskets
Loading the upper and lower baskets
The upper basket is designed to hold delicate and light items such as glasses, cups, saucers, serving bowls and shallow pans.
The lower basket is designed to take saucepans, lids, plates, salad bowls, cutlery etc.
Serving dishes and large lids should be arranged around the edge of the basket, ensuring that the upper spray arm can turn freely.
Arrange items so that water can reach all surfaces.
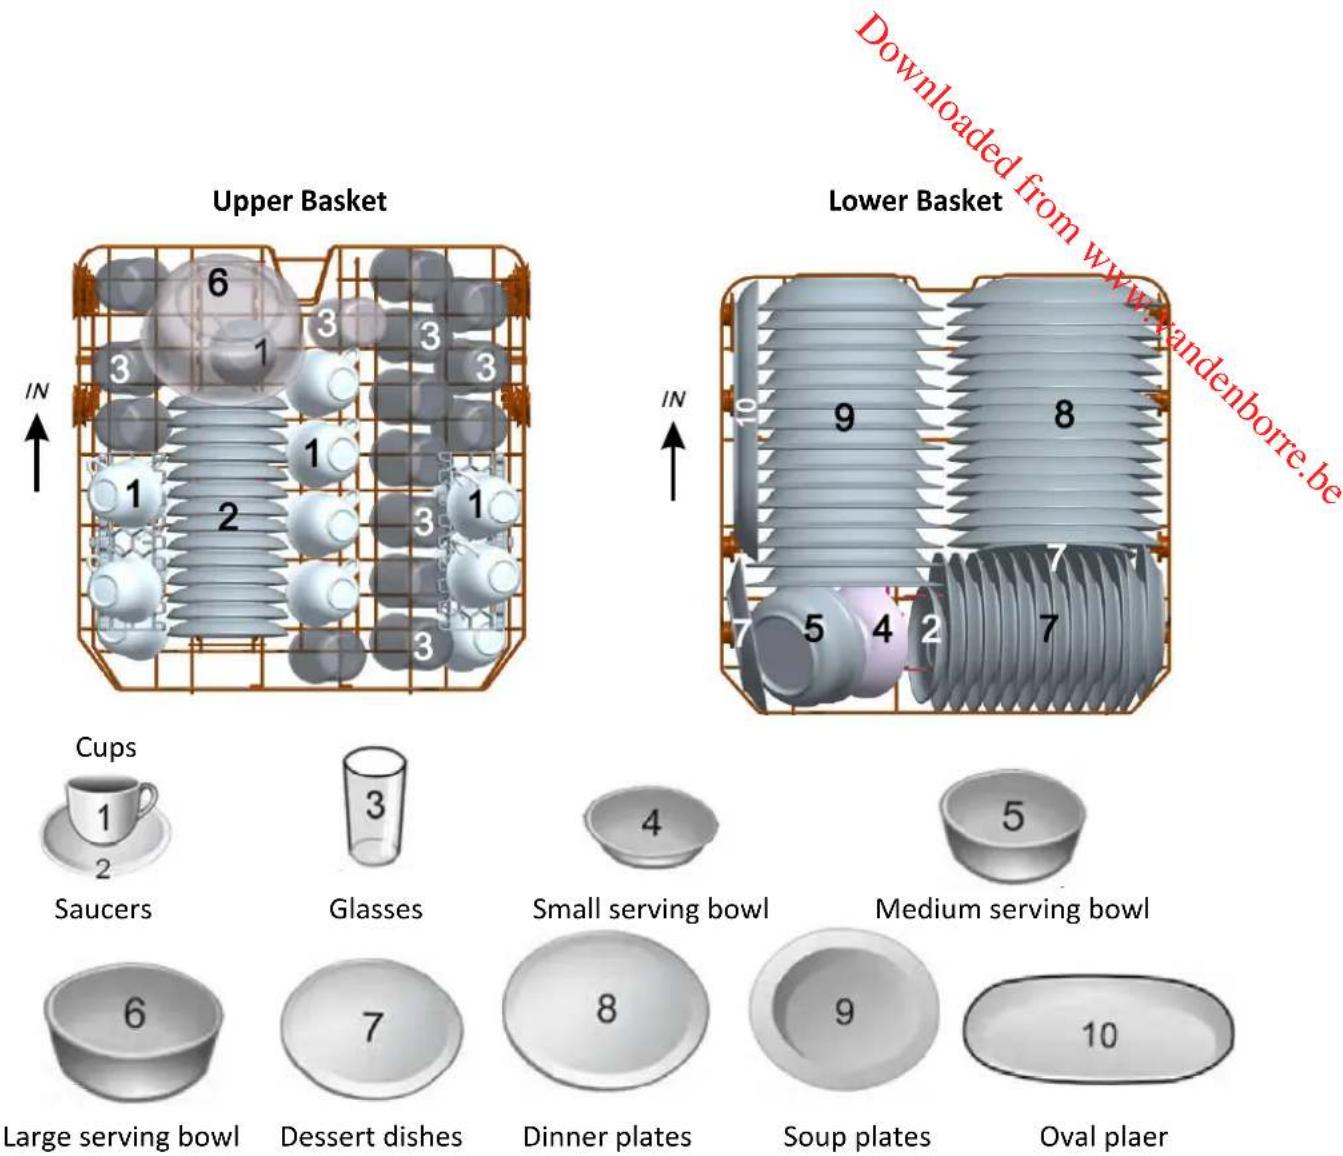
The upper basket is equipped with two cup shelves.
For reduced loads, the additional cup shelves can be folded down if not required as shown below.
natural_image
Technical illustration of a mechanical cage or rack structure with no visible text or symbols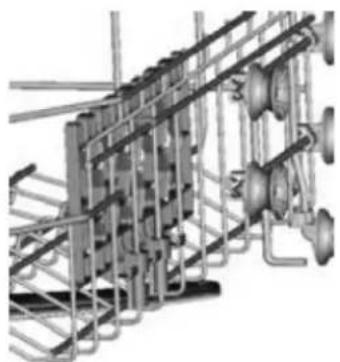
natural_image
Mechanical assembly diagram showing interconnected pipes and valves (no text or labels)To make full use of the space in the lower basket when large dishes are loaded, the lower basket has Ing plate supports which can be stowed horizontally.

natural_image
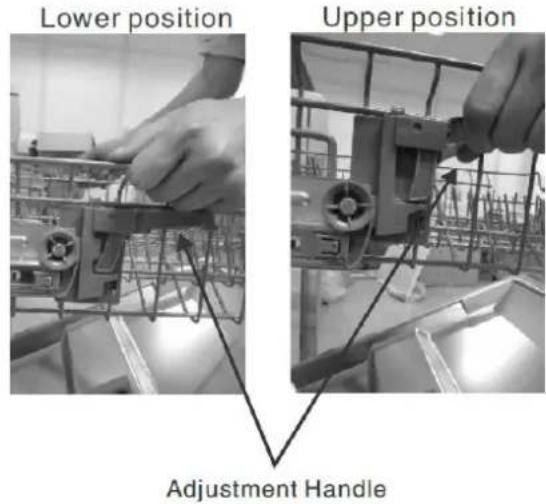
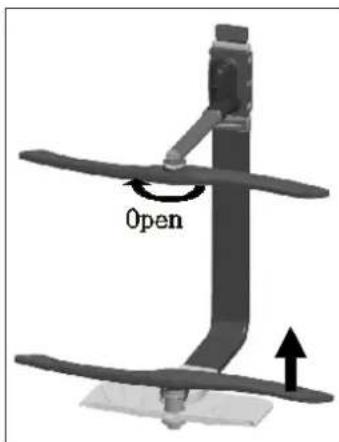
Hand reaching toward a grid of abstract geometric shapes (no text or symbols visible)Adjusng the upper basket
The height of the upper basket can be adjusted in order to create more space for large utensils both for the upper/lower basket. The height of the upper basket can be adjusted by liing the handle on either side of the basket, see pictures below:
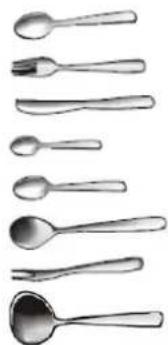
Loading the cutlery rack
Arrange the cutlery in the rack.
The top spray arm must not be blocked by items.
Take care during loading to avoid injury from the knife blades.
- Soup spoons
- Forks
- Knives
- Teaspoons
- Dessert spoons
- Serving spoons
- Serving forks
- Gravy ladles
natural_image
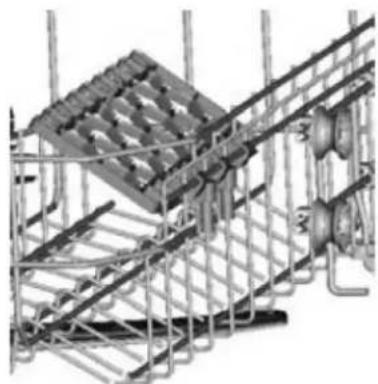
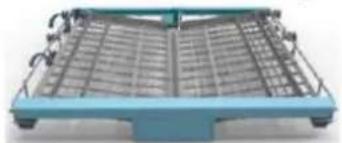
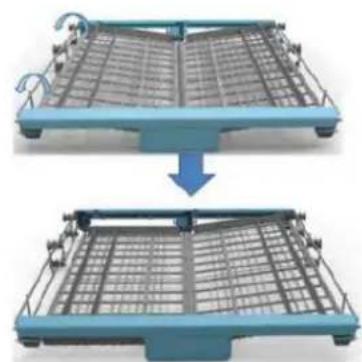
Row of eight different kitchen utensils in a row, including spoons, platters, and spoons (no text or labels visible)5 Positions of cutlery rack:
natural_image
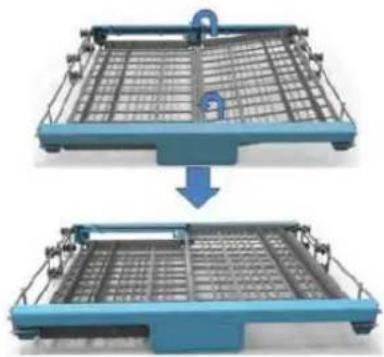
Blue industrial machine frame with metal grid and control panel (no visible text or symbols)Le and right parts of rack are lted.
natural_image
Two identical blue metal cage setups with grid patterns, one being lifted by a blue arrow (no text or symbols visible)Le part is at whilst right part is lted.
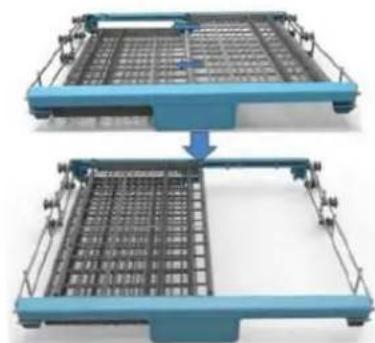
natural_image
Two blue metal shopping carts with grid patterns, one being lifted by a blue arrow (no text or symbols visible)Both parts of rack are at.
natural_image
Two blue industrial conveyor systems with grid and rail grids, showing a structural change (no text or symbols visible)Move the right part over the le part.
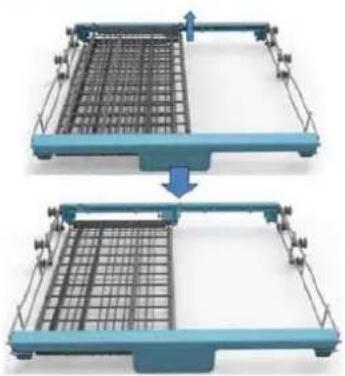
natural_image
Two identical blue metal tray structures with grid patterns, one being lifted by a directional arrow (no text or symbols)Right part of rack is removed.
Using the Water Soener
The hardness of the water varies from place to place. If hard water is used in the dishwasher, deposits will be formed on the utensils. This appliance is equipped with a water soener which uses a salt specifically designed to eliminate the minerals from the water.
CAUTION:
- Only use salt specially formulated for domesc dishwashers.
- Do not use table salt as it contains insoluble substances which may damage the water soening system.
- Fill the salt container before starng the washing programme. In this way, the excess saline soluon will be immediately removed by the water; the prolonged presence of salt water inside the tank may lead to corrosion.
- If you plan to use dishwasher tablets for your washing needs, then you do not require to use salt or rinse agent but please note that the rell salt indicator light will remain illuminated on the control panel. This is quite normal and will not aect the operaon of your dishwasher.
Adjusng the salt consumpon
-
Open the door and switch on the dishwasher.
-
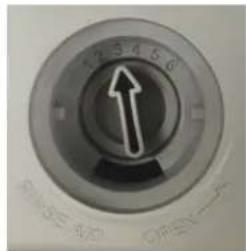
Enter the status of salt consumption by holding down P until the value "H3" (factory seng) appears on the display.
-
While the value shows on the display, repeatedly press P to adjust the seng from H1 to H6 to suit the water hardness.
-
Press ⏻ to conrm the seng.
| WATER HARDNESS | Display | Salt consumpon (gram/cycle) | |||
| °dH | °fH | °Clarke | mmol/l | ||
| 0~5 | 0~9 | 0~6 | 0~0.94 | H1 | 0 |
| 6~11 | 10~20 | 7~14 | 1.0~2.0 | H2 | 9 |
| 12~17 | 21~30 | 15~21 | 2.1~3.0 | H3 | 12 |
| 18~22 | 31~40 | 22~28 | 3.1~4.0 | H4 | 20 |
| 23~34 | 41~60 | 29~42 | 4.1~6.0 | H5 | 30 |
| 35~55 | 61~98 | 43~69 | 6.1~9.8 | H6 | 60 |
NOTE:
1° dH=1.25° Clarke=1.78° fH=0.178mmol/l
° dH: German degree
° fH: French degree
°Clarke: Brish degree
Filling with salt
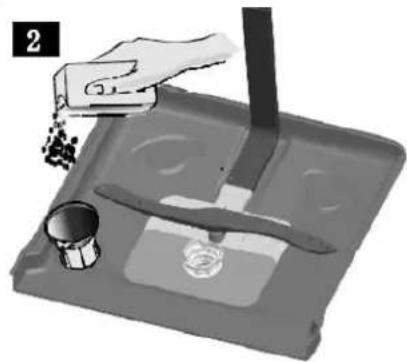
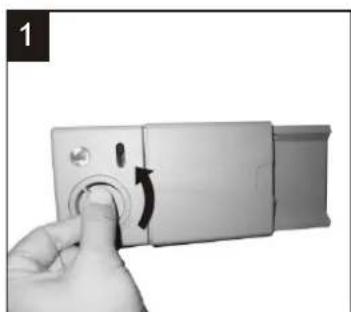
1 Unscrew the cap from the salt container by turning it anclockwise.
2 Place the supplied funnel so the end ts into the opening of the salt container. Load about 1.5kg of salt into the salt container.

natural_image
Illustration of a hand cleaning a small boat with a brush and a container (no text or symbols)Screw the cap back clockwise.
NOTE: The salt container must only be relied when the rell salt indicator light illuminates. Depending on how fully the salt dissolves, the rell salt indicator light may sll be on even though the salt container is lled.
Using the Rinse Aid and Detergent Dispensers
The rinse aid helps the dishes dry faster and prevents the formaon of scale deposits and staining. It is automacally added to the water during the nal rinse cycle.
The detergent and rinse aid dispensers are located on the inner part of the door: the detergent dispenser is on the right, and the rinse aid dispenser is on the left.

natural_image
Exterior view of a modern office building (no signage)Adding the rinse aid
1 Rotate the dispenser cap anclockwise and remove it.
2 Add the rinse aid unl the container is full.
- The opcal level indicator on the side of the cap should be completely dark.
3 Replace the cap and turn it clockwise.
NOTE: Rell the rinse aid when the opcal level indicator becomes clear again, or when the rinse aid indicator light illuminates.
natural_image
Hand pressing a button on a device (no visible text or symbols)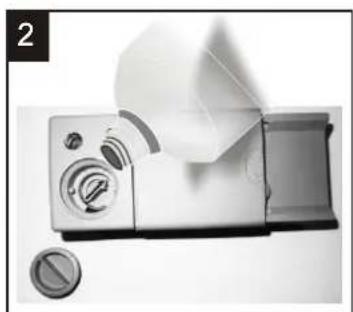
natural_image
Close-up of a vintage camera module with control knobs and a paper roll, no visible text or symbols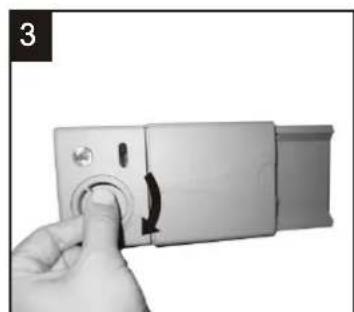
natural_image
Hand inserting a button into a device (no text or symbols visible)Adjusng the rinse aid dispenser seng
The factory seng for the dishwasher is 3 and you can choose among 6 sengs. The amount of rinse aid dispensed is proporonal to the selector posion.
- To adjust the rinse aid seng, remove the dispenser cap.
- Use a screwdriver (not supplied) to rotate the rinse aid selector to the desired posion.
- Replace the cap and turn it clockwise.
NOTE: The amount of rinse aid must be increased if the washed dishes appear dull or feature circular stains. If the dishes are sticky or have white streaks, it is necessary to reduce the rinse aid seng.
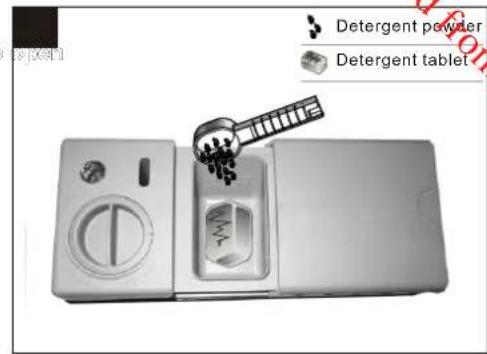
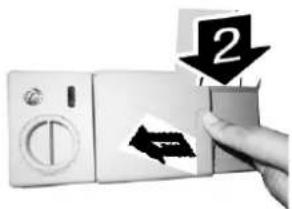
Adding the detergent
1 To open the detergent dispenser cap, gently press the release buon.
2 Add the detergent and close the cap carefully.


natural_image
Exterior view of a modern office building (no signage)A detergent for main wash cycle

natural_image
Hand holding a white digital camera module with control panel and buttons (no visible text or symbols)NOTE: Use only detergent specifically formulated for dishwashers. For opmal washing results it is important to use a good quality detergent.
To achieve beer drying performance, it is recommended to use a Rinse Aid when using a 3-in-1 or all-in-one tablet.
Close the Detergent compartment
If your dishes are only moderately dirty, you may be able to use less detergent than recommended.
- compartment. Press down the lid (1) until it clicks shut (2).
- If you are using detergent in tablet form, read the manufacturer recommendations on the packaging in order to determine where the tablets should be placed inside the dishwasher (e.g. in cutlery basket, detergent compartment, etc.).
Make sure that the lid on the detergent compartment is closed, even if you are using tablets.
Washing Programmes
| Programme | Degree of soil | Cycle Descripon | Recommended quantity of detergent pre-wash / main wash | Washing me (min.) | Energy (Kwh) | Water (L) | * Rinse Air needed? |
 | Auto sensing wash, for lightly, normally or heavily soiled loads | Pre-wash (45°C) Auto wash (45°C -55°C) Rinse Rinse(65°C) Drying | 5/3 2.5g 1or 2pieces | 150 | 0.9-1.3 | 11-15 | Yes |
 In /e In /e | For extremely soiled crockery and normally soiled pots, pans, dishes, etc. | Pre-wash (50°C) Wash (60°C) Rinse Rinse Rinse(70°C) Drying | 5/3 g 2.5 1or 2pieces | 175 | 1.6 | 17.5 | Yes |
 N I N I | For normal soiled loads, such as pots, glasses and lightly soiled pans | Pre-wash (45°C) Wash (55°C) Rinse Rinse (65°C) Drying | 5/3 g 2.5 1or 2pieces | 185 | 1.3 | 13.5 | Yes |
 | Standard daily cycle for normal soiled loads, such as pots, plates and glasses | Pre-wash Wash (45°C) Rinse (55°C) Drying | 5/3 g 2.5 1or 2pieces | 220 | 0.84 | 10 | Yes |
 | For lightly soiled loads that need no excellent drying eciency | Pre-wash Wash (40°C) Rinse Rinse (60°C) Drying | 5/3 g 2.5 1 piece | 130 | 0.9 | 13 | Yes |
 90 tes 90 tes | For lightly soiled loads that need no excellent drying eciency | Wash (65°C) Rinse Rinse (65°C) Drying | 3 g 7.5 1 piece | 90 | 1.35 | 12.5 | Yes |
 | A shorter wash for lightly soiled loads and quick wash | Wash (45°C) Rinse(50°C) Rinse (55°C) | 27 g | 30 | 0.75 | 11 | No |
 | To rinse out loosen soil parcles from the dishes | Pre-wash | N/A | 15 | 0.02 | 4 | No |
* Tesng programme for EN 50242
The informaon for comparability test in accordance with EN 50242 is as follows:
- Capacity: 15sengs
- Posion of upper basket: Low posion
- Rinse aid seng: 6
- Soener seng: H4
NOTE:
- The washing me may vary depending on the incoming water temperature and the ambient temperature.
- The power consumpon in le-on mode is 0.49W (door open), in o-mode it is 0.45W.
Starng the Dishwasher
- Turn the water tap on.
- Open the dishwasher door.
- Check the Iters.
- Ensure they are clean and properly posioned. See “Cleaning and maintenance” secon.
- Check that there is rinse aid and salt.
- Load the dishes.
- Ensure that the spray arms can rotate freely.
-
Add the required amount of detergent into the dispenser according to the "Washing Programmes" chart.
-
Press ☐ to switch on the dishwasher.
- Select the desired washing programme by repeatedly pressing P.
- The corresponding programme indicator light will illuminate on the display.

- Delay mer: The delay mer allows you to delay the start of a washing programme from 1 hour to a maximum of 24 hours.
Repeatedly press url the desired start delay me is shown on the display, e.g. H:03 for a 3-hour delay.
Once the delay mer has been set, close the door to acvate the funcon.
To cancel the delayed start, repeatedly press √ unl the display shows "H:00".
- If you want to acvate extra dry or express funcon, repeatedly press desired funcon indicator light illuminates.

nl the

- The extra dry funcon can only be used with the Intensive, Normal, Eco, Glass and 90 min programmes. When this funcon is acvated, the dishwasher will increase temperature at the end of a washing programme to improve drying.
- The express funcon can only be used with the Intensive, Normal, Eco, Glass and 90 min programmes. When this funcon is acvated, the dishwasher will reduce the running me while slightly increasing water and energy
consumpon.


- Repeatedly press to select the upper, lower or both baskets to be sprayed during a washing cycle.
- The corresponding indicator light (s) will illuminate on the display.

- Close the dishwasher door securely.
• The washing cycle will start.
-
At the end of the washing programme, the dishwasher will buzz and automacally stop.
-
Wait for about 15 minutes before you open the dishwasher door in order to avoid burns.
-
Unload the dishes.

The washing cycle will not start if the dishwasher door is le open or not properly closed.

Do not open the door when the dishwasher is working since hot water may be ejected, which could cause scalding.
Adding extra crockery
- Open the door a lile to stop the dishwasher, taking care to avoid the escaping steam.
- Place the crockery inside the dishwasher.
- Close the door. The cycle will start from the point at which it was interrupted.
Modifying a washing programme in progress
If a mistake was made during the washing programme selecon process it is possible to change the programme.
- Open the door.
- Press and hold P for about 3 seconds. You will hear a beep.
- Repeatedly press P to select a new programme.
- The new programme indicator light will illuminate.
- Close the door to start the new programme.
CLEANING AND MAINTENANCE
Always switch o and unplug the appliance before cleaning.
Do not use chemical solvents or strong detergents as these may damage the cosmec nish.
Clean the outer surfaces and the tank of the dishwasher with a damp cloth.
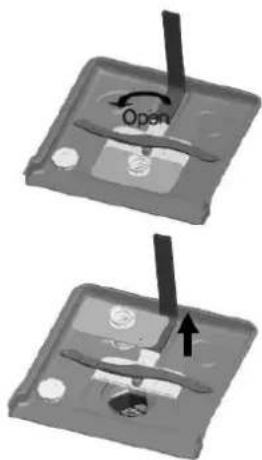
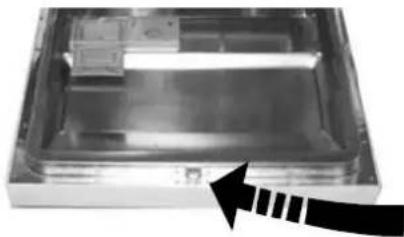
Cleaning the Filter Unit
The Iter unit consists of a main Iter (1), central Iter (2) and micro Iter (3).
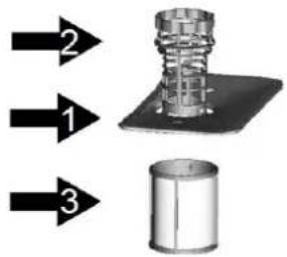
To disassemble the Iters
Turn the Iter unit anclockwise to unlock the Iters from the appliance.
Li up the lter unit and then separate the lters. Rinse them under running water using a so brush.
Clean the Iters regularly. Replace the Iter unit by turning them clockwise until they lock into posion.
CAUTION: Never operate the dishwasher without the Iters.
Cleaning the Door
Use a damp cloth to clean the edge around the door.
To avoid penetraon of water into the door lock and electrical components, do not use a spray cleaner.
natural_image
Interior view of a rectangular electronic device with internal components and a black arrow pointing to a section (no visible text or symbols)Cleaning the Spray Arms
The spray arms can be easily removed for periodic cleaning of the nozzles, to prevent possible clogging.
To remove the upper and lower spray arms, hold and unscrew or pull them out.
Wash the spray arms under running water and each them back in place, checking that the rotary movement is in no way impeded.
Frost Precauons
Avoid placing the dishwasher in a locaon where the temperature is below 0^ C. If this is unavoidable, empty the dishwasher, close the door, disconnect the water inlet pipe and empty it.
TROUBLESHOOTING
| Problem | Possible Causes | Soluons |
| Dishwasher will not start. | Fuse blown, or the circuit breaker tripped | Replace fuse or reset circuit breaker.Remove any other appliance sharing the same circuit with the dishwasher. |
| Power supply is not turned on. | Make sure the dishwasher is turned on and the door is closed securely.Make sure the power cord is properly plugged into the wall socket. | |
| The door has not been properly closed. | Close the door securely. | |
| Water not pumped from dishwasher | Kink in drain hose | Check drain hose. |
| Filter clogged | Check the Iters (see “Cleaning the Filter Unit”). | |
| Kitchen sink clogged | Check kitchen sink to make sure it is draining well. If kitchen sink is not draining, you may ask a plumber to check it. | |
| Suds in the tub | Improper detergent | Use only the detergent special for dishwasher to avoid suds. If this occurs, open the door and let the suds evaporate. Close the door securely then start the soak wash cycle to drain the water out. Repeat if necessary. |
| Spilled rinse aid | Always wipe up rinse aid spills immediately. | |
| Stained tub interior | Detergent with colourant is used. | Make sure the detergent does not contain any colourant. |
| White lm over the inside surface | Hard water minerals | To clean the interior, use a damp sponge with dishwasher detergent and wear rubber gloves.Never use any other cleaner than dishwasher detergent for the risk of foaming or suds. |
| There are rust stains on the | The cutlery is not corrosion resistant. | |
| cutlery. | No programme has run aer dishwasher salt was added. Traces of salt have got into the wash cycle. | Always run the rapid washing programme.Add dishwasher salt with no crockery in the dishwasher. |
| The dishwasher is noisy. | Dishes are raling against each other. The spray arms are knocking against the dishes. | Refer to “Loading the Basket” to rearrange the dishes. |
| The dishes are not clean. | The dishes have not been arranged properly. | Refer to “Loading the Baskets”. |
| The washing programme selected is too gentle. | Select a more intensive programme.Refer to “Washing Programmes”. | |
| Not enough detergent has been used or it is unsuitable. | Use more detergent or change the detergent. | |
| The spray arms are clogged. | Rearrange the items so that the spray arms can rotate freely. | |
| The Iters are not clean or not in the correct posion. | Clean and/or posion the Iters correctly. | |
| Streaking and staining on the dishes | The rinse aid dispenser seng is not high enough. | Adjust the rinse aid dispenser seng. |
| The dishes are not quite dry. | Improper loading | Refer to “Loading the Baskets”. |
| The rinse aid has run out or too lile is being used. | Increase or rell the amount of rinse aid. | |
| Wrong programme selecon | Choose a programme with long washing me. |
Error codes
When some malfuncons occur, the display will show the following error codes to warn you:
| Error code | Meaning | Possible cause |
| E1 | Longer inlet me. | Tap is not opened, or water inlet is restricted, or water pressure is too low. |
| E4 | Overow | Some dishwasher parts are leaking. |
| E8 | Failure of orientaon of distributary valve | Open circuit or break of distributary valve.Call a qualified service agent. |
WARNING!
If overow occurs, turn o the main water supply before calling service.
PRODUCT FICHE
This product che has been setup in conformity with EU Regulaon No 1059/2010.
| Brand | Thomson |
| Model | THOMINOX SILENCE |
| Standard place sengs | 15 |
| Energy eciency class 1 | A+++ |
| Annual energy consumpon 2 | 241kWh/annum |
| Energy consumpon of the standard cleaning cycle | 0.84 kWh/cycle |
| Power consumpon of o-mode | 0.45W |
| Power consumpon of le-on mode (door open) | 0.49W |
| ‘Le-on mode’ duraon | 30 minutes |
| Annual water consumpon 3 | 2800 litres |
| Drying eciency class 4 | A |
| Standard cleaning cycle 5 | Eco 45°C |
| Programme duraon of the standard cleaning cycle | 220 minutes |
| Noise level | 40 dB(A) re 1 pW |
| Mounng | Free standing |
| Height | 845mm |
| Width | 598mm |
| Depth | 6 m35 m |
| Power consumpon | 1760W-2100W |
| Rated voltage / frequency | 220-240V~ 50Hz |
| Water pressure (ow pressure) | 0.4-10 bar = 0.04-1 Mpa |
NOTE:
① A+++ (highest eciency) to D (lowest eciency)
② Energy consumpon "241" kWh per year, based on 280 standard cleaning cycles using cold water II and the consumpon of the low power modes. Actual energy consumpon will depend on how the appliance is used.
③ Water consumpon “2800” litres per year, based on 280 standard cleaning cycles. Actual water consumpon will depend on how the appliance is used.
4 A (highest eciency) to G (lowest eciency)
⑤ This programme is suitable for cleaning normally soiled tableware and it is the most efficient programme in terms of combined energy and water consumption for that type of tableware.
The device meets the European standards and the directives in the current version at delivery:
- LVD 2006/95/EC
- EMC 2004/108/EC
- ErP 2009/125/EC
The above values have been measured in accordance with standards under specified operang conditions, amount of detergents, etc.
The manual is based on the European Union's standards and rules.
THOMSON is a trademark of Technicolor or its Aliates used under license by DARTY.
DISPOSAL
natural_image
Symbolic illustration of a trash bin with crossed lines indicating no waste or discharge (no text or labels)As a responsible retailer we care about the environment.
As such we urge you to follow the correct disposal procedure for the appliance and packaging materials. This will help conserve natural resources and ensure that it is recycled in a manner that protects health and the environment.
You must dispose of this appliance and its packaging according to local laws and regulaons. Because this appliance contains electronic components, the appliance and its accessories must be disposed of separately from household waste when the appliance reaches its end of life.
Contact your local authority to learn about disposal and recycling.
The appliance should be taken to your local collecon point for recycling. Some collecon points accept appliance free of charge.
We apologise for any inconvenience caused by minor inconsistencies in these instrucons, which may occur as a result of product improvement and development.
Darty Holdings SAS © 14 route d'Aulnay 93140 Bondy, France 17/10/2016
Downloaded from www.vandenborre.be NL 2 5 6
INHOUDSOPGAVE
WAARSCHUWINGEN 2
BELANGRIJKE VEILIGHEIDSINSTRUCTIES....5
BESCHRIJVING....6
VOORDAT U UW VAATWASSER INSTALLEERT....7
INSTALLATIE-INSTRUCTIES....8
PROBLEEMOPLOSSING 21
PRODUCTFICHE 24
WAARSCHUWINGEN
natural_image
Close-up of a flexible electrical cable or wire component with a grid base, shown in a black frame (no text or symbols visible)natural_image
Coiled white cable with a small connector at the end (no text or symbols visible)natural_image
Line drawing of a hand holding a tool with a handle (no text or symbols)natural_image
Technical illustration of a mechanical assembly with rods and gears (no text or symbols)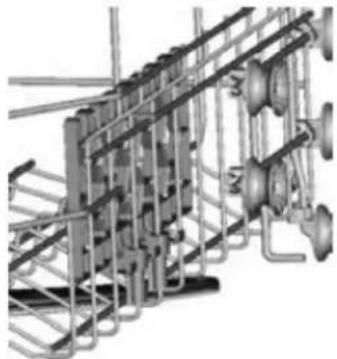
natural_image
Mechanical assembly diagram showing interconnected pipes and valves (no text or labels)natural_image
Hand holding a grid of abstract lines and arrows, no text or symbols visiblenatural_image
Row of eight different kitchen utensils in a row, including spoons, platters, and spoons (no text or labels visible)natural_image
Blue rectangular metal rack with grid pattern, no visible text or symbolsnatural_image
Illustration of a blue metal rack with grid pattern and a downward arrow indicating compression (no text or symbols)natural_image
Blue metal rack with grid pattern, no visible text or symbols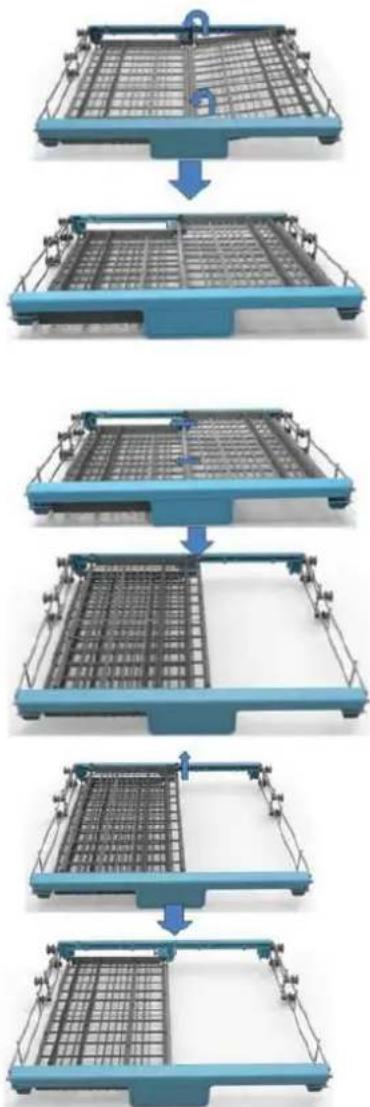
flowchart
graph TD
    A["Start"] --> B["Step 1: Initial material handling"]
    B --> C["Step 2: Material inspection or assembly"]
    C --> D["Step 3: Final assembly with grid and metal frame"]
    D --> E["Step 4: Final product release"]
natural_image
Illustration of a hand pouring granular material into a tray with a tool and a small container (no text or symbols)natural_image
Exterior view of a silver portable device with control panel and side door (no visible text or symbols)natural_image
Hand pressing a button on a device (no text or symbols visible)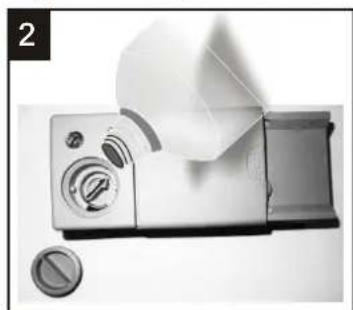
natural_image
Close-up of a white digital camera with control knobs and a paper roll, no visible text or symbols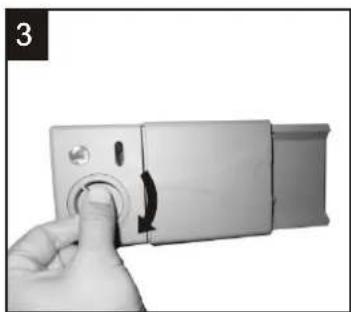
natural_image
Hand pressing a button on a silver device (no visible text or symbols)natural_image
Exterior view of a modern office building (no signage)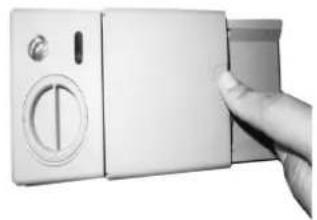
natural_image
Hand inserting a small white device into a rectangular panel (no visible text or symbols)natural_image
Metallic tray or container with internal compartments and a black arrow pointing to a section (no visible text or symbols)Darty Holdings SAS © 14 route d'Aulnay 93140 Bondy, France 17/10/2016