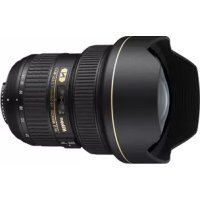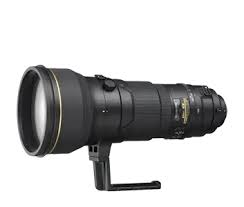
NIKKOR ED 400MM F/2.8 IF - Camera lens NIKON - Free user manual and instructions
Find the device manual for free NIKKOR ED 400MM F/2.8 IF NIKON in PDF.


User questions about NIKKOR ED 400MM F/2.8 IF NIKON
0 question about this device. Answer the ones you know or ask your own.
Ask a new question about this device
Download the instructions for your Camera lens in PDF format for free! Find your manual NIKKOR ED 400MM F/2.8 IF - NIKON and take your electronic device back in hand. On this page are published all the documents necessary for the use of your device. NIKKOR ED 400MM F/2.8 IF by NIKON.
USER MANUAL NIKKOR ED 400MM F/2.8 IF NIKON
- Lens hood screw
- Tripod collar alignment scale (four marks)
- Tripod collar alignment index
- Preset-focus ring
- Focusing ring
- Distance scale
- Depth-of-field indicators
- Distance index
- Infrared compensation index
- Filter holder mounting index
- Glass filter holder
- Filter holder knob
- Shoulder strap eyelets
- Aperture index
-
Extension lens hood HE-3
-
Built-in lens hood
- Tripod collar lock screw
- Preset-focus ring lock screw
- Tripod sockets
- Built-in rotating tripod collar
- Tripod socket position guides
- Aperture scale
- Aperture ring
- EE servo coupling post
- Aperture indexing post
- Aperture-direct-readout scale
- Meter coupling shoe
- Meter coupling ridge
- Gelatine filter holder plate
- Gelatine filter holder
Thank you for your kind patronage of Nikon.
Before using your new lens, read the following carefully so you get the most out of your lens now and for years to come.
MOUNTING THE LENS
To mount, position the lens in the camera's bayonet mount, lining up the aperture index on the lens with the lens mounting index on the camera. Twist the camera body clockwise until it clicks into place.
To remove, press the lens release button on the camera and turn the camera body counterclockwise. For details, refer to the camera's instruction manual.
FOCUSING
Turn the focusing ring until the image in the viewfinder appears sharp and crisp. The effective focal length may vary in extreme heat or cold. To compensate for this, turn the lens focusing ring slightly beyond the (infinity) position.
Preset Focusing
When you want to refocus rapidly to a specific object distance, preset the focused distance.
- Loosen the preset-focus ring lock screw and turn the ring in either direction until it clicks.
- Turn the focusing ring to set the desired distance.
- Tighten the preset-focus ring lock screw.
It is possible to focus/refocus by turning either the preset-focus ring or focusing ring.
RECOMMENDED FOCUSING SCREENS
Various interchangeable focusing screens are available for F3- and F2-series cameras to suit any type of lens or picture-taking situation. Those which are recommended for use with your lens are listed below. For screens used with Nikon cameras other than F3- and F2-series cameras (e.g., Nikon FA, FE2, FM2 and FE), refer to the column for F3-series cameras. For the K2, B2 and E2 focusing screens, refer to the columns on the K, B and E screens, respectively. For details, also refer to the specific focusing screen's instruction sheet.
| Camera\Screen | A/L | B | C | D | E | G1 | G2 | G3 | G4 | H1 | H2 | H3 | H4 | J | K/P | M | R | T | U |
| F3 | ◎ | ◎ | ◎ | ◎ | ◎ | ◎ | ○ | ○ | ◎ | ○ | ◎ | ◎ | ◎ | ◎ | |||||
| F2 | ◎ | ◎ | ◎ | ◎ | ◎ | ◎ | ○ | ○ | ◎ | ○ | ◎ | ◎ | ◎ |
- When the Teleconverter TC-201 or TC-200 is attached to this lens, use the following table:
| Camera\Screen | A/L | B | C | D | E | G1 | G2 | G3 | G4 | H1 | H2 | H3 | H4 | J | K/P | M | R | T | U |
| F3 | ◎ | ◎ | ○ | ○ | ◎ | ○ | ◎ | ◎ | ◎ | ◎ | ◎ | ||||||||
| F2 | ◎ | ◎ | ○ | ○ | ◎ | ○ | ◎ | ◎ | ◎ |
- When the Teleconverter TC-301 or TC-300 is attached to this lens, use the following table:
| Camera\Screen | A/L | B | C | D | E | G1 | G2 | G3 | G4 | H1 | H2 | H3 | H4 | J | K/P | M | R | T | U |
| F3 | ● | ◎ | ○ | ○ | ◎ | ○ | ◎ | ◎ | ◎ | ◎ | ◎ | ◎ | ◎ | ||||||
| F2 | ● | ◎ | ○ | ○ | ◎ | ○ | ◎ | ◎ | ◎ | ◎ | ◎ |
- When the Teleconverter TC-14B or TC-14 is attached to this lens, use the following table:
| Camera\Screen | A/L | B | C | D | E | G1 | G2 | G3 | G4 | H1 | H2 | H3 | H4 | J | K/P | M | R | T | U |
| F3 | ◎ | ◎ | ○ | ○ | ◎ | ○ | ◎ | ◎ | ◎ | ◎ | ◎ | ◎ | |||||||
| F2 | ◎ | ◎ | ○ | ○ | ◎ | ○(-1) | ◎(-1) | ◎ | ◎ | ◎ |
= Excellent focusing
= Acceptable focusing
The split-image rangefinder, microprism or cross-hair area is dim. Focus on the surrounding matte area.
= Acceptable focusing
Slight vignetting (or moiré phenomenon, in the case of the microprism) affects the screen image. The image on the film, however, shows no trace of this.
= Exposure measurement not possible; lens/screen combination permits only focusing operation.
(=) Indicates degree of exposure compensation.
Blank means not usable.
DEPTH OF FIELD
Depth of field can be checked with the color-coded depth-of-field indicators engraved on the lens barrel.
If your camera has a depth-of-field preview function, it is possible to check the depth of field in the viewfinder. (For details, see camera instruction manual.)
Depth of field can also be checked by referring to the table on page 42.
INFRAREDPHOTOGRAPHY
In infrared photography, it is necessary to make the following adjustments to the focused distance.
- Focus subject.
- Reset the focusing ring to align the focused distance with the infrared focusing index.
- Attach the appropriate filter, such as R60, etc., and take the shot.
USING FILTERS
Always use a filter with the lens. The slip-in glass filter holder comes mounted with a Nikon L37C filter. A slip-in gelatine filter holder is also supplied with the lens.
Replacing Glass Filters C_1· C_2· C_3
- Press down on the glass filter holder knob, and turn counterclockwise until the white line on the knob is at a right angle to the axis of the lens.
- Pull the holder out.
- Unscrew the mounted filter and replace with the filter you want to use.
- Put the holder back, push down on the knob, and turn clockwise to lock.
Using Gelatine Filter D
- Cut the gelatine filter into a circle of approx. 55mm (2.2 in.) in diameter.
- Open the gelatine filter holder plate by pushing on the latch and lifting up.
- Insert the gelatine filter into the holder and close the plate. Make sure the filter is unscratched and free from dust and take care that it stays flat.
- Remove the glass filter holder from the lens and insert the gelatine filter holder.
USING LENS HOODS
When shooting in bright sunlight, use the lens hoods to prevent stray light from entering your lens.
To Use Built-In Lens Hood E_1· E_2
- Turn the hood clockwise and pull out as far as it goes.
- Secure in place by continuing to turn counterclockwise until it locks.
To Attach Extention Lens Hood HE-3
- Loosen the lock screw on the HE-3.
- Slip the HE-3 onto the front of the built-in hood.
- Tighten the locking screw.
SPECIFICATIONS
Focal length: 400mm
Maximum aperture: f/2.8
Lens construction: 8 elements in 6 groups (plus dustproof glass plate built into front)
Picture angle: 6^10'
Distance scale: Graduated in meters and feet from 4m (15 ft.) to infinity ()
Aperture scale: f / 2.8 f / 22 on both standard and aperture-direct-readout scales
Diaphragm: Fully automatic
Exposure measurement: Via full-aperture method; meter coupling ridge provided for AI cameras and meter coupling shoe for non-AI cameras
Focusing: Nikon Internal Focusing (IF) system
Infrared focusing index: Provided
Tripod mounting: Built-in tripod mounting collar rotatable through 360^
Lens hood: Built-in telescopic screw-out type
Extension lens hood: Provided
Filters: Slip-in type glass filter holder accepts 52mm dia. screw-in filters; gelatine filter holder accepts gelatine filters
Mount:Nikon bayonet mount
Dimensions: Approx. 163mm dia. × 378.5mm extension from flange; approx. 386.5mm long (overall)
Weight: Approx. 5150g
| Accessories | |
| Slip-on leatherette front lens cap | 52mm-dia. screw-in filters |
| Rear lens cap LF-1 | Soft lens pouch No. 59 |
| 52mm-dia. screw-in ultraviolet filter L37C | Teleconverter TC-201 Teleconverter TC-301 |
| Gelatine slip-in filter holder | Teleconverter TC-14B |
| Extension lens hood HE-3 | |
| Shoulder strap | |
| Aluminum Trunk CT-400 | |
LENS CARE
- Although you should always keep the lens surfaces clean, rough cleaning must be avoided: Wipe with a soft, clean cotton cloth moistened with alcohol to remove grease or fingerprints from the lens surfaces.
If you use ether in cleaning the lens, a smudge sometimes appears on the surface of a multi-coated lens. If this happens, wipe it again with a cotton cloth moistened with alcohol.
-
Take care in cleaning the rear part of the lens with a spray-gun type blower, because its strong stream of air may damage the lens diaphragm blades. To avoid damage, set the lens at full aperture and use the blower far enough away.
-
Always protect the lens surface from dirt or damage. The lens hood also helps to protect the lens.
-
Keep the lens cap in place whenever the lens is not in use.
ABOUT THE NIKKOR ED SERIES
Correction of chromatic aberration in camera lenses has been limited, for the most part, to the use of techniques which bring two wavelengths of light, normally blue and red, to a common focus. Although known as "achromatic," lenses employing these designs exhibit a certain amount of undesirable residual dispersion (called the "secondary spectrum") which limits image contrast and sharpness, particularly at full aperture. Telephoto lenses are most prone to the ill effects of chromatic aberration, since secondary spectrum increases with focal length.
The Nikkor ED series consists of telephoto and super-telephoto lenses fitted with elements made of a Nippon Kogaku-developed special optical glass called "Extra-low Dispersion" (ED) glass. Although the optical characteristics of this new glass are similar to those of calcium-fluorite crystal, ED glass possesses a more constant refractive index over a wide range of temperatures and will, therefore, cause less of a focus shift. Also, ED glass is much harder and more resistant to scratches, enabling its use for front and rear lens elements to obtain optimum correction of chromatic aberration over the widest possible wavelength range. Some lenses within the ED series have been so fully corrected that image sharpness extends uniformly to the infrared region; for these lenses, corrective refocusing for infrared exposure is unnecessary. The remaining lenses, such as this Nikkor 400mm f/2.8 IF-ED, have been built exceptionally compact due to the use of ED glass elements; for these lenses, however, corrective refocusing for infrared photography is necessary. Regardless of which type, ED-series lenses offer exceptional sharpness and full contrast for the most precise photography under the widest conditions.
NOMENKLATUR
| Kamera | Einstellcheibe | ||||||||||||||||||
| A/L | B | C | D | E | G1 | G2 | G3 | G4 | H1 | H2 | H3 | H4 | J | K/P | M | R | T | U | |
| F3 | ◎ | ◎ | ◎ | ◎ | ◎ | ◎ | ○ | ○ | ◎ | ○ | ◎ | ◎ | ◎ | ◎ | ◎ | ||||
| F2 | ◎ | ◎ | ◎ | ◎ | ◎ | ◎ | ○ | ○ | ◎ | ○ | ◎ | ◎ | ◎ | ||||||
| Kamera | Einstellschabe | ||||||||||||||||||
| A/L | B | C | D | E | G1 | G2 | G3 | G4 | H1 | H2 | H3 | H4 | J | K/P | M | R | T | U | |
| F3 | ◎ | ◎ | ○ | ○ | ◎ | ○ | ◎ | ◎ | ◎ | ◎ | ◎ | ◎ | ◎ | ||||||
| F2 | ◎ | ◎ | ○ | ○ | ◎ | ○ | ◎ | ◎ | ◎ | ◎ | ◎ | ||||||||
Aluminiumkoffer CT-400
OBJEKTIVPELEGE
| Boitier Verre | A/L | B | C | D | E | G1 | G2 | G3 | G4 | H1 | H2 | H3 | H4 | J | K/P | M | R | T | U | |
| F3 | ◎ | ◎ | ◎ | ◎ | ◎ | ◎ | ○ | ○ | ◎ | ○ | ◎ | ◎ | ◎ | ◎ | ◎ | ◎ | ||||
| F2 | ◎ | ◎ | ◎ | ◎ | ◎ | ◎ | ○ | ○ | ◎ | ○ | ◎ | ◎ | ◎ | ◎ |
| Boitier Verre | A/L | B | C | D | E | G1 | G2 | G3 | G4 | H1 | H2 | H3 | H4 | J | K/P | M | R | T | U |
| F3 | ◎ | ◎ | ○ | ○ | ◎ | ○ | ◎ | ◎ | ◎ | ◎ | ◎ | ||||||||
| F2 | ◎ | ◎ | ○ | ○ | ◎ | ○ | ◎ | ◎ | ◎ |
| Boitier Verre | A/L | B | C | D | E | G1 | G2 | G3 | G4 | H1 | H2 | H3 | H4 | J | K/P | M | R | T | U |
| F3 | ● | ◎ | ○ | ○ | ◎ | ○ | ◎ | ◎ | ● | ● | ● | ● | ● | ||||||
| F2 | ● | ◎ | ○ | ○ | ◎ | ○ | ◎ | ◎ | ● | ● | ● |
| Boitier Verre | A/L | B | C | D | E | G1 | G2 | G3 | G4 | H1 | H2 | H3 | H4 | J | K/P | M | R | T | U |
| F3 | ◎ | ◎ | ○ | ○ | ◎ | ○ | ◎ | ◎ | ◎ | ◎ | ◎ | ||||||||
| F2 | ◎ | ◎ | ○ | ○ | ◎ | ○(-1) | ◎(-1) | ◎ | ◎ | ◎ |
= Excellent
= Mise au point acceptable
| Pantalla Cama | A/L | B | C | D | E | G1 | G2 | G3 | G4 | H1 | H2 | H3 | H4 | J | K/P | M | R | T | U |
| F3 | ◎ | ◎ | ◎ | ◎ | ◎ | ◎ | ○ | ○ | ◎ | ○ | ◎ | ◎ | ◎ | ◎ | ◎ | ||||
| F2 | ◎ | ◎ | ◎ | ◎ | ◎ | ◎ | ○ | ○ | ◎ | ○ | ◎ | ◎ | ◎ | ◎ |
| Pantalla Cama | A/L | B | C | D | E | G1 | G2 | G3 | G4 | H1 | H2 | H3 | H4 | J | K/P | M | R | T | U |
| F3 | ◎ | ◎ | ○ | ○ | ◎ | ○ | ◎ | ◎ | ◎ | ◎ | ◎ | ||||||||
| F2 | ◎ | ◎ | ○ | ○ | ◎ | ○ | ◎ | ◎ | ◎ | ||||||||||
| Pantalla Cama | A/L | B | C | D | E | G1 | G2 | G3 | G4 | H1 | H2 | H3 | H4 | J | K/P | M | R | T | U |
| F3 | ● | ○ | ○ | ○ | ○ | ○ | ○ | ○ | ● | ● | ● | ● | ● | ||||||
| F2 | ● | ○ | ○ | ○ | ○ | ○ | ○ | ○ | ● | ● | ● |
| Pantalla Cama | A/L | B | C | D | E | G1 | G2 | G3 | G4 | H1 | H2 | H3 | H4 | J | K/P | M | R | T | U |
| F3 | ◎ | ◎ | ○ | ○ | ◎ | ○ | ◎ | ◎ | ◎ | ◎ | ◎ | ◎ | |||||||
| F2 | ◎ | ◎ | ○ | ○ | ◎ | ○(-1) | ◎(-1) | ◎ | ◎ | ◎ | |||||||||
= Excelente
= Enfoque acceptable
LaImagenesbrillantedeunbordealotro,perolapatécentrelvdvisormicroprismáticooreticuladoesoscura.Enfouquese sobre la partemate de alrededor.
= Enfoque acceptable
| Fotocamera\Scheme | A/L | B | C | D | E | G1 | G2 | G3 | G4 | H1 | H2 | H3 | H4 | J | K/P | M | R | T | U |
| F3 | ◎ | ◎ | ◎ | ◎ | ◎ | ◎ | ○ | ○ | ◎ | ○ | ◎ | ◎ | ◎ | ◎ | |||||
| F2 | ◎ | ◎ | ◎ | ◎ | ◎ | ◎ | ○ | ○ | ◎ | ○ | ◎ | ◎ | ◎ |
| Fotocamera\Scheme | A/L | B | C | D | E | G1 | G2 | G3 | G4 | H1 | H2 | H3 | H4 | J | K/P | M | R | T | U |
| F3 | ◎ | ◎ | ○ | ○ | ◎ | ○ | ◎ | ◎ | ◎ | ◎ | ◎ | ||||||||
| F2 | ◎ | ◎ | ○ | ○ | ◎ | ○ | ◎ | ◎ | ◎ |
| Fotocamera\Scheme | A/L | B | C | D | E | G1 | G2 | G3 | G4 | H1 | H2 | H3 | H4 | J | K/P | M | R | T | U |
| F3 | ● | ◎ | ○ | ○ | ◎ | ○ | ◎ | ◎ | ◎ | ◎ | ◎ | ◎ | ◎ | ||||||
| F2 | ● | ◎ | ○ | ○ | ◎ | ○ | ◎ | ◎ | ◎ | ◎ | ◎ |
| Fotocamera\Scheme | A/L | B | C | D | E | G1 | G2 | G3 | G4 | H1 | H2 | H3 | H4 | J | K/P | M | R | T | U | |
| F3 | ◎ | ◎ | ○ | ○ | ◎ | ○ | ◎ | ◎ | ◎ | ◎ | ◎ | ◎ | ||||||||
| F2 | ◎ | ◎ | ○ | ○ | ◎ | ○(-1) | ◎(-1) | ◎ | ◎ | ◎ |
| Close-up attachment | Lens in normal position | ||
| Reproduction ratio | Subject field | Focused distance | |
| E2 Ring | 1/28.6–1/6.3 | 27.0 × 40.5 × 6.0 × 9.0 | 479.1–129.1 |
| K Ring Set | 1/69.0–1/4.1 | 65.2 × 97.8 × 3.9 × 5.8 | 1114.9–97.1 |
| PK-Series Ring | 1/50.0–1/4.0 | 47.2 × 70.9 × 3.8 × 5.6 | 816.3–95.3 |
| PN-Series Ring | 1/7.6–1/3.9 | 7.2 × 10.8 × 3.6 × 5.5 | 150.6–93.7 |
- The first values are for the K1 ring used alone and the second ones for five rings used together.
** The first values are for the PK-1 or PK-11 ring used alone and the second ones for three rings (PK-1 ~ PK-3) or PK-11 ~ PK-13) used together.
Nikon
No reproduction in any form of this booklet, in whole or in part (except for brief quotation in critical articles or reviews), may be made without written authorization from the publishers.