RATAB1005 - Tablet Ricatech - Free user manual and instructions
Find the device manual for free RATAB1005 Ricatech in PDF.

| Product type | Tablet |
| Brand / Model | Ricatech RATAB1005 |
| Dimensions | 262 × 172 × 15 mm (approx.) |
| Weight | 660 g (approx.) |
| Screen | 4:3 high resolution liquid crystal widescreen, 10 inches, 1024 × 768 pixels |
| Processor | ARM Cortex-A9 1 GHz |
| RAM memory | DDR2 512 MB |
| Internal storage | 4 GB (expandable via microSD card up to 32 GB) |
| Operating system | Android 2.2 |
| Camera | 2.0 megapixels (still and video) |
| Connectivity | WiFi, Bluetooth, 3.5 mm headphone jack, mini-HDMI, mini-USB, microSD slot, 3G SIM slot (optional) |
| Speakers | Dual-channel stereo speakers |
| Battery | Rechargeable lithium-ion polymer battery, battery life: 11 h music / 5 h video |
| Power supply | Dedicated power adapter (included) |
| Maintenance and cleaning | Unplug the device before cleaning. Use a soft, dry cloth. Do not use abrasive cleaners or solvents. |
| Safety | Use only the provided adapter. Do not expose to moisture. Keep out of reach of children. Avoid shocks. |
| Customer service | Email: support@ricatech.com, Phone: +32 3 3265694, Website: www.ricatech.com |
Frequently Asked Questions - RATAB1005 Ricatech
User questions about RATAB1005 Ricatech
0 question about this device. Answer the ones you know or ask your own.
Ask a new question about this device
Download the instructions for your Tablet in PDF format for free! Find your manual RATAB1005 - Ricatech and take your electronic device back in hand. On this page are published all the documents necessary for the use of your device. RATAB1005 by Ricatech.
USER MANUAL RATAB1005 Ricatech
text_image
Google Email Camera Gallery Calendar Maps Video Player YouTube File Manager Market Youtube Repurchase THU 10:00 sales meeting officeUSER MANUAL GEBRUIKERSHANDLEIDING MODE D'EMPLOI BEDIENUNGSANLEITUNG MANUAL DE USUARIO
USER MANUAL
Section 1: Getting Started
Understanding this User Manual
Special Text
Instruction Icon Conventions
Battery
Battery Indicator
Charging the Battery
Turning Your Device On and Off
Memory Card
Installing a Memory Card
Removing a Memory Card
HDMI
Connecting HDMI to Display
Disconnecting HDMI
Reset Your Device
Factory Reset Your Device
Section 2: Understanding Your Device
Front View
Side Views
Rear View
System Tray Controller View
Android User Guide
Device Features and Technical Details
Understanding this User Manual
This user manual is generally follow the features of your device.
Special Text
In this user manual, you will discover text that is formatted differently from the rest. These specially formatted text are intended to bring your attention, point out important information, or define terms, and more.
Tips : Provides alternative more robust suggestion.
Important : Indicating important information you should know about that may potentially affect device performance.
Warning : Brings to your attention of information in order to prevent damage to your device, data or functionality.
Instruction Icon Conventions
This user manual consists of information on how to use your device. To make it easy to follow, this user manual will use the arrow icon to represent steps.
→ Arrows refer to sequence of steps to perform in order of its appearance.
Battery
Your device is powered by a rechargeable, Lithium-ion polymer battery. An AC Adapter Charger are included with the device for charging the battery.
Important : The battery may be partially charged. You must fully charge the battery before using your device for the first time.
After the first complete charge, you may use the device while it is being charged
Warning : To avoid damage to your device, use only approved charging adapter. Using non-approved charging devices may invalidate your warranty and may cause damages.
Battery Indicator
Your device status bar consists of Battery Icon (When battery power is less than 15%, your device will prompt you to charge the device. If you continue to use the device without charging your battery, the device will shutdown.
Charging the Battery
You can charge your device from any standard AC power outlet.
Warning : To avoid damage to your device, use only approved charging adapter. Using non-approved charging devices may invalidate your warranty and may cause damages.
- Use the AC adapter provided and connect to your device s charging plug.
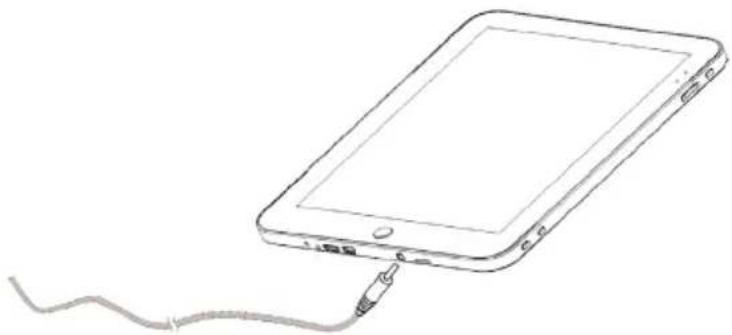
natural_image
Line drawing of a tablet connected to a cable (no text or symbols)- Plug the other end of AC adapter into a standard AC power outlet.
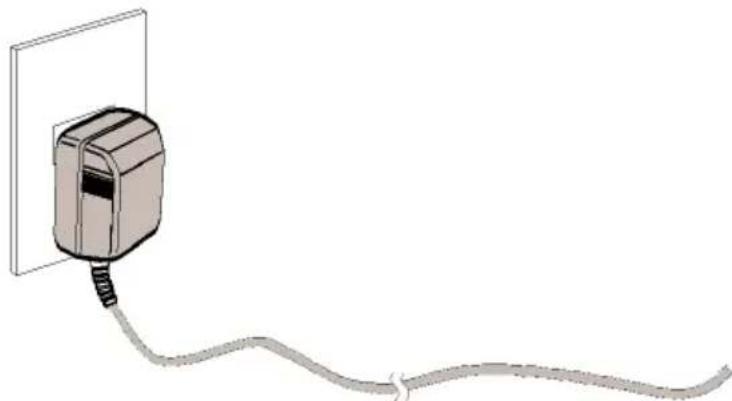
natural_image
Simple line drawing of a plug inserted into a wall, connected to a cable (no text or symbols)- When charging is complete, unplug the AC adapter from power outlet and disconnect it from your device.
Turning Your Device On and Off
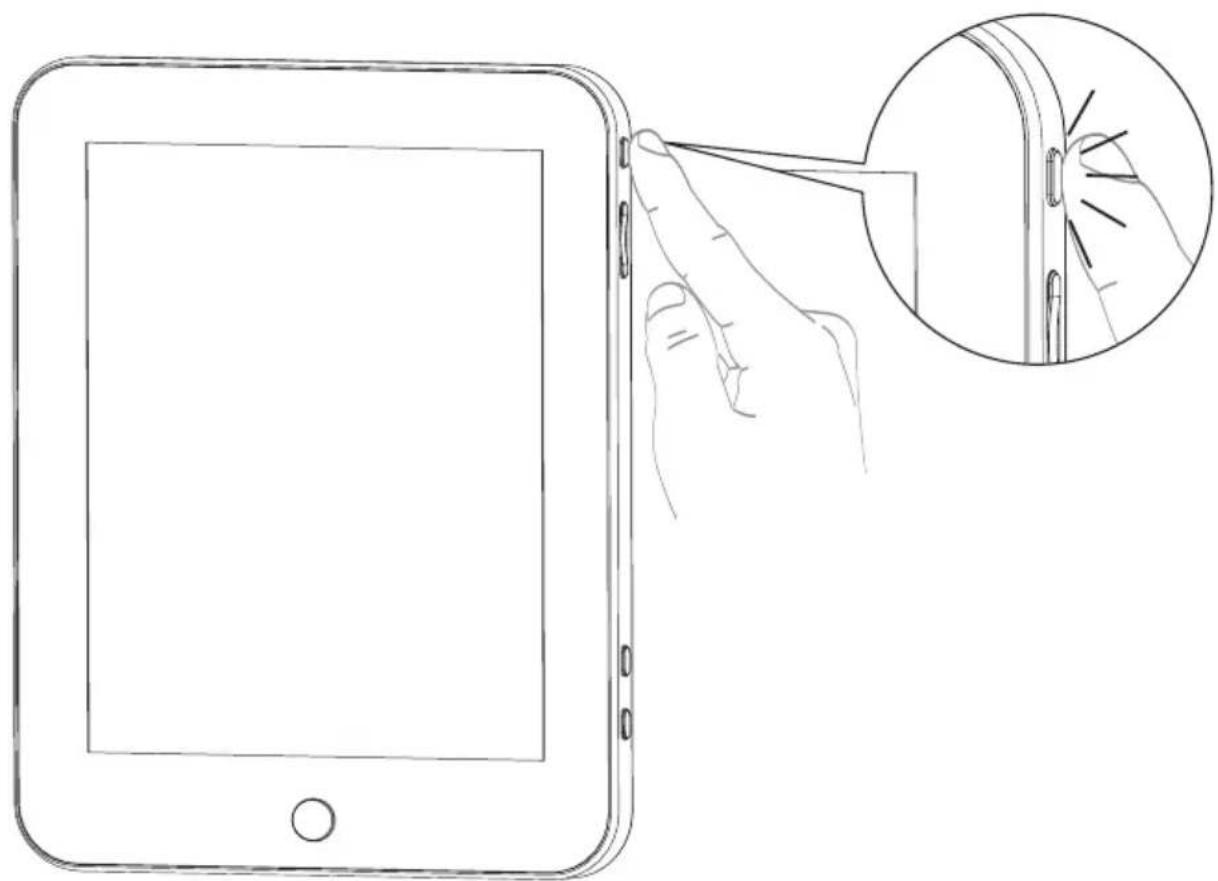
Turning Your Device On
Press and hold the Power / Standby Key ( ⏻ ).
natural_image
Line drawing of a tablet device with a close-up inset showing the tip of the cable being held, no text or symbols present.Turning Your Device Off
- Press and hold the Power / Standby Key
- When screen prompt, touch Power off.
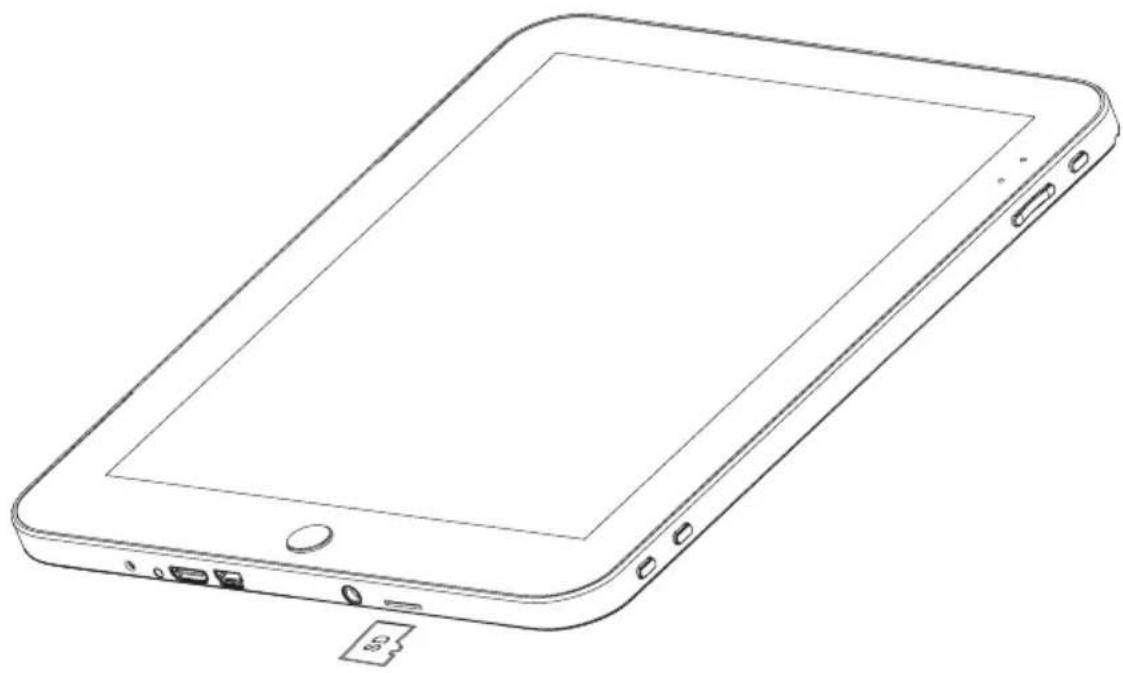
Memory Card
Your device supports external removable micro SD or micro SDHC memory cards. It is used to store music, pictures, videos, documents and other files.
natural_image
Line drawing of a tablet device with visible screen and buttons (no text or symbols)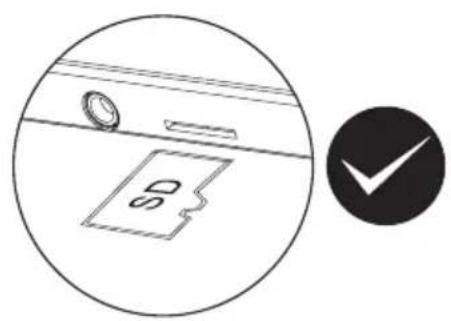
natural_image
Simple line drawing of a document with a magnifying glass and a checkmark icon (no text or symbols)
natural_image
Simple line drawing of a kitchen sink with a plate and a magnifying glass, next to a black circular symbol with a white cross (no text or labels)Installing a Memory Card
- Remove the Memory Card Place Holder from Memory Card Slot to make the slot available.
- With the metal contacts facing to the back of the device and carefully and gently push the memory card into the slot until it is in place.
Tips : You do not need to turn off the device to insert
a memory card.
Warning : Inserting memory card incorrectly may potentially damage both memory card and the device.
Removing a Memory Card
- From a Home screen, press the Menu Key

Settings

D card and device storage

Unmount SD Card.
- Gently press down on the memory card to pop out the memory card from the slot.
- Replace the Memory Card Place Holder.
Warning : Removing memory card without unmounting first may cause damages to memory card and your device.
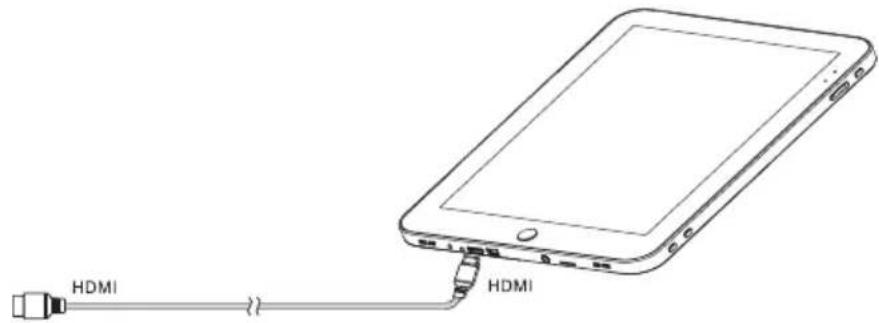
HDMI
You can connect your device to other display devices such as TV, Monitor via HDMI connection.
Important : In order to connect your device to an external display, you need to ensure your display is able to accept HDMI as input. For more information please refer to your display's user manual.
Connecting HDMI to Display
- Connect HDMI cable to the Mini-HDMI connector on your device.
text_image
HDMI HDMI- Connect the other end of the cable to your display HDMI connector.
Disconnecting HDMI
- Remove HDMI cable from your display
- Remove HDMI cable from your device
Reset Your Device
Your device contain a hidden reset button for you to use in certain extreme circumstances.
To reset your device, take a pin and push the reset button for 1 second and release to reset the device.
Important : Resetting your device will not erase any data or setting currently saved in the device or memory card.
Factory Reset Your Device
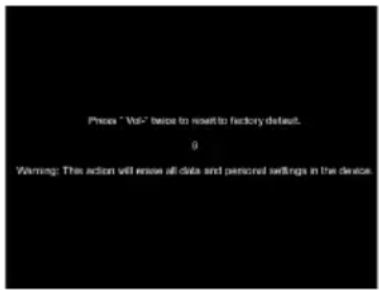
You can reset your device to factory default in the situation where you cannot turn on your device successfully.
- Press and hold the Power / Standby Key ( ⏻ and VOL+ Key at the same time.
- Press VOL- Key twice to confirm and reset to factory default.
text_image
Press "Vol" before to reset to factory default. 0 Warning: This action will renew all data and personal settings in the device.WARNING : By performing factory reset, all your data, settings, files, applications on the device will be erased.
This procedure is recommended for advanced user only.
TIPS : Before you try to restore your device to factory default, try to reset your device using the hidden reset button (see Reset Your Device).
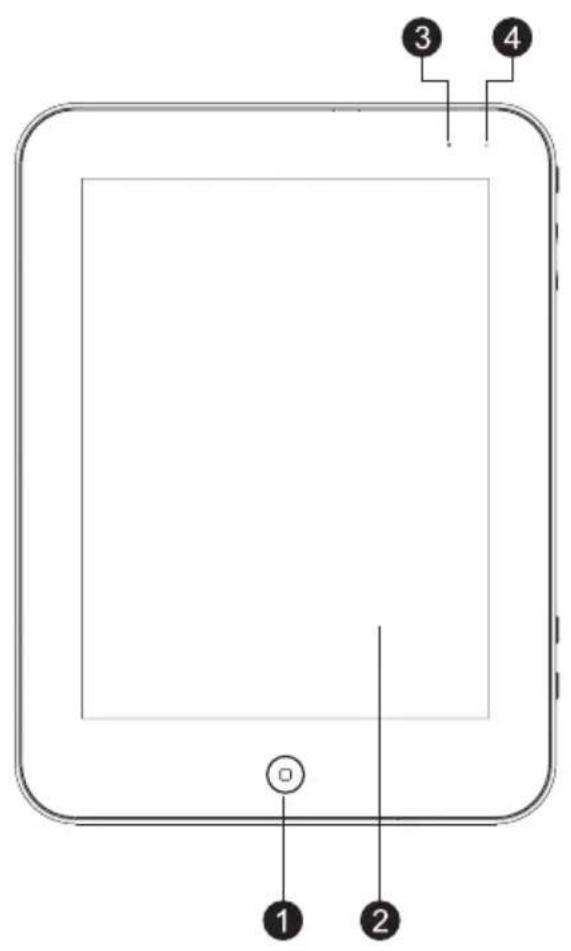
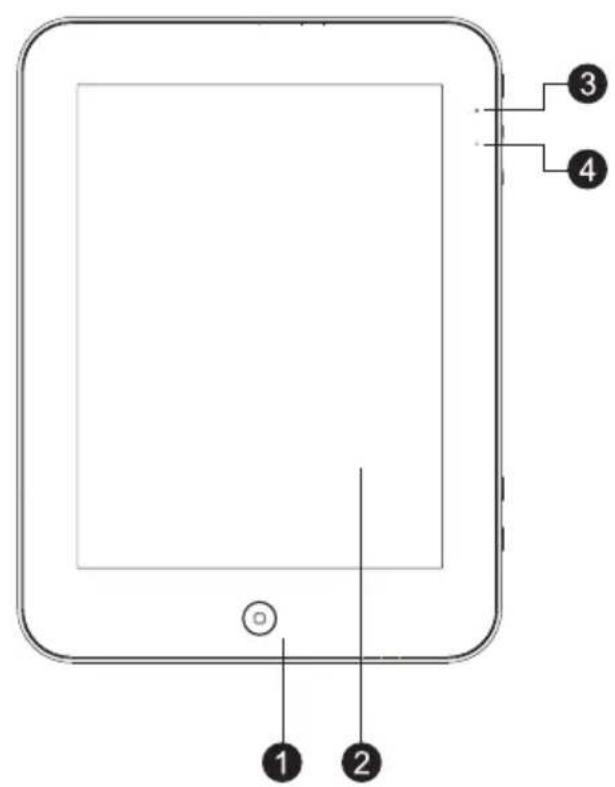
Front View
text_image
1 2 3 410 "
text_image
① ② ③ ④7"
- Home
- Touch screen
- LED power indicator
- LED charging indicator
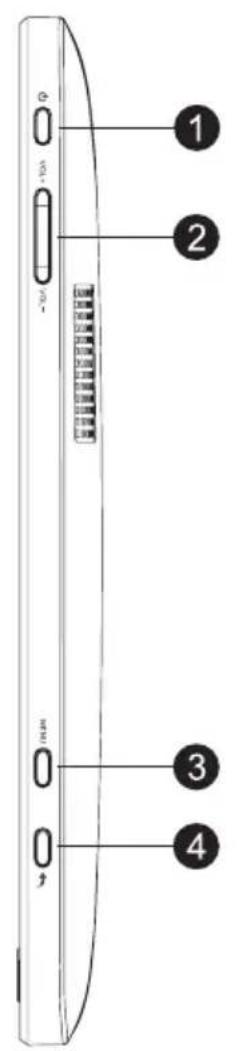
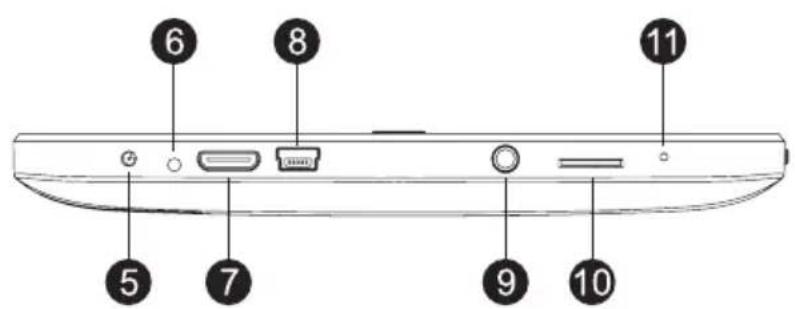
Side views
text_image
1 2 3 4-
Power
-
Vol+ / Vol-
-
Menu
-
Back
-
Power jack
-
Reset
-
Mini HDMI output jack
-
Mini USB port
-
Earphone jack
-
Micro SD slot
-
Microphone
text_image
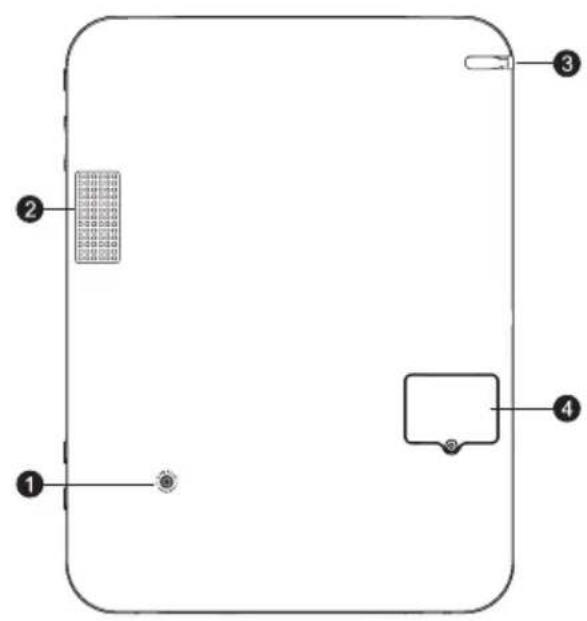
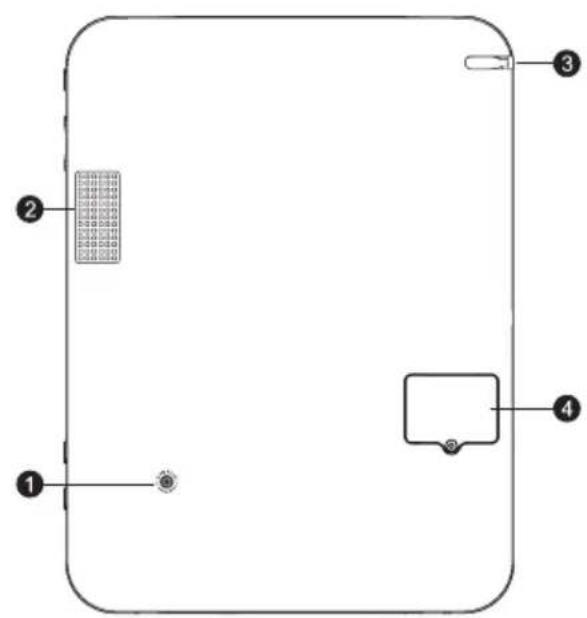
6 8 11 5 7 9 10Rear View
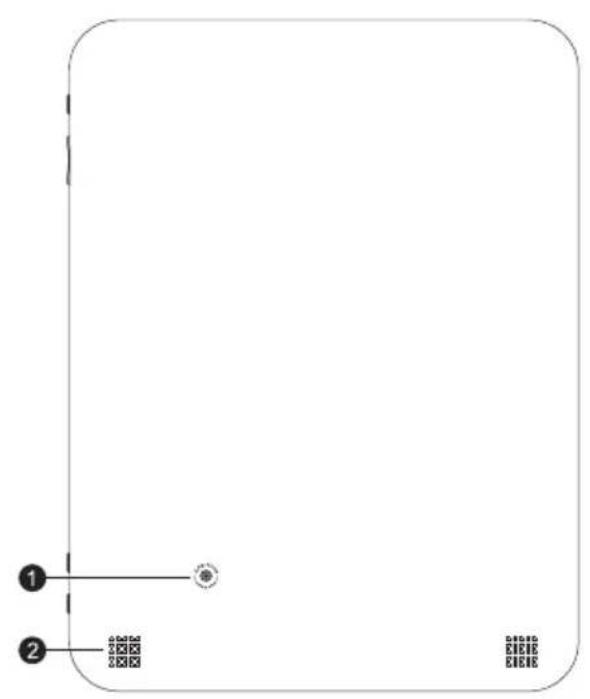
text_image
Diagram showing two labeled points (1 and 2) with a central symbol and a grid-like pattern at the bottom right.10 "

text_image
Diagram of a device panel layout with labeled components including grid, button, and indicator lights7"
- Camera
- Speaker
- Stylus
- 3G SIM Card(optional)
System Tray Controller View

text_image
15-30-2011 10:01.m ① ② ③ ④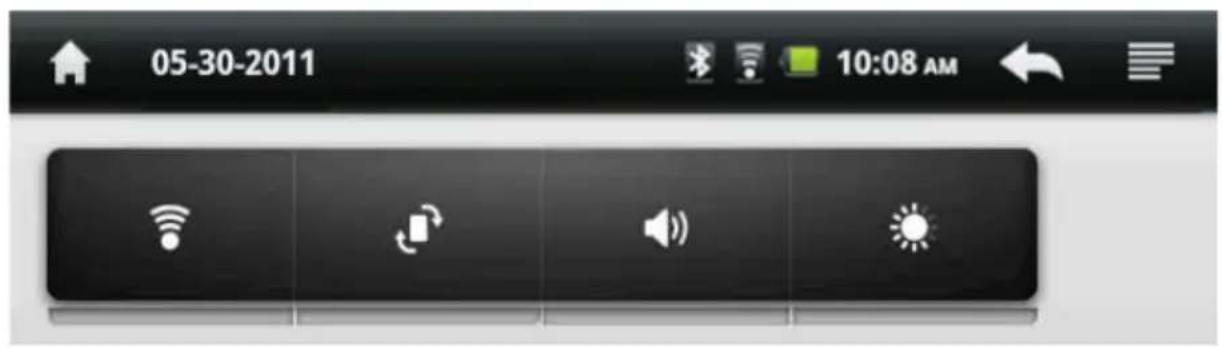
text_image
05-30-2011 10:08 AM- Wi-Fi ON/OFF
- Rotation Lock
- Silence all sounds except media & alarms
- Brightness Control
Device Features and Technical Details
- ARM Cortex-A9 1GHz Processor
- 2.0 M Pixels Motion / Still Image Camera
- Android 2.2
- 4GB Internal Storage
- 11 Hours of Music Playback or 5 Hours of Video Playback(10)
12 Hours of Music Playback or 7 Hours of Video Playback (7) - Hardware Audio / Video Encoder & Decoder
- 3D Accelerator Technology
- Integrated Invisible Microphone
- Mini-HDMI 1080HD Experience
- Multi-Touch
- 4:3 Widescreen High Resolution LCD 1024 X 768 (10")
4:3 Widescreen High Resolution LCD 800 X 600 (7") - Dual-Channel Stereo Speaker (10)
- MicroSD Expansion Slot (32GB Max)
- DDR2 512MB System Internal Memory
- Integrated Wi-Fi & Bluetooth
- Stereo 3.5mm Headphone
A. Optional 3G SIM Card
B. Optional integrated GPS
CUSTOMER SUPPORT
You can contact the Ricatech customer service when you have a question or a problem with your Ricatech product. You can contact us by telephone and email.
For customer support by email, please sent a email to support@ricatech.com Please make sure that you mention the model number and serial number of the product, mention your name & address and describe your question or problem clearly.
Telephone
For customer support by telephone, please dial +32 3 3265694.
One of our service staff will be ready to serve you.
For full procedure please visit the website of Ricatech at: www.ricatech.com
GEBRUIKERSHANDLEIDING
natural_image
Line drawing of a tablet with a cable inserted, showing the screen and port (no text or symbols)natural_image
Illustration of a cable being inserted into a wall socket (no text or symbols)natural_image
Line drawing of a tablet with a hand inserting a cable to a cable connector, showing the magnified detail (no text or symbols)natural_image
Line drawing of a tablet device with visible screen and buttons (no text or symbols)
natural_image
Simple line drawing of a document with a magnifying glass and a checkmark icon (no text or symbols)
natural_image
Simple line drawing of a kitchen sink with a plate and a coin, next to a black circular symbol with a white cross (no text or labels)text_image
Press "Vol" twice to reset to factory default. 0 Warning: This action will ensure all data and personal settings in the device.text_image
Diagram showing two labeled points (1 and 2) with a central symbol and a grid-like pattern at the bottom right.10 "
text_image
Diagram of a device panel layout with labeled components including grid, button, and indicator lights7"
natural_image
Line drawing of a tablet connected to a cable (no text or symbols)natural_image
Simple line drawing of a plug inserted into a wall, connected to a cable (no text or symbols)natural_image
Line drawing of a tablet device with a magnified inset showing the tip of the screen (no text or symbols present)natural_image
Line drawing of a tablet device with visible screen and buttons (no text or symbols)
natural_image
Simple line drawing of a document with a magnifying glass and a checkmark icon (no text or symbols)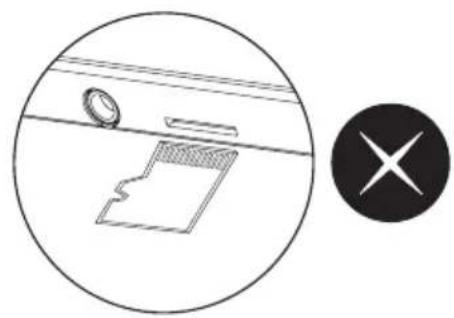
natural_image
Simple line drawing of a document with a magnifying glass and a cross symbol, enclosed in a circle (no text or labels)text_image
Press "Vol" bezo to reserto factory defact. 0 Warning: This action will erase all data and personal settings in the device.text_image
Diagram showing two labeled points (1 and 2) with a central symbol and a small grid of symbols, likely from a software interface or layout.10 "

text_image
Diagram of a device panel layout with labeled components including grid, button, and indicator lights7"
natural_image
Line drawing of a tablet connected to a cable (no text or symbols)natural_image
Simple line drawing of a plug inserted into a wall, connected to a cable (no text or symbols)natural_image
Line drawing of a tablet device with a hand inserting a cable to its screen, showing a magnified inset (no text or symbols)natural_image
Line drawing of a tablet device with visible screen and buttons (no text or symbols)
natural_image
Simple line drawing of a document with a magnifying glass and a checkmark icon (no text or symbols)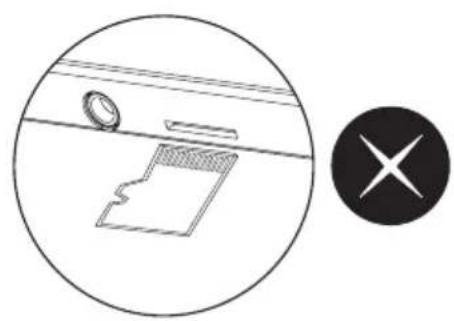
natural_image
Simple line drawing of a kitchen sink with a plate and a coin, next to a black circular symbol with a white cross (no text or labels)text_image
Press "Vol" twice to reset to factory defect. Warning: This action will erase all data and personal settings in the device.text_image
Diagram showing two labeled points (1 and 2) with a central symbol and a small grid of symbols, likely from a software interface or layout.10 "
text_image
Diagram of a device panel with labeled components including grid, button, and indicator lights7"
natural_image
Line drawing of a tablet connected to a cable (no text or symbols)natural_image
Illustration of a cable being inserted into a socket (no text or symbols)natural_image
Line drawing of a tablet device with a hand inserting a cable to its screen, accompanied by an inset showing the cable being cut (no text or symbols present)natural_image
Line drawing of a tablet device with visible screen and buttons (no text or symbols)
natural_image
Simple line drawing of a document with a magnifying glass and a checkmark icon (no text or symbols)
natural_image
Simple line drawing of a kitchen sink with a plate and a coin, alongside a black circular symbol with a white cross (no text or labels)text_image
Phone "Vol" before to reset to factory default. 0 Warning: This action will issue all data and personal settings in the device.text_image
Diagram showing two labeled points (1 and 2) with a central symbol and a grid-like pattern at the bottom right.10 "

text_image
Diagram of a device panel layout with labeled components including grid, button, and indicator lights7"
You can contact the Ricatech customer service when you have a question or a problem with your Ricatech product. You can contact us by telephone and email.
For customer support by email, please sent a email to support@ricatech.com Please make sure that you mention the model number and serial number of the product, mention your name & address and describe your question or problem clearly.
Telephone
For customer support by telephone, please dial +32 3 3265694.
One of our service staff will be ready to serve you.
For full procedure please visit the website of Ricatech at: www.ricatech.com