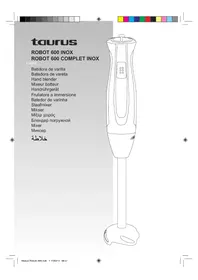
Prima Complet - Mixer TAURUS - Free user manual and instructions
Find the device manual for free Prima Complet TAURUS in PDF.
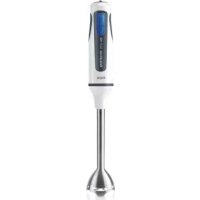
| Product type | Hand mixer |
| Brand | Taurus |
| Model | Prima Complet |
| Power supply | Mains (220-240 V ~ 50/60 Hz) |
| Speed | Speed selector |
| Bowl | Rotating |
| Included accessories | Whisk, Kneading hooks |
| Usage | Domestic |
| Body cleaning | Damp cloth, no immersion |
| Accessories cleaning | Dishwasher |
| Safety | Check voltage before connection, do not touch moving parts |
| Repairability | Authorized technical service only |
| Body material | Plastic |
| Accessories material | Stainless steel |
| Color | White/Black (depending on model) |
| Weight | Approximately 1 kg |
| Dimensions | Approximately 20 x 15 x 25 cm |
| Warranty | 2 years |
| Certifications | CE, Low Voltage Directive 2006/95/EC, Electromagnetic Compatibility 2004/108/EC |
Frequently Asked Questions - Prima Complet TAURUS
User questions about Prima Complet TAURUS
0 question about this device. Answer the ones you know or ask your own.
Ask a new question about this device
Download the instructions for your Mixer in PDF format for free! Find your manual Prima Complet - TAURUS and take your electronic device back in hand. On this page are published all the documents necessary for the use of your device. Prima Complet by TAURUS.
USER MANUAL Prima Complet TAURUS
natural_image
Line drawing of a hand mixer with a side arm and control panel (no text or symbols)


natural_image
Line drawing of a hand using a power tool to press or install a component, with no visible text or symbols.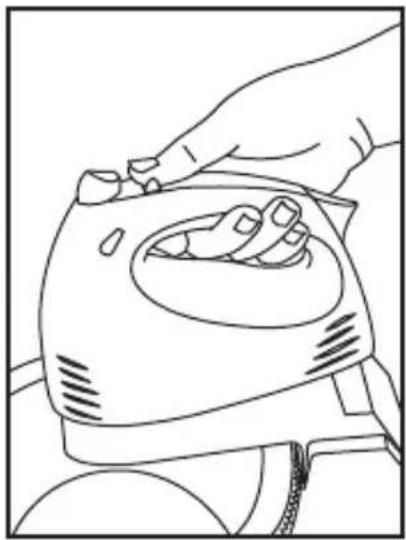
natural_image
Line drawing of a hand holding a small electronic device with a handle, no text or symbols present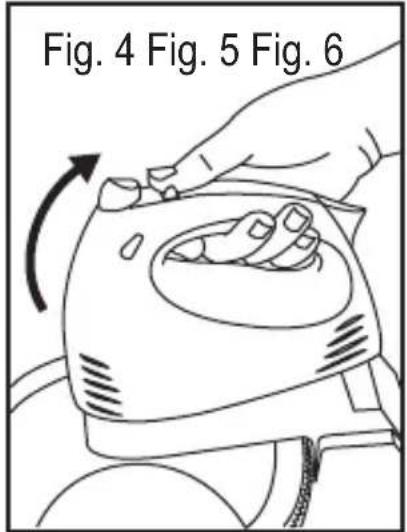
natural_image
Line drawing showing two sequential steps of a hand holding a small object, no text or symbols present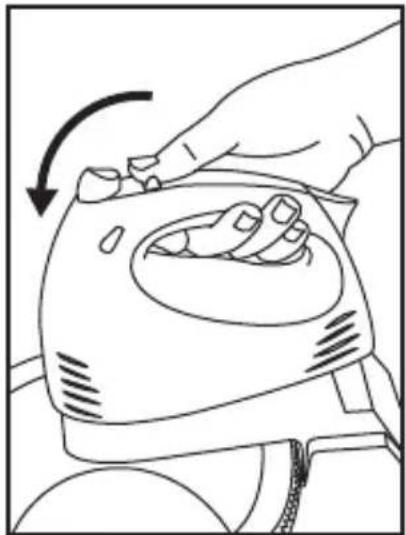
natural_image
Line drawing of a hand pressing down on a device with a curved arrow indicating rotation (no text or symbols)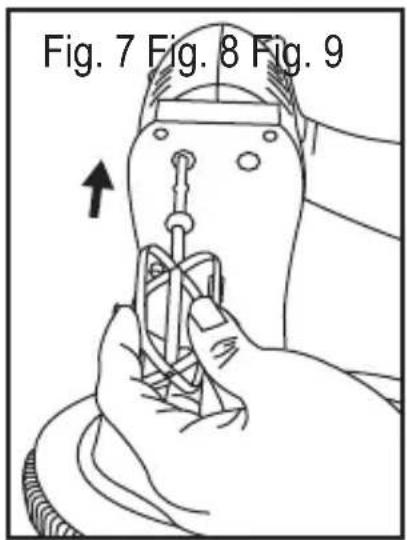
natural_image
Line drawing of a person using a tool on a circular object, with an arrow indicating direction (no text or symbols)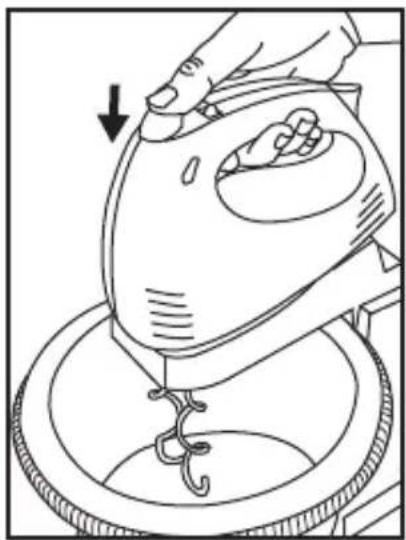
natural_image
Line drawing of a hand using a hairdryer to lift a circular component, with a downward arrow indicating motion (no text or symbols)Español
Batidora manual PRIMA COMPLET

natural_image
Symbol of a trash bin with crossed lines and a solid black rectangle below (no text or labels)natural_image
Symbol of a trash bin crossed with no text or labels, accompanied by a black rectangular block below (no readable text or symbols)Many thanks for choosing to purchase a TAURUS brand product.
Thanks to its technology, design and operation and the fact that it exceeds the strictest quality standards, a fully satisfactory use and long product life can be assured.
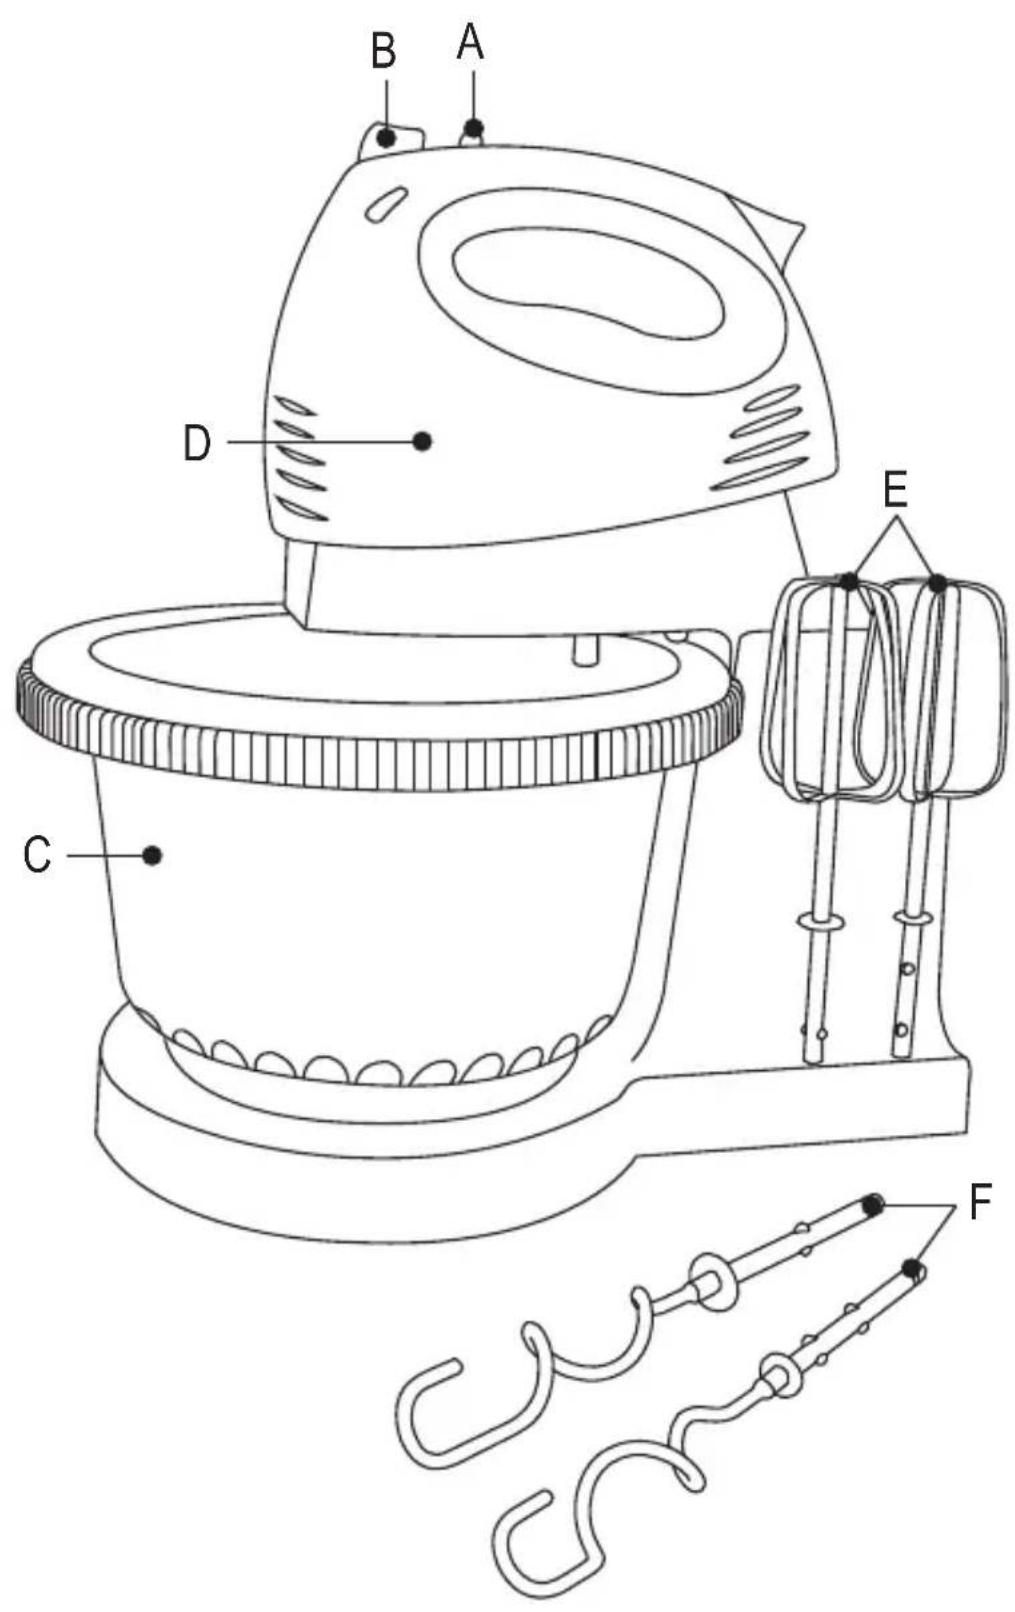
Description
A Speed selector control
B Ejection knob
C Rotating bowl
D Motor body
E Blending whisks
F Dough hooks

Safety advice and cautions
- Read these instructions carefully before switching on the appliance and keep them for future reference. Failure to follow and observe these instructions could lead to an accident.
- Clean all the parts of the product that will be in contact with food, as indicated in the cleaning section, before use.
Working Environment
- Place the appliance on a horizontal, flat, stable surface.
Electrical safety:
- Do not use the appliance if the cable or
plug is damaged.
- Ensure that the voltage indicated on the nameplate matches the mains voltage before plugging in the appliance.
- If any of the appliance's casing breaks, immediately disconnect the appliance from the mains to prevent the possibility of an electric shock.
- Do not use the appliance if it has fallen on the floor, if there are visible signs of damage or if it has a leak.
- Do not force the electrical connection wire. Never use the electric wire to lift up, carry or unplug the appliance.
- Do not touch the plug with wet hands.
Personal safety:
- Do not touch any of the appliance's moving parts while it is operating.
Use and care:
- Fully unroll the appliance's power cable before each use.
- Do not use the appliance if its accessories are not properly fitted.
- Do not use the appliance if the on/off switch does not work.
- Disconnect the appliance from the mains when not in use and before undertaking any cleaning task.
- This appliance is not a toy. Children should be supervised to ensure that they do not play with the appliance.
- This appliance is for household use only, not professional or industrial use.
- This appliance is intended for adult use. Ensure that this product is not used by the disabled, children or people unused to its handling.

- This appliance should be stored out of reach of children and/or the disabled.
- Any misuse or failure to follow the instructions for use renders the guarantee and the manufacturer's liability null and void.

Instructions for use
Use:
- Connect the appliance to the mains.
- Place the bowl in the stand.
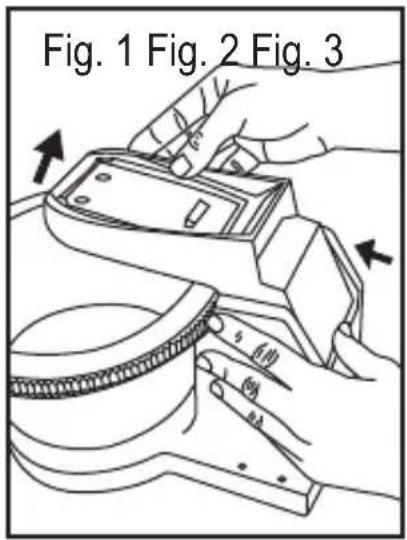
- Press the dislocking zone(Fig 1) if necessary until the bowl is put properly in place.
- Mount the main unit onto the stand (Fig 2 and 3). (To remove the main unit proceed in reverse).
- Press the dislocking zone (Fig 1) and turn the main unit with holder backwards (Fig4).
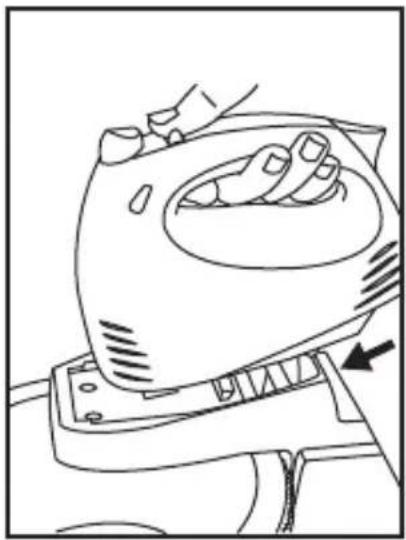
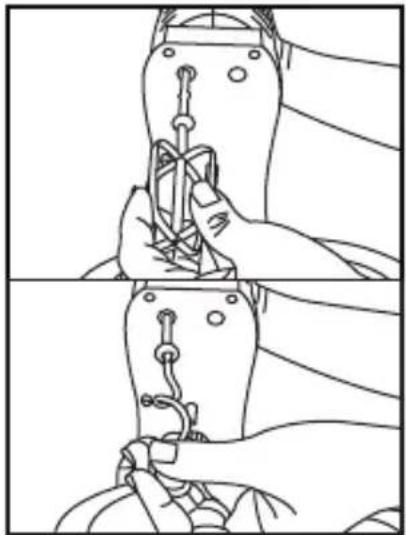
- Insert the beater or dough hooks. It may be necessary to turn the beaters or dough hooks a little while doing so. (Fig 5) It is important that you insert the whisk with the bigger ring into the bigger hole.
- Turn the main unit back into a horizontal position (Fig 6).
- Turn the appliance on using the on/off switch.
Accessories:
Whisk accessory (E):
- This accessory is used to whip cream, beat egg whites...
-
Mount the main unit onto the stand (Fig 2 and 3). (To remove the main unit proceed in reverse.)
-
Press the dislocking zone (Fig 1) and turn the main unit with holder backwards (Fig4).
- Insert the whisk into the adapter fitting. Join this unit to the motor unit by pressing until you hear click (Fig. 7). It is important that you insert the whisk with the bigger ring into the bigger hole.
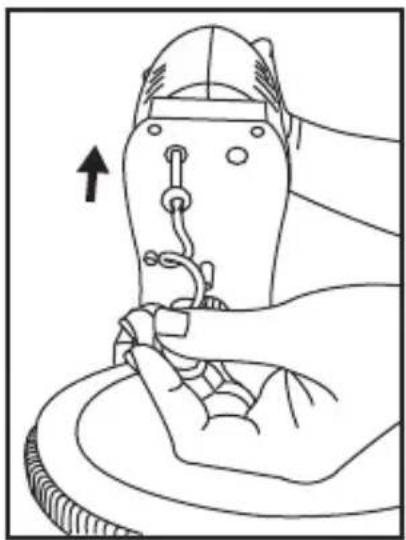
- Remove the dough hook accessory and press the accessory ejection knob to free the adapter fitting (Fig. 9).
Dough hooks (F):
- This accessory is used for kneading bread, pizza dough, and cakes...
- Mount the main unit onto the stand (Fig 2 and 3). (To remove the main unit proceed in reverse.)
- Press the dislocking zone (Fig 1) and turn the main unit with holder backwards (Fig4).
- Insert the dough hook into the adapter fitting. Join this unit to the motor unit by pressing until you hear click (Fig. 8). It is important that you insert the dough hook with the bigger ring into the bigger hole.
- Remove the dough hook accessory and press the accessory ejection knob to free the adapter fitting (Fig. 9).

Cleaning
- Disconnect the appliance from the mains and allow it to cool before undertaking any cleaning task.
- Clean the equipment with a damp cloth with a few drops of washing-up liquid and then dry.
- Do not use solvents, or products with an acid or base pH such as bleach, or abrasive products, for cleaning the appliance.

- Do not let water or any other liquid get into the air vents to avoid damage to the inner parts of the appliance.
- Never submerge the appliance in water or any other liquid or place it under running water.
-
The following pieces may be washed in a dishwasher:
-
Blending whisks
- Dough hooks

Anomalies and repair
- Take the appliance to an authorised technical support service if problems arise. Do not try to dismantle or repair without assistance, as this may be dangerous.
- If the connection to the mains has been damaged, it must be replaced and you should proceed as you would in the case of damage.
This appliance has been filled with a quantity and quality of certain oils, therefore the replacement or refilling of oil in case of a leakage should be carried out by an authorised technical service centre.
once its working life has ended, take it to an authorised waste agent for the selective collection of waste from electric and electronic appliances.
natural_image
Symbol of a trash bin crossed out by two crossed lines, with no text or labels present.- This symbol means that in case you wish to dispose of the product once its working life has ended, take it to an authorised waste
agent for the selective collection of Waste from Electric and Electronic Equipment (WEEE).
This appliance complies with Directive 2006/95/EC on Low Voltage and Directive 2004/108/EC on Electromagnetic Compatibility.
Ecology and recyclability of the product
- The materials of which the packaging of this appliance consists are included in a collection, classification and recycling system. Should you wish to dispose of them, use the appropriate public containers for each type of material.
- The product does not contain concentrations of substances that could be considered harmful to the environment.
- Should you wish to dispose of the product

Français
natural_image
Symbol of a trash bin crossed with a diagonal line, no text or numbers presentnatural_image
Symbol of a trash bin crossed out by two crossed lines, with a solid black rectangle below (no text or labels)natural_image
Symbol of a trash bin crossed with no visible text or labelsnatural_image
Simple line drawing of a trash bin with crossed lines and a blank rectangular base (no text or symbols)natural_image
Symbol of a trash bin with crossed lines indicating no waste, and a solid black rectangle below (no text or labels)natural_image
Symbol of a trash bin crossed with no text or labels, accompanied by a black rectangular block below (no readable text or symbols)natural_image
Symbol of a trash bin crossed with a diagonal line, no text or numbers presentnatural_image
Symbol of a trash bin crossed out by two crossed lines, with a solid black rectangle below (no text or labels)natural_image
Symbol of a trash bin crossed with diagonal lines, no text or numbers presentProduct weight (approximate)
Prima Complet: G.W. 2,25 Kg
N.W. 2,1 Kg