
ST 6 E - Vacuum Cleaner TEAM - Free user manual and instructions
Find the device manual for free ST 6 E TEAM in PDF.
| Product Type | Canister vacuum cleaner |
| Brand | Team |
| Model | ST 6 E |
| Power supply | Mains (check voltage on rating plate) |
| Suction power | Electronically variable (from MIN to MAX) |
| Power cord length | Approximately 6 meters (estimate) |
| Automatic cord rewind | Yes, with pedal |
| Filtration system | Main filter, motor protection filter, exhaust air filter |
| Dust container capacity | Approximately 2 liters (estimate) |
| Included accessories | Hose, tubes, combination nozzle (2 positions), 2-in-1 tool |
| Power control | Yes, electronic, integrated into the on/off button |
| Suction type | Dry only (do not vacuum liquids) |
| Use | Household |
| Maintenance | Empty the container after each use, replace the main filter when saturated, clean the motor filter if necessary, replace the exhaust filter approximately every 3 months |
| Repairability | Have it repaired by a qualified service |
| Safety | Do not use without filter, do not obstruct the hose, unplug before maintenance |
Frequently Asked Questions - ST 6 E TEAM
User questions about ST 6 E TEAM
0 question about this device. Answer the ones you know or ask your own.
Ask a new question about this device
Download the instructions for your Vacuum Cleaner in PDF format for free! Find your manual ST 6 E - TEAM and take your electronic device back in hand. On this page are published all the documents necessary for the use of your device. ST 6 E by TEAM.
USER MANUAL ST 6 E TEAM
Bagless vacuum cleaner
Aspirateur sans sac
A. Carrying handle
B. Release button of the dust compartment
C. Cable rewind pedal
D. ON/OFF switch and power regulator
E. Air outlet grille
F. Wind-force adjuster
G. Handle of the flexible hose
H. Flexible hose
I. Tubes
J. Floor brush
K. Pedal of the floor brush
L. Hose connection
M. Dust compartment
FR
Copies of the I/B. Please reproduce them without any changes except under special instruction from Team International BELGIUM. The pages must be reproduced and folded in order to obtain a booklet A5 (+/- 148.5 mm width x 210 mm height). When folding, make sure you keep the good numbering when you turn the pages of the I/B. Don't change the page numbering. Keep the language integrity.
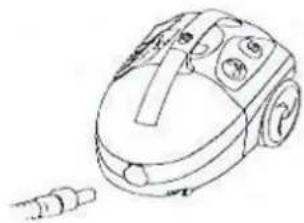
Fig.1
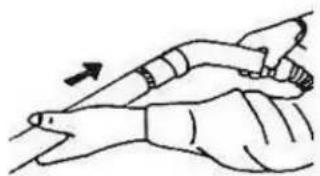
Fig.2
Fig. 3

Fig. 4
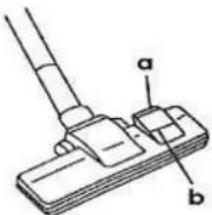
Fig. 5

Fig.6
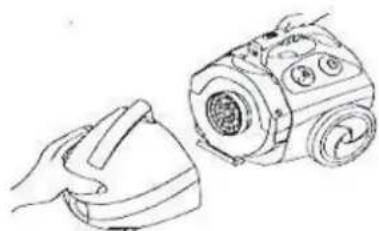
Fig.7
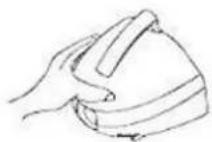
Fig.8
4 TEAM ST 6 E-060105
Please read these instructions carefully before using the appliance.
Check that your mains voltage corresponds to that stated on the appliance.
Never leave the appliance unsupervised when in use. Keep out of reach of children or incompetent persons.
From time to time check the cord for damages. Never use the appliance if cord or appliance shows any signs of damage. Should the cord be damaged, it must be replaced by a competent qualified electrician (^) . All repairs should be made by a competent qualified electrician (^) .
Only use the appliance for domestic purposes and in the way indicated in these instructions.
Never immerse the appliance in water or any other liquid for any reason whatsoever.
Never use the appliance near hot surfaces.
Before cleaning or storing the appliance, or when changing its filters, always unplug it from the power supply. Never use the appliance outside and always place it in a dry environment.
Never use accessories that are not recommended by the producer. They could constitute a danger to the user and risk to damage the appliance.
Never move the appliance by pulling the cord. Make sure the cord cannot get caught in any way; that would cause the appliance to get unplugged or cause a bad contact in the cable rewind system.
This appliance is not a toy, it is not supposed to be sat on.
Never use the appliance to vacuum matches, pointed objects, cigarettes, butts or other glowing things. Do not use it on wet surfaces or surfaces covered with cement or other substances that are too fine or even toxic when inhaled. Never vacuum any kind of liquid with this appliance.
Do not try to repair the winding-on spool yourself. Make sure it is repaired by a competent qualified electrician!
Do not block the vacuum passage. If this should happen by accident, unplug the appliance before unblocking it.
Make sure not to point the vacuum cleaner at persons or animals, and especially stay clear of eyes and ears.
If you use the appliance with damaged filters, the appliance might get damaged. Make sure to check the good quality and placement of the dust bag and/or filter.
If your appliance no longer vacuums correctly or if the dust bag full indicator becomes red, change the bag or empty the compartment (model with filter) before the appliance overheats.
Competent qualified electrician: after sales department of the producer or importer or any person who is qualified, approved and competent to perform this kind of repairs in order to avoid all danger. In any case you should return the appliance to this electrician.
ASSEMBLING THE VACUUM CLEANER
- Remove all packaging material from the appliance and its accessories.
- Assemble the handle of the flexible hose (G) on the upper part of the tubes (I) and then assemble the floor brush (J) on the other end of the tubes, as indicated on figures 2-3-4.
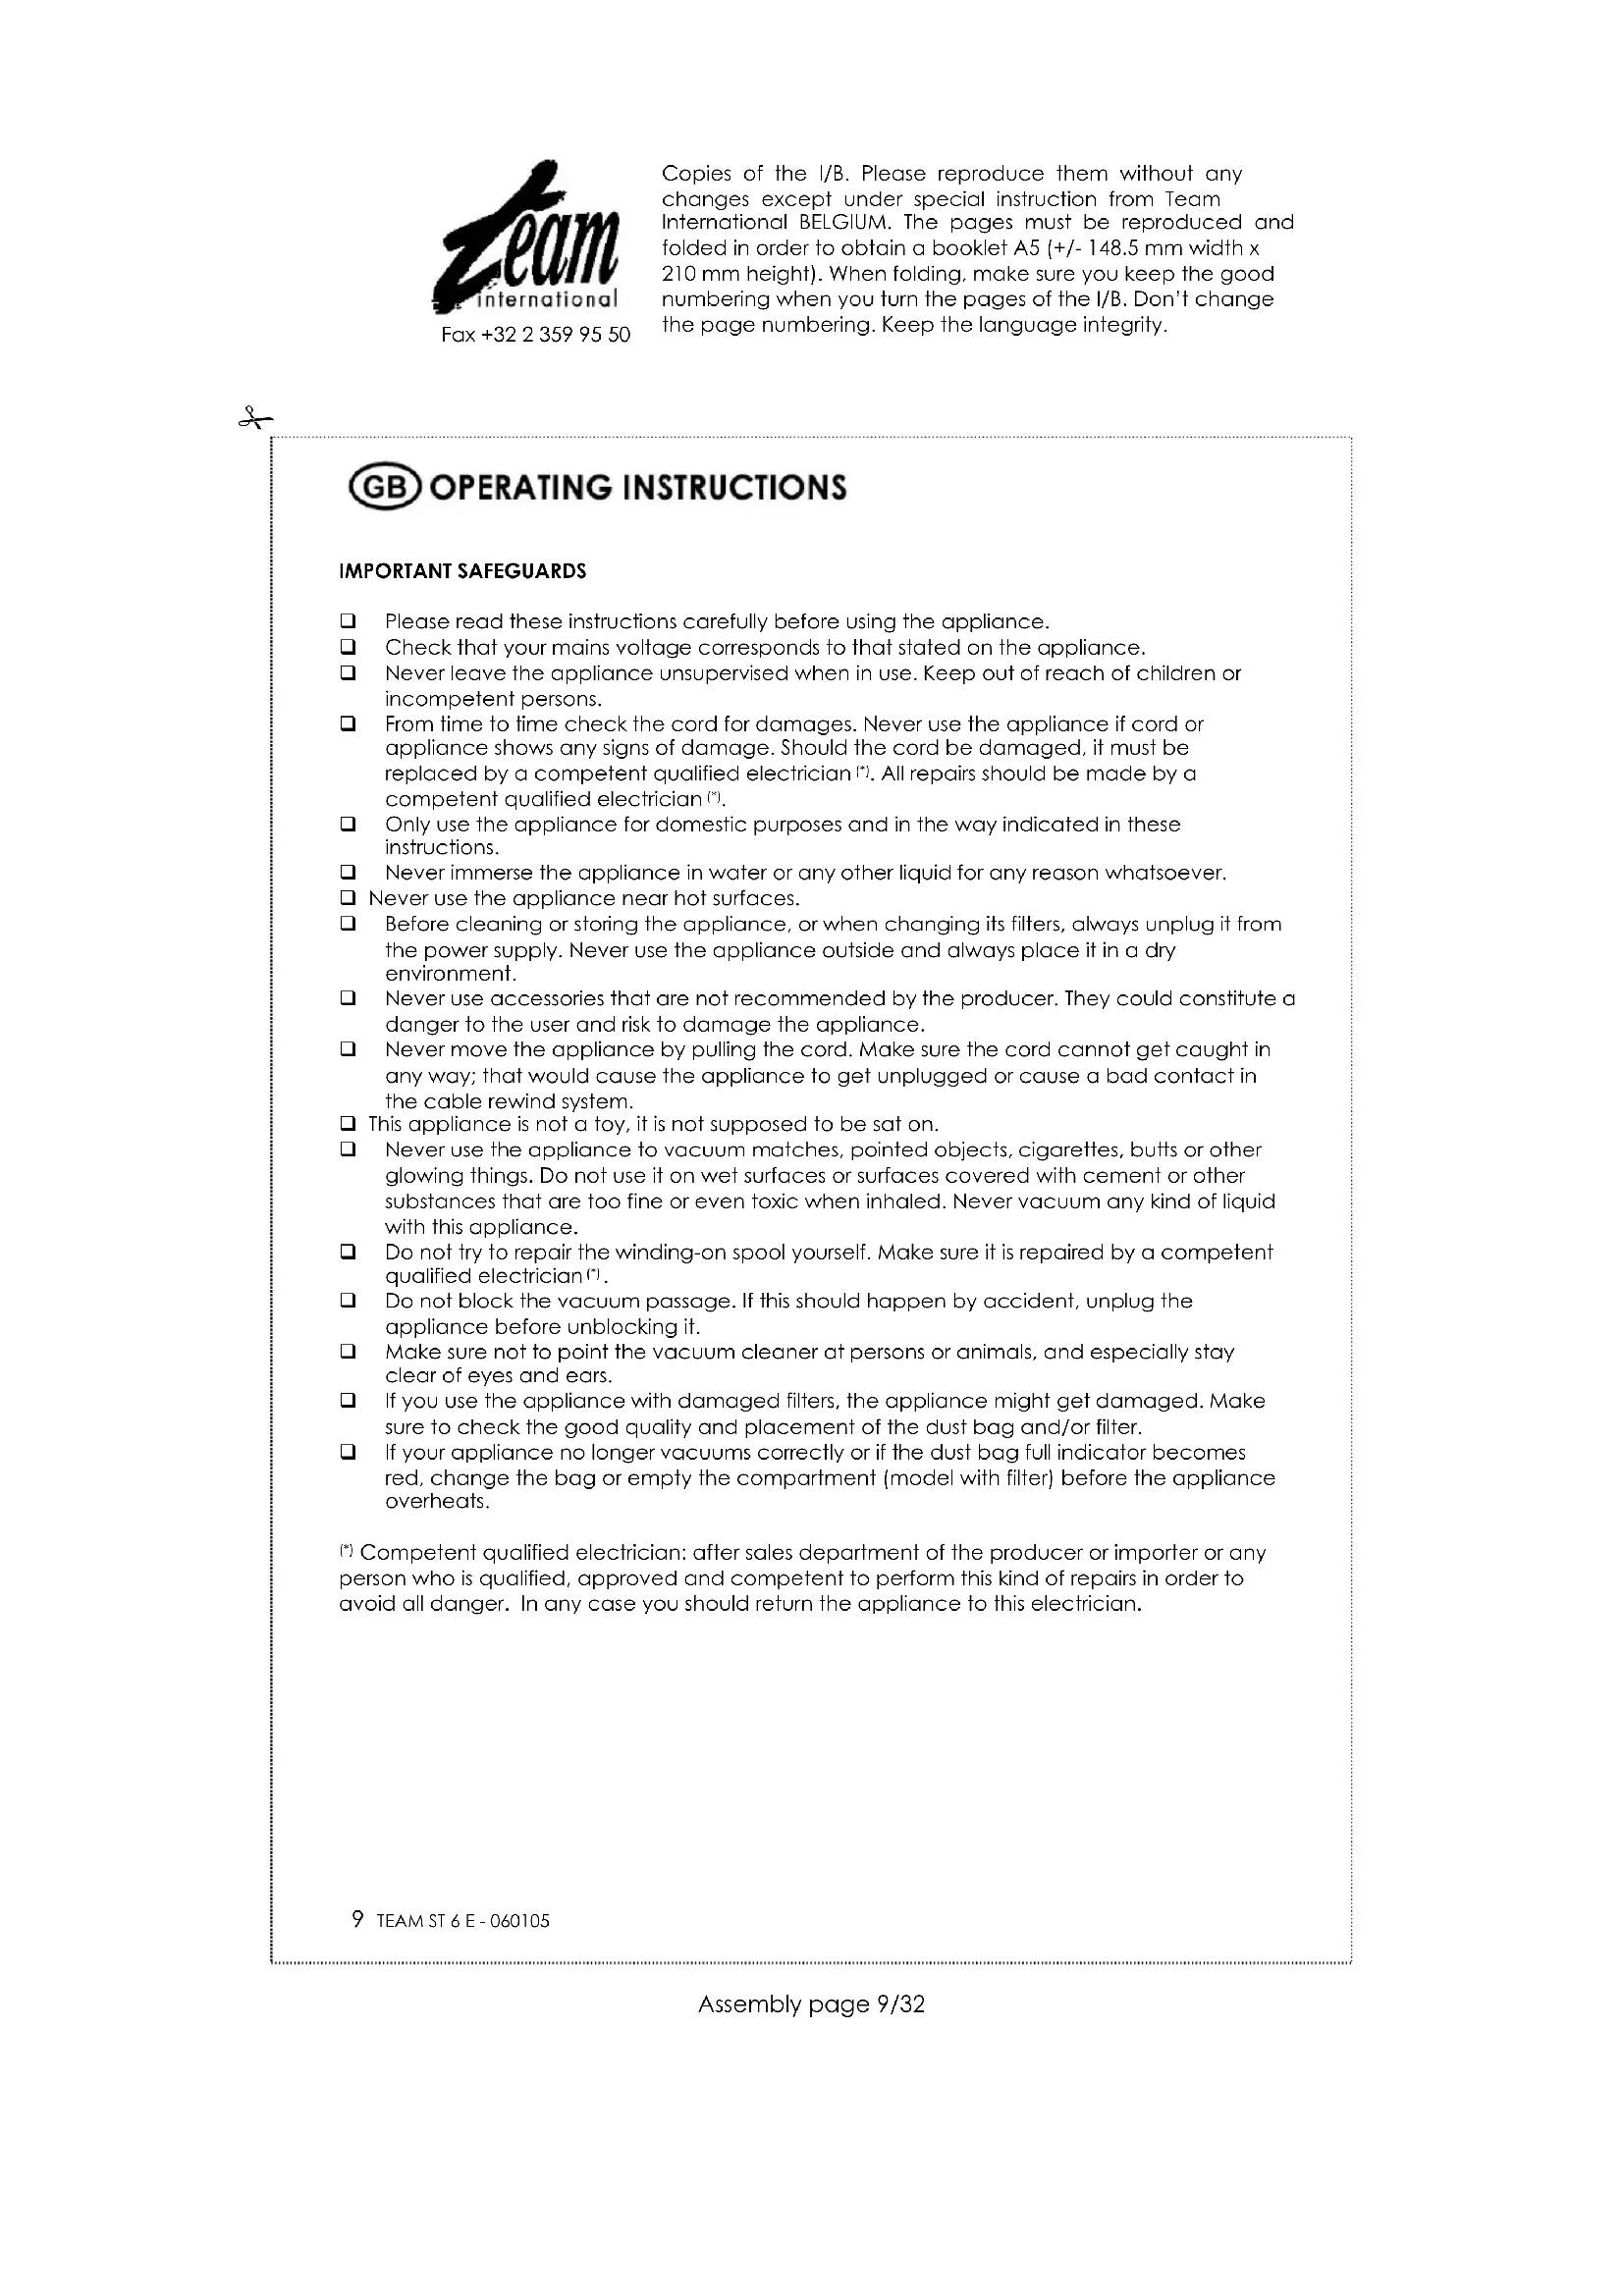
- Insert the hose (L) in the connection inlet of the dust collector (M) by having the release button facing upward, and press until it clicks (Fig. 1). To remove the hose, press its release button and pull at it.
- The floor brush (J) possesses 2 positions (Fig. 5) which allow you to clean all kinds of surfaces very easily, simply by changing the position adequately: Setting with the bristles inside for cleaning carpets. Setting with the bristles outside for cleaning hard floors.
OPERATION
- First of all, check if the filters are placed properly in the appliance, as vacuum cleaning without filter might damage the motor of the appliance irreparably. (see paragraph FILTERS for their use and installation).
- Pull out a sufficient length of power cord and insert the plug into the power socket. A yellow mark on the power cable shows the ideal cable length. Do not extend the cable beyond the red mark.
It is advisable to set the electronic power regulator to MIN before switching the appliance on. By turning the regulator button, the suction power can be adjusted. - When you use the floor brush, make longitudinal to and fro movements (do not make lateral movements) and insist on the places that are dirtier, always keeping the sole of the floor brush in contact with the surface you want to vacuum. To clean under low pieces of furniture, hold the handle (G) and make a quarter of a turn with the hinge of the floor brush to put it in its lowest possible position. Make sure you still keep the sole of the floor brush in contact with the surface you want to clean.
- With the delivered 2 in 1 accessory (Fig. 6) you can clean surfaces that are hard to reach, such as furniture (use the crevice tool) and delicate surfaces such as curtains (use the small brush). This accessory can be mounted on the handle or on the tube.
After use we advise you to empty the dust collector to avoid smells and mildew that could be caused by damp dust particles that could have been vacuumed, and also to guarantee an optimal efficiency during the next use. To do so, press the release button (B) and remove the dust collector (Fig. 7). Then hold it above the dust bin, and remove the main filter.
WHEN CLEANING IS FINISHED
- Stop the vacuum cleaner by depressing on the switch button.
- Disconnect plug from electrical outlet.
- Simply press lightly with your foot on cable rewind button on top of cleaner. If the cord does not enter completely in the appliance, pull 50~cm of the power cord out of the appliance and try again.
FILTERS
To reach the filters situated in the durst collector, press the release button (B) and remove the dust collector (Fig. 7). For practical reasons, it is recommended to remove the hose from the connection inlet first.
The filter system consists of:
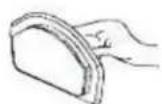
- a main filter that stops the particles and allows the storage in the dust collector. This filter plays the same role as a regular dust bag. This filter consists of 2 parts, a hard bracket and a textile part fixed on an elastomer seam. To replace a dirty filter, separate the bracket from this textile part by pulling at the elastomer seam and put a new filter in the bracket by inserting it in the edge of the seam.
a motor protection filter which catches larger particles in case the main filter wouldn't have caught them. This filter is an additional protection for the motor but must not be used as the only filter. - an air filter situated in the air outlet grid (E) and filtering small particles rejected by the motor.
Changing and cleaning the filters
A) Main filter
If you notice a loss of suction power, this means that the filter is full and must be replaced. The replacing frequency depends both on the operation frequency and on the type of dust you vacuum. For instance very small particles of plaster or concrete will stick to the filter very easily. To reduce the replacing frequency, you can either remove the bigger particles obstructing the filter, or shake the filter above the dustbin. Never try to clean the filter with a brush or water. Filters are available at your retailer's.
B) Motor protection filter
Theoretically this filter must not be replaced, as the main filter catches almost all the vacuumed dust particles, but if it is dirty, you can clean it. To do so, take it out of the appliance and wipe it. You can also make use of some soapy water, but make sure it is completely dry before putting it back in the appliance.
C) Air filter
This filter guarantees fresh air during cleaning. It should be rinsed clean at least three times a year or when it becomes visibly solid.
- Unplug the appliance, open the air outlet grille and remove the filter. Replace it and close the grille.
D) Dust collector
Clean the inside of the dust collector with a damp cloth or sponge, but make sure it is totally dry before using the appliance again.
PRACTICAL HINTS
- When cleaning stairs, we advise you to keep the unit in a vertical orientation or to use the shoulder strap provided. To attach it, fix its two rings in the loops on the appliance and pass it along the end of the flexible hose before fixing the latter to the dust compartment.
- There is a tube park at the back of the appliance. To attach the tube to the tube park, put the appliance in vertical position.
- In horizontal position, the appliance also has a storage facility in the back of the appliance, that allows storing the floor brush, tubes and flexible hose (for instance to move furniture).
If you notice a loss of suction power, it is probably due to one or a combination of the following events: blocked filter, full or punctured bag or blockage in tubes. If your appliance still does not
11 TEAM ST 6 E-060105
work properly after you have checked those problems, please ask a qualified electrician for advice.
PROTECTION OF THE ENVIRONMENT-DIRECTIVE 2002/96/EC
In order to preserve our environment and protect human health, the waste electrical and electronic equipment should be disposed of in accordance with specific rules with the
implication of both suppliers and users. For this reason, as indicated by the symbol the rating label, your appliance should not be disposed of as unsorted municipal waste but should either be returned to the vendor, or disposed of in a separate collection point performing waste recovery by means of reuse, recycling or use for other applications.
FR MODE D'EMPLOI
POUR VOTRE SECURITE
Copies of the I/B. Please reproduce them without any changes except under special instruction from Team International BELGIUM. The pages must be reproduced and folded in order to obtain a booklet A5 (+/- 148.5 mm width x 210 mm height). When folding, make sure you keep the good numbering when you turn the pages of the I/B. Don't change the page numbering. Keep the language integrity.

Fax +32 23599550
Copies of the I/B. Please reproduce them without any changes except under special instruction from Team International BELGIUM. The pages must be reproduced and folded in order to obtain a booklet A5 (+/- 148.5 mm width x 210 mm height). When folding, make sure you keep the good numbering when you turn the pages of the I/B. Don't change the page numbering. Keep the language integrity.
TEAM ST 6 E
| Deutsch | 5 |
| English | 9 |
| François | 13 |
| Nederlands | 17 |
| Espanol | 21 |
| Português | 25 |

am
international


- Bagless vacuum cleaner
- Aspirateur sans sac
- FR
- ASSEMBLING THE VACUUM CLEANER
- OPERATION
- WHEN CLEANING IS FINISHED
- FILTERS
- Changing and cleaning the filters
- A) Main filter
- B) Motor protection filter
- C) Air filter
- D) Dust collector
- PRACTICAL HINTS
- PROTECTION OF THE ENVIRONMENT-DIRECTIVE 2002/96/EC
- FR MODE D'EMPLOI
- POUR VOTRE SECURITE
- TEAM ST 6 E
Brand : TEAM
Model : ST 6 E
Category : Vacuum Cleaner